Jotform’s Image Upload Preview widget lets users easily upload and preview their images right on the form, giving them the chance to double-check their files before sending them in. Whether you’re collecting profile pictures, artwork, or photo submissions, this widget makes the process smoother and more user-friendly.
Here are a few ways to use it:
- Collect Profile Pictures — Perfect for registration forms, memberships, or employee onboarding—users can easily upload and preview their profile picture before submitting, so they know it looks just right.
- Support or Feedback Forms — Make it simple for users to attach screenshots of issues, bugs, or errors, giving your support team the full picture to solve problems faster.
- Product or Item Submissions — Let customers or team members upload product photos, damaged item reports, or inventory images—and preview them to be sure the right file is attached.
- Creative Portfolios — Perfect for photo contests, art competitions, or event submissions, so participants can double-check their images before hitting submit.
Notes
- The Image Upload Preview widget is designed for one image at a time. If you’d like to let users upload more than one, you can simply add more Image Upload Preview fields or pair it with the File Upload element for a smoother experience.
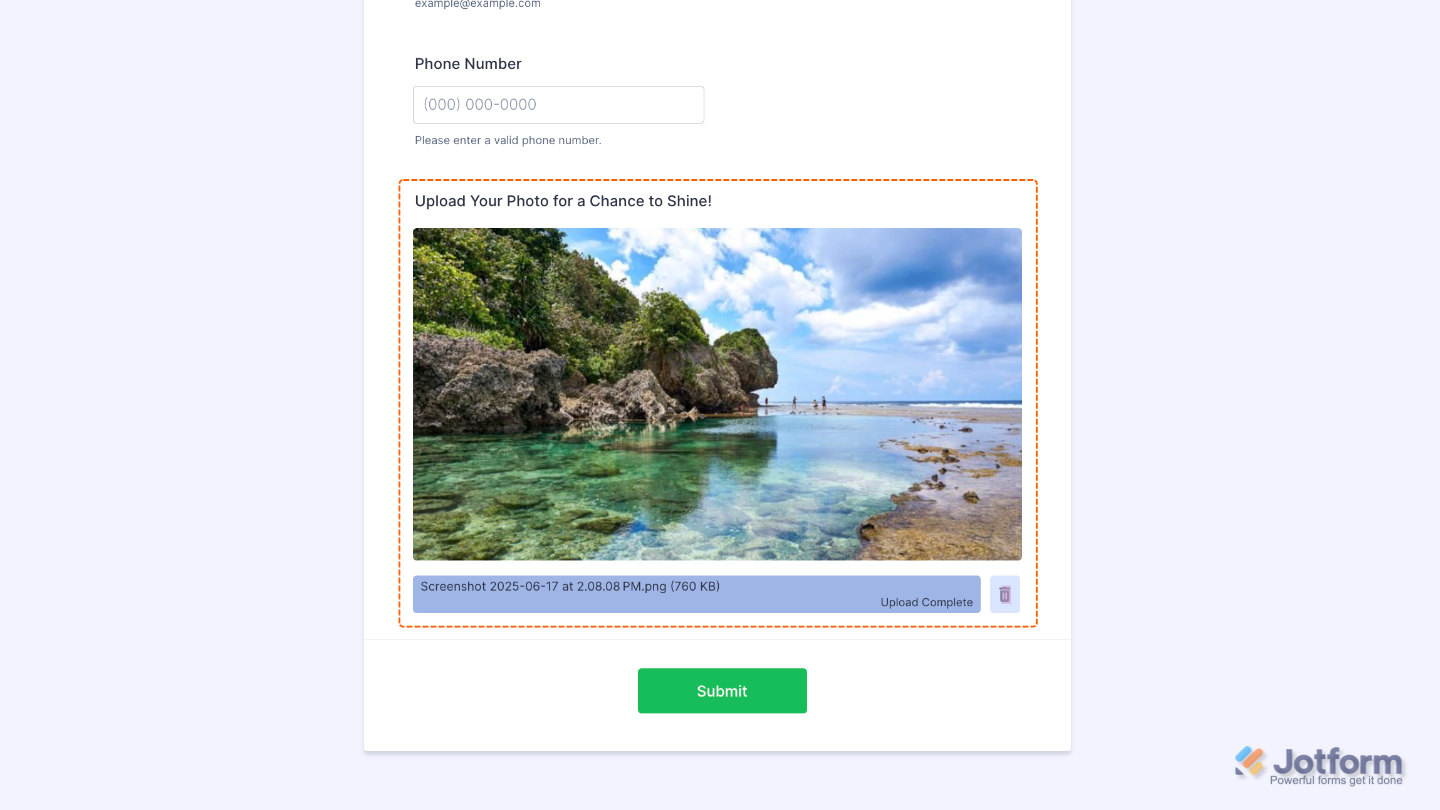
- Once an image is selected, a preview shows up right away so users can see it instantly.
- Works on both desktop and mobile. Just make sure users allow access to their device’s gallery or camera when prompted.
Adding and Setting Up the Image Upload Preview Widget
Adding an Image Upload Preview field to your form lets users instantly see their selected images, so they can double-check they’ve chosen the right ones before submitting. Want to set it up? Just do this:
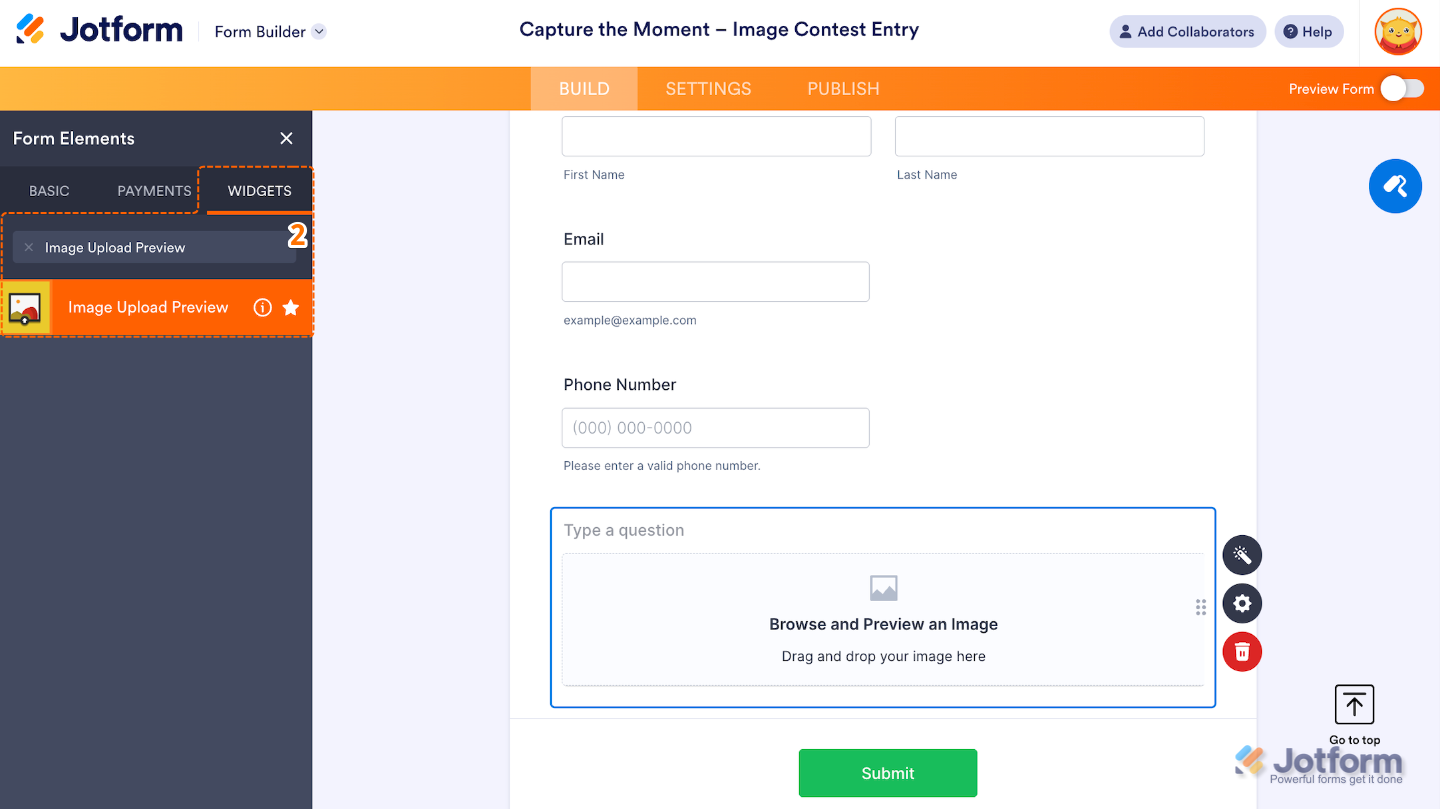
- In Form Builder, click on Add Element on the left side of the page.

- Now, in the Form Elements menu, under the Widgets tab, search for Image Upload Preview and then click on it. Or, just drag and drop it to where you want it to be on your form.
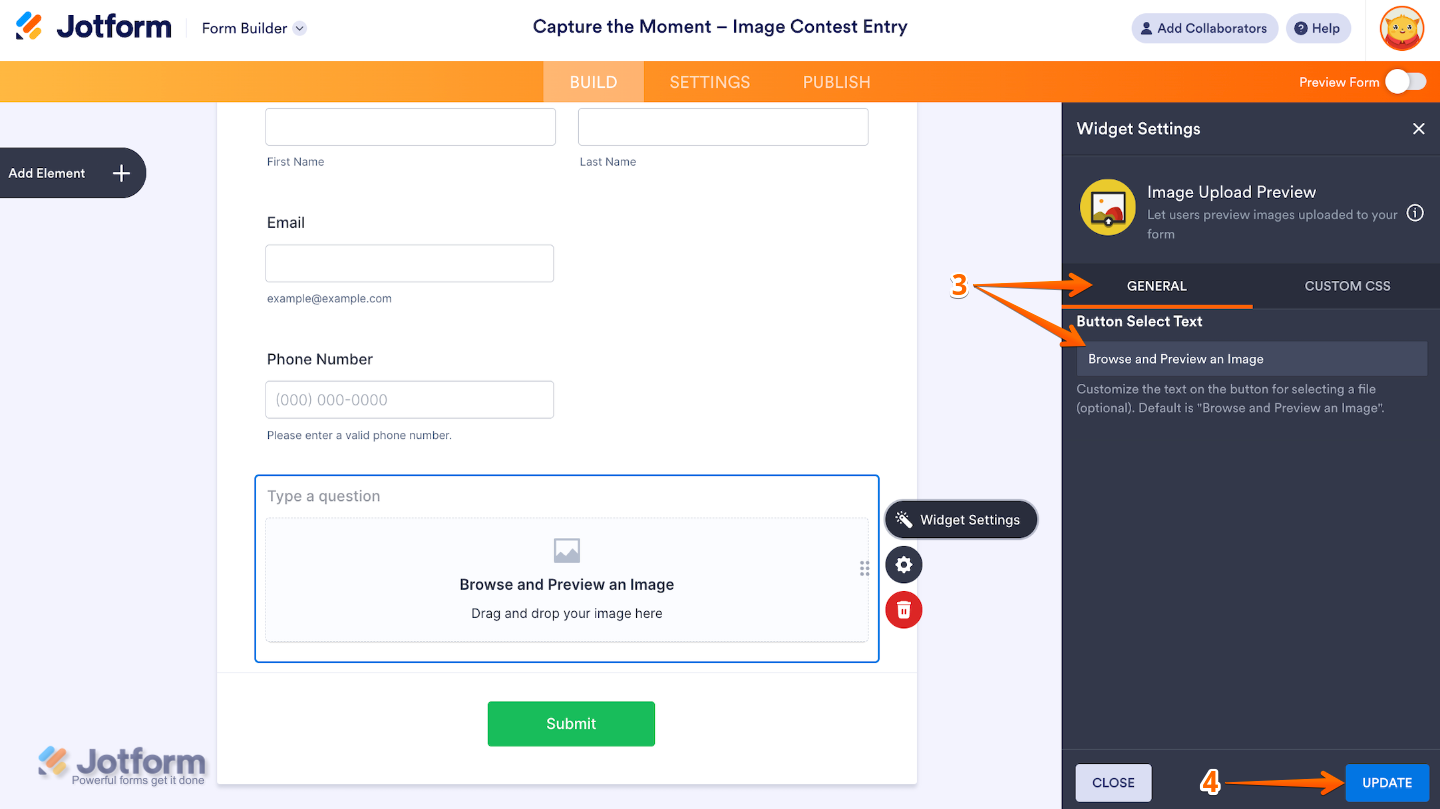
- Next, in the Widget Settings window that opens on the right side of the page, under the General tab, set up the Button Select Text.
- Once you’re done, click on Update.
That’s it. You’ve successfully added and set up the Image Upload Preview widget to your form. Now, your users can preview the uploaded file before hitting the submit button. Curious how it works on a live form? Check out this Demo Form.
To customize how your Image Upload Preview field looks, simply click the gear icon to open its settings and make it your own.
Note
For advanced styling, you can add your own custom CSS under the Custom CSS tab in the widget settings and style the Image Upload Preview field. Our guide on How to Inject CSS Codes to Widgets walks you through everything.
Pro Tips
- Mark the widget as Required if you need a photo with every submission, perfect for contests, registrations, or reports.
- Use conditional logic to only show the widget when it’s actually needed.
- Give your form a quick test on different devices to make sure the preview works smoothly everywhere.
- Help users upload the right image size by adding a quick note about size or resolution in your form description or helper text.

Send Comment: