Jotform’s Spacer widget helps you add a bit of blank space to your form, making everything easier on the eyes and simpler to follow. You can use it to separate sections, guide users smoothly from one part to the next, or just clean up the layout. Sometimes, a little extra breathing room is all it takes to make your form feel more welcoming and easier to fill out.
Here are a few ways to use it:
- Create a Cleaner Layout — Use the spacer to separate sections or groups of fields so your form doesn’t feel crowded. A little space can go a long way in making everything look neat and organized.
- Improve Readability — By adding some distance between questions, you make the form easier to read and less overwhelming—especially for longer forms.
- Highlight Important Sections — Want a certain part of your form to stand out? Add some space around it so it grabs attention without being too flashy.
- Customize the Flow of Your Form — Spacers help you control how users move through your form, guiding their eyes naturally from one section to the next.
Note
The Spacer widget works quietly in the background to help create a cleaner, more organized layout.
Adding and Setting Up the Spacer Widget
Adding and setting up the Spacer widget is quick and hassle-free. With just a few simple steps, you can add extra breathing room to your form, organize sections more clearly, and create a smoother, more comfortable experience for your users. It’s easier than you think:
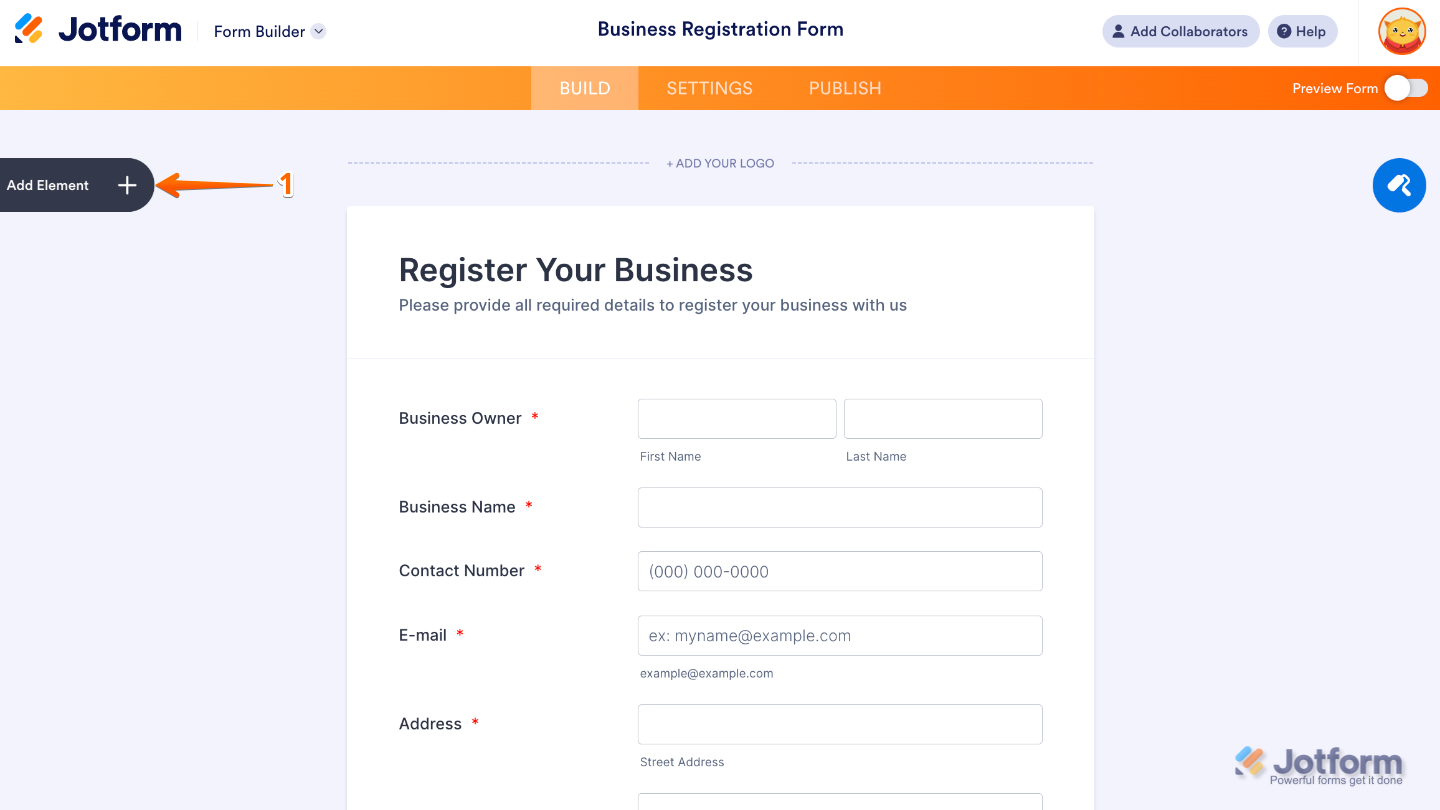
- In Form Builder, click on Add Element on the left side of the page.
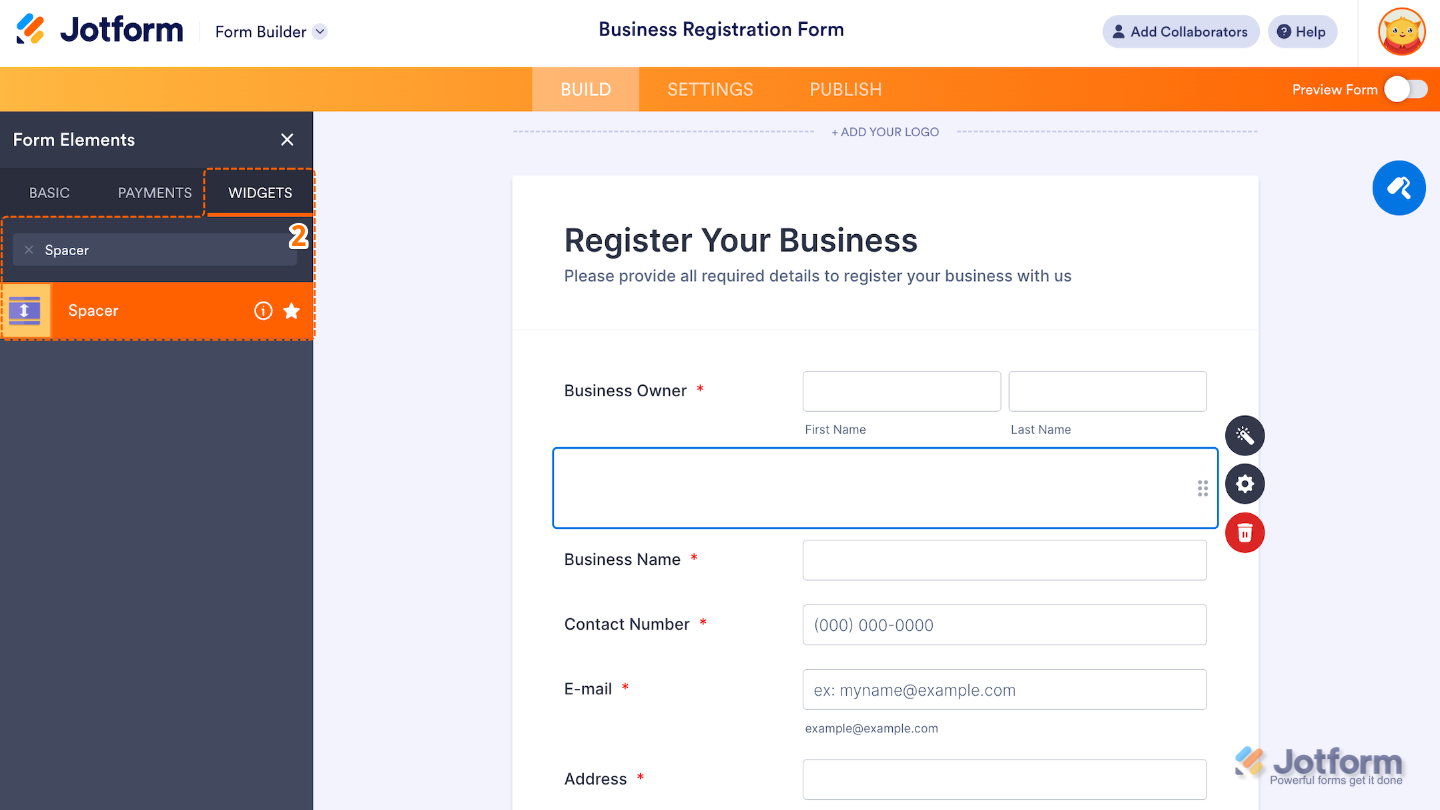
- Now, in the Form Elements menu, under the Widgets tab, search for Spacer and then click on it. Or, just drag and drop it to where you want it to be on your form.
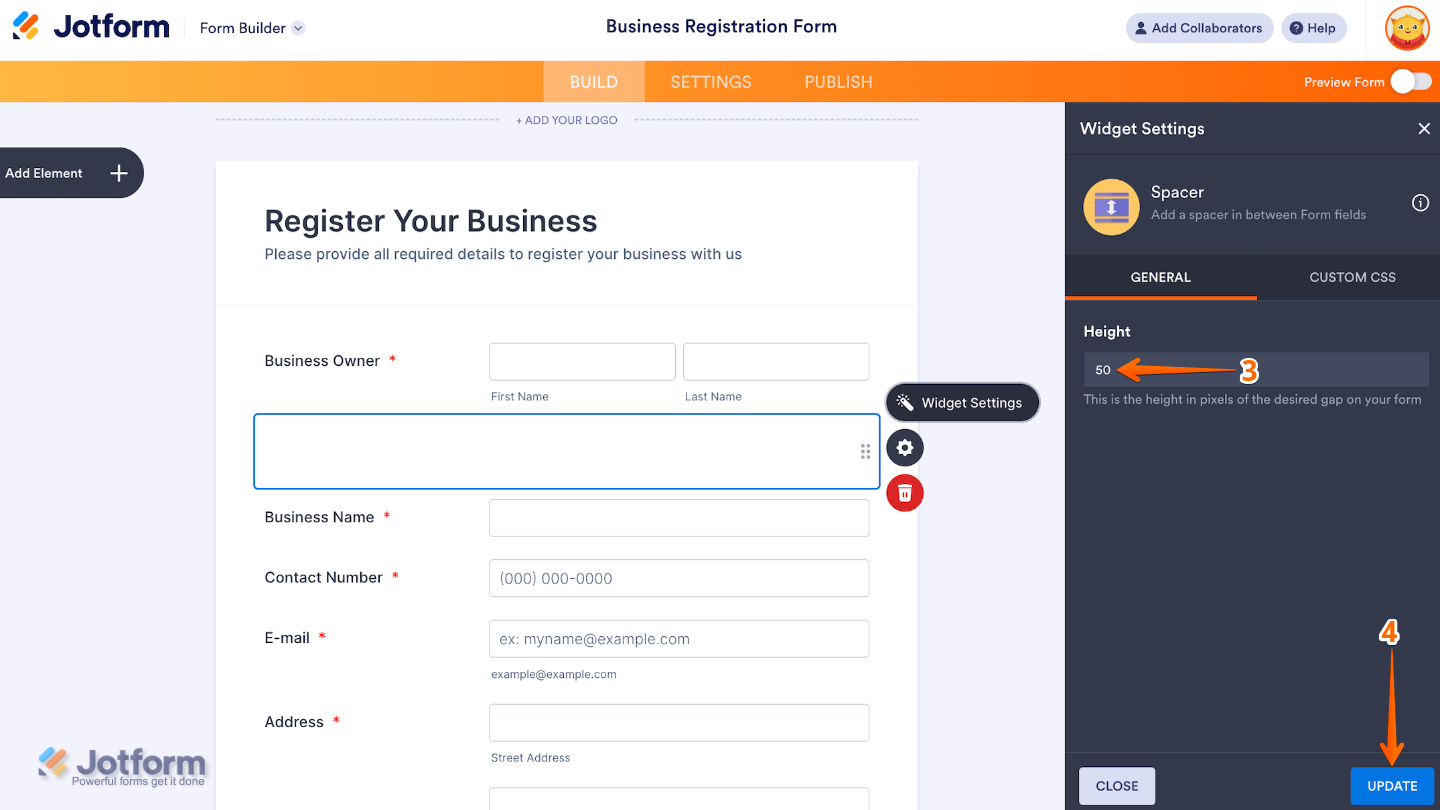
- Next, in the Widget Settings window that opens on the right side of the page, set up the Height option to fine-tune how much space appears between sections.
- Once you’re done, click on Update.
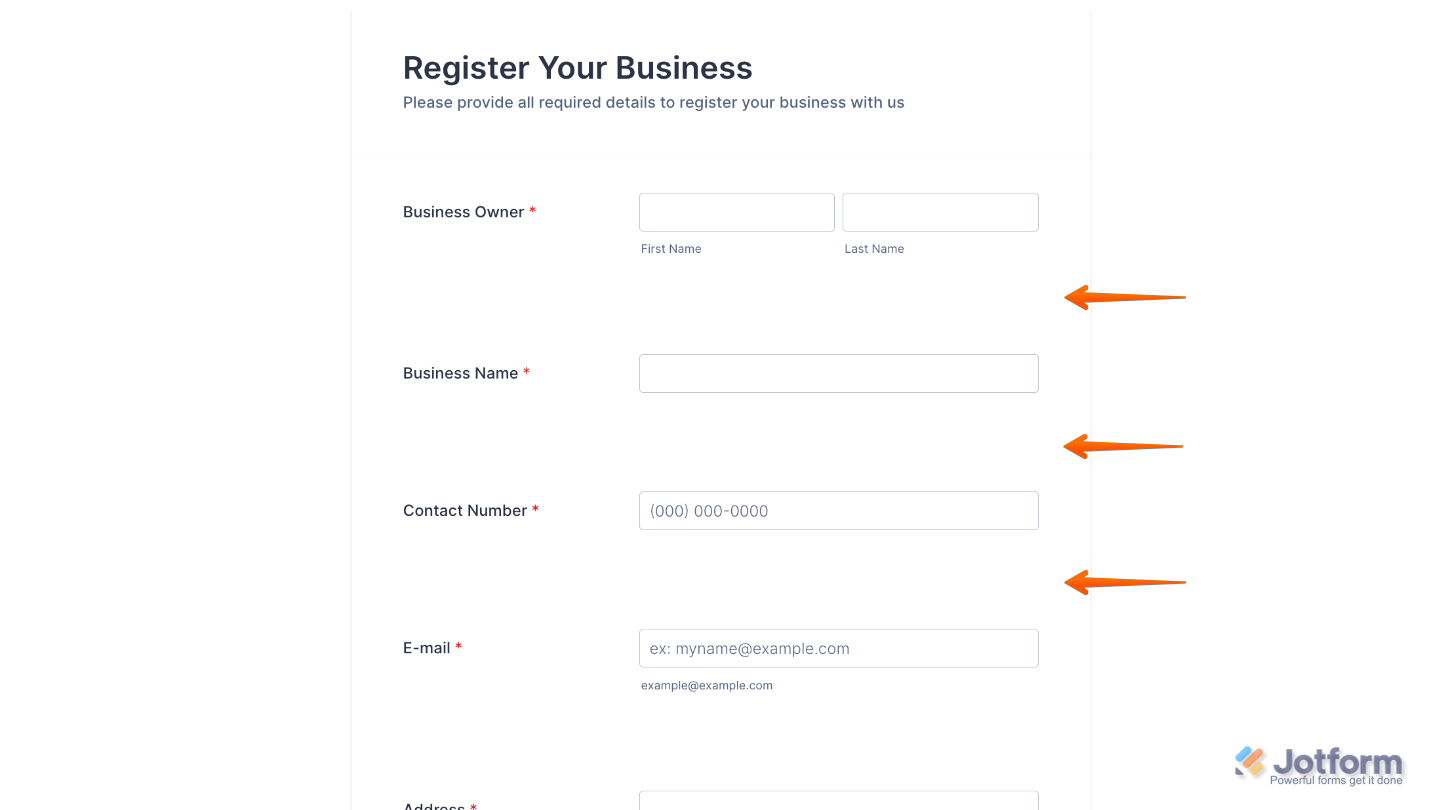
That’s it. You’ve successfully added and set up the Spacer widget to your form. Now, you’ve added some breathing room between your form fields, making everything look much clearer and easier to follow. See it live for yourself—here’s a Demo Form.
To further customize your Spacer field appearance, just click on the Gear icon to open its properties.
Note
For advanced styling, you can add your own custom CSS under the Custom CSS tab in the widget settings and style the Spacer field. Our guide on How to Inject CSS Codes to Widgets walks you through everything.
Pro Tip
If you’re designing for mobile users, test your form on different screen sizes to ensure your spacing looks just right.

Send Comment: