Staying on top of new form submissions doesn’t have to mean constantly checking your email or dashboard. With push notifications, you can get instant alerts sent straight to your smartphone through the mobile app, so you’re always in the loop no matter where you are. It’s a simple and reliable way to stay informed the moment someone submits a form.
Push notifications are especially helpful for people who are often on the move, like field workers, service teams, healthcare staff, sales professionals, and busy administrators who need real-time updates. In this guide, you’ll learn how to turn on push notifications, customize them to fit your needs, and test them to make sure everything is working smoothly.

Install and Log In to the Jotform Mobile App
Push notifications work through the mobile app, so having it installed is a must. Simply download the app from the App Store (for iOS) or Google Play (for Android) and sign in using the same account you use in the Form Builder. Once you’re logged in, the app becomes your direct line to real-time alerts—like getting notified the moment a new form submission comes in. Without the app, there’s nowhere for those notifications to go, so be sure it’s installed, and notifications are turned on to stay updated wherever you are.
Enabling Push Notifications in the App Builder
To make sure your push notifications go through smoothly, your users will need to have your app installed on their phones and at least one person subscribed to receive alerts. Subscribing is simple—users just need to allow push notifications on their device so messages can be sent straight to their phone. You’ll just need to do this:
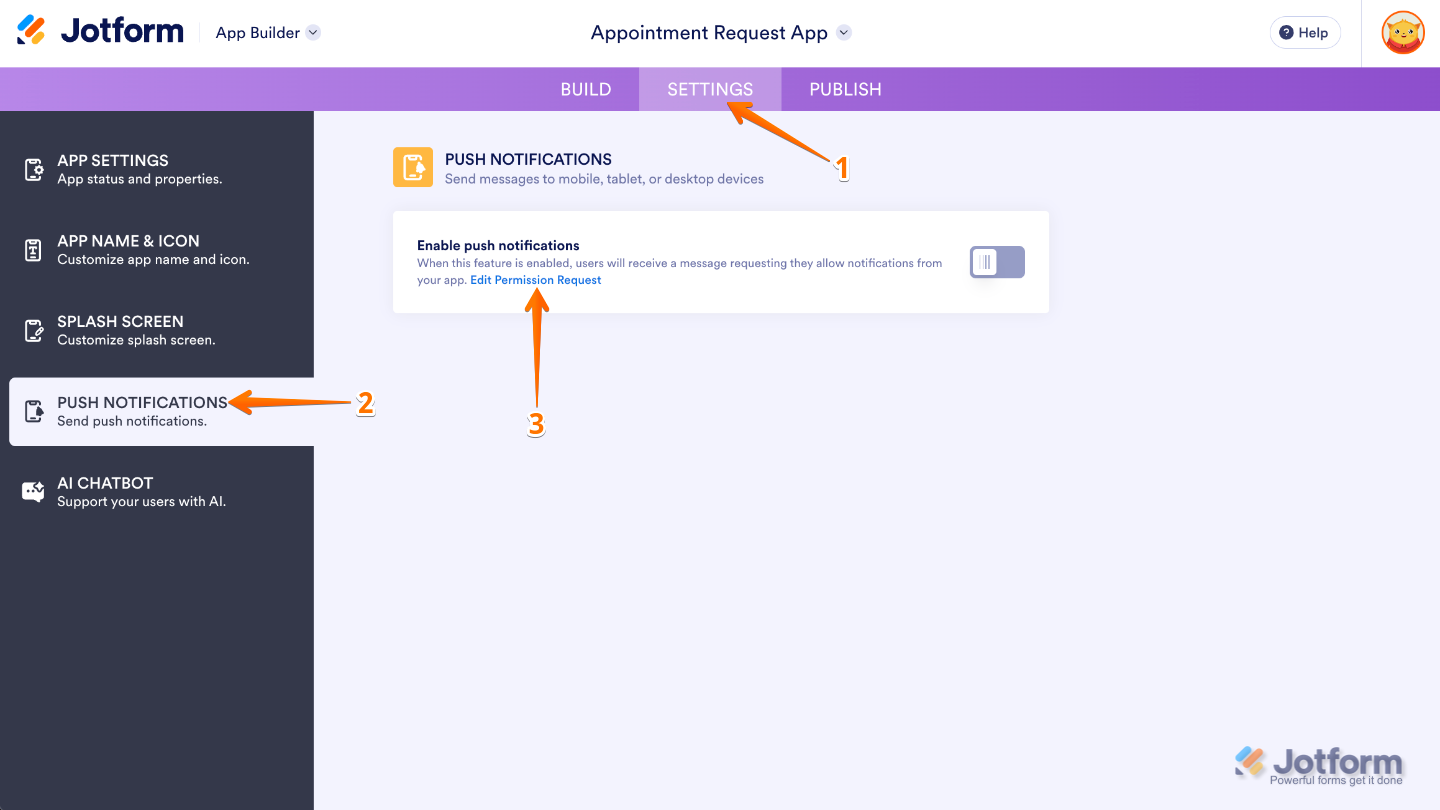
- In App Builder, in the purple navigation bar at the top of the screen, click on Settings.
- In the menu on the left side of the page, click on Push Notifications.
- Next, click on the Edit Permission Request.
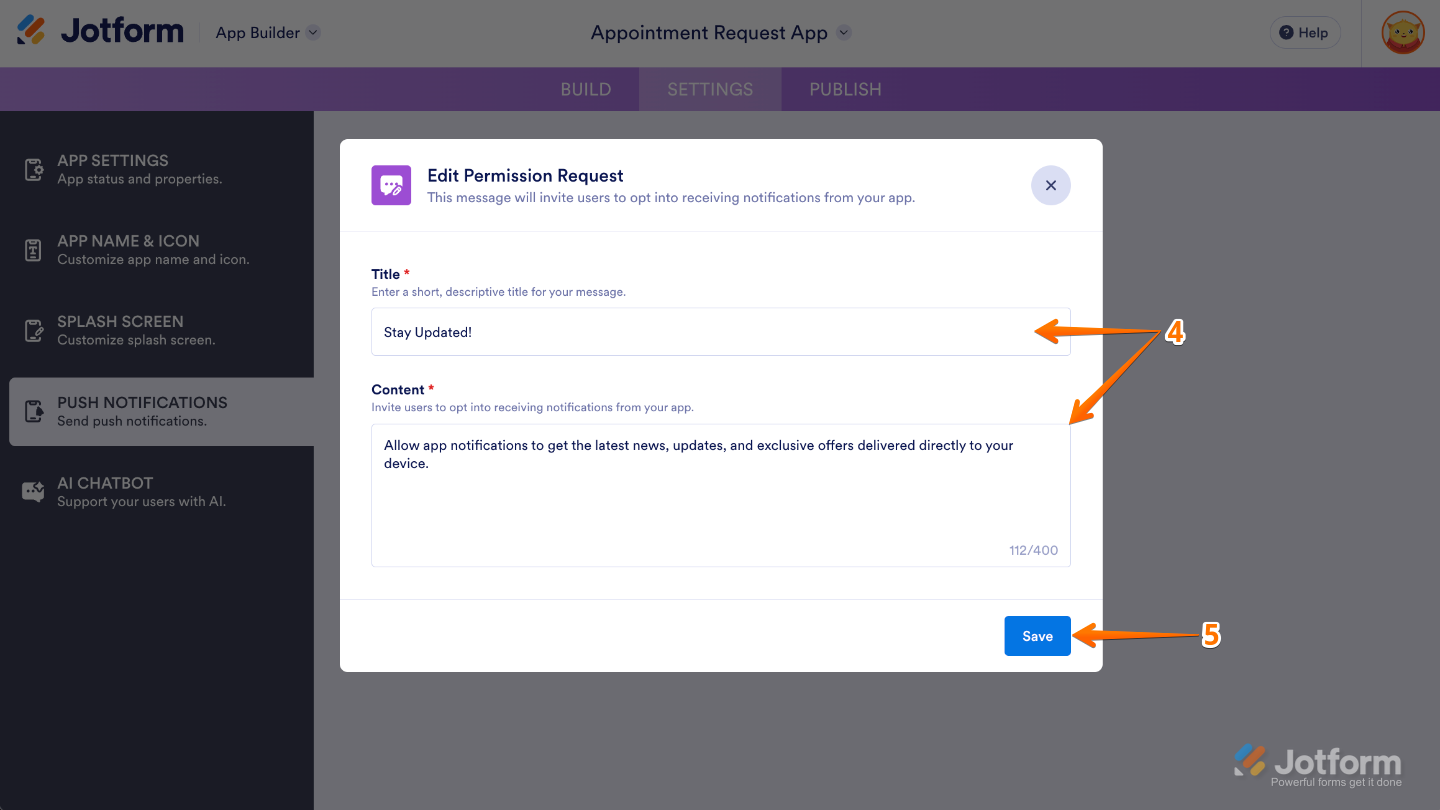
- Then, in the Edit Permission Request menu that comes up, customize the Title and Content to let users know why you’re asking for permission.
- Once you’re done, click on Save.
- Now, click on the Switch icon to enable push notifications.

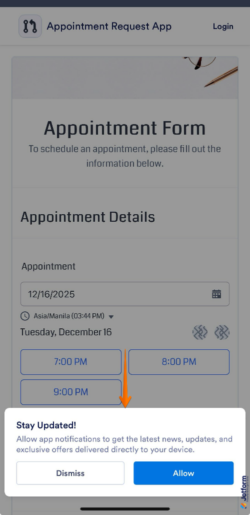
Here’s a peek at what the permission request message will look like for your app users:
Creating Push Notifications
Now that you’ve sent the permission request and your users have opted in, you’re all set to start setting up push notifications. From here, you can customize how and when alerts are sent, so you’ll receive timely updates exactly the way you want them. This is how it’s done:
- In App Builder, in the purple navigation bar at the top of the screen, click on Settings.
- In the menu on the left side of the page, click on Push Notifications.
- Next, type in yourNotification Title and the message you want to show in the Notification Content.
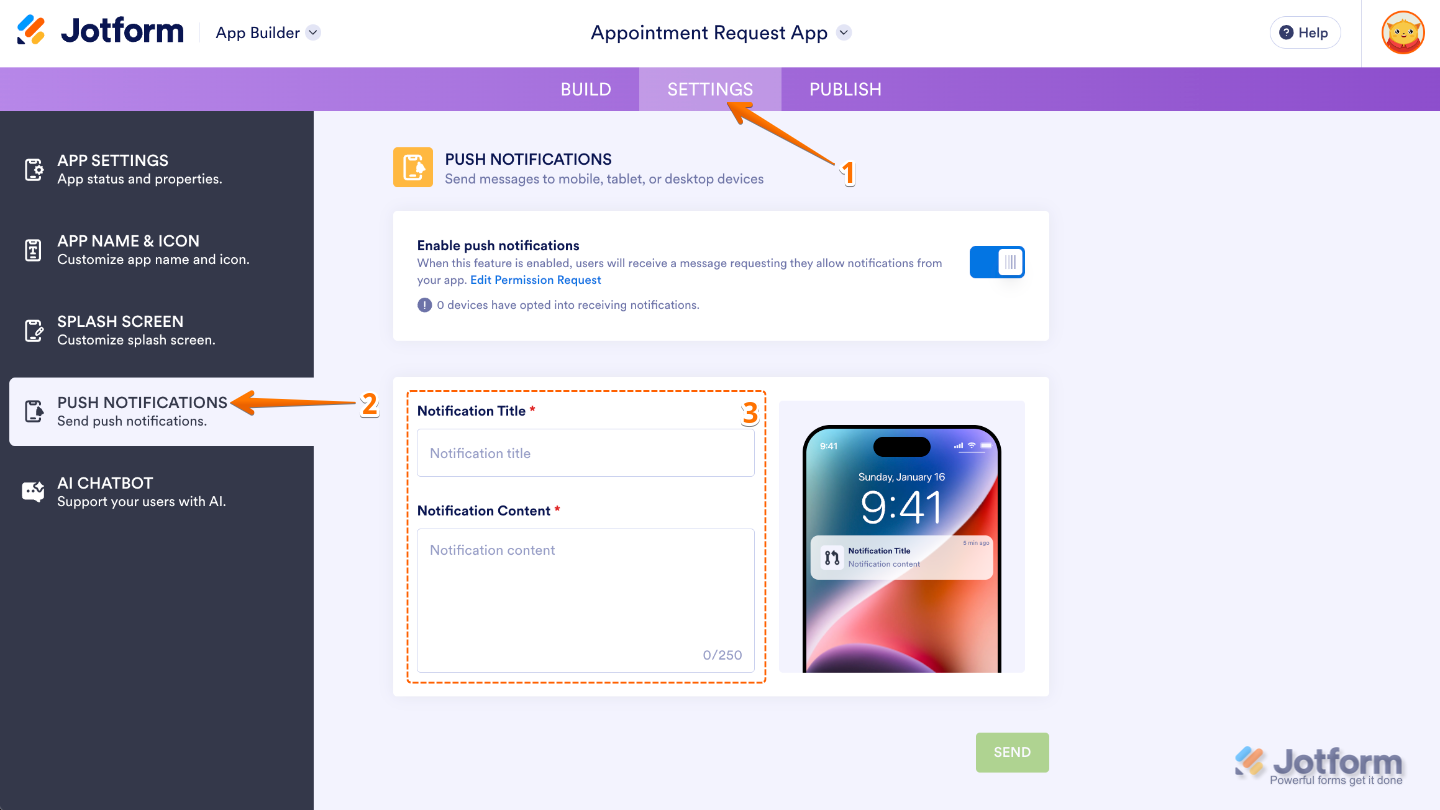
- Once you’re done, click on Send.
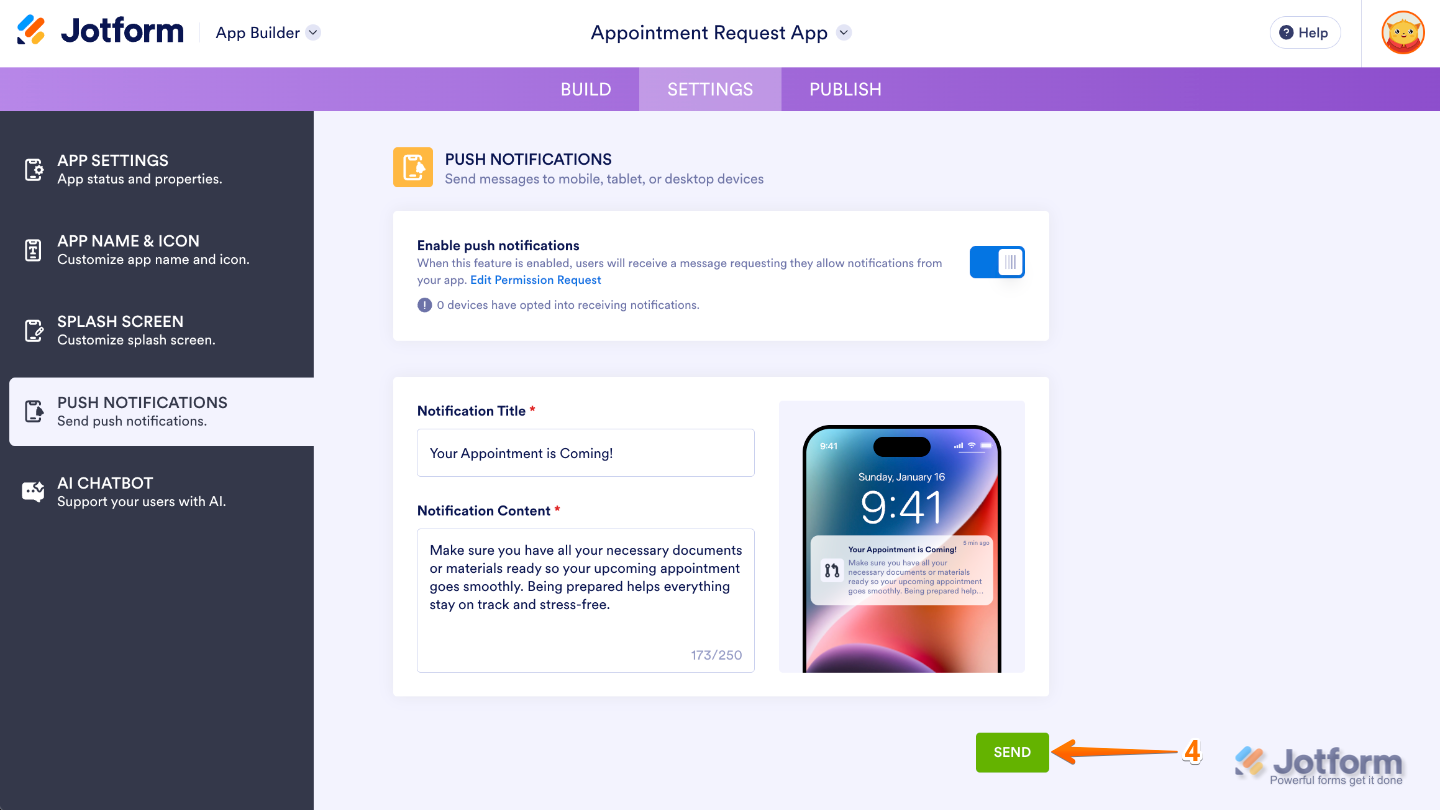
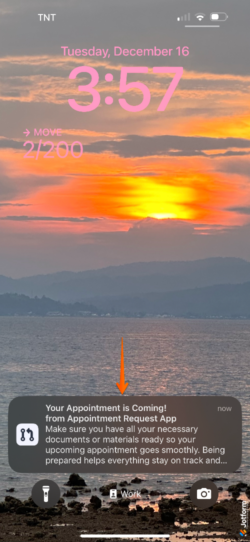
This is how the notification will appear on your subscriber’s phone:
Tracking Push Notifications
Scroll down a bit in the Push Notifications tab, and you’ll find your notification history. Here, you can easily track how many subscribers you have, see how many notifications were sent and successfully delivered, and even check how many people clicked on them. It’s a handy way to keep tabs on your notifications and see what’s engaging your audience.
Pro Tip
Learn how to use Jotform Apps as a push notification software and discover the best use cases for sending timely updates, reminders, and alerts that keep your team and users in the loop.
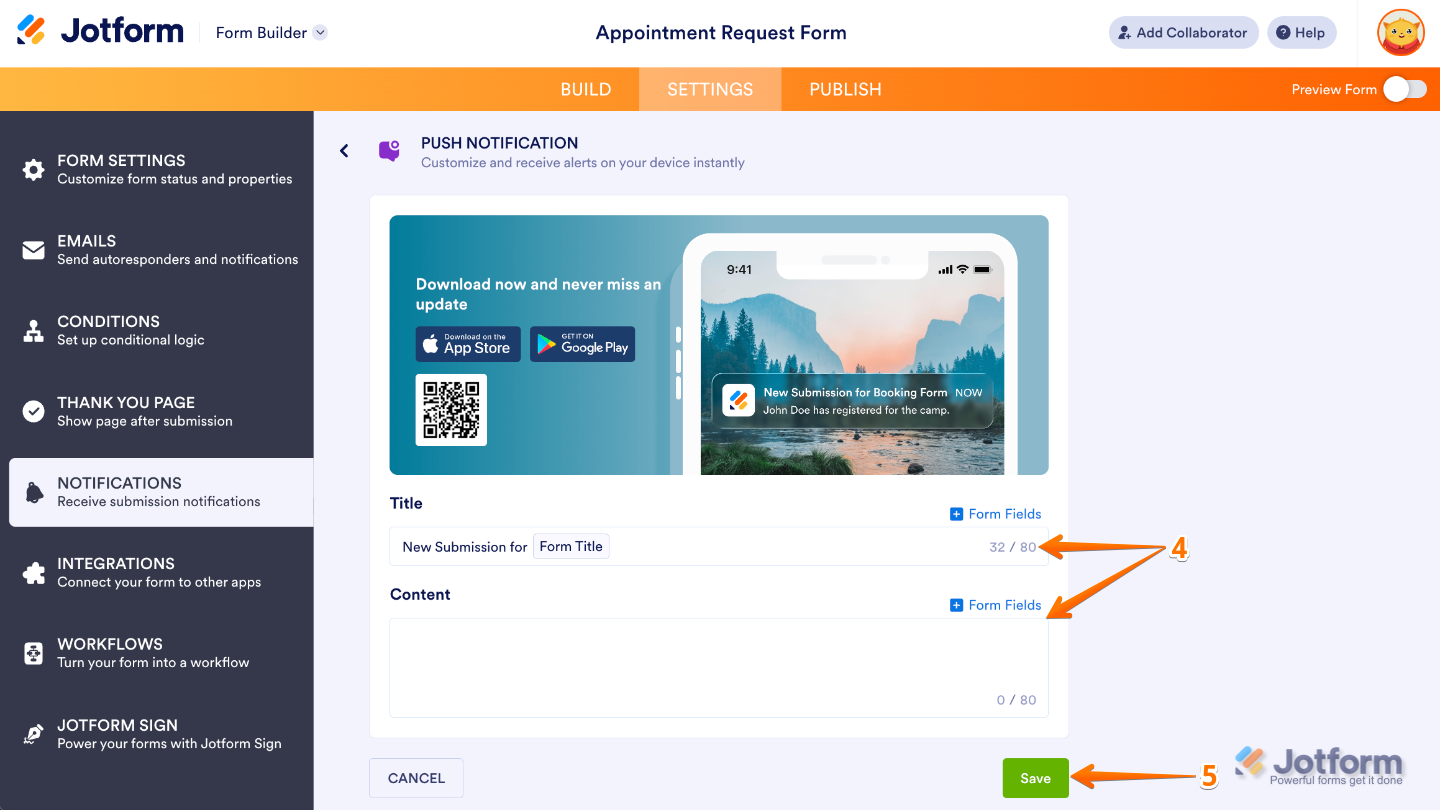
Enabling Push Notifications in the Form Builder
Stay on top of your form submissions by enabling push notifications in the Form Builder. With just a few clicks, you can make sure your mobile app alerts you instantly whenever someone submits your form, keeping you informed no matter where you are. It’s easier than you think:
- In Form Builder, in the orange navigation bar at the top of the screen, click on Settings.
- In the menu on the left side of the page, click on Notifications.
- Now, click on Push Notification.
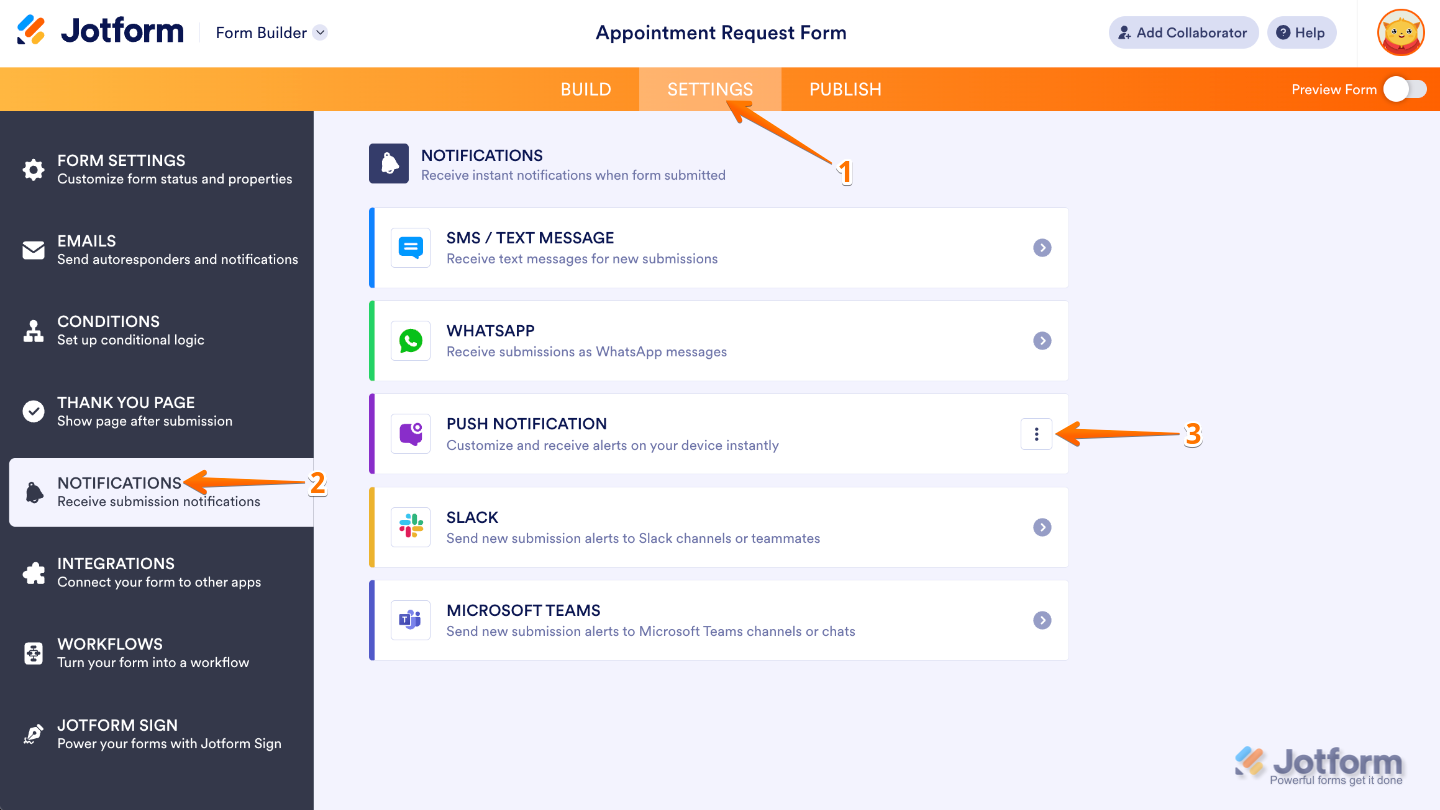
- Next, customize these things:
- Title — Enter the headline of your push notification, the first thing users will see when it pops up on their device. This is limited to 80 characters only.
- Content — Type in the main message of your notification. It can provide details, instructions, or a call-to-action that complements the title. This can also include any of your form fields, letting you personalize notifications with the information your users submit.
- Once you’re done, click on Save.
Notes
- Push notifications aren’t listed under Form Integrations—they can only be managed from the Notifications panel. This is where you’ll set them up and keep everything organized.
- Push notifications work best with short, concise messages. Longer text may get cut off on some devices, so it’s a good idea to put the most important information first—like the user’s name or email—so it’s always visible.
If you don’t receive a push notification, try these steps:
- Make sure your phone allows notifications for the Jotform Mobile App.
- Confirm you’re logged in to the correct account.
- Check that push notifications are turned on in your Notification list.

Send Comment:
10 Comments:
November 17, 2025
Is there a way to choose which people I want to send the push notification to, or must it be all at the same time?
August 31, 2025
do recepients have to be logged in to receive the prompt to allow notifications?
May 28, 2025
I, too, am wondering if there is a way to display the push notifications I'm sending on a page in my app. We're using it to help manage our summer camp. If we have a weather warning and want people to take cover in a specific area, it would be helpful if recipients could click the push notification and open to a page that shows the full message.
January 14, 2025
I am having the same issue as Basri below. Is there a fix for this yet?? I am unable to view the answers to his post?
Basri Shabani
49 days ago
I am setting up push notifications and the messages are being received, but when you click on them, the application/app opens, but the message itself is not there. It is not displayed. What am I doing wrong?
January 14, 2025
This is great! I have a study planner app for students. I would like to schedule a push notification every Friday, reminding them to plan next weeks study. Is it possible to schedule push notifications? If not this would be a brilliant feature to add!!
November 26, 2024
I am setting up push notifications and the messages are being received, but when you click on them, the application/app opens, but the message itself is not there. It is not displayed. What am I doing wrong?
November 24, 2024
Is there a limit on subscribed devices to an app?
November 21, 2024
Is there a limit on subscribed devices to an app?
November 21, 2024
Are the push notifications free in my gold plan?
November 15, 2024
Can the push notification link directly to the form / page that we're notifying them about?