With Jotform’s Airbnb Reviews Widget, you can easily showcase real guest feedback from your Airbnb listing directly on your website. Instead of asking visitors to leave your site to check ratings and reviews, you can highlight authentic experiences right where decisions are made. It’s a simple way to build credibility, reinforce your reputation, and give potential guests the confidence to book.
Whether you manage a vacation rental, boutique stay, or short-term property, displaying trusted reviews helps turn interest into action. The widget presents your Airbnb feedback in a clean, customizable layout that fits seamlessly into your site—so your best guest experiences are always front and center.
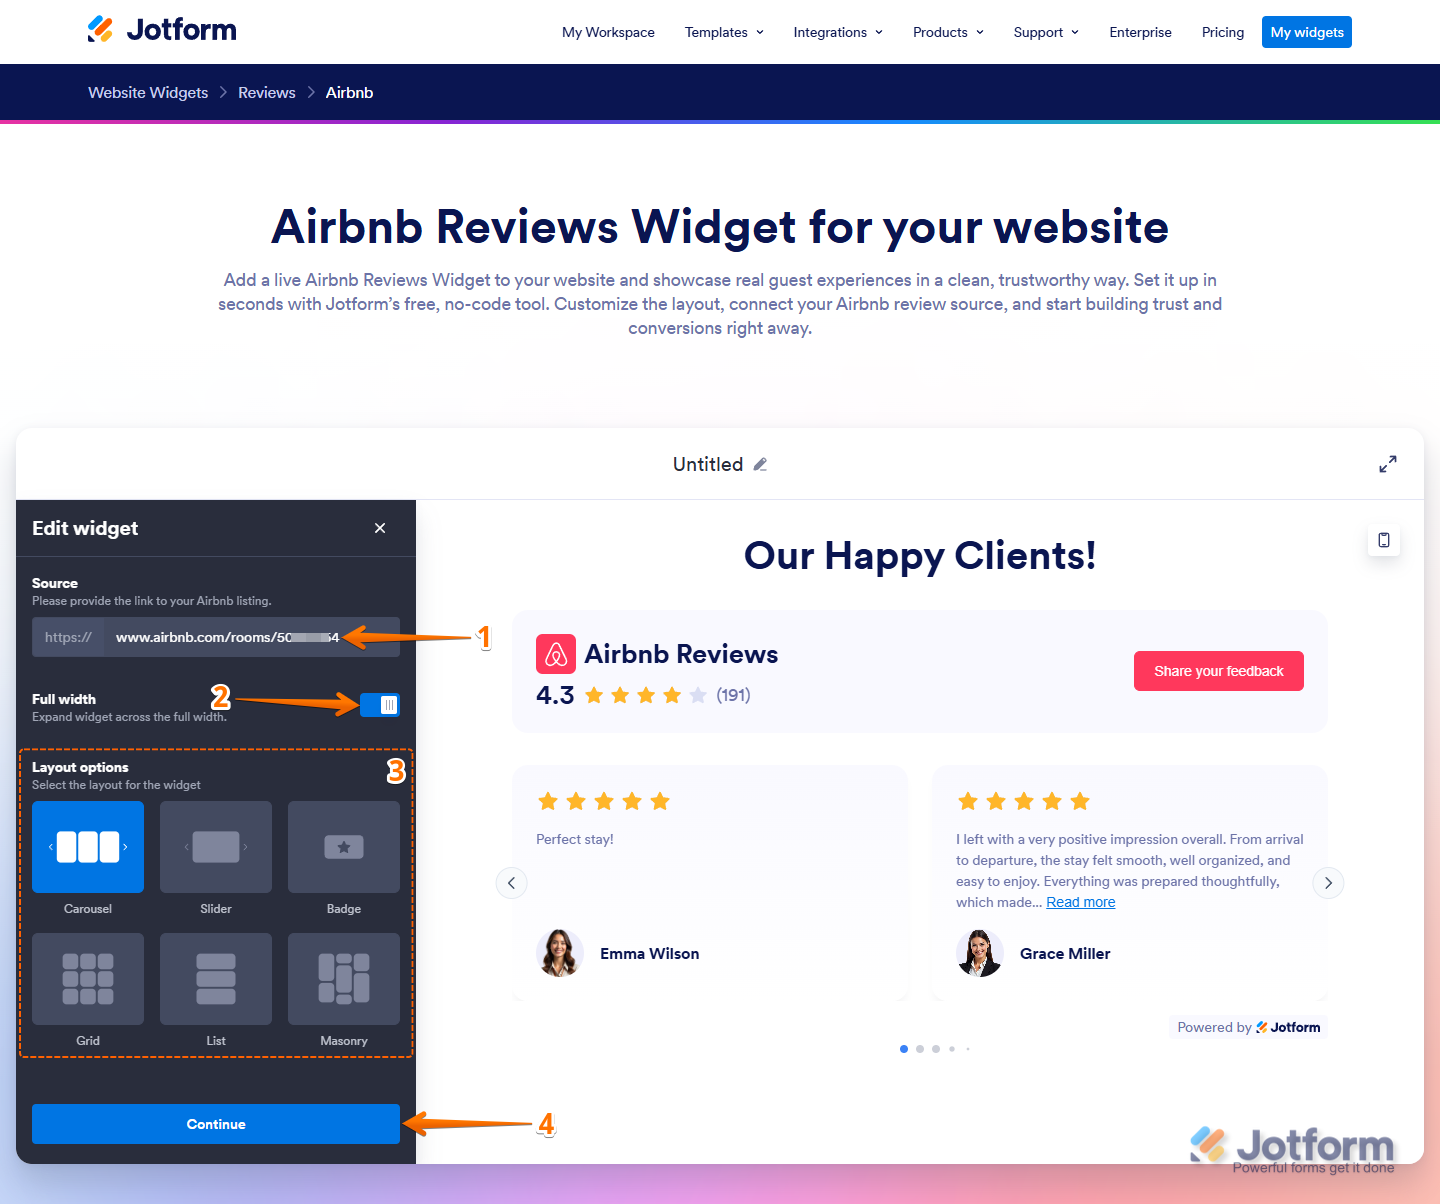
Generating an embed code for your Airbnb reviews is quick and easy, so you can display them on your website right away. Here’s how to set it up:
- In the Edit Widget menu on the left side of the Airbnb Reviews Widget page, in the Source Input box, paste the link to your Airbnb listing.
- Next, on the right side of the Full Width setting, keep it on if you want your widget to automatically stretch across your website, or toggle it off to set its custom fixed width.
- Now, under Layout Options, select one of the following layouts:
- Carousel — This layout displays your Airbnb reviews in your widget in a slide-style format, showing multiple reviews at a time. Your visitors can browse through them using navigation arrows or pagination dots.
- Slider — This layout highlights one review at a time in your widget for a more focused viewing experience. Like Carousel, your visitors can move through each review individually using navigation arrows or pagination dots.
- Badge — This option adds your widget as a badge on the left or right side of your website that your visitors can use to view your reviews in a side panel. They can scroll through all of them and close the panel at any time.
- Grid — This layout displays the reviews in your widget as neat, evenly sized cards arranged in columns that adjust based on your widget’s width. Your visitors can see multiple reviews at once, giving them a clear, organized view of the feedback.
- List — This layout displays reviews in your widget in a single column, with one review per row. Your visitors can scroll through each one easily, making it simple to read feedback one at a time.
- Masonry — Similar to Grid, this layout arranges reviews in your widget in multiple columns, but each card’s height adjusts based on its content. Your visitors see a visually varied layout that makes browsing feedback engaging.
- Then, click on Continue.
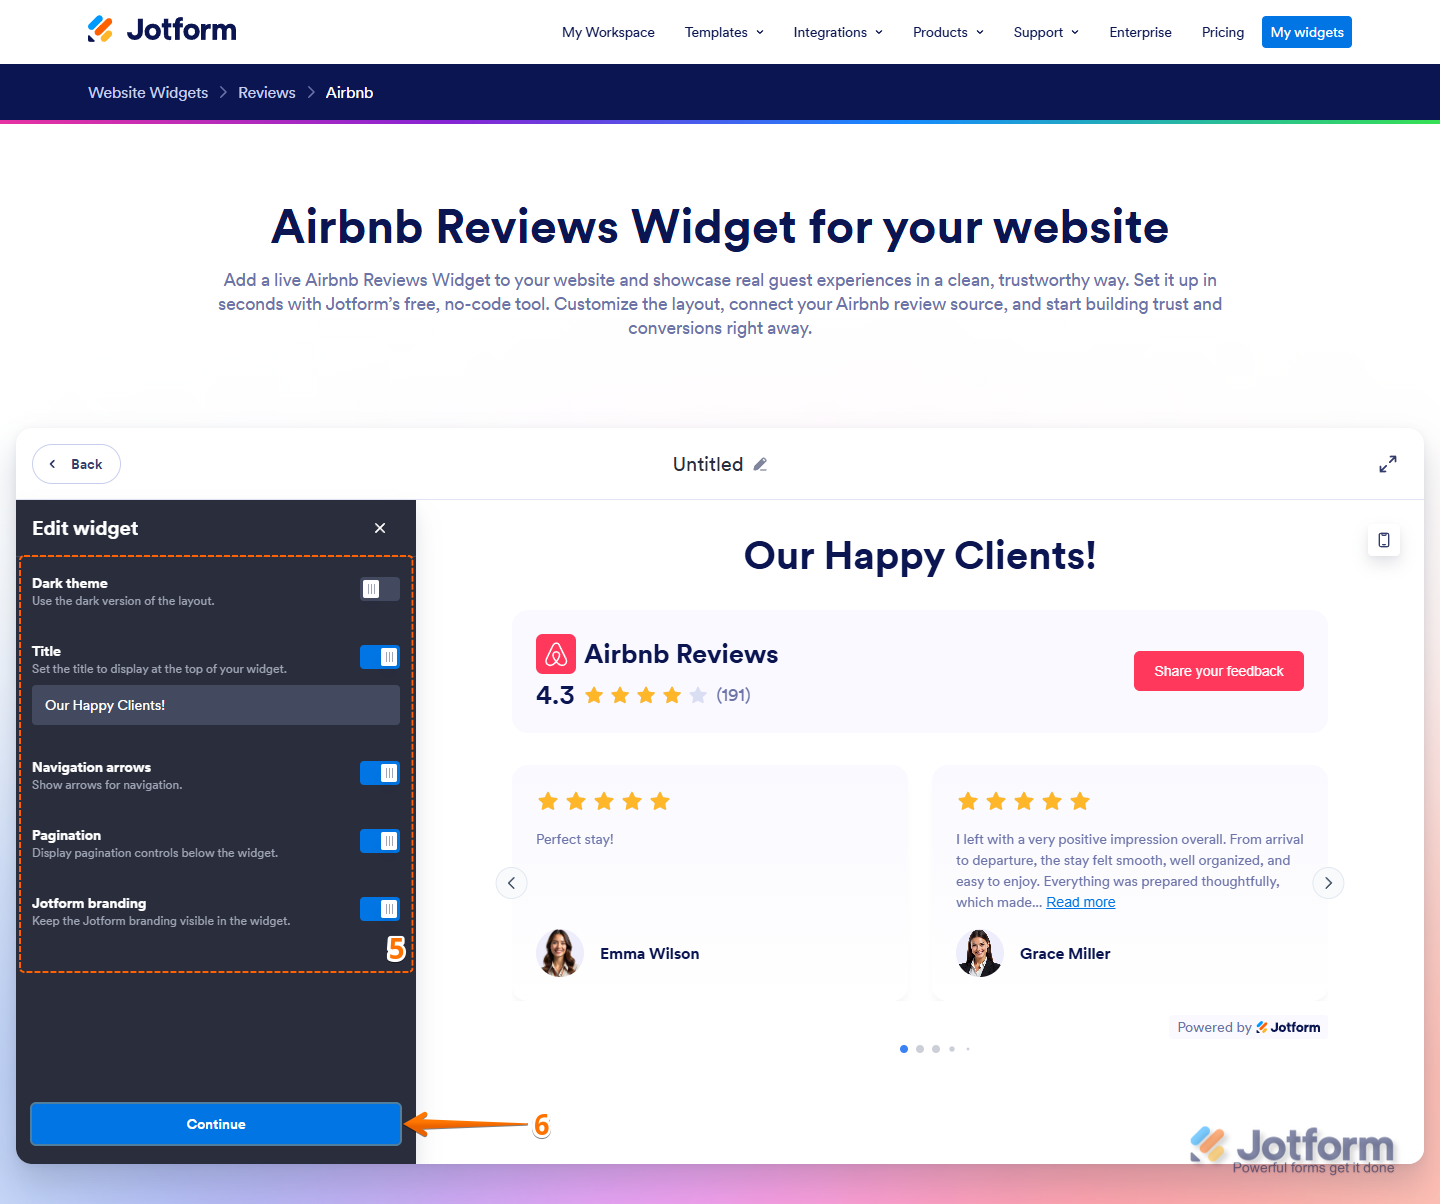
- Now, depending on the layout you chose, you’ll see this list of settings you can configure:
- Widget Position — This option only appears when you select the Badge layout for your widget. Select whether the badge appears on the left or right side of your website, which also determines where the side panel will slide in from.
- Dark Theme — This sets the color scheme of your widget. You can toggle this on to use a dark theme or keep it off to use the default white theme.
- Close Button — This option only appears when you select the Badge layout for your widget. You can keep it on to show a button that lets visitors close the widget, or toggle it off if you don’t want the button displayed.
- Title — This sets the title displayed at the top of your widget. You can keep the default text or enter a custom title in the input box to better match your website.
- Navigation Arrows — This option only appears when you select the Carousel or Slider layout for your widget. You can keep it on to show arrows that your visitors can use to navigate through reviews, or toggle it off if you want a cleaner look.
- Pagination — This option only appears when you select the Carousel or Slider layout for your widget. Keep it on to display pagination dots below the reviews so visitors can navigate easily, or toggle it off if you prefer not to show them.
- Show Reviews on Click — This option only appears when you select the Badge layout for your widget. Keep it on to let visitors view the full reviews after clicking the badge, or toggle it off to only display the badge with your review rating and number of reviews.
- Load More Button — This option appears when you select the Grid, List, or Masonry layout for your widget, and is also available for the Badge layout in the next section of settings. Keep it on to show a button at the bottom of your widget that lets visitors view more reviews, or toggle it off if you want to display only the initial set of reviews.
- Button Text — This option appears only when the Load More Button setting is enabled and sets the text displayed on the button. You can keep the default text or enter a custom label in the input box.
- Button Color — This option appears only when the Load More Button setting is enabled and sets the background color of the button. You can keep the default color or enter a new hex code in the input box. You can also click on the Color Picker button on the right side of the field and, in the color menu, select a specific color or choose from the predefined options.
- Text Color — This option appears only when the Load More Button setting is enabled and sets the color of the button text. You can keep the default color or enter a new hex code in the input box. You can also click on the Color Picker button on the right side of the field and, in the color menu, select a specific color or choose from the predefined options.
- Jotform Branding — This option appears for all layouts, but in the Badge layout, it shows in the next section of settings. Keep it on to display the Jotform branding in your widget, or toggle it off if you prefer to hide it.
- Once everything’s set, click on Continue to proceed.
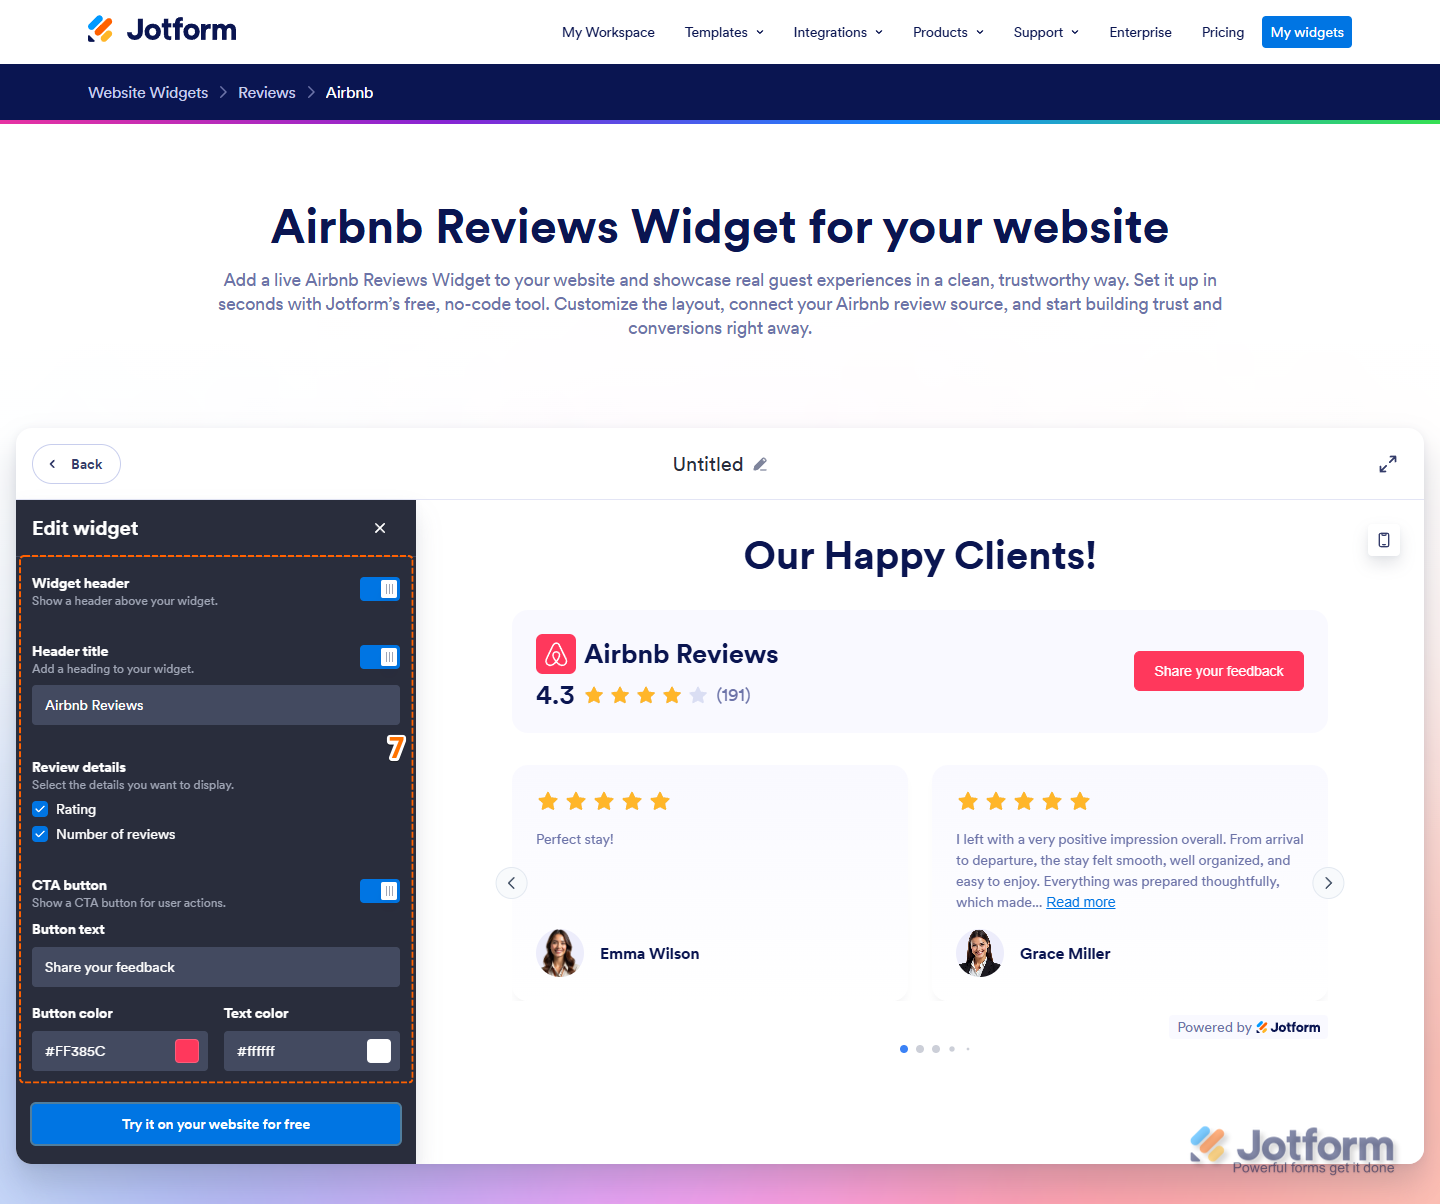
- Then, set up these additional settings:
- Widget Header — This setting controls whether a header appears above your widget. Keep it on to display it, or toggle it off to hide it.
- Header Title — This option appears when the Widget Header setting is enabled. You can toggle it off to hide the title on your widget header, or keep it on and use the default title or enter a custom one.
- Review Details — This option appears when the Widget Header setting is enabled. For the Badge layout, it appears in the previous section of settings. Remove the checks in the boxes next to the Rating and Number of Reviews options if you don’t want them to show on your widget header, or keep them checked to display them.
- CTA Button (Call to Action) — This option appears when the Widget Header setting is enabled. Keep it on to show the Share Your Feedback button on your widget header, or toggle it off to hide it. This redirects your visitors to the page where they can leave a review on your Airbnb listing.
- Button Text — This option appears only when the CTA Button is enabled and sets the text displayed on the button. You can keep the default text or enter a custom label in the input box.
- Button Color — This option appears only when the CTA Button is enabled and sets the background color of the button. You can keep the default color or enter a new hex code in the input box. You can also click on the Color Picker button on the right side of the field and, in the color menu, select a specific color or choose from the predefined options.
- Text Color — This option appears only when the CTA Button is enabled and sets the color of the button text. You can keep the default color or enter a new hex code in the input box. You can also click on the Color Picker button on the right side of the field and, in the color menu, select a specific color or choose from the predefined options.
- Widget Header — This setting controls whether a header appears above your widget. Keep it on to display it, or toggle it off to hide it.
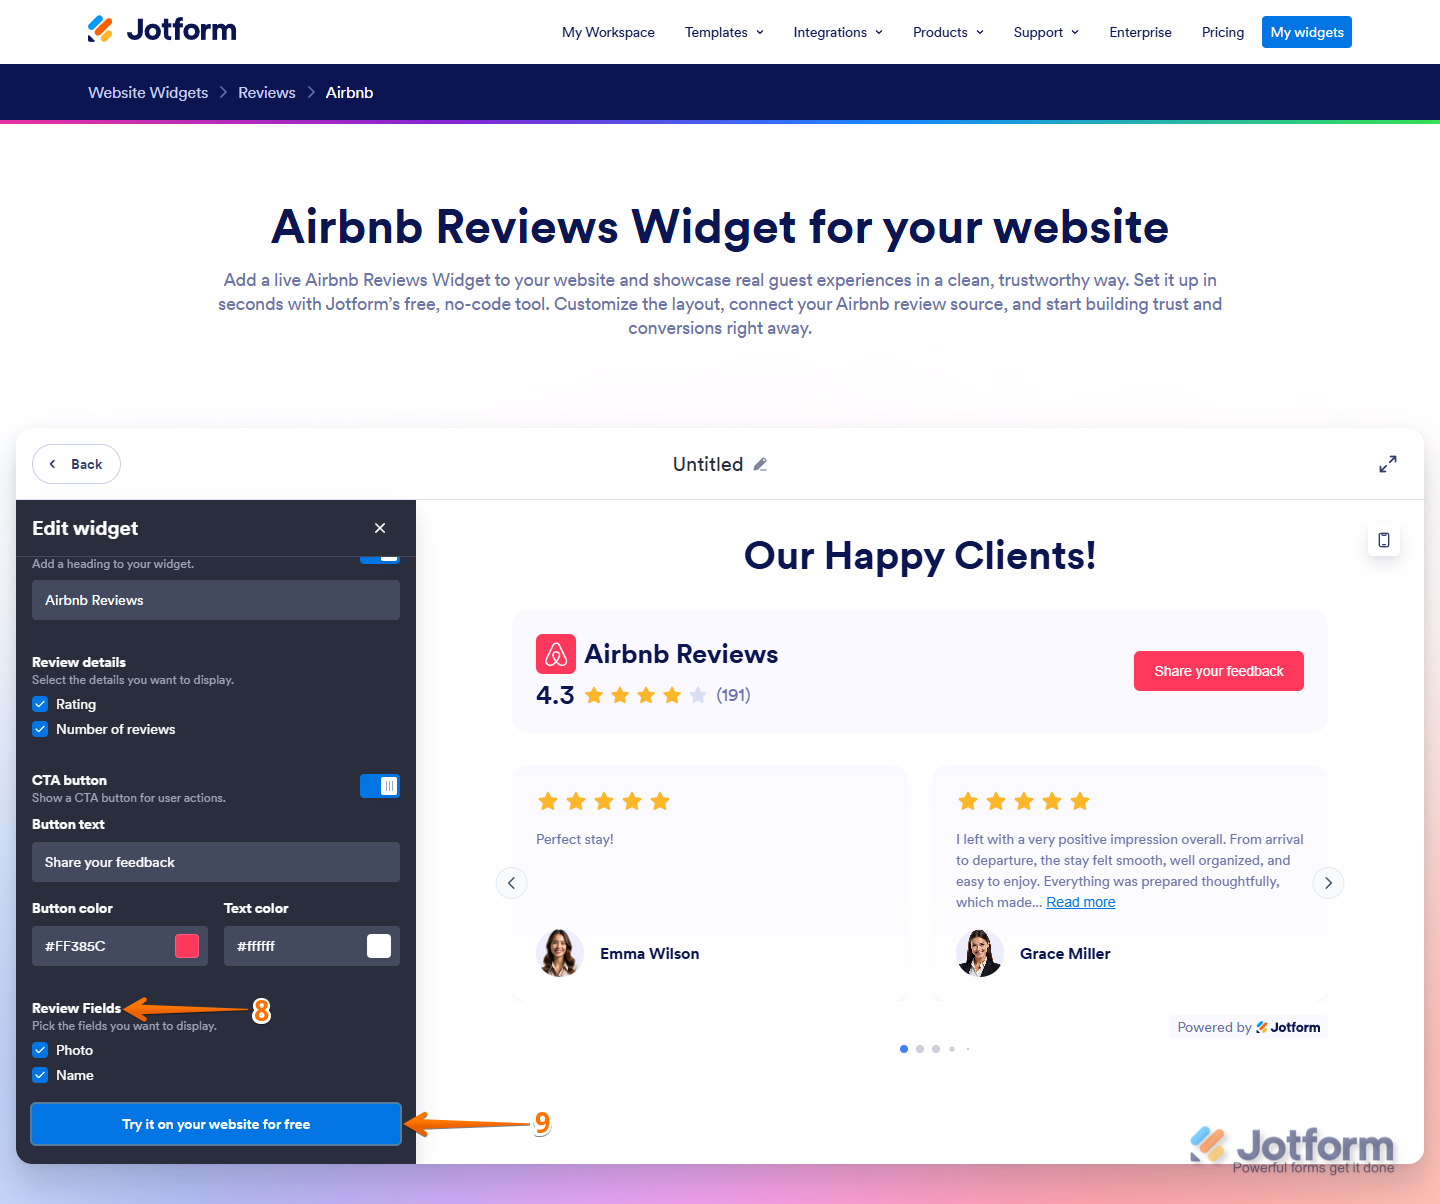
- After that, scroll down to the bottom of the Edit Widget menu and, in the Review Fields settings, remove the checks in the boxes next to the Photo and Name options if you don’t want them to show on each review card, or keep them checked to display them.
Note
You’ll see the Card Details setting instead of the Review Fields setting when you choose the Badge layout for your widget.
- When everything looks correct, click on Try it on your Website for Free.
- Finally, in the Embed window that pops up, click on Copy Code.
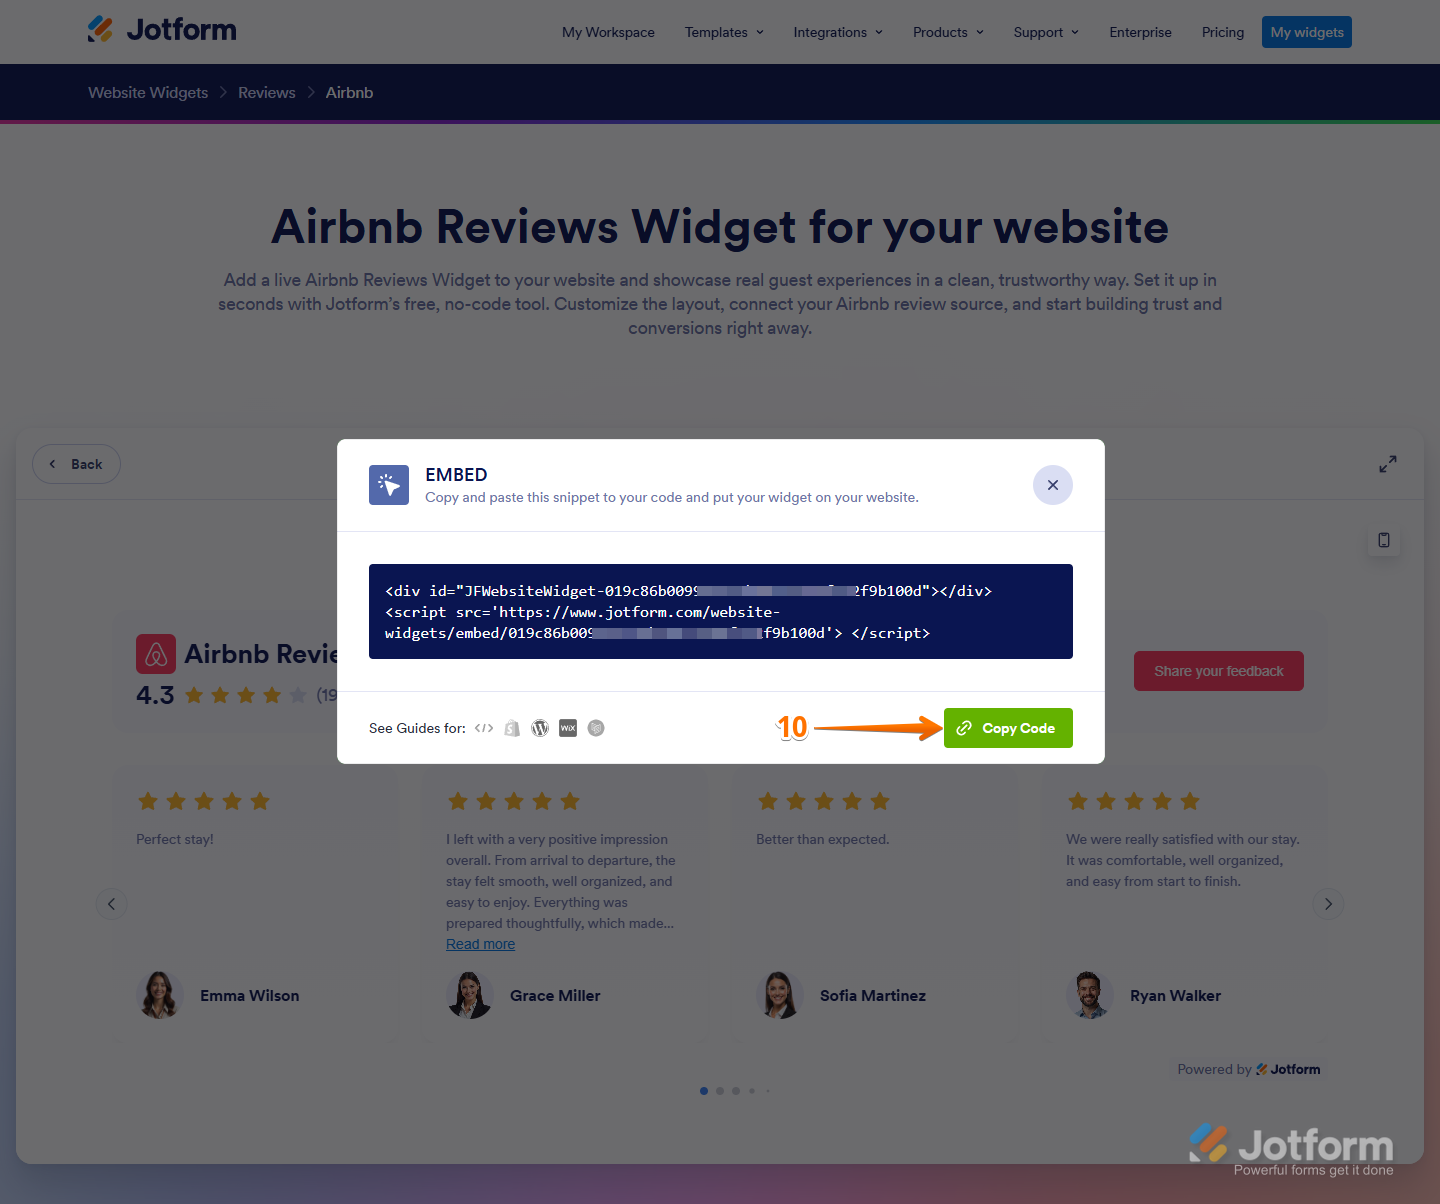
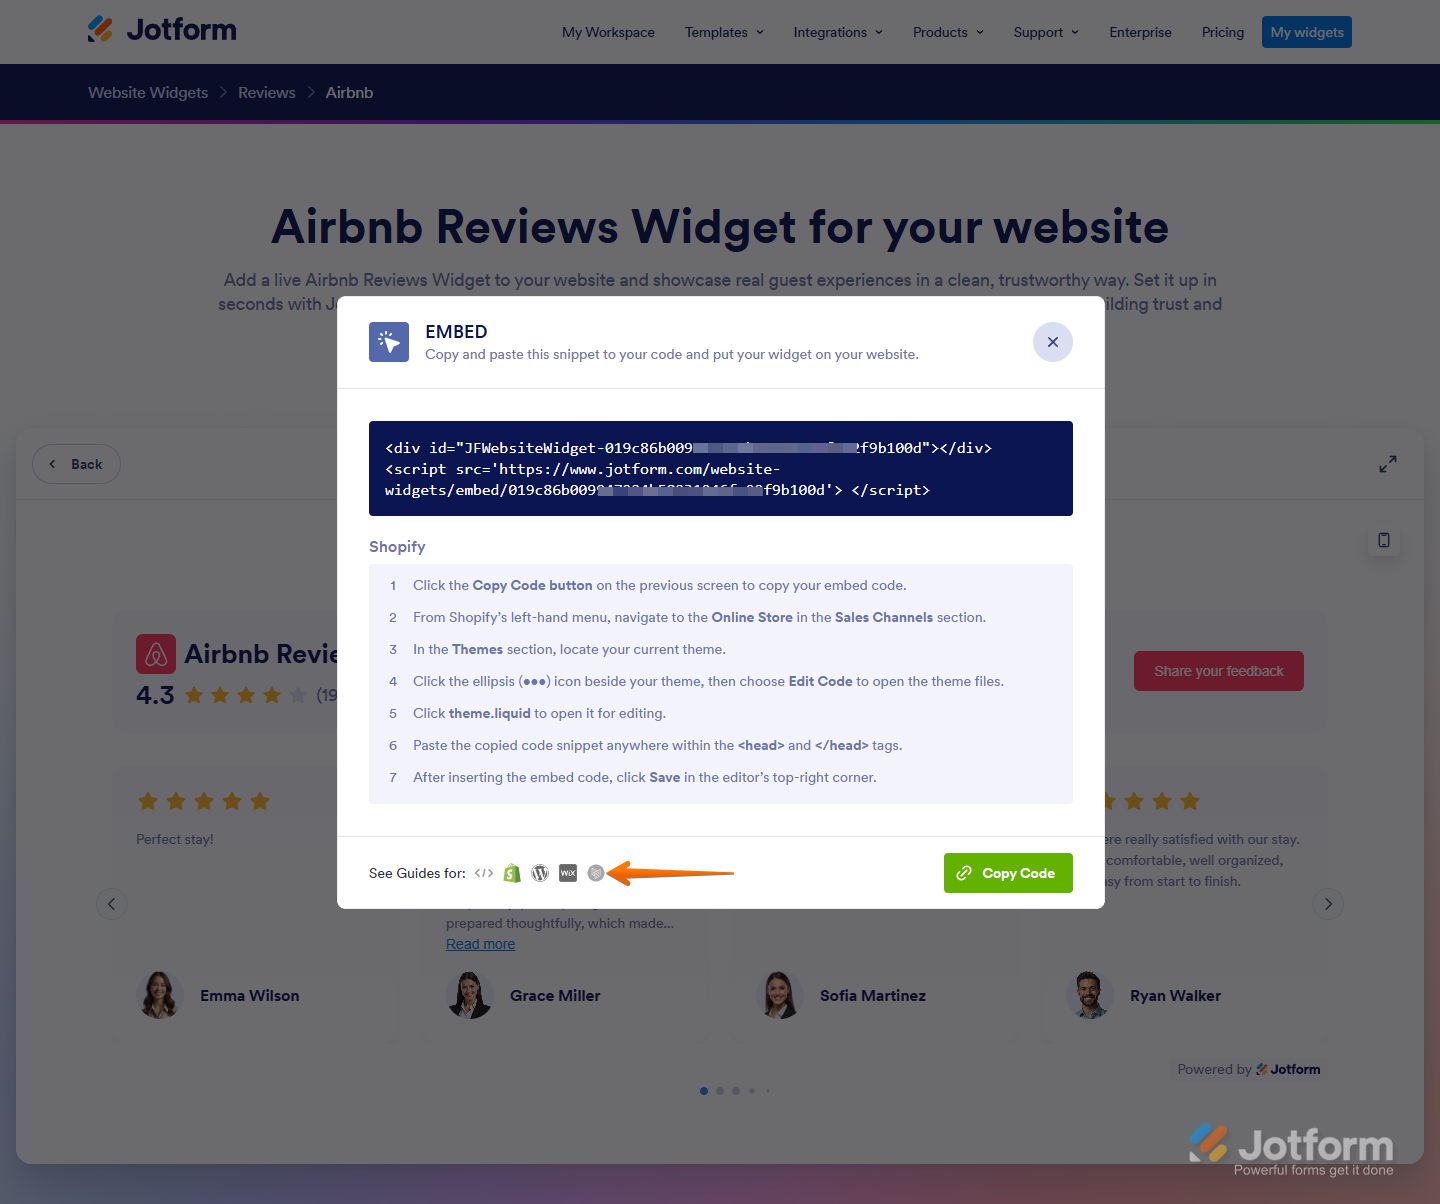
You can also click on the icons on the bottom-left side of the Embed window to view the steps for embedding your widget on these platforms:
- HTML
- Shopify
- WordPress
- Wix
- Ghost
That’s it. You can now paste your Airbnb Reviews widget embed code on your website so your visitors can easily see what others have to say about your listings directly from there.

Note
You can also manage your widget at any time from the My Widgets page. For a full breakdown of how to do it, head over to our guide on How to Manage Website Widgets.

Send Comment: