WhatsApp Business makes it easy to keep customers informed with timely updates, confirmations, reminders, and other important notifications. By integrating it with your form, you can automatically send Meta-approved message templates whenever a form is submitted.
Connecting WhatsApp Business to your form helps reduce manual follow-ups and deliver personalized messages. Whether you’re confirming appointments or sharing order updates, the integration streamlines your communication from start to finish.
Note
The following are required before setting up the integration:
- A WhatsApp Business account connected to a Meta Business account.
- Permission to connect the account and send messages using its approved templates.
- At least one Meta-approved WhatsApp message template. If you have not yet created a template, see Creating and Managing WhatsApp Business Message Templates before continuing.
- A Phone Number field in your form, if you want each message sent to a different recipient.
Integrating Your Form With WhatsApp Business
Setting up the WhatsApp Business integration in your form through Form Builder only takes a few steps. Here’s how to get started:
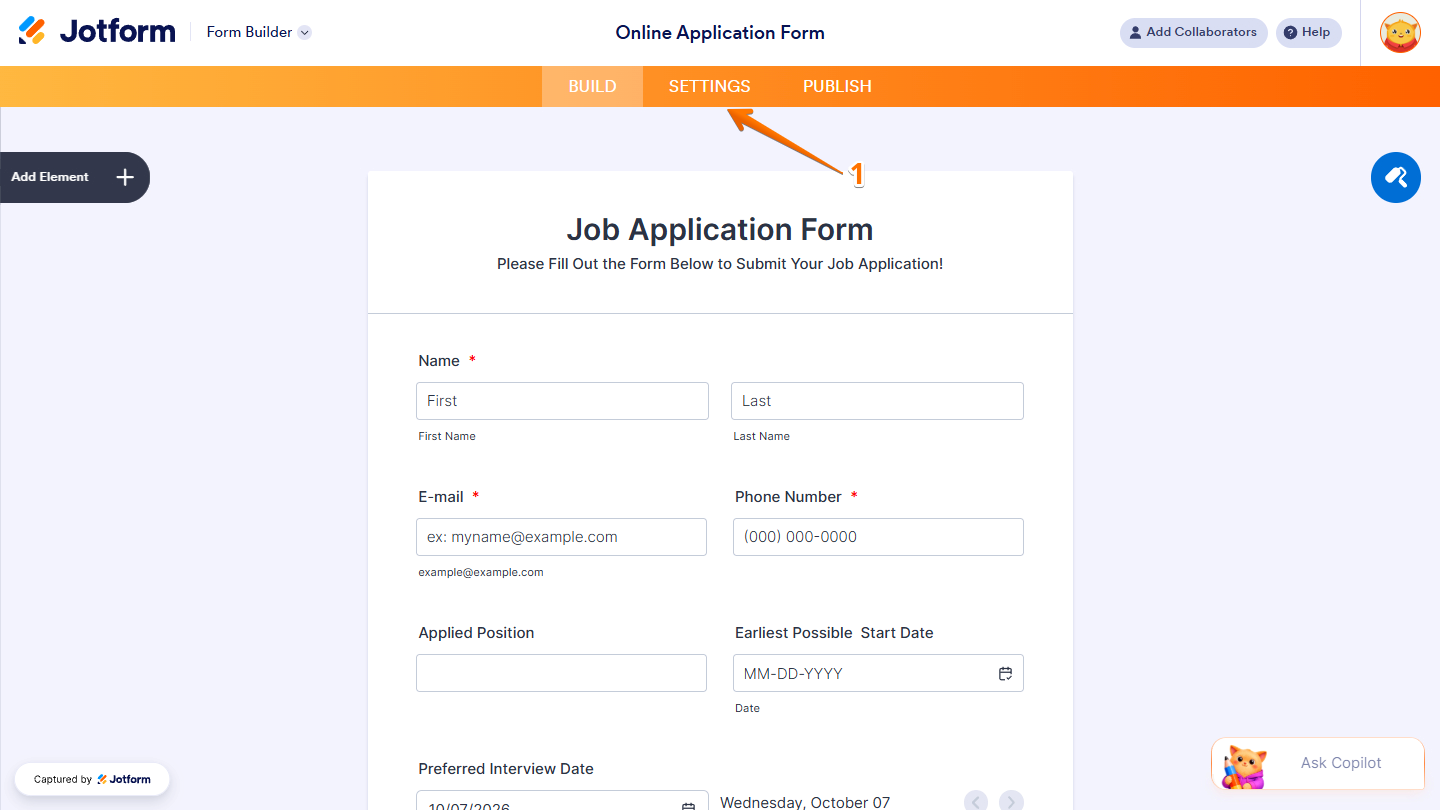
- In Form Builder, in the orange navigation bar at the top of the page, click on Settings.
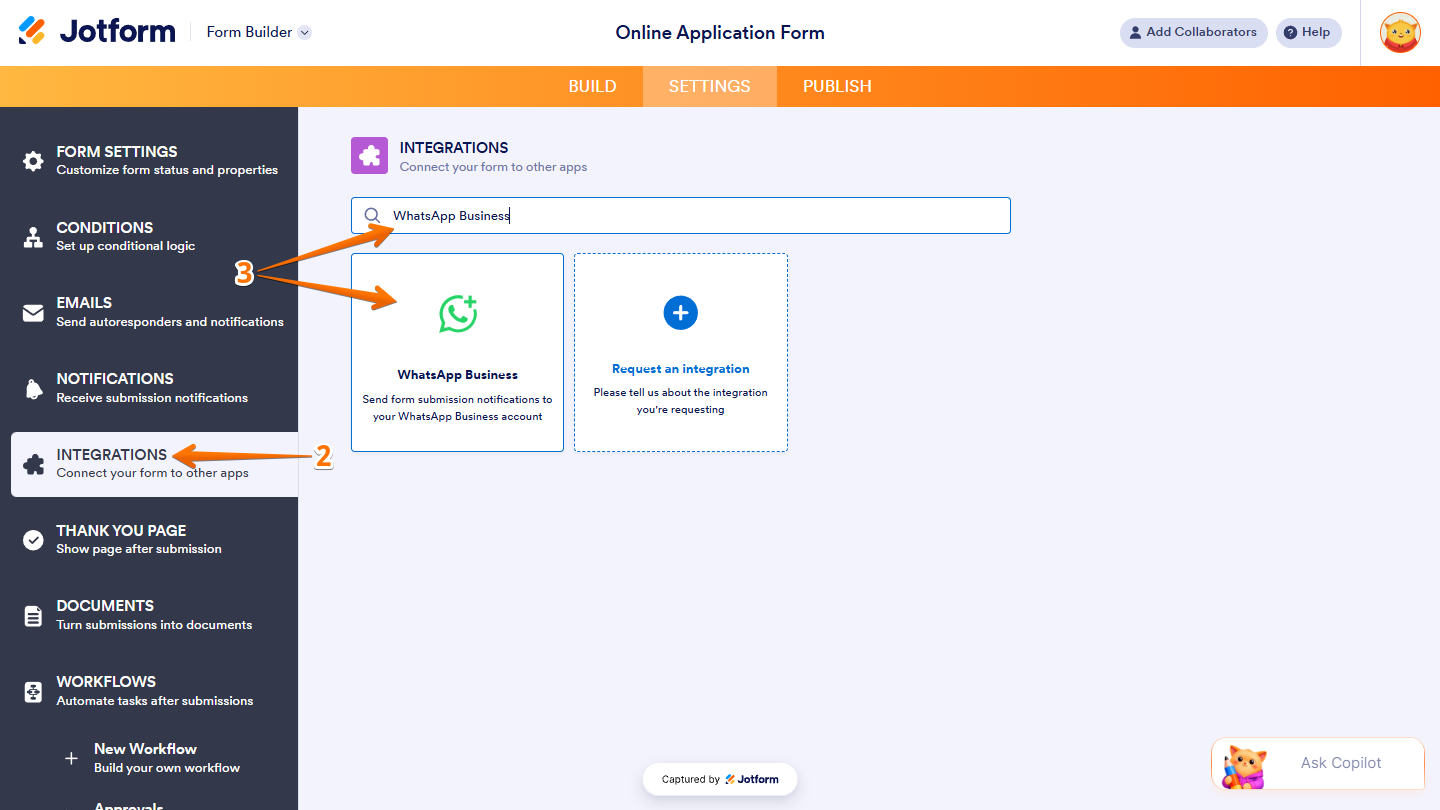
- Then, in the menu on the left side of the page, click on Integrations.
- Next, in the Integrations section on the right, search for WhatsApp Business and click on it.
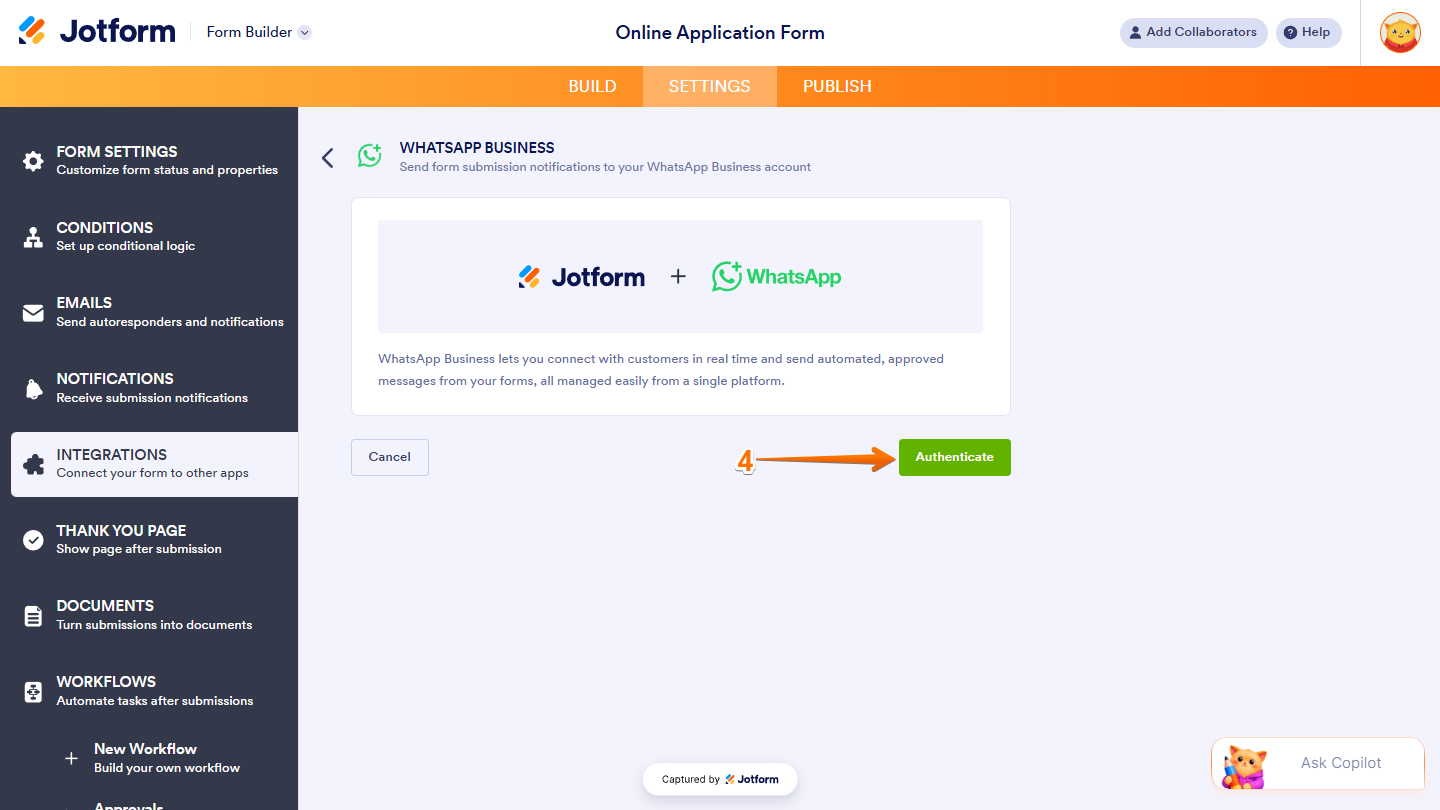
- Now, click on Authenticate.
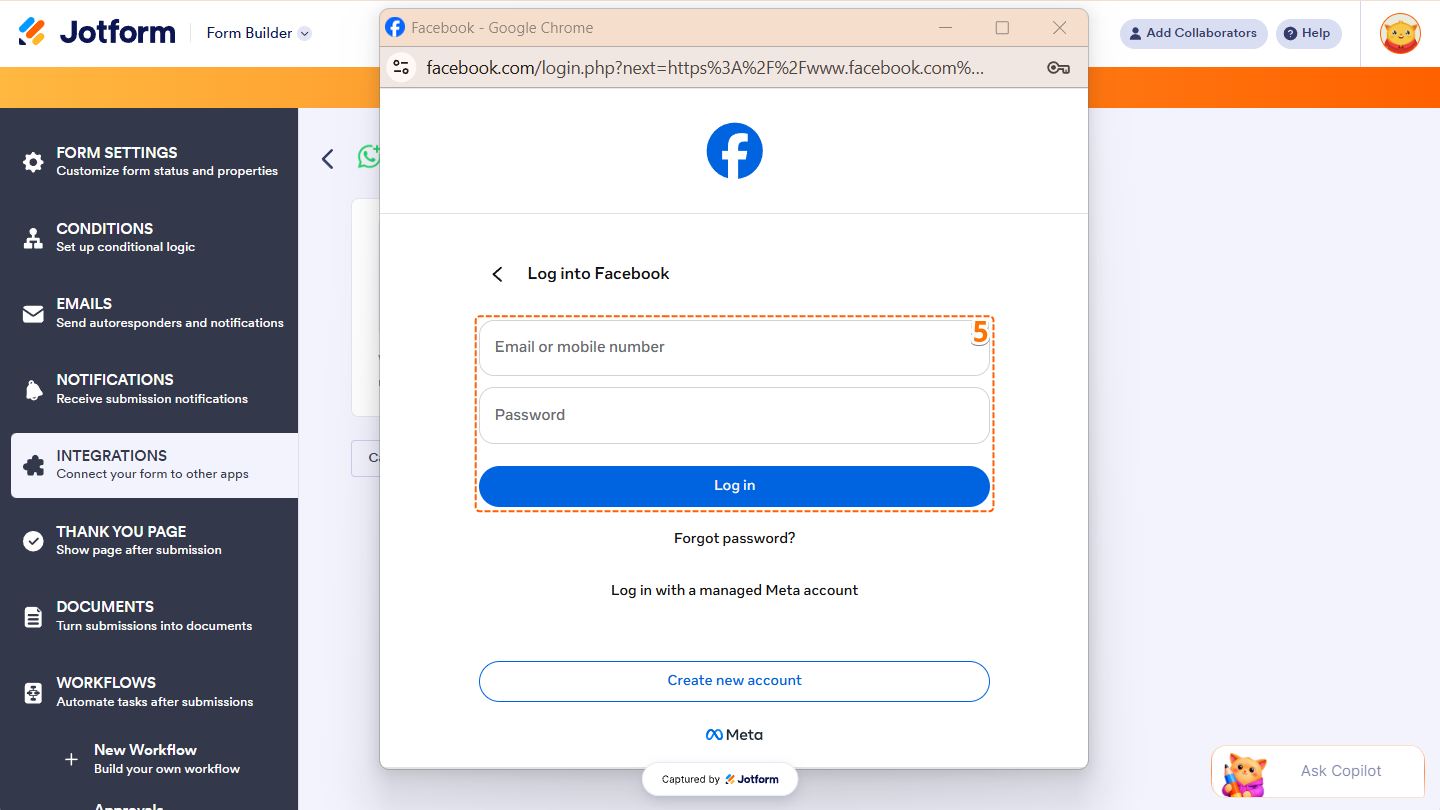
- Then, in the Log in to Facebook window that comes up, enter your Email or Mobile Number and Password, then click on Log in.
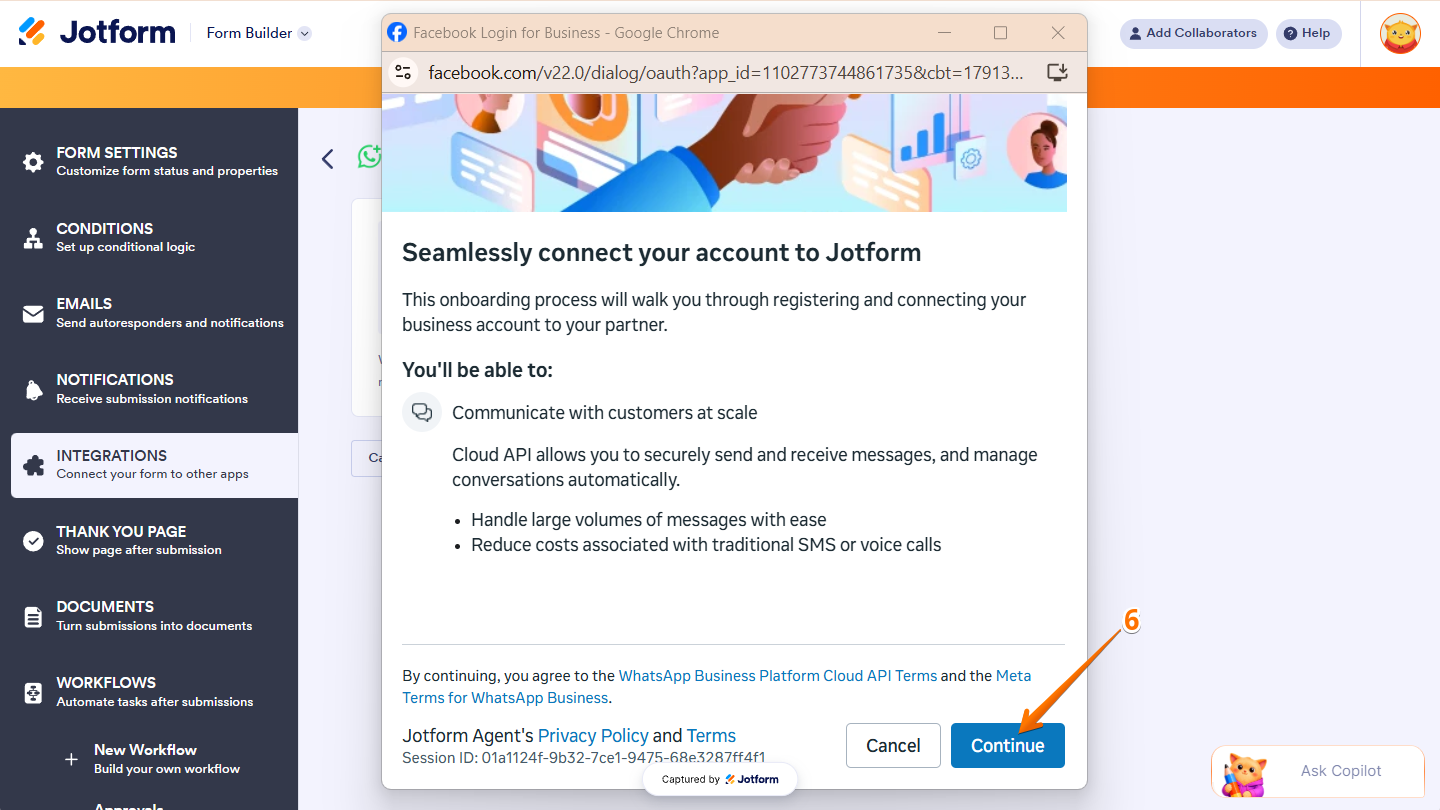
- Next, click on Continue.
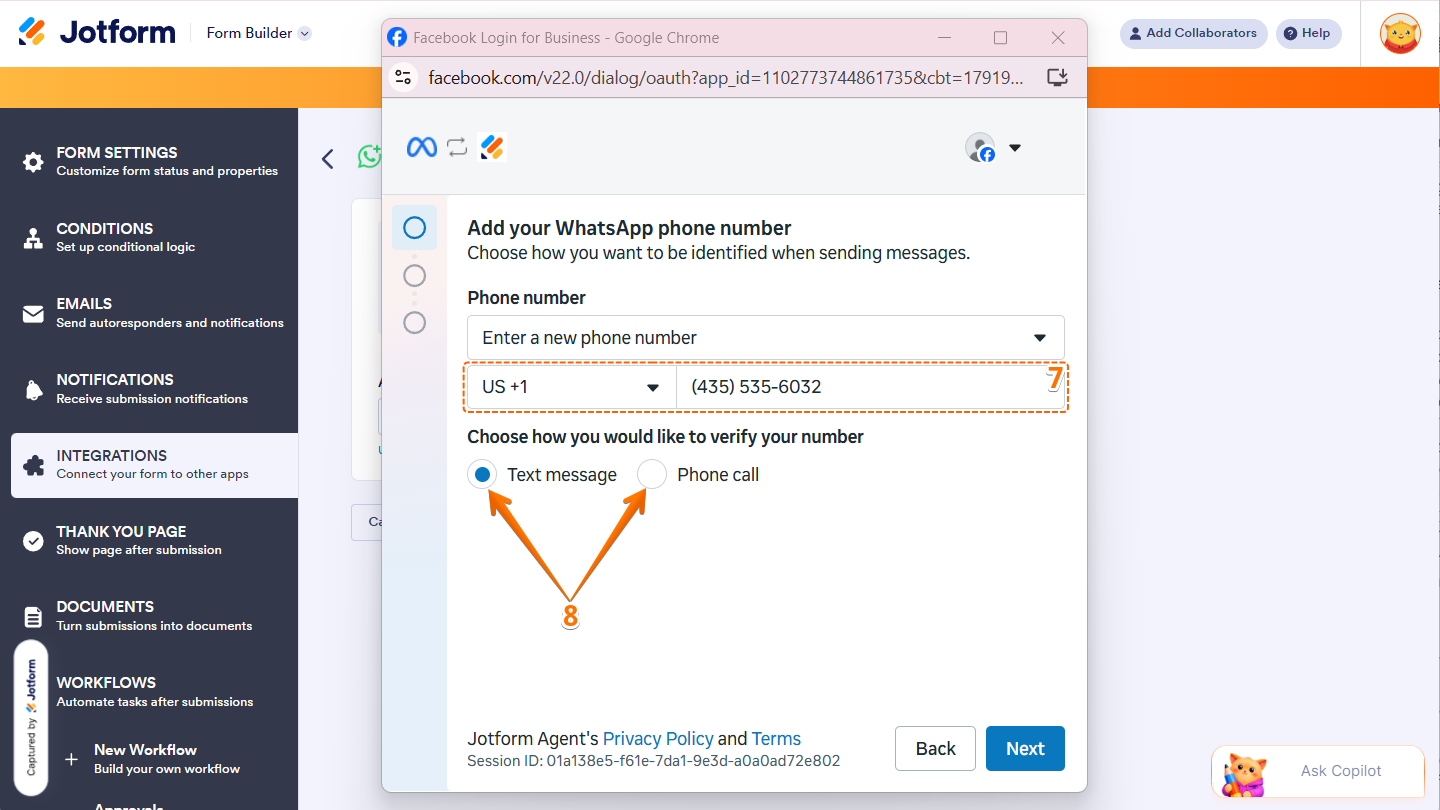
- Now, in the Add Your WhatsApp Phone Number window, in the Phone Number section, select your Country Code in the Dropdown menu, and then enter your phone number in the Phone Number box.
- Then, in the Choose How You Would Like to Verify Your Number section, select Text Message to verify your phone number through SMS, or Phone Call to verify it by accepting a call from Meta.
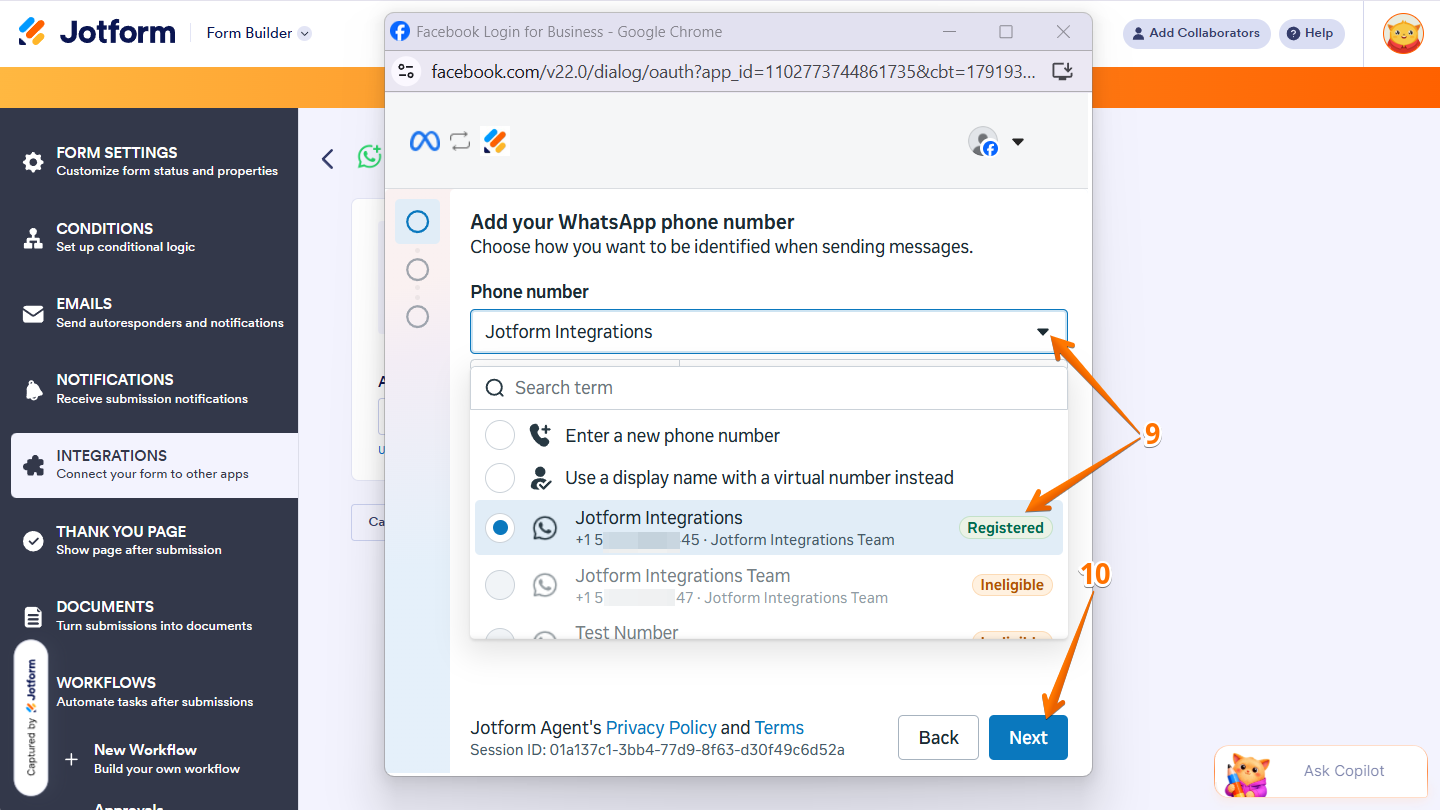
- Or, click on the Downward Arrow icon on the right side of the Phone Number section, then select a verified number
- Then, click on Next.
Note
You can also opt to display a business name with a virtual phone number, but that requires further verification. Check out Meta’s guide on Business Verification to learn more.
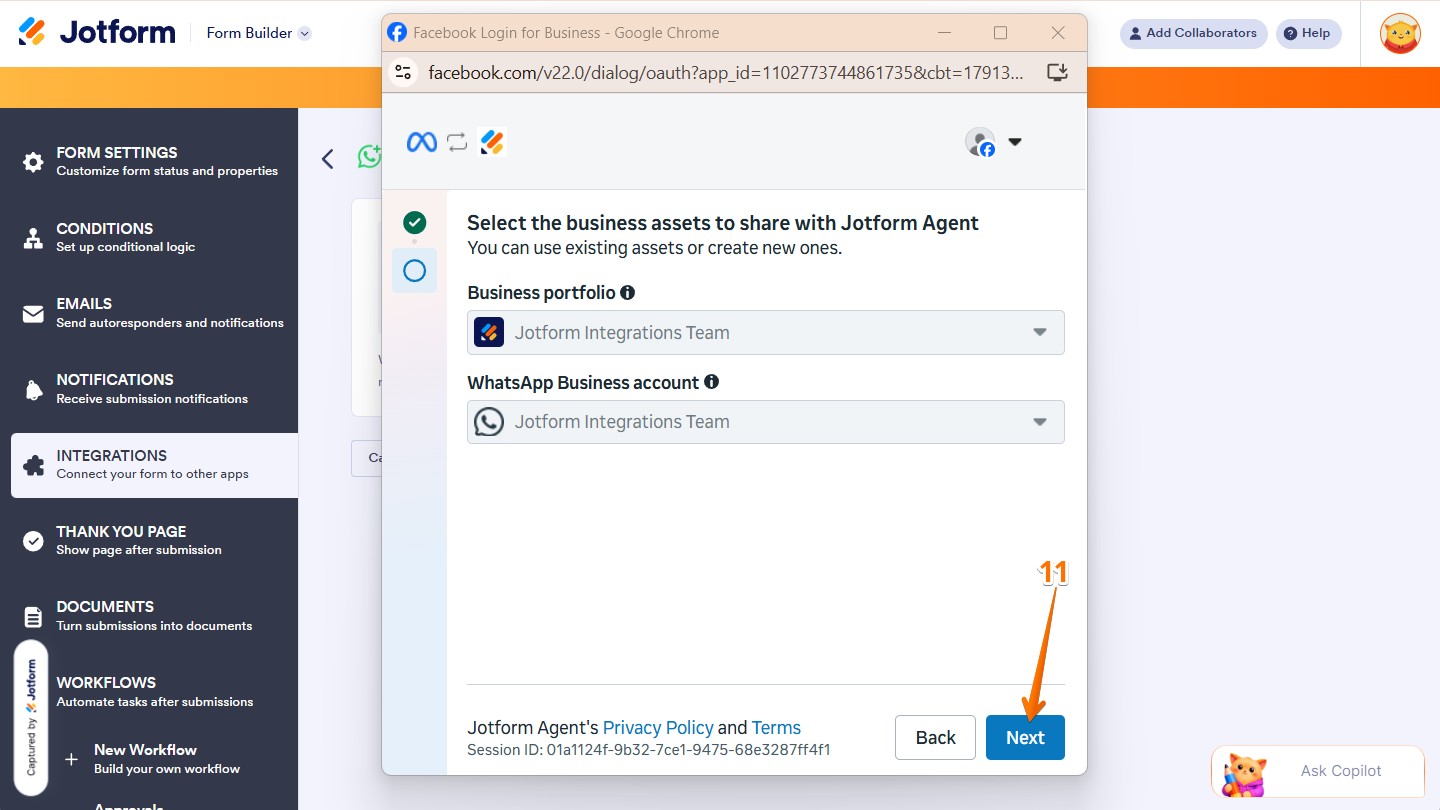
- Then, in the Select the Business Assets to Share With Jotform Agent window, click on Next.
Note
The Business Portfolio and WhatsApp Business Account dropdown menus are automatically populated based on your Meta and WhatsApp settings.
- Next, click on Confirm.
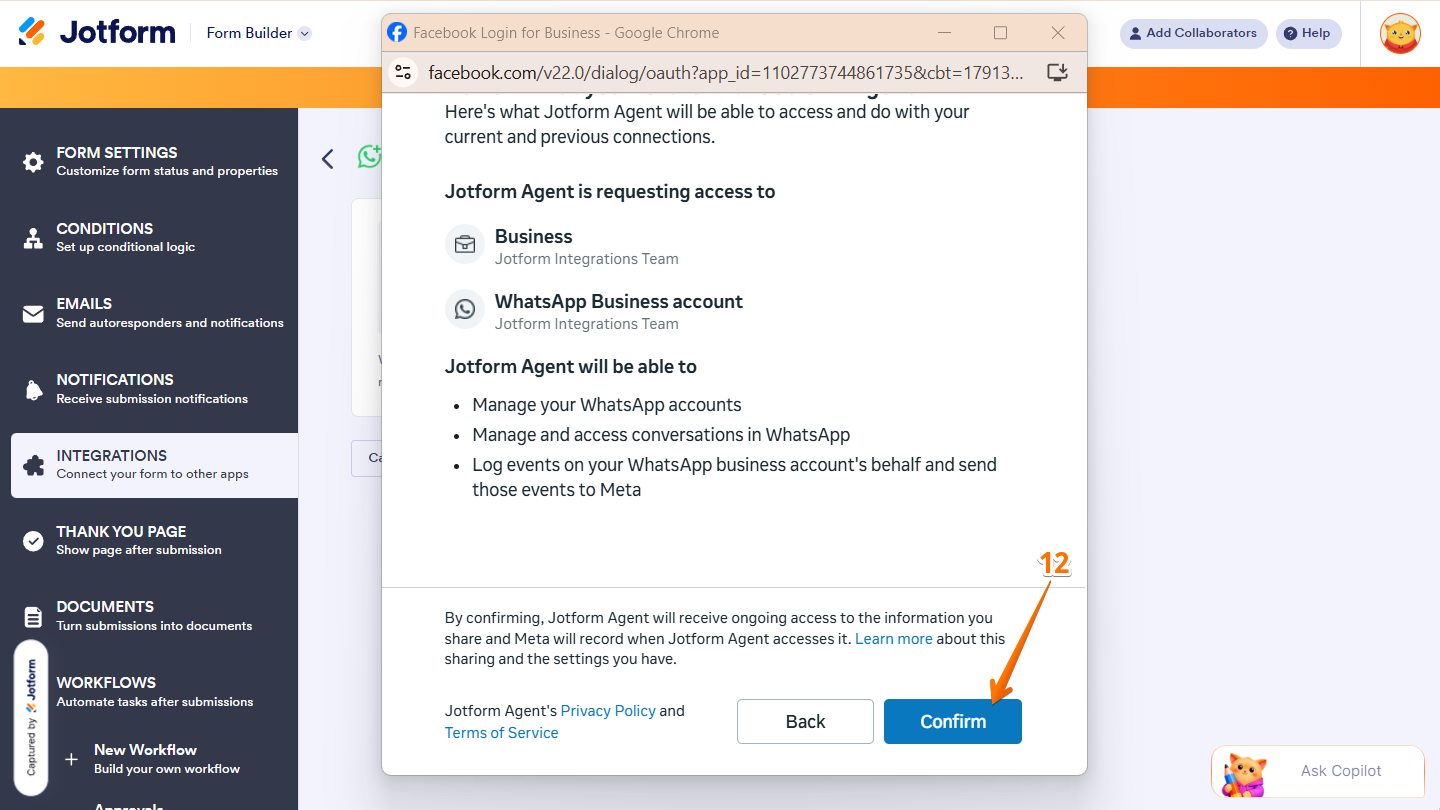
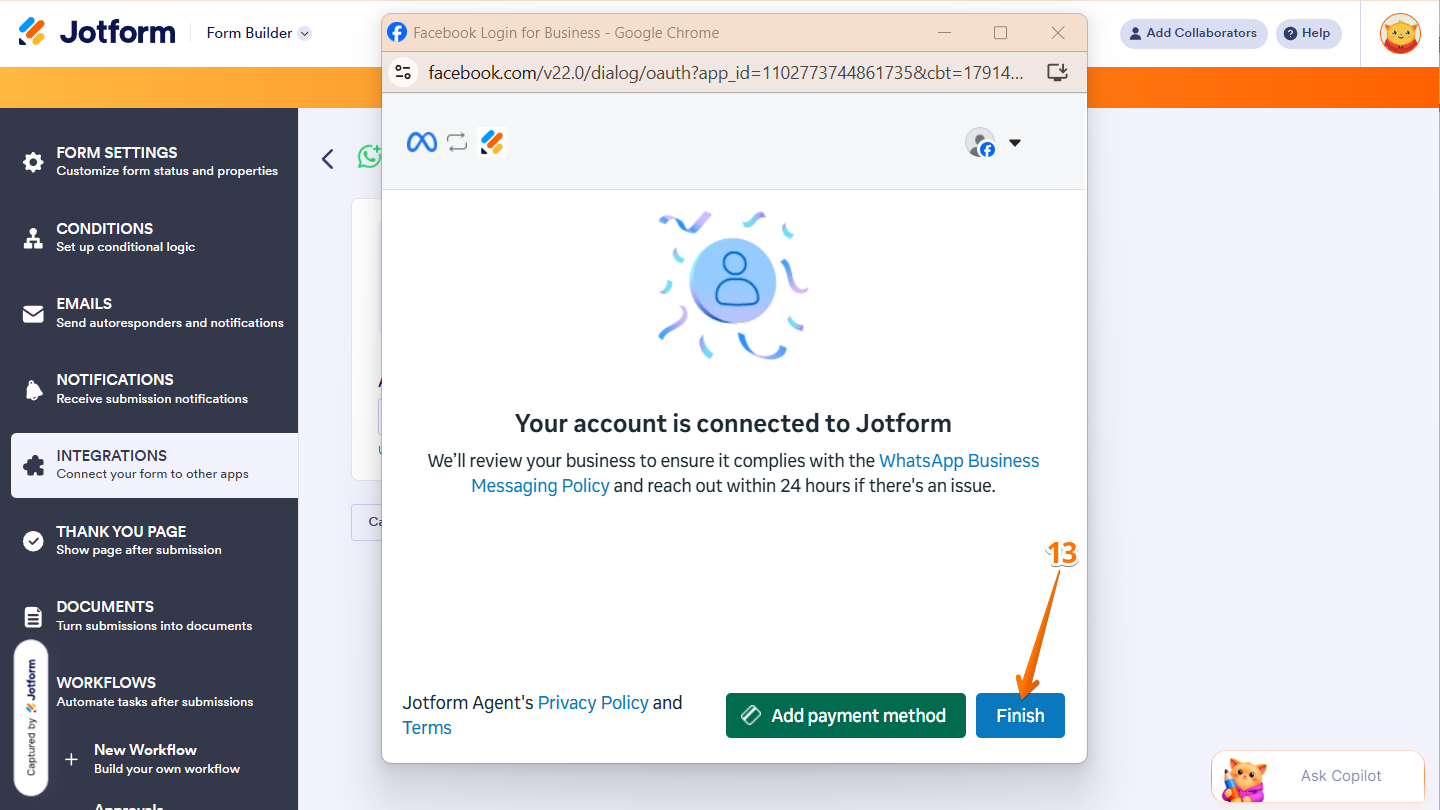
- Now, click on Finish.
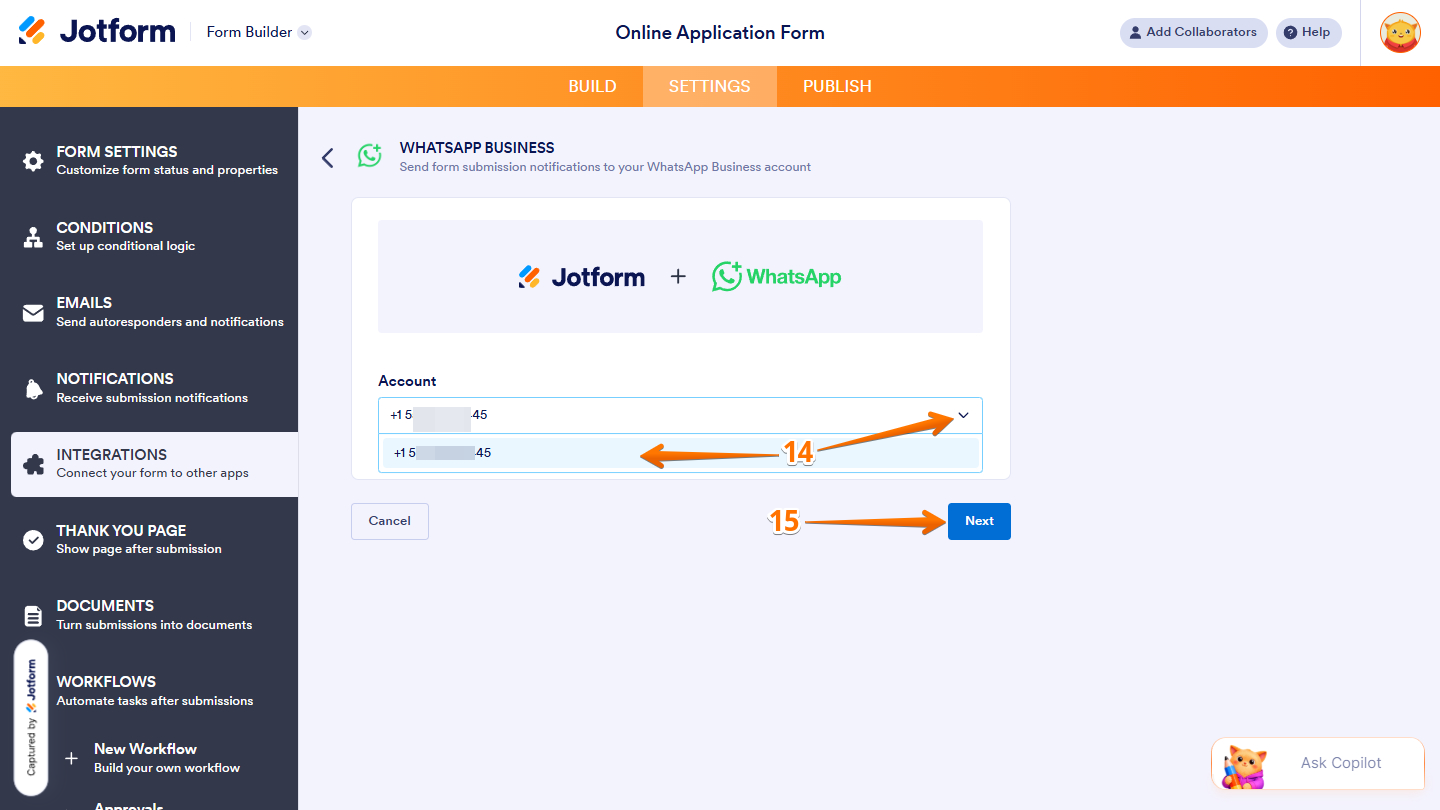
- If you’ve logged in before through one of your other forms, click on the Downward Arrow icon, and in the Dropdown menu that comes up, select that WhatsApp Number.
- Then, click on Next.
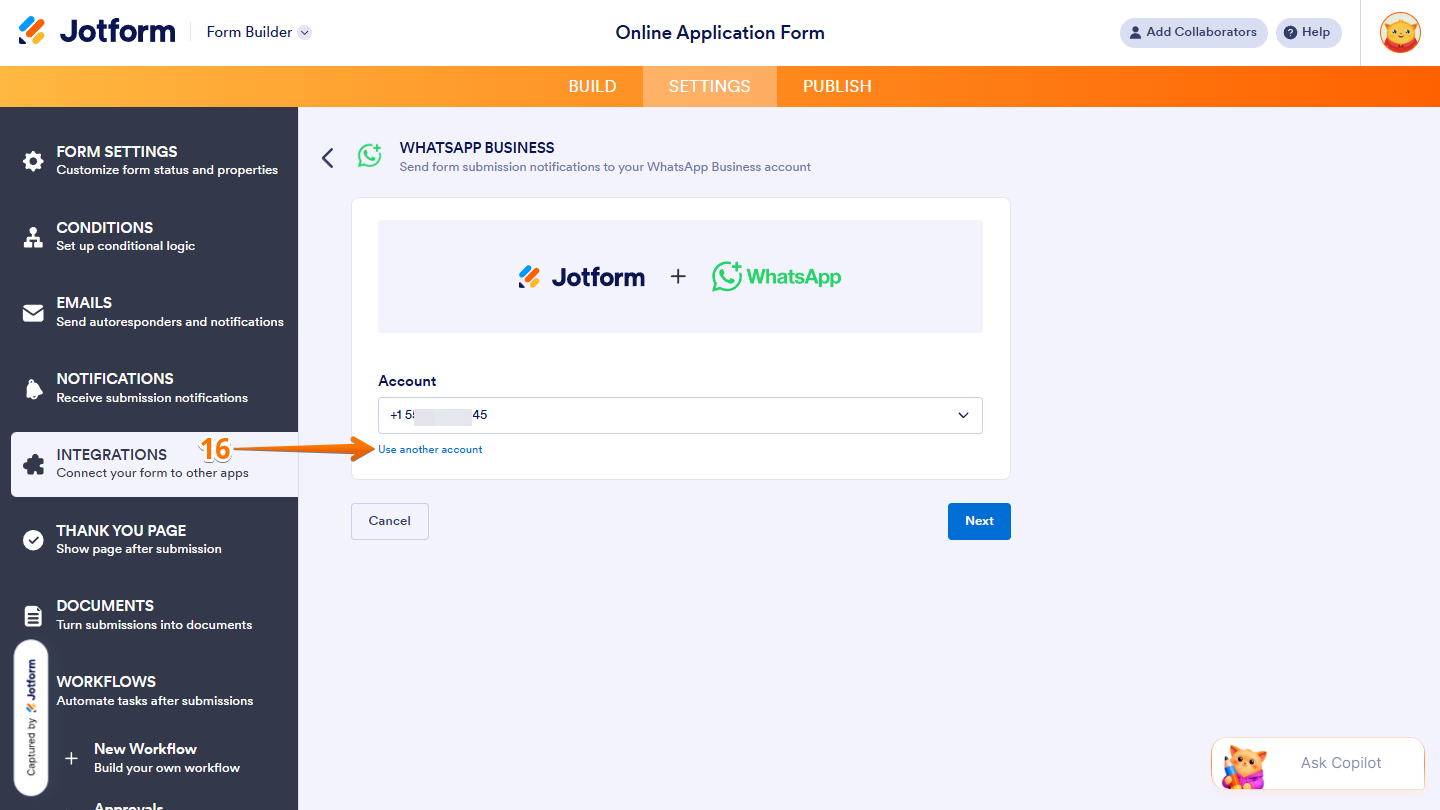
- Or, to use a different one, click on Use Another Account below the dropdown.
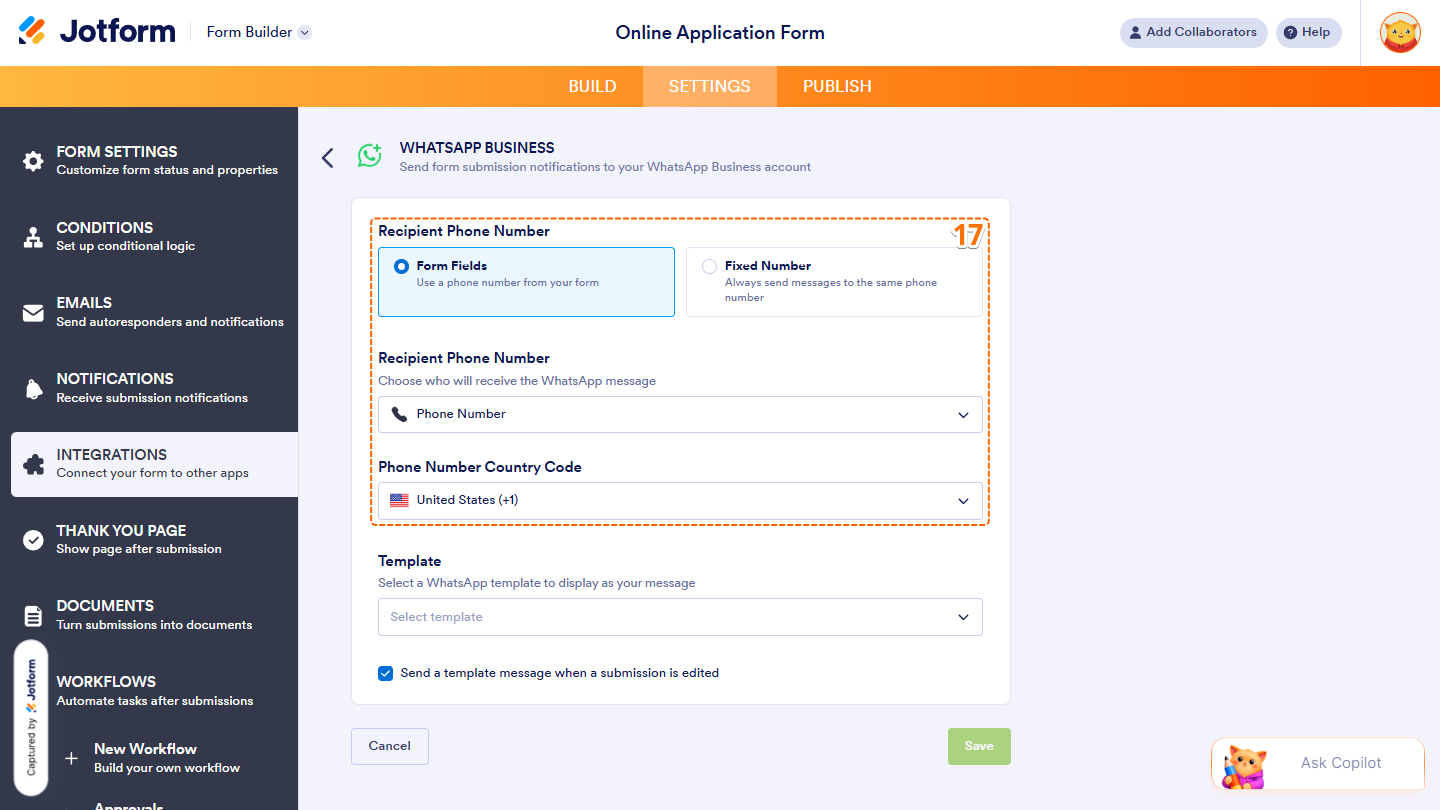
- In the WhatsApp Business section, set up these things:
- Recipient Phone Number — Select whether to use a Phone Number field from your form or a fixed phone number as the recipient.
- Recipient Phone Number (Field) — Select the Phone Number field that contains the number where the WhatsApp message will be sent.
- Phone Number Country Code — Select the country code for the recipient’s phone number.
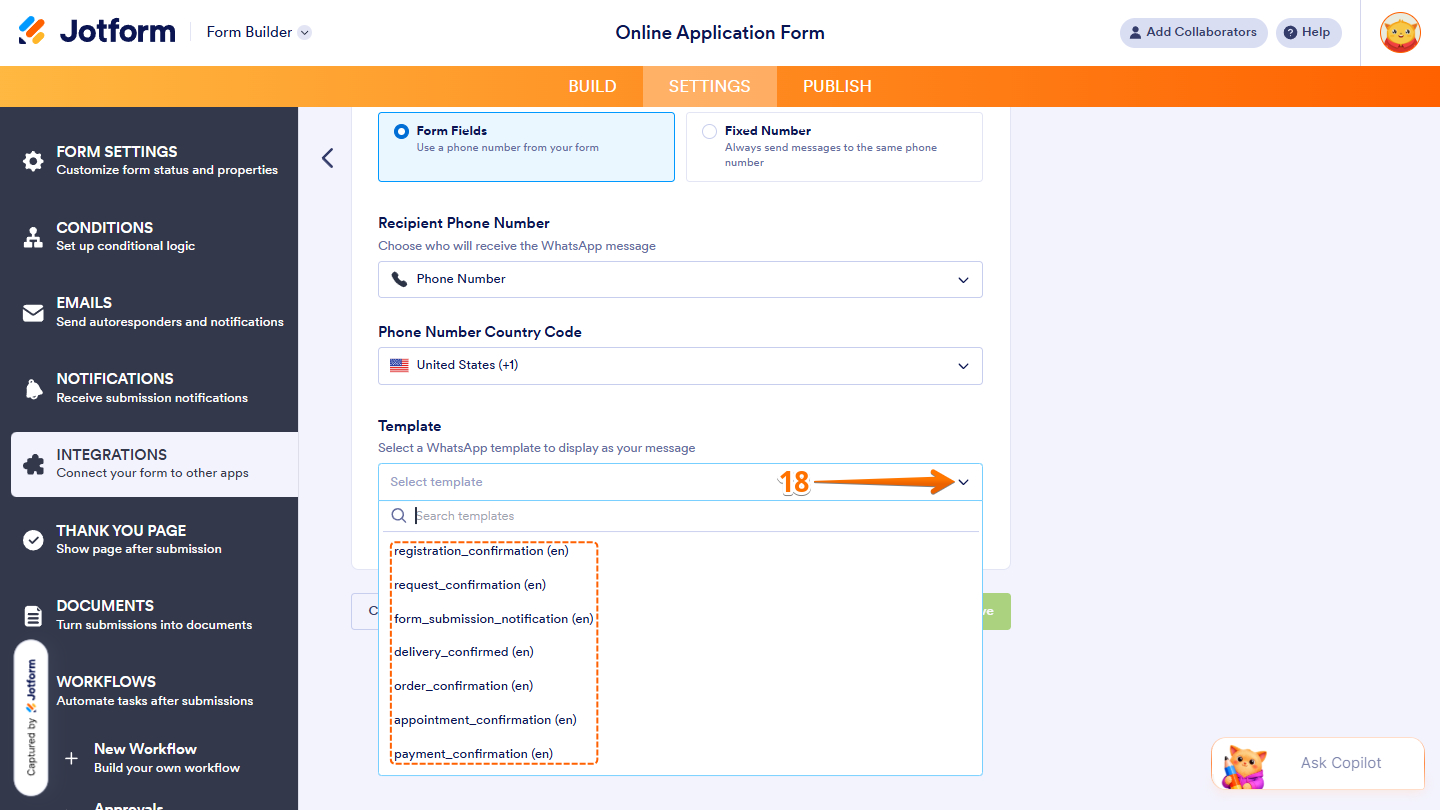
- Then, click on the Downward Arrow icon on the right side of the Template, and in the Dropdown menu that opens, select a WhatsApp template to display as your message.
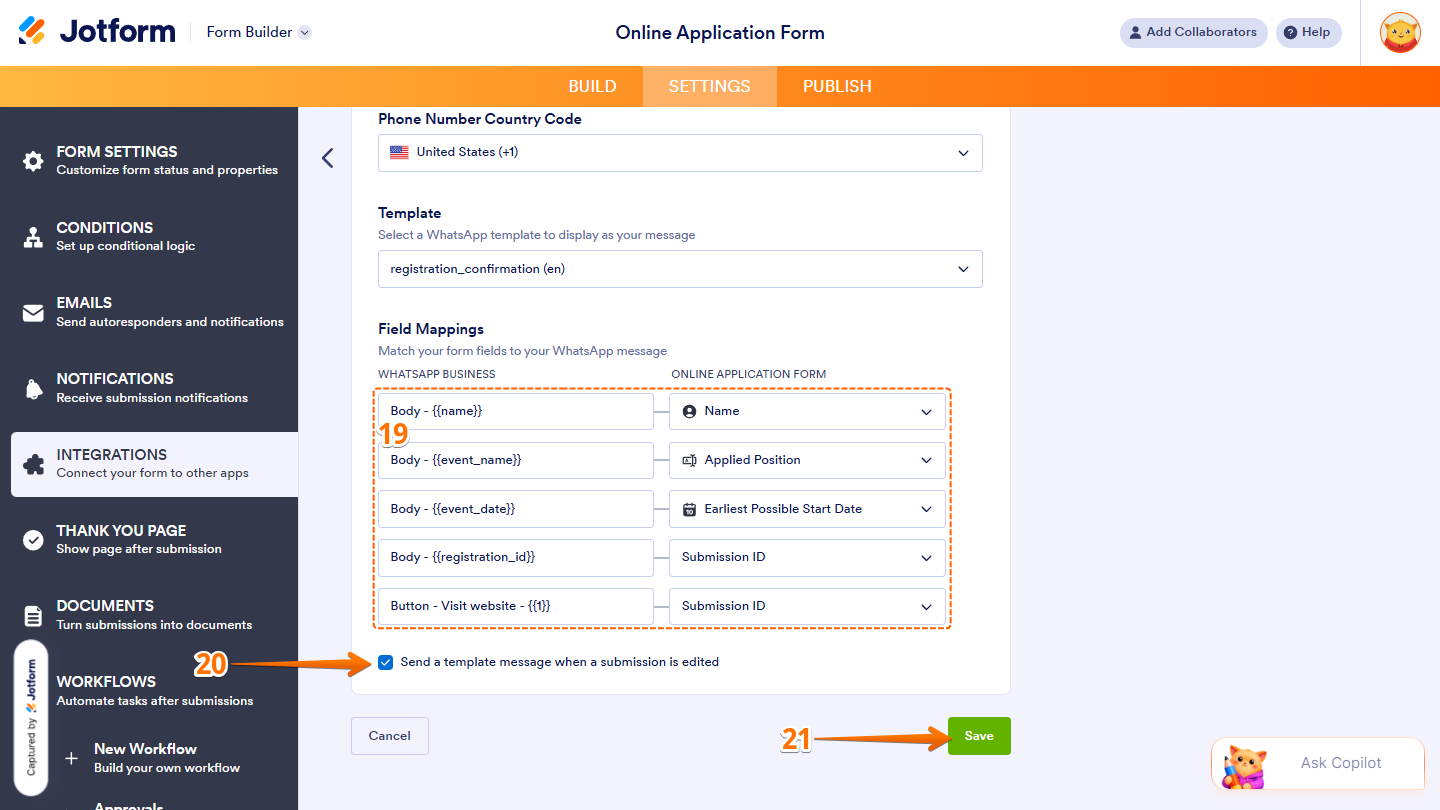
- Next, under Field Mappings, match your WhatsApp Business fields on the left to your Jotform form fields on the right.
- Now, tick or untick the Send a Template Message When a Submission Is Edited option to send your WhatsApp message when your form submission is edited.
- Once everything’s set, click on Save.
That’s it! You’ve successfully integrated WhatsApp Business with your form. Once the form is submitted, your clients will receive the WhatsApp Message Template you’ve configured.
Managing WhatsApp Business Integration Actions
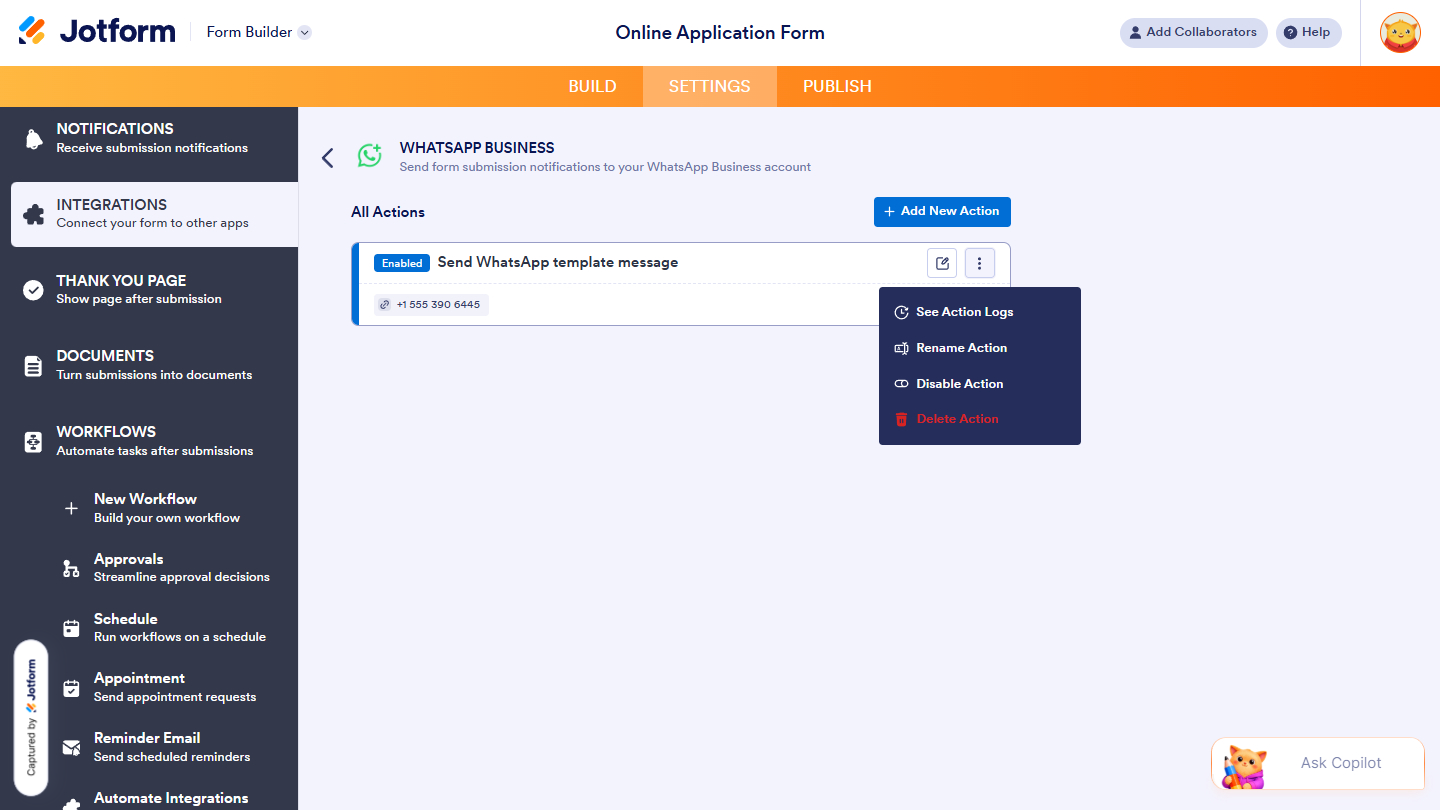
After saving the integration, you’ll see the list of actions you’ve set up and the Add New Action button on the main page. Hover your mouse over an action and click on the Pencil icon to edit it or the Three Dots icon to access more options:
- See Action Logs — View successful and failed runs, helpful for troubleshooting.
- Rename Action — Change the action’s title.
- Disable Action — Temporarily stop the integration from sending data.
- Delete Action — Remove the action from your form.

Send Comment: