As the number of forms in your workspace grows, keeping everything organized becomes more important. Jotform AI Smart Labels automatically analyzes your forms and generates relevant labels based on their content, making it easier to categorize, filter, and quickly find the forms you need without organizing them manually.
Generating Smart Labels
Generating Smart Labels with AI only takes a minute to set up—here’s how:
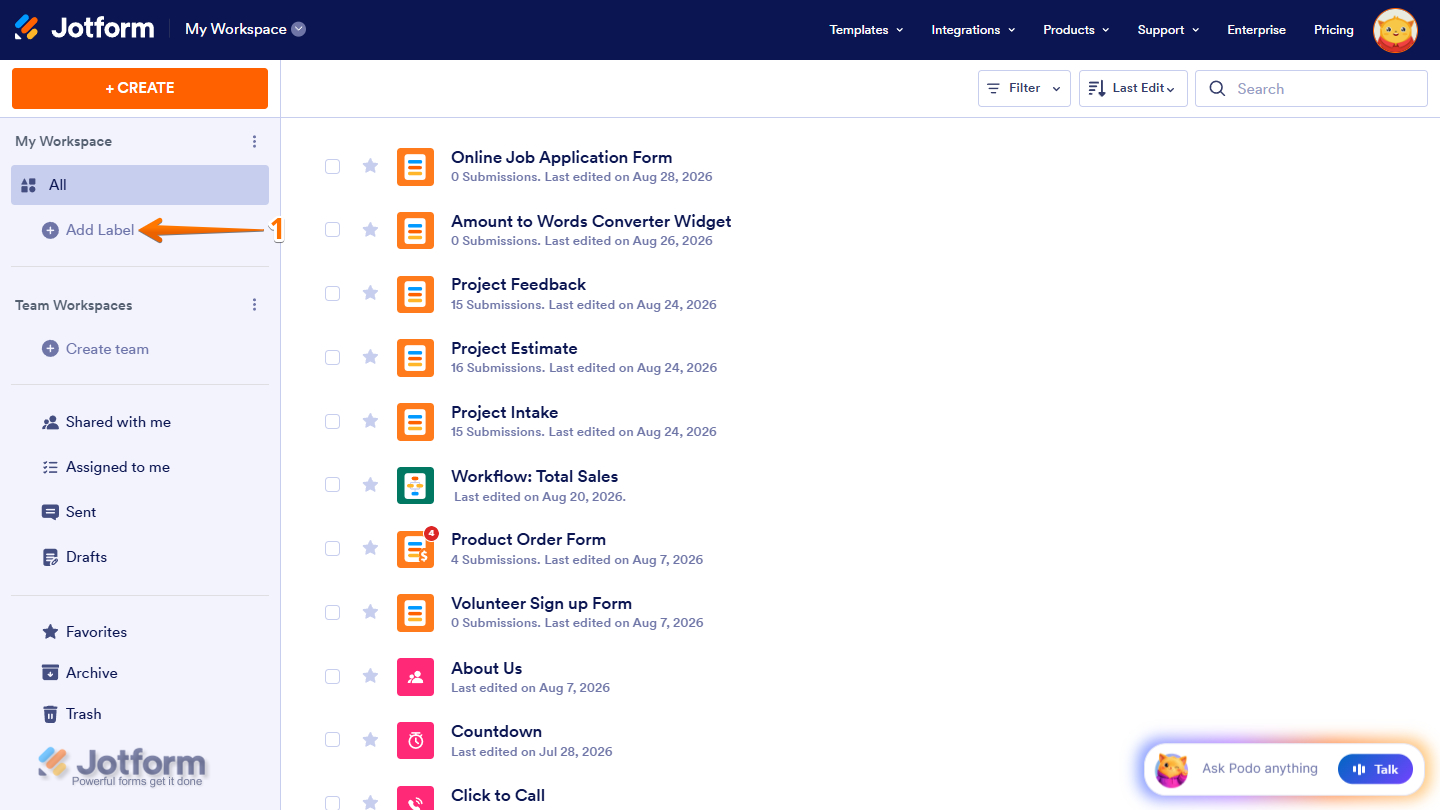
- On your Workspace page, click on Add Label on the left side of the page.
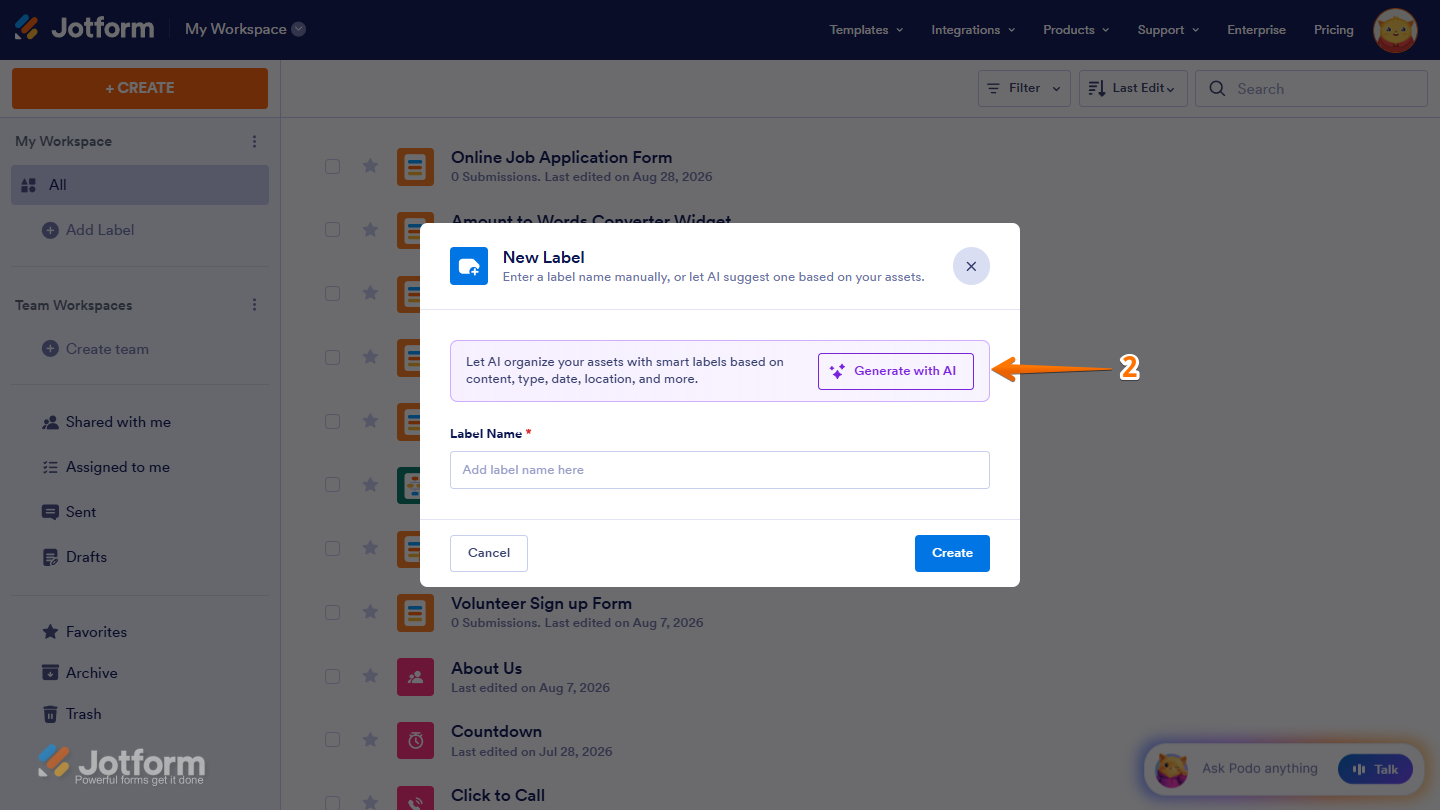
- Then, in the New Label window that opens, click on Generate with AI. Jotform AI will process your request immediately.
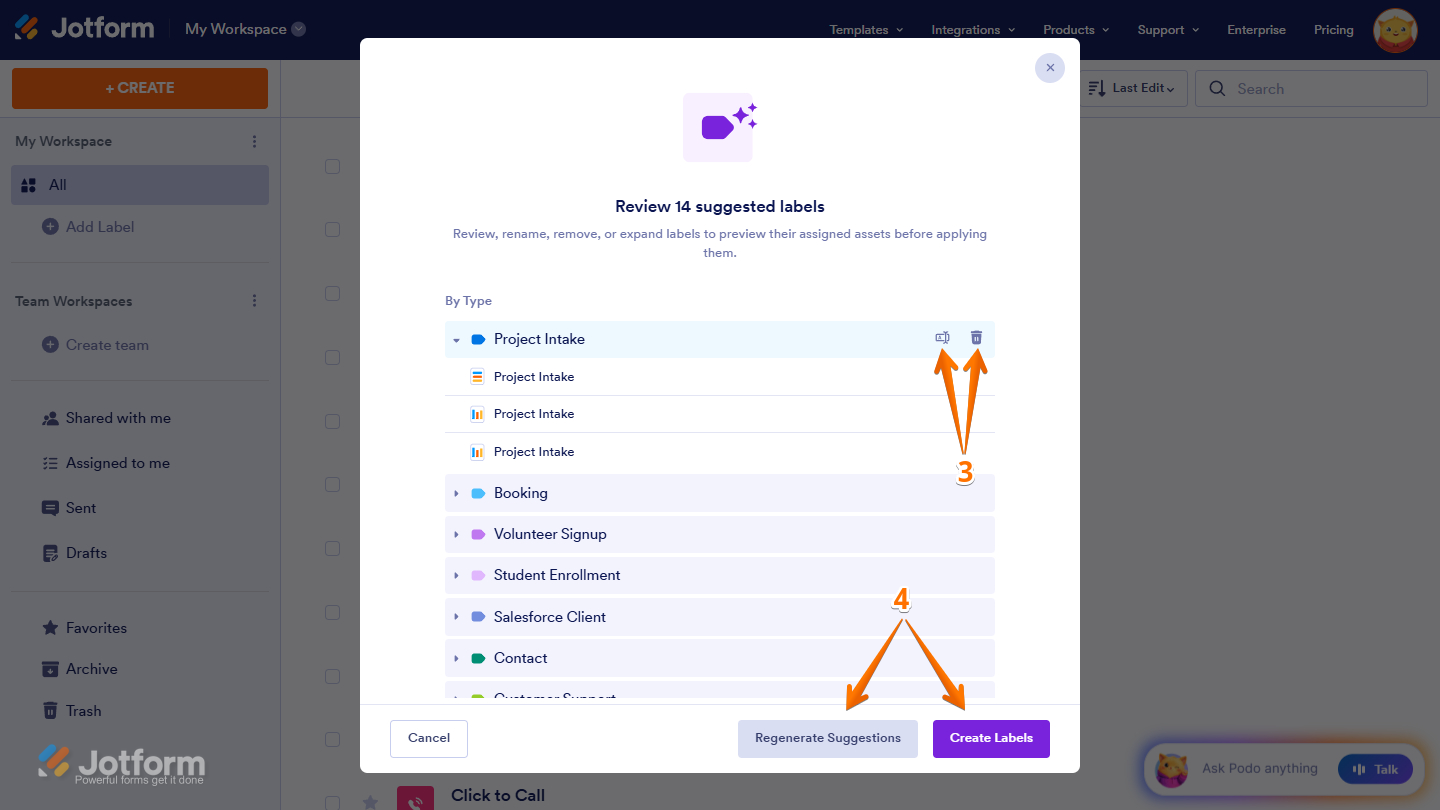
- Now, review the generated labels, then hover over a label and click on the Edit Text icon to rename it or the Trash Can icon to delete it.
- Finally, click on Create Labels to create the labels. Or, click on Regenerate Suggestions to have the AI generate a new set of label suggestions.
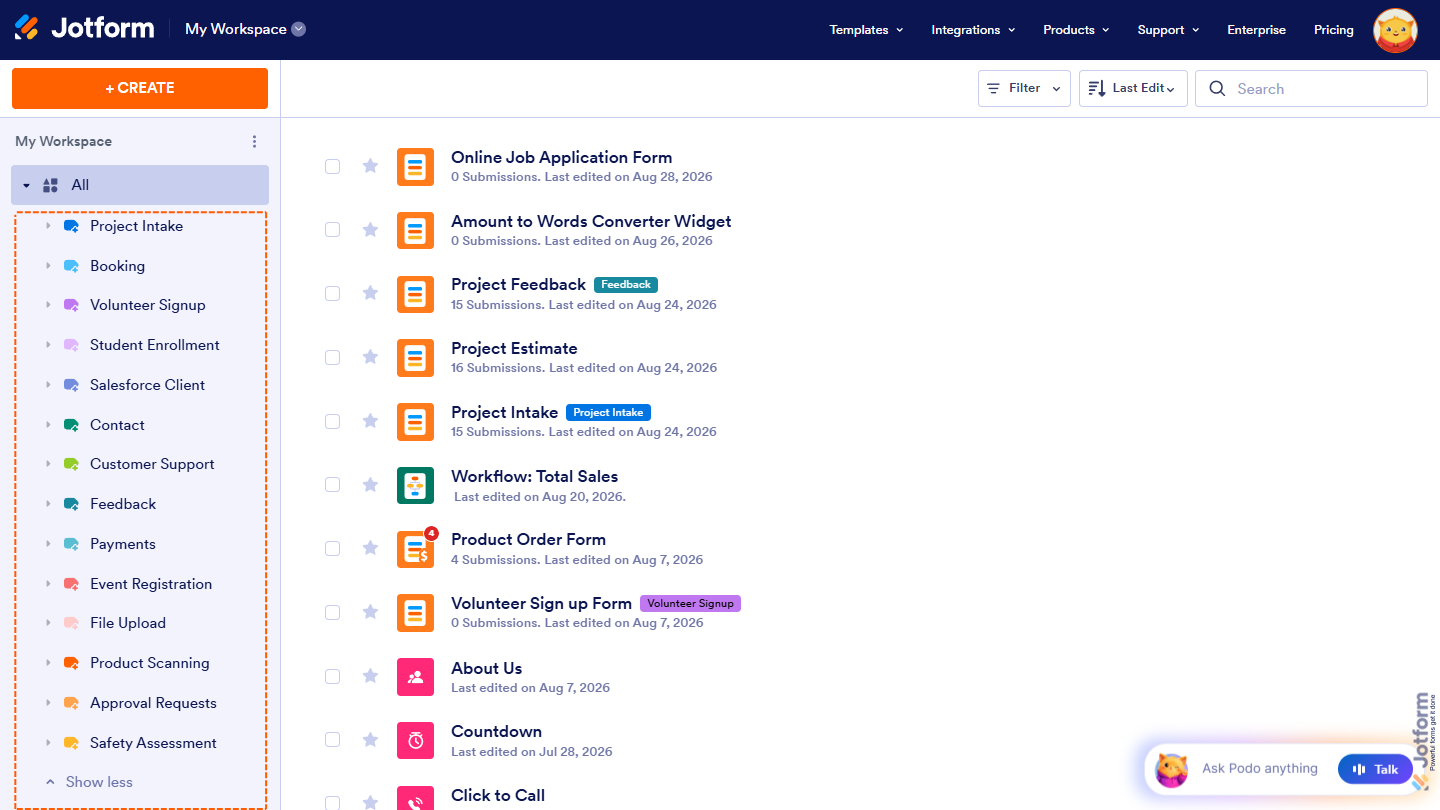
That’s it! Your AI-generated labels are now available and are marked with a star icon to distinguish them from manually created labels. Below is an example of how they appear in My Workspace section.
Managing Labels
Once you’ve generated your labels, you can organize and manage them to keep your workspace tidy. The available options let you sort labels, manage them individually, or remove multiple labels at once.
Sorting Labels Alphabetically
By default, AI-generated labels are listed in the order determined by Jotform AI, while manually created labels are listed in the order of their creation. You can sort all labels alphabetically, making them easier to browse and find. Here’s how:
- On your Workspace page, click on the Three Dots icon on the right side of the My Workspace section on the left.
- Now, in the Dropdown menu that opens, click on Sort Alphabetically.

That’s it! Your Smart and manually created labels are now sorted alphabetically. You’ll also notice that the Sort Alphabetically option has a blue check mark in it, and can no longer be clicked after sorting. Below is an example of alphabetically sorted labels:

Deleting Labels at Once
If you no longer need certain labels, you can delete multiple labels at once. Here’s what to do:
- On your Workspace page, click on the Three Dots icon on the right side of the My Workspace section on the left.
- Then, in the Dropdown menu that opens, click on Manage Labels.
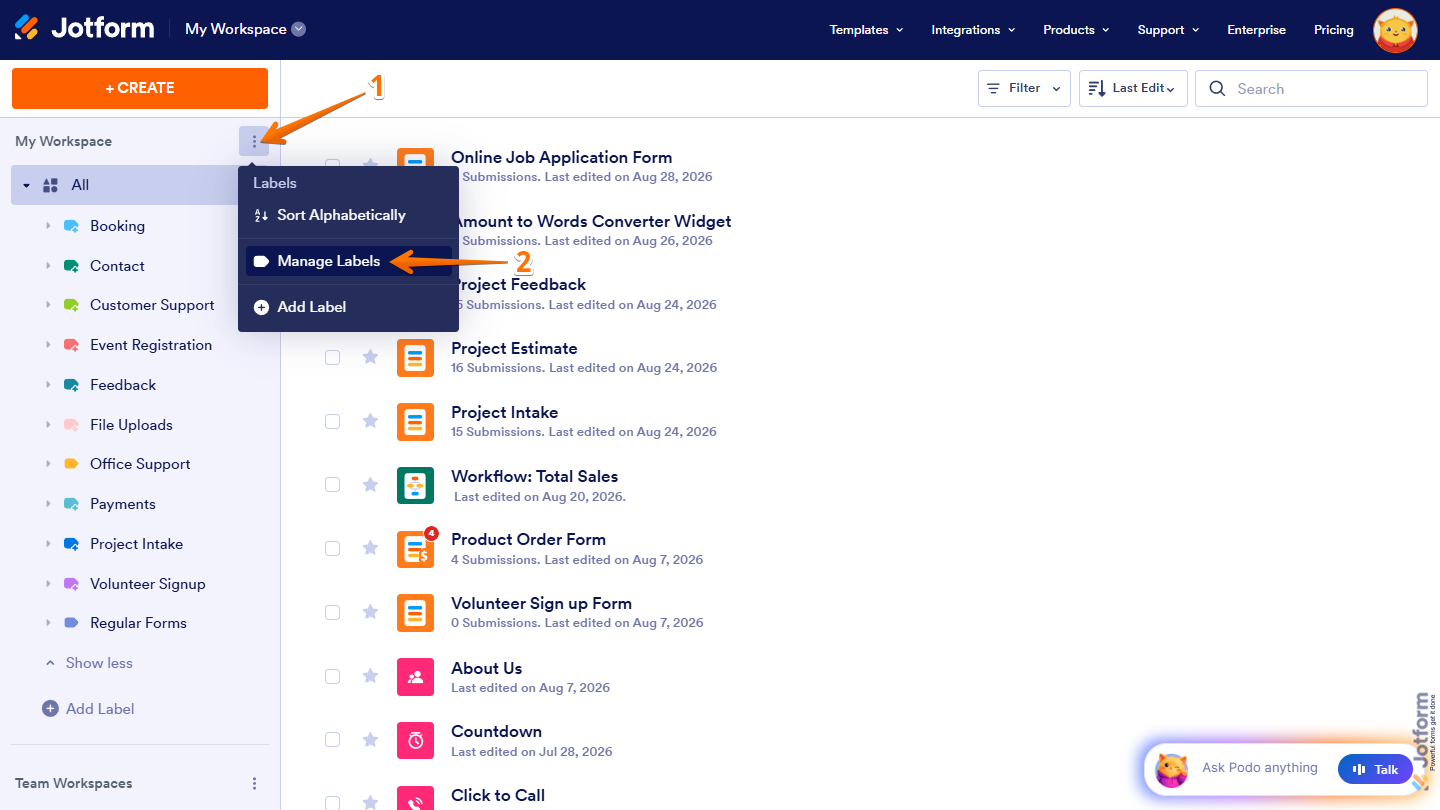
- Next, in the Manage Labels window that opens, click on Select All to select all labels.
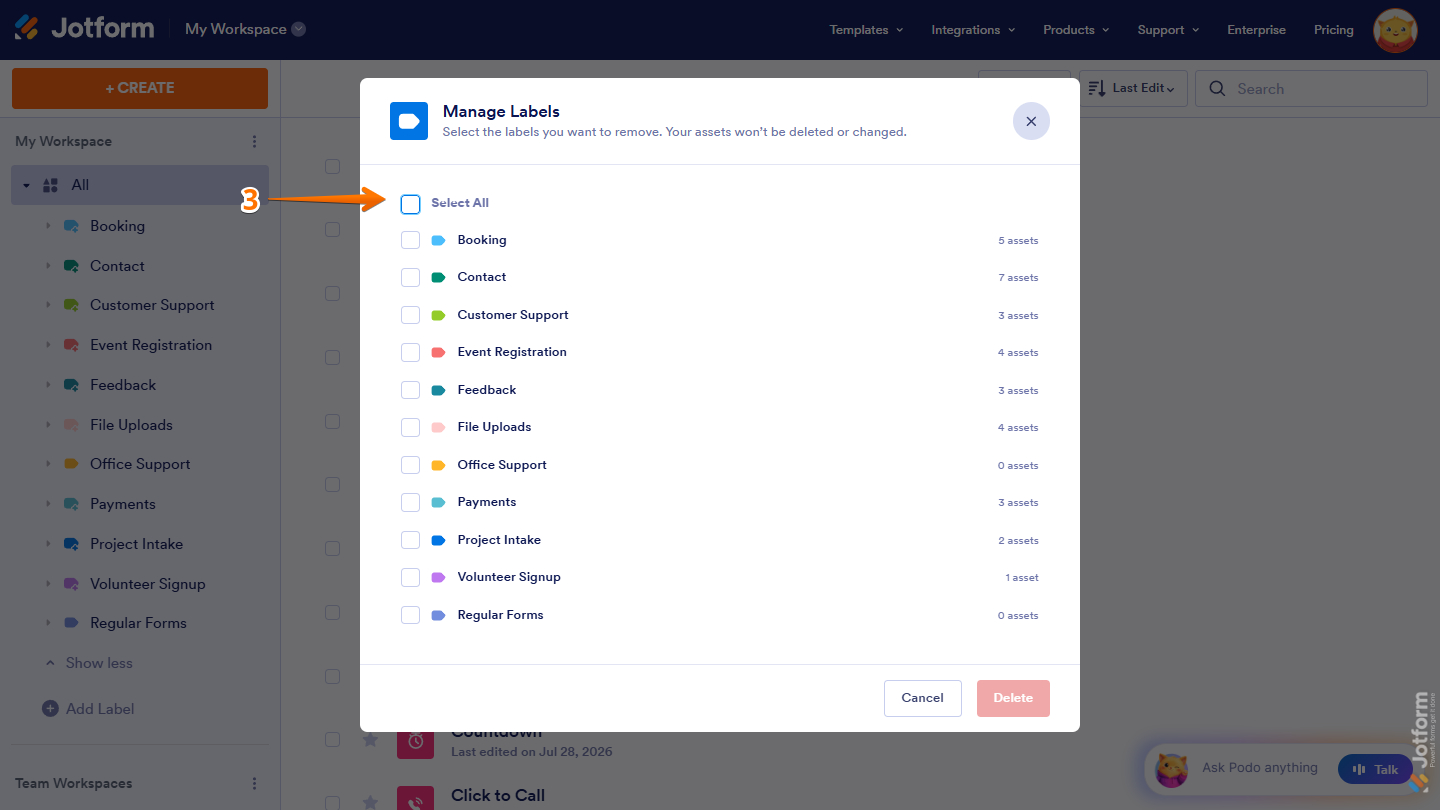
- Now, click on Delete at the bottom.
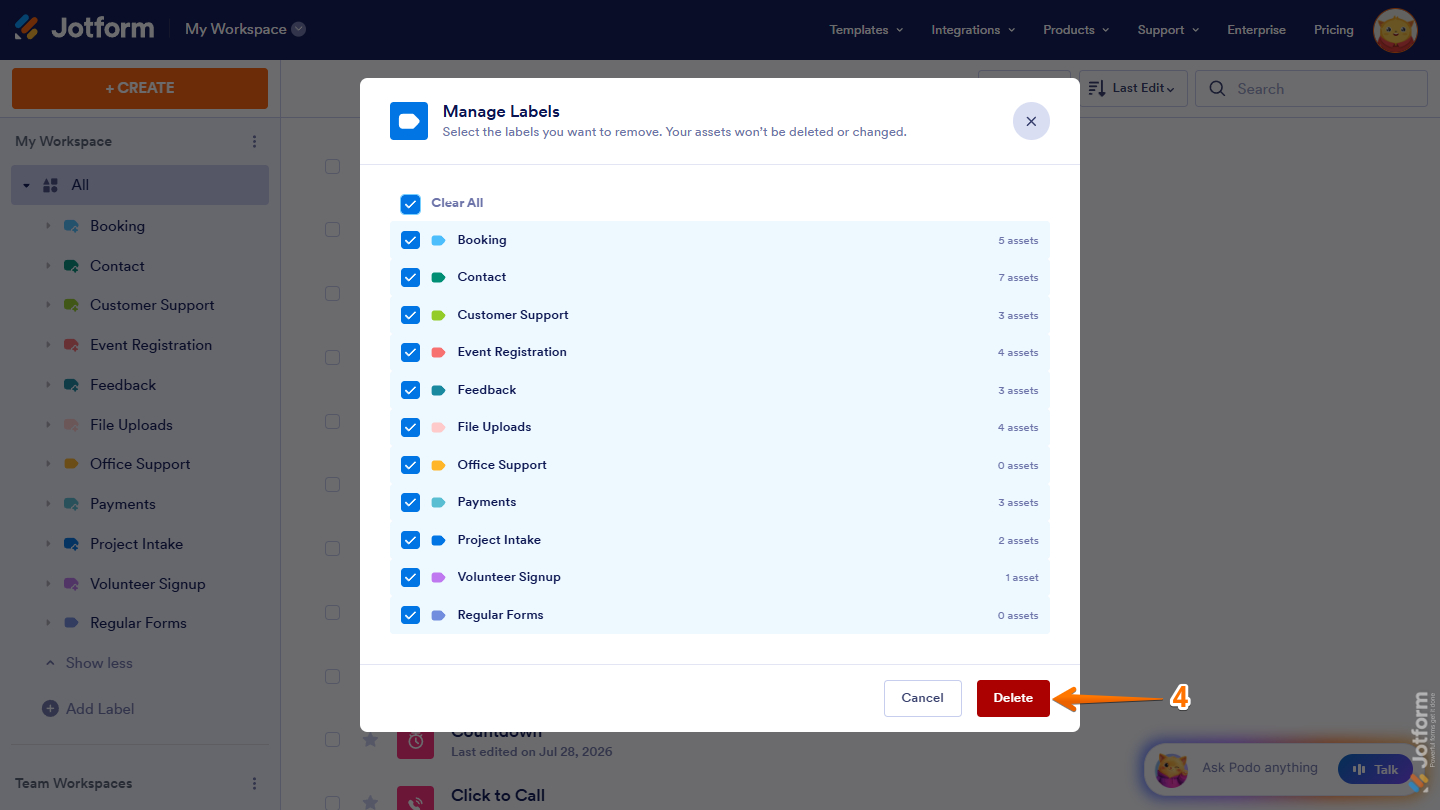
That’s it! The labels are now deleted from your Workspace page.
Managing Individual Label
You can also manage individual labels to keep them organized and up to date. You can add new assets to a label, rename it, add sublabels, change its color, or delete it from the list. Here’s how:
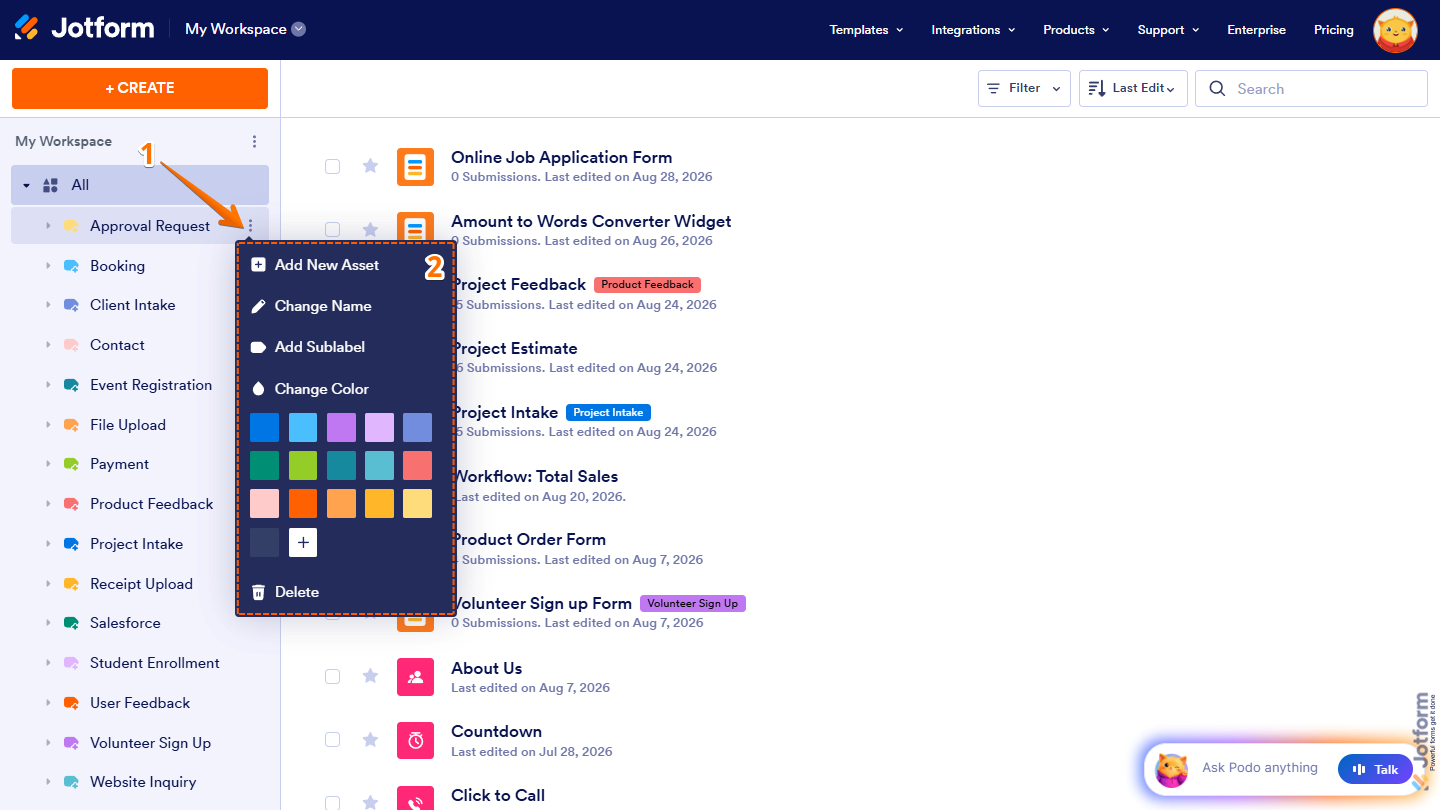
- On your Workspace page, under the All section on the left, hover your mouse over a label, and click on the Three Dots icon on its right.
- Now, select what you want to do:
- Add New Asset — Add a new asset to the selected label. This follows the same Create flow, with the new asset automatically added to the selected label.
- Change Name — Rename the label.
- Add Sublabel — Add a sublabel under the selected label.
- Change Color — Select from the predefined colors or set a custom color.
- Delete — Permanently delete the label.
That’s about it! You can now generate Smart Labels with Jotform AI and manage them alongside your manually created labels. From sorting and organizing labels to updating, adding sublabels, changing colors, or removing labels you no longer need, these options make it easier to keep your forms organized.

Send Comment: