Action Buttons in Tables give you an easy, efficient way to manage submission data and keep tasks moving forward. With just one click, you can handle entry-related actions such as sending emails, sharing data, syncing files, and requesting updates—helping you stay connected and organized. These buttons enhance your control over submission management, allowing you to handle tasks manually as needed while keeping things running smoothly.
Adding Action Buttons
Follow these steps to add Action Buttons to your table:
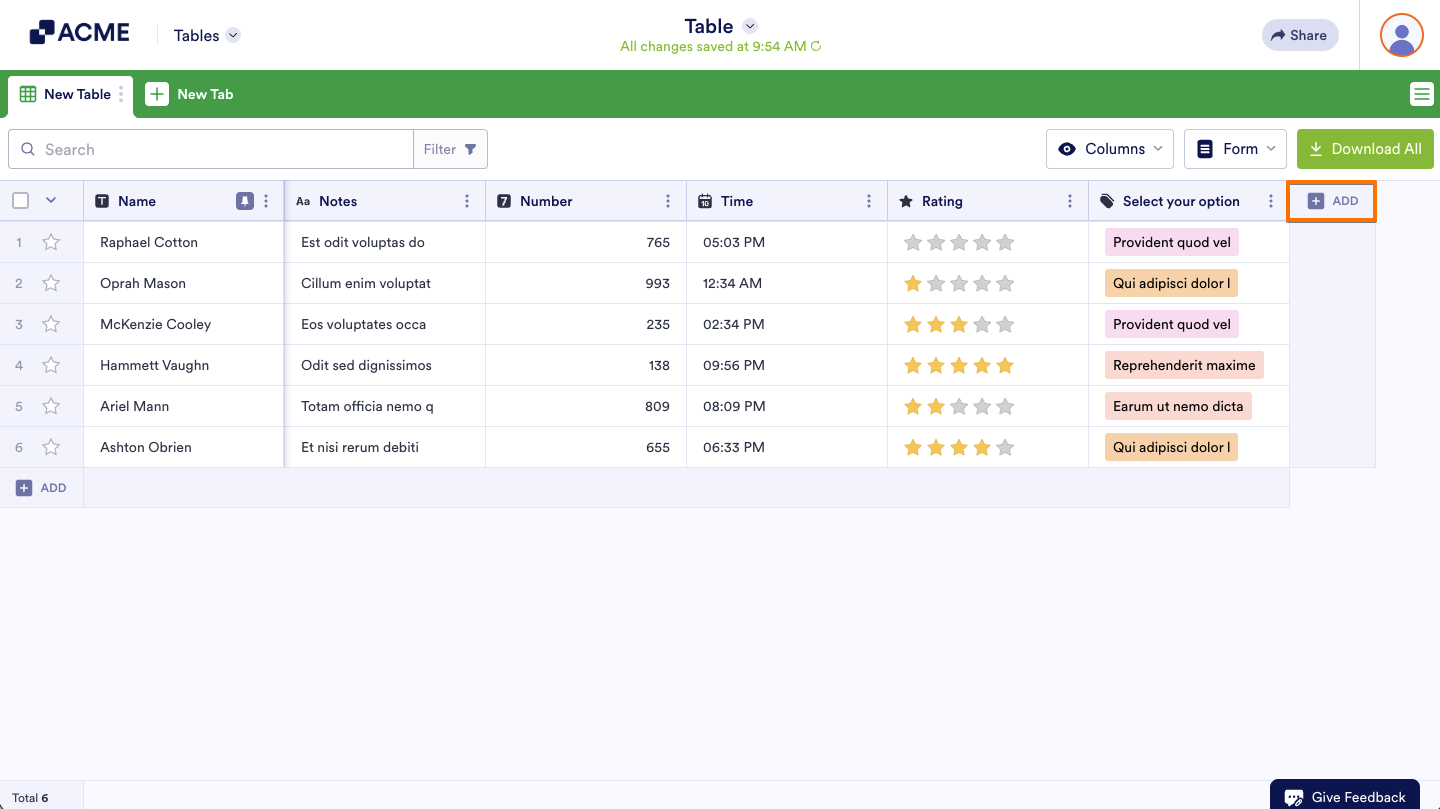
- In Tables, click on the Add button at the end of the table to insert a new column. See How to Add and Organize Columns for more information.
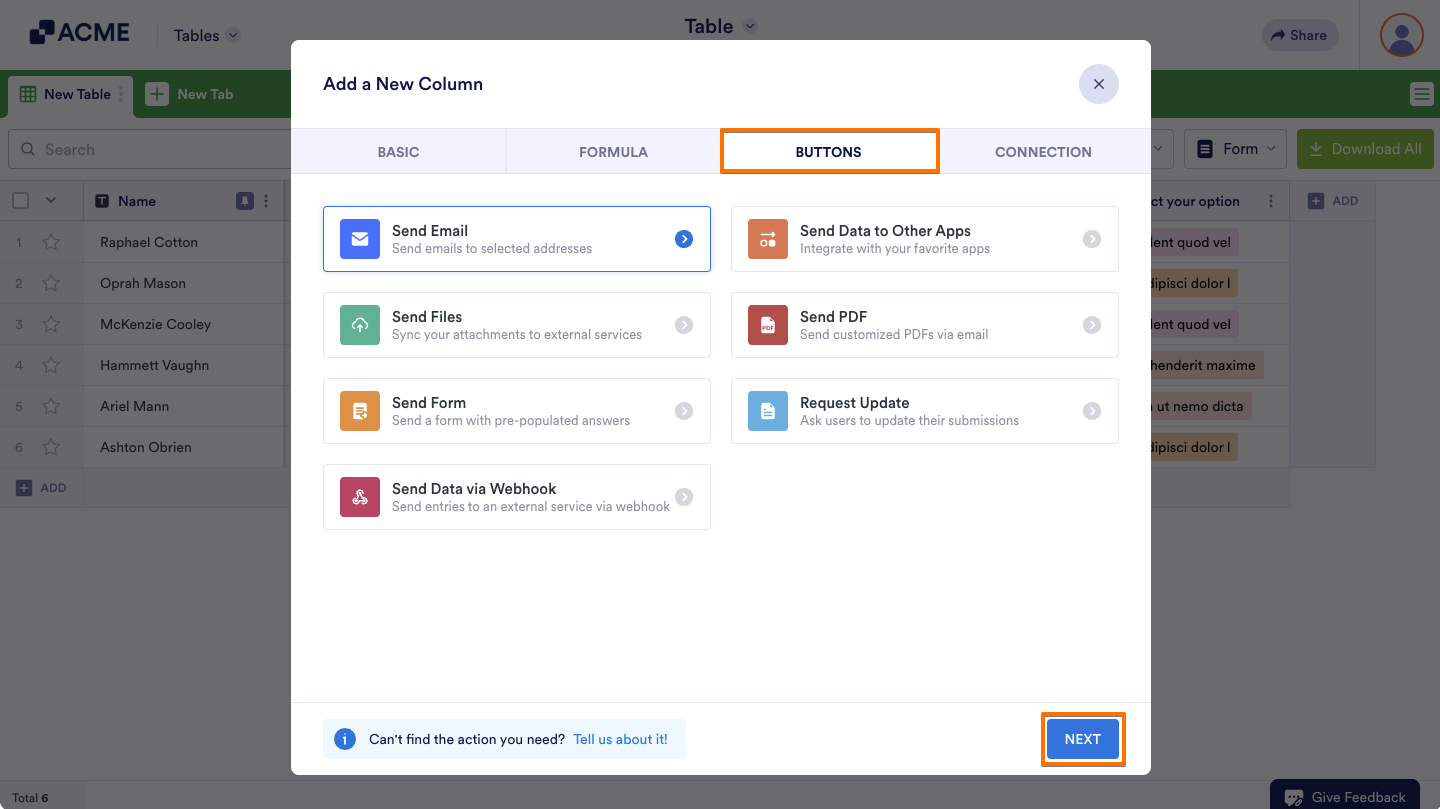
- In the Add a New Column window, go to the Buttons tab
- Select an action you want your button to perform and click on Next.
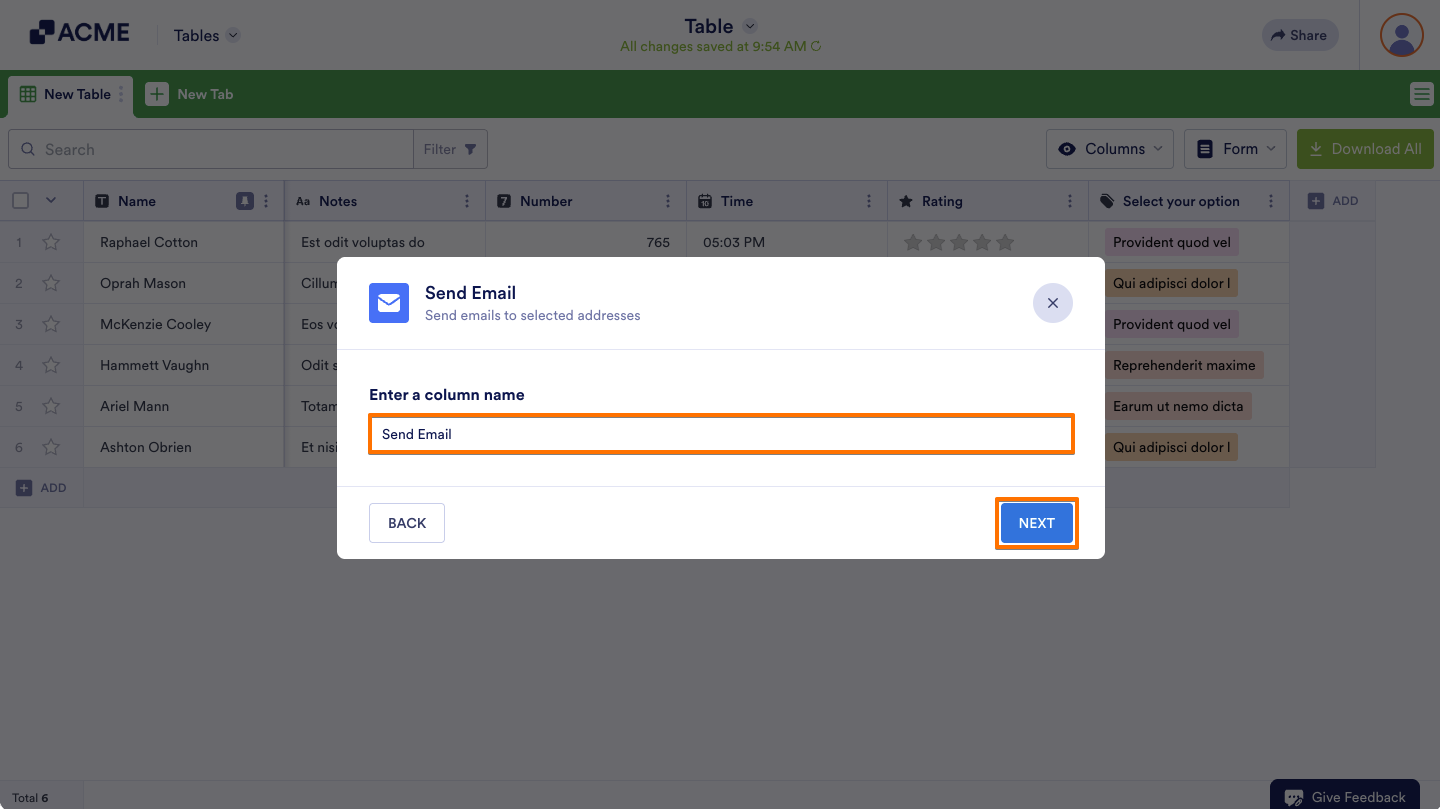
- In the next screen, enter a column name and click on Next again.
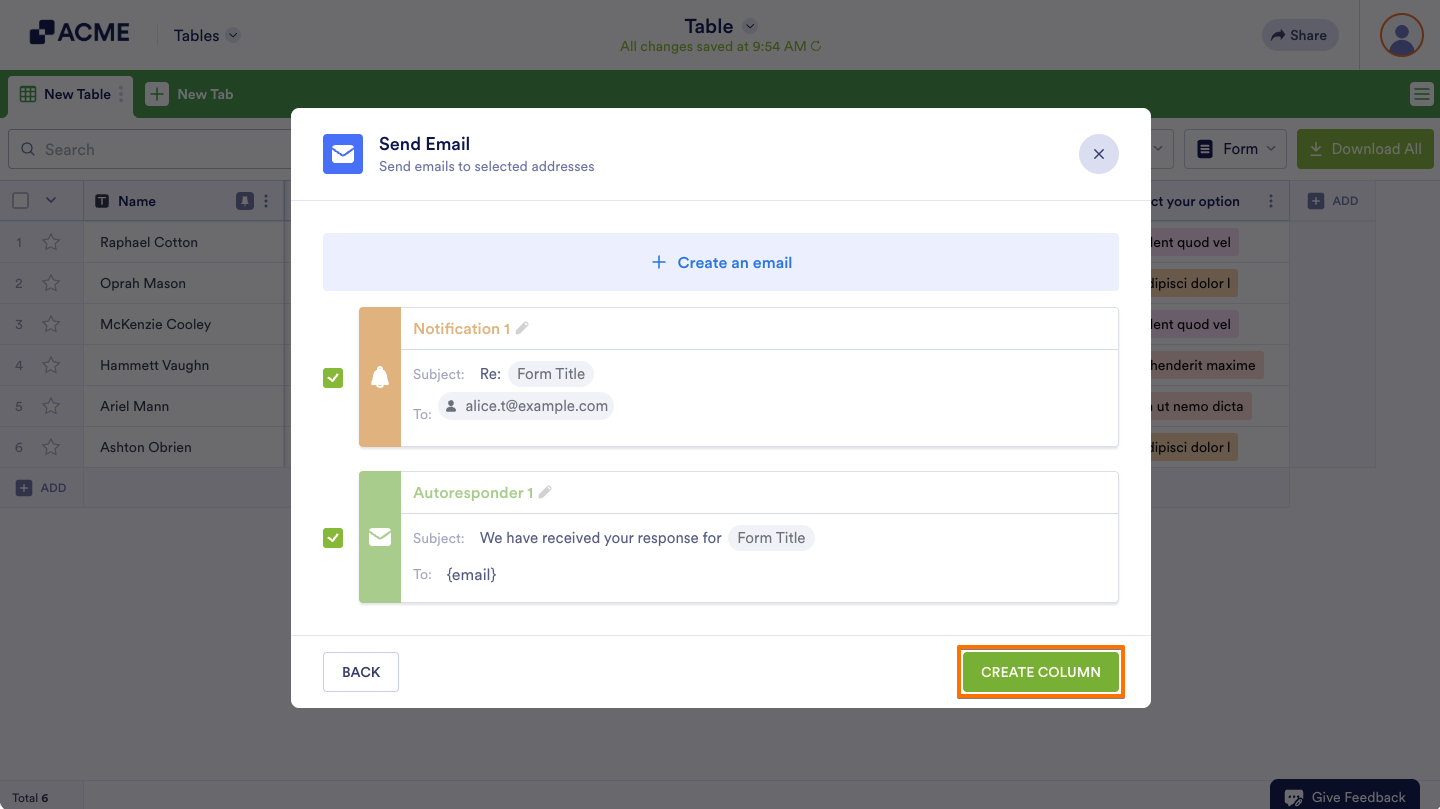
- Follow the instructions provided in the next steps and click on Create Column to complete the setup.
Here’s what each Action Button does:
- Send Email — Sends new and existing email alerts within the Tables manually.
- Send Data to Other Apps — Sends submission data manually to your favorite third-party applications you can integrate your form with.
- Send Files — Syncs PDF submission report and uploaded files submitted on your form manually to selected third-party file hosting applications via integration.
- Send PDF — Sends PDF submission reports to specified email addresses manually.
- Send Form — Sends prefilled forms with data from your table manually to email addresses for users to complete.
- Request Update — Sends email request manually to form users to update their previous submissions.
- Send Data via Webhook — Sends submission data manually from your table to external services via webhook.
Utilizing the Action Buttons
The buttons under the column in Tables trigger the actions you’ve set up for them. Whether they’re configured to send data, files, reports, or emails, assign forms, or request updates to submissions, you can activate the action for a single entry, multiple entries at once, or retrigger the button to perform the action again.
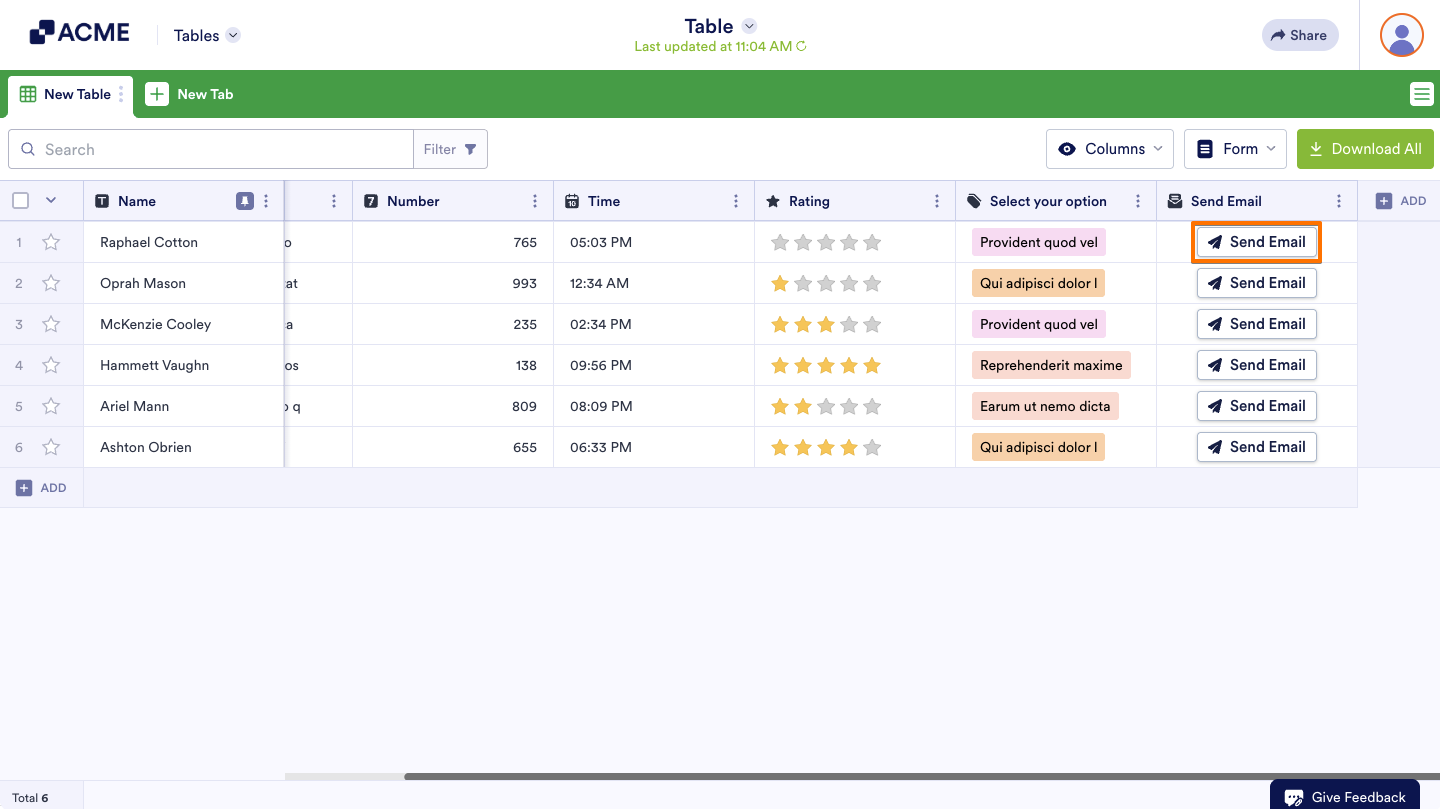
Performing Actions on a Single Entry
You can click a button on a specific submission to quickly perform an action for that submission manually.
Performing Actions on Multiple Entries
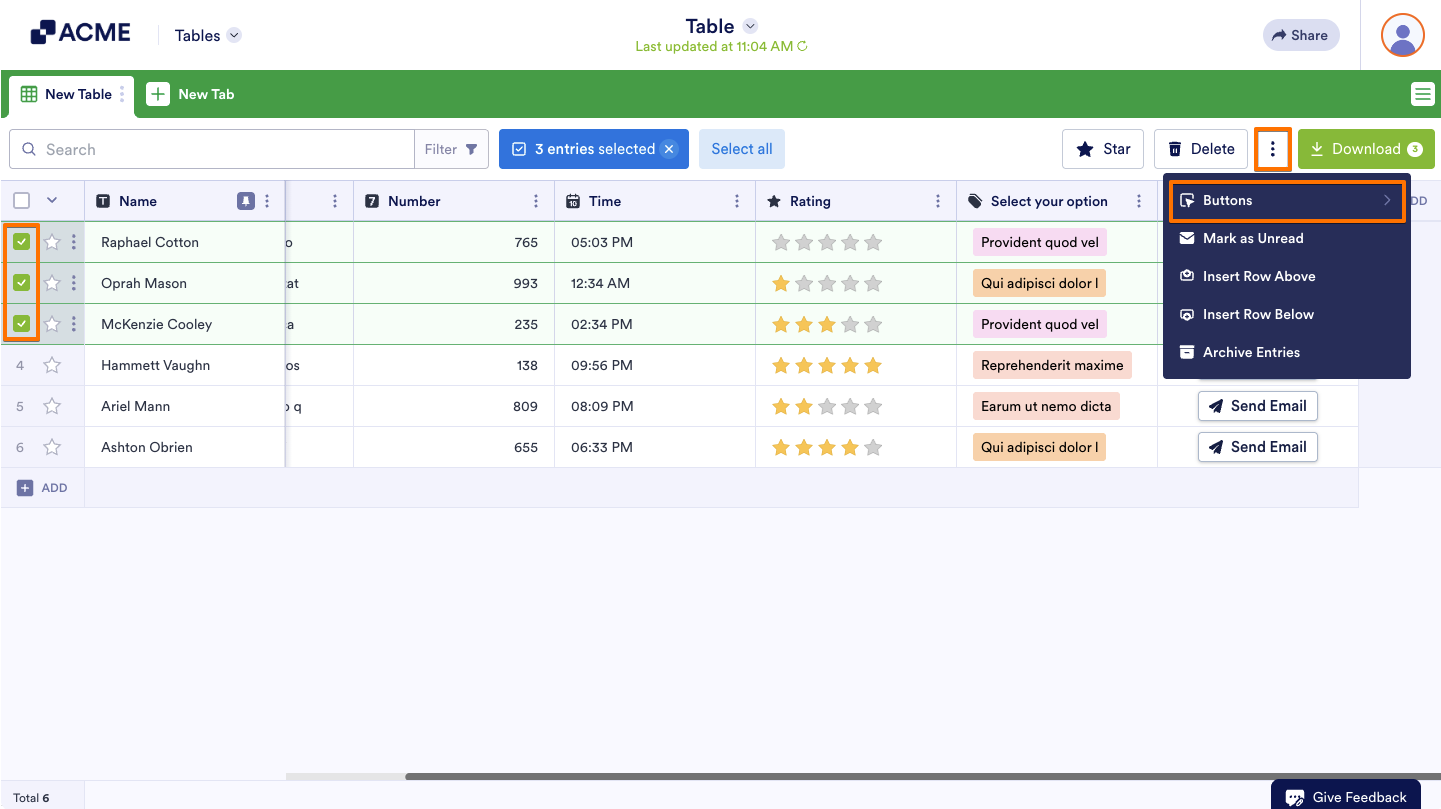
You can trigger an action on multiple submissions at once to save time, process them efficiently, and ensure the same action is applied to all selected entries. Here’s how to do it:
- In your table, check the box on the left side of the entries you want to perform an action on.
- Then, click on the Three Dots icon at the top.
- In the menu that comes up, click on Buttons and then select an action.
Note
You can select multiple consecutive submissions by holding the Shift key and checking the box of another entry. This automatically selects all entries between the last checked entry and the one you just selected.
You can trigger up to 100 buttons at a time. If you need to perform an action on over 100 submissions, select and process them in smaller batches.
Retriggering Actions
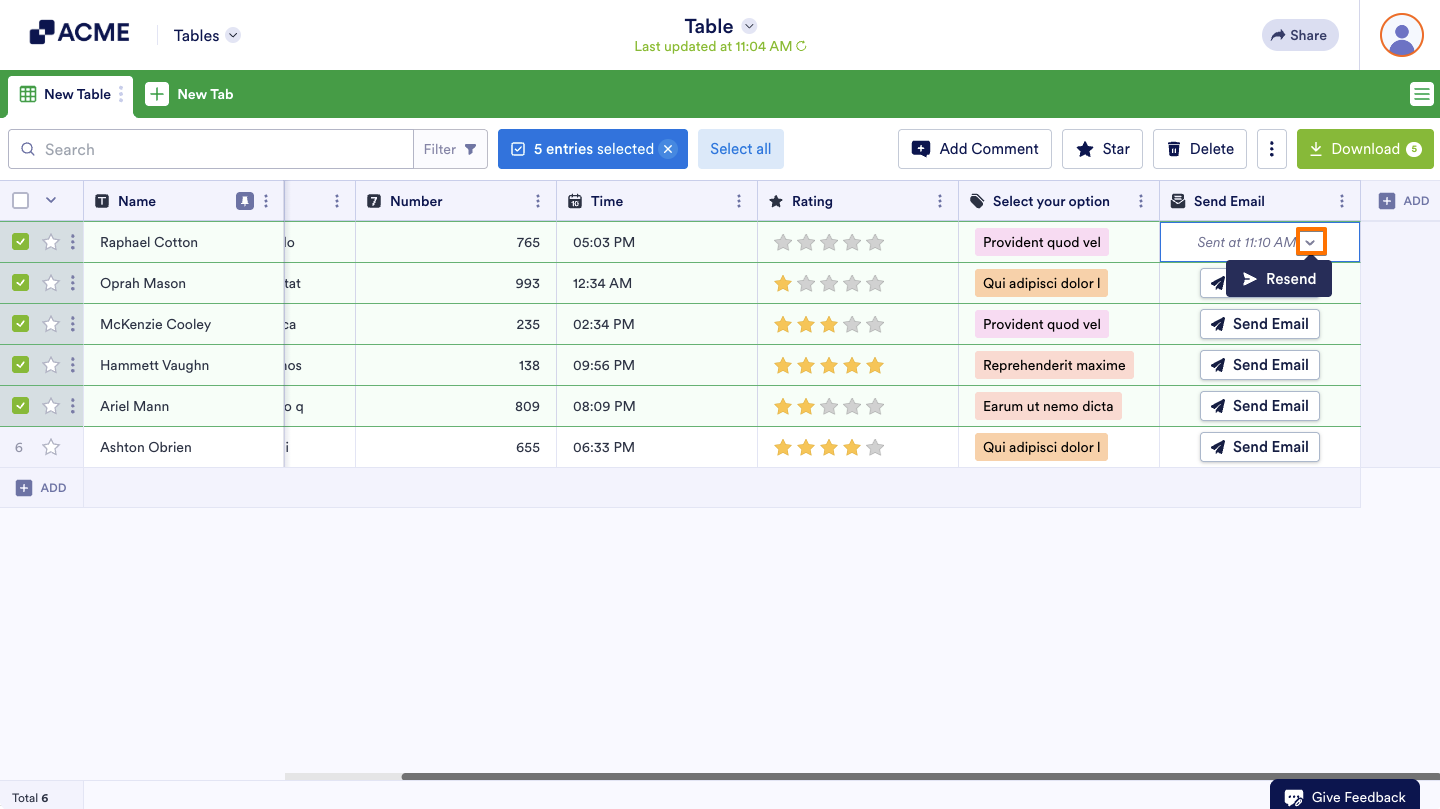
When you trigger an action, the button changes to show a message with the date and time it was performed. You can click the Downward Arrow icon next to the message and select Resend to repeat the action and keep your submissions updated without starting over. If you’ve reconfigured the button, you can also resend actions with the new settings.
Updating Action Buttons
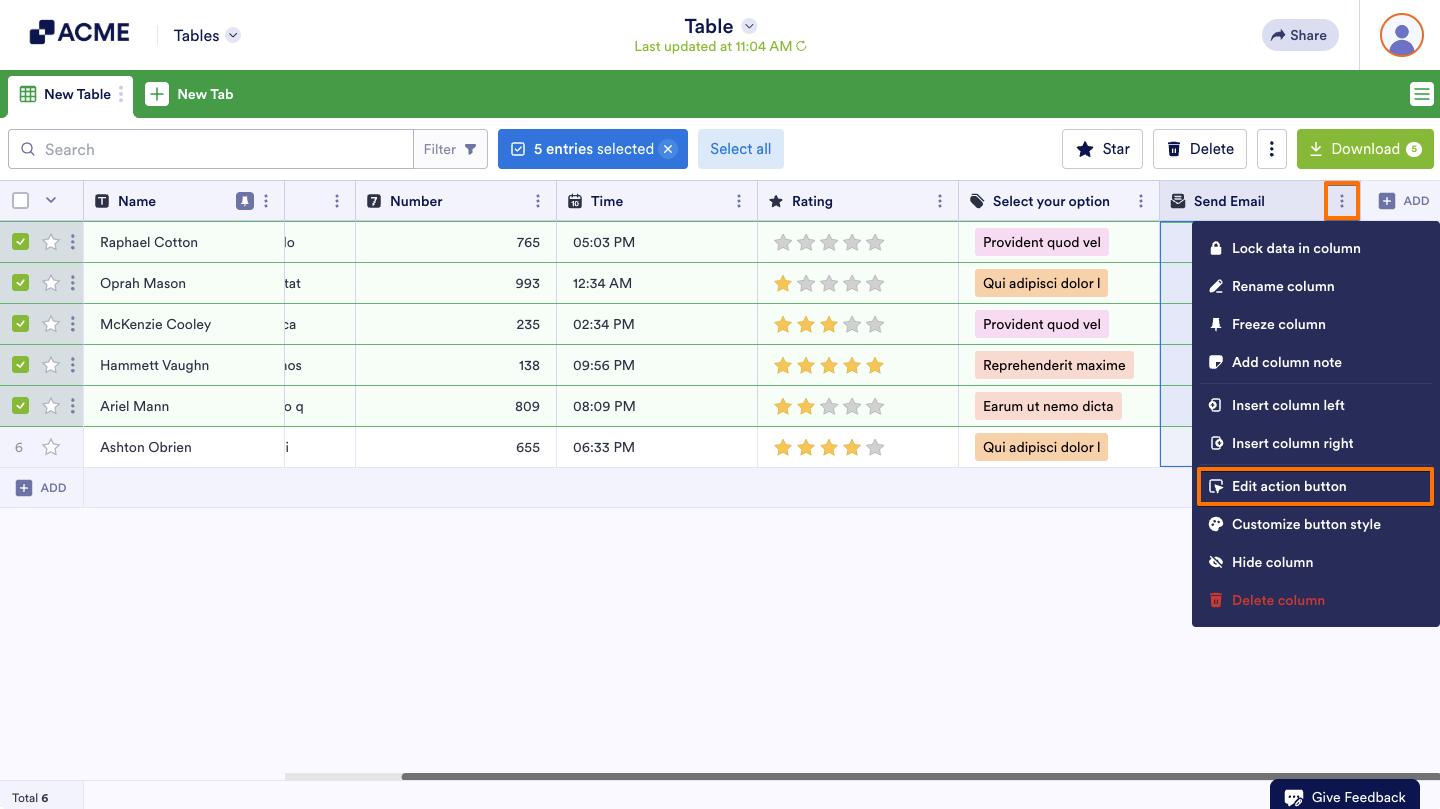
You have the option to reconfigure the action buttons if you need to adjust their settings. Click on the Three Dots icon on your Action Button column to open the Column menu and select Edit action button.
Note
Reconfiguring the button settings does not automatically trigger or reset the buttons for submissions with previously sent actions. You can resend actions with the updated settings for those submissions if needed.
Customizing Action Button Style
Follow the steps below to customize the Action Buttons on your table:
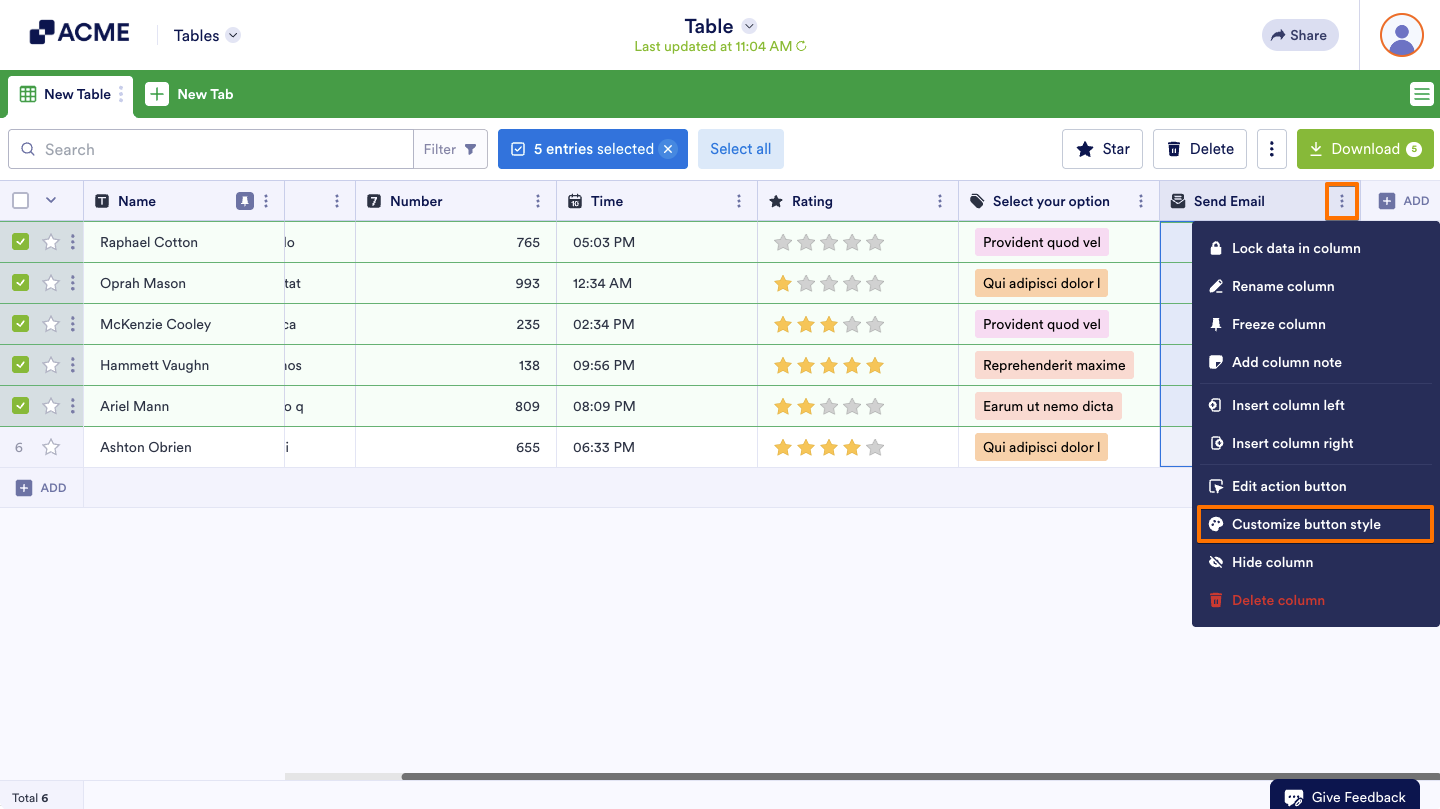
- Click on the Three Dots icon on your Action Button column to open the Column menu and select Customize button style.
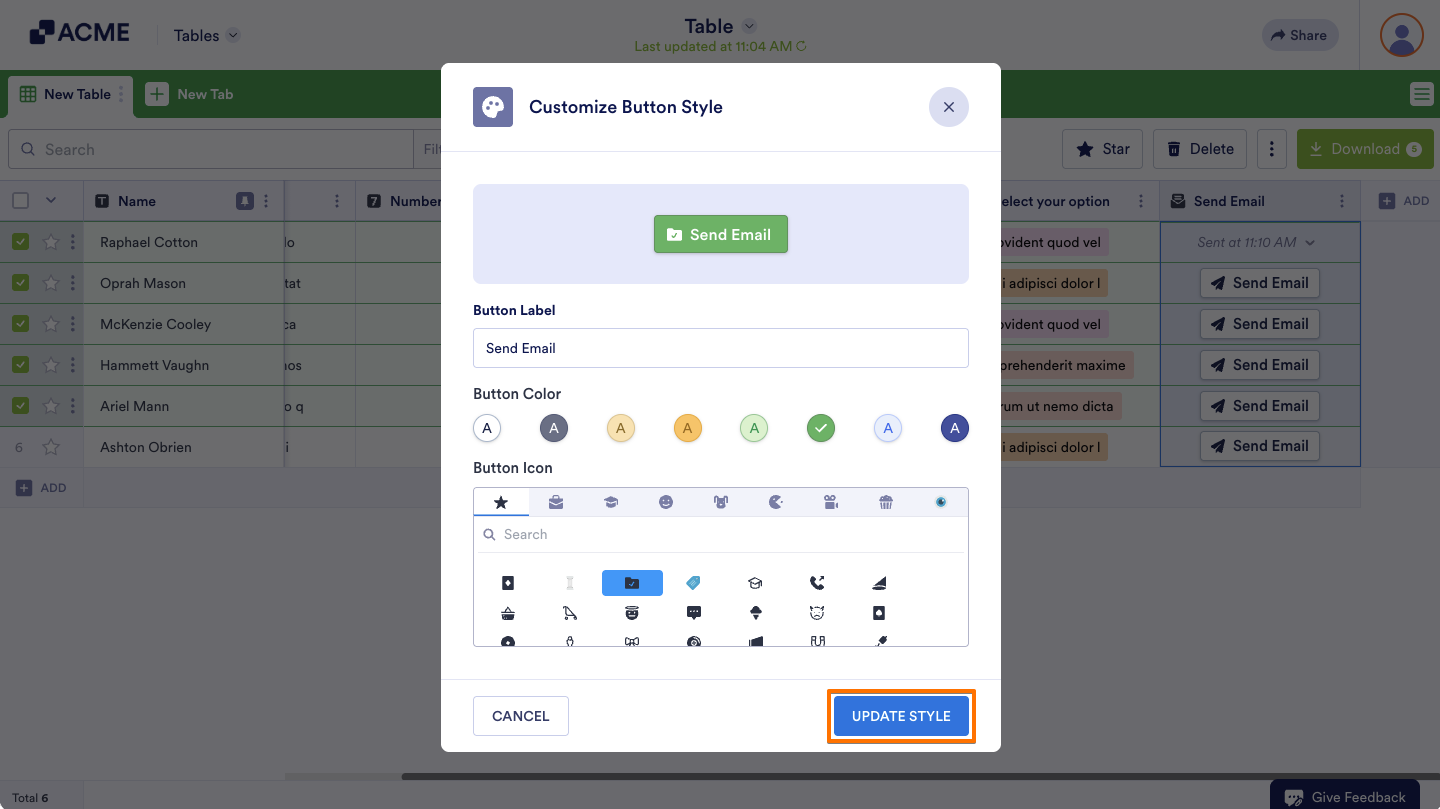
- In the Customize Button Style window, update the label, change the color, and add icons to your Action Buttons. Once you’re done, click on Update Style to save your changes.
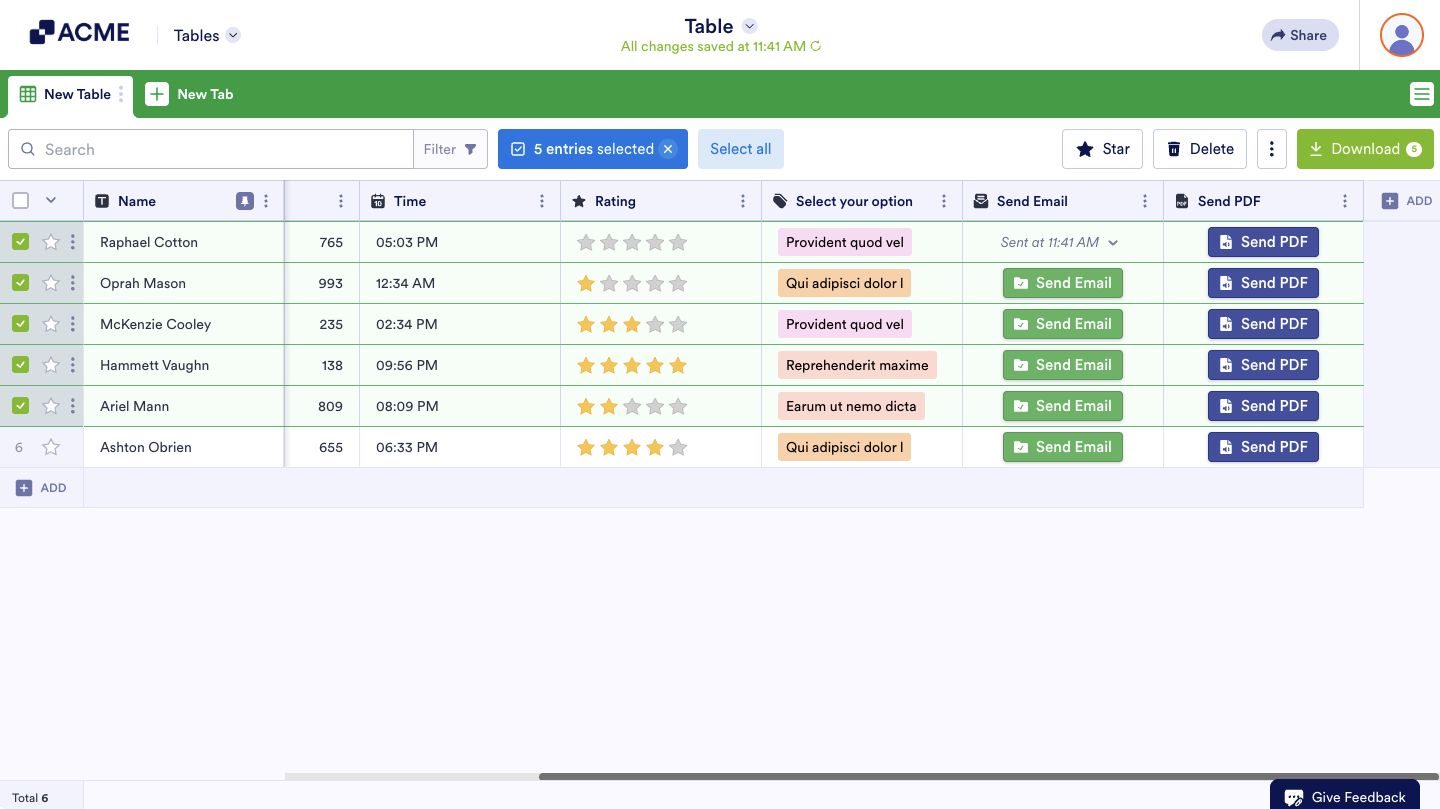
This will make it easier to identify different buttons on your table.
Note
Just like any other cells in the table, you can also add comments to each Action Button, which you can later use for reference or clarification. See How to Add Descriptions to Tabs and Columns in Tables.

Send Comment: