
8 steps to send a Docusign document
- Upload the document
- Enter the recipient’s name and email address
- Select Email as your preferred delivery method
- Add the email subject and message
- Add a message by typing in the Email Message field
- Click Next
- Click the Preview button
- Select the yellow Send button
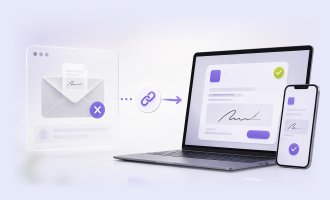
Getting documents signed — like employment contracts, insurance forms, invoices, and lease agreements — is a key part of keeping any business running. And using sleek, modern processes for signing and sharing documents drives productivity and profitability.
While you can sign and share paperwork the old-fashioned way — with pen and paper — it’s a more time-consuming and expensive approach than using electronic signatures.
How electronic signatures work
Put simply, an electronic signature is the digital equivalent of a wet signature (a pen-on-paper signature). Electronic signatures provide an easy, streamlined way to sign documents.
Pro Tip
Use Jotform Sign Mobile to sign, send, and track documents on your phone, collect in-person approvals, and track status in Sign Inbox.
Where e-signatures deliver benefits
In fast-paced industries, no one has time to print, sign, mail, track, and wait for the return of physical documents. E-signatures cut costs and save time, improving the customer and vendor experience, streamlining processes, optimizing workflows, and boosting productivity.
Sending and signing documents electronically is also environmentally friendly. In addition to saving trees, using e-signatures also eliminates the need to ship or transport documents between signers, which reduces greenhouse gas emissions.
How to send a Docusign document
Now that you understand a bit more about e-signatures — including their many benefits — let’s learn how to share an online document using one of the world’s most popular e-signature tools: Docusign. This comprehensive platform, which boasts more than a billion users worldwide, prides itself on offering custom branding, configurable workflows, and enterprise-grade security.
Here’s how to send a Docusign document to someone for signature:
- Upload the document that you need others to sign by following these steps:
- Log in to your Docusign account.
- Click Start and then Send an Envelope.
- Click Upload to either locate and upload the document from your computer or drag and drop it into the provided field.
- Enter the recipient’s name and email address.
- Select Email as your preferred delivery method from the dropdown menu.
- Add the email subject and message to your uploaded document. While Docusign automatically includes an email subject when you upload a document, you can always replace it with your own custom subject line.
- Add a message by typing in the Email Message field. (Note: the Email Subject field is mandatory during this step, but the Email Message field is optional.)
- Click Next when you’re finished. Docusign’s Field Palette box and your document should appear so you can add signing fields.
- To assign a standard signature field for your intended recipient, select and drag one of them — Signature, Stamp, Initial, or Date Signed — from the palette on the left and place it on the uploaded document. Repeat this until you’ve placed all necessary signature fields.
- Click the Preview button at the top of the page to ensure it looks correct and that all the signature fields are accurate.
- Select the yellow Send button at the bottom of the page to send your Docusign document out for signature.
Need to involve more than one person? Learn how to send DocuSign to multiple signers.
Why Jotform Sign is a great Docusign alternative
With its notable threat detection capabilities, extensive list of features, and prebuilt integrations, it’s no surprise many people use Docusign.
But it’s not the only e-signature platform on the market. Jotform Sign is a free e-signature software that’s code-free, secure, and fully customizable, making it easy to create, sign, and share documents in just a few clicks.
Jotform Sign’s features include
- Intuitive drag-and-drop functionality
- Hundreds of e-signature document templates spanning a wide variety of document types and target industries
- The ability to add documents and signers to workflows
- Integrations with 30-plus powerful third-party apps, such as data management, file sharing, and CRM systems
- Automatic field detection to automatically turn uploaded PDFs into fillable documents
How to send a document with Jotform Sign


While learning how to send a Docusign document is straightforward, it’s even simpler with Jotform Sign. Here’s how:
- Navigate to the e-sign template you’d like to use in Jotform’s Sign Builder or upload an existing PDF.
- Click the Send button at the top of the screen.
- Type in the signers’ names and email addresses.
- Customize and streamline the signing experience by
- Inviting signers to sign in a particular order by toggling the Signing order button and rearranging them as you see fit.
- Setting up a document viewing and signing access code by clicking the key icon.
- Create a custom message for specific signers by clicking the message icon to the right of the key icon.
- Select the Options tab above the Signing order button for additional customization options — like the ability to send automatic reminder emails or include cc recipients.
- Click the green Send to Sign button when you’re ready to start the signing process. Under the Sign Builder’s Sent tab, you should now see a list of sent documents. Simply hover over each and click Track whenever you want to see where they are in the signing journey.
Send my document for signature
File type is not allowed.
Maximum file size limit exceeded. (5MB)
Something went wrong.
As you can see, learning how to send a Docusign or Jotform Sign document is easy. But it’s also important. By enabling you to sign and share online forms more quickly than ever before, both e-signature platforms help you save time and money — and stress.
Photo by Designnn.co on Unsplash
AS ALWAYS, CONSULT AN ATTORNEY BEFORE RELYING ON ANY INFORMATION ON THIS PAGE. THE CONTENT ABOVE IS FOR INFORMATIONAL PURPOSES ONLY. JOTFORM IS NOT PROVIDING LEGAL, FINANCIAL OR OTHER ADVICE.


Send Comment: