Webhooks make it easy to send your form submissions exactly where they need to go, the moment they’re submitted. Instead of manually moving data around, you can automatically pass it to another app or your own server in real time. With Jotform, setting up a webhook is straightforward and quick, helping you streamline your workflow and keep all your systems perfectly in sync without extra work.
Sending Submission Data via a Webhook
Configuring a webhook on your form is simple and doesn’t take much time. You’ll be able to send your submission data exactly where it needs to go as soon as someone fills out your form. Here’s how to set it up:
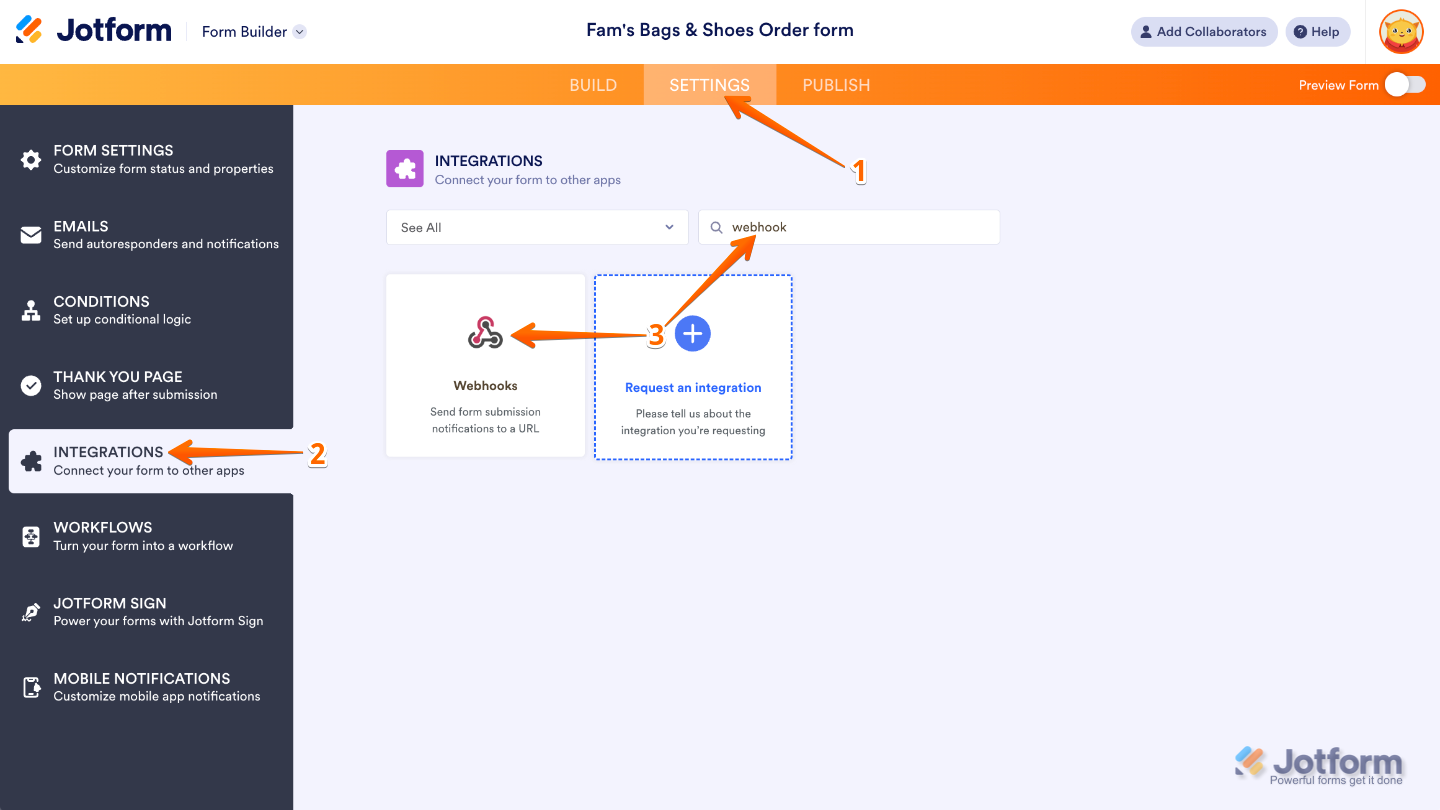
- In Form Builder, in the orange navigation bar at the top of the page, click on Settings.
- Click on Integrations in the menu on the left side of the page.
- In the search bar, enter Webhooks, and then click on the Webhooks icon.
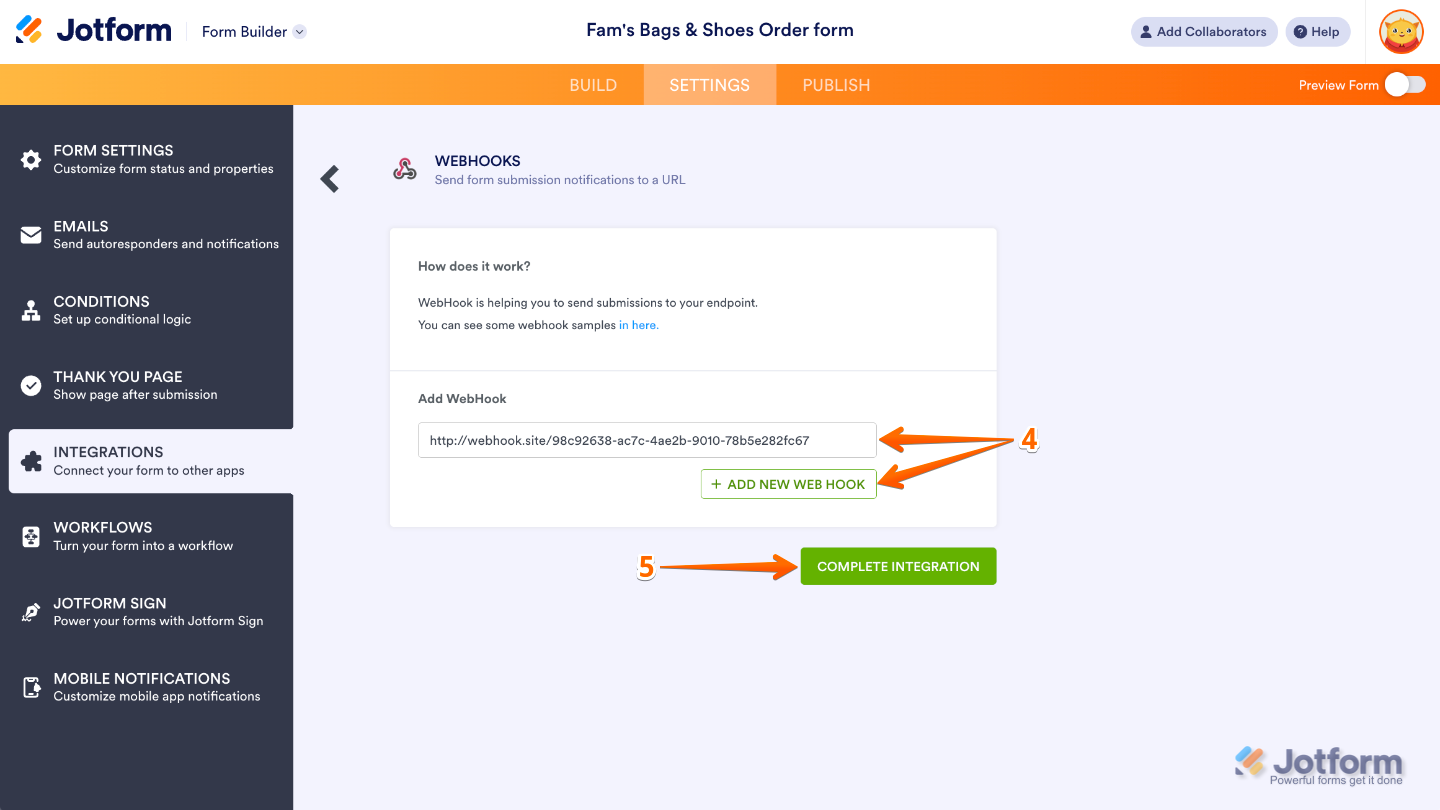
- Now, enter your endpoint or webhook URL in the Add WebHook field. To add more endpoints, click on Add New Webhook.
- Once done, click on Complete Integration.
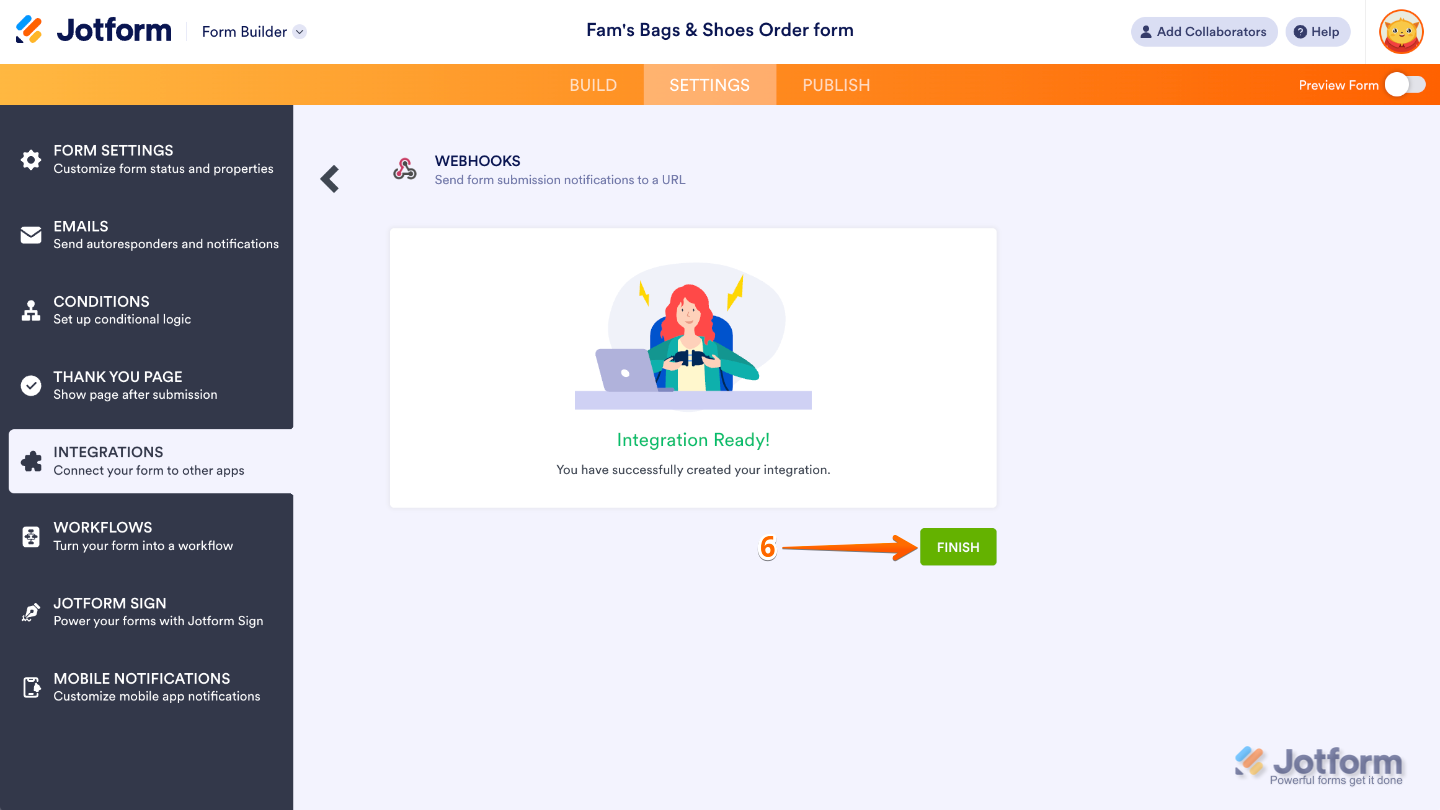
- Finally, click on Finish.
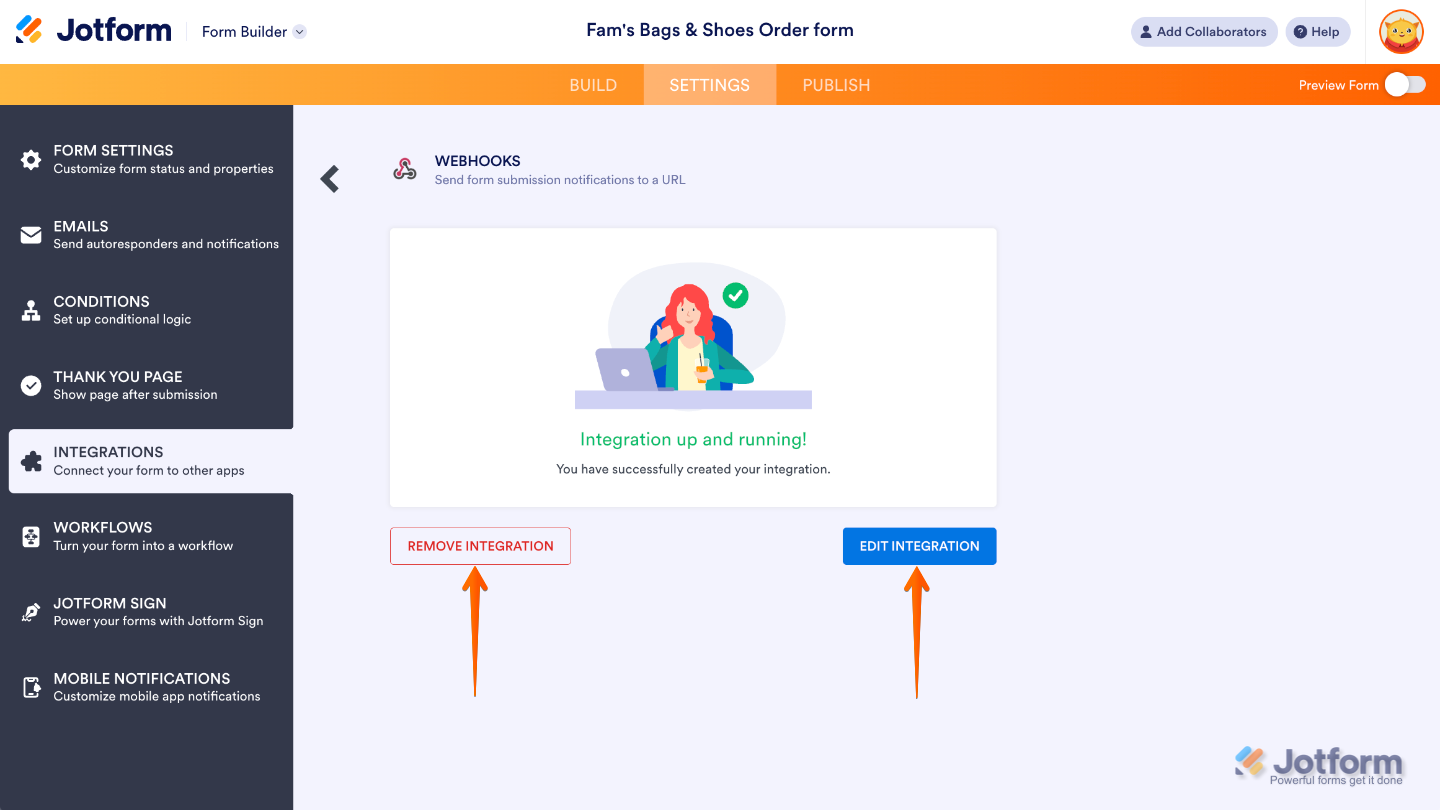
That’s it. Your form is now all set to send submission data to your chosen endpoint automatically. If you ever need to make changes, you can easily update or remove the webhook anytime by heading back to the Integrations tab and clicking the Webhooks icon. This gives you full control to adjust your setup as your workflow evolves.
Notes
- The Webhooks integration has a 30-second request timeout, so make sure your endpoint can process the data quickly.
- If your form is encrypted, only encrypted data can be sent through the webhook.
- Keep in mind that your endpoint might have limitations that could prevent the request from going through. This could include things like:
- The connection is timing out before the request is fully processed.
- A maximum data size limit that’s smaller than your submission.
- Firewall or security rules that block the request.
Here’s an example PHP script you can use as a test endpoint for your webhook. It will save incoming form submissions to a text file, making it easy to debug and see exactly what data your form is sending:
<?php
// convert JSON to PHP
$data = json_decode($_REQUEST['rawRequest'], true);

// write data to a file
file_put_contents(
    'webhook_test.txt',
    print_r($data, true),
    FILE_APPEND
);
?>
We also have a related guide about How to Send Submission Data via a POST Request that you can check out.

Send Comment:
13 Comments:
February 12, 2025
Is it possible to use a dynamic token from our website within the Jotform platform to include it in API call headers?
December 26, 2024
Hi,
My name is Dan,
Can I get your tutorial on email hacking using Weebly links for my project?
Here's how far I have gone on it, I created a Weebly website and created the link and it works fine for me, But I don't know how to capture the login data when someone opens the link and login, this is where I am having issues. Can you help or suggest the tools I need to do it correctly?
Dan.
October 3, 2024
Hola Alguien me puede ayudar como enviar a make automatizar tareas
August 27, 2024
Hi Team,
Is there any possibility to use POST method API's webhook integration. Ex: Body will have JSON parameter values.
July 3, 2024
How do I authenticate my webhook url.
February 23, 2024
how do i get webhook url
February 6, 2024
This method does not provide a JSON output, rather it provides a form-data output
February 4, 2024
I want to use a webhook to connect to my custom Mendix app, to send the form submission. I understand that I should just need to provide the Mendix defined webhook address (i.e., like the Zapier example above) to send the form data in JSON string format...
June 13, 2023
If the webhook was not delivered, for example, downtime on the receiving end, will Jotform keep trying? If yes, how many times and with what interval between tries?
June 13, 2023
So, we must send this a a server where we can use the data and manipulate it? So unless we have a php server to manipulate data you recomend use an automation platform?
Suppose i want to send to bubble database, do i need to use an automation platform right? bubble cant just automatiaccly update any row i suppose
March 8, 2023
Please mera id hack Ho Gaya usko recover karne ke liye madad karo
September 9, 2022
Hello. How can use an authenticated webhook?
October 3, 2021
How to setup this with Discord webhook? I've tried once but it didn't work.