With Sign Documents, you can take things further by creating signable documents and collecting legally binding e-signatures in just a few clicks. Every document created in Sign Document is UETA and ESIGN compliant and seamlessly integrates into an automated workflow, making it easy to track, manage, and complete signing processes.
Adding and Setting Up an E-Signature to Your Form
Whether you’re creating a new form or updating an existing one, you can add and set up the Signature field on your form in a few easy steps. Here’s how to do it:
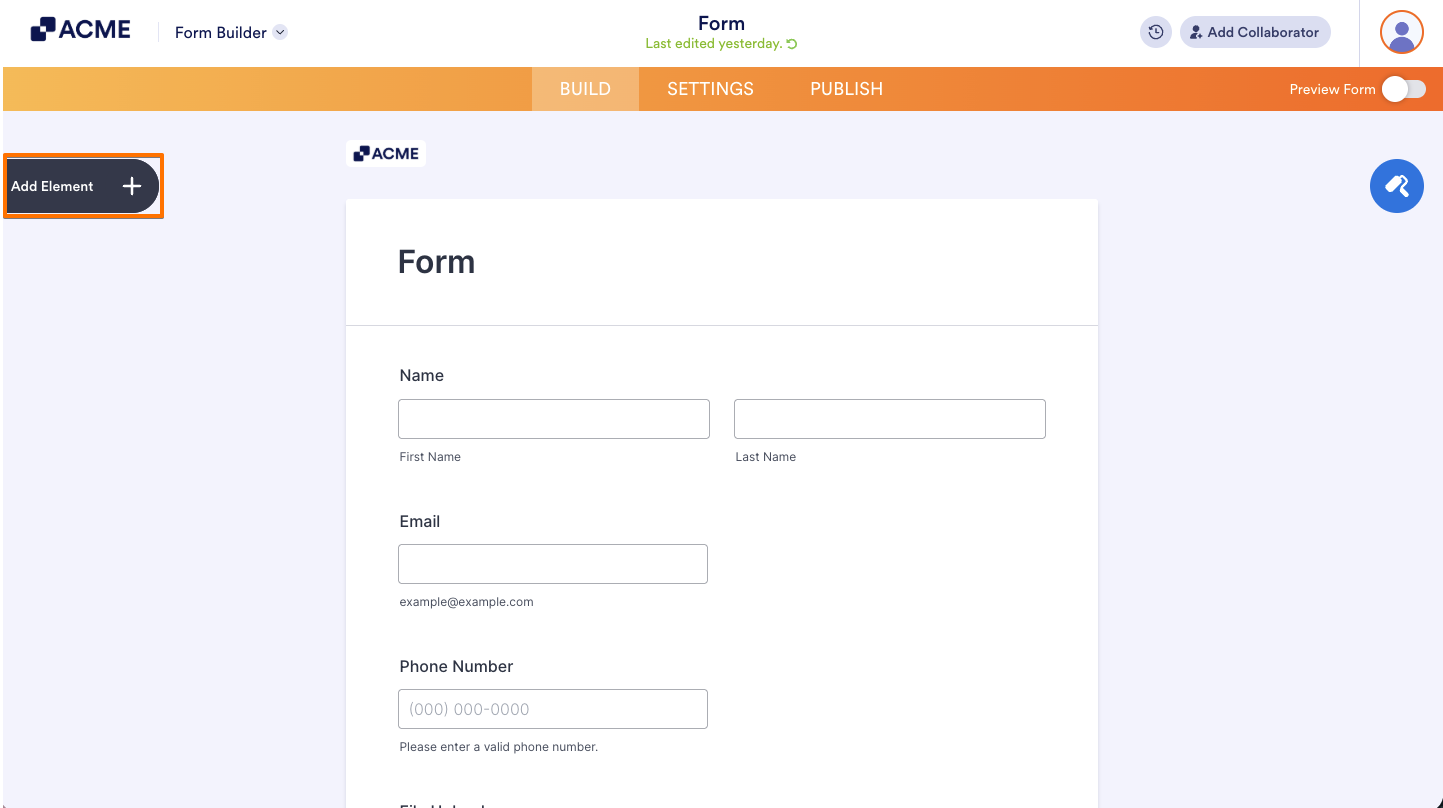
- In Form Builder, click on Add Element on the left side of the page.
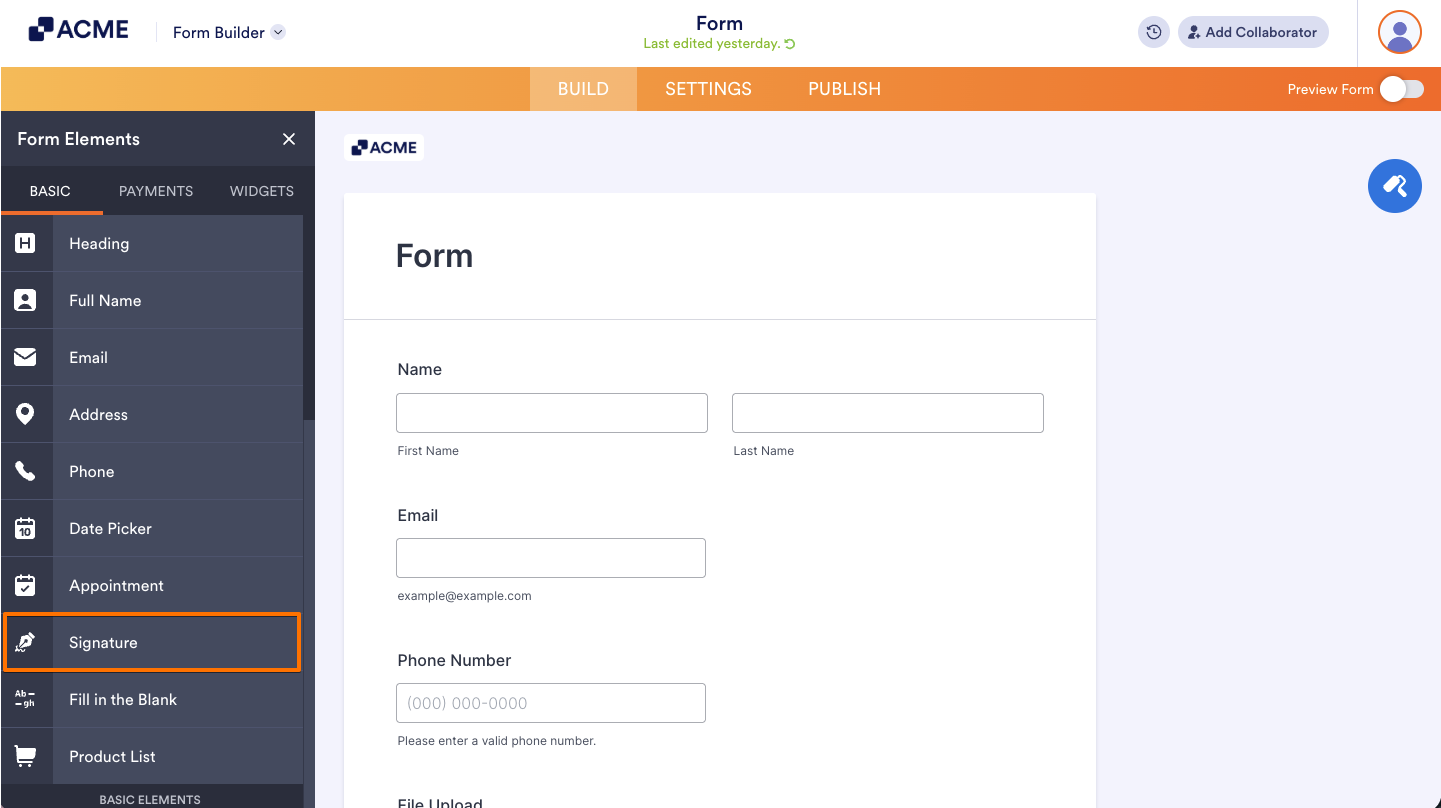
- Then, in the Form Elements menu, under the Basic tab, click on Signature. Or, just drag and then drop it to where you want it to be on your form.
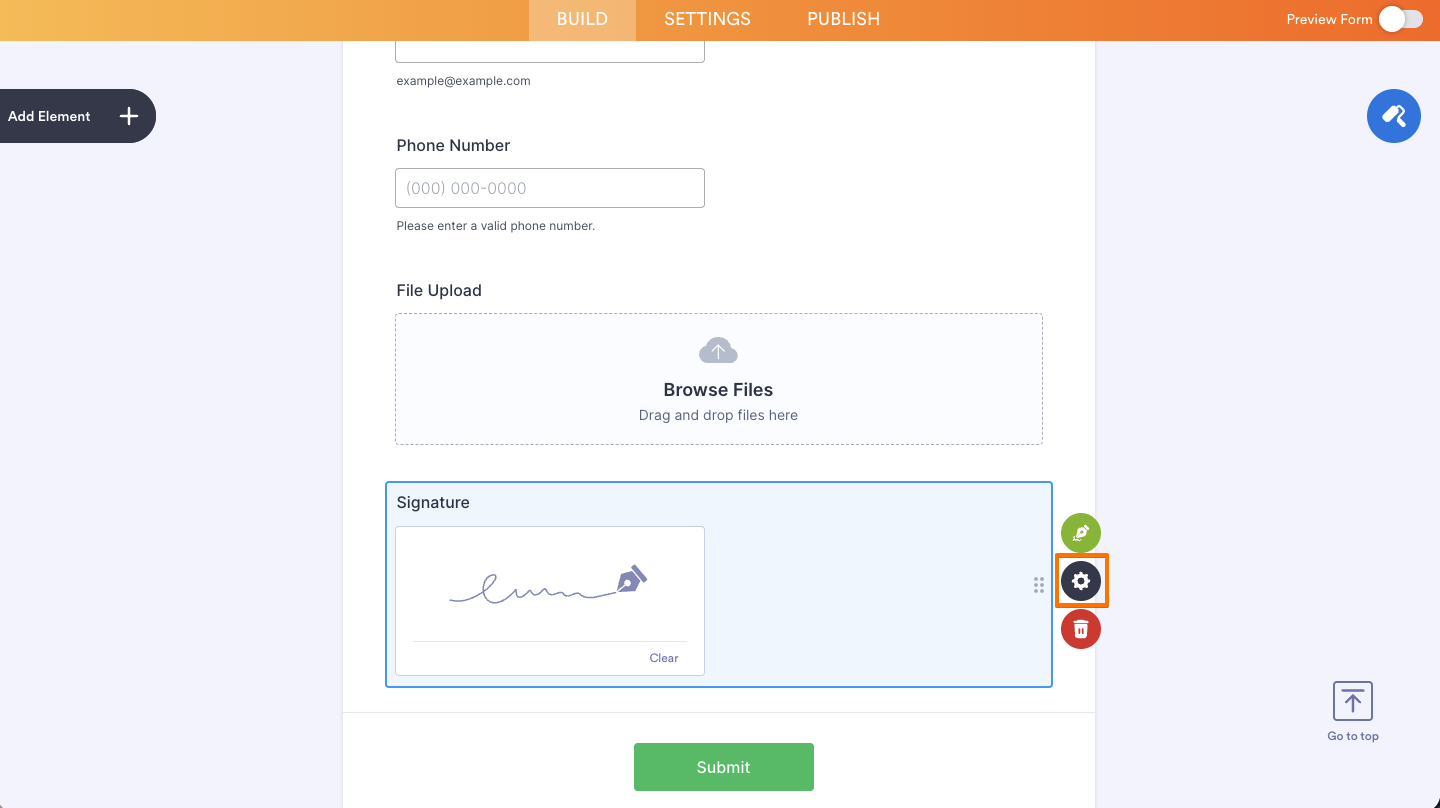
- Next, click on the Gear icon to open its properties.
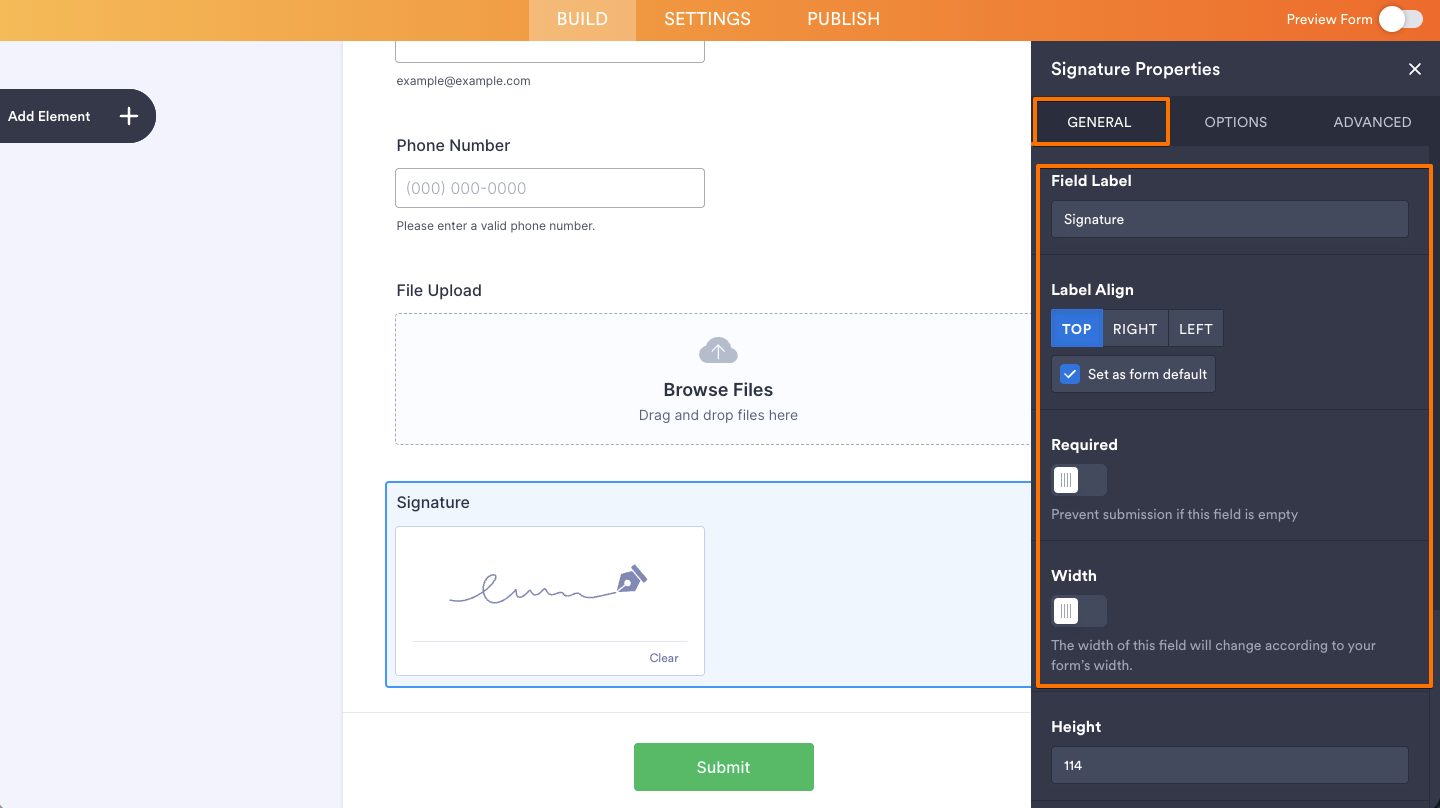
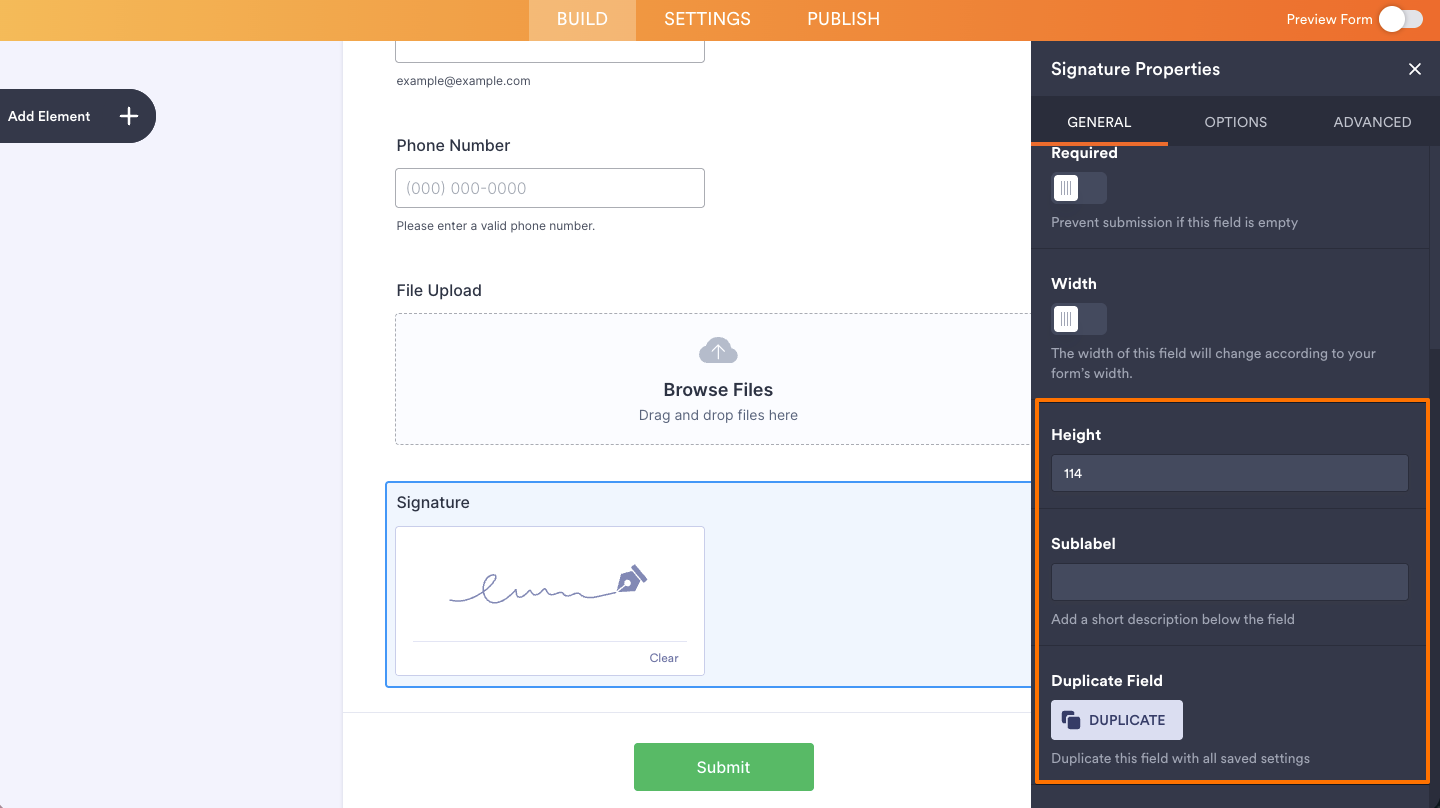
- Then, in the Signature Properties menu on the right side of the page, under the General tab, set up these things:
- Field Label — Lets you add the main title or name of the Signature field so users know what they need to sign.
- Label Align — Allows you to choose where the field label appears, such as above or beside the signature field.
- Required — Makes the Signature field mandatory, preventing users from submitting the form without adding their signature.
- Width — Adjusts how wide the signature box appears on the form.
- After that, scroll down and continue using these options:
- Height — Changes the height of the signature area to give users more or less space to sign.
- Sublabels — Lets you add helper text below the field, such as instructions or extra details for users.
- Duplicate Field — Creates a copy of the Signature field with the same settings, helping you add another one quickly.
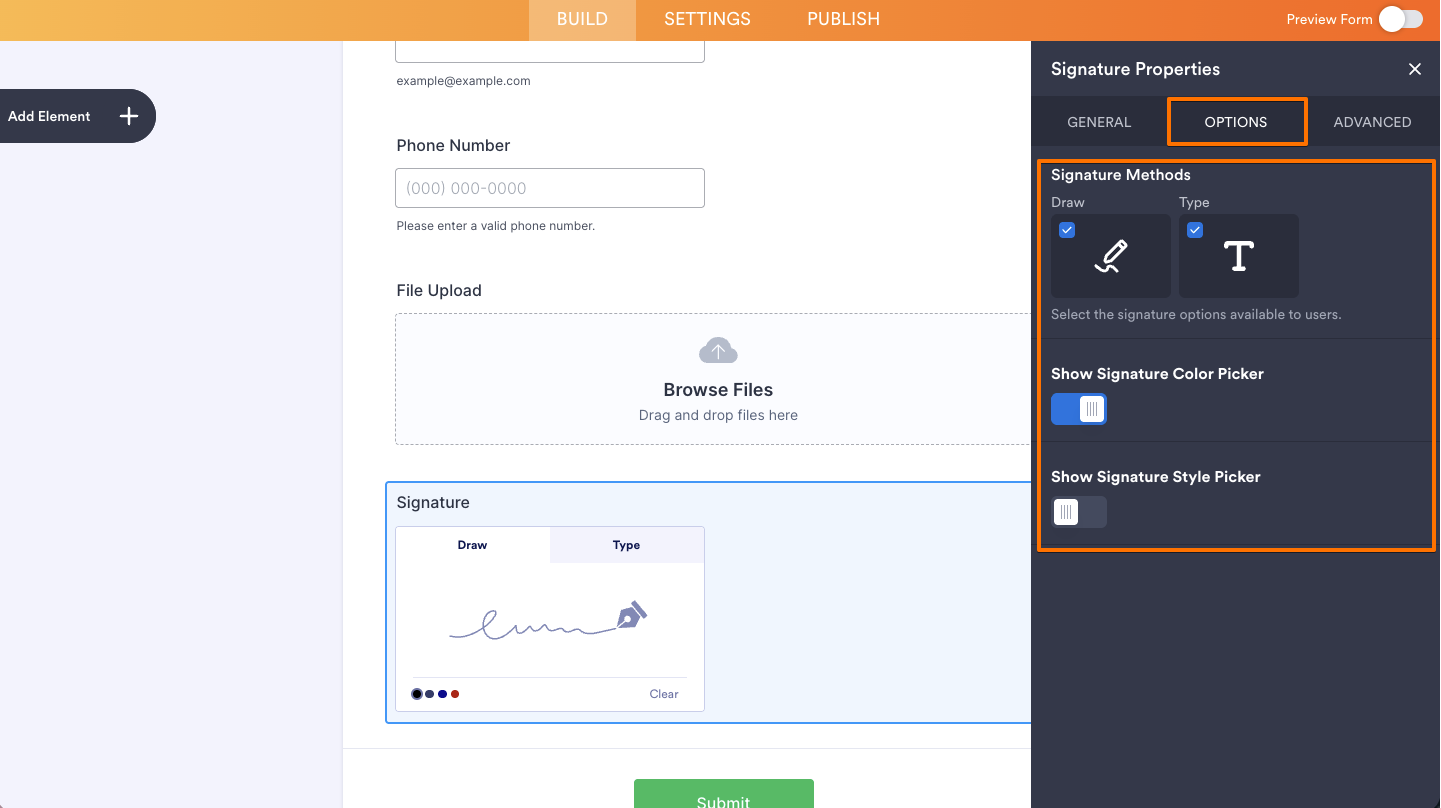
- Now, click on the Options tab and select the options that you want to use:
- Draw — Allows users to create their signature by drawing it directly inside the signature box using a mouse, touchpad, or touchscreen.
- Show Signature Color Picker — Enables users to choose a color for their drawn signature.
- Type — Lets users type their name instead of drawing it, which is then converted into a signature-style text.
- Show Signature Color Picker — Allows users to change the color of their typed signature.
- Show Signature Style Picker — Gives users different font or style options for their typed signature so they can choose the look they prefer.
- Draw — Allows users to create their signature by drawing it directly inside the signature box using a mouse, touchpad, or touchscreen.
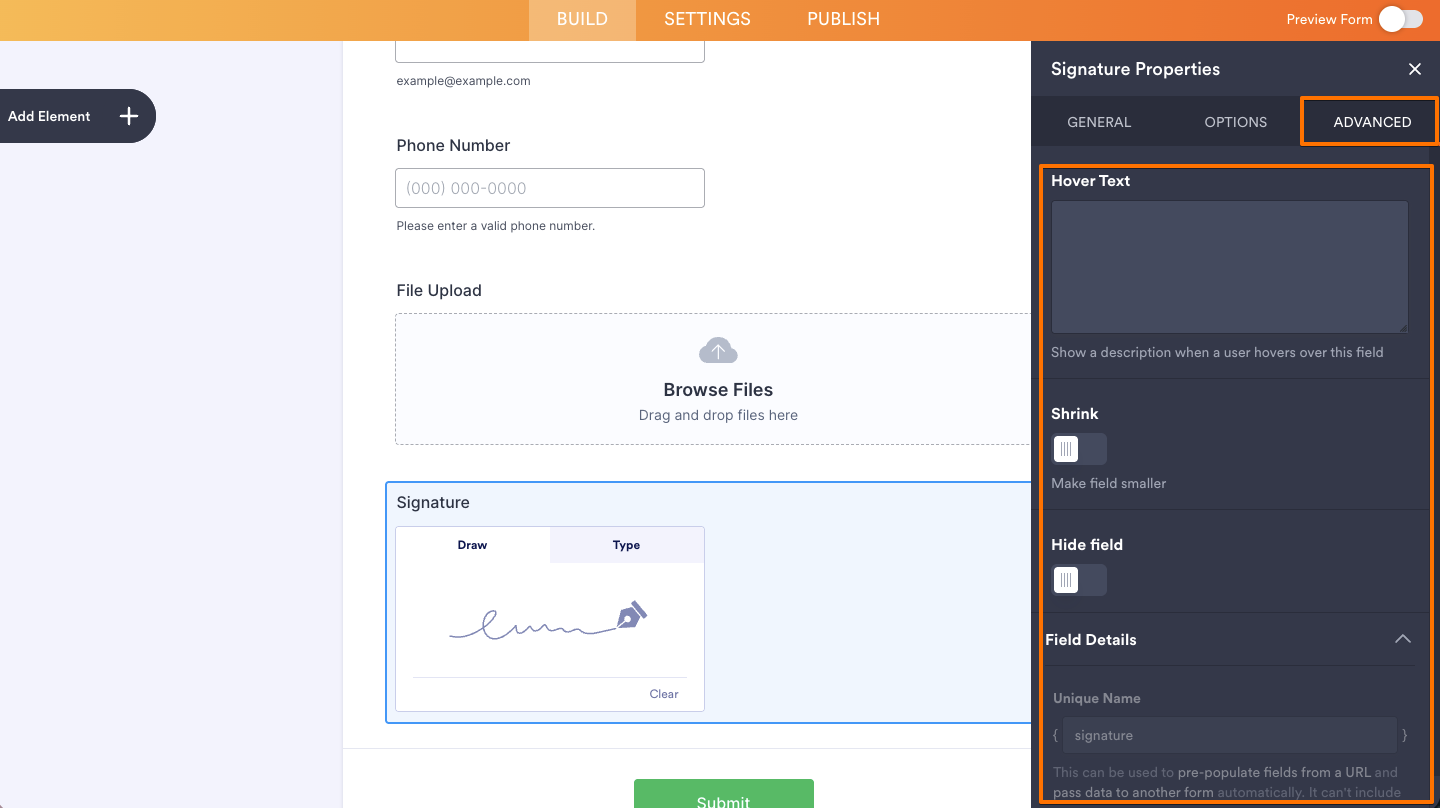
- Lastly, click on the Advanced tab and continue to manage these details:
- Hover Text — Set this up to show help text when users hover over the field.
- Shrink — When enabled, it reduces the visual size of the field.
- Hide Field — Turn this on to completely hide the field from users.
- Field Details — View additional technical information about the field:
- Unique Name — The unique identifier for the field, which can be used to pre-populate it from a URL or pass data to another form automatically.
That’s it. Your form is now set up to collect e-signatures smoothly and securely.
Note
The Smooth Signature and Signature widgets functions similarly to the regular Signature element — both let users draw and submit their e-signature. The key difference is that they are located under the Widgets tab.
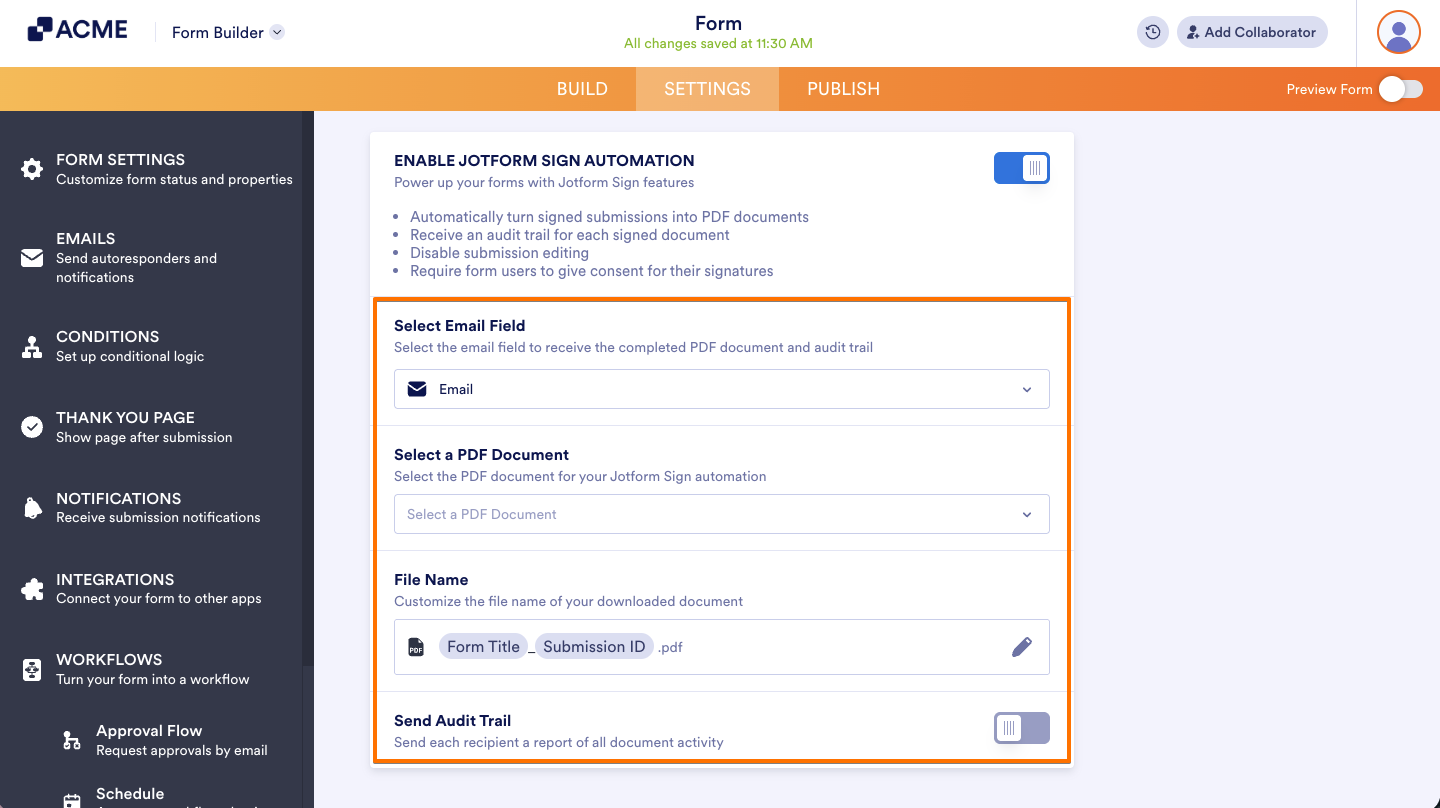
Enabling Sign Automation
It only takes a minute to enable Sign Automation so you can collect legally binding signatures. Here’s how:
- In Form Builder, click on the Signature field, and then click on the Signature Pen icon on the right.
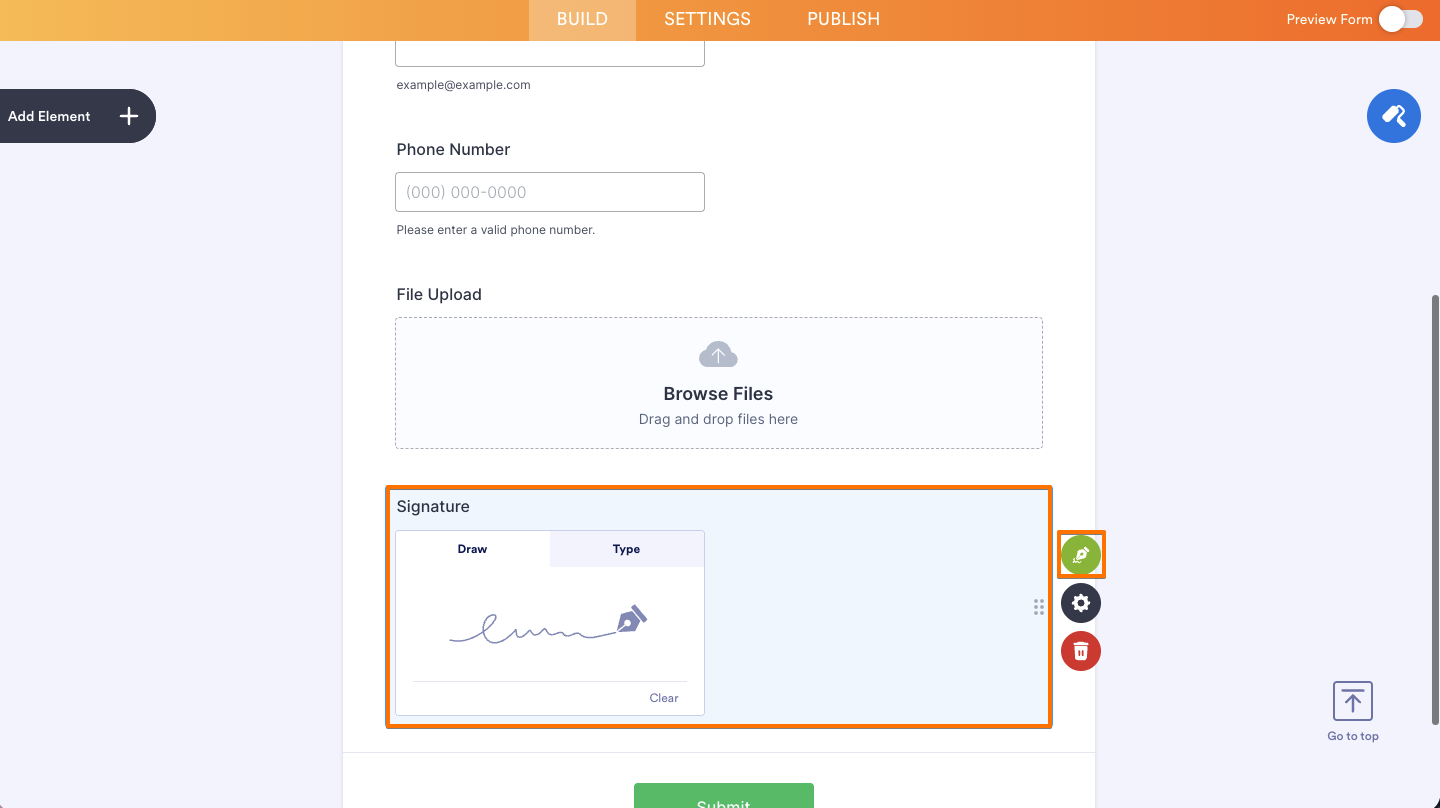
- Then, toggle Enable Jotform Sign Automation to On.
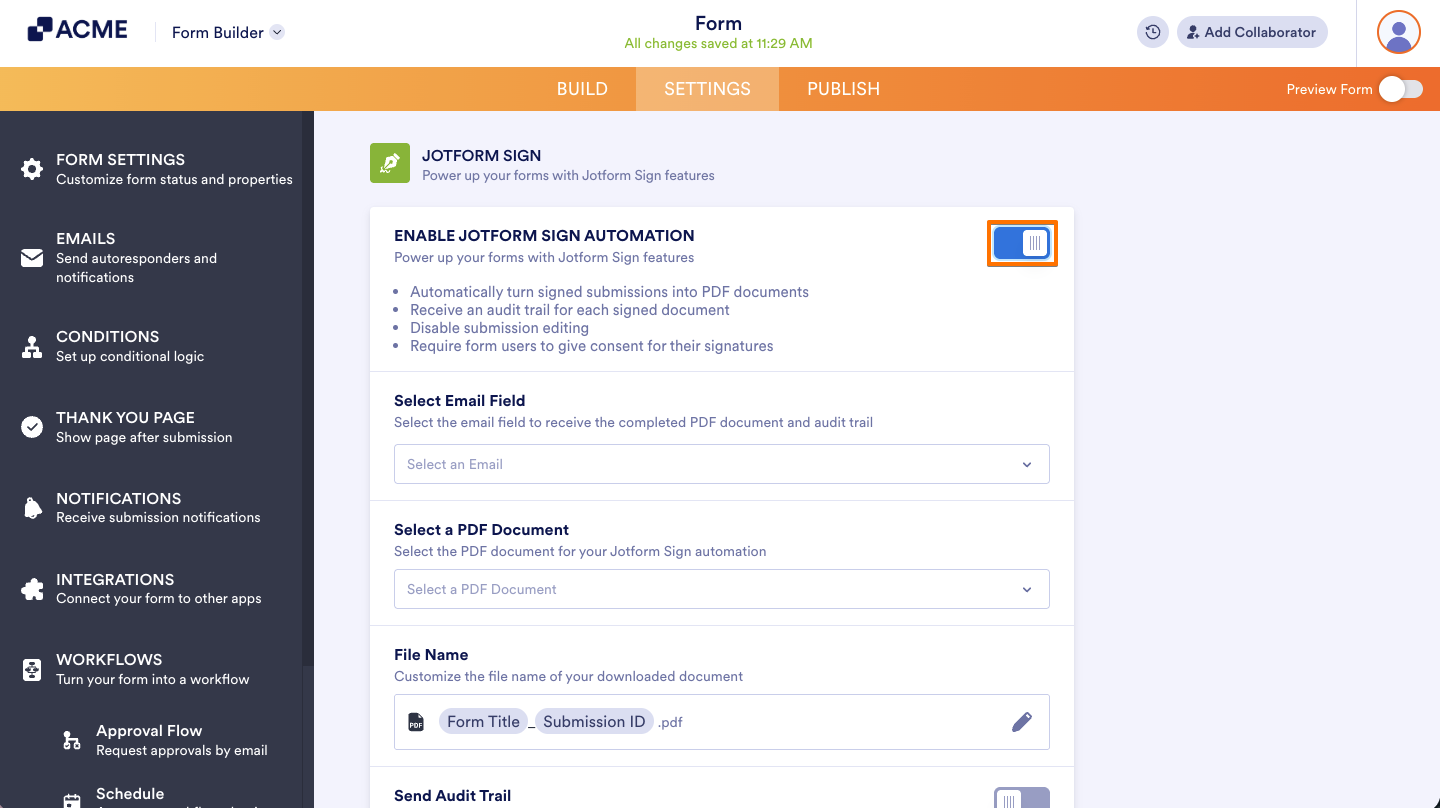
- After enabling Sign Automation, you can also configure the other settings as needed:
- Select Email Field — Lets you choose which email field in your form will receive the Sign document for signing.
- Select a PDF Document — Allows you to upload or choose the PDF file that will be sent through Sign Automation for e-signatures.
- File Name — Lets you customize the name of the generated document so it’s easier to identify and organize.
- Sent Audit Trail — Enables an audit trail to be sent along with the signed document, providing a record of signing activity such as timestamps and signer details for added transparency and security.
And that’s it! Our guide about How to Use Sign Documents for more details about it.
Note
If the form belongs to a team, team admins can configure which team members receive team notifications for sign-enabled forms.

Send Comment: