Jotform makes it easy to reuse and manage dropdown options across multiple forms with the Reusable Dropdown widget. By connecting your dropdown field to a Jotform Table, you can update your choices in one place and automatically keep all connected forms up to date.
This setup helps reduce manual edits, maintain consistency, and simplify dropdown management across your forms.
Here are a few ways to use it:
- Reuse department, location, or category lists across forms.
- Manage product or service options from one central table.
- Keep registration or application choices up to date.
- Reduce repetitive updates when dropdown options change.
Whether you’re building a new form or editing an existing one, you can add and configure the Reusable Dropdown widget in just a few steps. This is how it’s done:
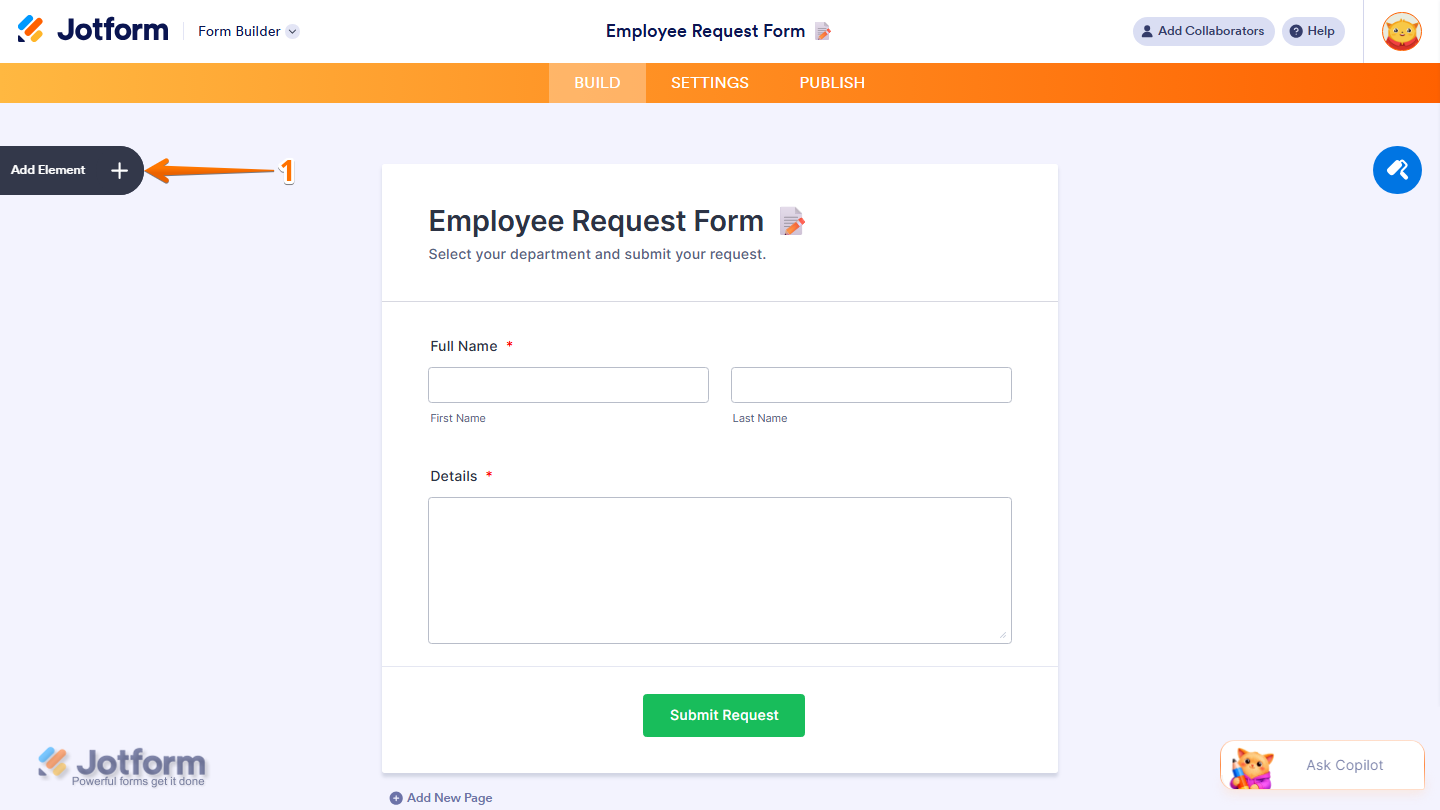
- In Form Builder, click on Add Element on the left side of the page.
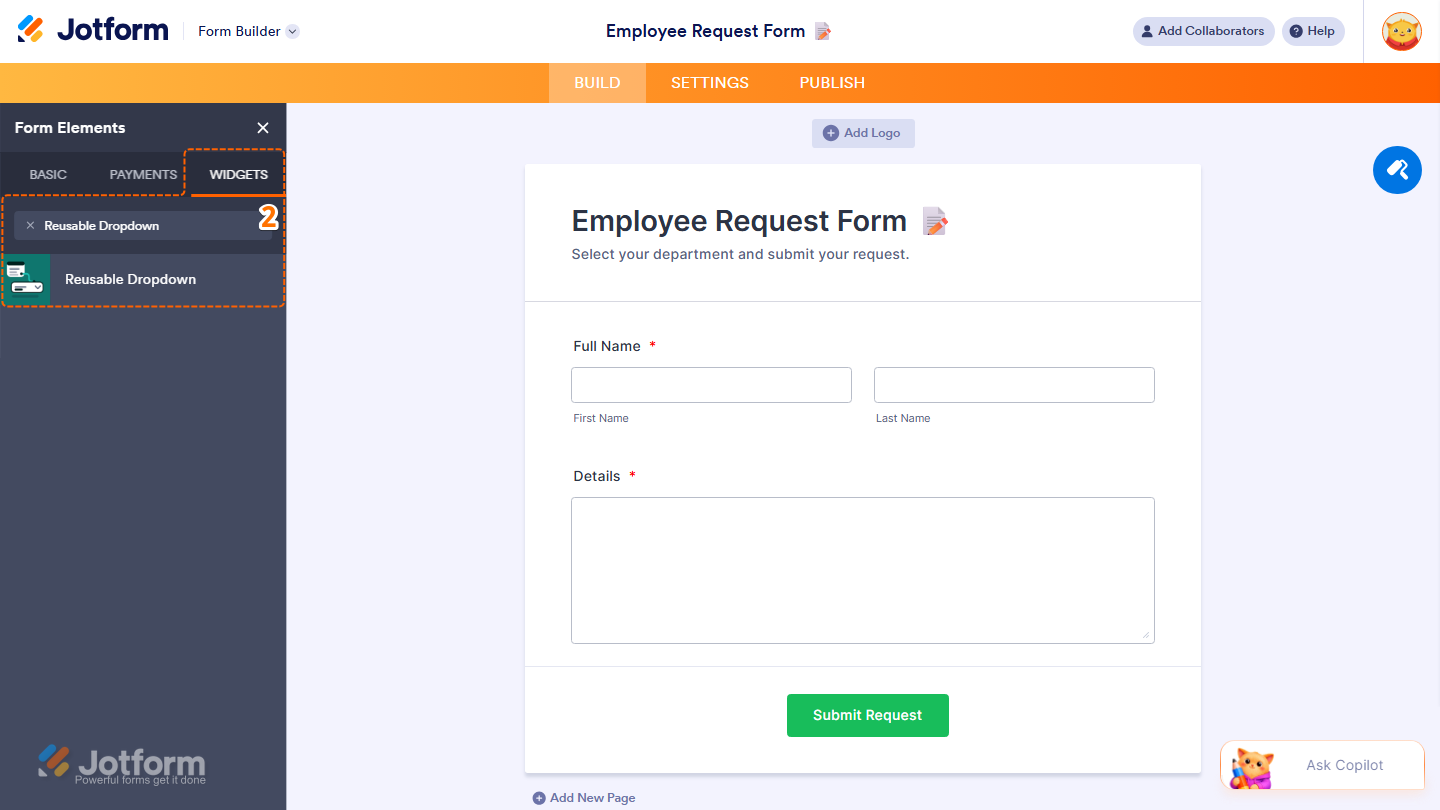
- Now, in the Form Elements menu, under the Widgets tab, search for Reusable Dropdown and click on it. Or, just drag and drop it to where you want it to be on your form.
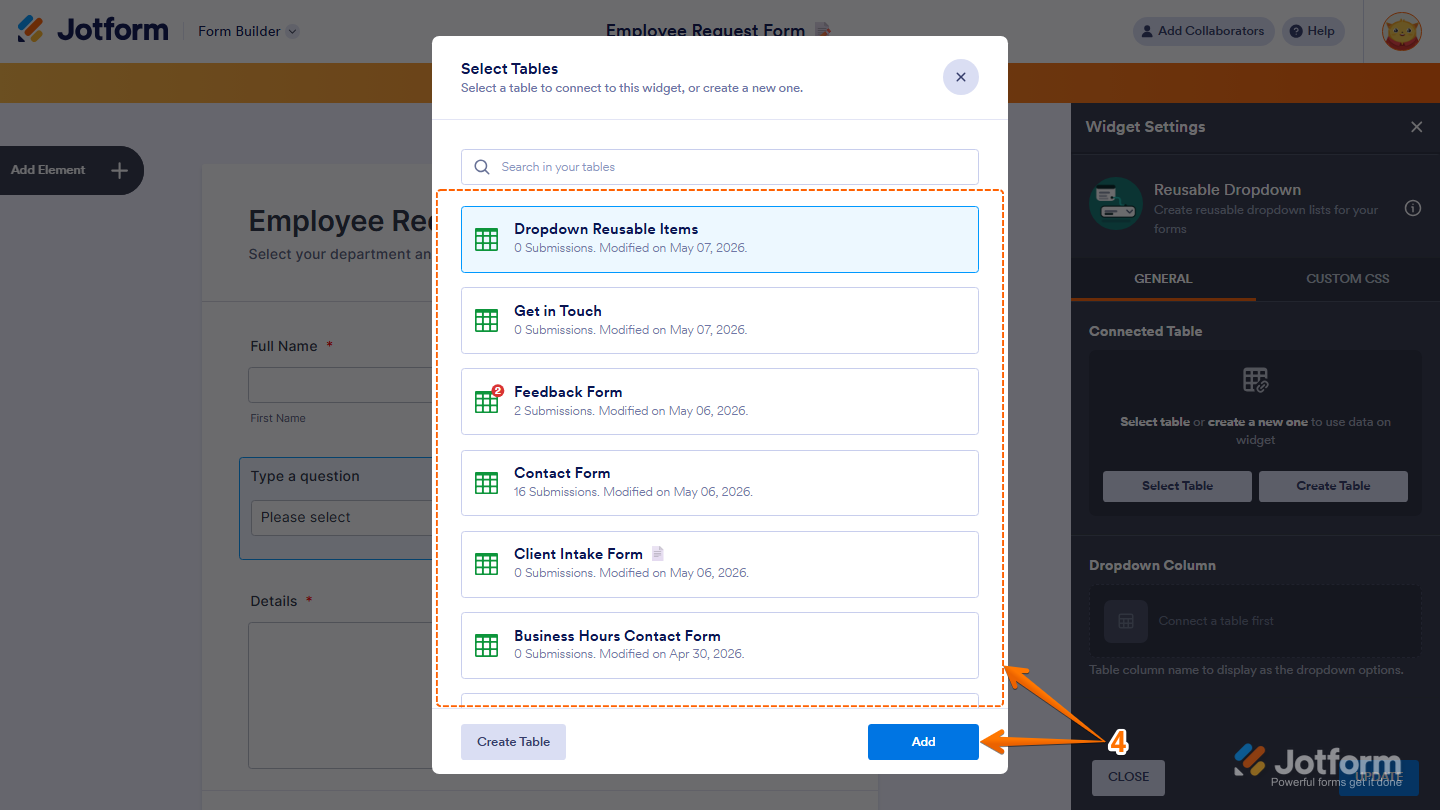
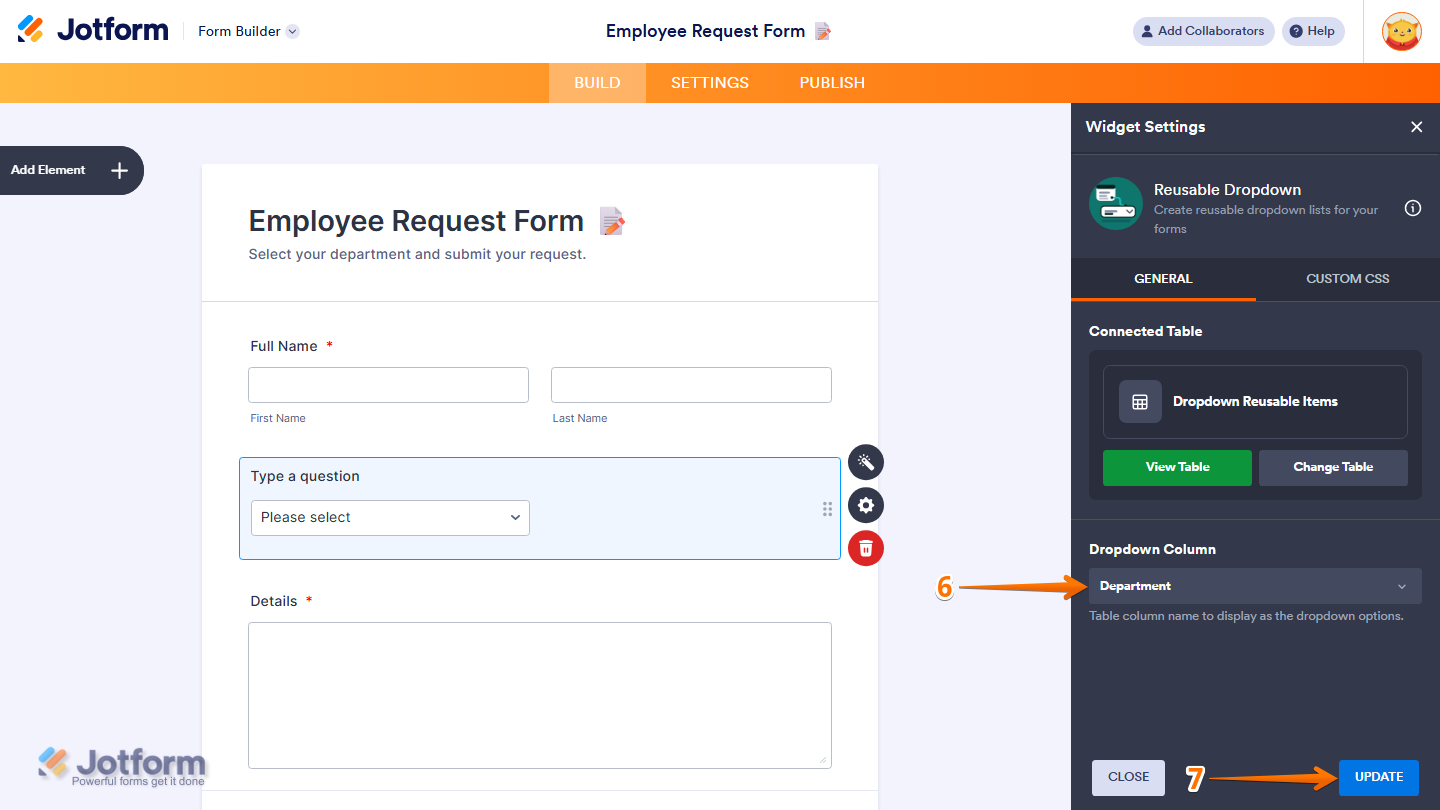
- Next, in the Widget Settings window that opens on the right side of the page, under the General tab, in the Connected Table section, choose one of these options:
- Select Table — Connect an existing Jotform Table to the widget.
- Create Table — Create a new table to use as the dropdown data source.

- If you selected Select Table, choose the table you want to use and click on Add.
Note
If the selected table is set to private, Jotform will ask you to make it public before it can be used as the dropdown source.
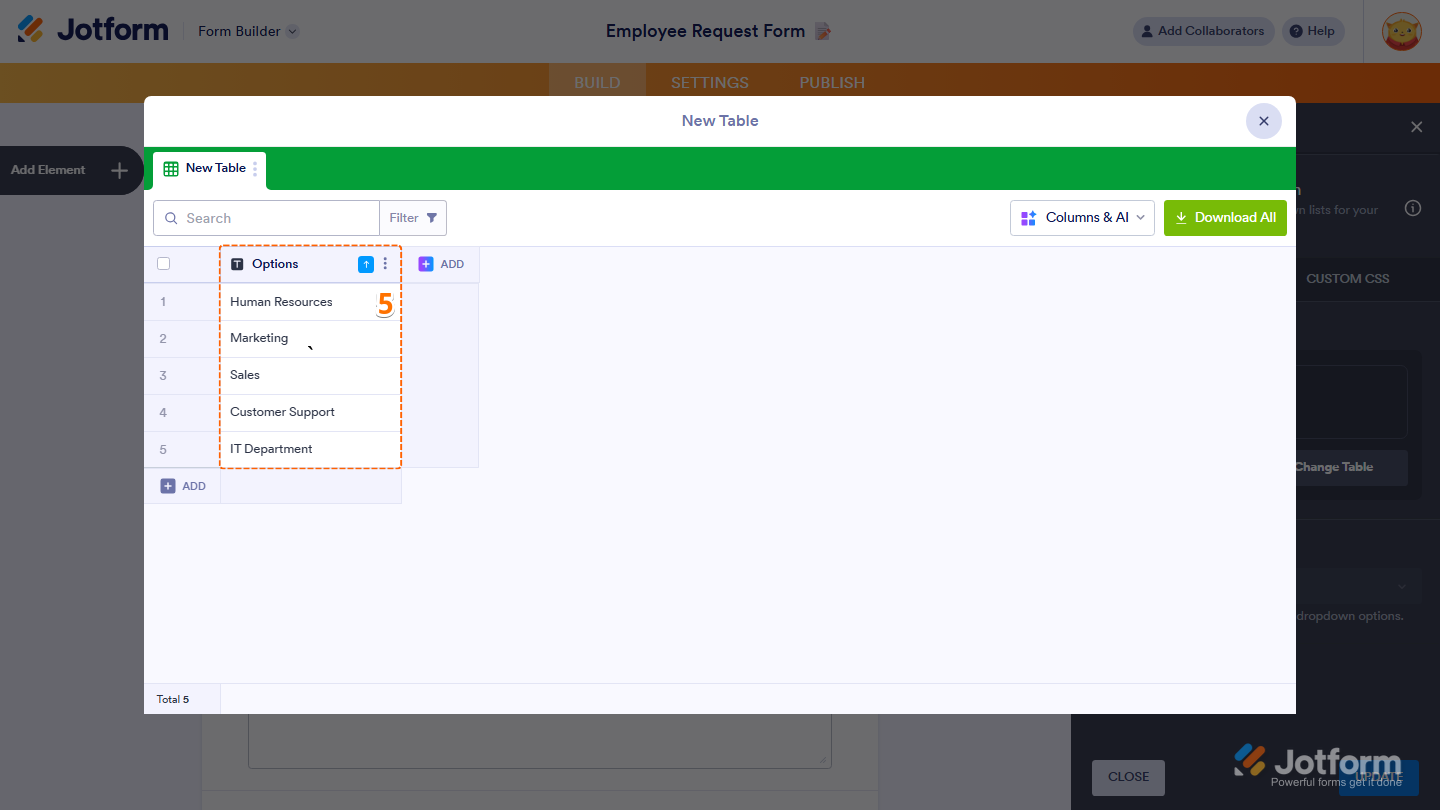
- If you selected Create Table, enter the values you want to display as the dropdown options in the new table.
- Next, in the Dropdown Column section, select the column whose values you want to display in the dropdown field.
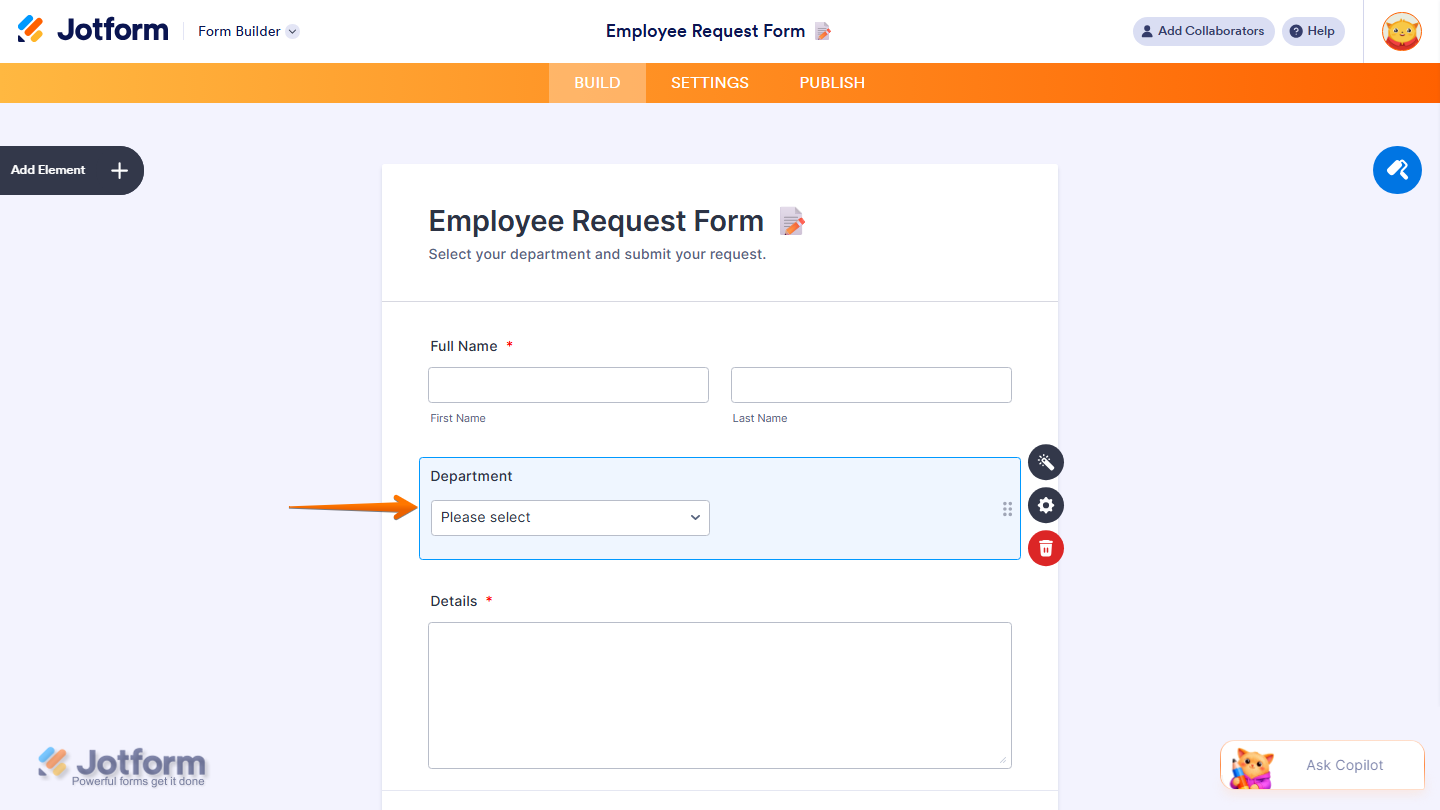
- Once everything’s set, click on Update.
That’s it. You’ve successfully added and set up the Reusable Dropdown widget on your form.
Wondering how it looks in action? Check out this demo form.
Note
- For advanced styling of the Reusable Dropdown widget, you can add your own custom CSS code under the Custom CSS tab in the Widget Settings. Our guide on How to Inject CSS Codes to Widgets walks you through everything.
- You can also configure the widget properties, like alignment, labels, size, visibility, and more, to control how it looks and behaves in your form. Check out our guide on How to Access and Configure the Question Properties of a Widget to learn more.

Send Comment:
5 Comments:
July 21, 2026
Is there a way to access other columns form the dropdown table? That would be very useful!
July 21, 2026
Is there anyway to access other columns from the dropdown table to fill in other fields on the form or access them in the workflow.
I really need to be able to take input as a Name dropdown, and do a "lookup" to an email. I have tried to use this dropdown widget, I have tried the new google sheets step in work flows (the email will show up correctly, but it won't work as a recipient to send them an email). I have even tried the AI "Update Value" step in the workflow (which was absolutely worthless).
Why not just have a non-ai update value step for these simple things?
What is the best way to do this, I have been frustrated by this and similar issues for years with Jotform. It seems like you are almost there now.
May 18, 2026
Hi everyone,
I’m using the Reusable Dropdown widget and I can successfully select my table and configure it. I’ve also set the widget to Public.
However, when I go to the form and try to test it, the widget appears blocked/disabled when I hover over it and I can’t interact with it.
Has anyone experienced this issue or knows what could be causing it? Any help would be appreciated.
May 13, 2026
This is almost useful. What would make this really useful is if you could access other columns from the dropdown table in other parts of the form. For example, they select a department, and then I can input the department head into another column and use that email as in a workflow.
May 12, 2026
This could be a game changer for us, great addition to the Jotform features!!