Jotform’s Testimonials widget lets you display customer feedback directly on your form so you can highlight positive experiences and build trust with your audience. It’s a simple way to showcase reviews without adding extra fields or clutter.
Here are a few ways to use it:
- Show customer testimonials on your form.
- Highlight positive feedback about your services.
- Display multiple reviews in one section.
- Build trust with users before they submit the form.
Whether you’re creating a new form or updating an existing one, you can add and set up the Testimonials widget in a few easy steps. Here’s how to do it:
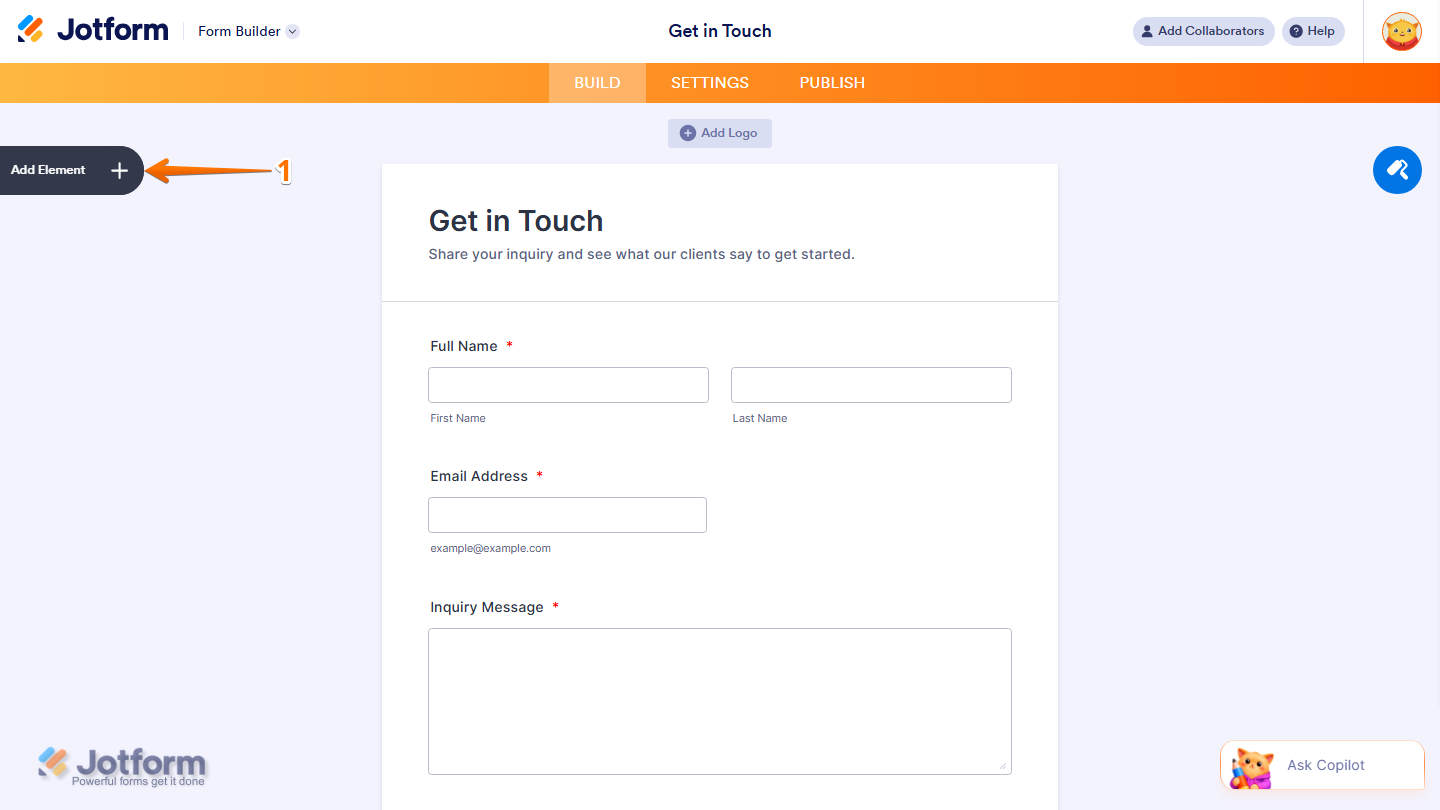
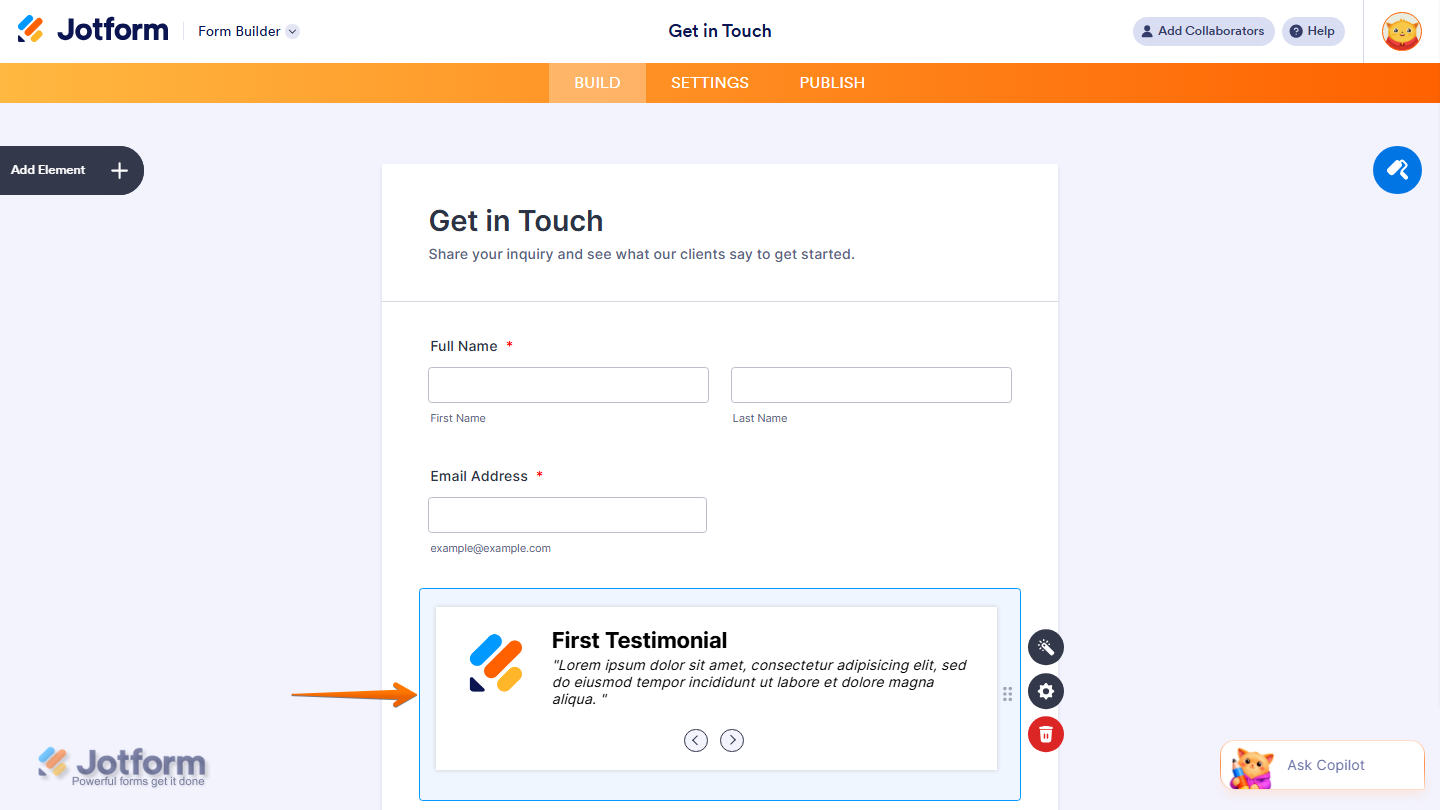
- In Form Builder, click Add Element on the left side of the page.
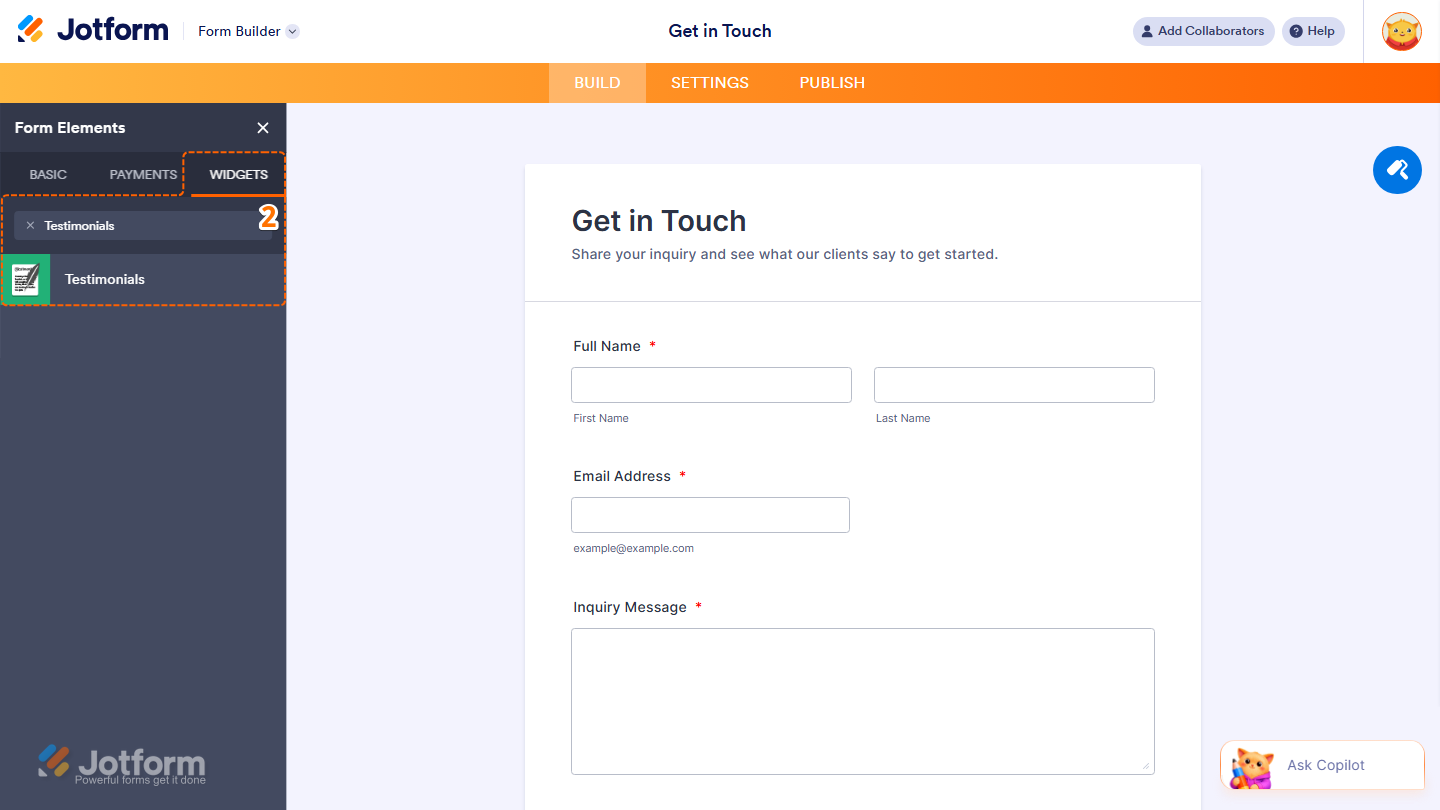
- Now, in the Form Elements menu, under the Widgets tab, search for Testimonials and click on it. Or, just drag and drop it to where you want it to be on your form.
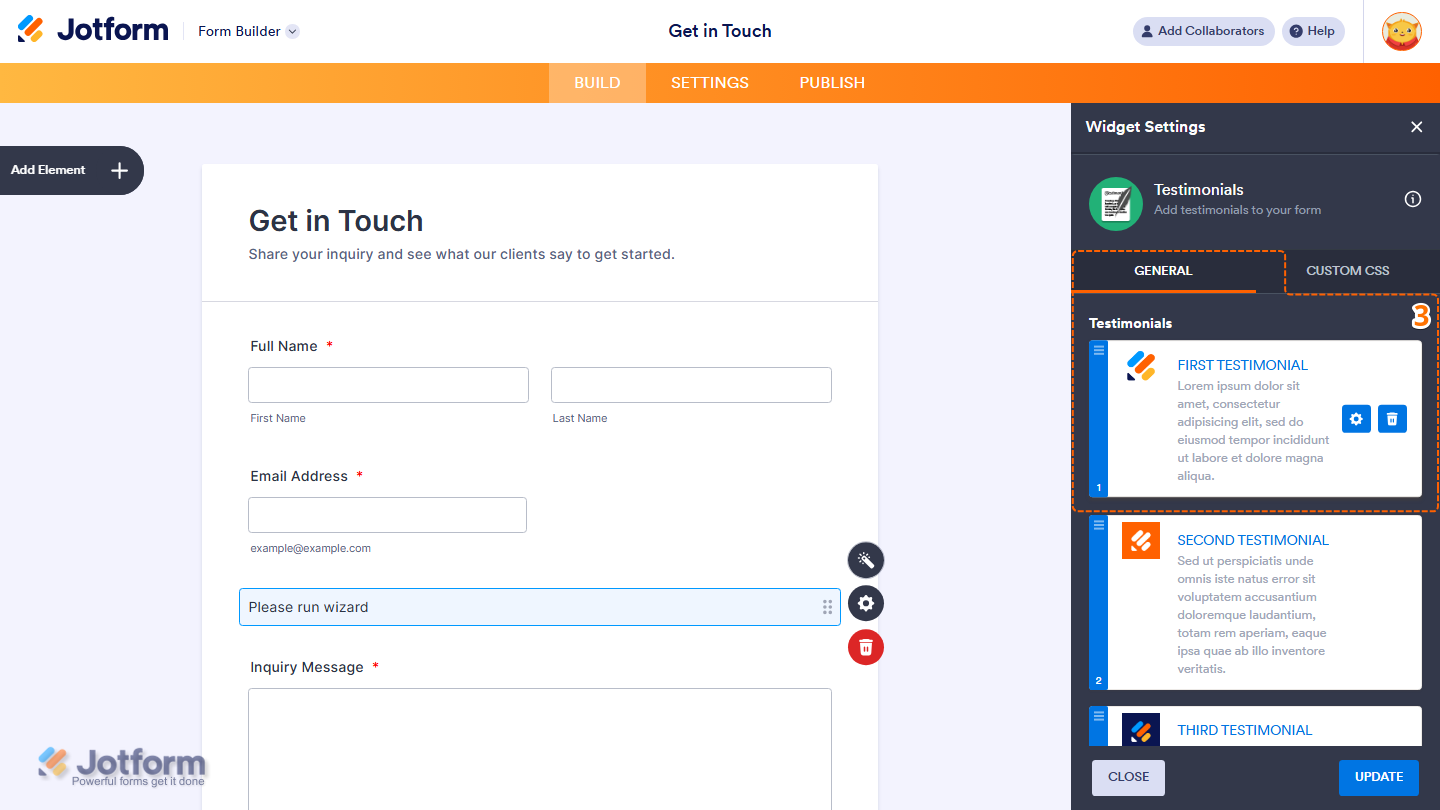
- Next, in the Widget Settings window that opens on the right side of the page, under the Generaltab, you’ll see a list of default testimonials. Hover over a testimonial to reveal the following options:
- Gear icon — Click on it to edit the testimonial’s details.
- Trash icon — Click on it to delete the testimonial.
Pro Tip
You can also drag and drop the Testimonials Card to rearrange the order.
- Now, to add a new testimonial, scroll down and click Add New Testimonial.
- Then, set up these things:
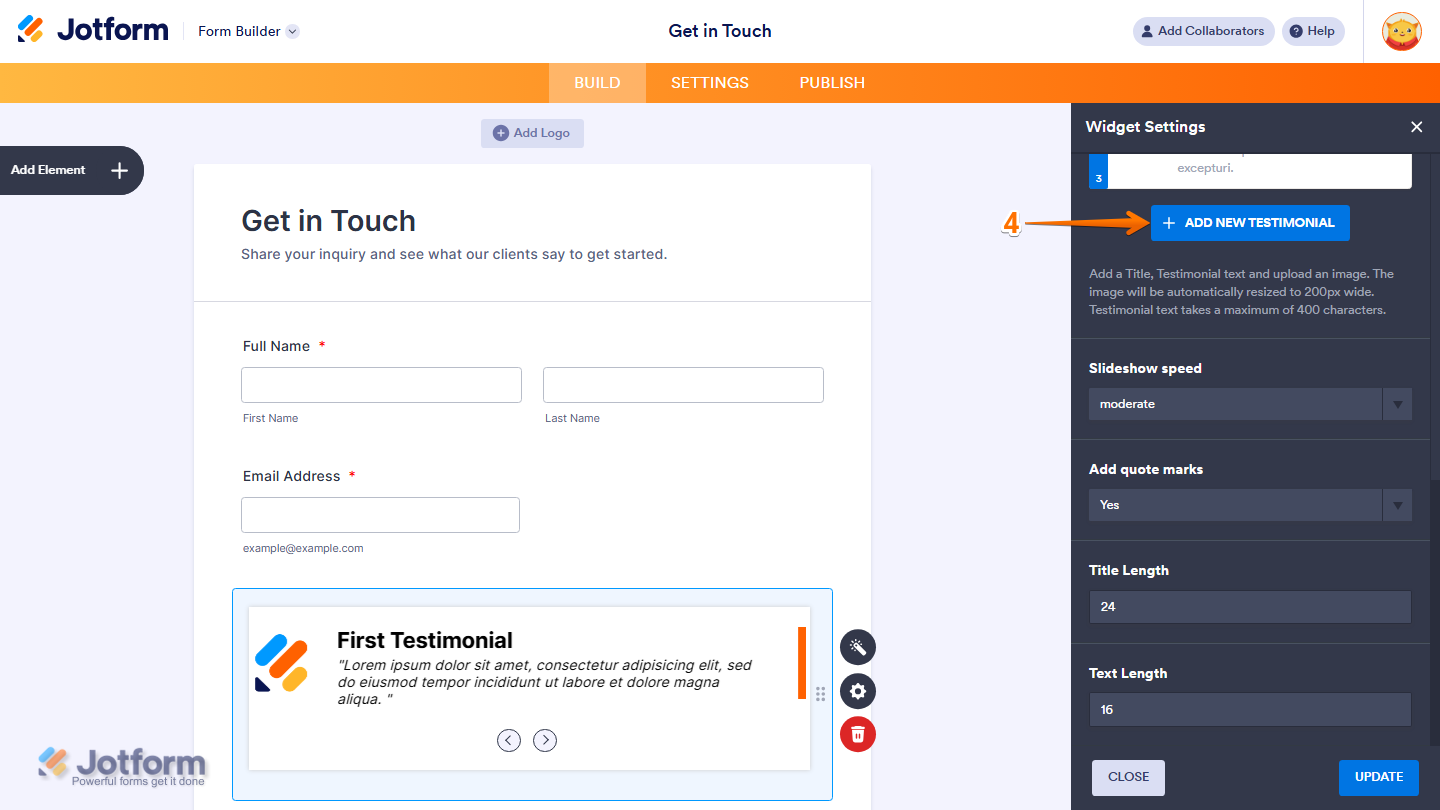
- Label — Enter the name or title of the person giving the testimonial.
- Image — Upload a photo or logo to display alongside the testimonial. The image will be automatically resized to 200px wide.
- Testimonial — Enter the testimonial text. This can be up to 400 characters long.
- Now, click Save to add the testimonial to your list.

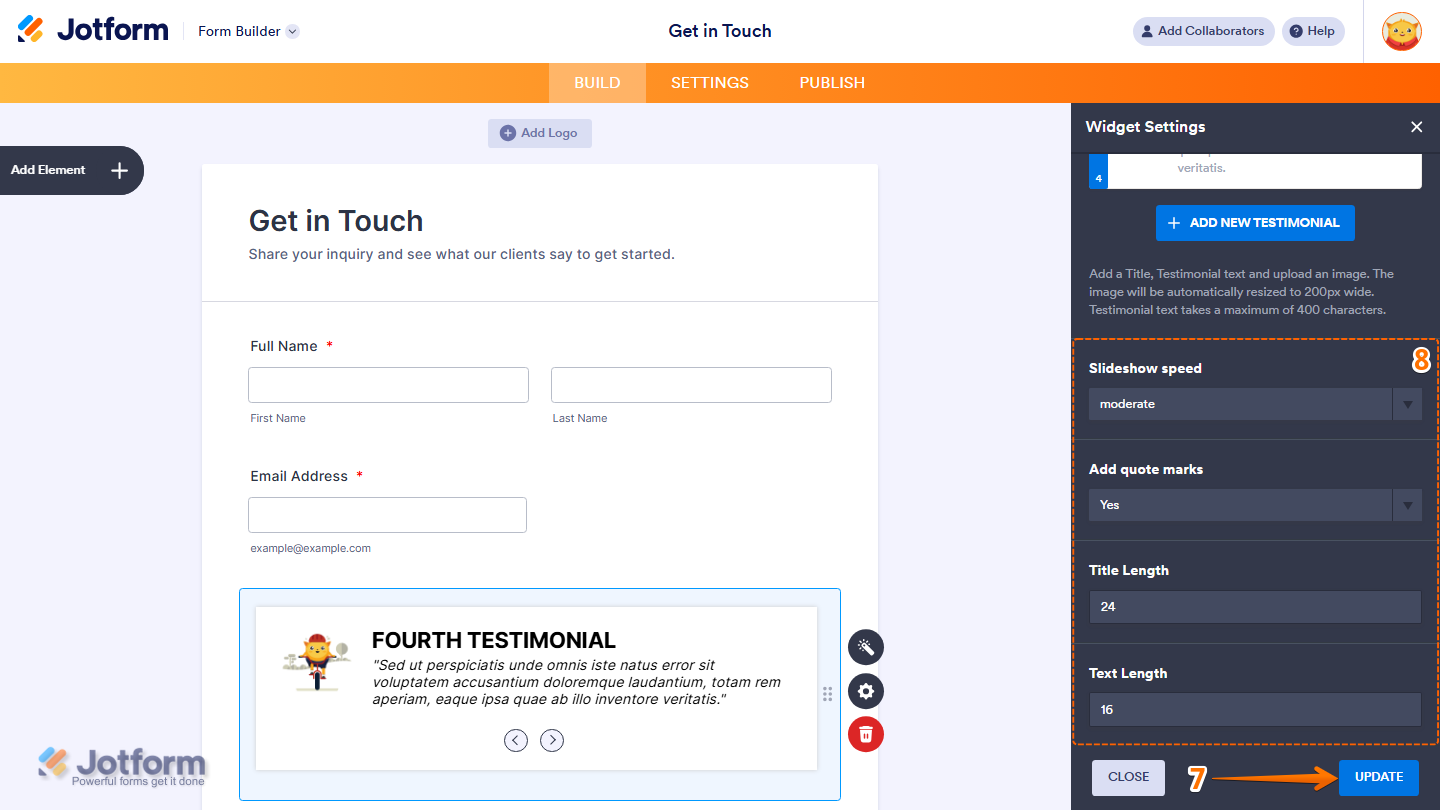
- Next, scroll down to the bottom and continue to set up these settings:
- Slideshow Speed — Set how fast the testimonials rotate. Options include slow, moderate, and fast.
- Add Quote Marks — Choose whether to display quote marks around the testimonial text.
- Title Length — Set the maximum number of characters displayed for the testimonial title.
- Text Length — Set the maximum number of characters displayed for the testimonial text.
- Finally, click Update and you’re all set.
That’s it. You’ve successfully added and set up the Testimonials widget on your form.
Wondering how it looks in action? Check out this demo form.

Send Comment: