Jotform makes it easy to collect multiple entries in a single question with the Add Options widget. This widget lets form respondents add as many answers as they need, making it perfect for lists like skills, ingredients, tags, or hobbies. It keeps your form neat and flexible while giving users the freedom to provide more details.
Here are a few ways to use it:
- Let applicants list their skills or hobbies on a job application.
- Collect special requests or item lists for purchase orders.
- Gather suggestions on surveys or feedback forms.
- And more!
Whether you’re building a new form or editing an existing one, you can add and configure the Add Options widget in just a few steps. This is how it’s done:
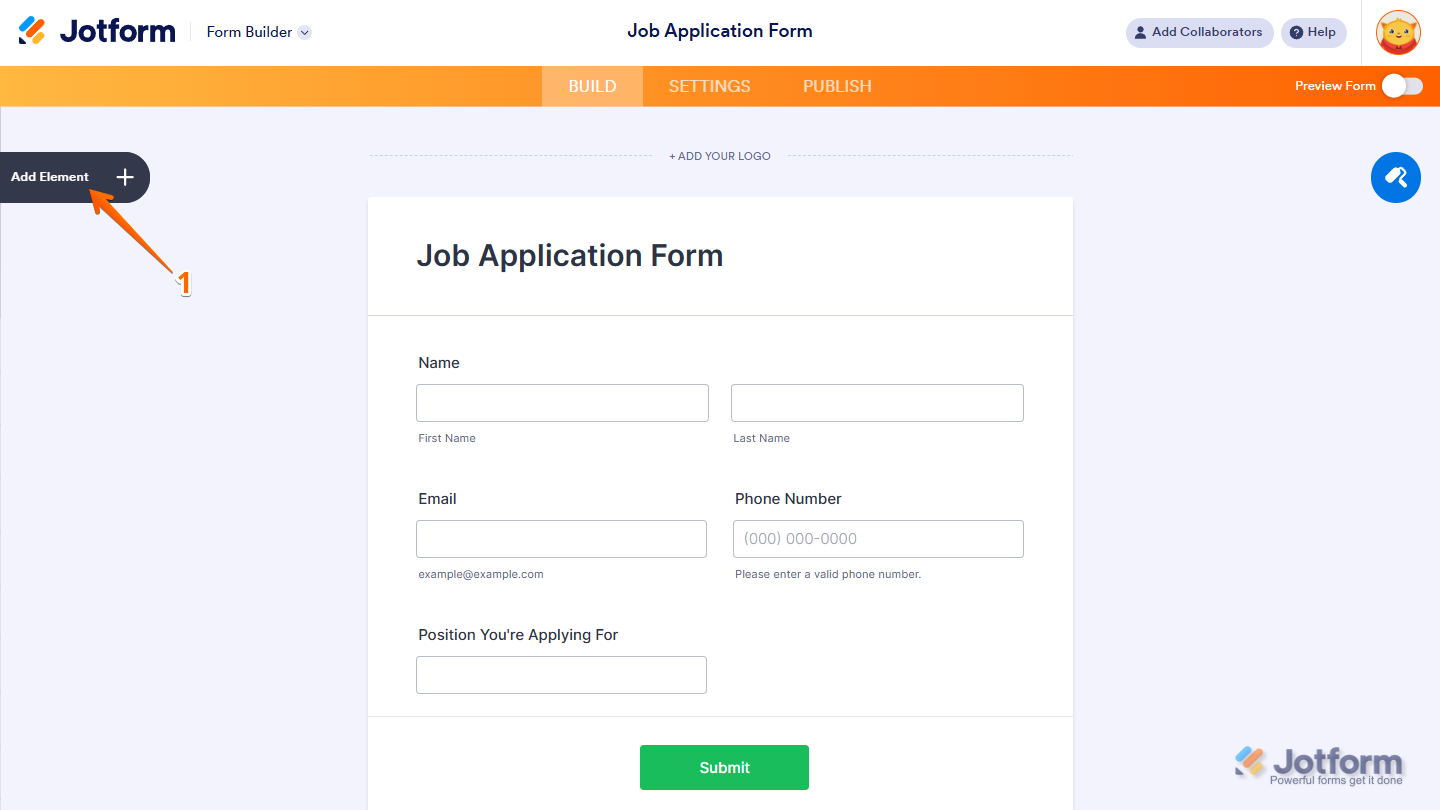
- In Form Builder, click on Add Element on the left side of the page.
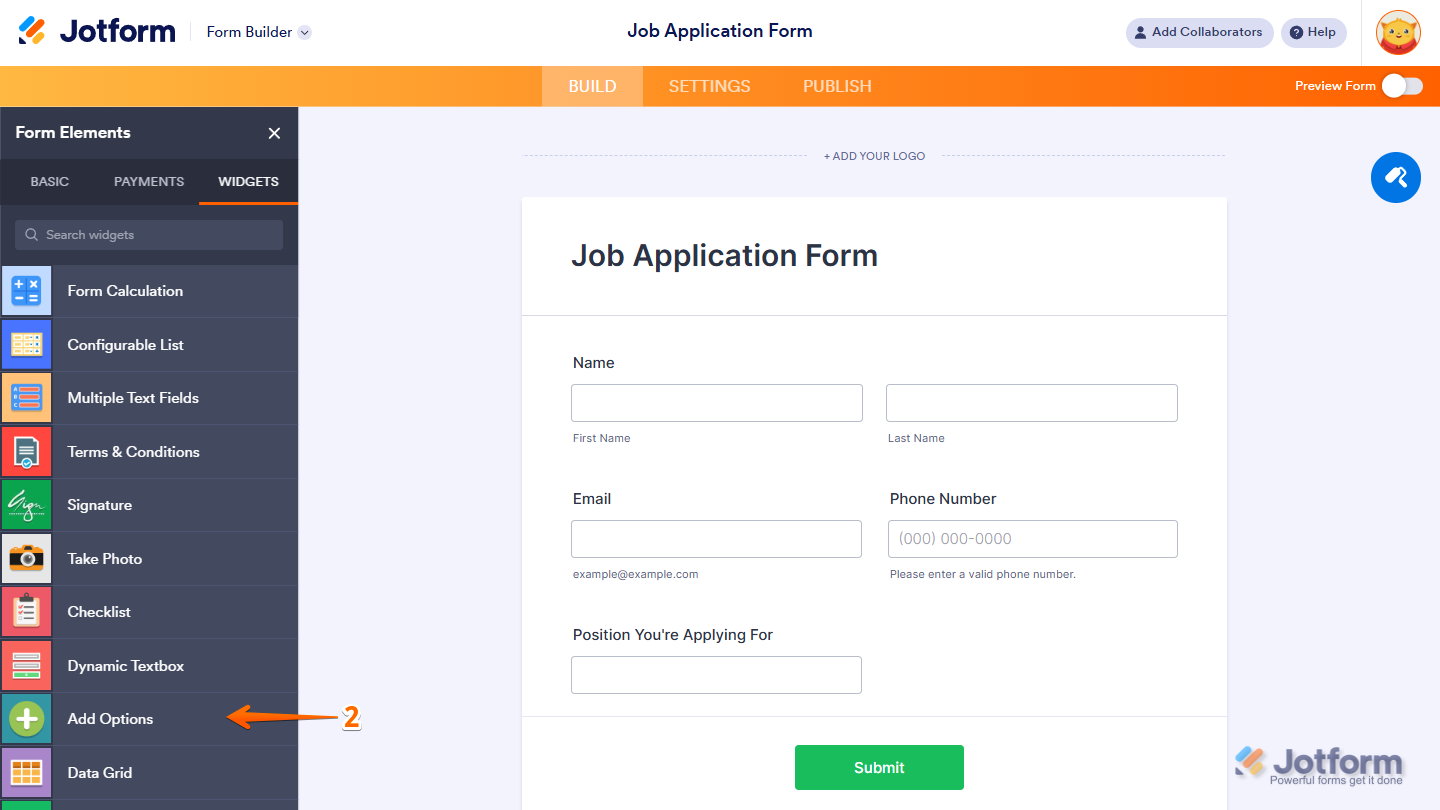
- Now, in the Form Elements menu, under the Widgets tab, click on Add Options. Or, just drag and then drop it to where you want it to be on your form.
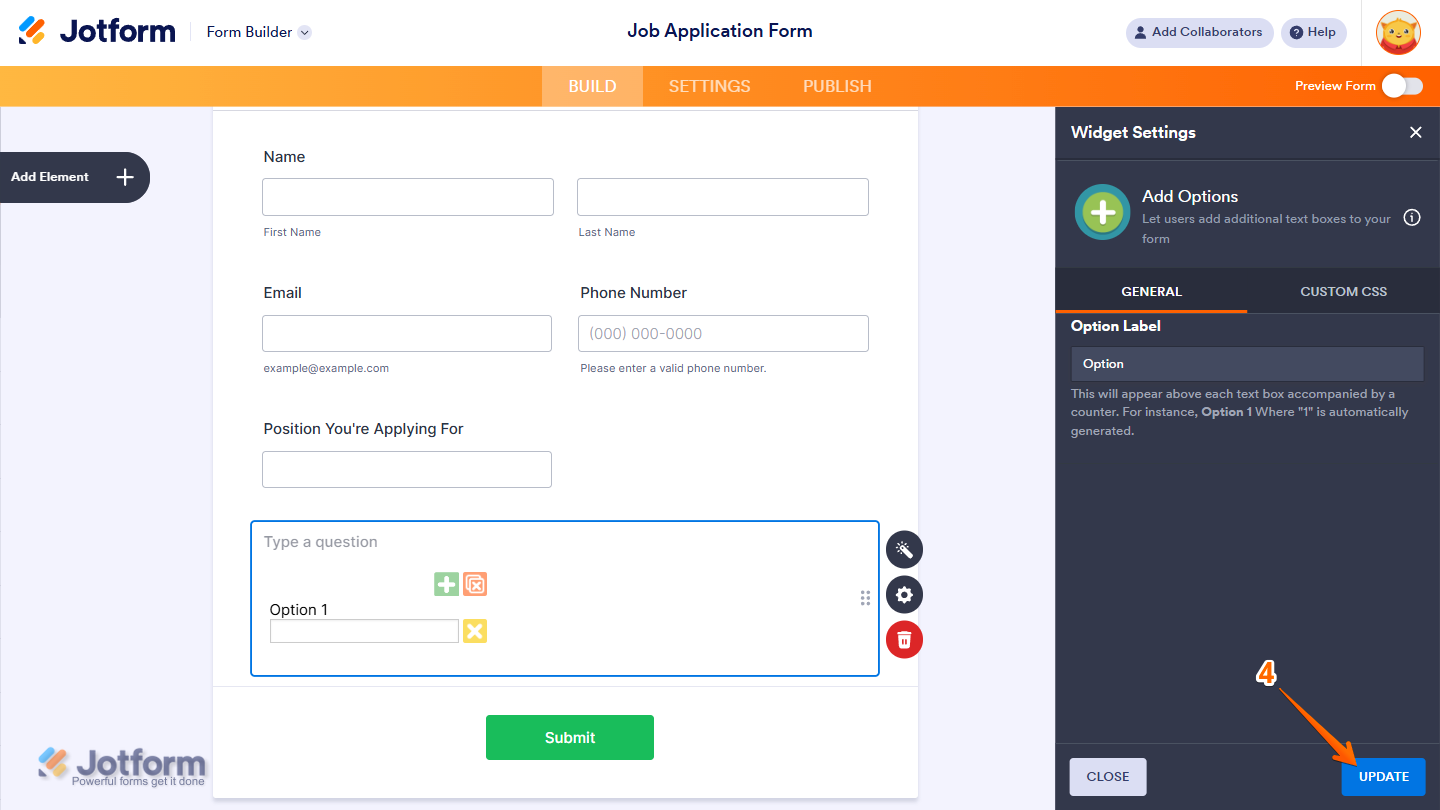
- Next, in the Widget Settings window that opens on the right side of the page, enter the label you want to add in the Option Label field.

- Once you’re done, click on Update.
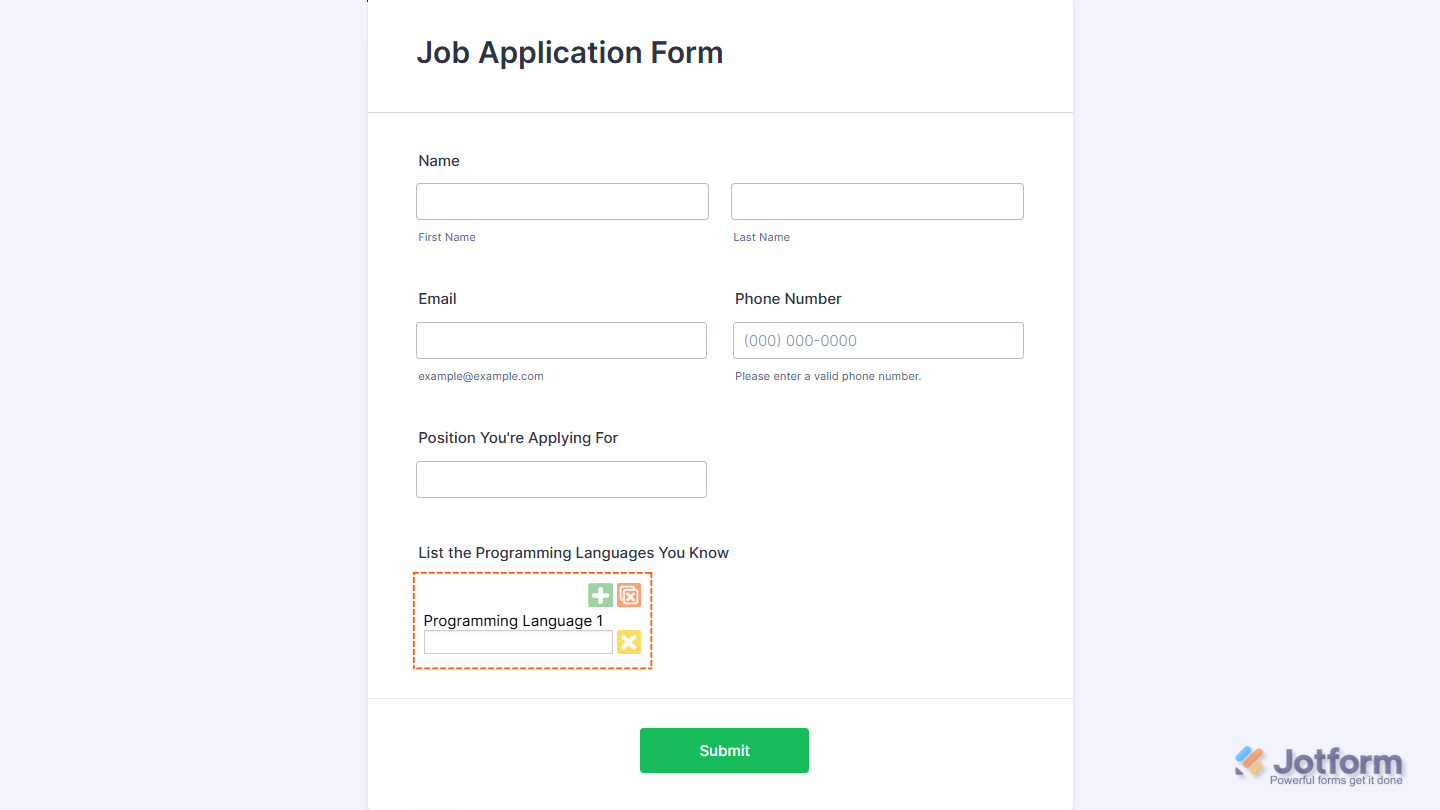
And that’s it! You’ve now successfully added and set up your Add Options widget on your form. When filling out the form, users can do the following actions:
- Green + button — Adds a new entry field.
- Yellow X button — Removes a specific entry field.
- Red X button — Clears all added fields at once.
Want to see how it works? Check out this live demo form.
Note
- For advanced styling of the Bootstrap Switch Field widget, you can add your own custom CSS code under the Custom CSS tab in the Widget Settings. Our guide on How to Inject CSS Codes to Widgets walks you through everything.
- You can also configure the widget properties, like alignment, labels, size, visibility, and more, to control how it looks and behaves in your form. Check out our guide on How to Access and Configure the Question Properties of a Widget to learn more.

Send Comment: