Jotform’s Autocompleted Address widget is ideal for forms that require accurate and efficient address entry. Powered by Google Maps, it helps users quickly find and fill in their location details by offering real-time suggestions as they type. This not only improves user experience but also ensures cleaner, more consistent data — perfect for order forms, event registrations, delivery services, or any form that depends on precise geographic information. By reducing typing effort and minimizing errors, the widget streamlines the submission process and enhances overall form accuracy.
Here are a few ways to use it:
- Let users quickly enter their address with real-time suggestions.
- Reduce typing effort by auto-filling address details.
- Improve accuracy by selecting from verified location results.
- Speed up checkout or registration forms with faster address entry.
- Standardize address data for shipping, billing, or service requests.
Note
The Autocompleted Address widget requires a Google Maps API Key to work. Take a look at our guide on How to Get Google Maps API Key for Jotform Mapping Widgets for more details.
Whether you’re creating a new form or updating an existing one, adding and setting up the Autocompleted Address widget only takes a second—get it started like this:
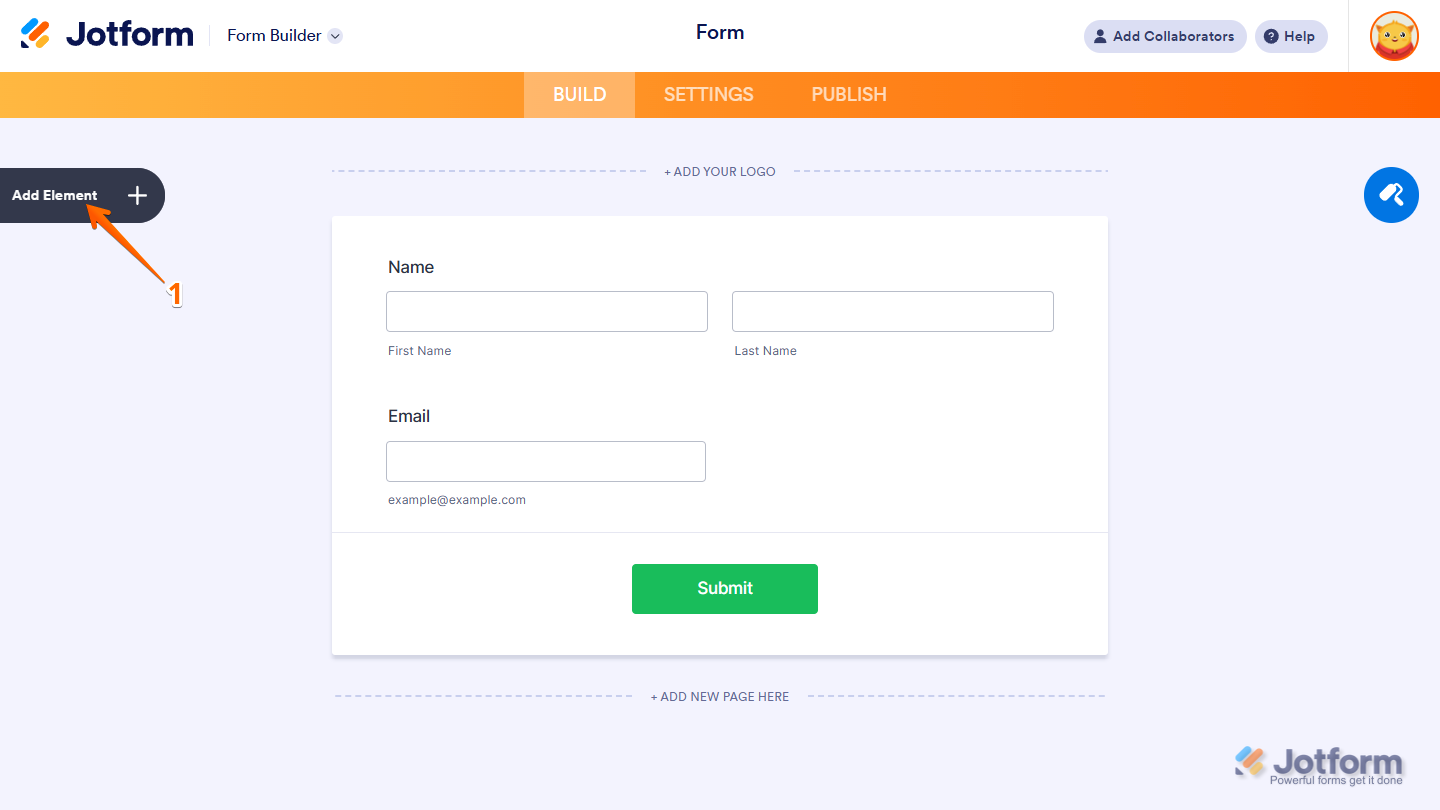
- In Form Builder, click on Add Element on the left side of the page.
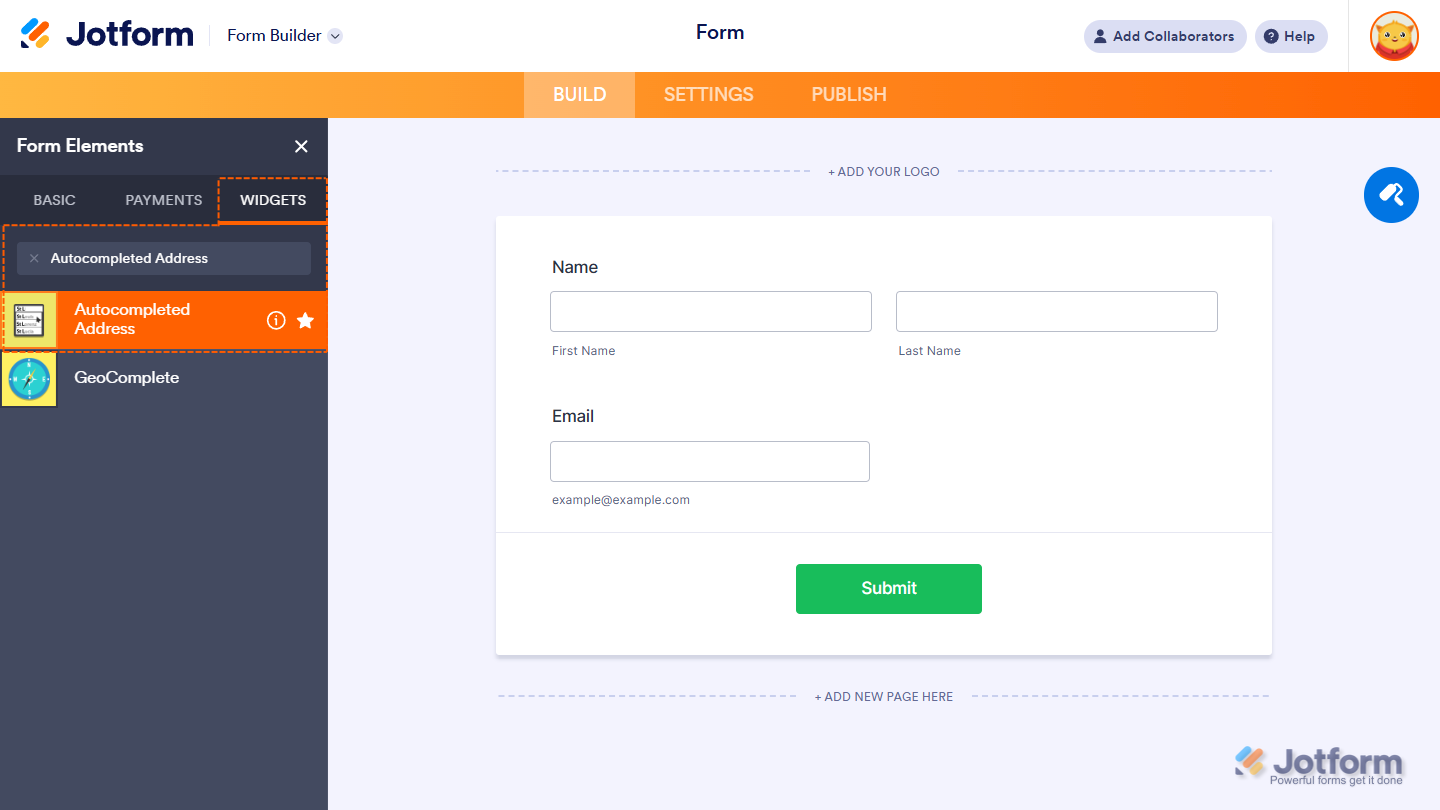
- Now, in the Form Elements menu, under the Widgets tab, search for Autocompleted Address and click on it. Or just drag and drop it to where you want it on your form.
- Next, in the Autocompleted Address Widget Settings menu that opens on the right side of the page, under the General tab, choose which fields you want to be autocompleted from the Address Fields options.
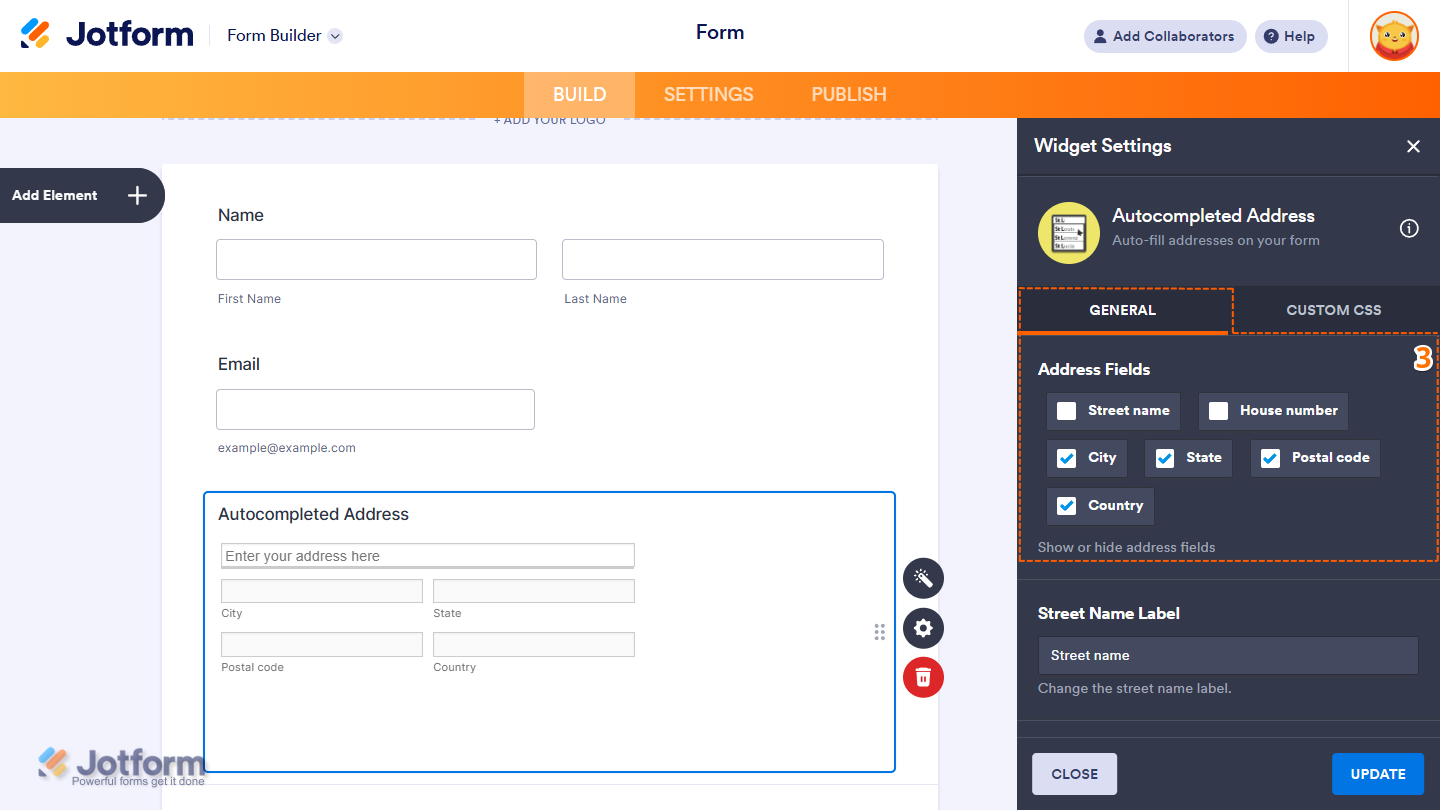
- Then, scroll down to the middle and continue to set up these options:
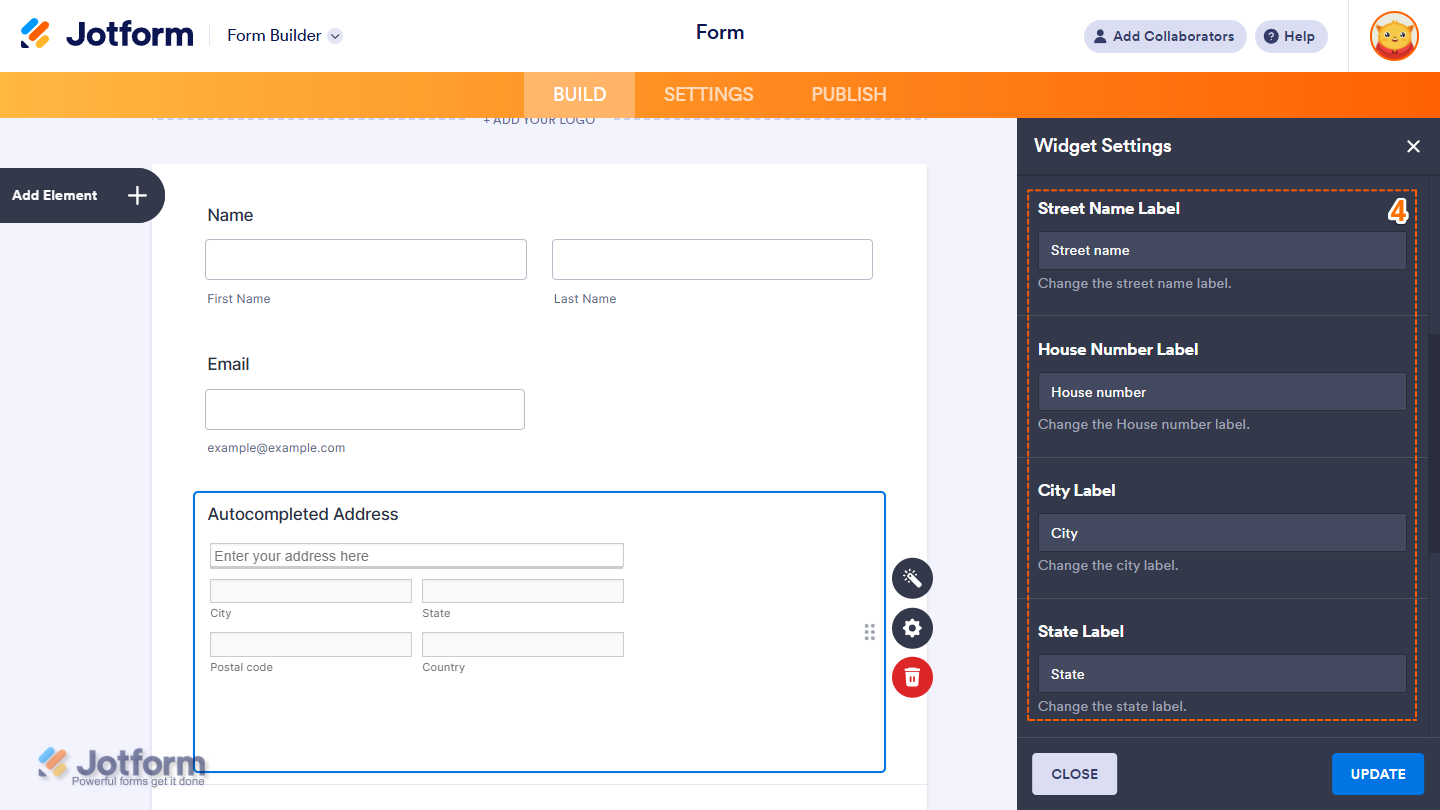
- Street Name Label — Enter the label for the Street Name.
- House Number Label — Specify how the House Number should be labeled.
- City Label — Define the label text for the City field.
- State Label — Indicate the label to use for the State or Province.
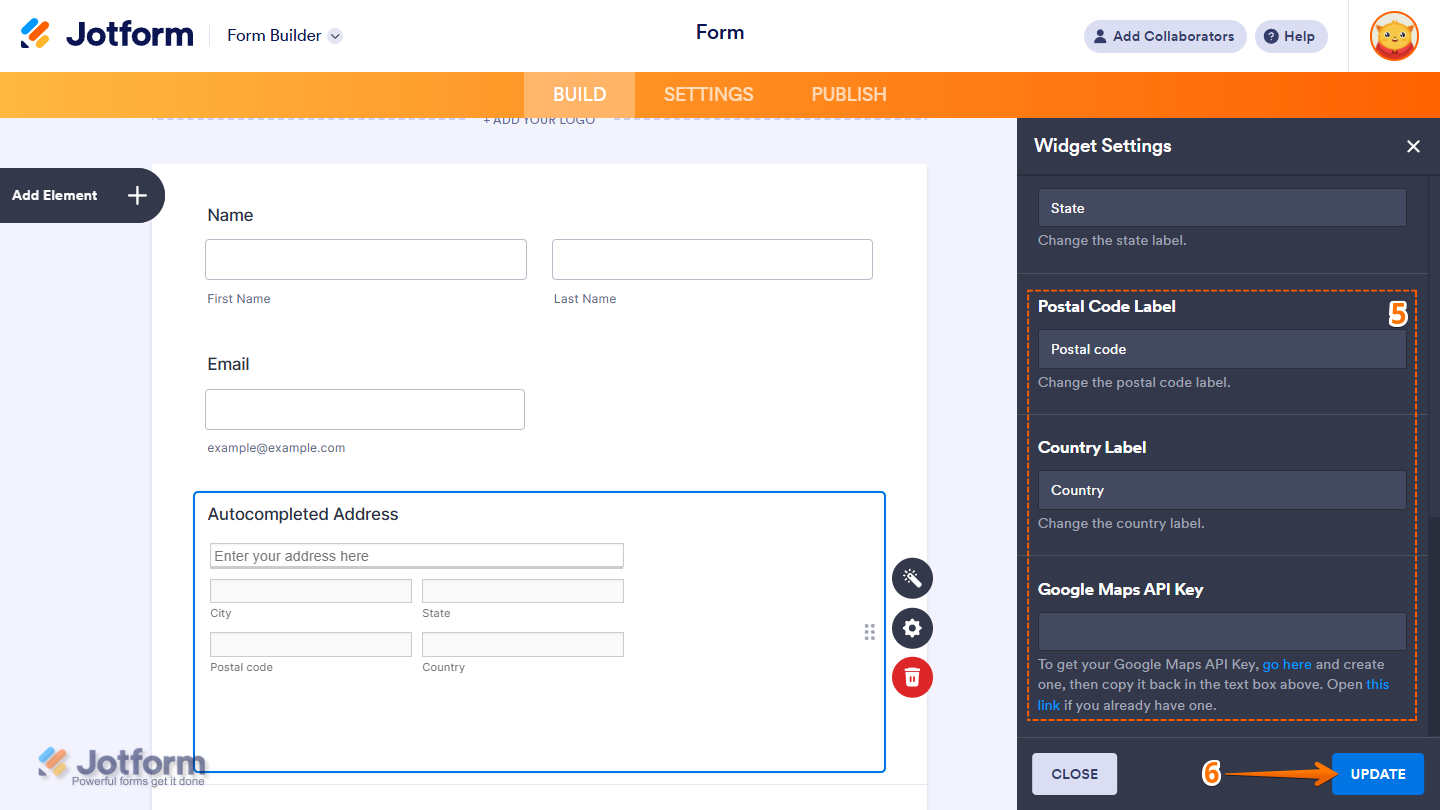
- Next, scroll down to the bottom and set up these final options:
- Postal Code Label — Provide the label for the Postal or ZIP Code field.
- Country Label — Assign a label for the Country field.
- Google Maps API Key — Provide your API Key to enable the autocomplete functionality.
- Once everything’s set, click on Update.
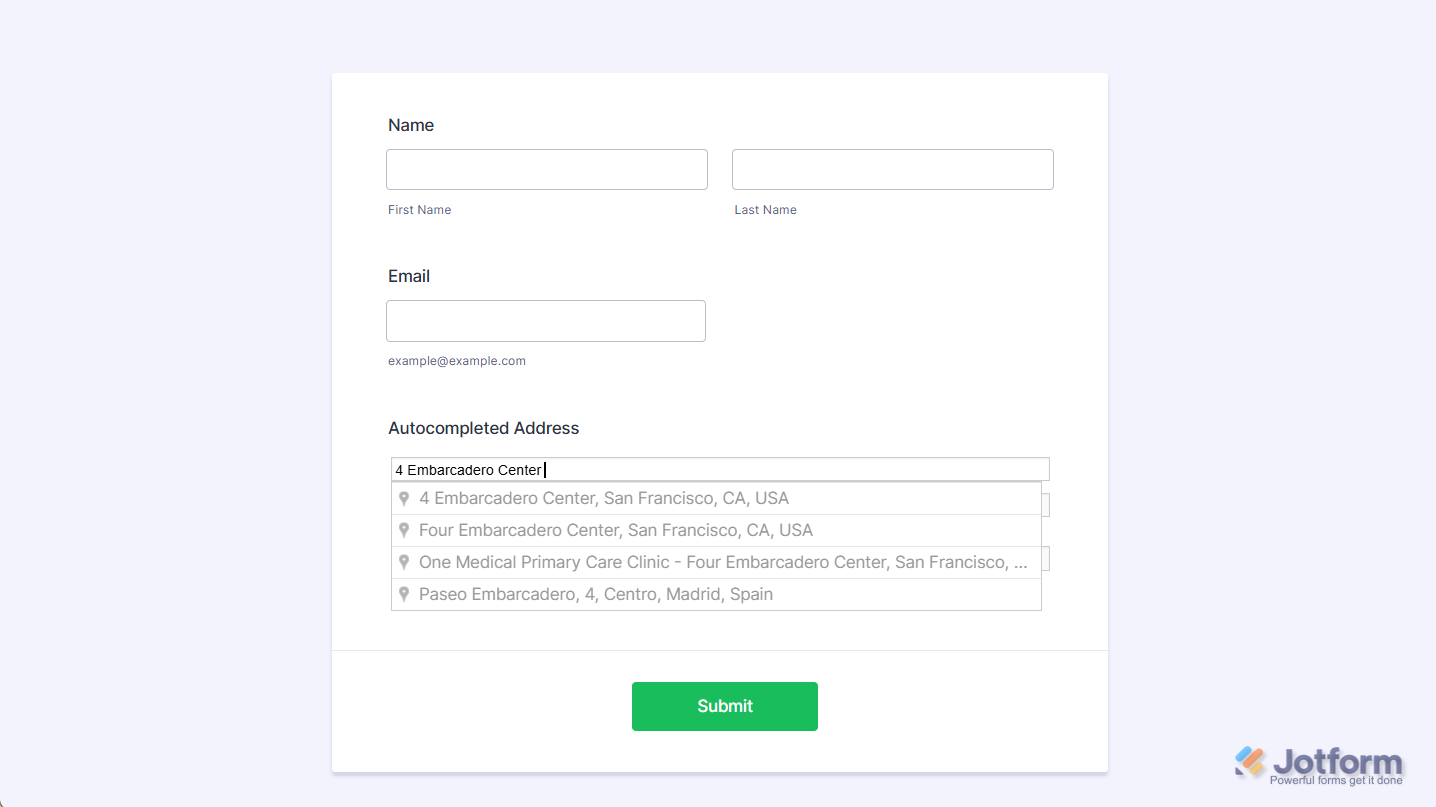
That’s it! You’ve now successfully added and set up the Autocompleted Address widget to your form. Here’s what the widget would look like in your form:
Notes
- To change the appearance of the widget, particularly the address box, you can inject custom CSS into the Custom CSS tab in the Widget Settings. You can check out our guide on How to Inject CSS Codes to Widgets to learn more.
- You can also configure widget properties, such as alignment, labels, size, visibility, and more, to control how it looks and behaves on your form. Check out our guide on How to Access and Configure the Question Properties of a Widget to learn more.

Send Comment:
1 Comment:
June 27, 2026
Really wish we could use this widget because I love it setting it up and using it.
However,
The autocomplete address widget does not use plain text when connecting it to our table.
It would be more useful for the clients if we didn't have to press the add+ button in the tables to populate the address but rather have a plain text from the widget.
That way we can sift through the data from our csv on our end if need be.
Just a recommendation that I saw.