Jotform’s Data Grid widget enables you to add a fully customizable, spreadsheet-style table directly into your form—no coding required. You can populate it with static data like product codes, service pricing, conference schedules, or replacement parts lists. With built-in, searchable, sortable columns, it gives your users a quick, intuitive way to find the information they need while completing the form.
Here are a few ways to use it:
- Display pricing plans or service tiers inside an order form for easy comparison.
- Show a product list with features before users make a selection.
- Present event schedules, agendas, or program lineups for reference.
- Include a fee breakdown, so respondents understand costs before submitting.
- Provide a list of required documents or submission guidelines.
- Show membership benefits side-by-side for clarity.
- Display shipping rates, turnaround times, or delivery options.
- Present grading criteria or scoring rubrics in application forms.
- Outline package inclusions for tours, services, or bundles.
- Share policy details, coverage comparisons, or terms in a structured format.
- And more!
Whether you’re creating a new form or updating an existing one, you can add and set up the Data Grid on your form in a few easy steps. Here’s what to do:
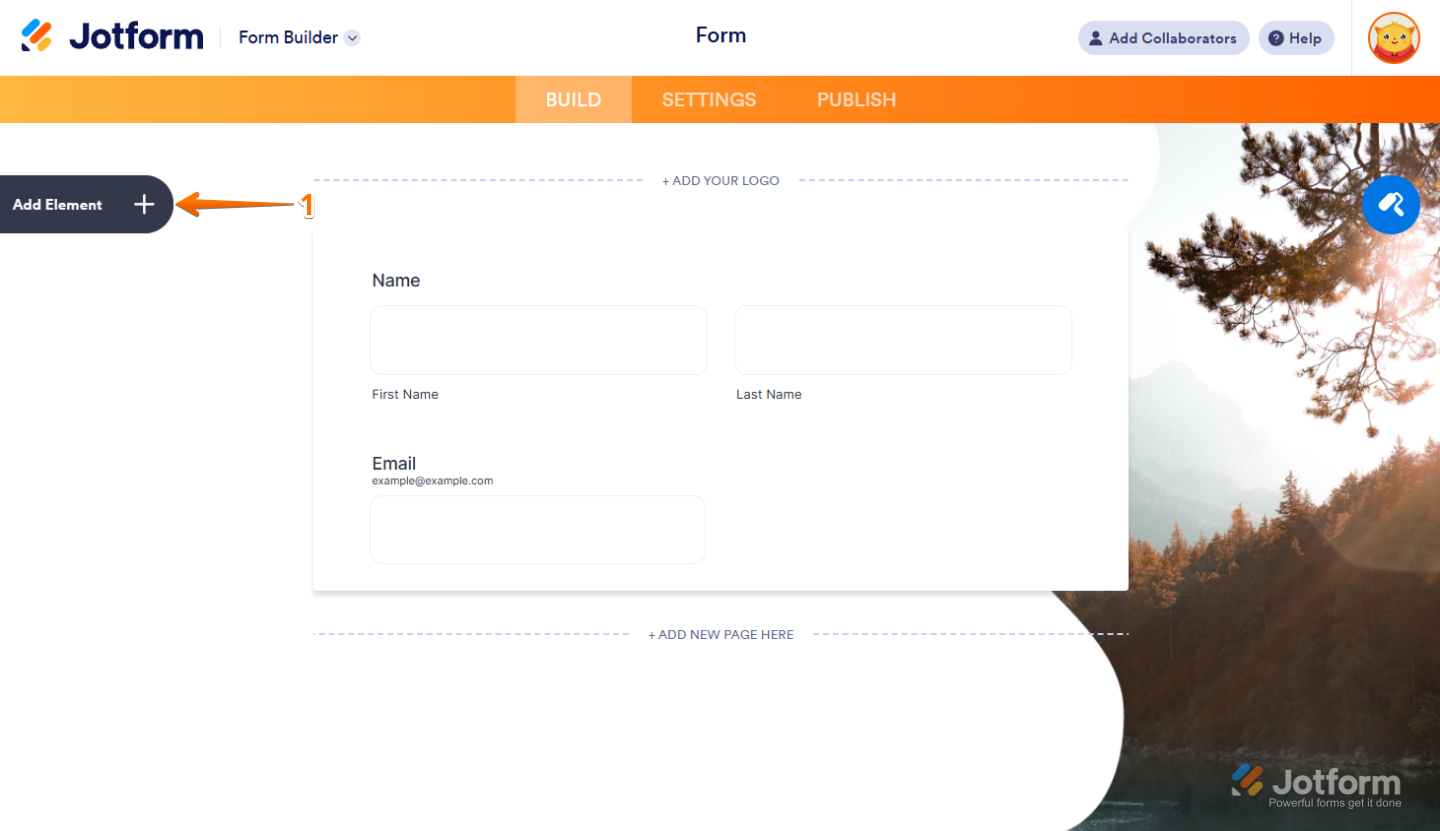
- In Form Builder, click on Add Element on the left side of the page.
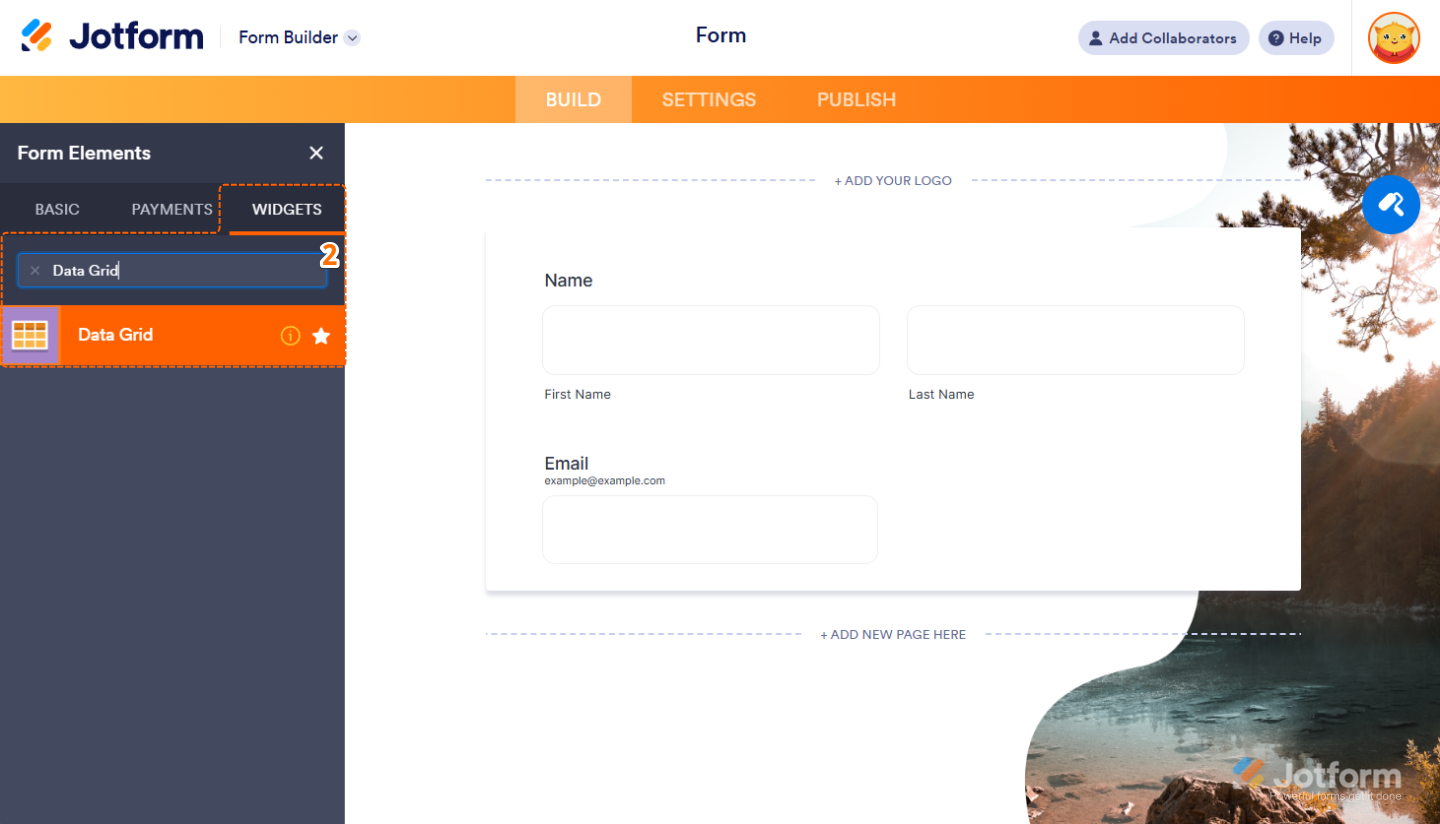
- Now, in the Form Elements menu, under the Widgets tab, search for Data Grid and click on it. Or just drag and drop it to where you want it on your form.
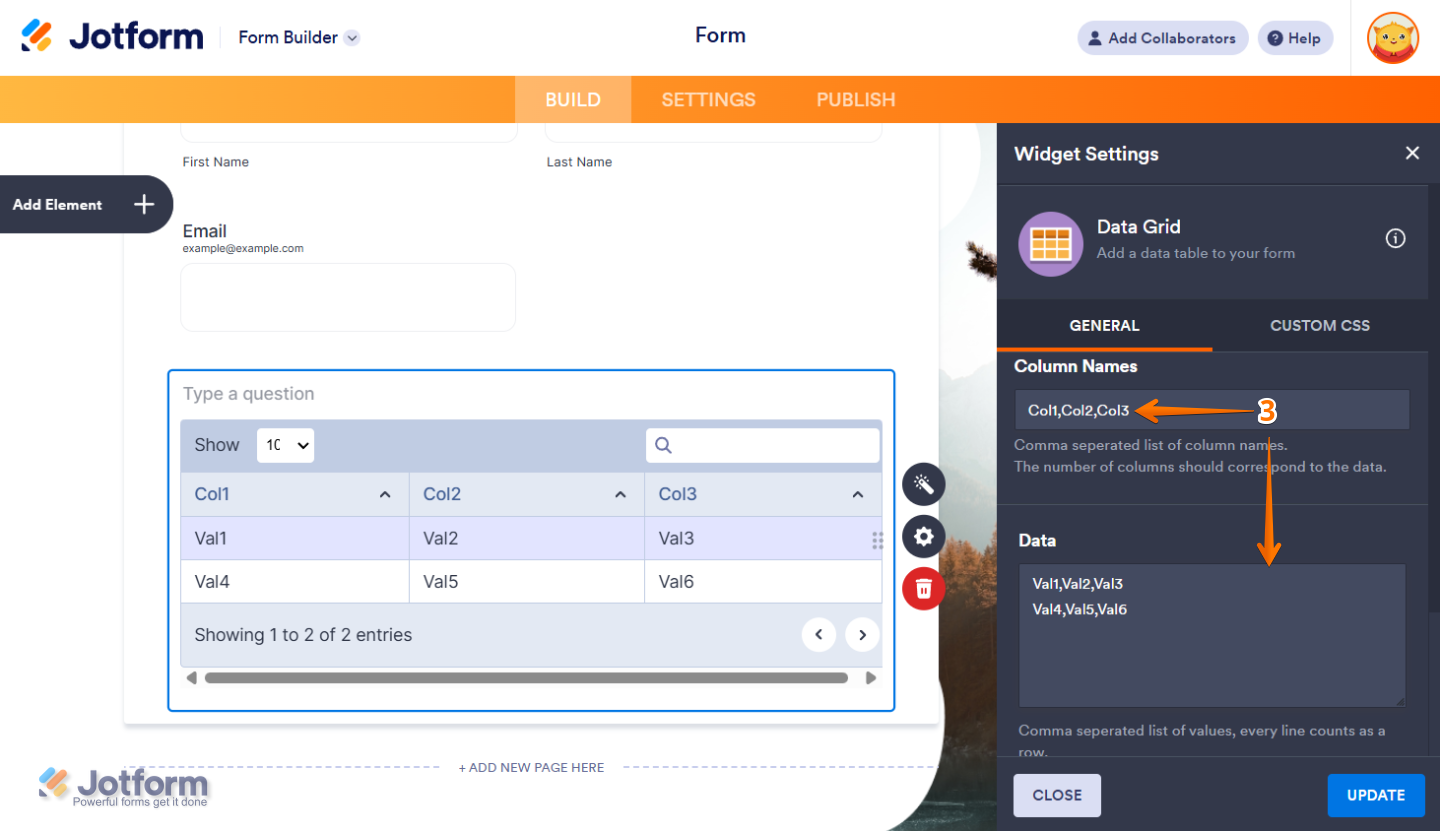
- Next, in the Widget Settings menu that opens on the right side of the page, under the General tab, you can configure the following:
- Column Names — Enter a comma-separated list of column names.
- Data — Enter a comma-separated list of values. Every line counts as a row, and each comma-separated value will correspond to the columns you set up in the Column Names box.
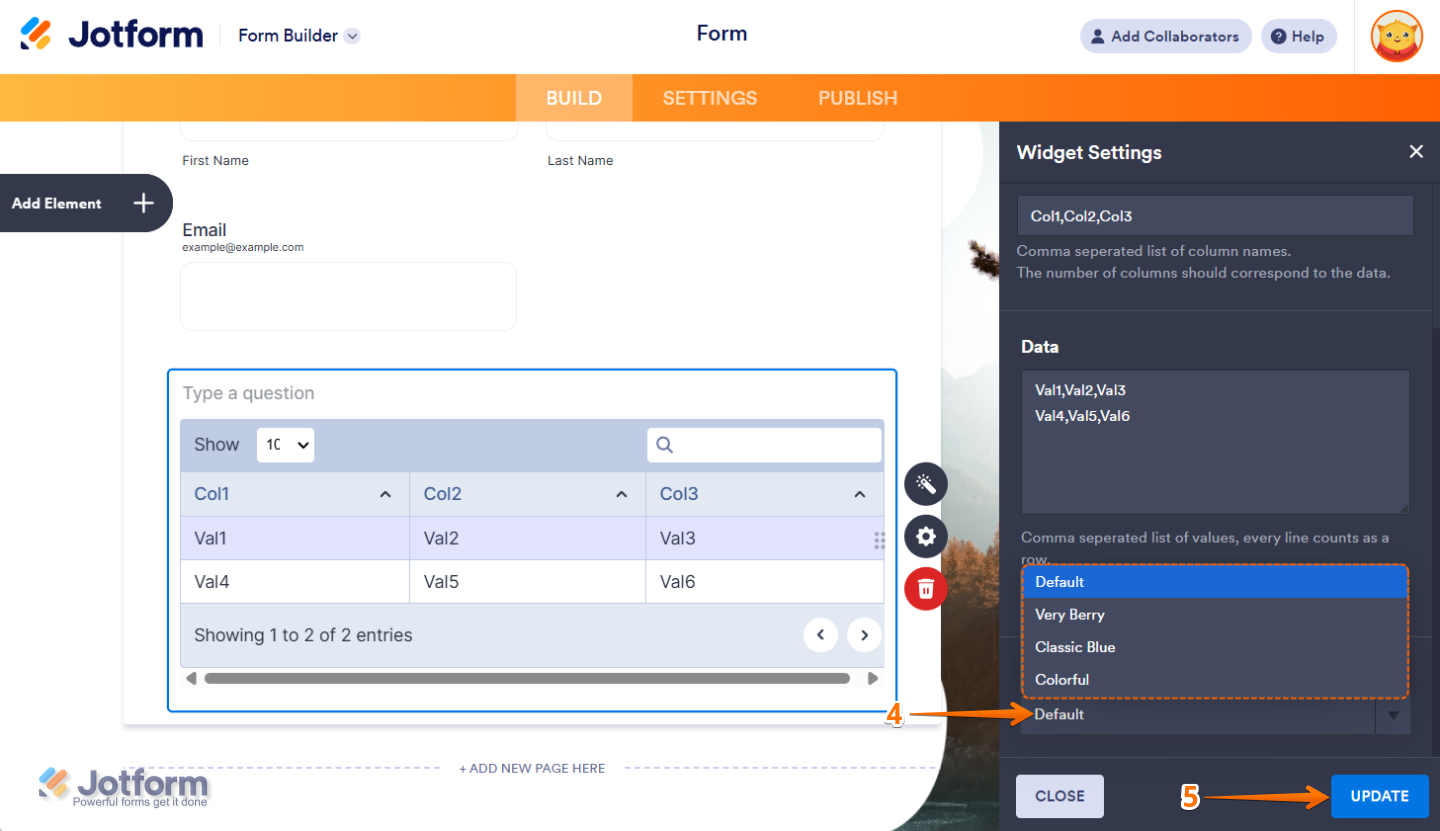
- Then, scroll down to the bottom, and in the Theme dropdown menu, select your preferred grid design.
- Once you’re done, click on Update.
That’s it. You’ve successfully added and set up the Data Grid widget on your form. You can explore how it looks with this demo form.
Notes
- For advanced styling of the Data Grid widget, you can add your own custom CSS code under the Custom CSS tab in the Widget Settings. Our guide on How to Inject CSS Codes to Widgets walks you through everything.
- You can also configure the widget properties, like alignment, labels, size, visibility, and more, to control how it looks and behaves on your form. Check out our guide on How to Access and Configure the Question Properties of a Widget to learn more.

Send Comment: