Jotform’s Date Reservation widget lets you set up a calendar-based booking system directly within your form, making it ideal for scheduling appointments, event registrations, or rental reservations. It prevents double-bookings by automatically disabling selected dates, ensuring availability is always up to date. This widget is especially useful for businesses, service providers, and organizers who need a simple, user-friendly way to manage date-specific entries.
Here are a few ways to use it:
- Let customers book available appointment or consultation dates.
- Allow clients to reserve rooms, venues, or rental spaces.
- Enable hotel or accommodation date reservations with blocked-out availability.
- Manage equipment or vehicle rental scheduling.
- Let users reserve photography or event service dates.
- Allow schools to schedule campus visits or facility use.
- Enable businesses to accept reservations for workshops or classes.
- Manage coworking space or meeting room bookings.
- Allow customers to select available delivery or installation dates.
- Prevent double bookings by automatically blocking reserved dates.
Whether you’re creating a new form or updating an existing one, you can add and set up the Date Reservation widget on your form in a few easy steps. Here’s how to get going:
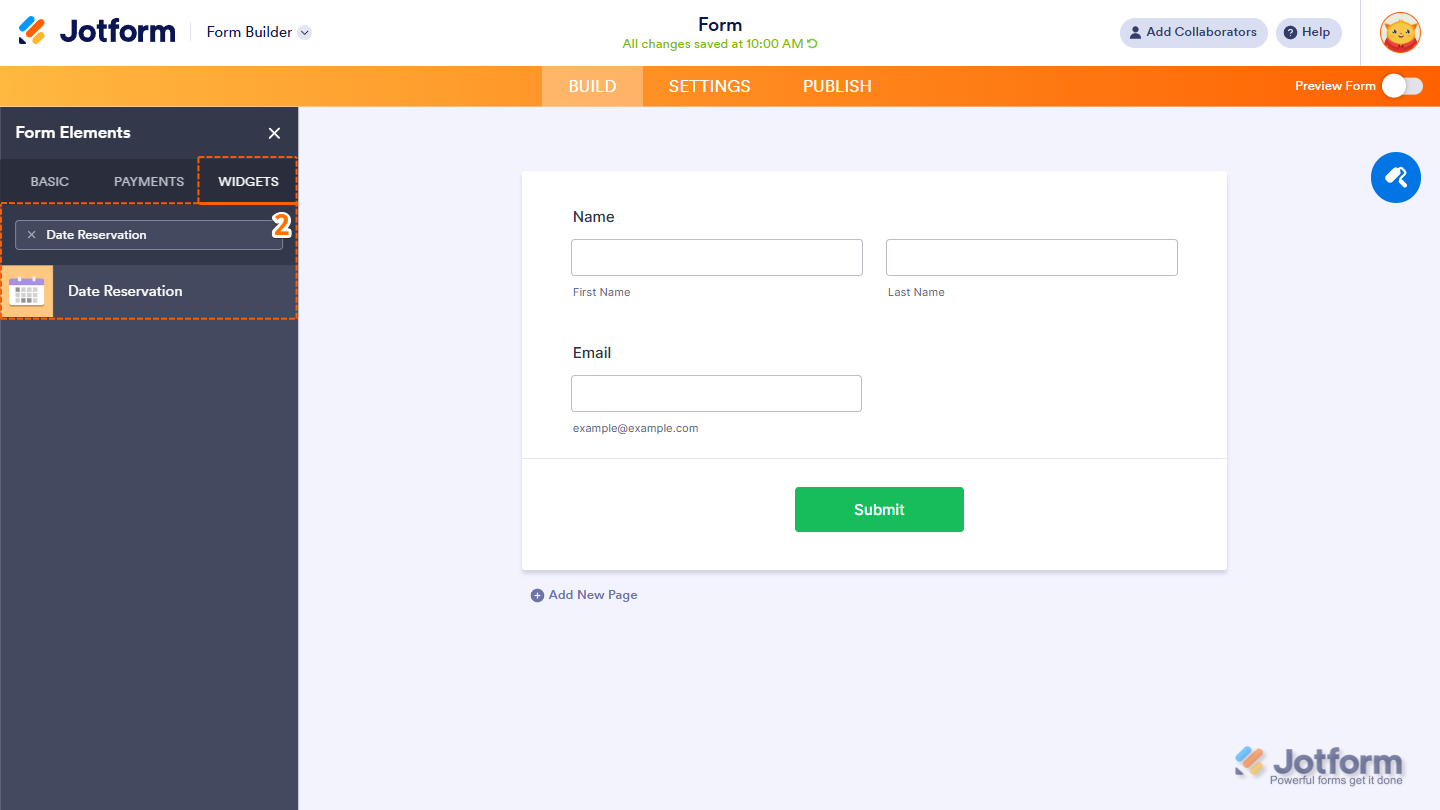
- In Form Builder, click on Add Element on the left side of the page.

- Now, in the Form Elements menu, under the Widgets tab, search for Date Reservation and click on it. Or just drag and drop it to where you want it on your form.
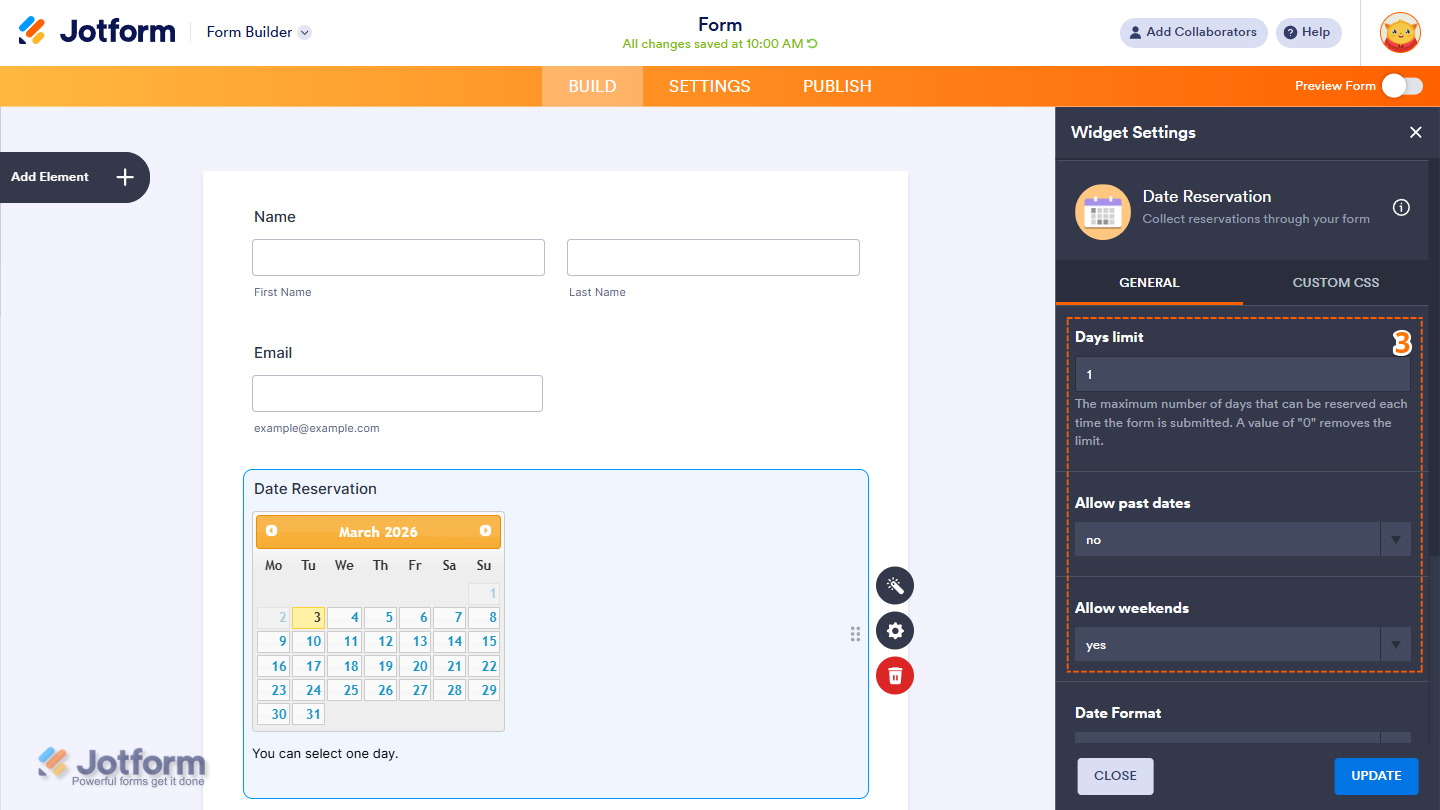
- Next, in the Date Reservation Widget Settings menu that opens on the right side of the page, under the General tab, set up the following options:
- Days Limit — Set the maximum number of days a user can reserve per submission. Enter ‘0’ to allow unlimited reservations.
- Allow Past Dates — Choose Yes to let users select past dates, or No to restrict selections to today and future dates only.
- Allow Weekends — Choose Yes to let users select Saturdays and Sundays, or No to prevent weekend dates from being selected.
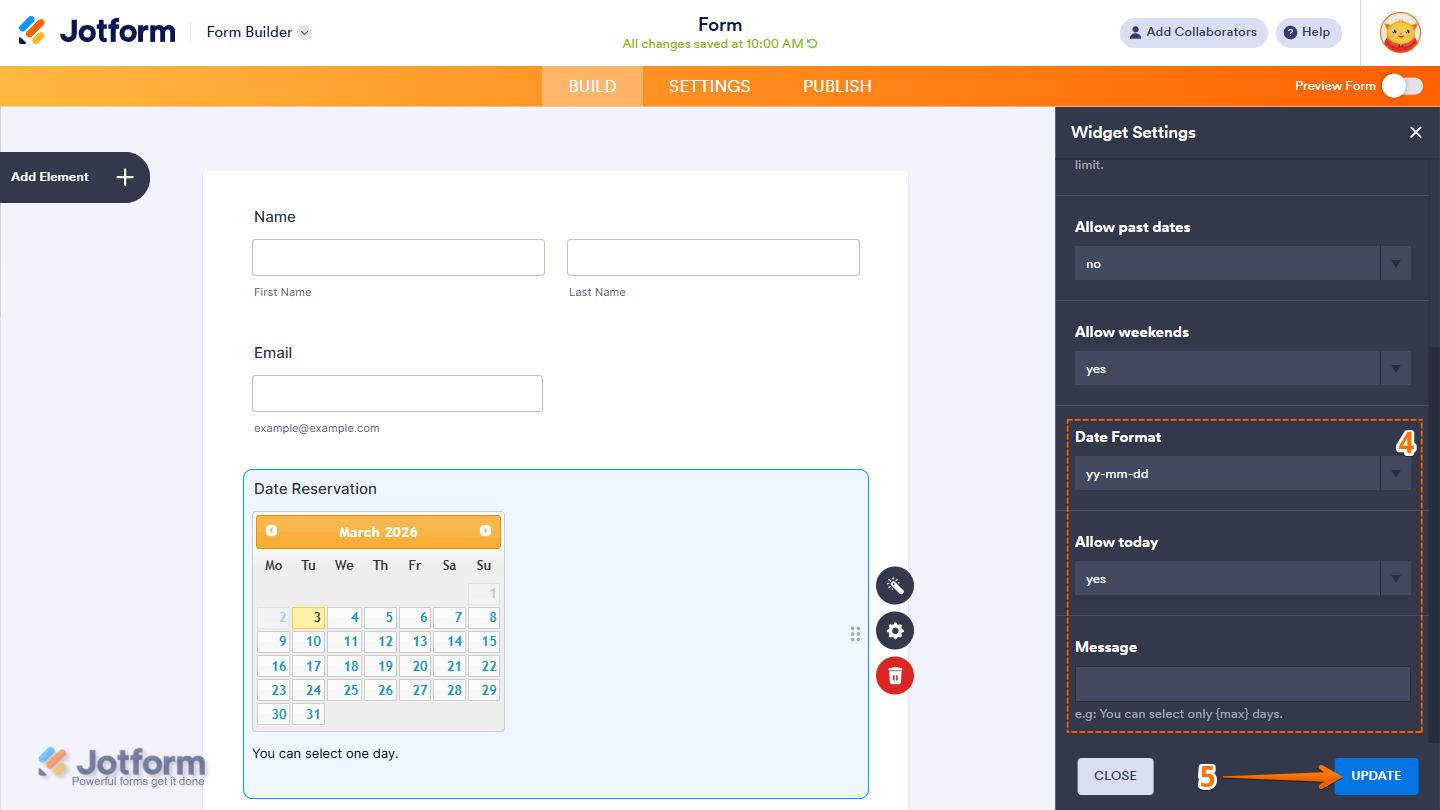
- Then, scroll down to the bottom and continue to set up these settings:
- Date Format — Choose your desired date format from the dropdown to control how dates are displayed in the calendar.
- Allow Today — Choose whether users can select the current date in the calendar.
- Message — Customize the message shown to users when they attempt to reserve a date beyond the allowed range.
- Once your changes are complete, click on Update.
That’s it! You’ve now successfully added and set up the Date Reservation widget to your form. See it live for yourself—here’s a Demo Form.
Notes
- To make a specific date available again on the calendar, delete the submission associated with that date.
- For advanced styling of the Voice Recorder widget, you can add your own custom CSS code under the Custom CSS tab in the Widget Settings. Our guide on How to Inject CSS Codes to Widgets walks you through everything.
- You can also configure the widget properties, like alignment, labels, size, visibility, and more, to control how it looks and behaves on your form. Check out our guide on How to Access and Configure the Question Properties of a Widget to learn more.

Send Comment: