Jotform’s Dates Difference widget helps you easily track how many days are between two selected dates, no manual calculations needed. Whether you’re building a booking form, leave request, or any form that requires date range calculations, this widget helps you capture the time difference with ease.
Here are a few ways to use it:
- Track Age Automatically — If you need to know how old someone is, just have them enter their birthdate, and the widget can instantly calculate their age without you lifting a finger.
- Perfect for Reservations and Bookings — Use it to figure out the length of a hotel stay, car rental, or event booking by calculating the days between check-in and check-out.
- Simplify Loan or Membership Applications — If you need to calculate durations (like loan terms or membership periods), this widget makes it quick and accurate.
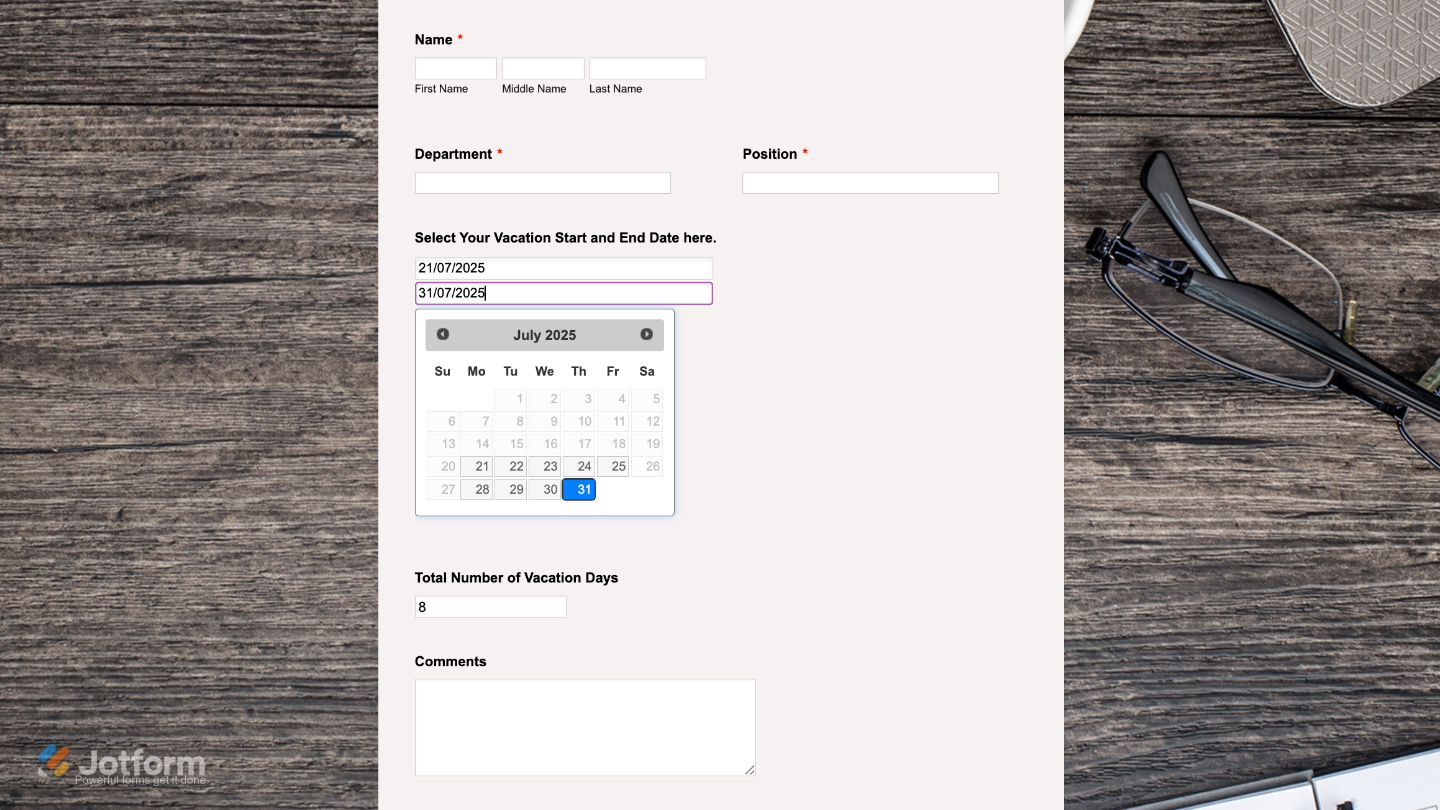
- Great for HR and Leave Requests — Employees can enter their start and end dates for vacation, and the widget will automatically show how many days off they’re requesting.
Notes
- It comes with two built-in calendar pickers, one for the start date and another for the end date.
- The widget works great with the Form Calculation widget when you want to include the number of days in a total, like computing durations.
Adding and Setting Up the Dates Difference Widget
Let your users pick a start and end date using two calendar fields, and the Dates Difference widget will instantly calculate the number of days in between, quick and hassle-free. It only takes a minute to set up—here’s how:
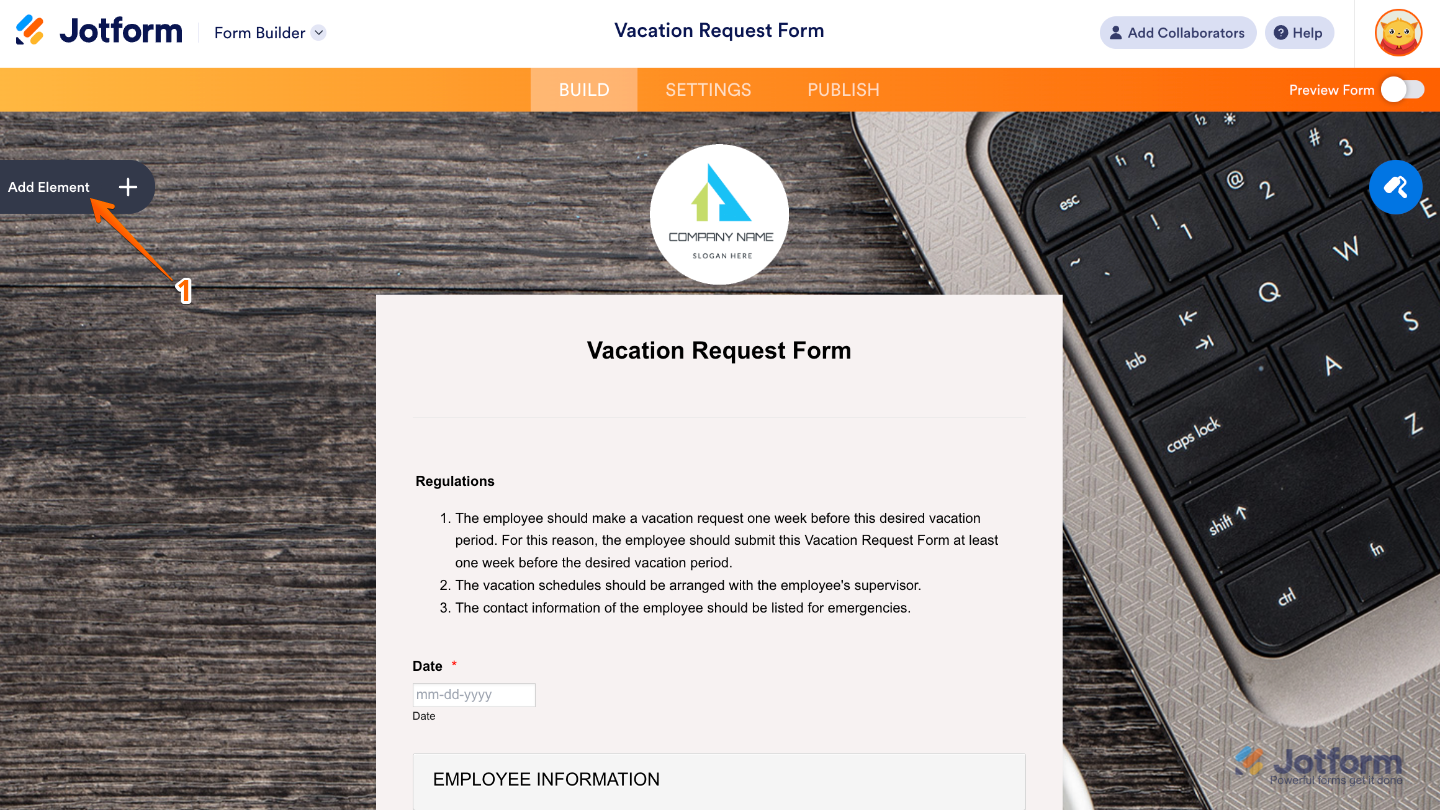
- In Form Builder, click on Add Element on the left side of the page.
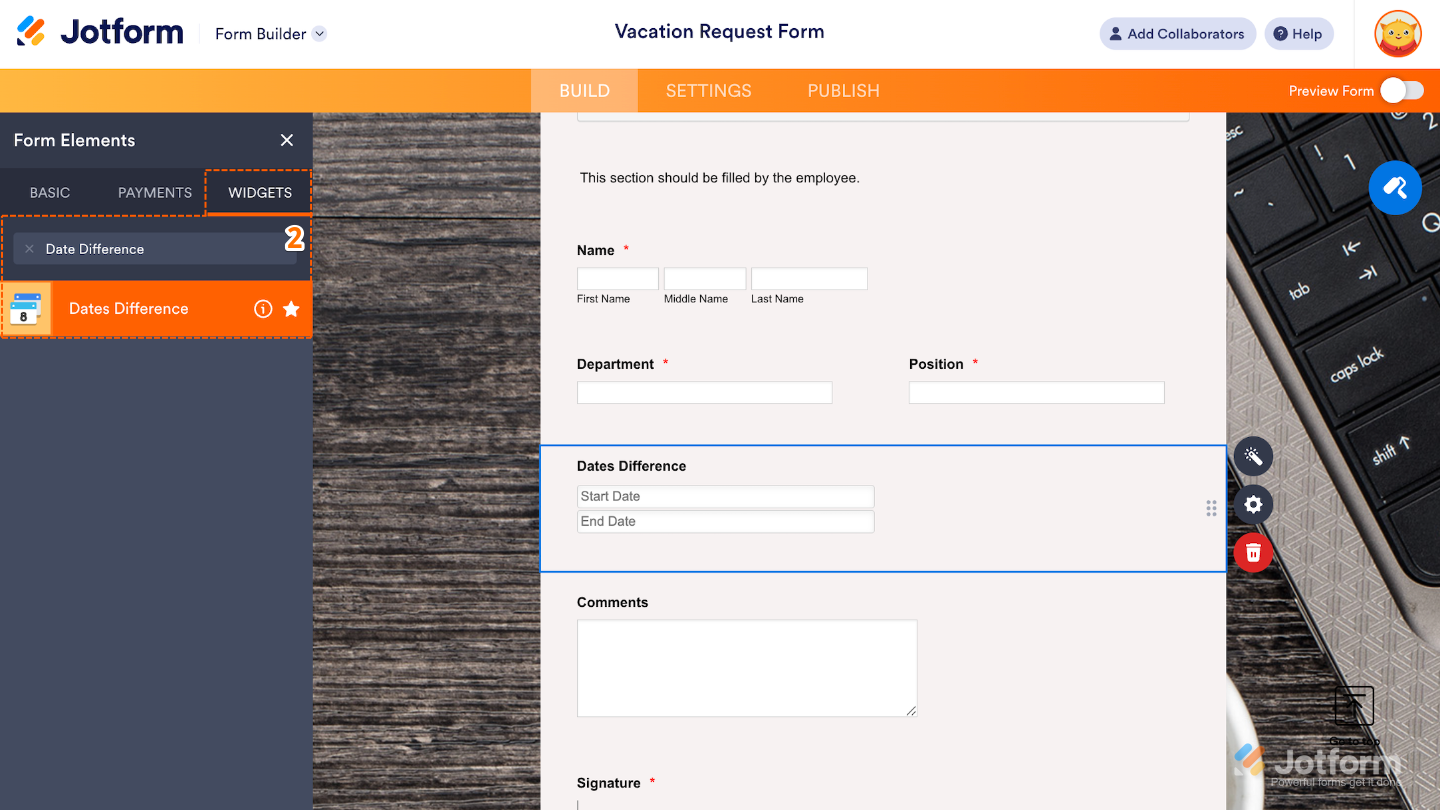
- Now, in the Form Elements menu, under the Widgets tab, search for Dates Difference and then click on it. Or, just drag and drop it to where you want it to be on your form.
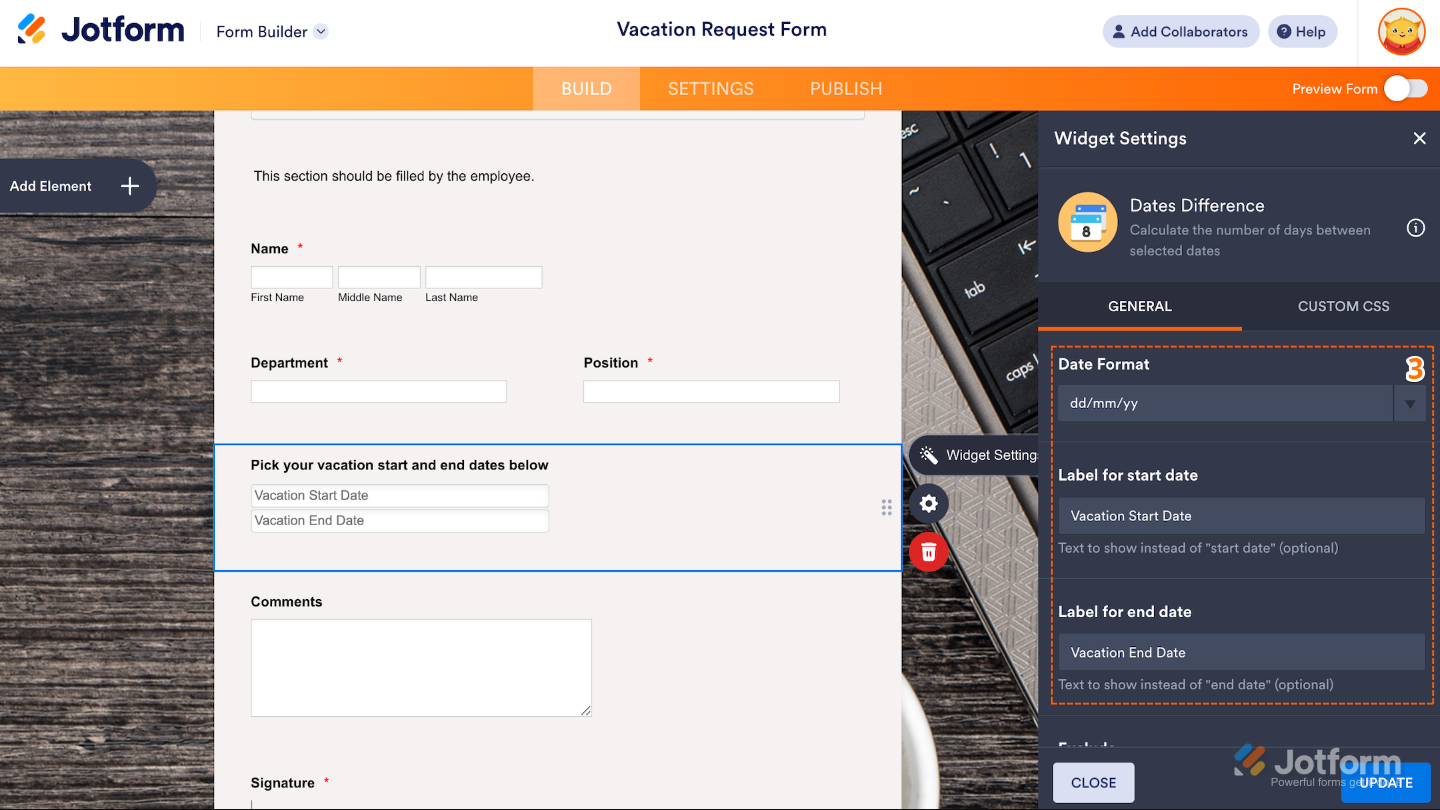
- Next, in the Widget Settings window that opens on the right side of the page, set up the following options:
- Date Format — Choose how the dates will appear in the form (yy-mm-dd, mm/dd/yy, dd/mm/yy, or dd.mm.yy) so it matches your regional preference or audience’s familiarity.
- Label for start date — Edit this to customize the grey text shown within the start date picker field.
- Label for end date — Set this up to personalize the grey text shown within the end date picker field.
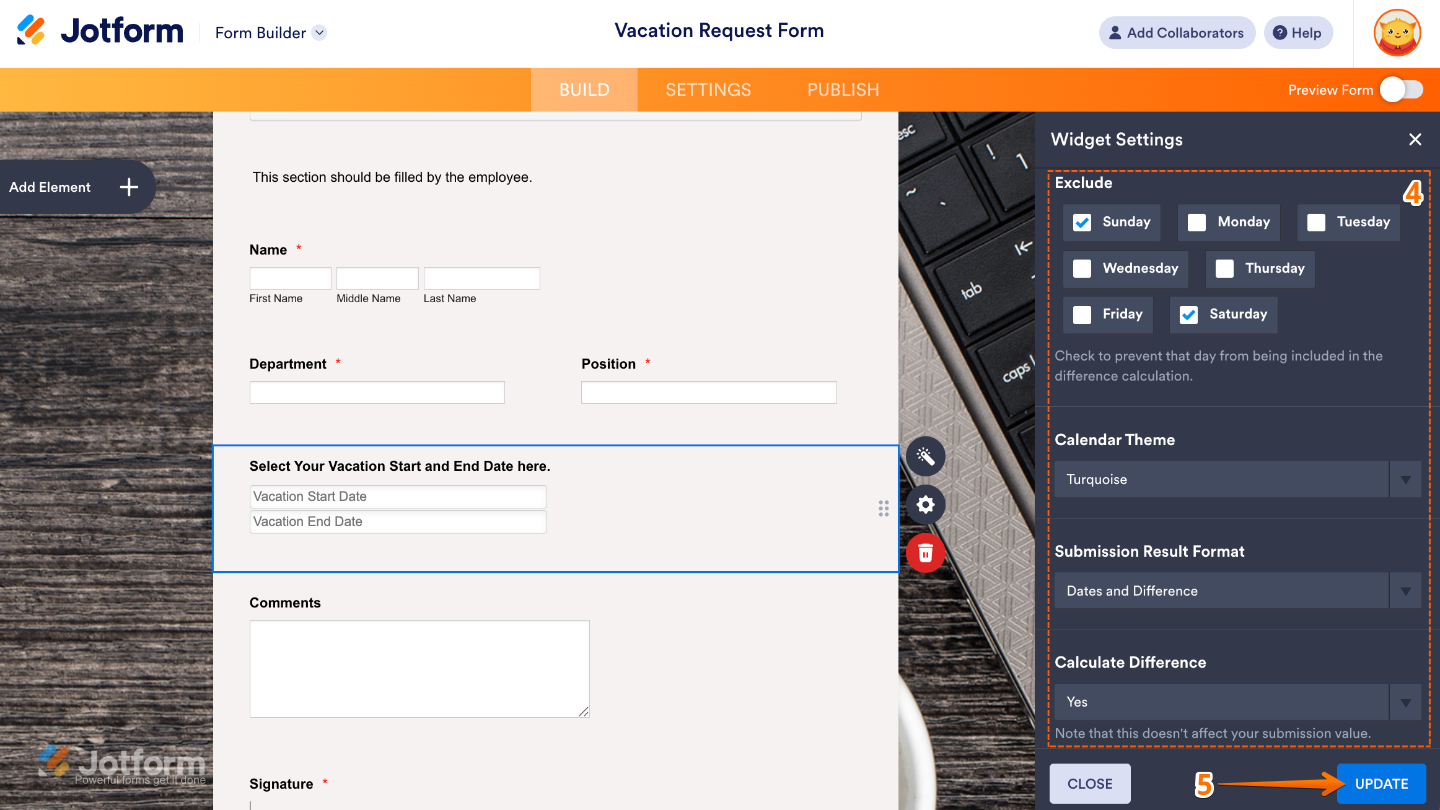
- Then, scroll down to the bottom and continue to set up these options:
- Exclude — Simply tick the checkboxes next to the days you’d like to exclude from the date calculation.
- Calendar Theme — Choose a visual style for the date pickers that will help match the widget’s look with your form’s overall design.
- Submission Result Format — Select an option to determine how the calculated result will be displayed in the submission.
- Calculate Difference — When you select “Yes,” the field will work seamlessly with the Form Calculation widget. You’ll find more info in our guide on How to Use Jotform’s Form Calculation Widget.
- Once you’re done, click on Update.
That’s it. You’ve successfully added and set up the Dates Difference widget to your form. Now, you have a field in your form that automatically calculates the number of days between two selected dates. Wondering how it looks in action? Check out this Demo Form.
To further customize your Dates Difference field appearance, just click on the Gear icon to open its properties.
Note
For advanced styling, you can add your own custom CSS under the Custom CSS tab in the widget settings and style the Dates Difference field. Our guide on How to Inject CSS Codes to Widgets walks you through everything.

Send Comment: