With Jotform, you can easily add Fill in the Blank Element to your form, allowing users to complete sentences by typing their answers into designated fields. This makes your form more interactive while helping you collect structured responses.
Here are a few ways to use it:
- Create fill-in-the-blank questions for quizzes or forms.
- Let users complete sentences with their own answers.
- Collect structured yet flexible responses.
- Add interactive elements to your form.
Whether you’re creating a new form or updating an existing one, you can add and set up the Fill in the Blank element in a few easy steps. Here’s how to do it:
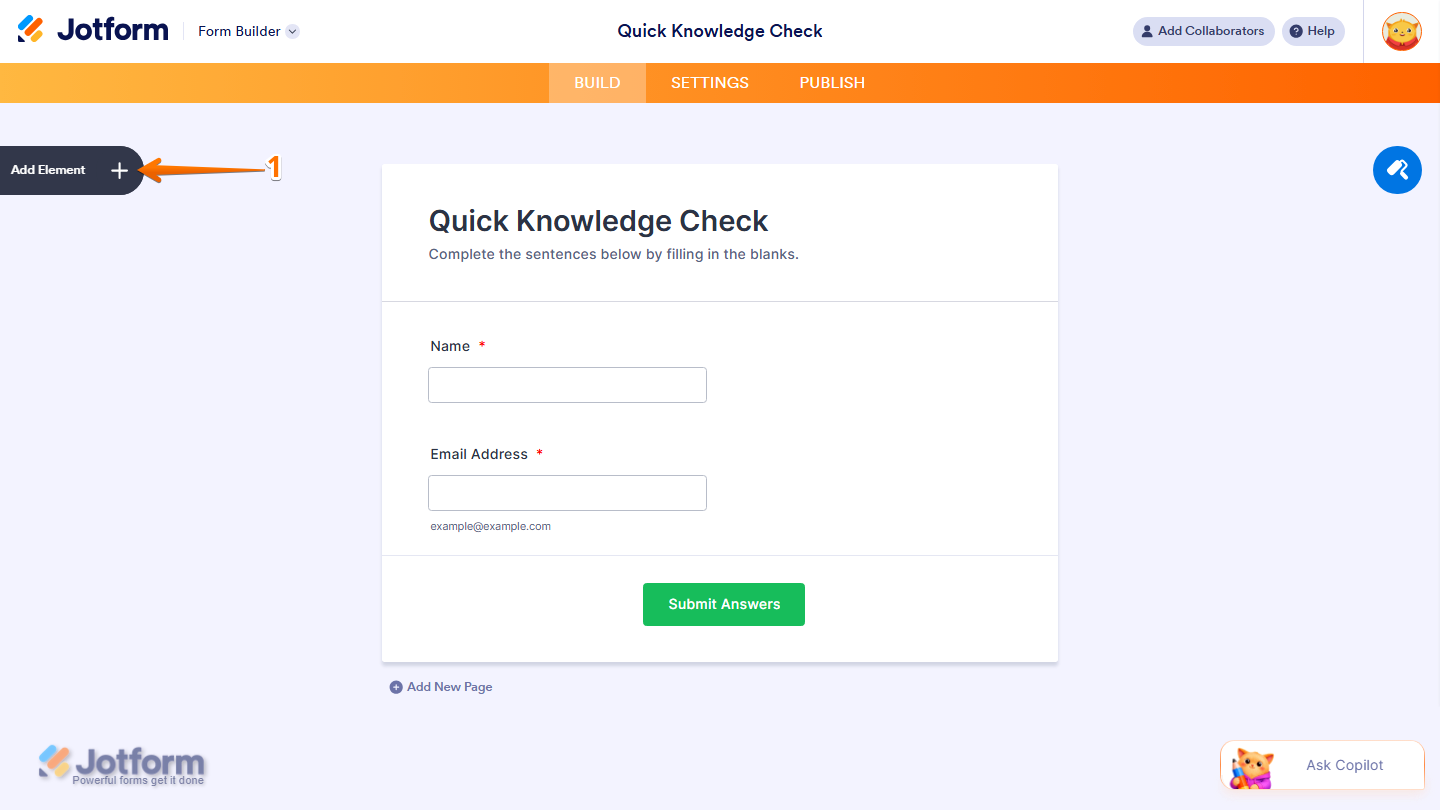
- In Form Builder, click on Add Element on the left side of the page.
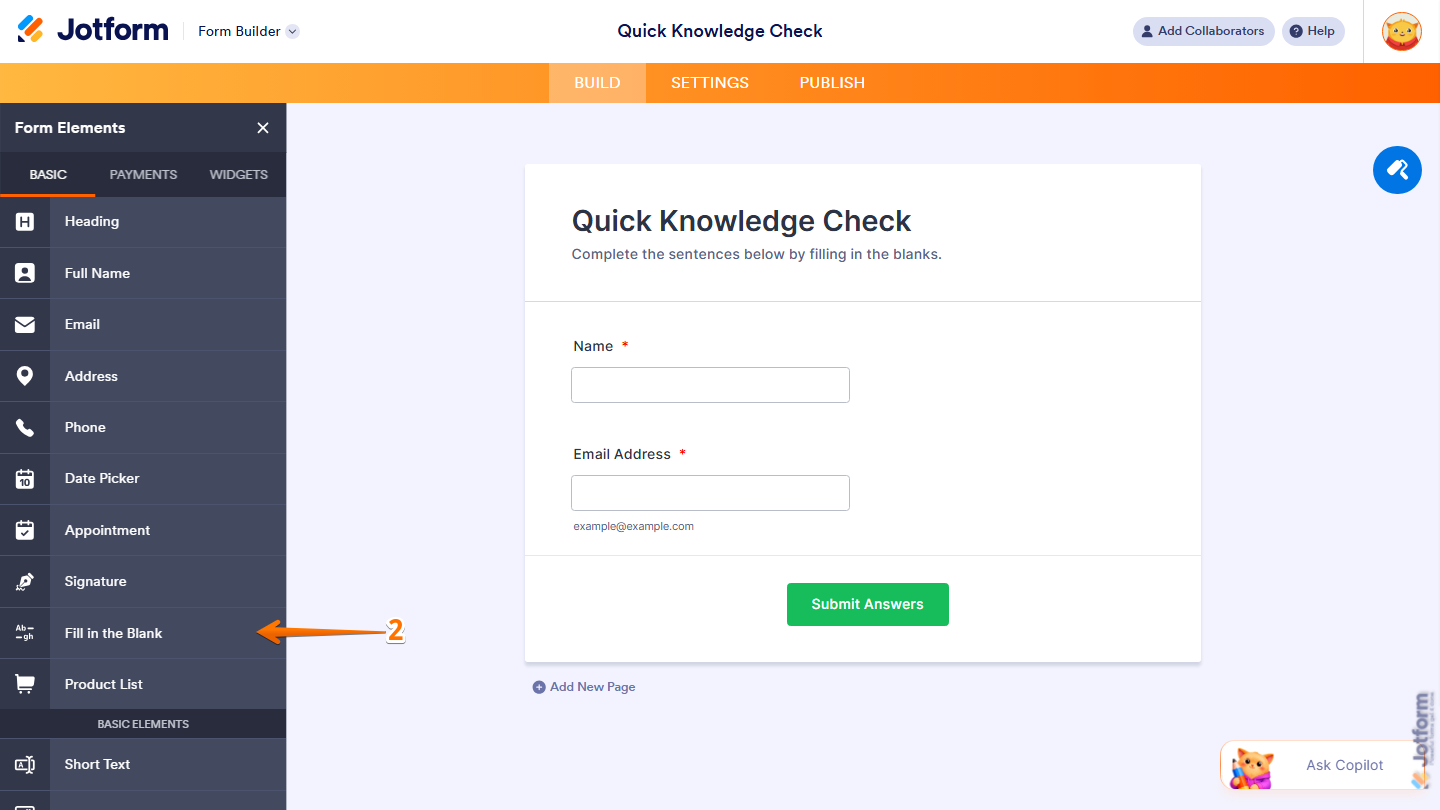
- Now, in the Form Elements menu, under the Basic tab, click on Fill in the Blank Element. Or, just drag and drop it to where you want it to be on your form.
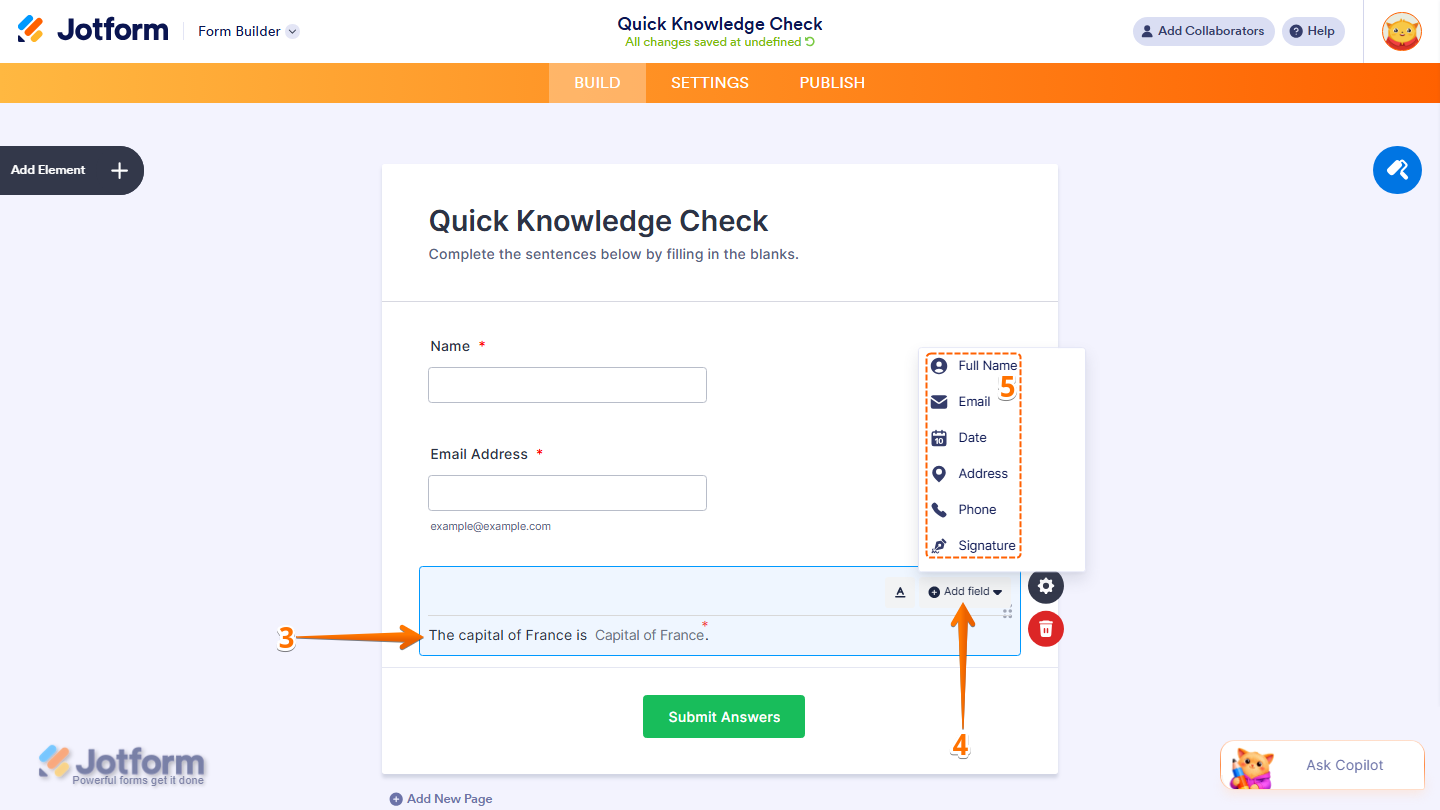
- Next, in the element that appears on your form, type your sentence directly in the text area.
- Then, to add a blank field within the sentence, click on the Add Field dropdown.
- Select the type of field you want to insert from the Dropdown menu that opens. The following field types are available:
- Full Name
- Date
- Address
- Phone
- Signature
- Short Text
- Dropdown
- Single Choice
- Multiple Choice
- Number
- Time
- Now, to format your text, click on the Formatting Text icon on the top-right of the element to reveal the text formatting toolbar, and customize the appearance of your text, such as changing the font, size, style, and alignment.

Now that you’ve added the Fill in the Blank Element to your form, you can continue customizing how it looks and behaves through the following tabs in its properties:
General Tab
The General tab includes the basic settings for the Fill in the Blank element. Here’s what to set up:
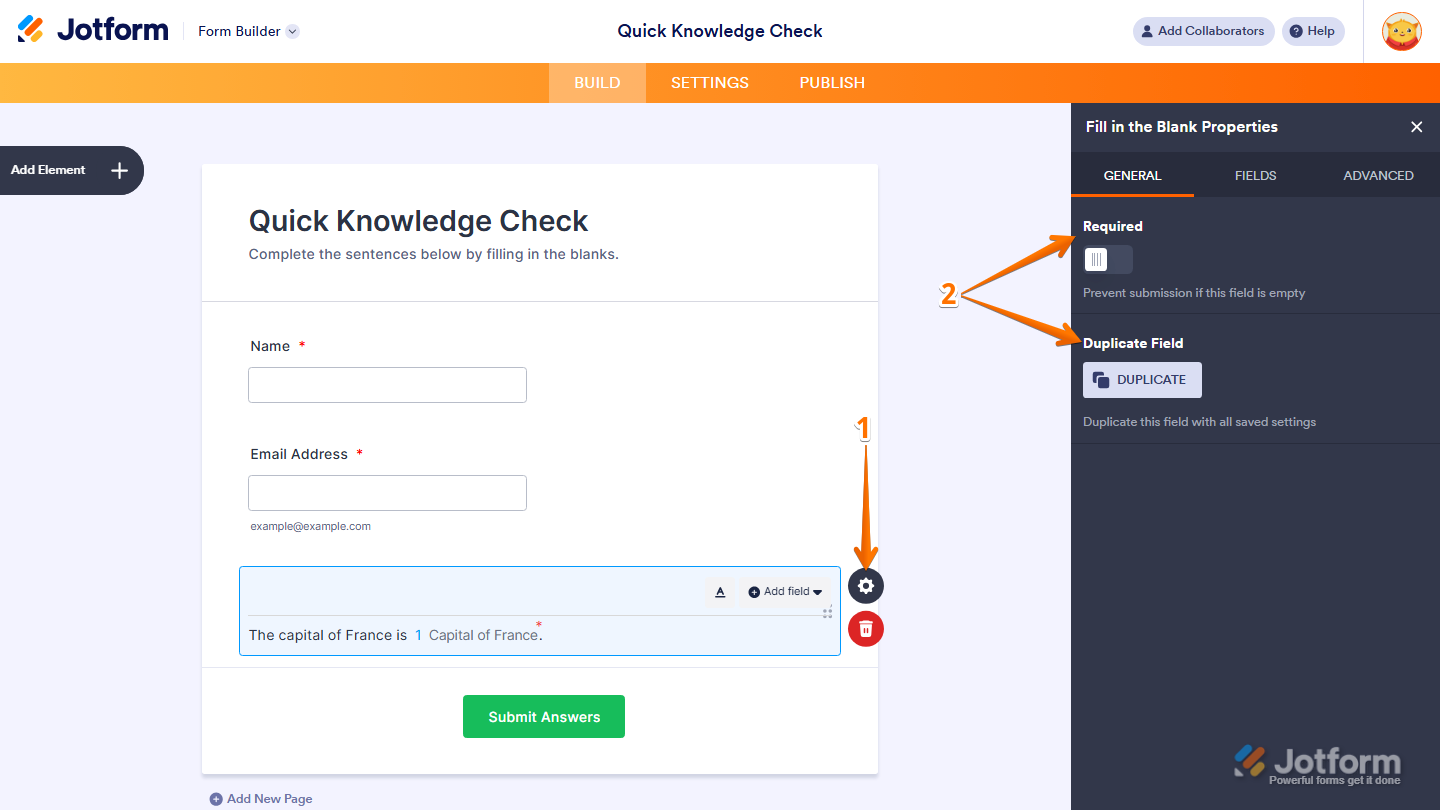
- While you’re in Form Builder, click on the Gear icon on the right side of the Fill in the Blank element to open the Fill in the Blank Properties menu on the right side of the page.
- Then, under the General tab, set up these things:
- Required — Toggle this on to prevent form submission if any blank in the element is left empty.
- Duplicate Field — Click on Duplicate to create a copy of this element with all its saved settings.
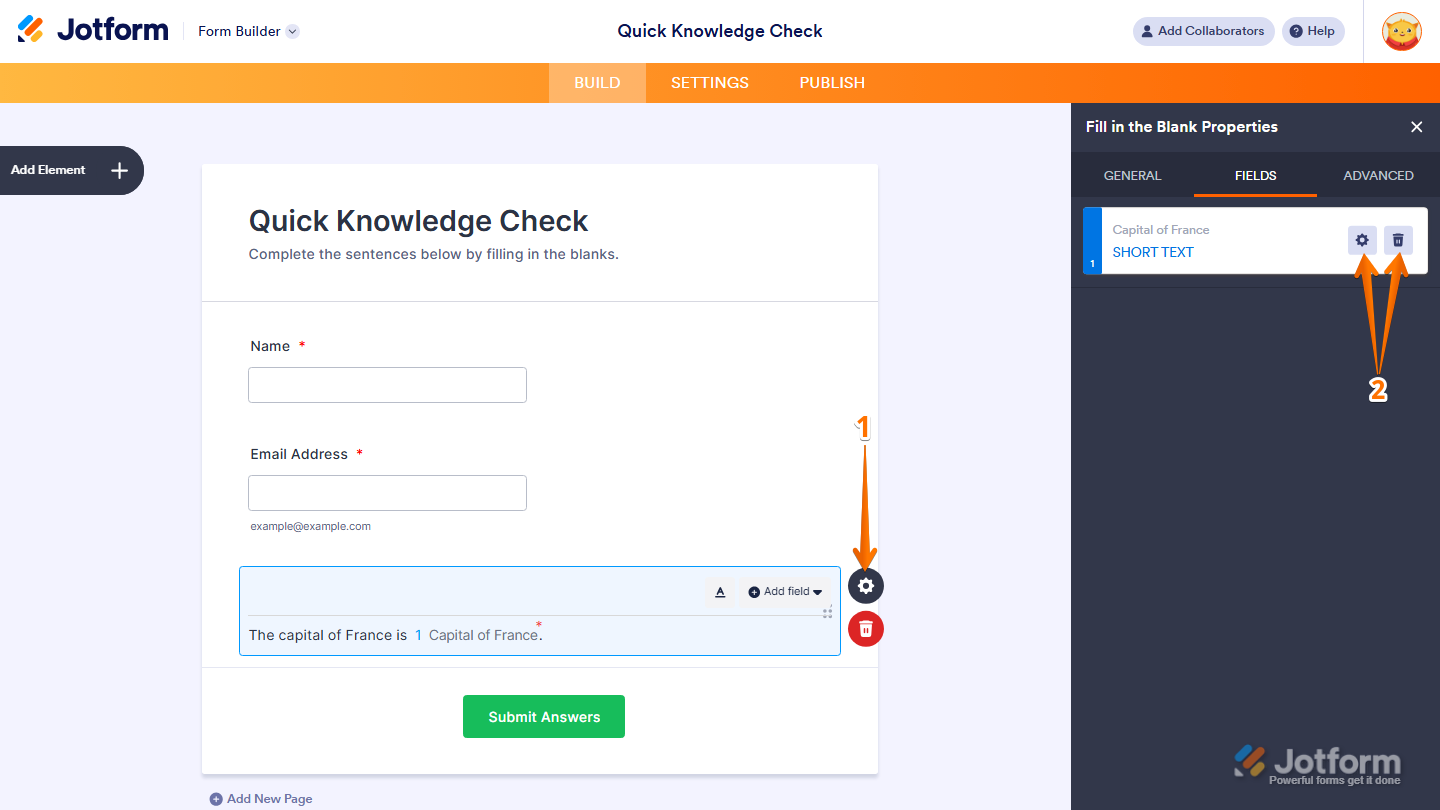
Fields Tab
The Fields tab shows a list of all the blank fields you’ve added to the element. Each field is labeled with its name and type. Here’s what to do next:
- While you’re in Form Builder, click on the Gear icon on the right side of the Fill in the Blank element to open the Fill in the Blank Properties menu on the right side of the page.
- Then, under the Fields tab, you’ll see a list of all the blank fields you’ve added to the element. Hover over a Field to reveal the following options:
- Gear icon — Click on it to edit the Blank Field details.
- Trash icon — Click on it to delete the Blank Field.
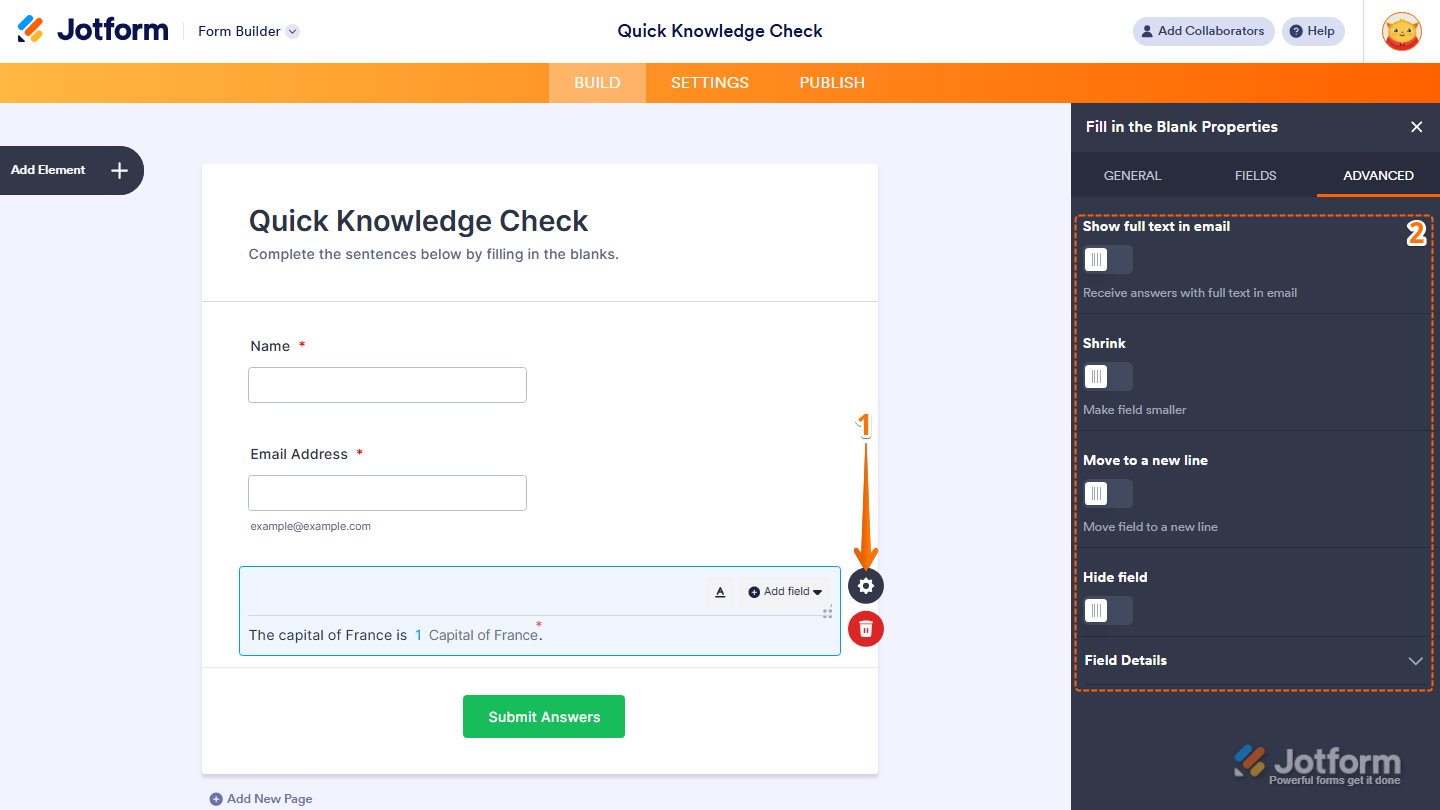
Advanced Tab
The Advanced tab provides additional options to control how the element behaves and appears on your form. Here’s what to configure:
- While you’re in Form Builder, click on the Gear icon on the right side of the Fill in the Blank element to open the Fill in the Blank Properties menu on the right side of the page.
- Then, click on the Advanced tab and configure these things:
- Show Full Text in Email — Toggle this on to include the full sentence with the filled-in answers in your email notifications.
- Shrink — Toggle this on to make the element smaller in size.
- Move to a New Line — Toggle this on to move the blank field to a new line within the sentence.
- Hide Field — Toggle this on to hide the element from form fillers.
- Field Details — View additional technical information about the element such as Unique Name and Field IDs.
That’s it! You’ve successfully added and set up the Fill in the Blank element on your form. Once configured, your form is ready to collect structured and interactive responses from your users. You can always revisit the settings to adjust the fields, formatting, or display options as your needs change.
Note
- If your form uses a Card Layout, the Shrink and Move to a New Line options will not be available in the Advanced tab. Need help changing the layout? See our guide on How to Change Your Form Layout.
- Any changes you make to the element are automatically saved.

Send Comment: