Jotform makes it easy to collect multiple entries under a single field with the Infinite List widget. This widget lets users add as many rows of information as they need—perfect for gathering lists of names, items, skills, or any repeating data without cluttering your form. It keeps your form flexible while giving respondents the freedom to provide detailed input.
Here are a few ways to use it:
- Let applicants list their previous jobs or qualifications
- Collect multiple guest names for an event registration
- Gather itemized details for purchase orders
- Allow students to enter several courses or subjects
- And More!
Whether you’re building a new form or editing an existing one, you can add and configure the Infinite List Widget in just a few steps. This is how it’s done:
- In Form Builder, click on Add Element on the left side of the page.

- Now, in the Form Elements menu, under the Widgets tab, search for Infinite List and click on it. Or, just drag and drop it to where you want it to be on your form.

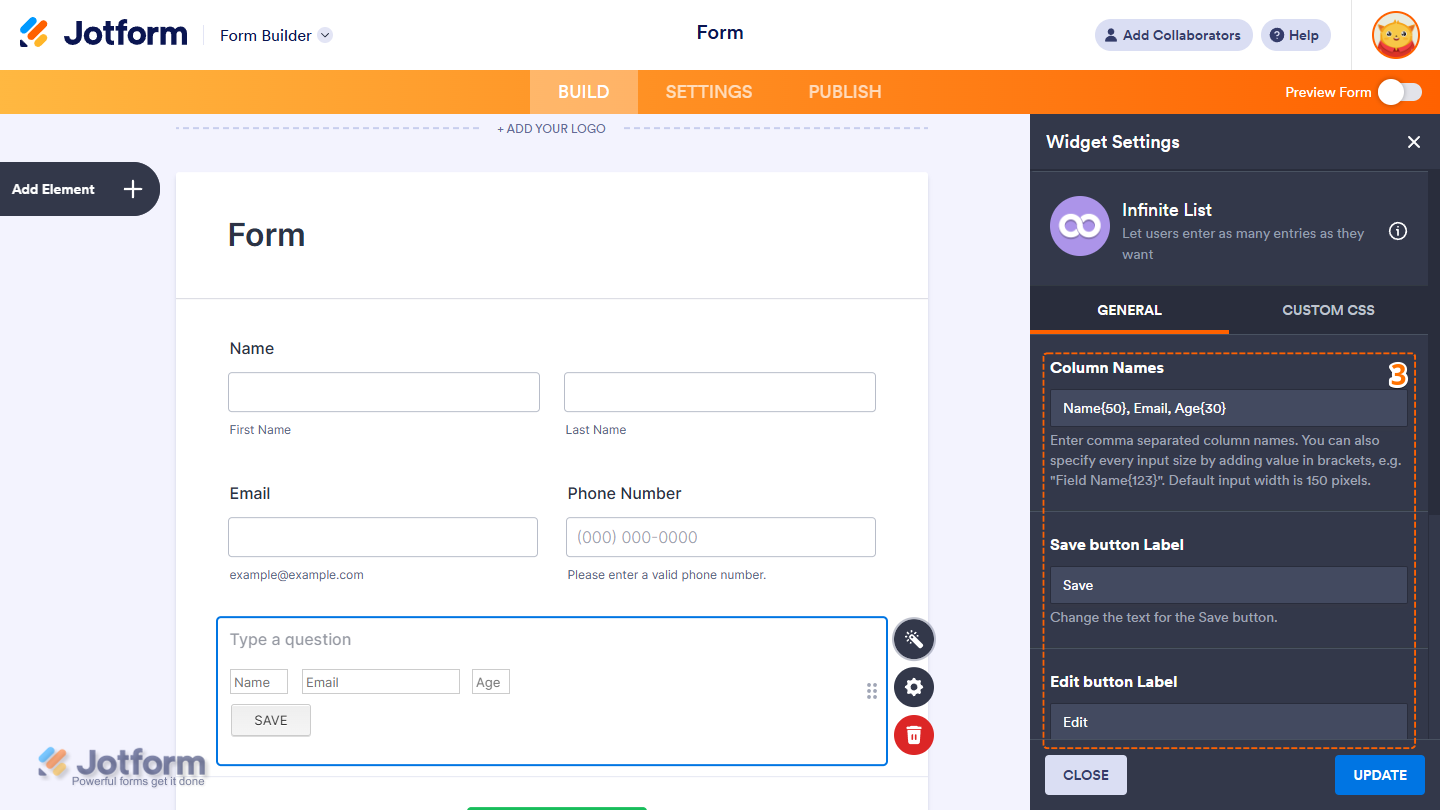
- Next, in the Widget Settings window that opens on the right side of the page, under the General tab, you’ll see this list of settings you can configure:
- Column Names — Delete the Default Values and enter your column names, each on a new line.
- Save Button Label — Change the text for the Save button.
- Edit Button Label — Change the text for the Edit button.
Note
For the Column Names field, just type your column names with commas in between. You can also set the input size by adding a number in brackets, like Field Name{123}. If you don’t add a size, the default width is 150 pixels.
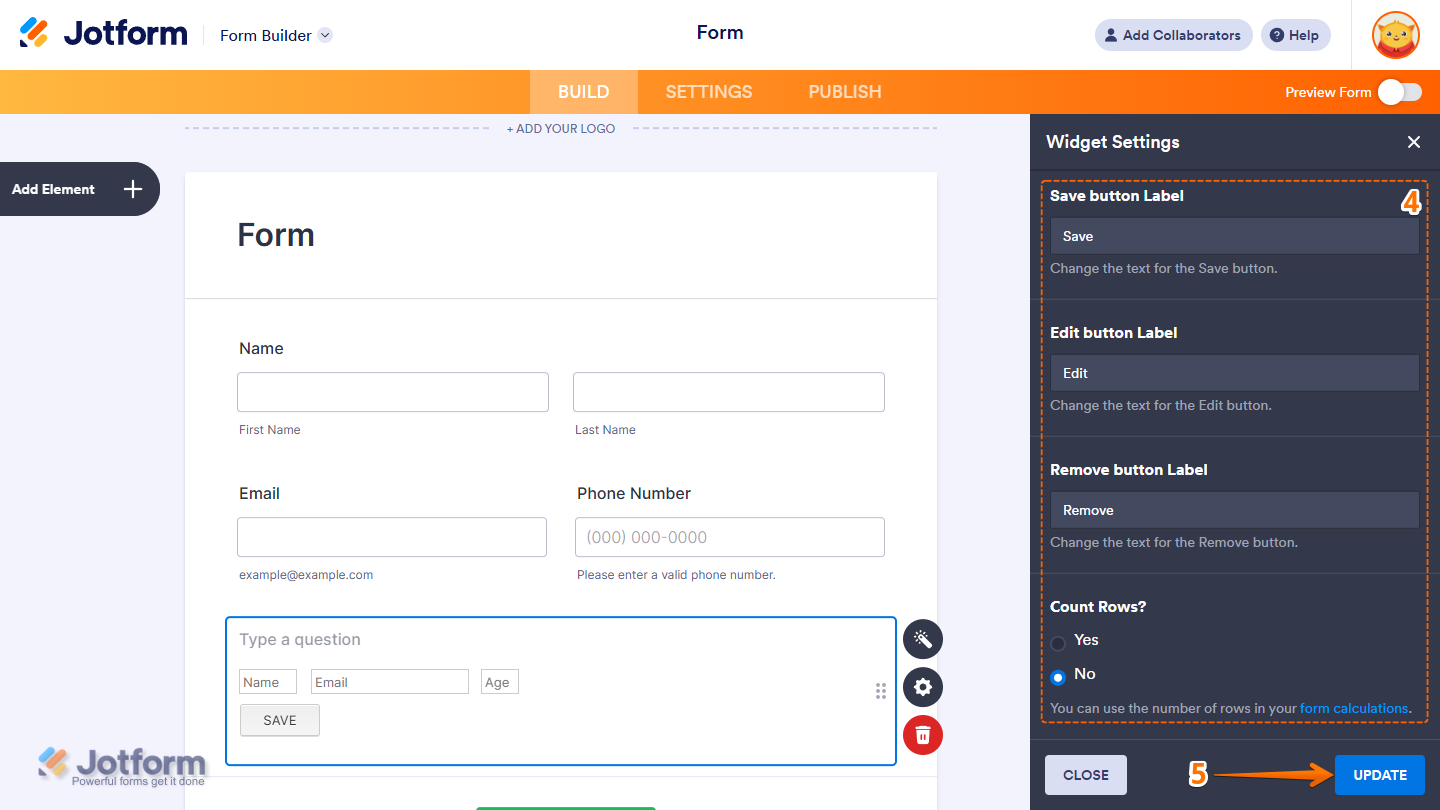
- Then, scroll down to the bottom and continue to set up these settings:
- Remove Button Label — Change the text for the Remove button.
- Count Rows — Turn this on if you want to count the rows and use that number in your form calculations.
- Once everything’s set, click on Update.
That’s it. Now you’ve added and set up the Infinite List widget on your form. You can explore how it looks with this demo form.
Note
- For advanced styling of the Bootstrap Switch Field widget, you can add your own custom CSS code under the Custom CSS tab in the Widget Settings. Our guide on How to Inject CSS Codes to Widgets walks you through everything.
- You can also configure the widget properties, like alignment, labels, size, visibility, and more, to control how it looks and behaves in your form. Check out our guide on How to Access and Configure the Question Properties of a Widget to learn more.

Send Comment: