Jotform makes it easy to manage limited products or spots with the free Inventory widget, letting you add it to your form, enter how many items or seats you have available, and automatically block users from selecting an option once stock has run out so you can avoid overselling products or overbooking events.
Here are a few ways to use it:
- Collect orders for products with limited inventory.
- Sell tickets for events with limited seating.
- Manage volunteer signups with a maximum number of spots per role.
- Gather tour or class registrations that are limited by group size.
Whether you’re starting fresh or updating a form, adding and setting up the Inventory widget takes only a few steps. Here’s a quick how-to:
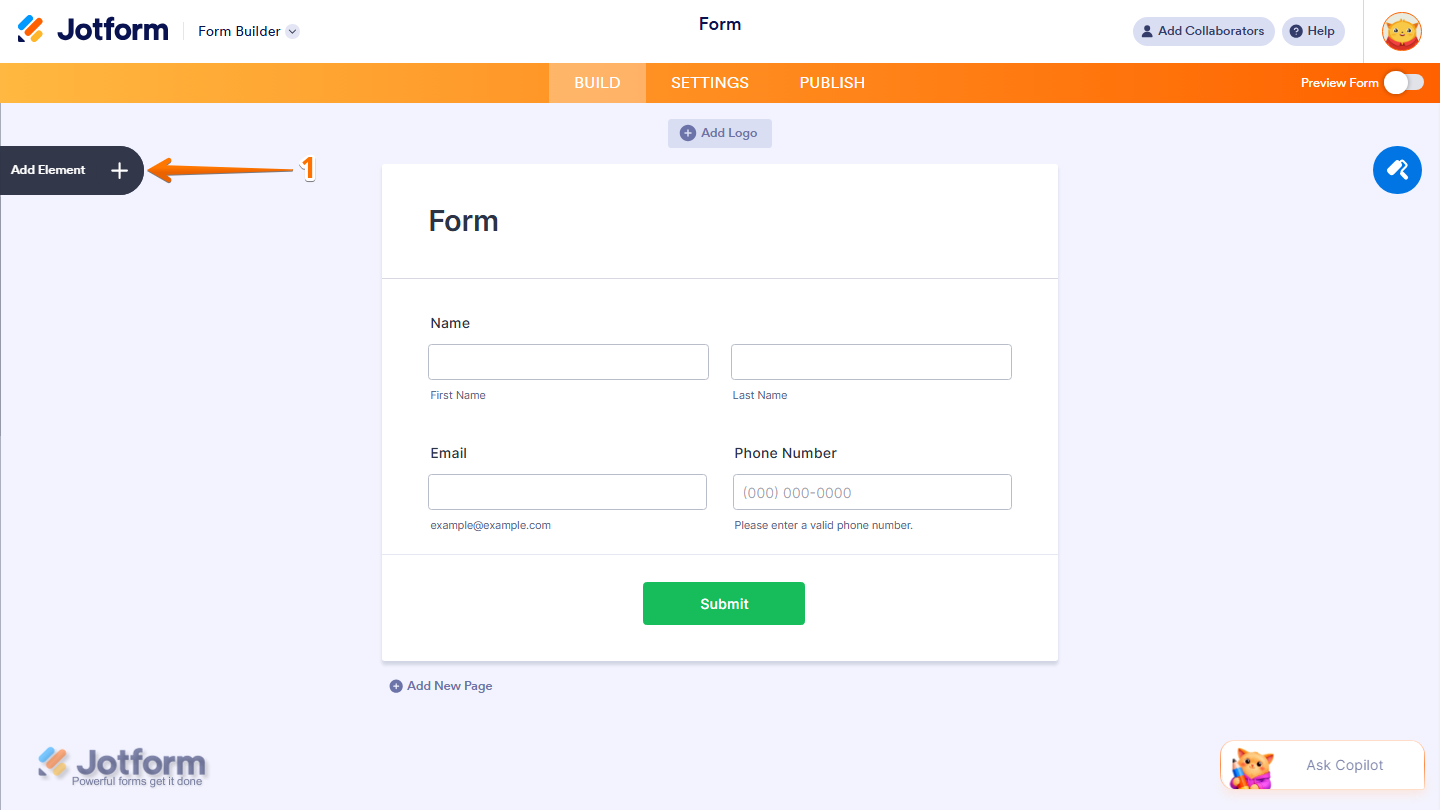
- In Form Builder, click on Add Element on the left side of the page.
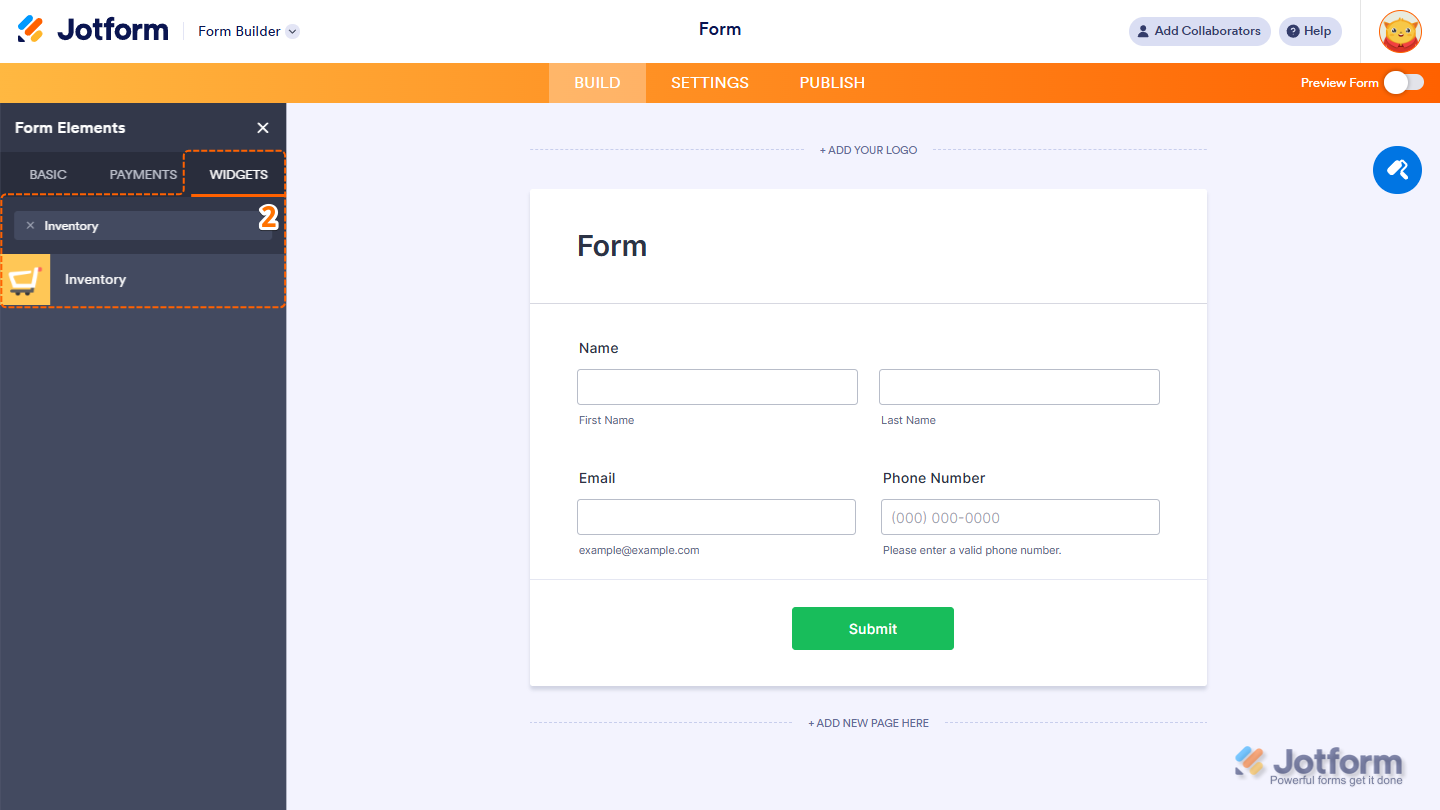
- Now, in the Form Elements menu, under the Widgets tab, search for Inventory and click on it. Or, just drag and then drop it to where you want it to be on your form.
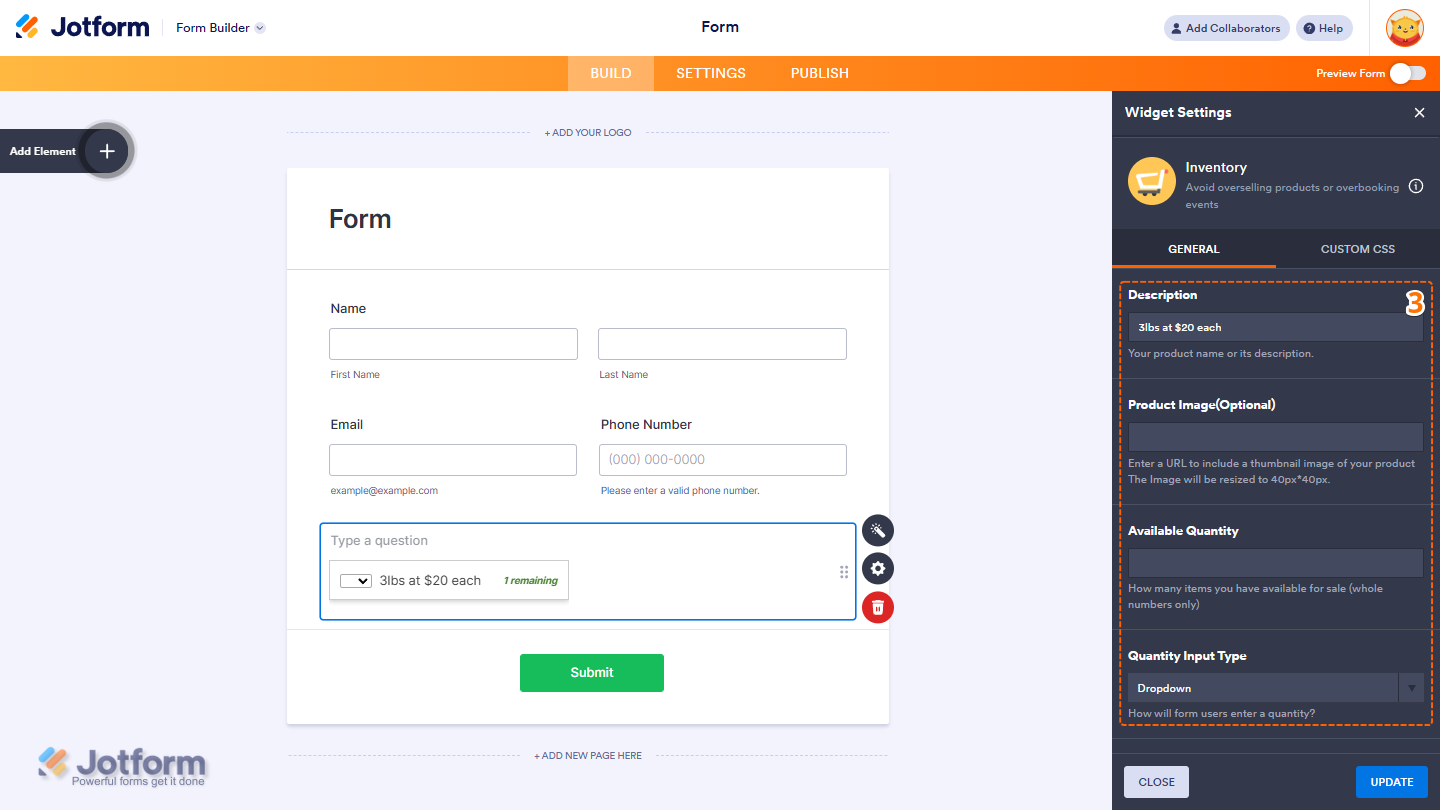
- Next, in the Widget Settings menu that opens on the right side of the page, under the General tab, you’ll see this list of settings you can configure:
- Description — Enter your product name or a short description.
- Product Image (Optional) — Add a URL to display a thumbnail image of your product. The image will automatically resize to 40×40 px.
- Available Quantity — Specify how many items you want to make available (whole numbers only).
- Quantity Input Type — Choose how users will select the quantity. The options are number or dropdown only.
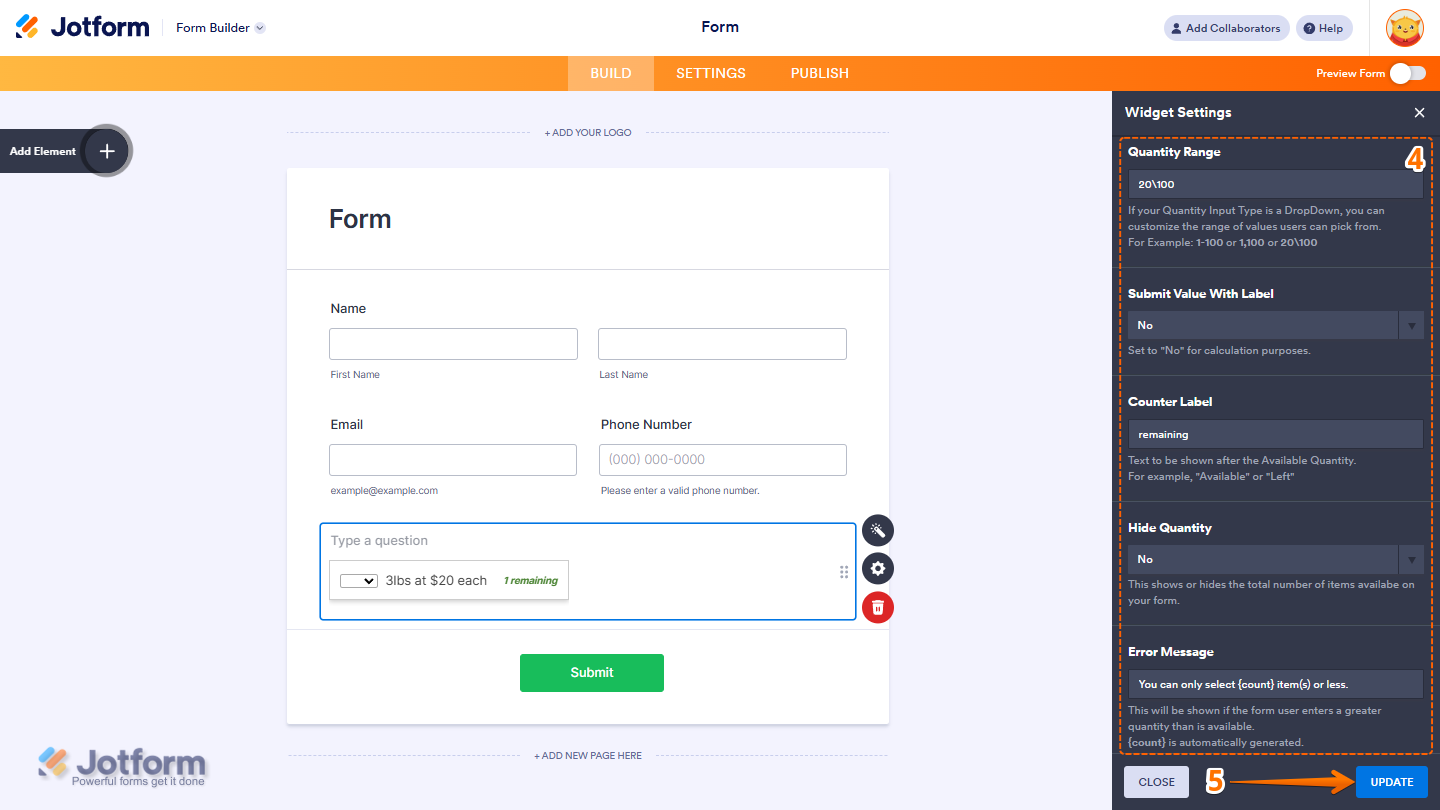
- Then, scroll down to the bottom and continue to set up these settings:
- Quantity Range — If you select the dropdown, define the range of values users can pick from. For example: 1–100, 1,100, or 20\100.
- Submit Value with Label — Set this to “No” if you need the value for calculation purposes only.
- Counter Label — Enter text that appears after the available quantity, such as “Available” or “Left.”
- Hide Quantity — Toggle this on or off to show or hide the number of items left.
- Error Message — Enter the message users will see if they request more than what’s available. The {count} placeholder is automatically generated and displays the remaining stock.
- Once you’re done, click on Update.
Each submission automatically updates the inventory. When items run out, users can’t select them anymore. To reset or adjust inventory, click on the Inventory widget, then click on the Wand icon to open the settings and update quantities or other options.
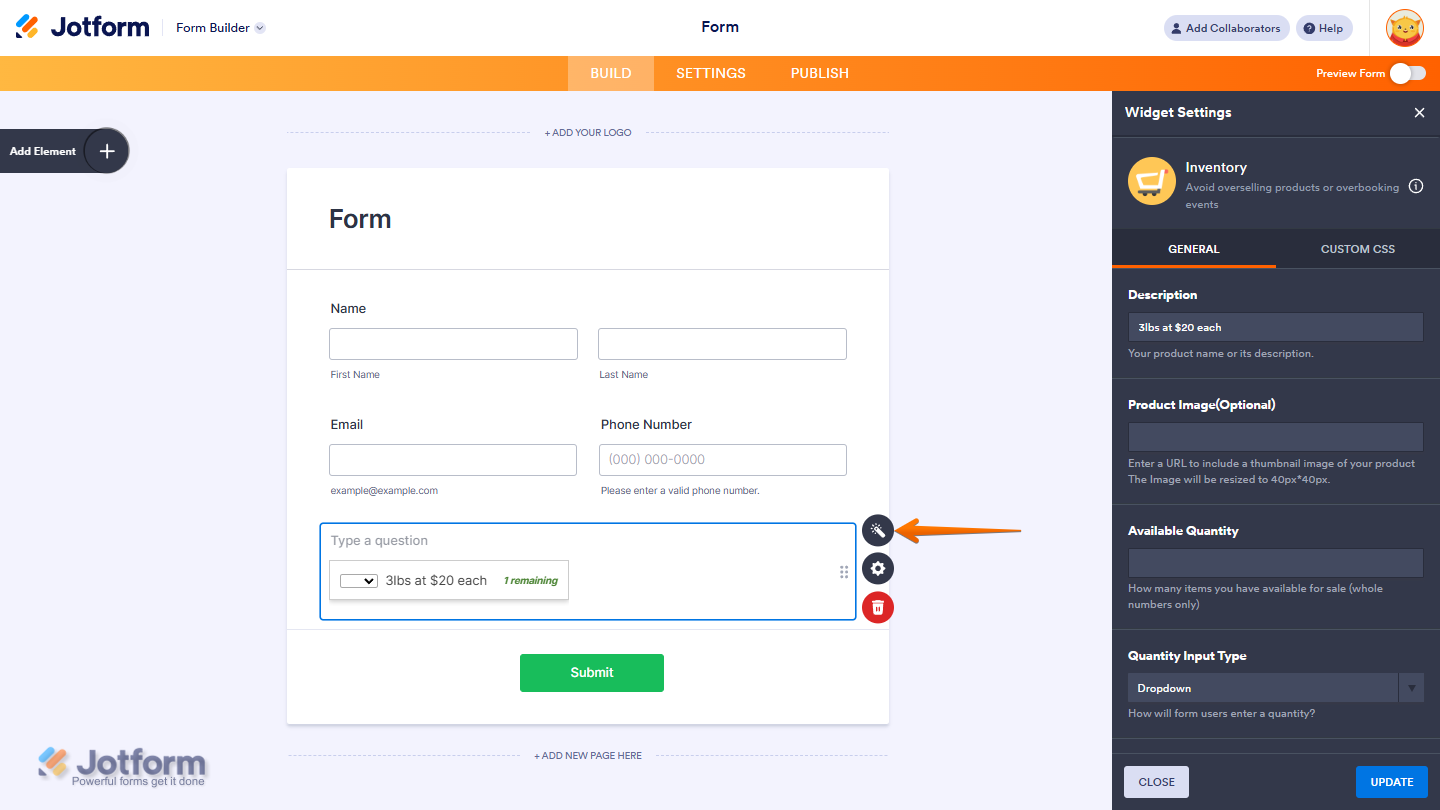
Wondering how it looks in action? Check out this demo form.
Note
- To add more items or options to your form, you’ll need to add another Inventory widget for each new item. Each widget can only track inventory for one item at a time.
- Inventory is tracked per form, not across multiple forms.
- To style the fields and labels in the Inventory widget, you can inject custom CSS into the Custom CSS tab in the Widget Settings. Need help getting started? Our guide on How to Inject CSS Codes to Widgets shows you how to do it.
- You can also configure the widget properties, like alignment, labels, size, visibility, and more, to control how it looks and behaves in your form. Check out our guide on How to Access and Configure the Question Properties of a Widget to learn more.

Send Comment:
2 Comments:
July 25, 2026
Unlike the product list, this widget does not allow me to pre-select "1" as a default quantity, which without doubt will confuse some of our older members. For this reason alone I cannot use this otherwise very useful widget
July 25, 2026
How does it link to payments?