Jotform makes it easy to let users pick dates using the Large Date Picker widget. It shows a clear, expandable calendar where people can quickly choose a day for appointments, reservations, interviews, or consultations. Once a date is selected, the calendar neatly collapses so users can continue filling out your form.
Here are a few ways to use it:
- Add a large, easy-to-read calendar to your form.
- Make date selection clearer and more comfortable for users.
- Collect date requests for appointments, reservations, interviews, and meetings.
- Improve the overall booking experience on your online forms.
Whether you’re starting fresh or updating a form, adding and setting up the Date Picker widget takes only a few steps. Here’s a quick how-to
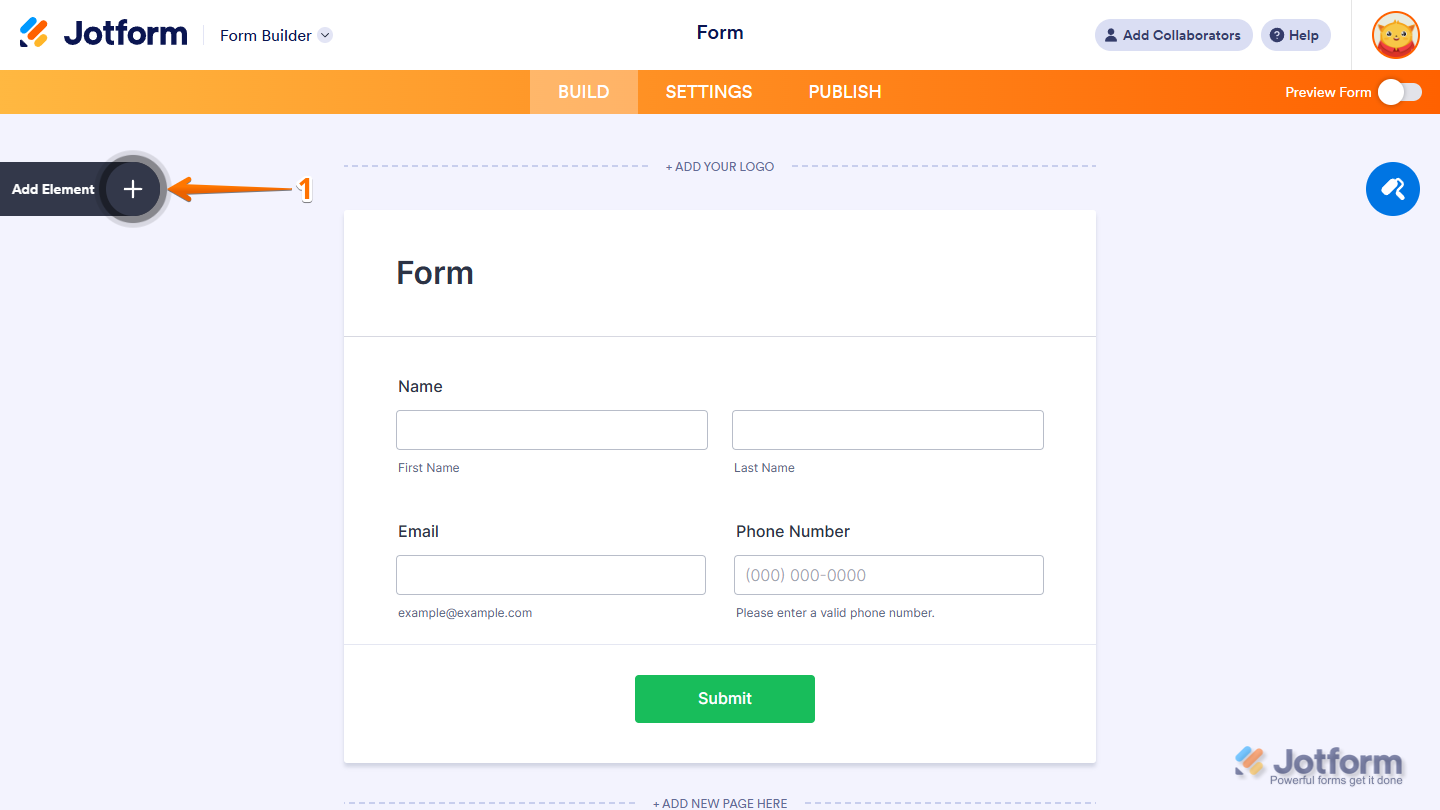
- In Form Builder, click on Add Element on the left side of the page.
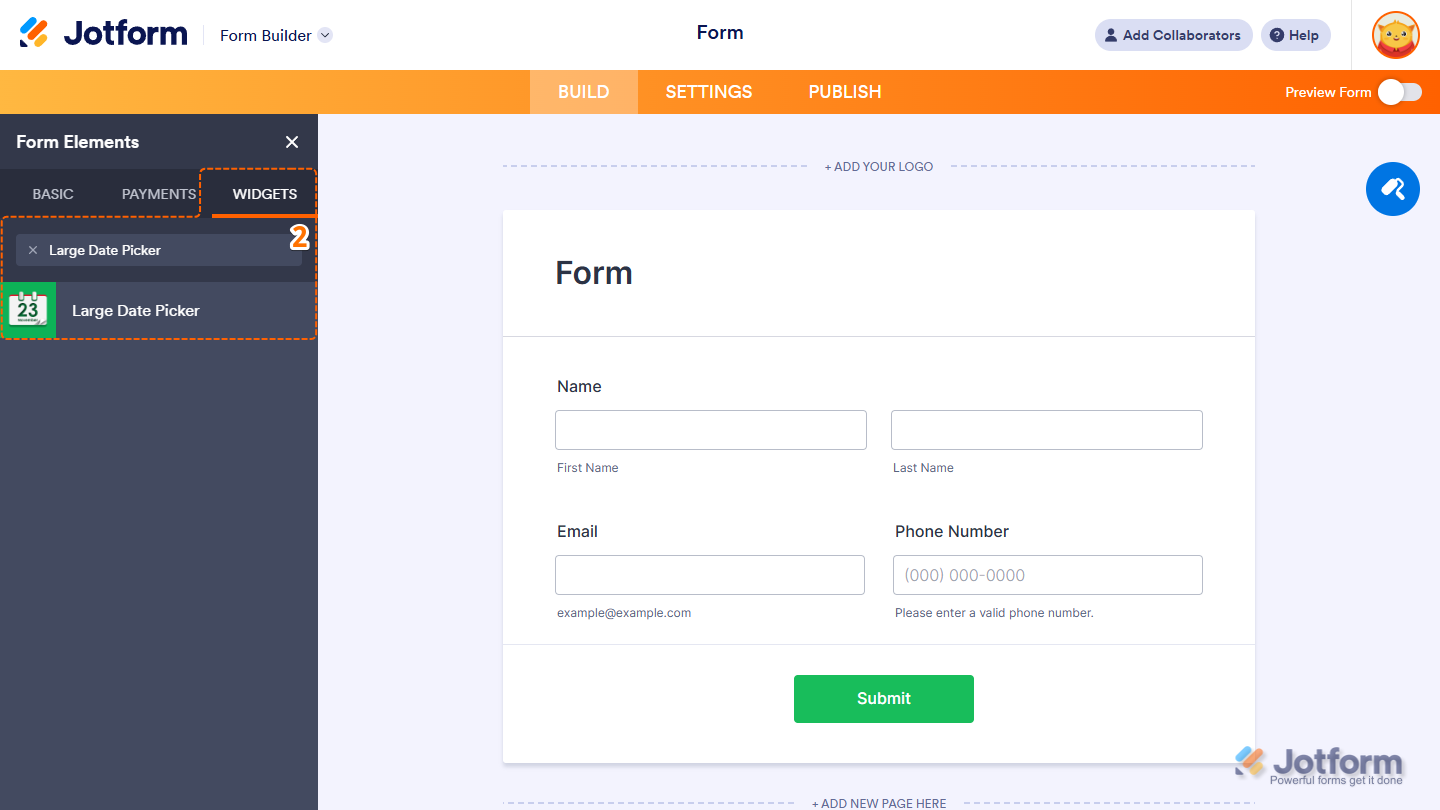
- Now, in the Form Elements menu, under the Widgets tab, search for Large Date Picker and click to add it to your form. Or, just drag and then drop it to where you want it to be on your form.
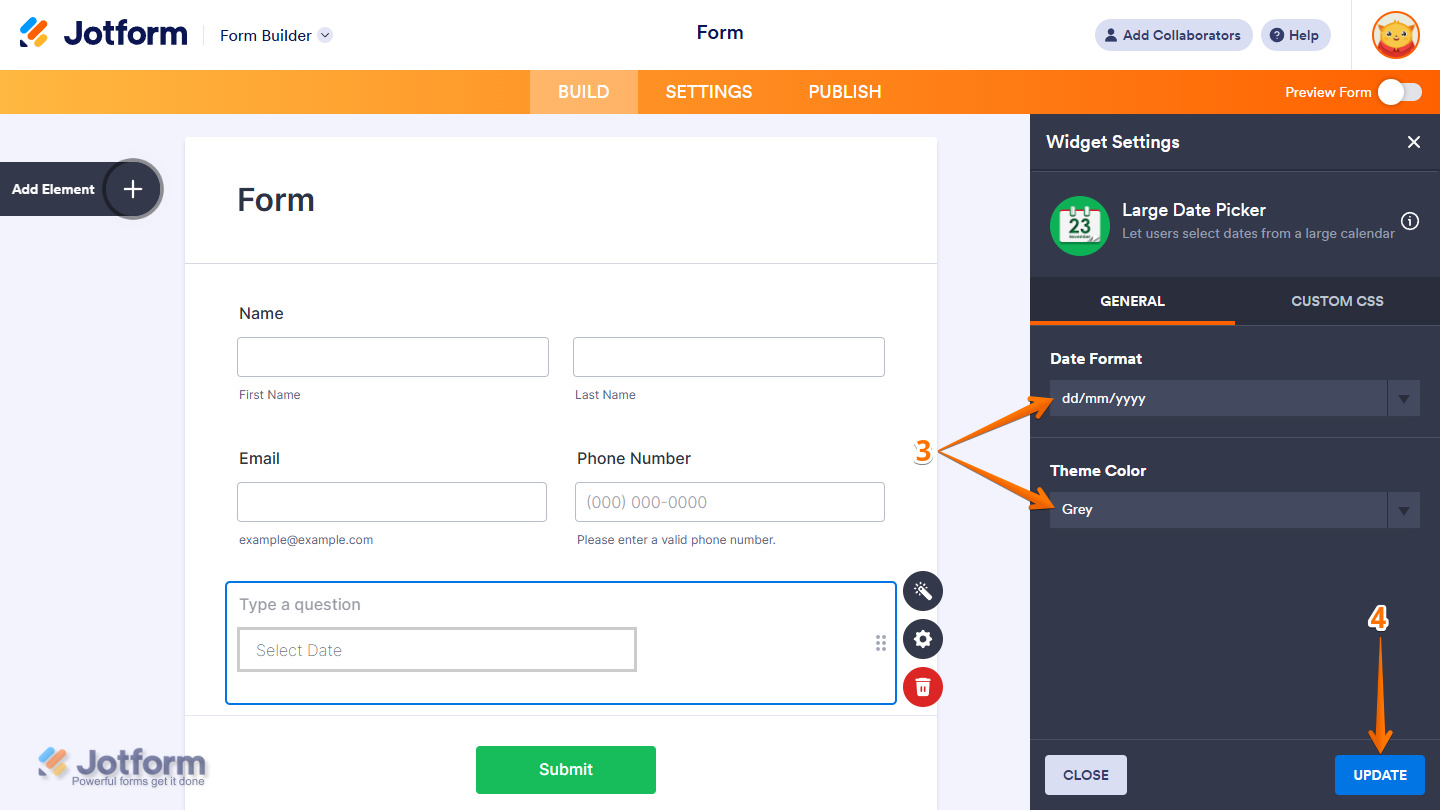
- Next, in the Widget Settings window that opens on the right side of the page, under the General tab, set up these things:
- Date Format — Choose how the date should appear in the widget. For example: MM/DD/YYYY.
- Theme Color — Pick a color that matches your form’s design. This will update the widget’s appearance to stay consistent with your branding.
- Now, click on Update, and you’re done.
That’s it! You’ve successfully added and set up the Large Date Picker widget on your form. Wondering how it looks in action? Check out this Demo Form.
Note
- To style the fields and labels, you can inject custom CSS into the Custom CSS tab in the Widget Settings. To learn how it’s done, see our guide on How to Inject CSS Codes to Widgets.
- You can also configure the widget properties, like alignment, labels, size, visibility, and more, to control how it looks and behaves in your form. Check out our guide on How to Access and Configure the Question Properties of a Widget to learn more.

Send Comment: