Jotform’s Match Items widget lets you create matching questions by displaying two columns of items that users can connect visually. You can define how items relate to each other, control matching rules, and customize how connections appear to fit your form.
Here are a few ways to use it:
- Build matching or pairing questions for quizzes or forms.
- Let users connect related items using a visual interface.
- Control matching rules such as one-to-one or multiple connections.
- Customize labels, instructions, and connection styles.
Whether you’re creating a new form or updating an existing one, you can add and set up the Match Items widget in a few easy steps. Here’s how to do it:
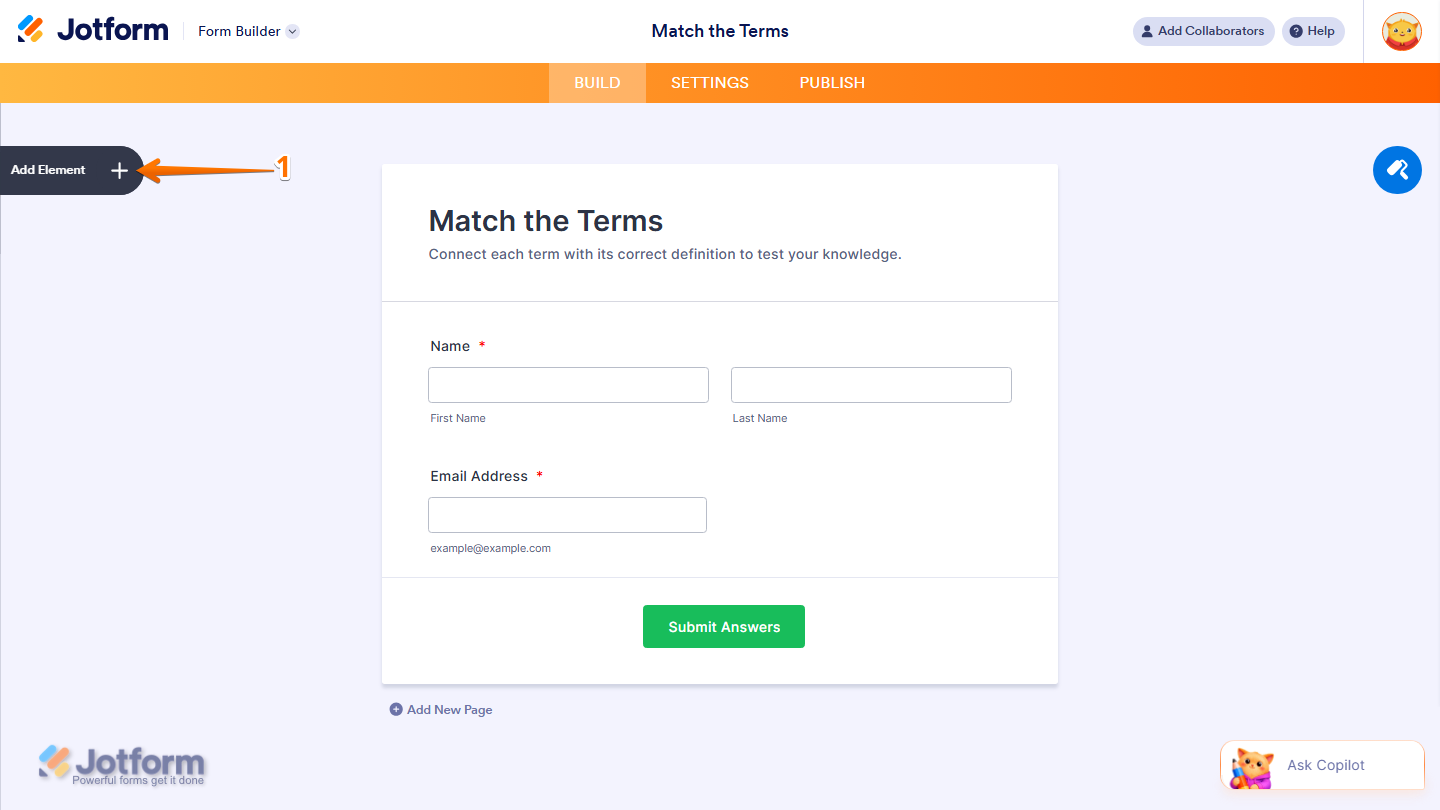
- In Form Builder, click on Add Element on the left side of the page.
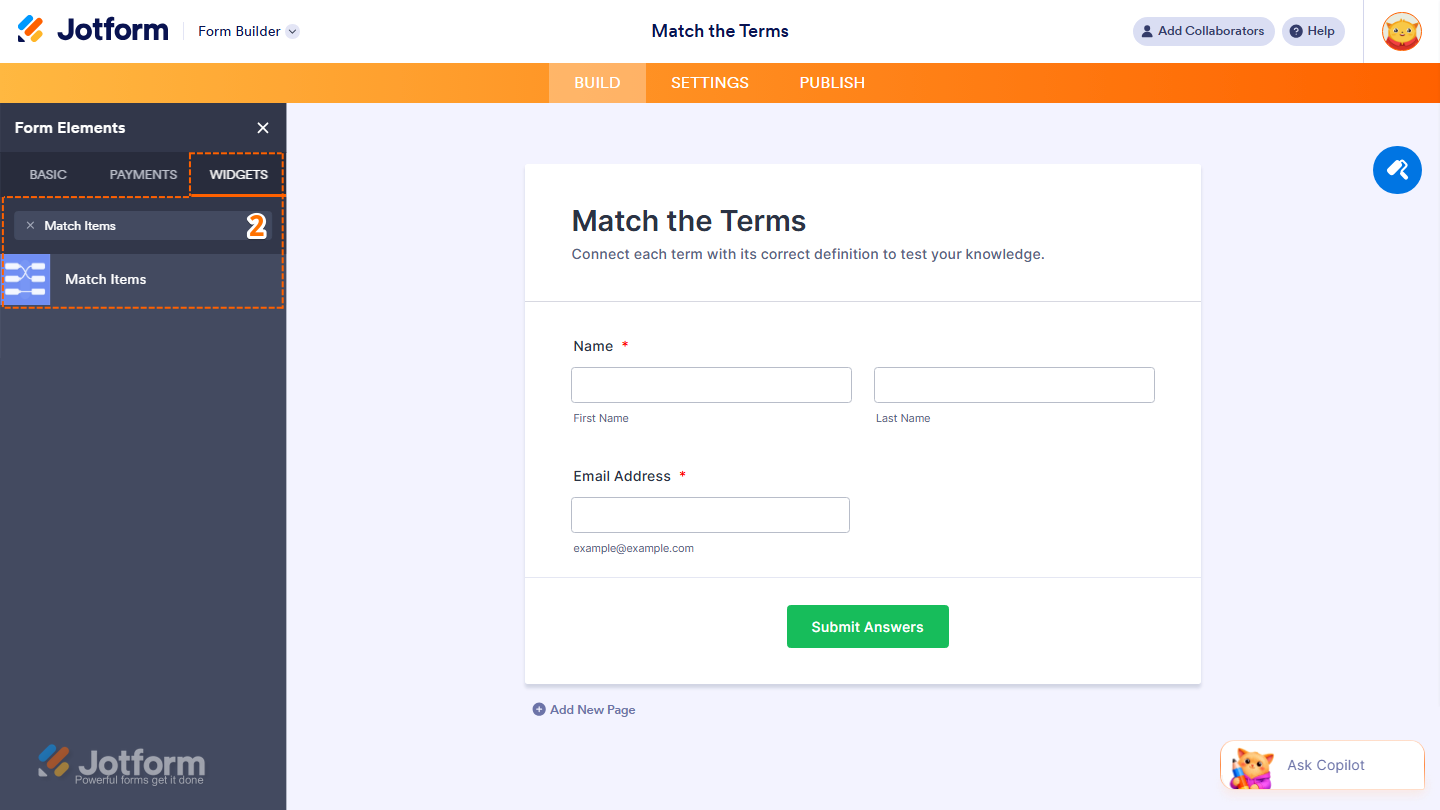
- Now, in the Form Elements menu, under the Widgets tab, search for Match Items and click on it. Or, just drag and drop it to where you want it to be on your form.
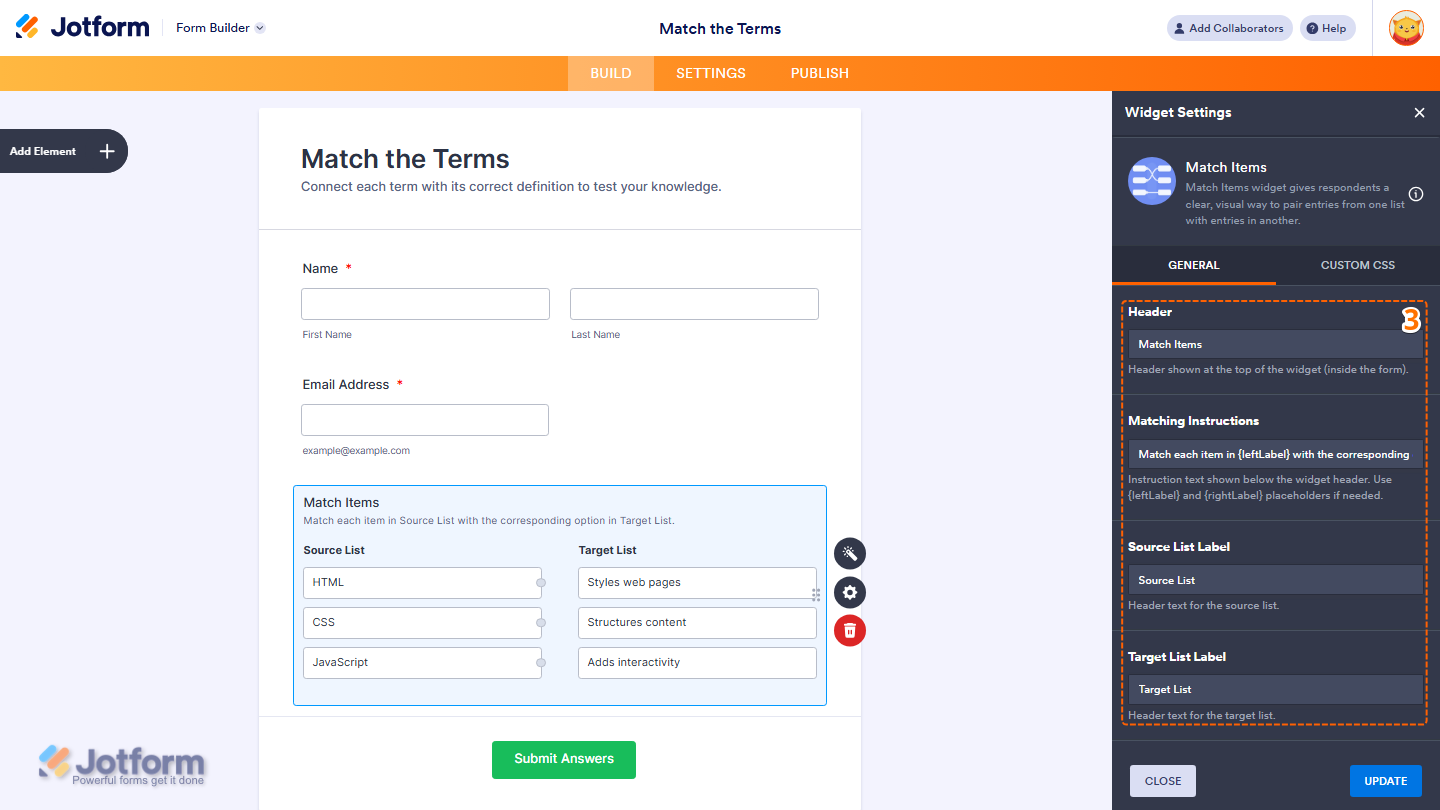
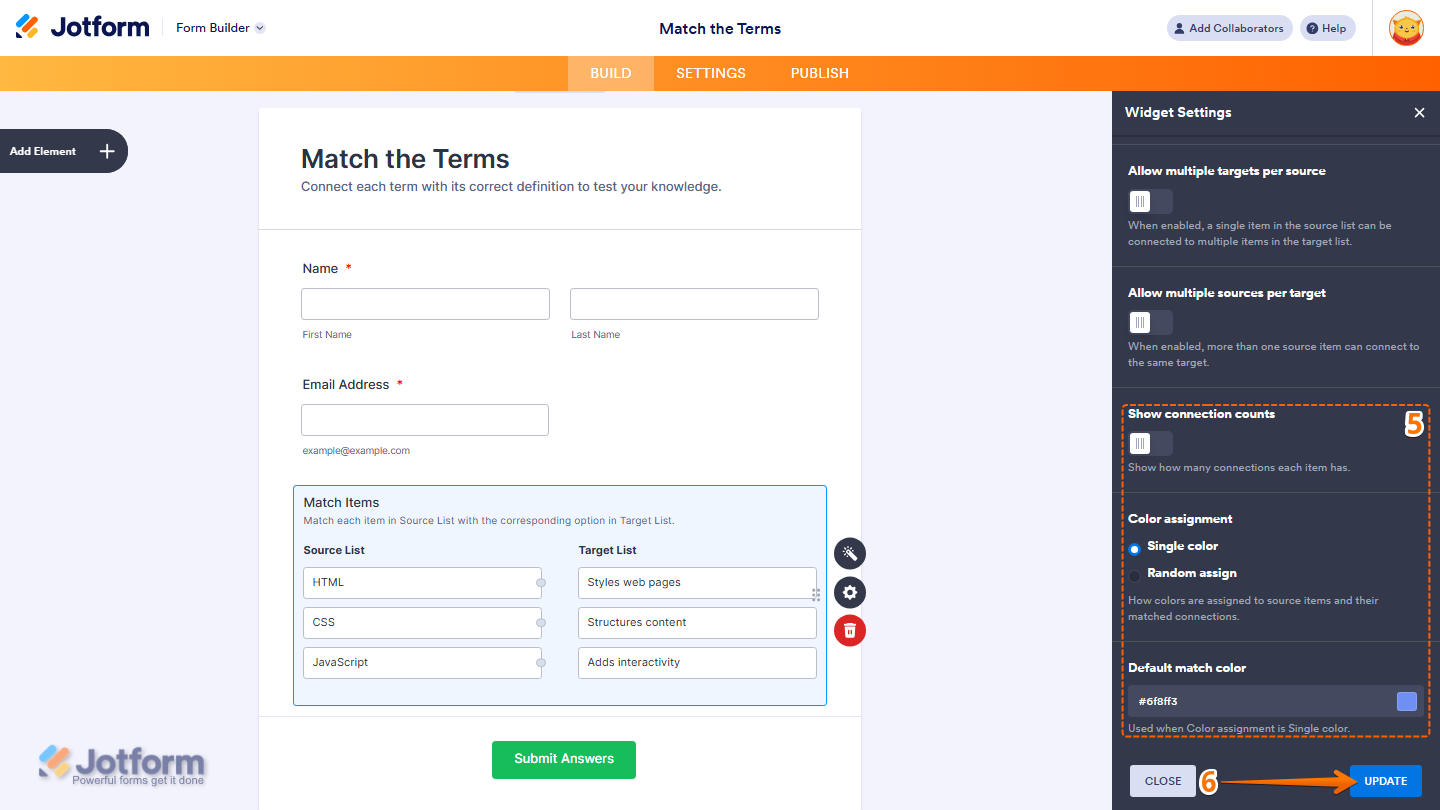
- Next, in the Widget Settings menu that opens on the right side of the page, under the General tab, you’ll see this list of settings you can configure:
- Header — Set the title displayed at the top of the widget.
- Matching Instructions — Add instructions to guide users on how to match the items.
- Source List Label — Set the label for the source list shown on the left side.
- Target List Label — Set the label for the target list shown on the right side.
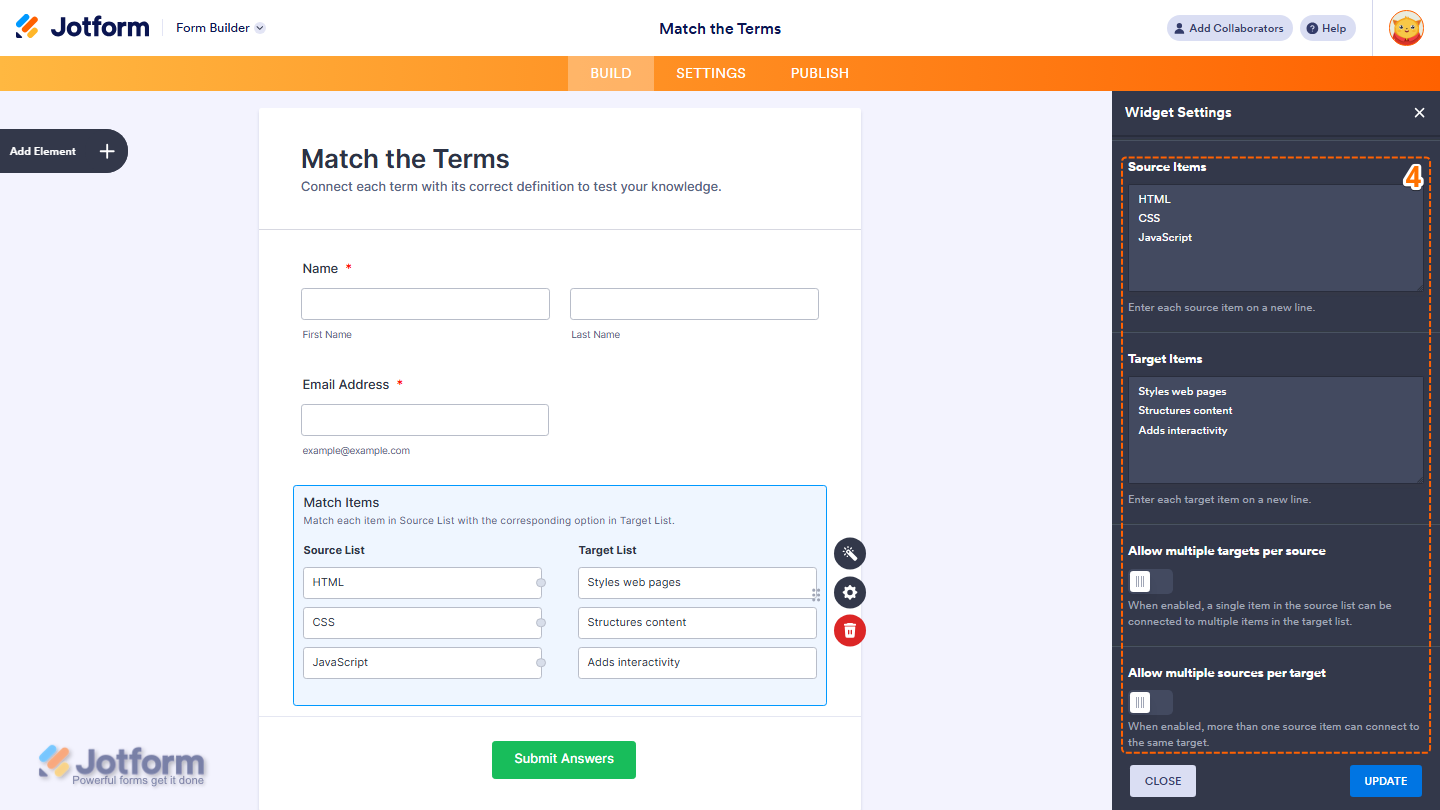
- Then, scroll down and set up these settings:
- Source Items — Enter the items for the source list, with each item on a new line.
- Target Items — Enter the items for the target list, with each item on a new line.
- Allow Multiple Targets per Source — Toggle this on to allow one source item to connect to multiple target items.
- Allow Multiple Sources per Target — Toggle this on to allow multiple source items to connect to the same target item.
- Now, scroll down to the bottom to continue set up these things;
- Show Connection Counts — Toggle this on to display how many connections each item has.
- Color Assignment — Choose how colors are applied to matched connections by selecting either a single color or random colors.
- Default Match Color — Choose the default color used for matches when a single color is selected.
- Once everything’s set, click on Update.
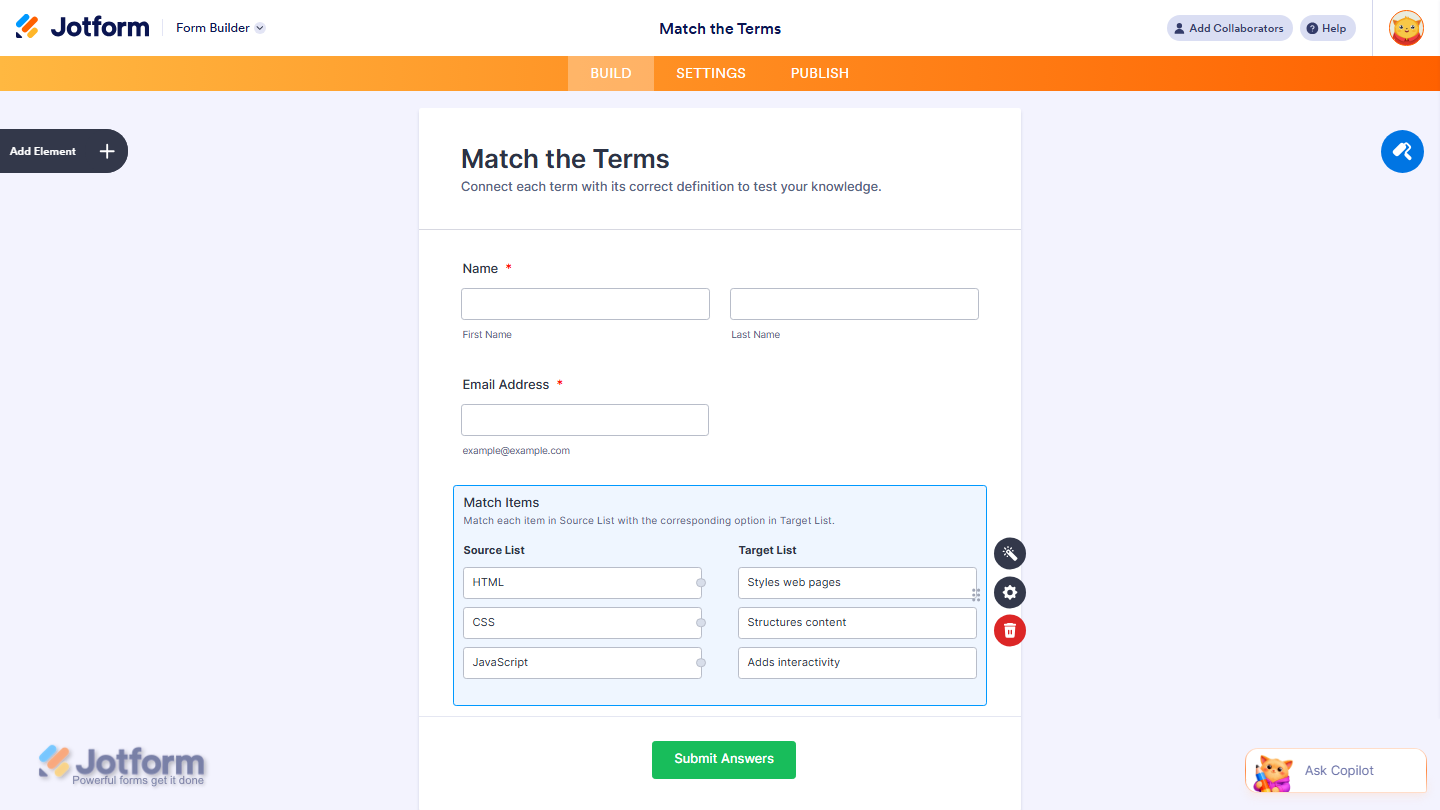
That’s it. You’ve successfully added and set up the Match Items widget on your form.
Wondering how it looks in action? Check out this demo form.
Note
- For advanced styling of the Match Items widget, you can add your own custom CSS code under the Custom CSS tab in the Widget Settings. Our guide on How to Inject CSS Codes to Widgets walks you through everything.
- You can also configure the widget properties, like alignment, labels, size, visibility, and more, to control how it looks and behaves in your form. Check out our guide on How to Access and Configure the Question Properties of a Widget to learn more.


Send Comment: