The Paragraph element is a rich text editor that allows you to display static text on your form and format it according to your form’s styles and branding guidelines. It is useful for adding instructions, descriptions, disclaimers, or any non-interactive content that enhances user understanding. The editor supports basic text formatting options, such as bold, italics, lists, links, and alignment, making it easy to present information in a clear, visually consistent manner.
Here are a few ways to use it:
- Provide instructions and guidelines for completing the form.
- Display terms and conditions, privacy policies, or disclaimers.
- Organize forms with section headers and descriptions.
- Add images, links, and formatted content to forms.
- Personalize content using data from form fields.
Pro Tip
The Paragraph element is available in both Classic and Card Forms. You can check out our guide on When to Use Card Forms to learn more.
Adding the Paragraph Element
Whether you’re creating a new form or updating an existing one, you can add the Paragraph element in a few easy steps. Here’s how to do it:
- In Form Builder, click on Add Element on the left side of the page.
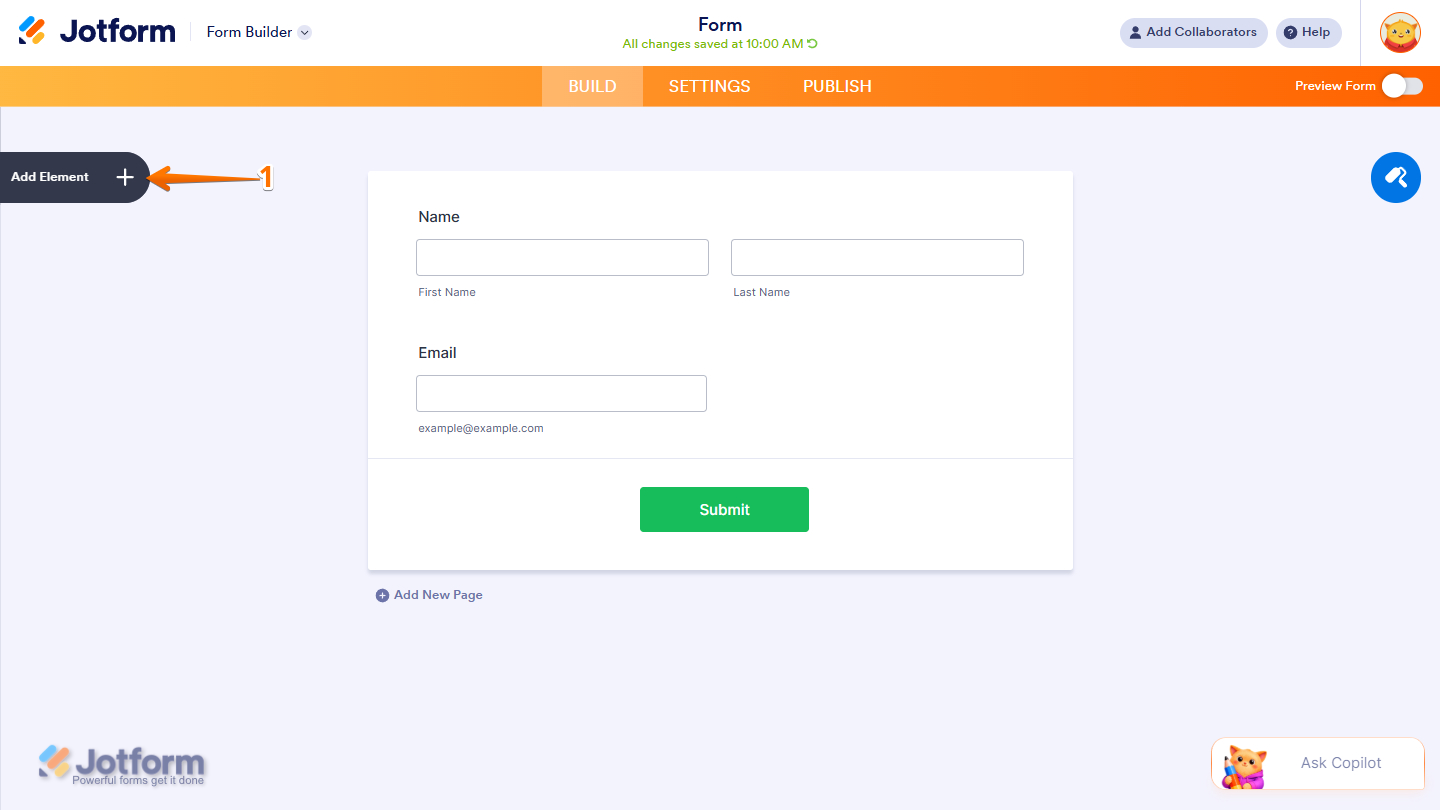
- Then, in the Form Elements menu, under the Basic tab, scroll down and then click on Paragraph. Or just drag and drop it to where you want it on your form.
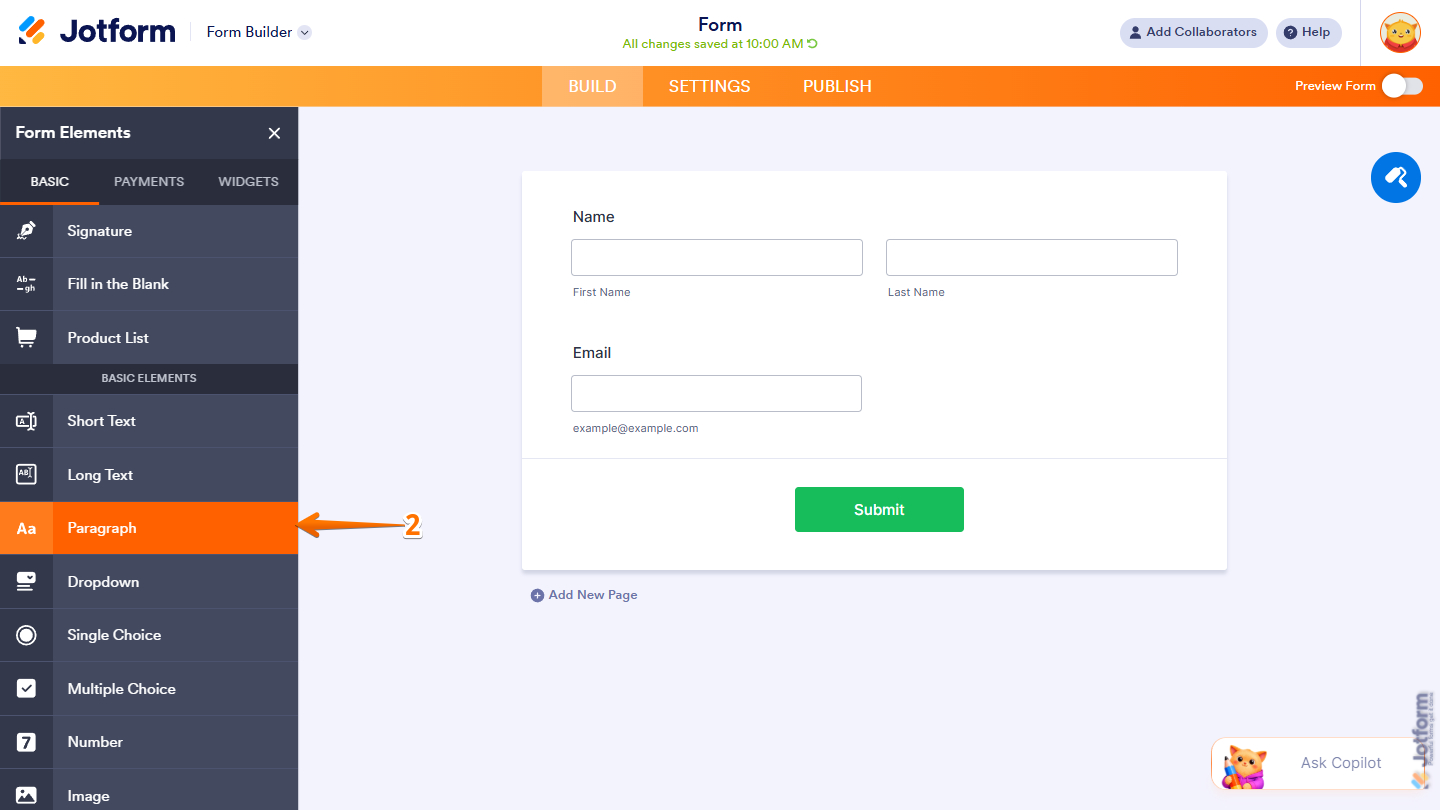
- Next, on the right side of the Paragraph field, click on the Pencil icon to start editing.
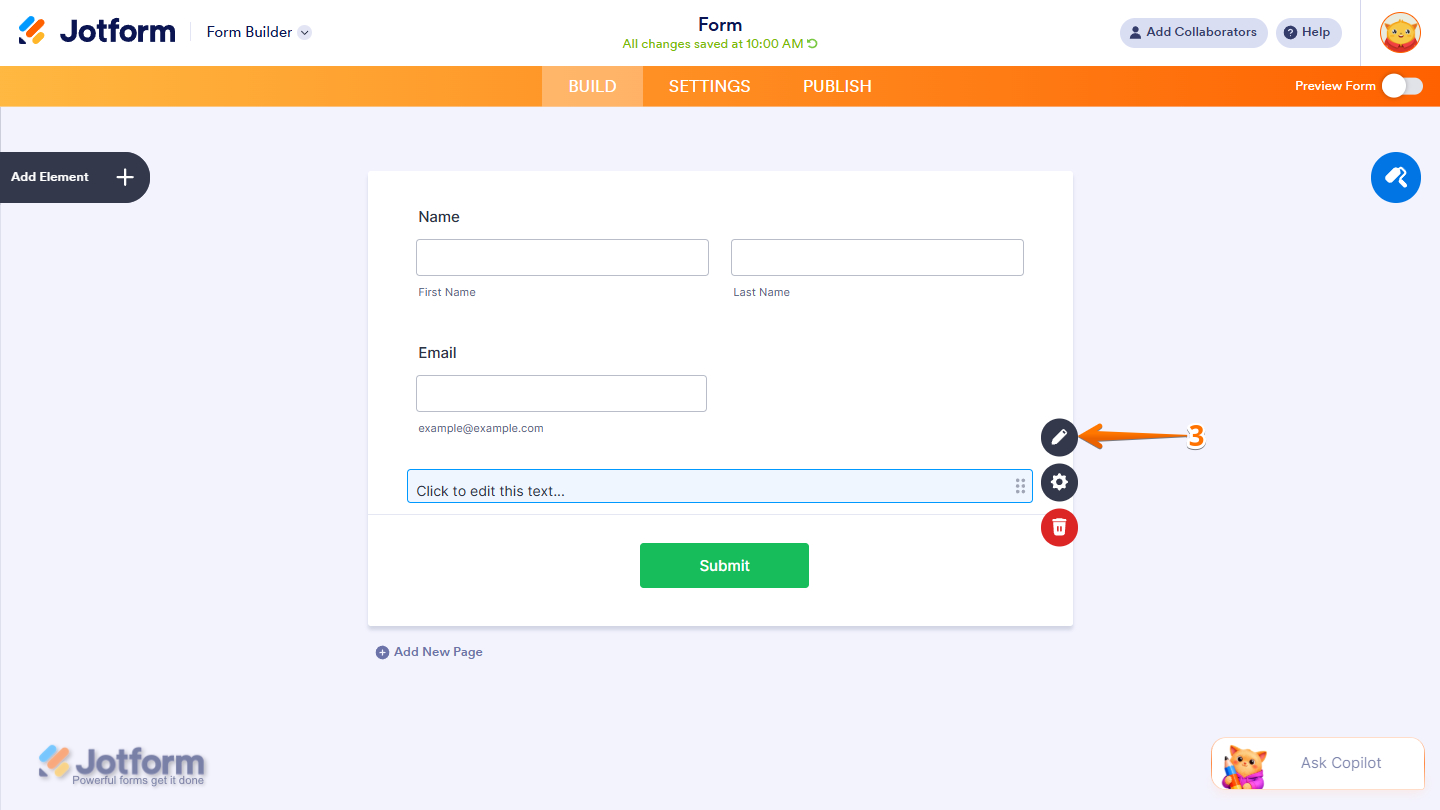
Using the Rich Text Editor of the Paragraph Element
In the Paragraph element’s editor, you’ll find the following tools that you can use to format your texts, add to your form, and personalize texts with dynamic content from your form fields — from top-left to bottom-right:
- Font Family
- Font Size
- Clear Formatting
- Bold
- Italic
- Underline
- Text Color
- Background Colour
- Text Align
- List
- Decrease/Increase Indent
- Table
- Source Code
- Insert or Edit Link
- Insert Image
- Preview
- Formats
- Form Fields
Font Family
Font family is a group of fonts with a similar design style, such as Arial or Times New Roman. Changing the Font Family is very easy. Let’s do it:
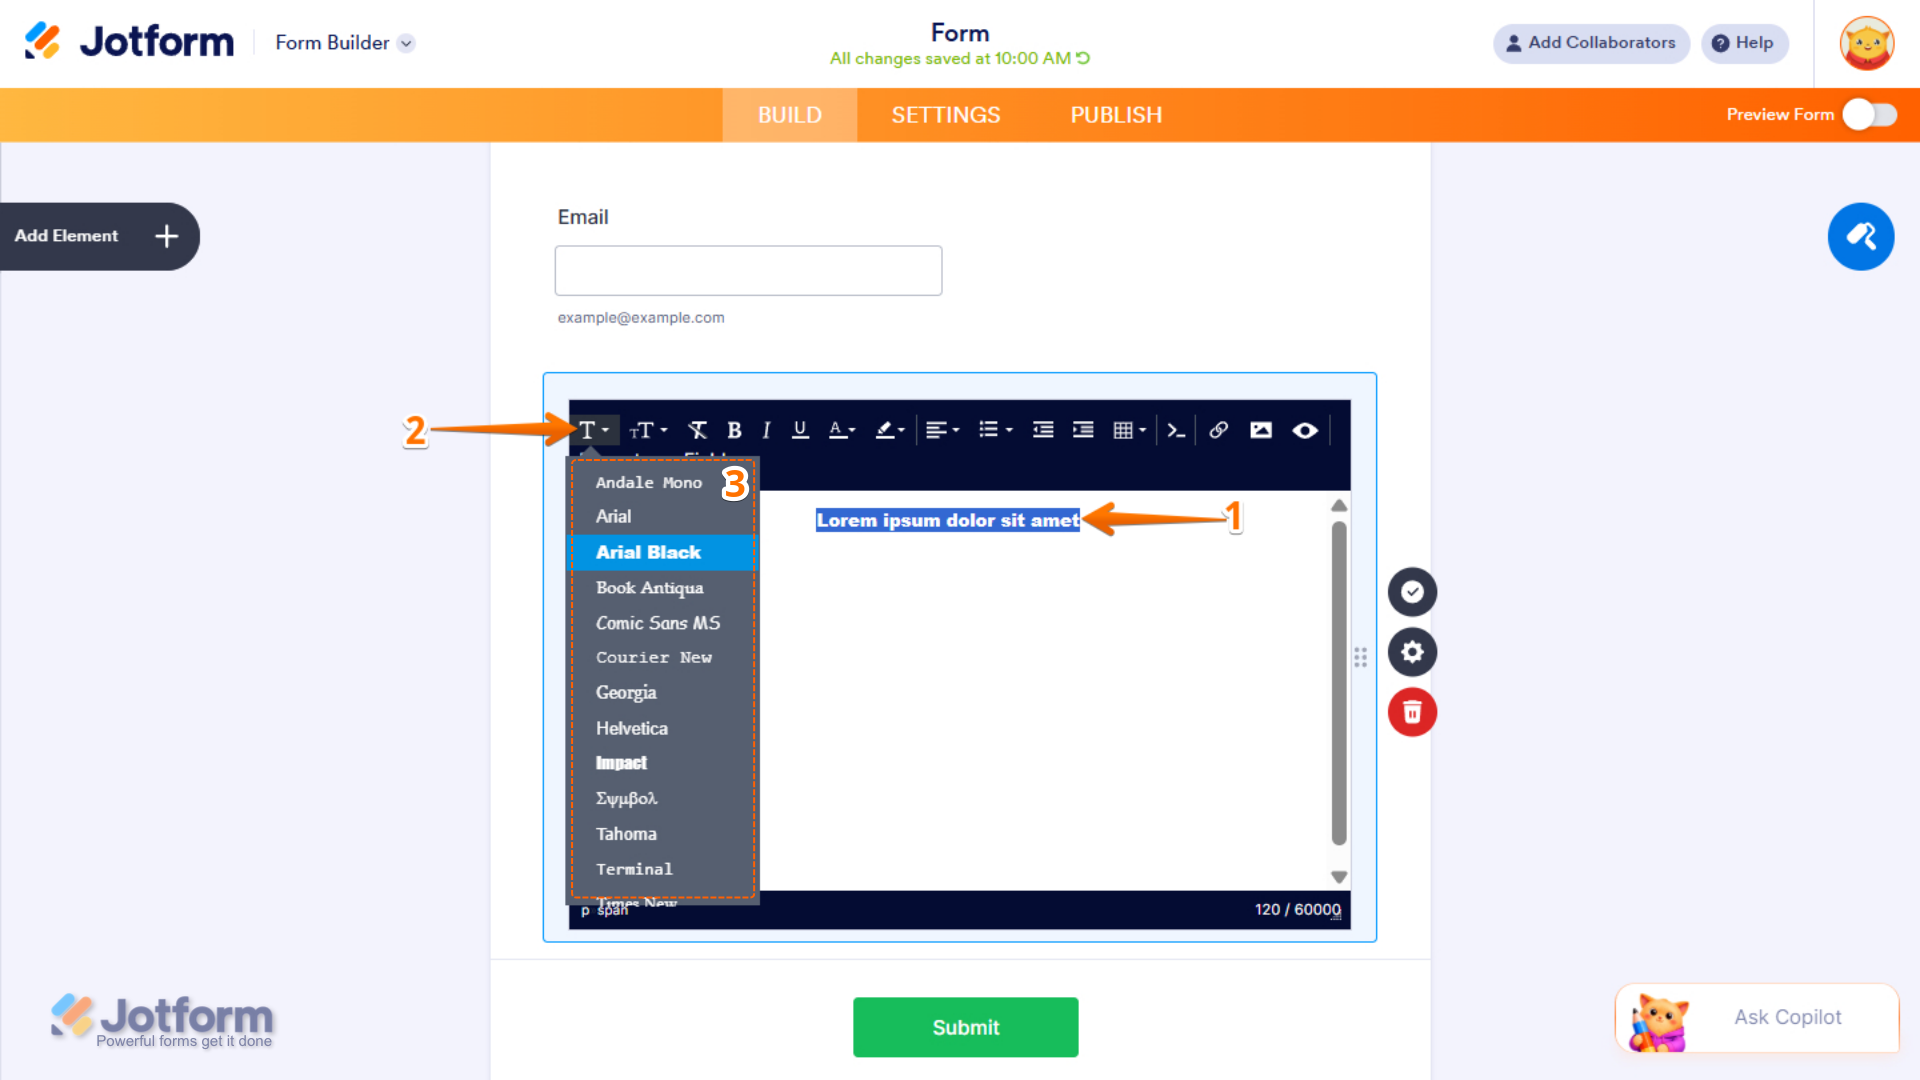
- In Paragraph’s Rich Text Editor, select the text you want to change the Font Family for.
- Next, click on the Font Family icon in the Rich Text Editor toolbar.
- Now, in the Dropdown menu that opens, select the Font Family from the list.
Font Size
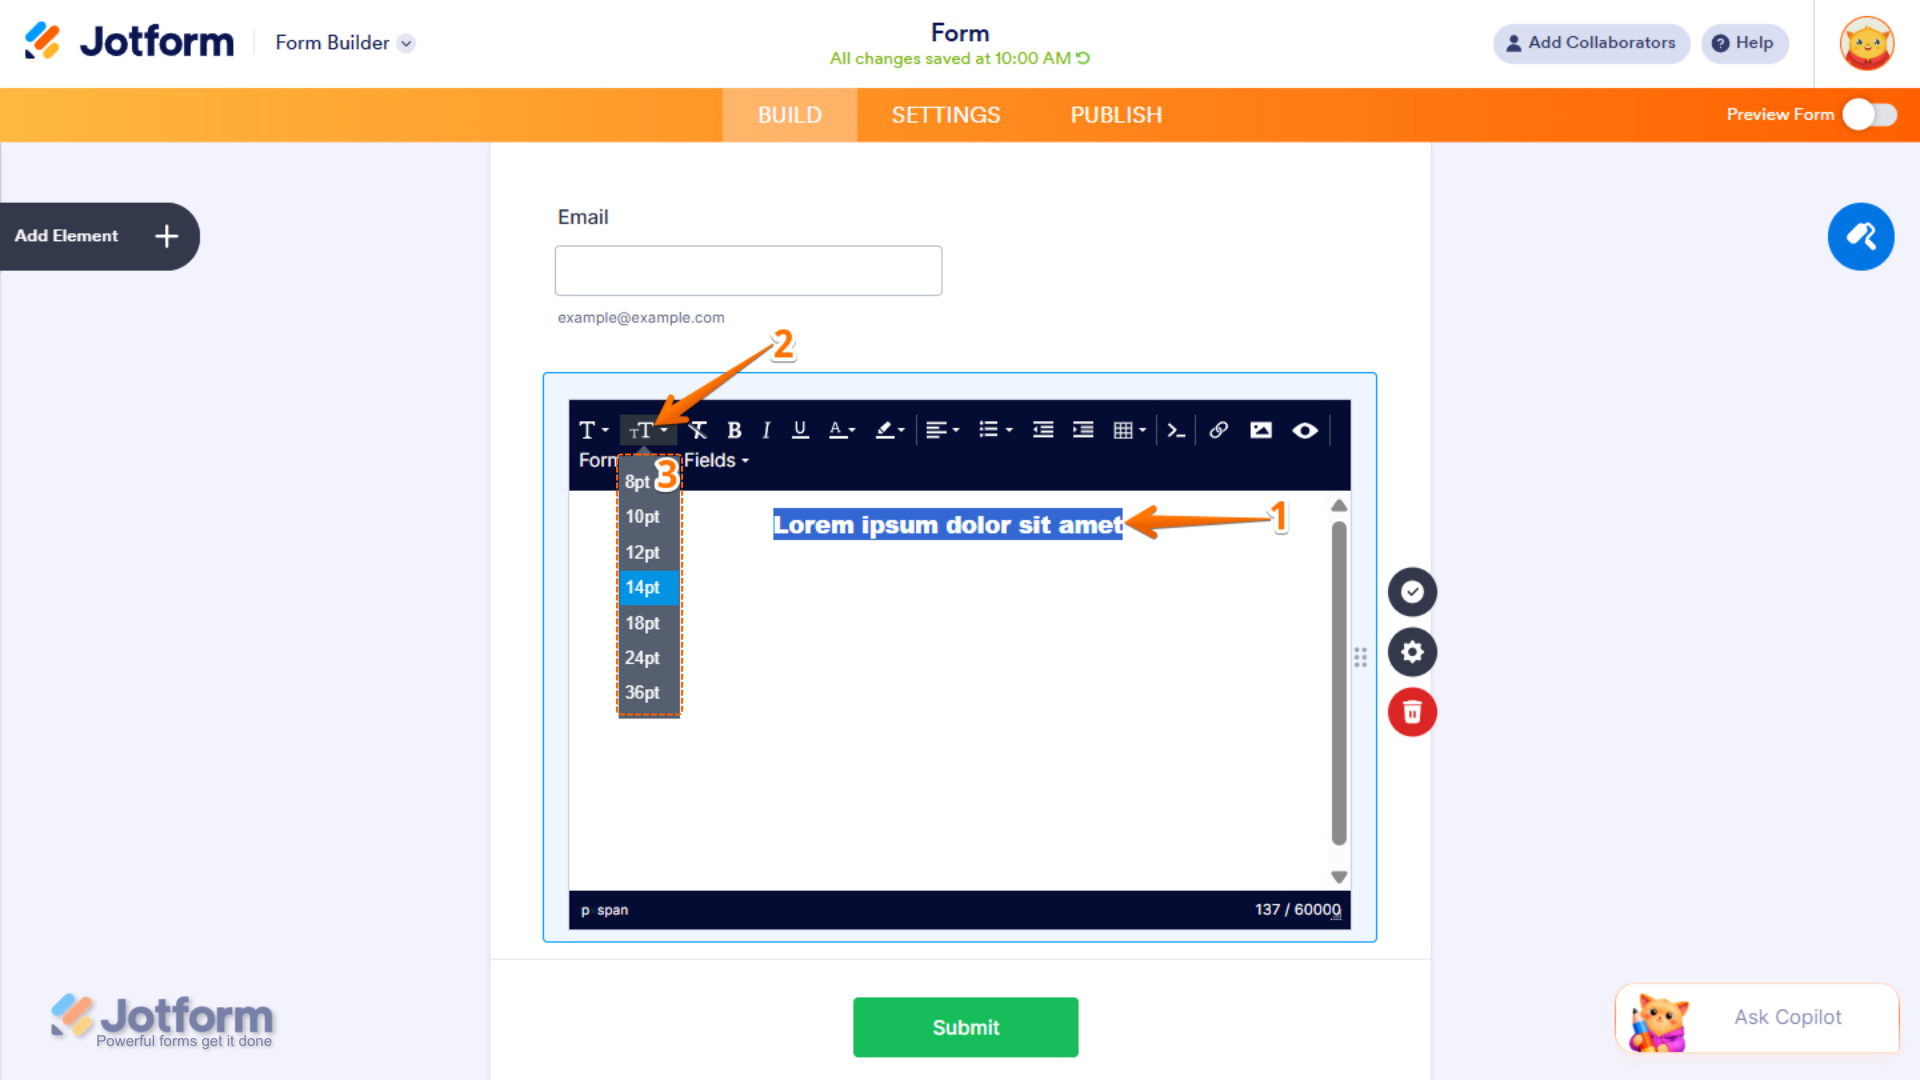
Font size refers to the size of the text characters displayed in the Paragraph element. Changing the Font Size is super easy. Here’s a quick how-to:
- In the Paragraph’s Rich Text Editor, select the text you want to change the size for.
- Next, click on the Font Size icon in the Rich Text Editor toolbar.
- Now, in the Dropdown menu that opens, select your preferred Font Size from the list.
Clear Formatting
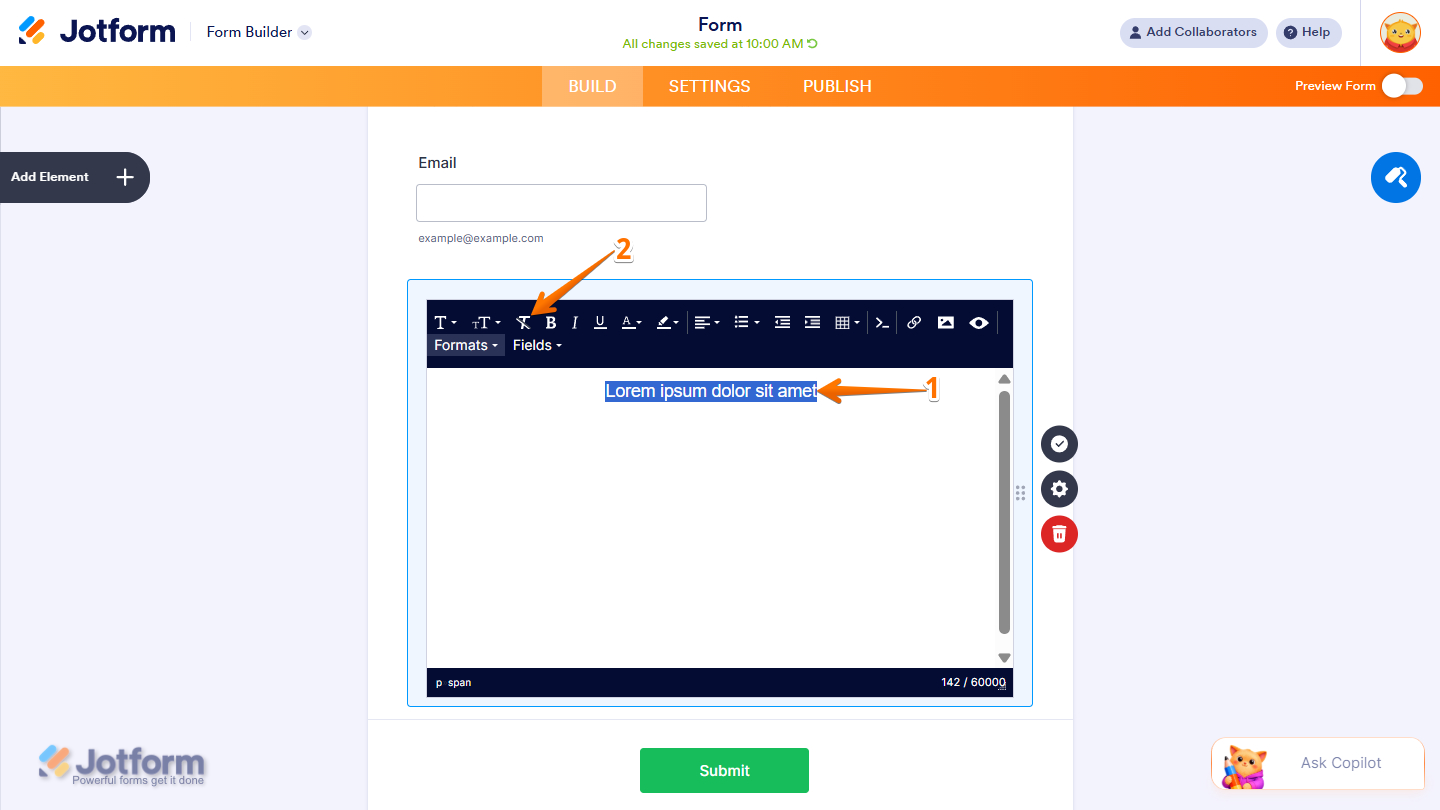
Clearing a text’s formatting removes all applied styles. You can clear formatting for the entire Paragraph element at once or for specific portions of text. It’s easy! Here’s how to do it:
- In the Paragraph’s Rich Text Editor, select the text that you’ve formatted.
- Now, click on the Clear Formatting icon in the Rich Text Editor toolbar.
Note
You can clear all styles of the Paragraph element without selecting the text. Just click the Clear Formatting icon to do so.
Bold
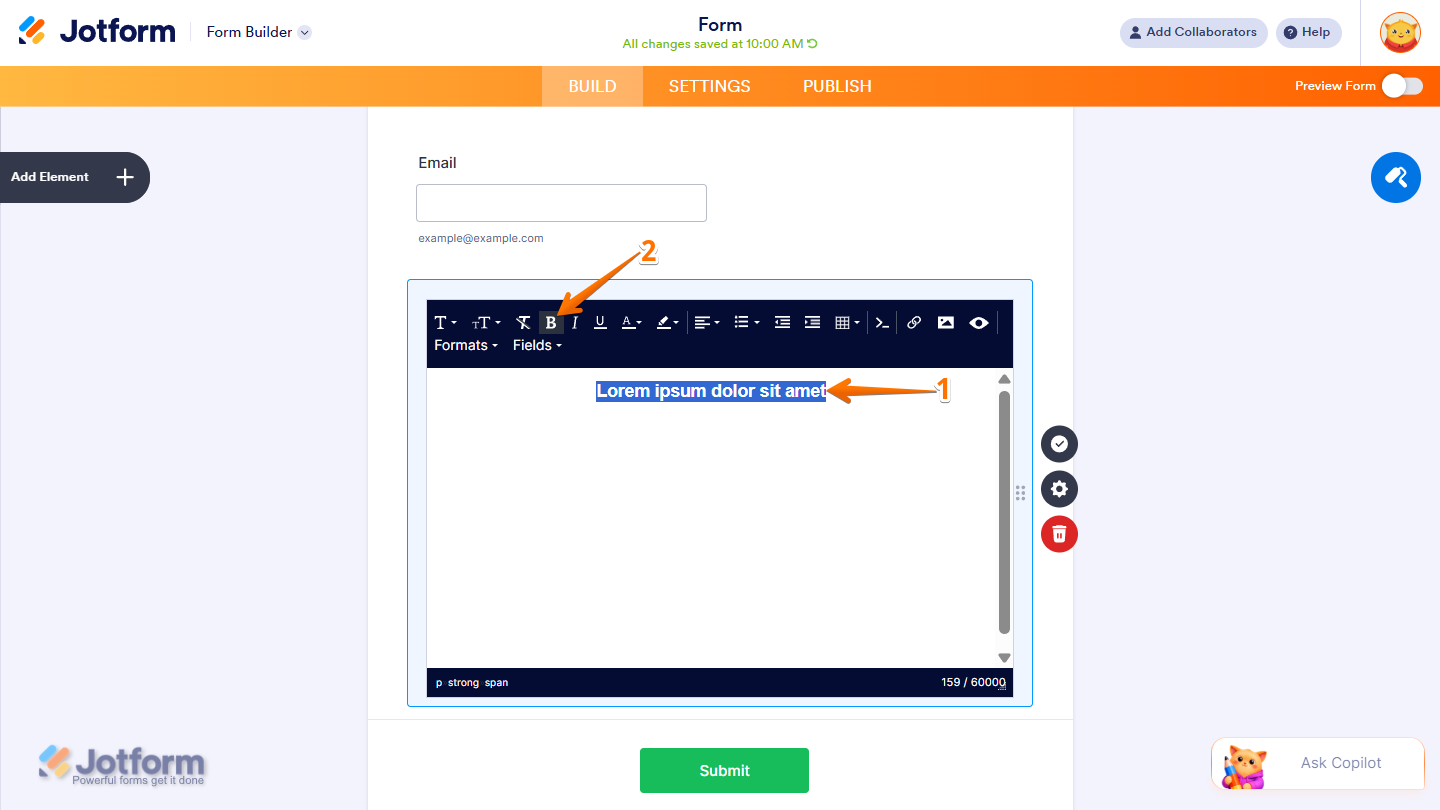
Bold text is text that appears thicker and darker to emphasize importance or draw attention. Changing the font weight to bold is just two steps away. Here’s how:
- In the Paragraph’s Rich Text Editor, select the text you want to bold.
- Now, click on the Bold icon in the Rich Text Editor toolbar. That’s it!
Italic
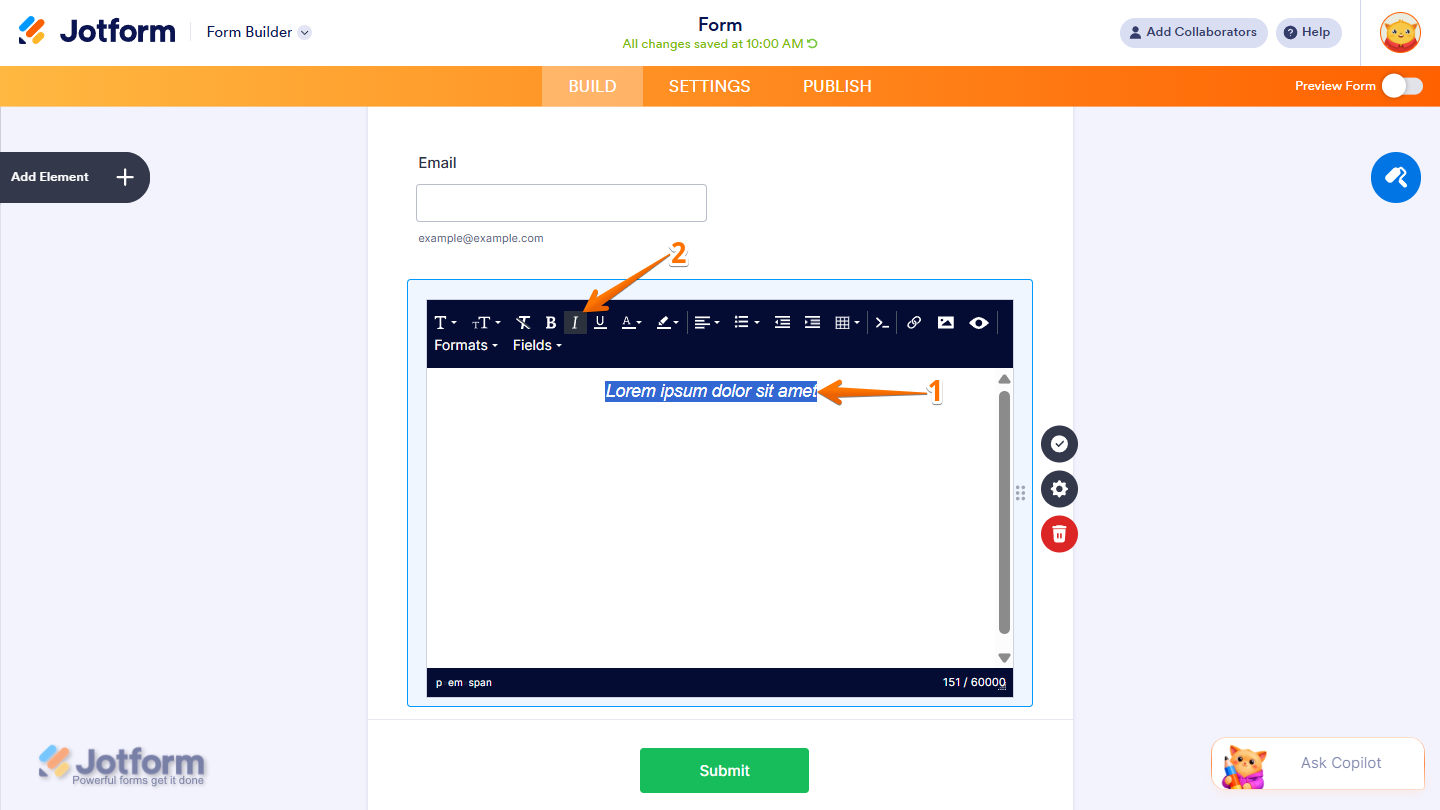
Italic text is slanted to the right and is often used for emphasis, titles, or foreign words. Changing the font style to italic is just two steps away. Here’s how to do it:
- In the Paragraph’s Rich Text Editor, select the text you wish to be in Italic style.
- Now, click on the Italic icon in the Rich Text Editor toolbar.
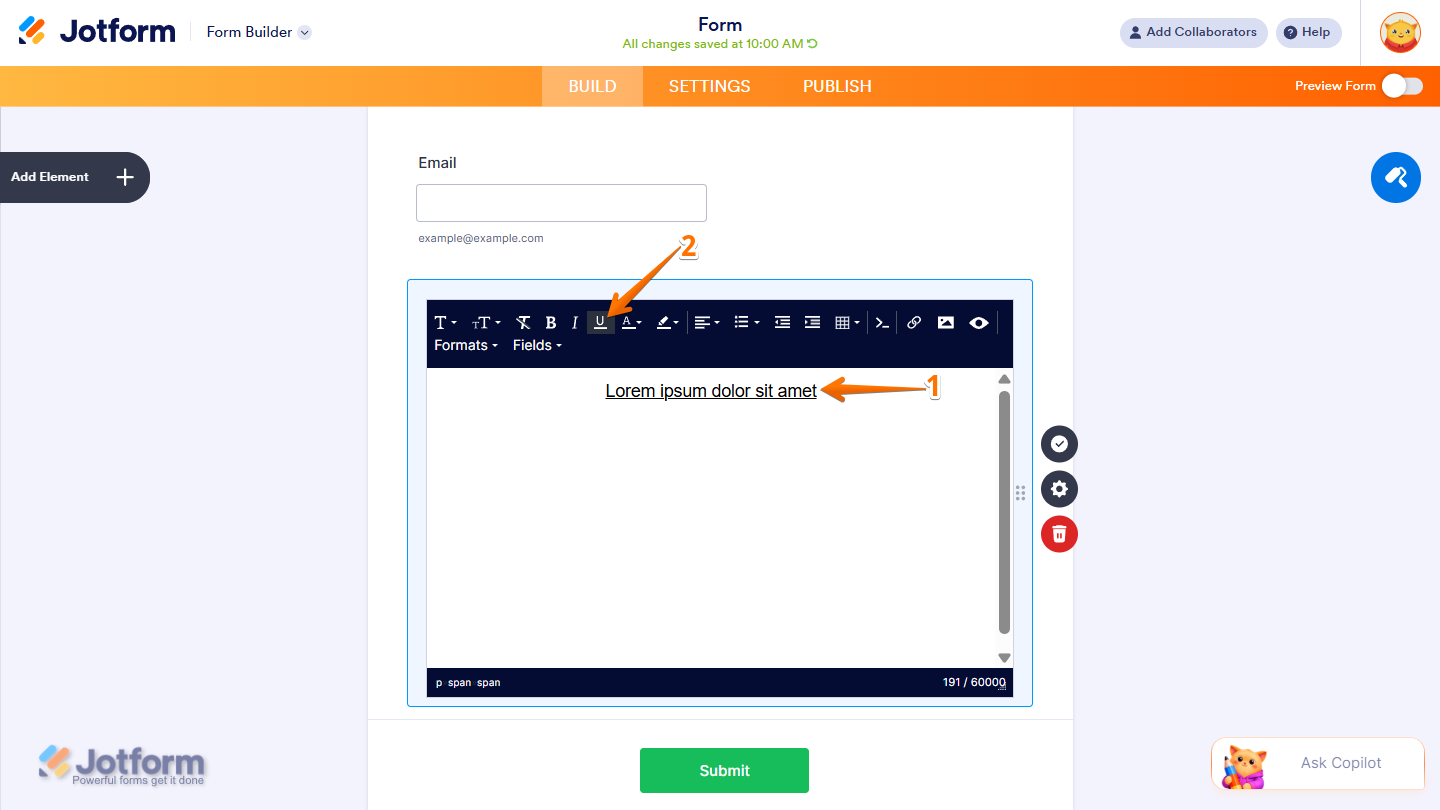
Underline
Underline is a text style where a line appears beneath the characters, often used for emphasis or hyperlinks. Here’s how to do it:
- In the Paragraph’s Rich Text Editor, select the text you want to be underlined.
- Now, click on the Underline icon in the Rich Text Editor toolbar.
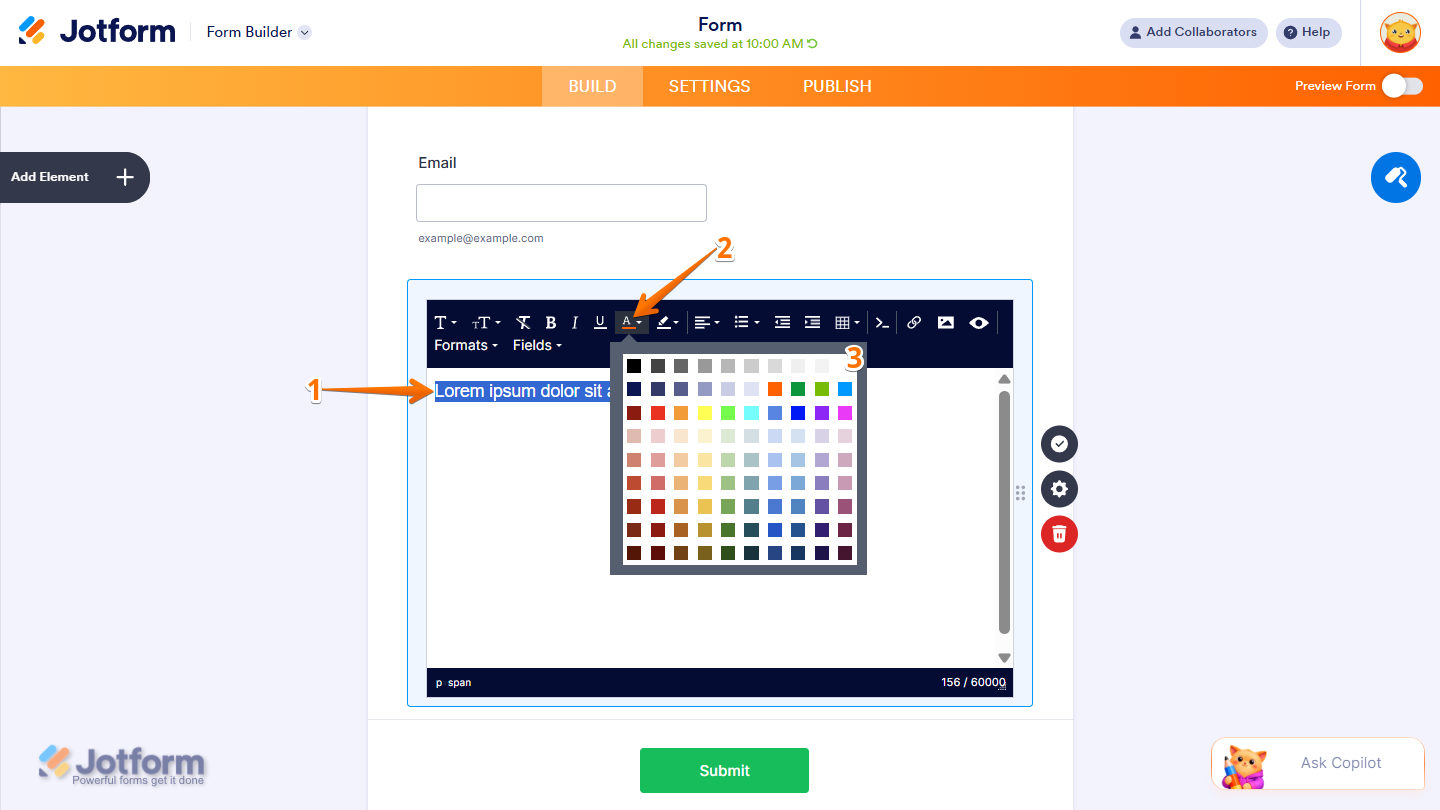
Text Color
The Text Color lets you control how your text appears by changing its color, helping you match your design, improve readability, and highlight important content. To change your text’s color, here’s what you’ll do:
- In the Paragraph’s Rich Text Editor, select the text you want to change its color.
- Then, click on the Text Color icon in the Rich Text Editor toolbar.
- Now, select your preferred text color in the Color menu.
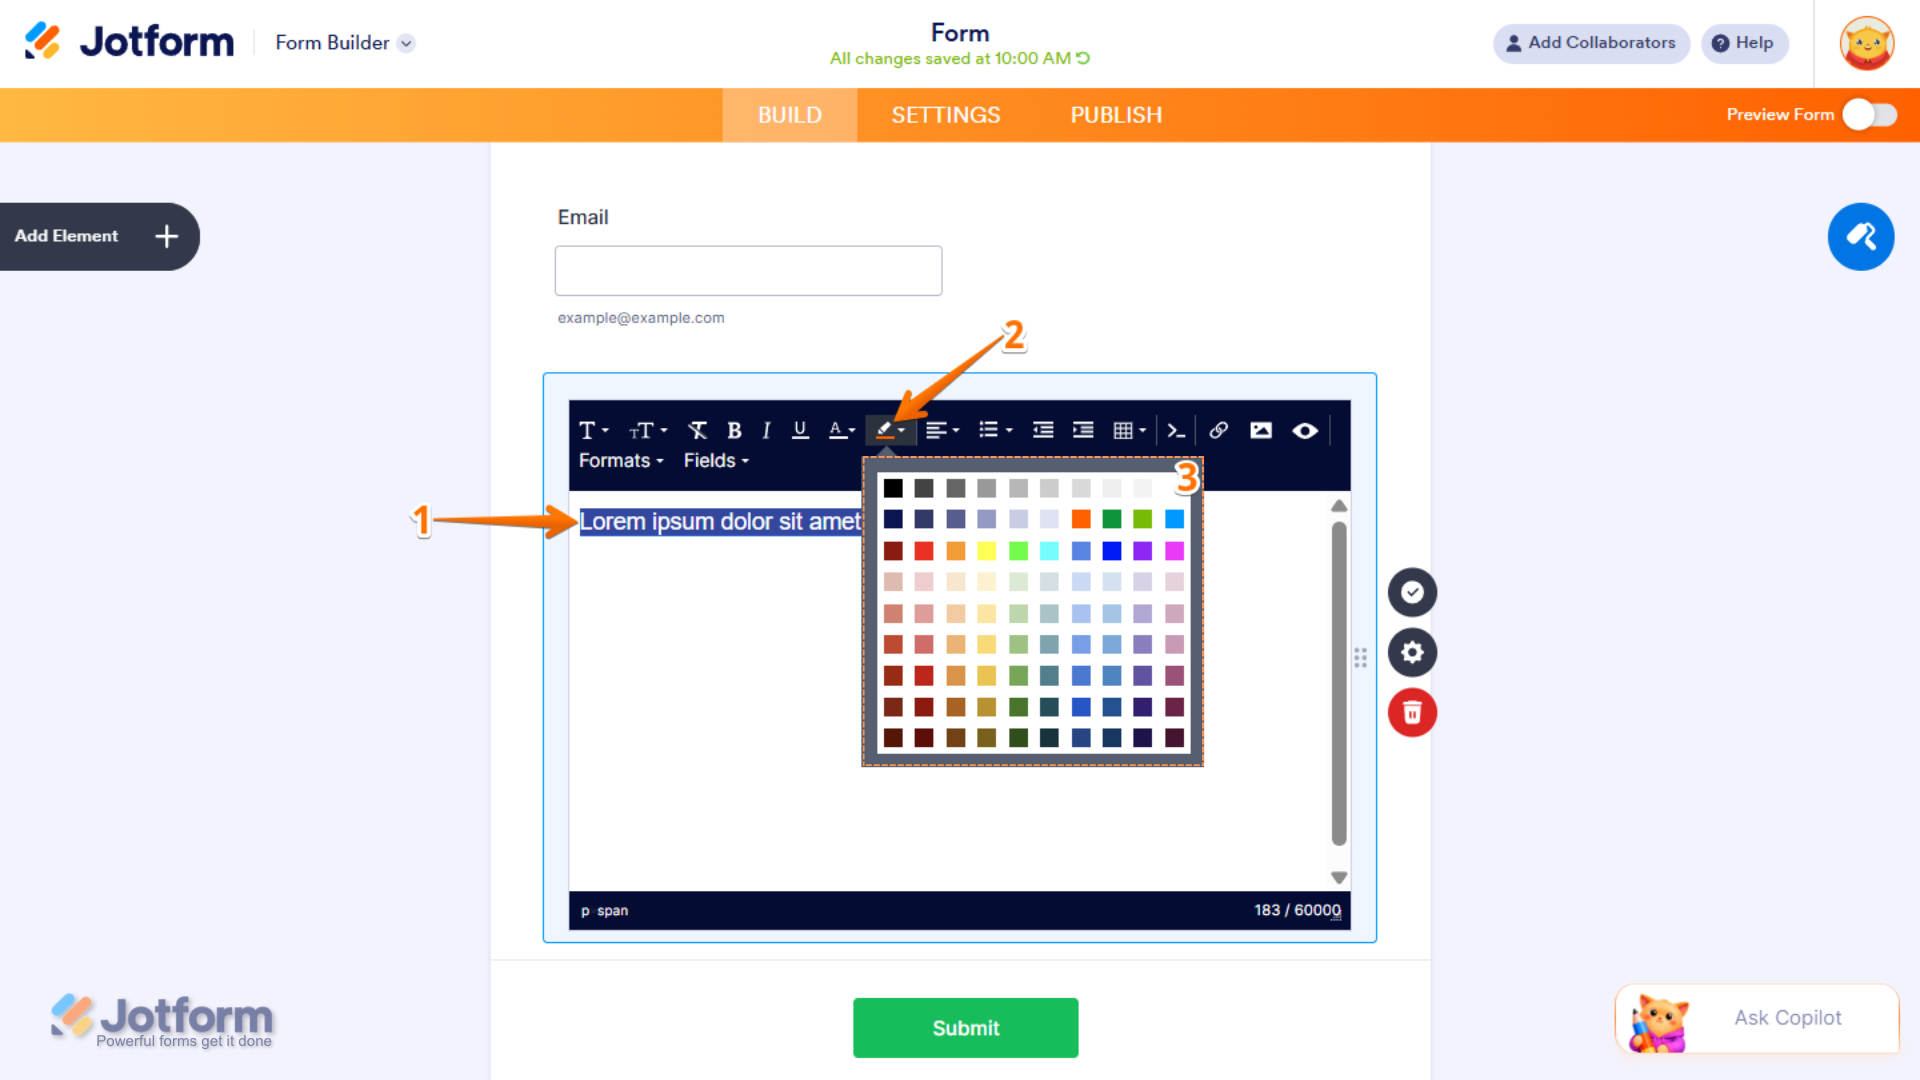
Background Colour
The Background Colour option lets you change the fill behind your text, helping you create contrast, improve readability, and match your overall design or branding. To change your text’s background color, here’s what you’ll do:
- In the Paragraph’s Rich Text Editor, select the text you need to have a background color.
- Next, click on the Background Color icon in the Rich Text Editor toolbar.
- Now, select your background color in the Color menu.
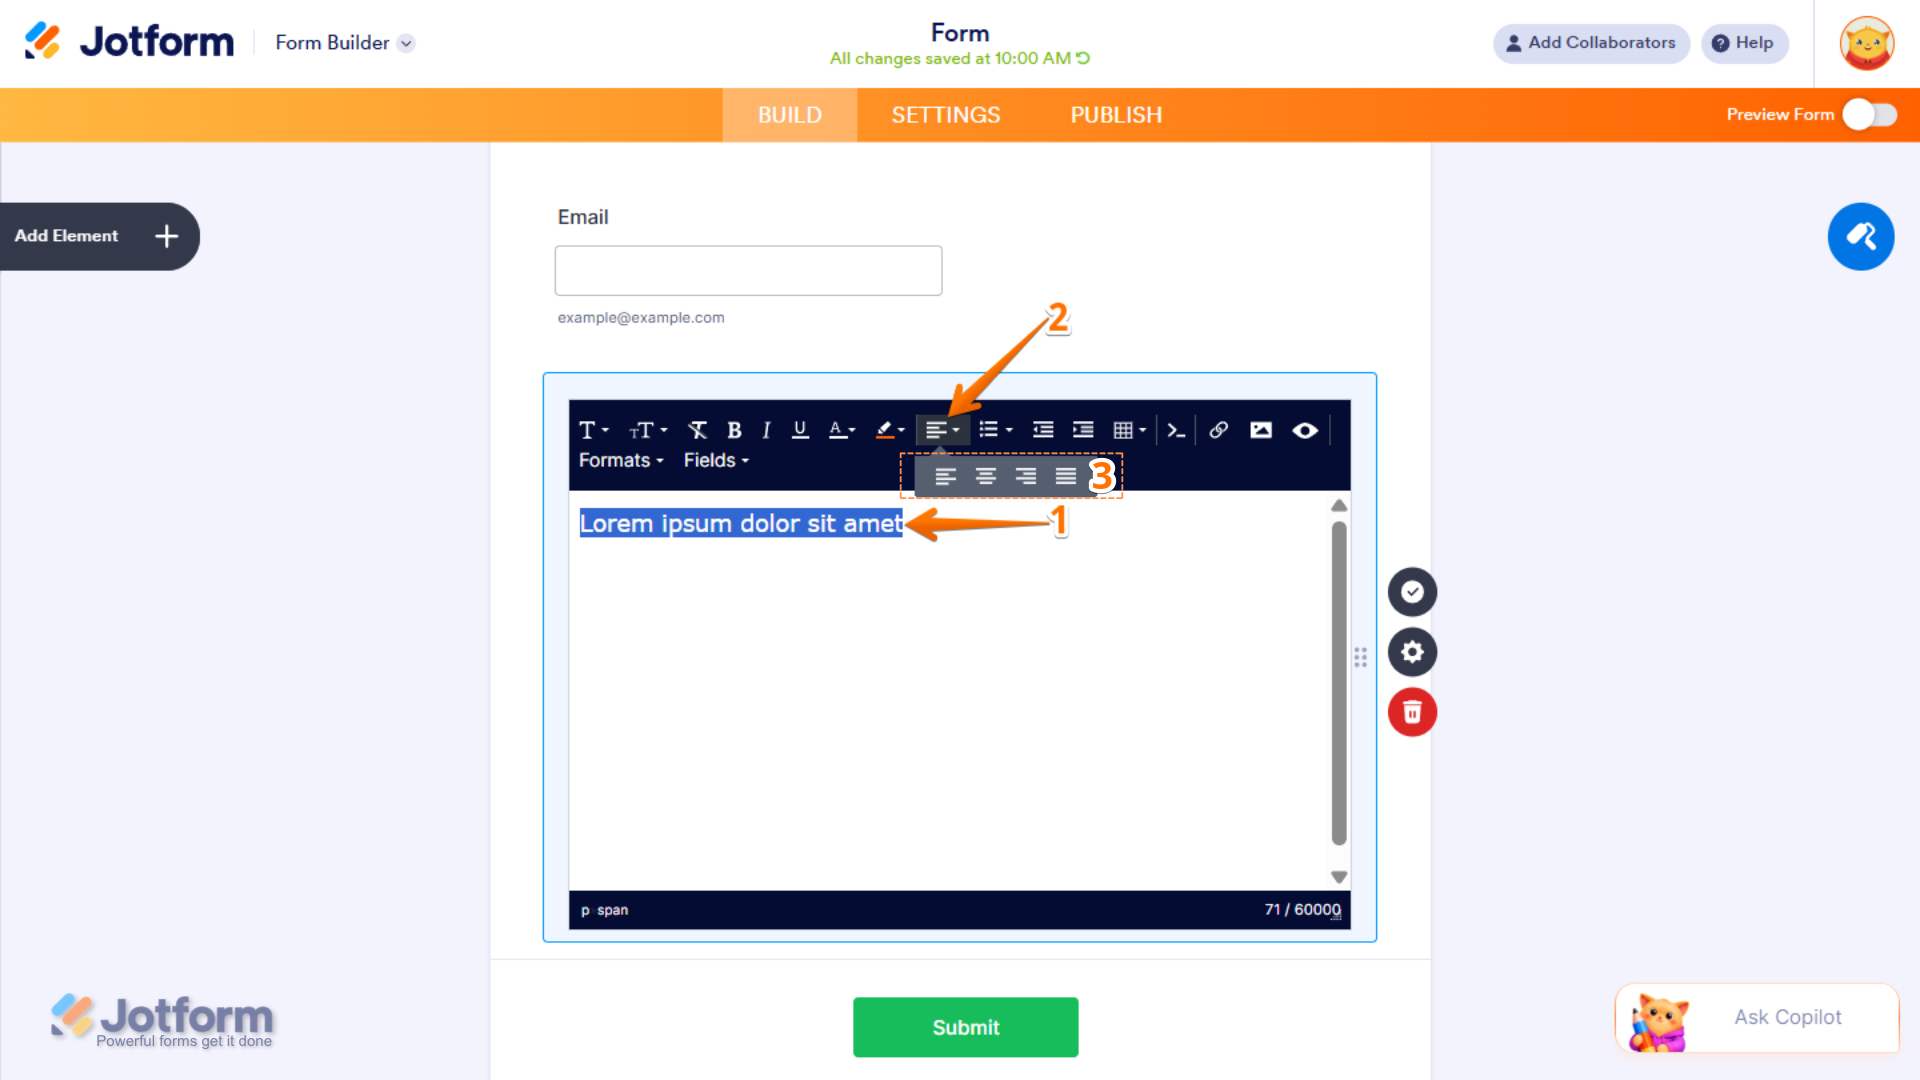
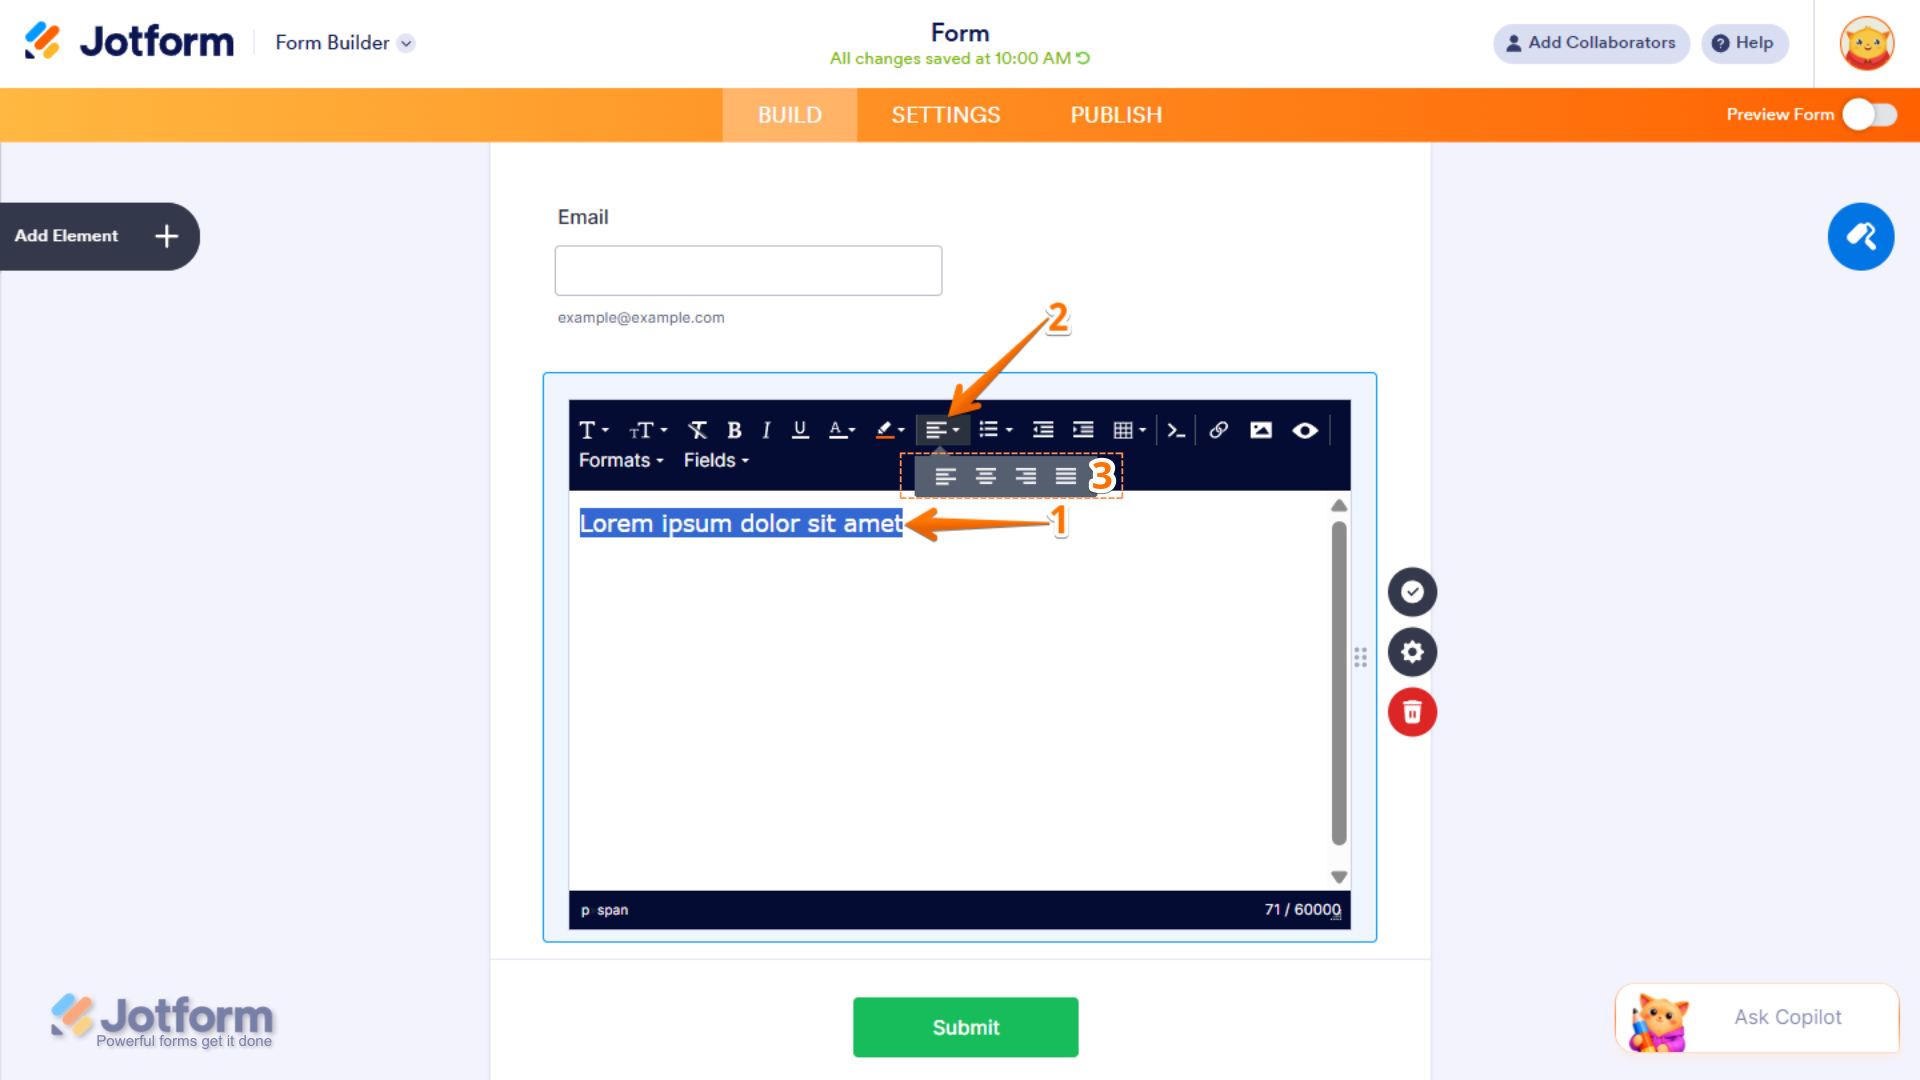
Text Align
The Text Align option controls how your text is positioned within the field, letting you align it to the left, center, right, or justify for a cleaner layout and better readability. To align your text, here’s what to do:
- In the Paragraph’s Rich Text Editor, select the text you need to be aligned.
- Then, click on the Text Align icon in the Rich Text Editor toolbar.
- Now, select the Left, Center, Right, or Justify option.
List
The List option lets you display items in a structured format, making content easier to scan, organize, and present clearly. This is how it’s done:
- In the Paragraph’s Rich Text Editor, select the text you need in list format.
- Next, click on the List icon in the Rich Text Editor toolbar.
- Now, select your list format: Bullet, Square, Numbered, Numerical, Roman Numeral.
Decrease and Increase Indent
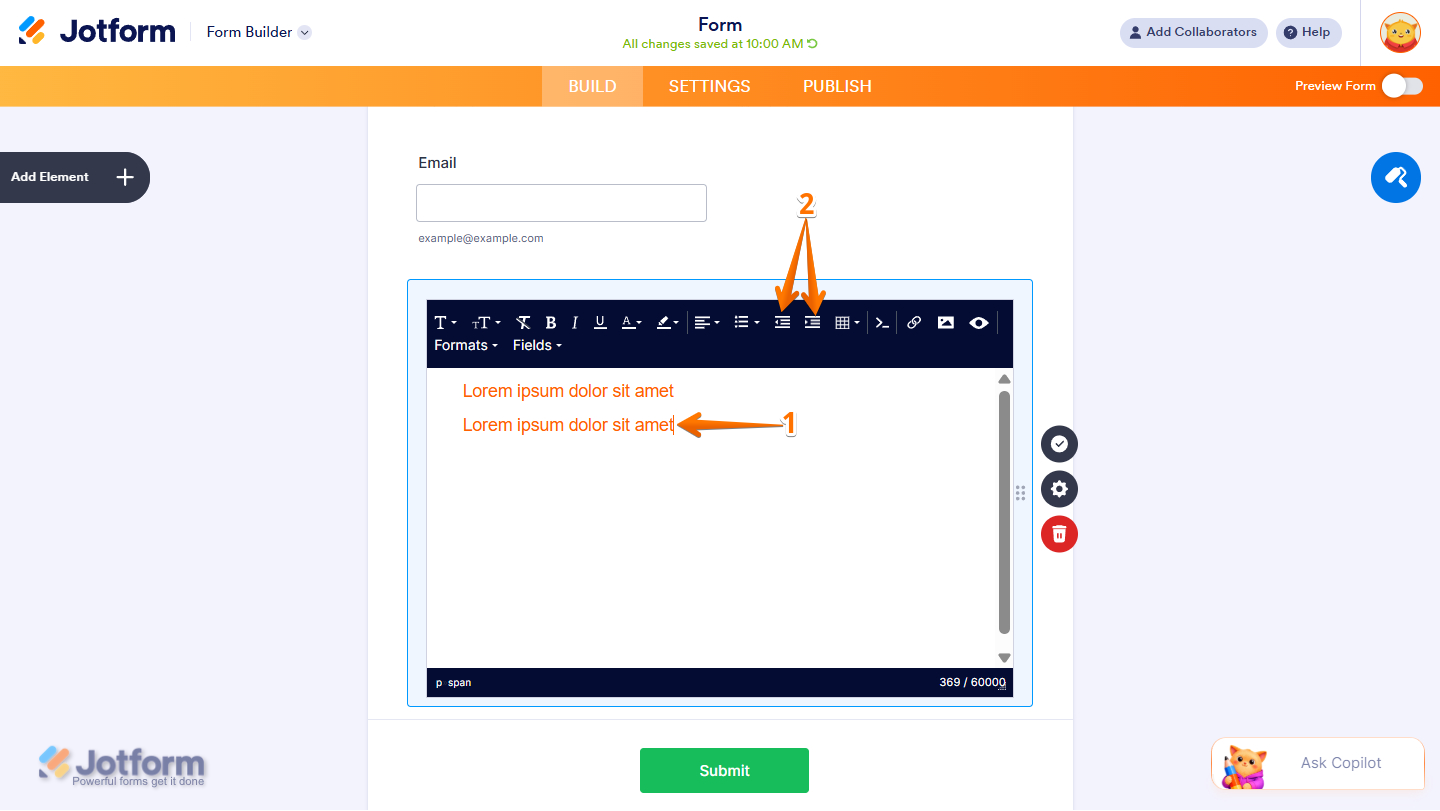
The Increase and Decrease Indent options let you adjust the spacing of your text from the margin, helping you create a clear hierarchy, improve readability, and organize content more effectively. Just set it up like this:
- In the Paragraph’s Rich Text Editor, select the text you want to adjust its indentation.
- Now, click on the Decrease Indent or Increase Indent icon.
Table
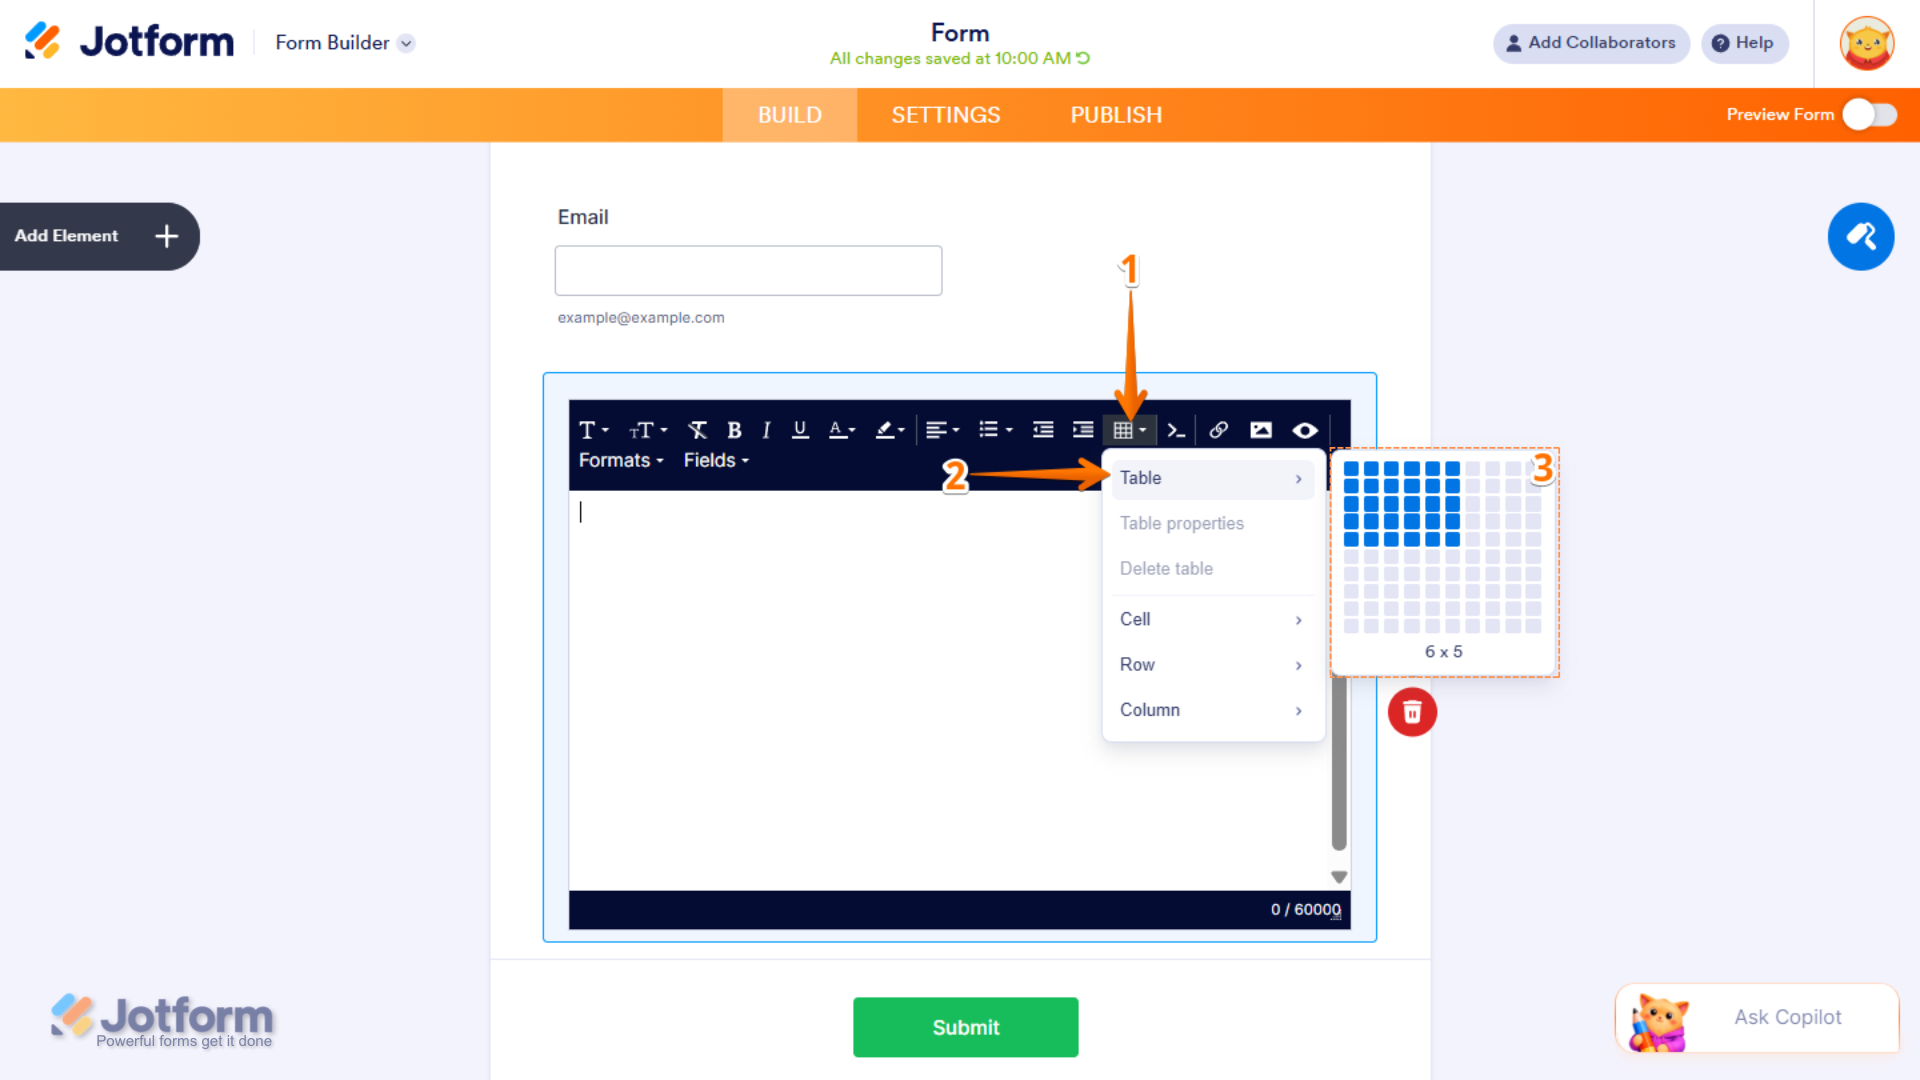
The Table option lets you insert a table into your document, making it easier to create structured layouts for organizing information. You can set it up like this:
- In the Paragraph’s Rich Text Editor, click on the Table icon.
- Then, in the Dropdown menu that opens, hover your mouse over the Table option.
- Now, point your mouse to the Square boxes that represent the number of cells you wish to add, then click to add the table.
Source Code
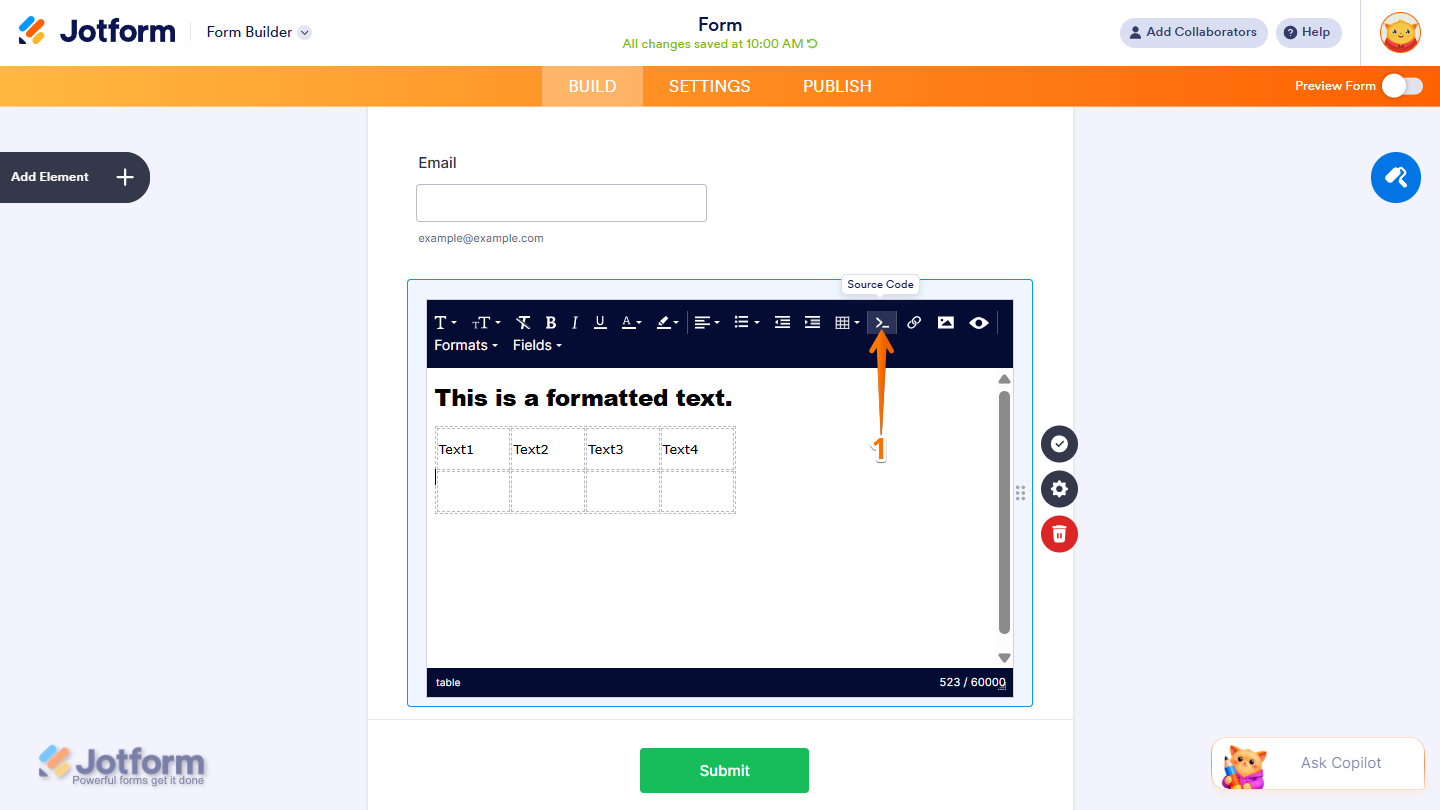
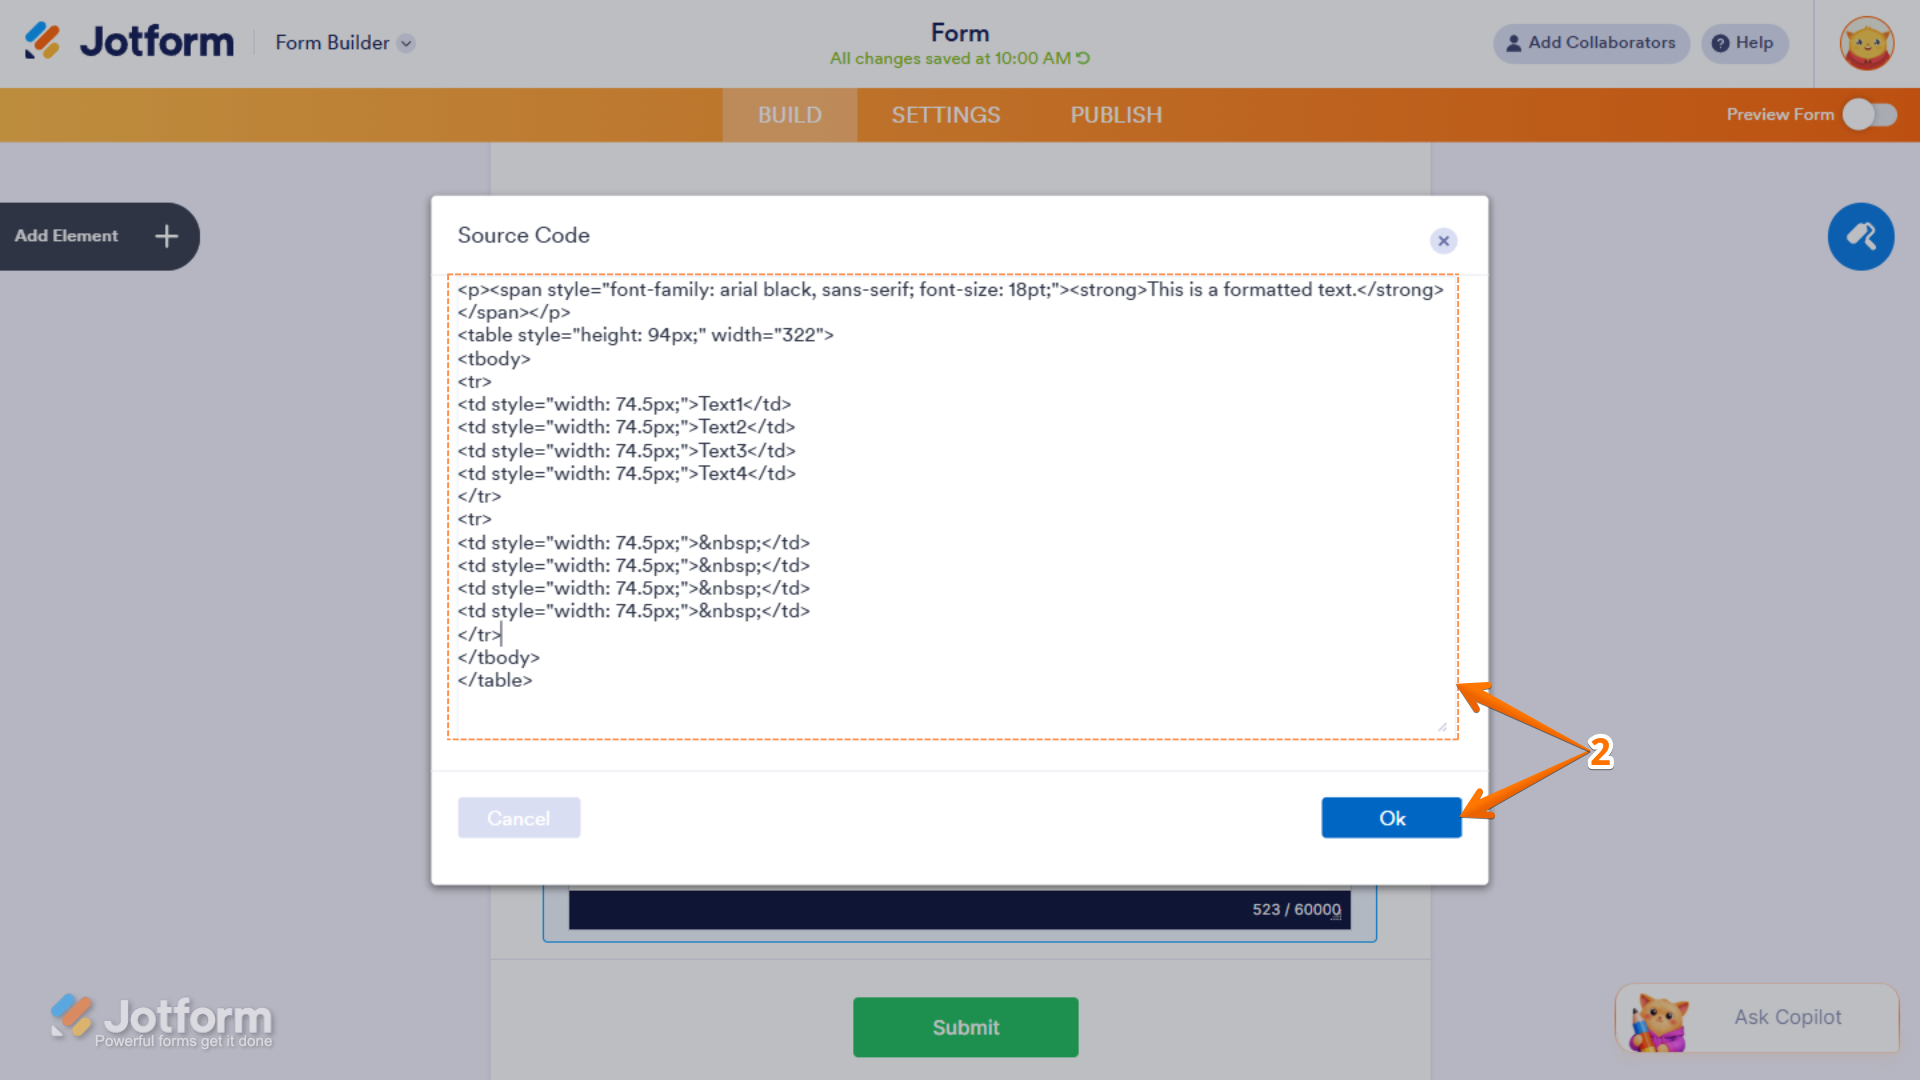
The Source Code option lets you view and edit the HTML source code of the entire Paragraph element content. To view the source code, you’ll just need to follow these simple steps:
- In the Paragraph’s Rich Text Editor, click on the Source Code icon.
- Next, in the Source Code window that opens, make your edits, then click on Ok to save.
Insert or Edit Link
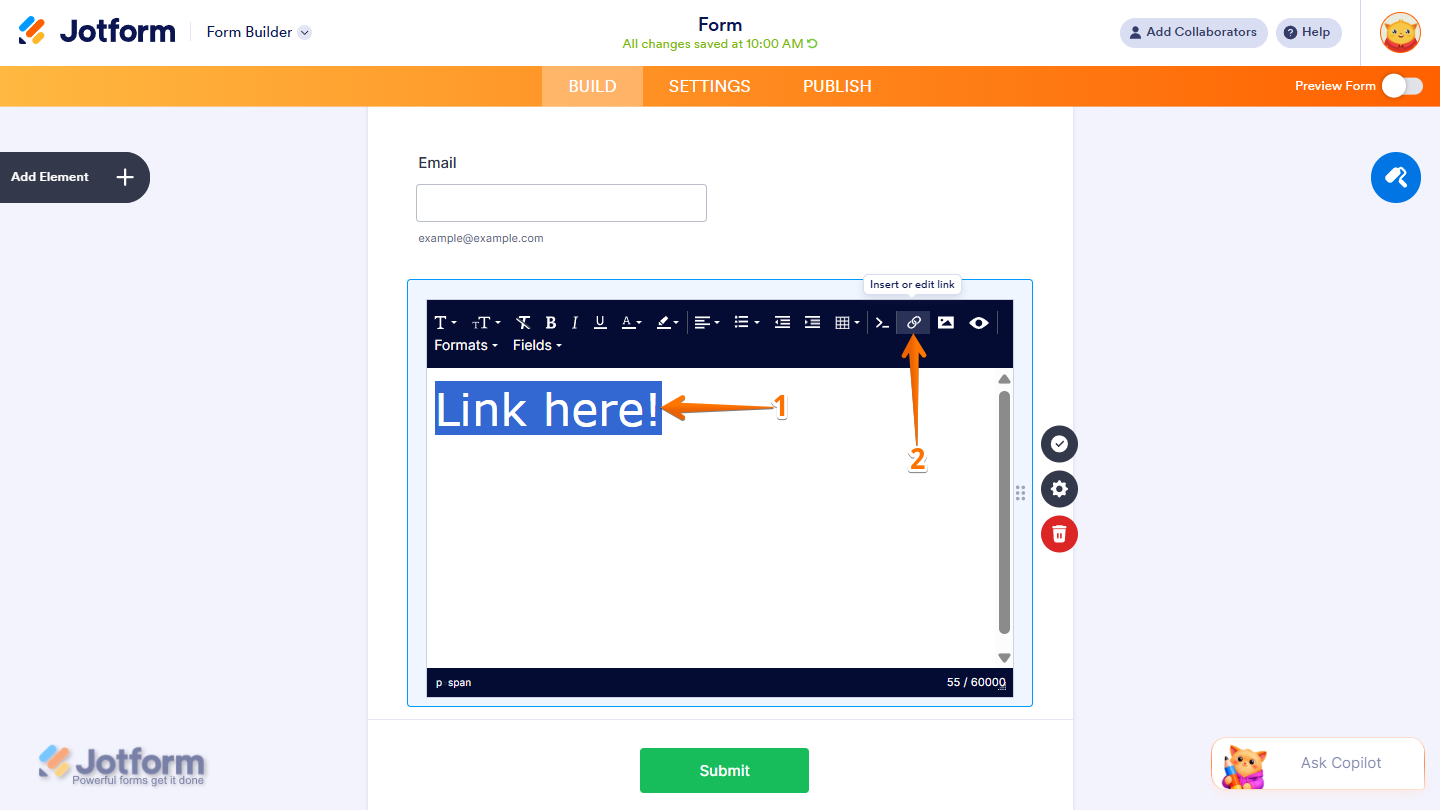
The Insert or Edit Link option lets you add new hyperlinks or modify existing ones, making it easy to connect your text to webpages, files, or other resources. Here’s how to set it up:
- In the Paragraph’s Rich Text Editor, select the text you want to put a link on.
- Then, click on the Insert or Edit Link icon.
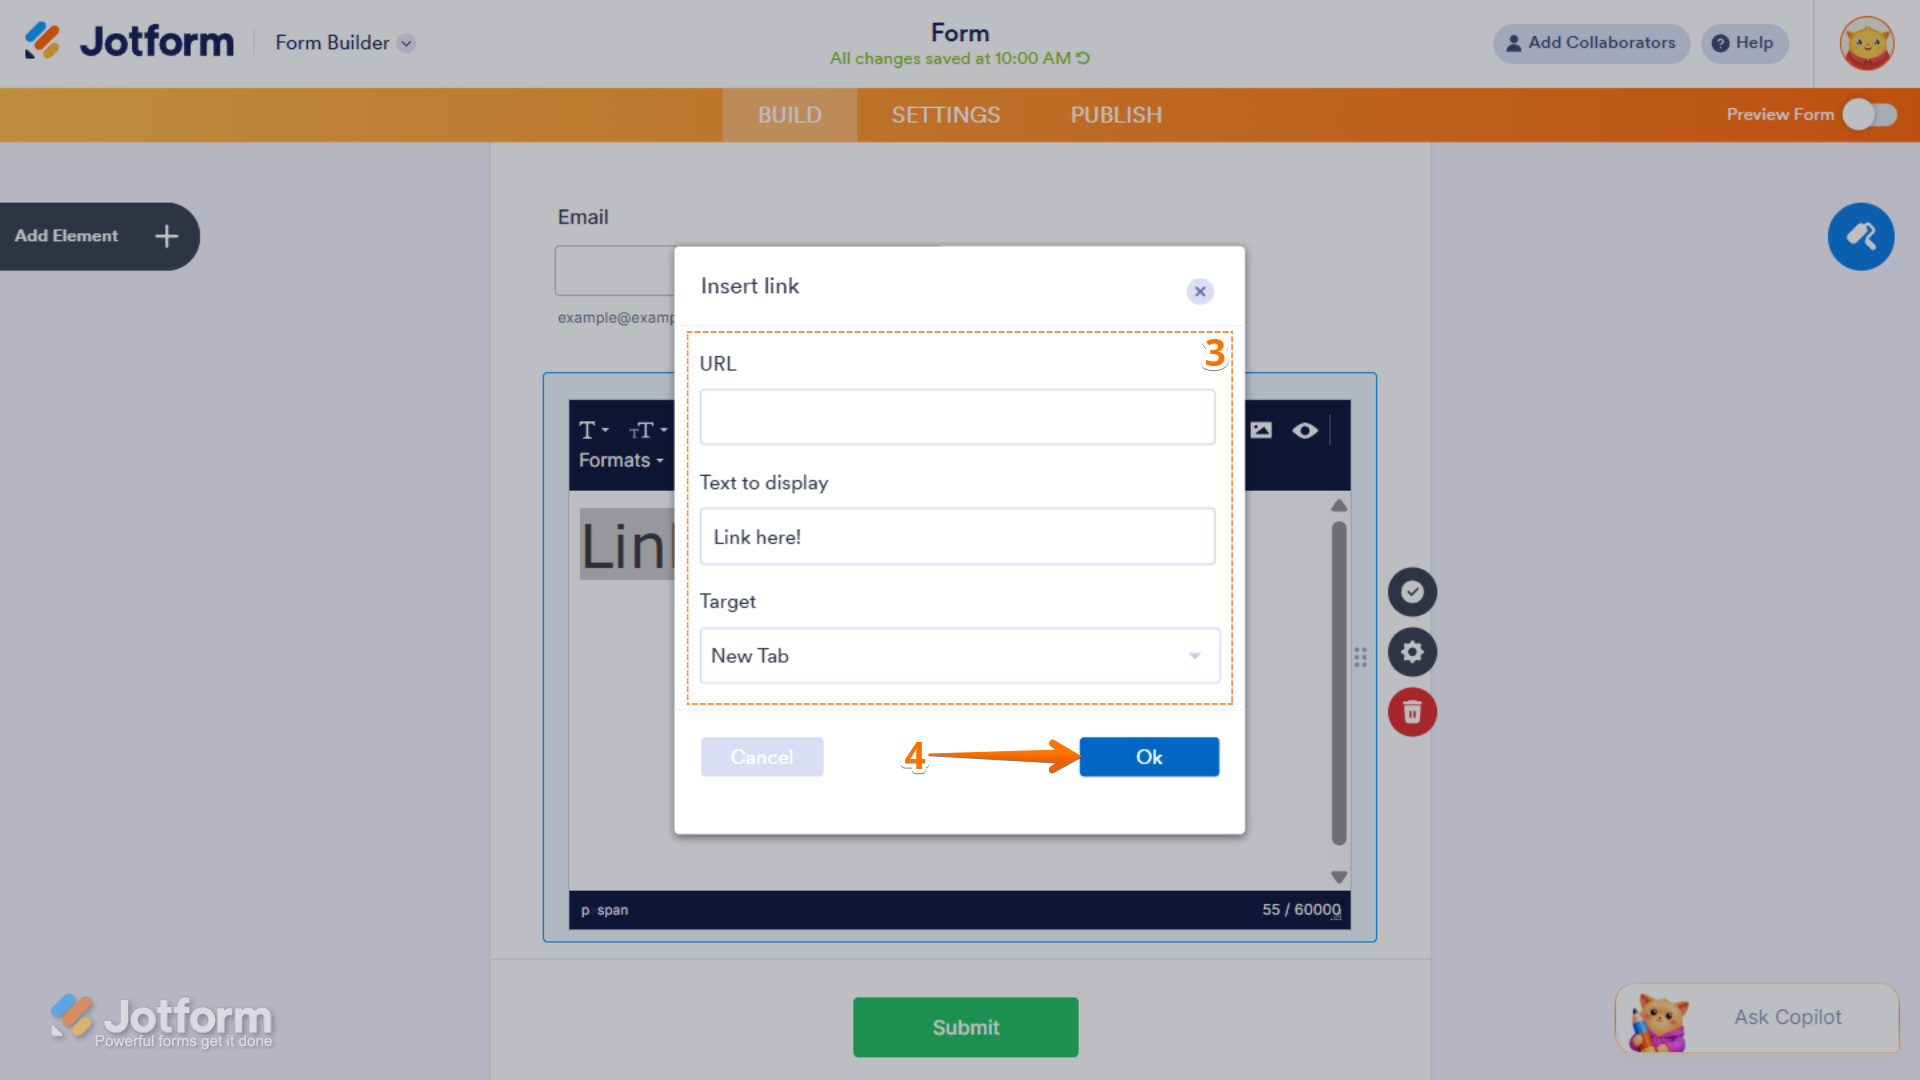
- Next, set up these things:
- URL — Enter the web address or link you want to attach to the text.
- Text to Display — This is the highlighted text. You can keep the text or change it here.
- Target — Choose New Tab to open the link in a separate browser tab, or Same Window to open it in the current browser window.
- Once everything is done, click on OK.
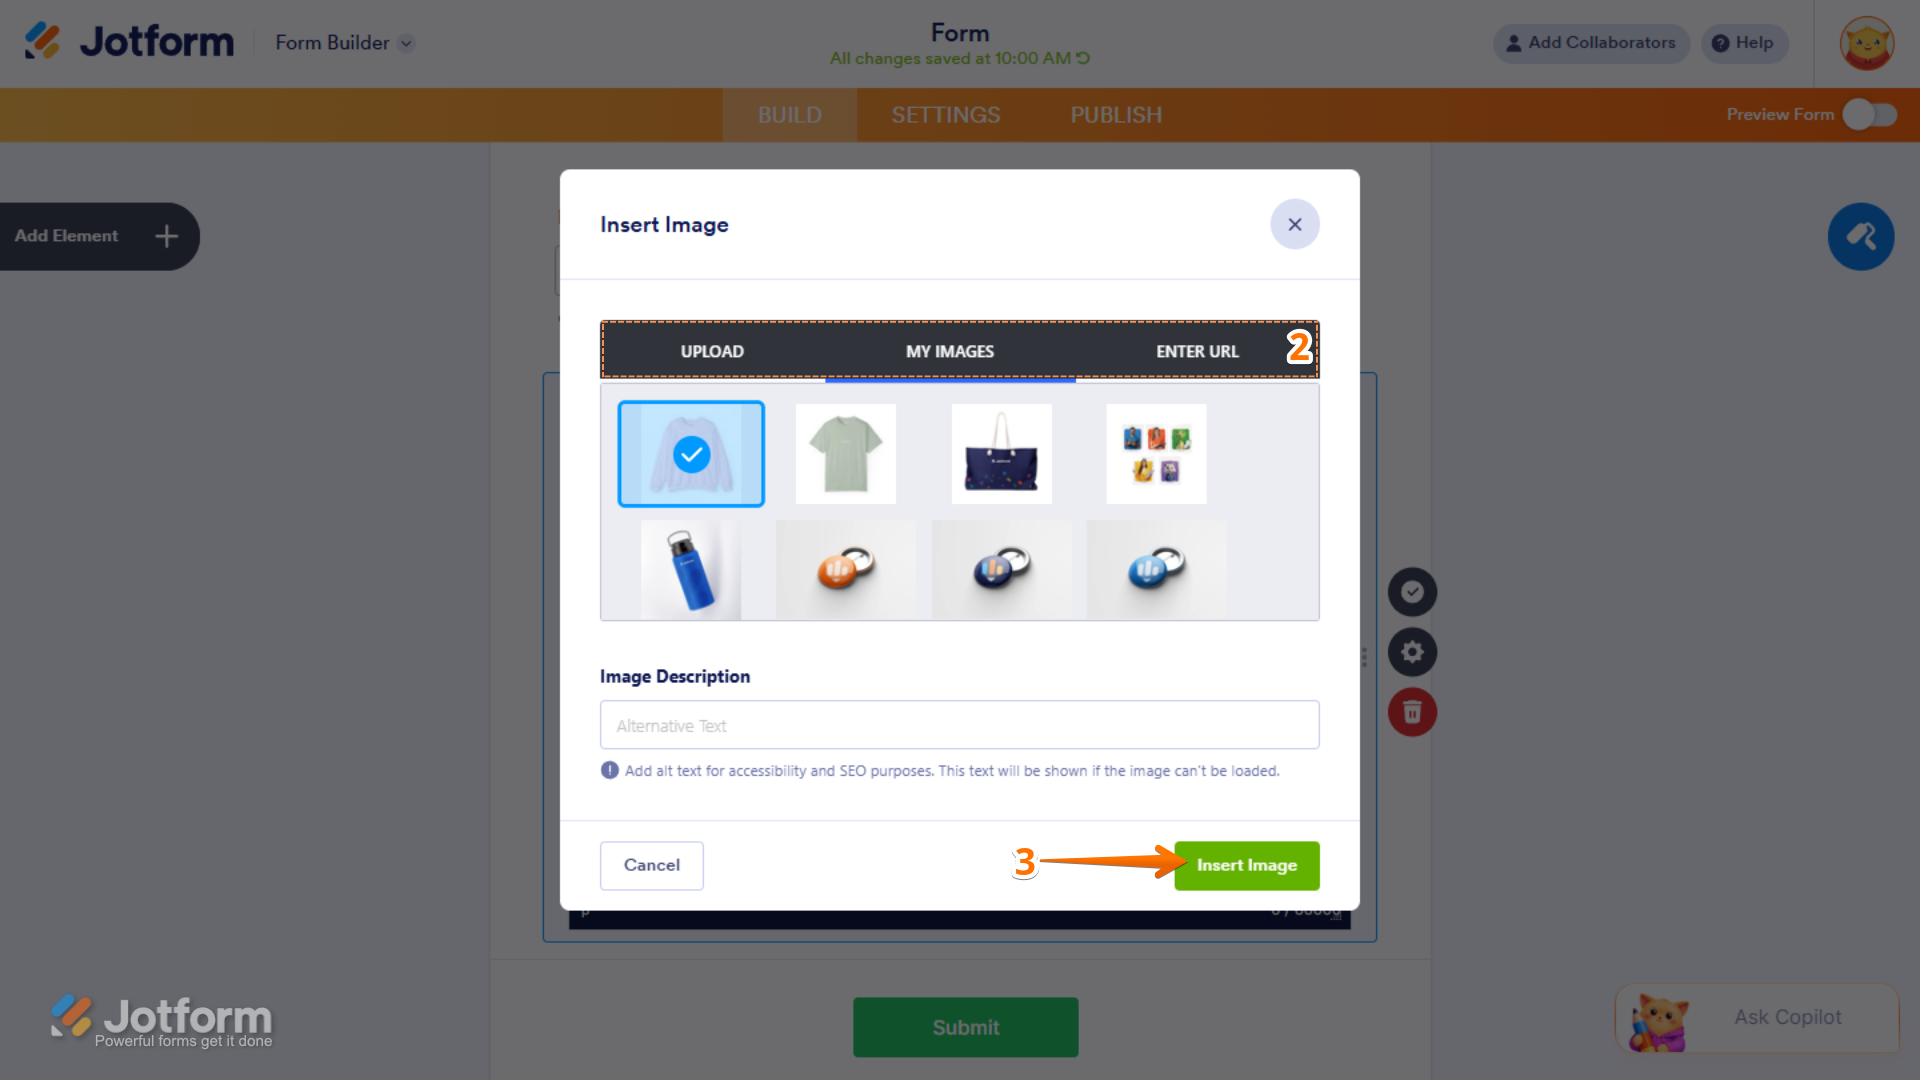
Insert Image
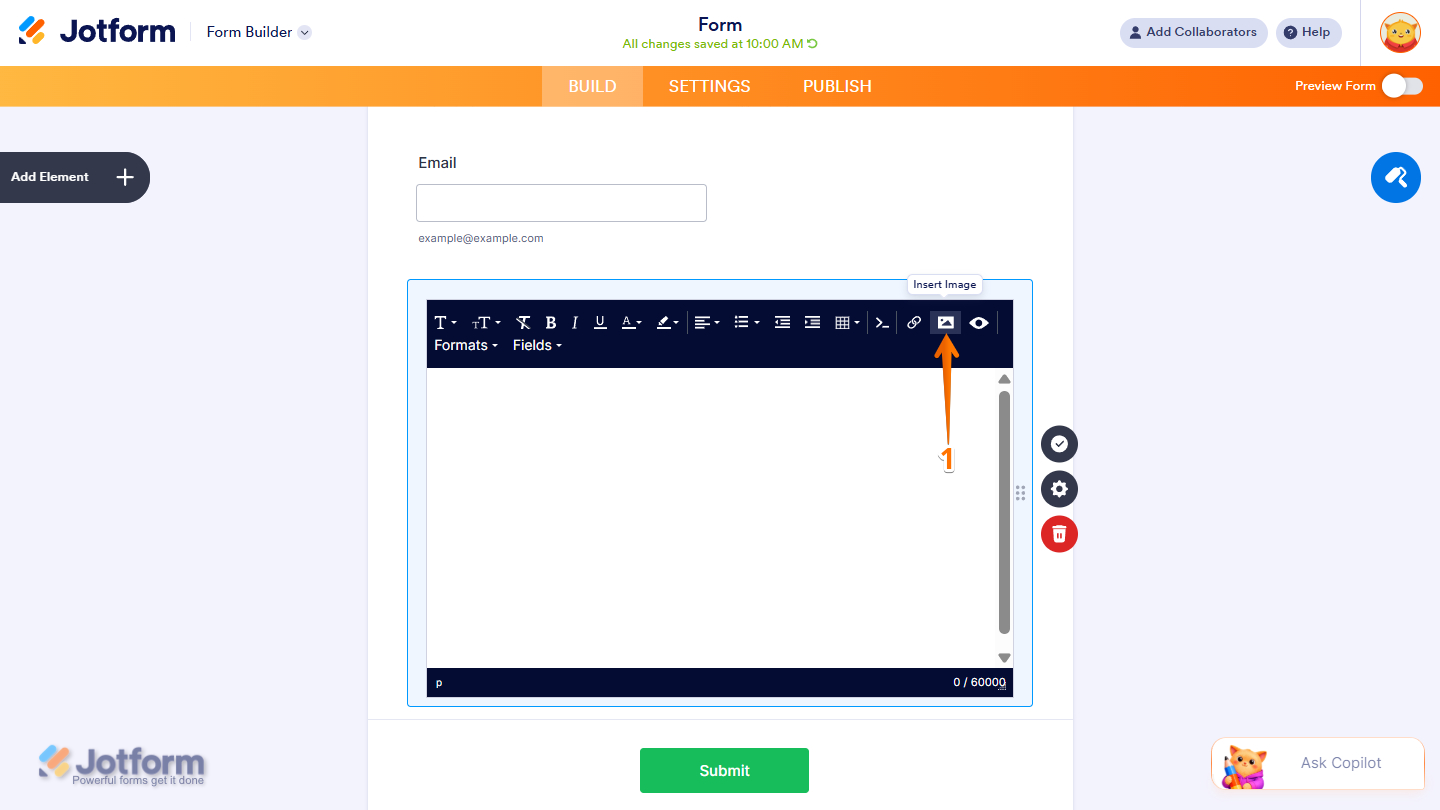
The Insert Image option lets you add images to your document or content area, helping you create more engaging and visually informative layouts. Setting it up is quick—here’s how:
- In the Paragraph’s Rich Text Editor, click on the Insert Image icon.
- Next, in the Insert Image window that opens, choose how to upload the images:
- Upload — Lets you upload a new image directly to the Paragraph element.
- My Images — Let’s you select from images you have previously uploaded.
- Enter URL — Lets you insert an image using a direct link from an external source or website.
- Once you’re done, click on Insert Image.
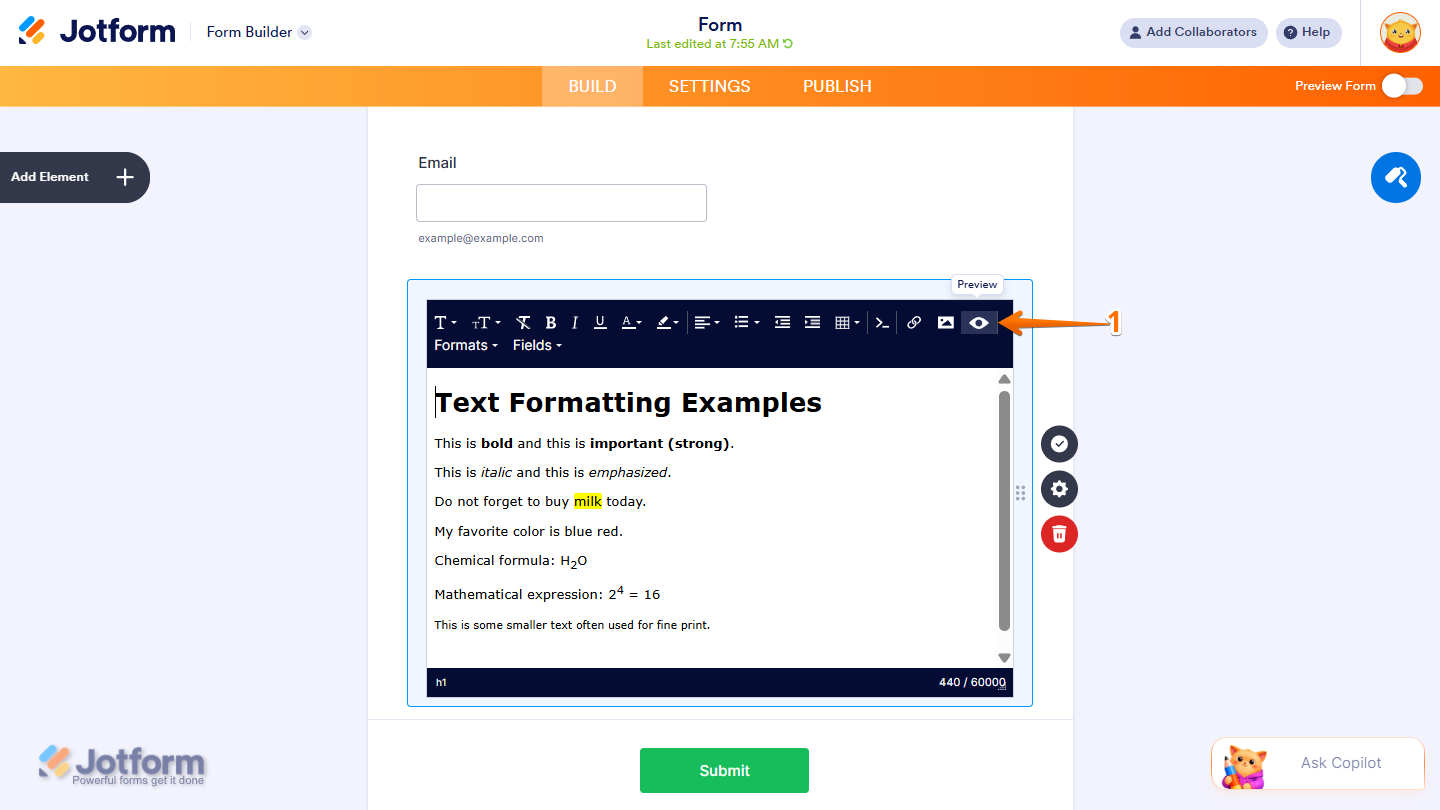
Preview
The Preview option lets you view the content added to the Paragraph element in a visual layout before publishing your form. Here’s what to do:
- In the Paragraph’s Rich Text Editor, click on the Preview icon.
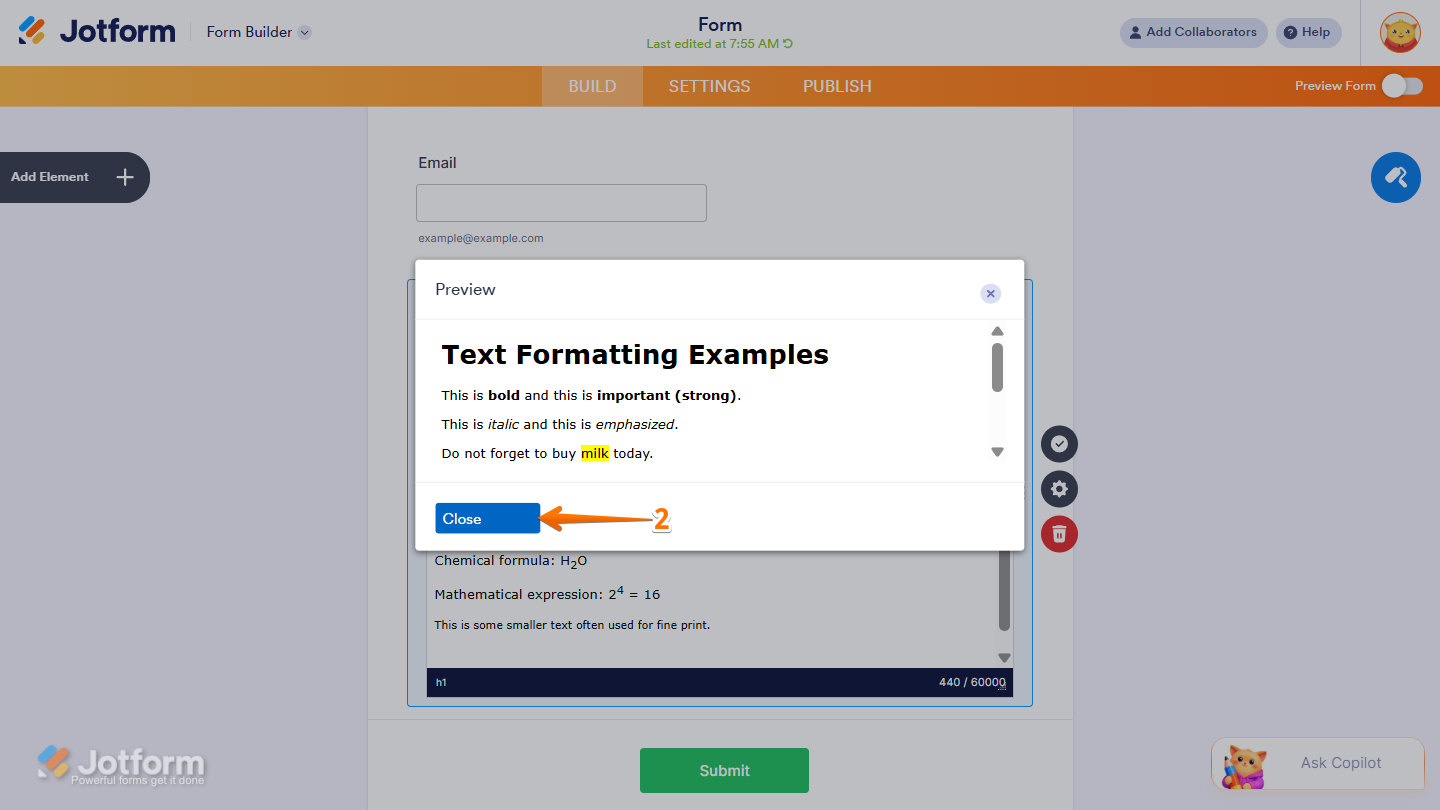
- Now, click on Close to exit the preview.
Formats
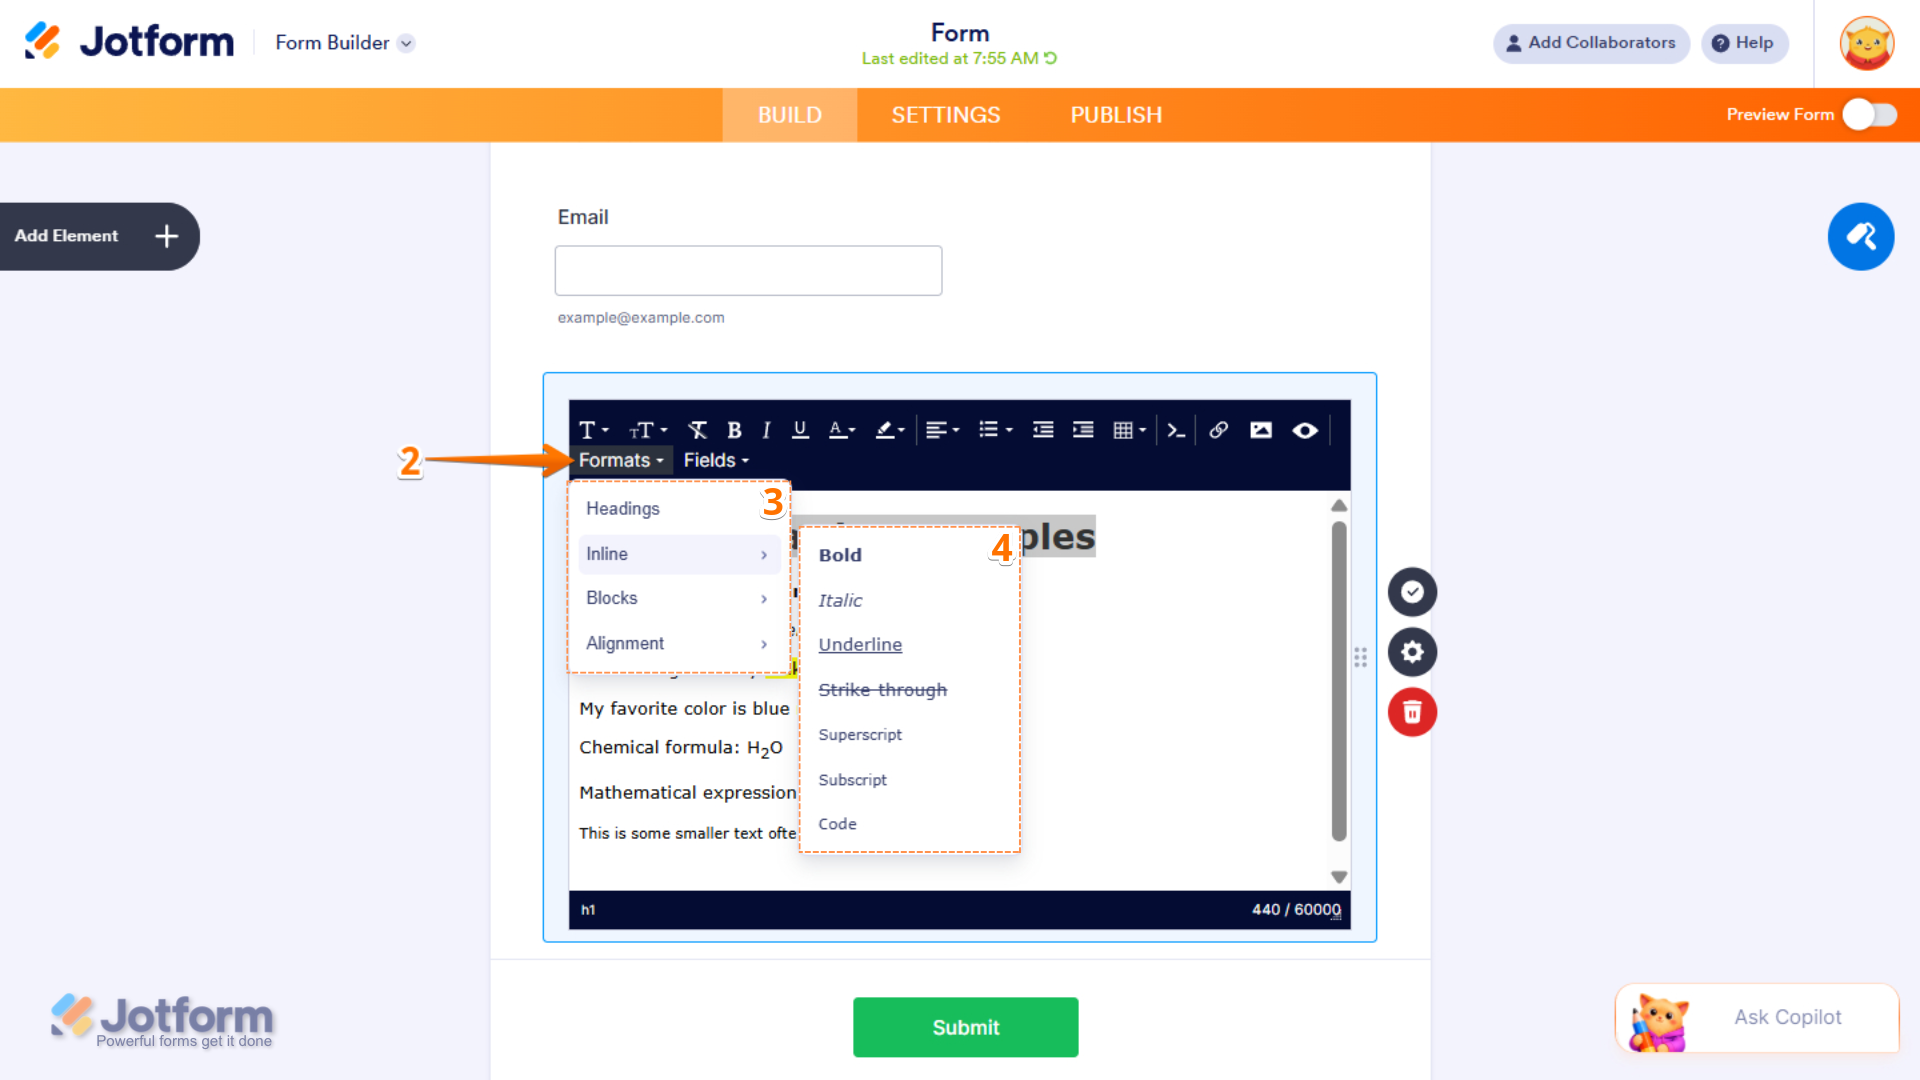
The Formats option gives you additional text styling tools, allowing you to format content as Headings, Inline styles, Blocks, and Alignments. Use these options to organize your content, emphasize important text, and improve the overall readability of your Paragraph element. You can set it up like this:
- In the Paragraph’s Rich Text Editor, select the text you want to format.
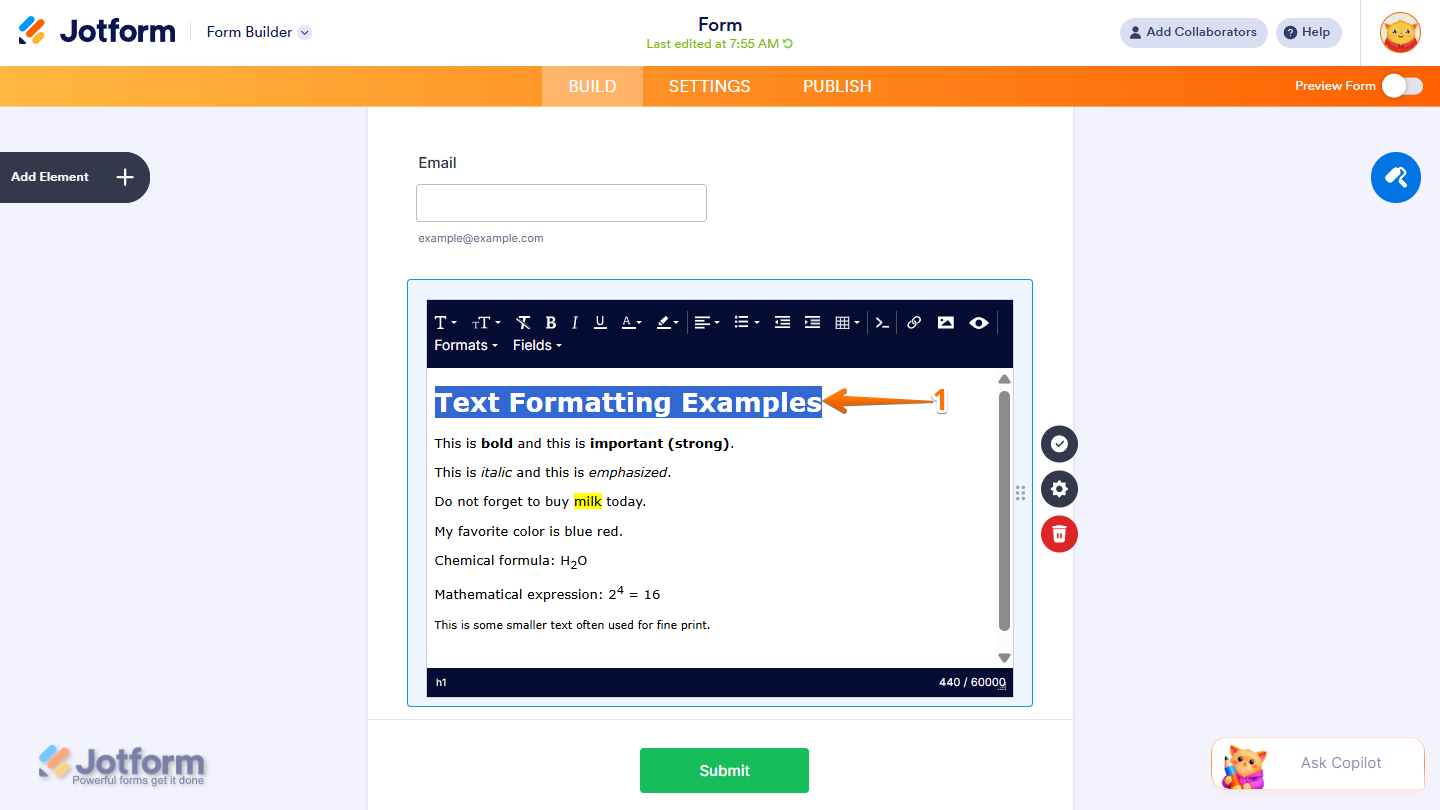
- Then, click on Formats in the Rich Text Editor toolbar.
- Next, in the Dropdown menu that opens, hover your mouse over your desired format:
- Headings — Apply heading styles to your text to create clear titles and section labels.
- Inline — Add inline text styles such as bold, italic, underline, superscript, or code formatting without affecting the overall paragraph layout.
- Blocks — Format text as separate content blocks, such as paragraphs, quotations, or preformatted text, to better structure your content.
- Alignment — Adjust how text is positioned within the Paragraph element. You can align text to the left, center, right, or justify it for a cleaner presentation.
- Now, in the Dropdown submenu that opens on the right side of the hovered format, click on the format item.
Fields
The Fields option lets you personalize the content inside the Paragraph element by inserting data from your form fields. This allows you to create dynamic text that automatically updates based on user responses, making your forms more interactive, informative, and personalized. Just set it up like this:
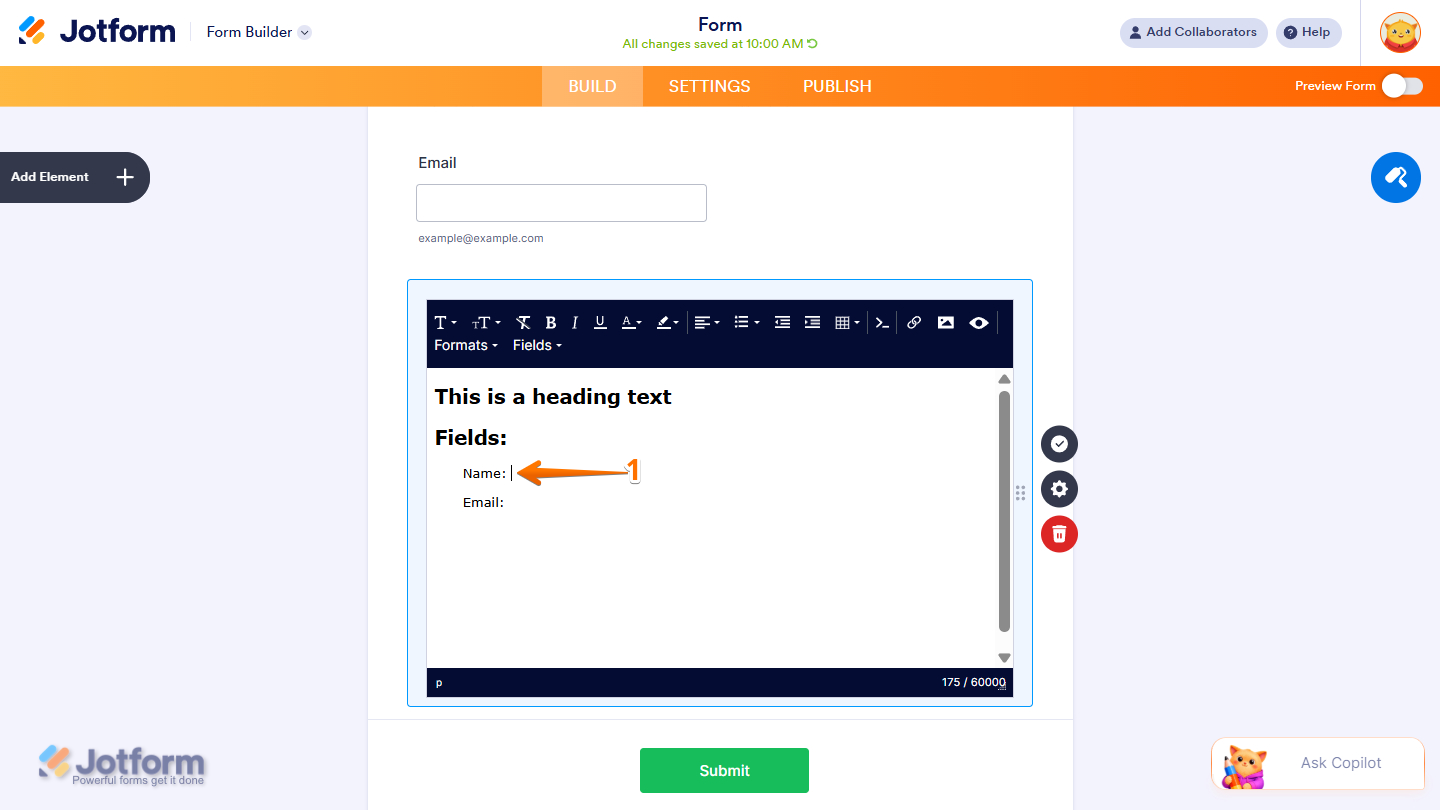
- In the Paragraph’s Rich Text Editor, place your cursor in the area where you want to display the data from a field.
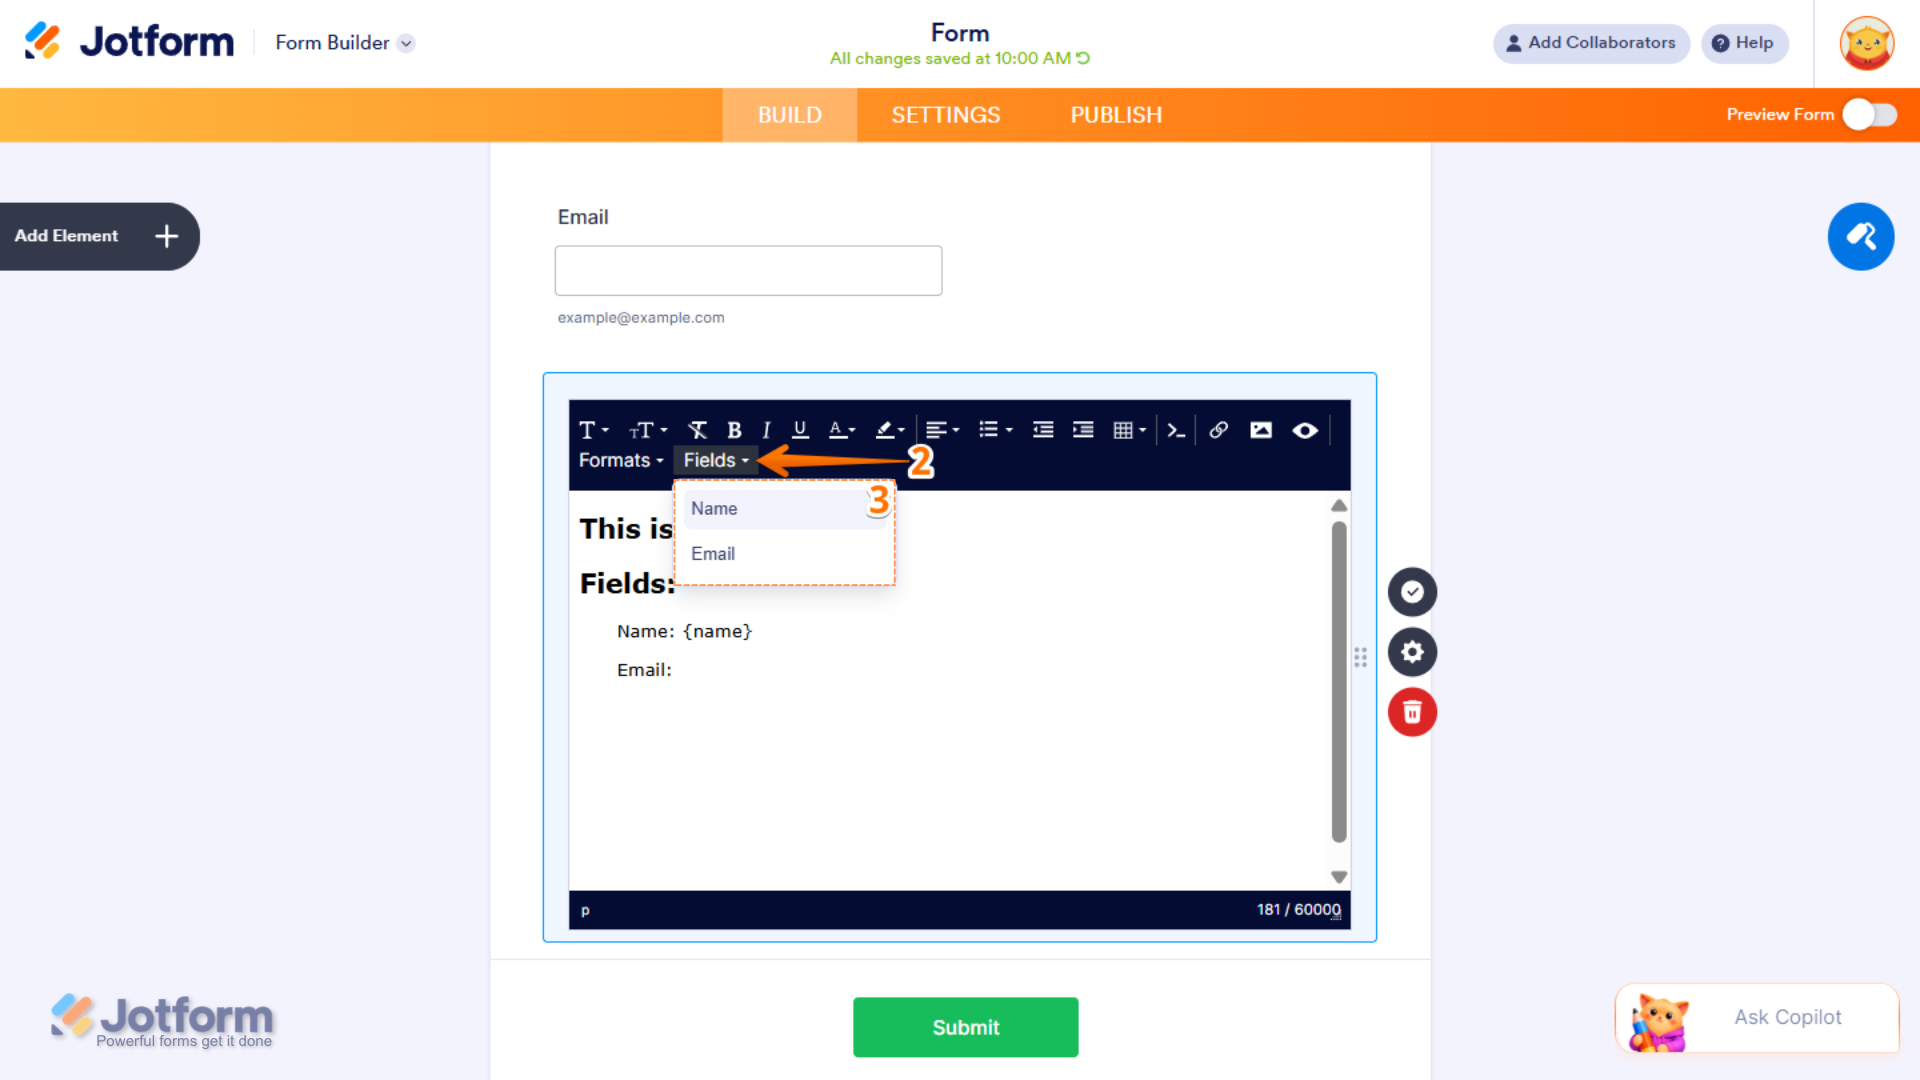
- Then, click on Fields in the Rich Text Editor toolbar.
- Now, in the Dropdown menu that opens, click on the visible field to add it.
That’s it! You’ve successfully added and configured the Paragraph element. You can now use it to display formatted text, images, links, and personalized field data to create more engaging and informative forms.

Send Comment:
1 Comment:
August 25, 2026
I already have a sales page design. can i paste the html on the paragraph element? do the same design will appear?