Jotform’s Remote Data Dropdown widget lets you populate dropdown choices from a remote HTTPS API endpoint when your form loads. It helps keep your dropdown options up to date with records from customer, inventory, CRM, or internal systems, so you don’t have to manually update the choices whenever the source data changes.
Here are a few ways to use it:
- Let operations teams select current customers, vendors, or work orders from an internal API.
- Help CRM admins keep account or contact choices aligned with their source system.
- Let IT teams reuse secure JSON endpoints for controlled form choices.
- Help inventory managers show current products, locations, or stock records in a form.
Whether you’re creating a new form or updating an existing one, you can add and set up the Remote Data Dropdown widget in a few easy steps. Here’s how to do it:
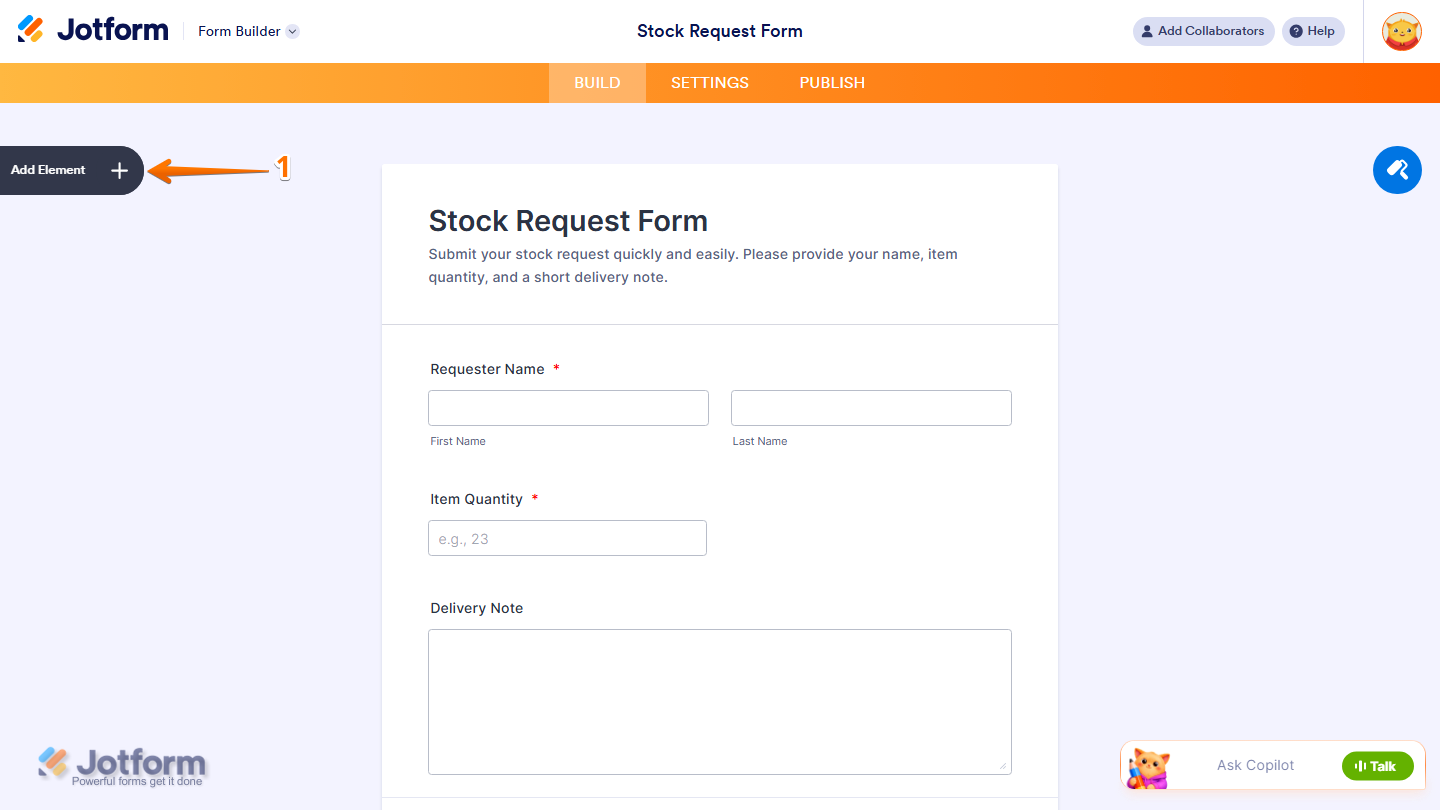
- In Form Builder, click on Add Element on the left side of the page.
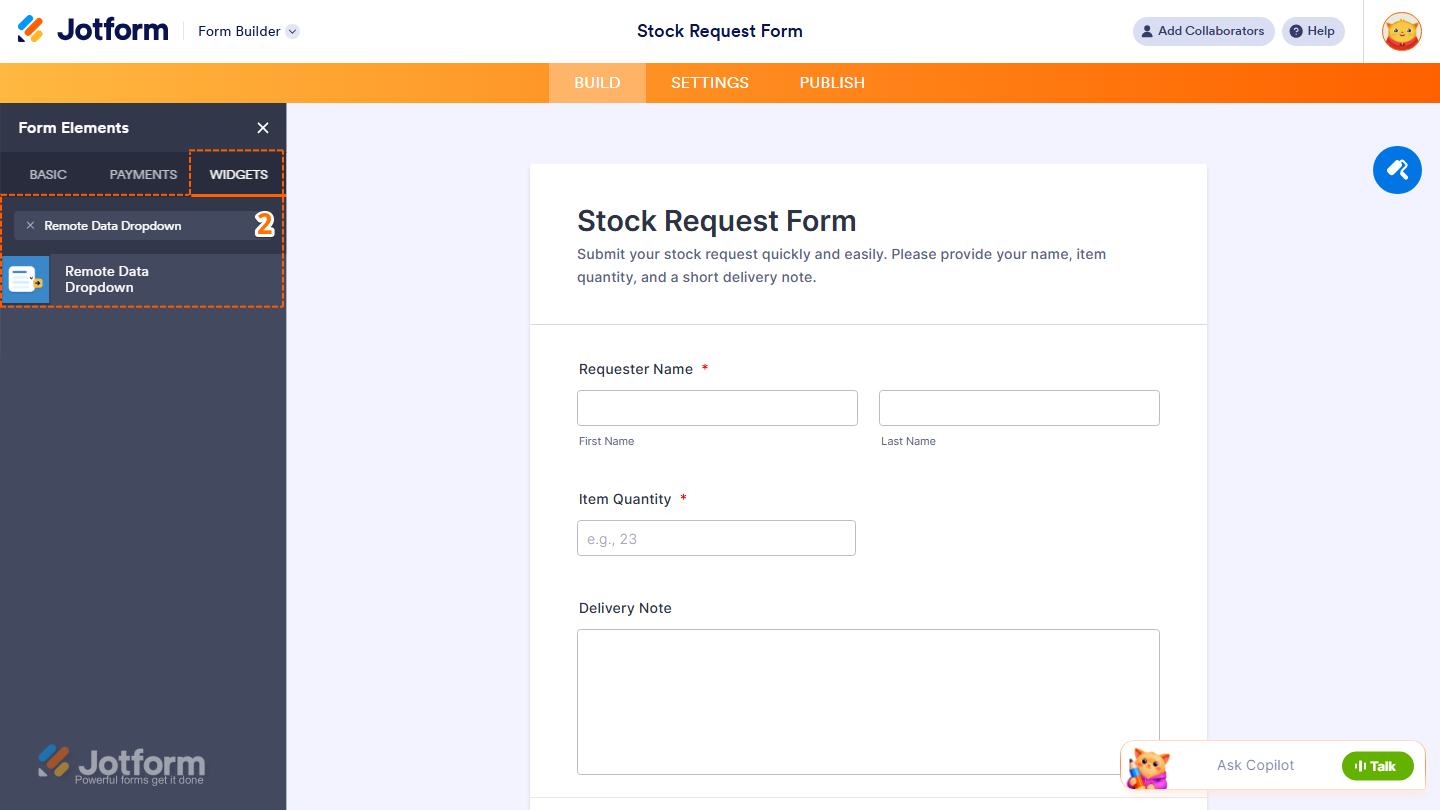
- Now, in the Form Elements menu, under the Widgets tab, search for Remote Data Dropdown and click on it. Or, just drag and drop it to where you want it to be on your form.
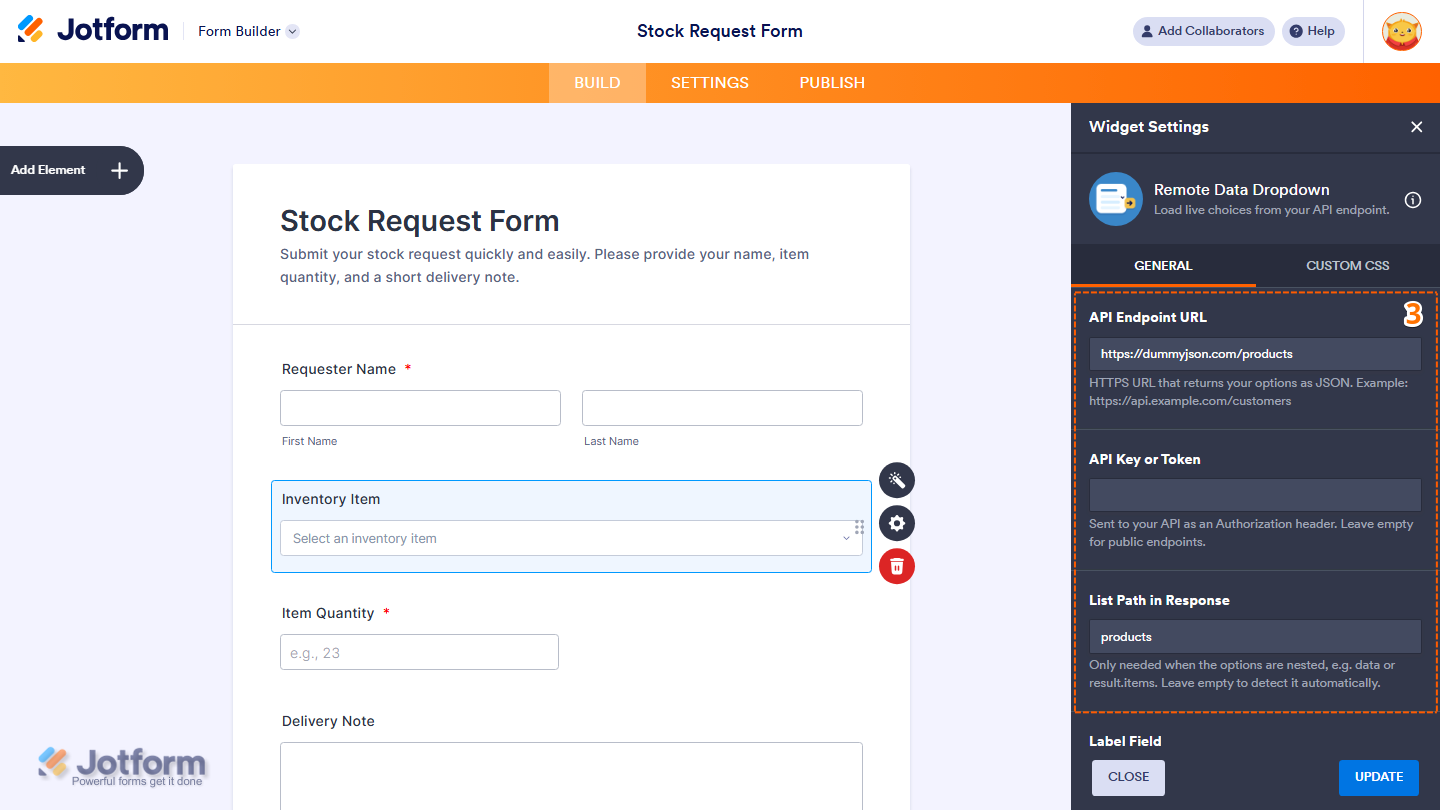
- Next, in the Widget Settings menu that opens on the right side of the page, you’ll see this list of settings you can configure:
- API Endpoint URL — Enter the HTTPS URL of the API endpoint that returns the dropdown options.
- API Key or Token — Enter the API key or token to send to the API as an authorization header. Leave this empty for public endpoints.
- List Path in Response — Enter the path to the list of options in the API response when the options are nested. Leave this empty to detect the path automatically.
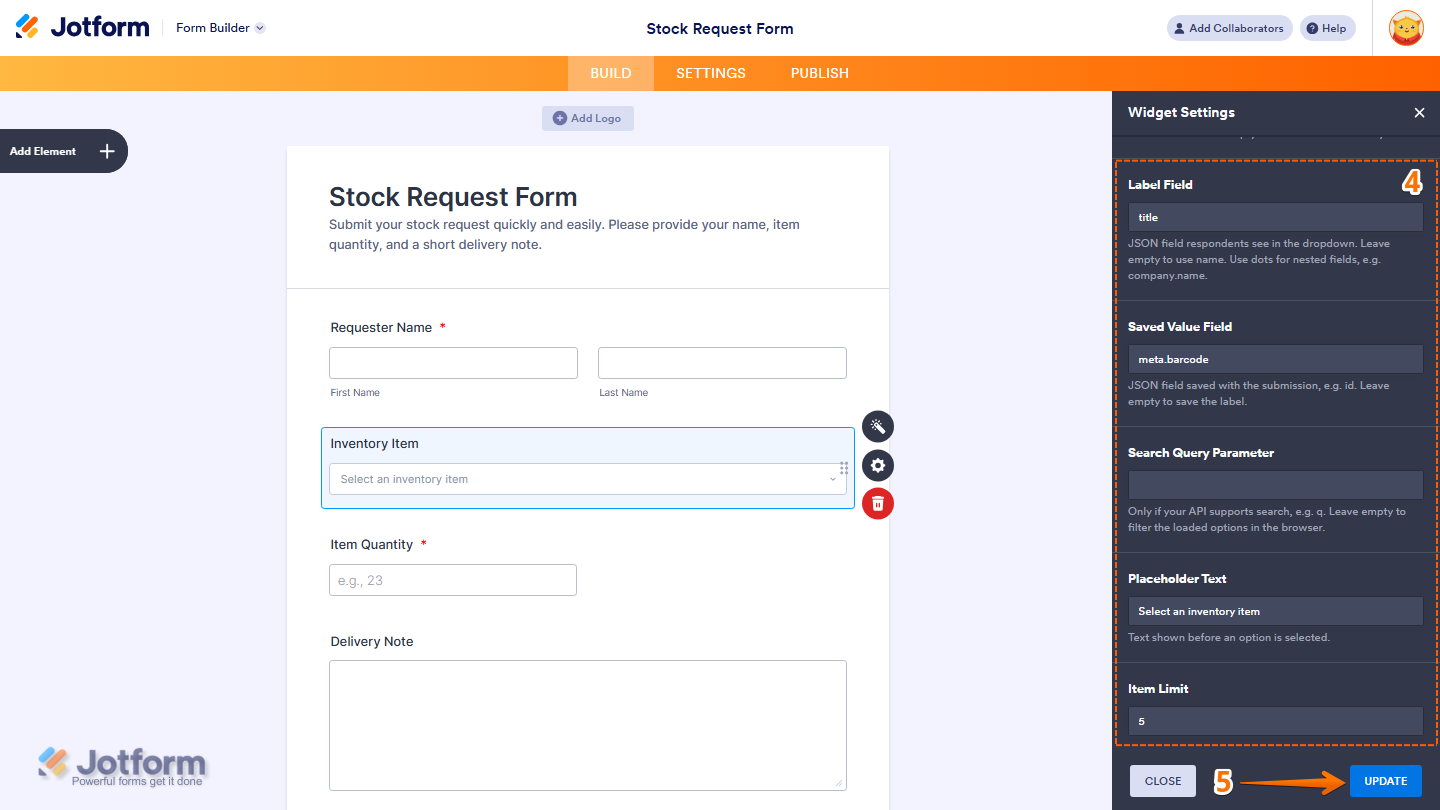
- Then, scroll down to the bottom and continue to set up these settings:
- Label Field — Enter the JSON field that contains the text to display for each dropdown option. Leave this empty to use the name field.
- Saved Value Field — Enter the JSON field whose value you want to save with the form submission.
- Search Query Parameter — Enter the API parameter used to filter dropdown options based on the respondent’s search.
- Placeholder Text — Enter the text displayed before an option is selected.
- Item Limit — Enter the maximum number of options to display in the dropdown.
- Once you’re done, click on Update.
That’s it. You’ve successfully added and set up the Remote Data Dropdown widget on your form.
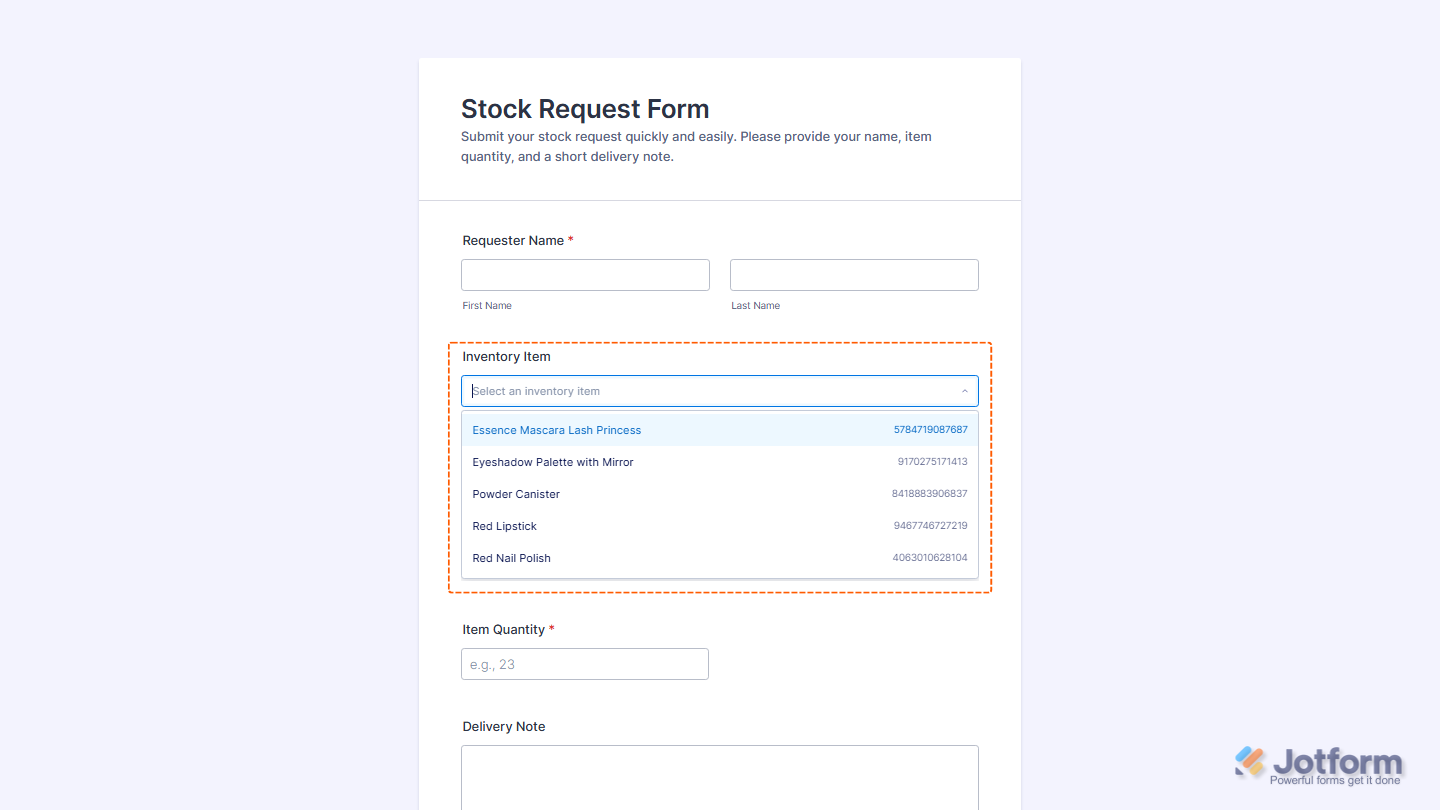
You can explore how it looks with this demo form.
Note
- For advanced styling of the Remote Data Dropdown widget, you can add your own custom CSS code under the Custom CSS tab in the Widget Settings. Our guide on How to Inject CSS Codes to Widgets walks you through everything.
- You can also configure the widget properties, like alignment, labels, size, visibility, and more, to control how it looks and behaves in your form. Check out our guide on How to Access and Configure the Question Properties of a Widget to learn more.

Send Comment: