Jotform’s Sliders with Calculated Result widget is ideal for forms that require interactive inputs and instant numerical feedback based on user selections. Whether you’re building a cost estimator, a loan calculator, or a custom quote form, this widget allows users to adjust multiple sliders and see the total Update in real time. It’s especially useful for forms that involve dynamic pricing or value assessment, making it easier for users to understand the impact of their choices without manual calculations.
Here are a few ways to use it:
- Let users estimate pricing based on adjustable quantities or options.
- Calculate service costs based on selected levels or usage.
- Estimate loan payments by adjusting the amount, interest, or duration.
- Provide project cost estimations based on selected requirements.
- Allow users to calculate subscription or package pricing interactively.
Whether you’re creating a new form or updating an existing one, adding and setting up the Sliders with Calculated Result widget only takes a second—here’s what to do:
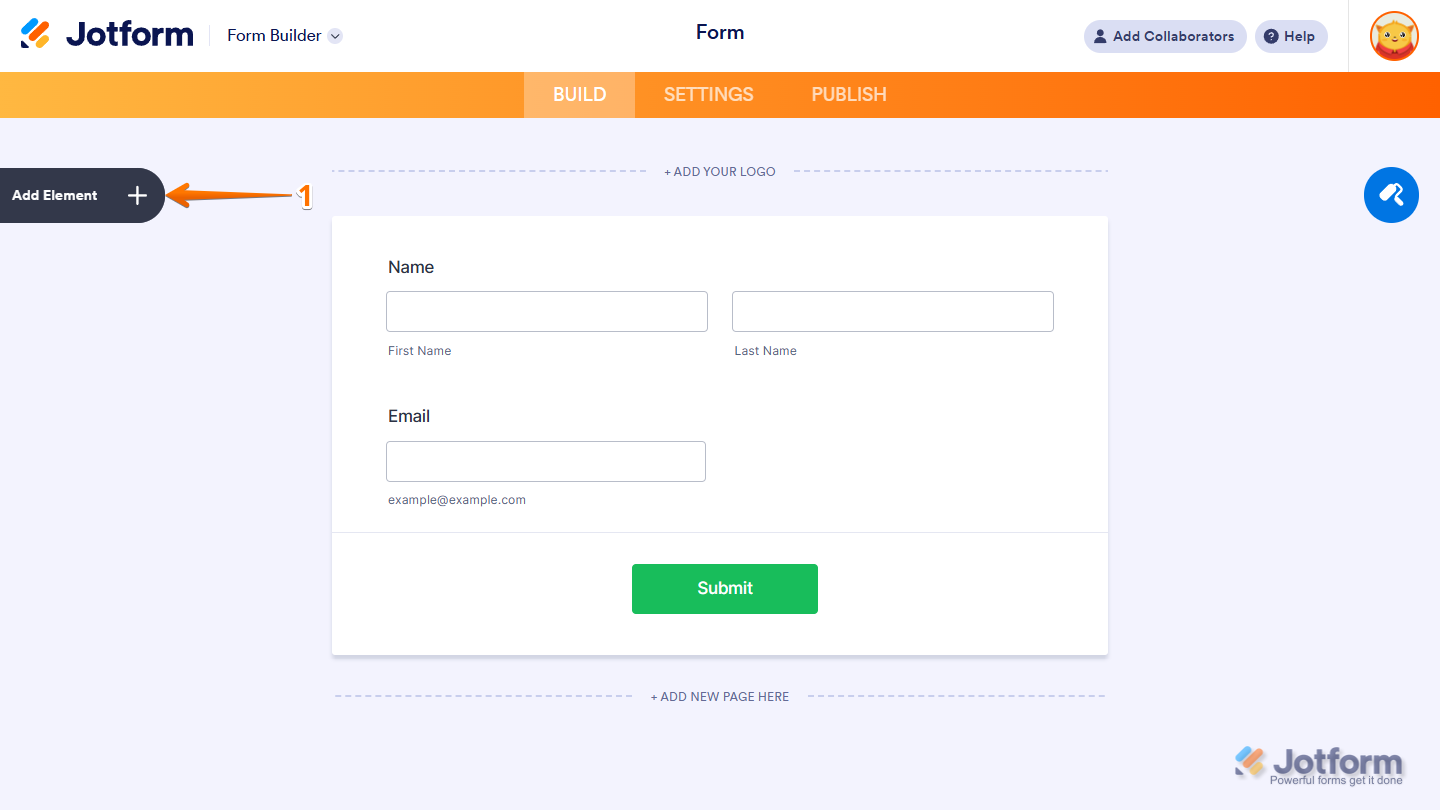
- In Form Builder, click on Add Element on the left side of the page.
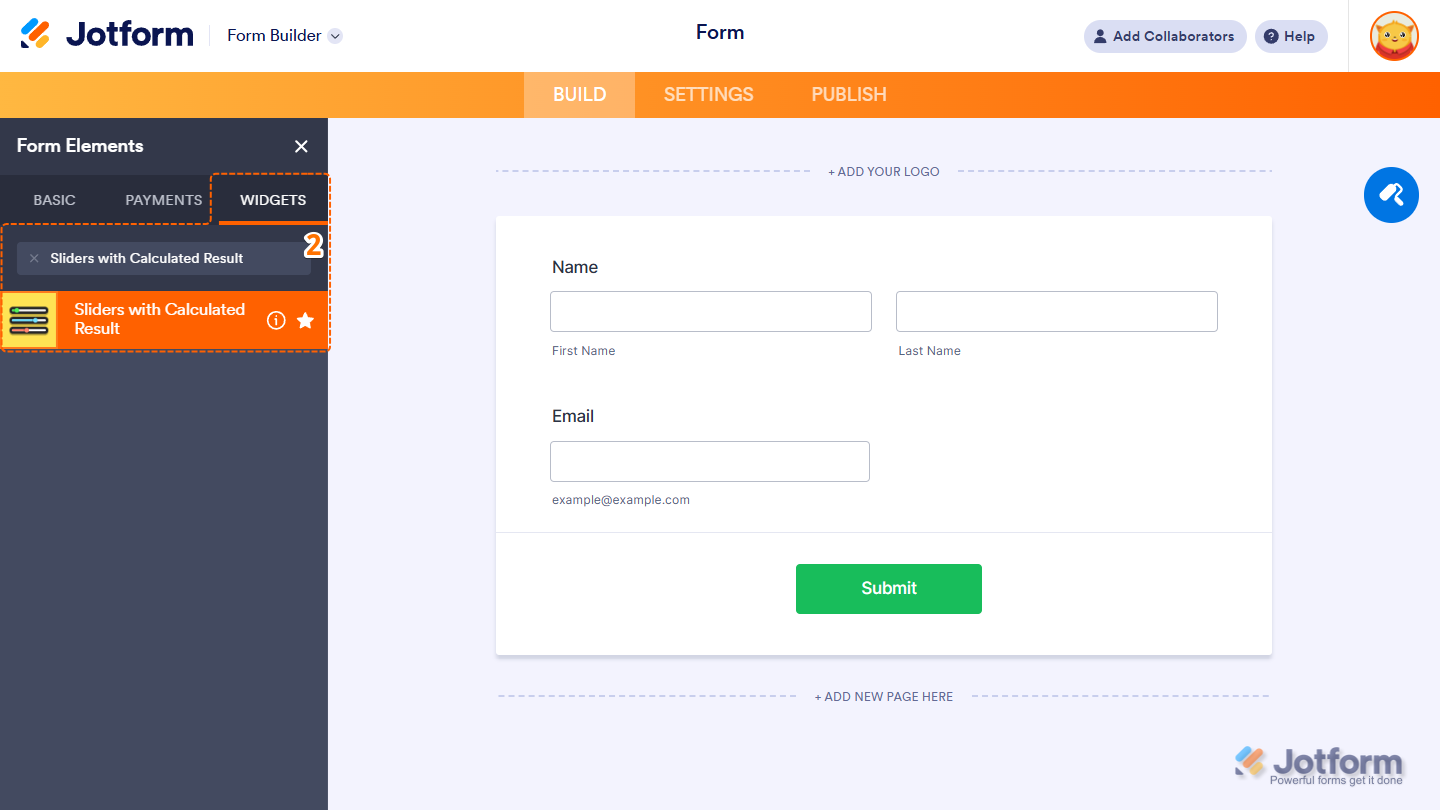
- Now, in the Form Elements menu, under the Widgets tab, search for Sliders with Calculated Result and click on it. Or drag and drop it to where you want it on your form.
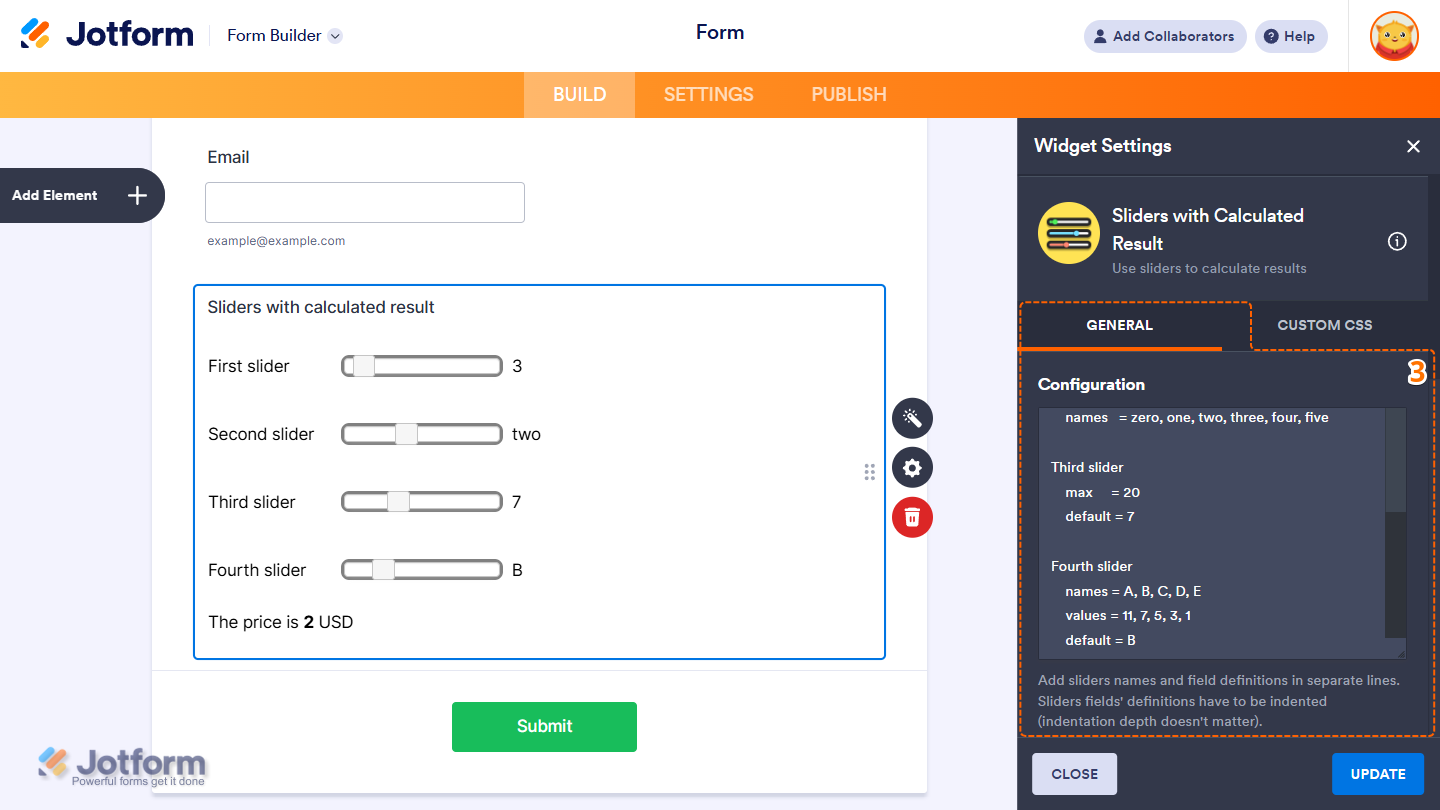
- Next, in the Sliders with Calculated Result Widget Settings menu that opens on the right side of the page, under the General tab, enter your slider items in the Configuration box as follows:
- Slider name — The label or title of the slider.
- min — The minimum value for the slider. Defaults to 0 if not specified.
- default — The initial value of the slider. If not set, it defaults to the min value.
- max — The maximum value for the slider. Required unless the values field is defined.
- names — A comma-separated list of labels to display in place of numeric values.
- values — A list of specific values for the slider. When this field is defined, the min and max fields are ignored.
Notes
- The min, max, names, and values fields should be indented—the indentation depth is flexible.
- Each slider must have either a ‘max’ or ‘values’ field defined. All other fields are optional.
- You can separate each slider with blank lines, as long as proper indentation is maintained.
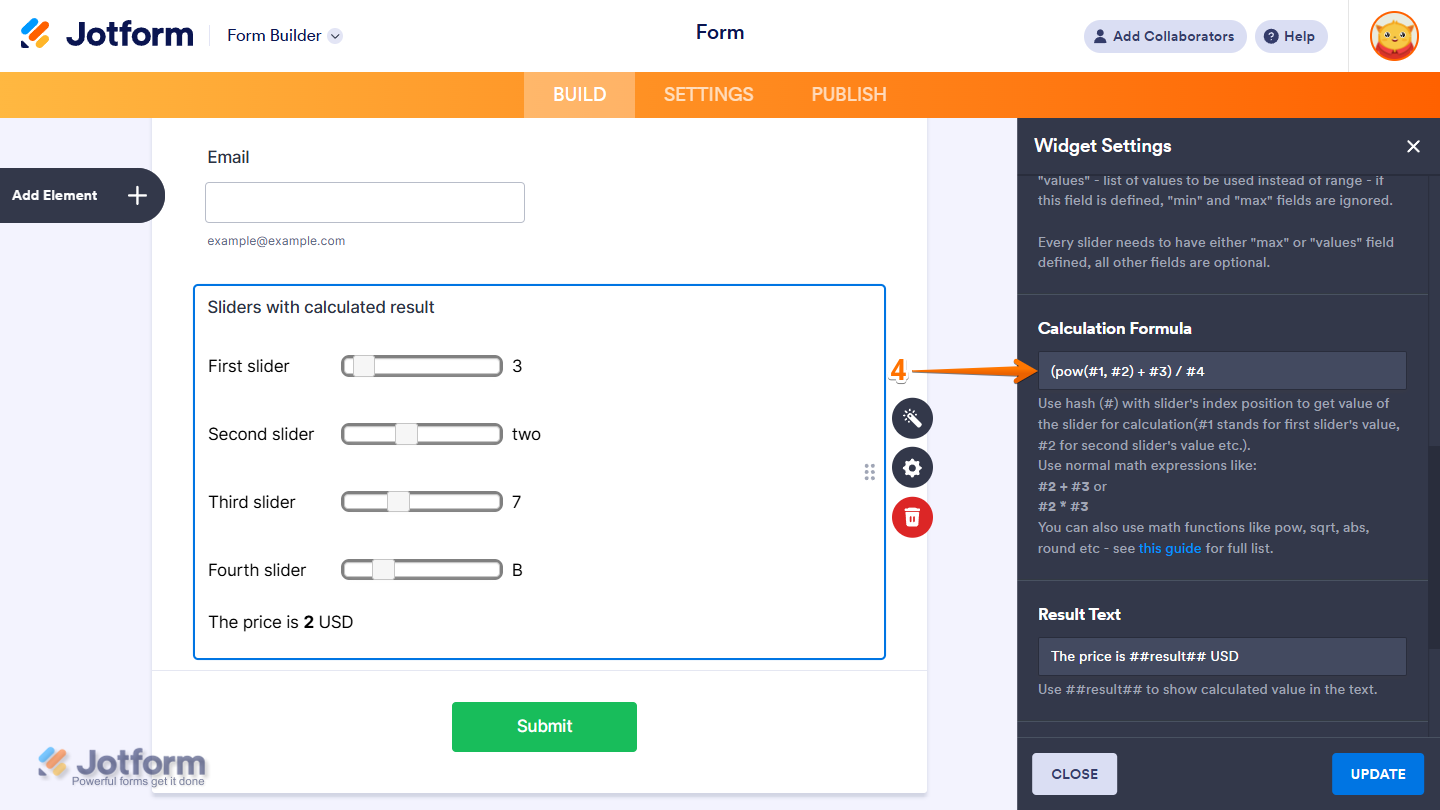
- Then, set up the Calculation Formula.
Notes
- Use a hash symbol (#) followed by a slider’s index to reference its value in calculations (e.g., #1 for the first slider, #2 for the second, and so on).
- You can write standard math expressions like #2 + #3 or #2 * #3.
- Math functions such as pow, sqrt, abs, round, and others are also supported — refer to the Math Functions – Static Methods for the full list.
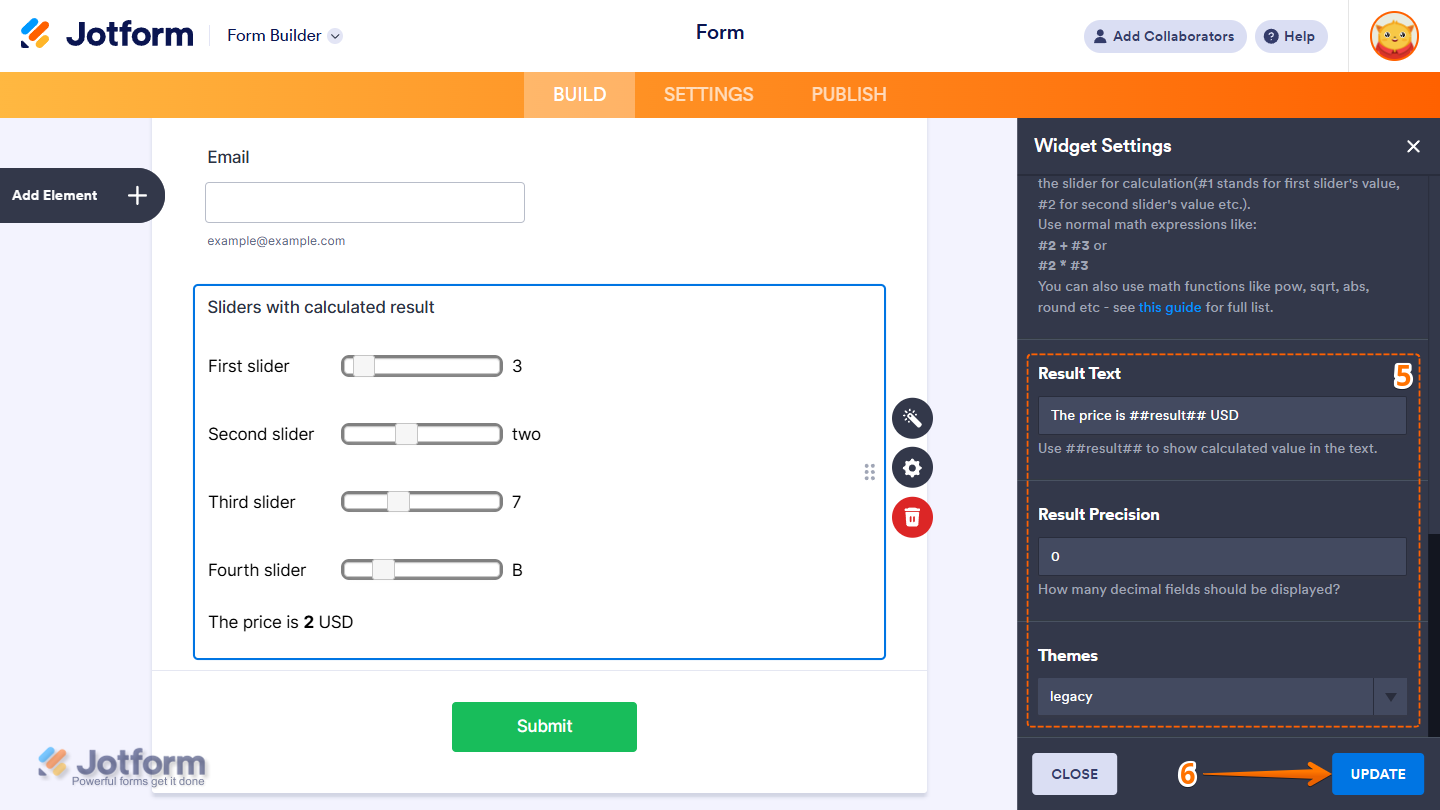
- Next, scroll down to the bottom and continue to set up these settings:
- Result Text — Customize the result display by inserting ##result## into your text. This placeholder will be replaced with the calculated value.
- Result Precision — Defines how many decimal places should be shown in the calculated result.
- Themes — Select from a variety of visual styles to change the appearance of the sliders and match your form’s overall design.
- Once you’re done, click on Update.
That’s it. You’ve successfully added and set up the Sliders with Calculated Result widget on your form. Want to see how it works? Check out this live demo form.
Pro Tip
- For advanced styling of the widget, you can add your own custom CSS code under the Custom CSS tab in the Widget Settings. Our guide on How to Inject CSS Codes to Widgets walks you through everything.
- You can also configure widget properties, such as alignment, labels, size, visibility, and more, to control how it looks and behaves on your form. Check out our guide on How to Access and Configure the Question Properties of a Widget to learn more.

Send Comment: