Here are a few ways to use it:
- Let users choose their US state quickly and accurately.
- Provide a clean and scrollable dropdown list.
- Improve the overall experience on registration and signup forms.
- Make location selection smoother and more organized.
Whether you’re building a new form or editing an existing one, you can add and configure the US State Picker widget in just a few steps. This is how it’s done:
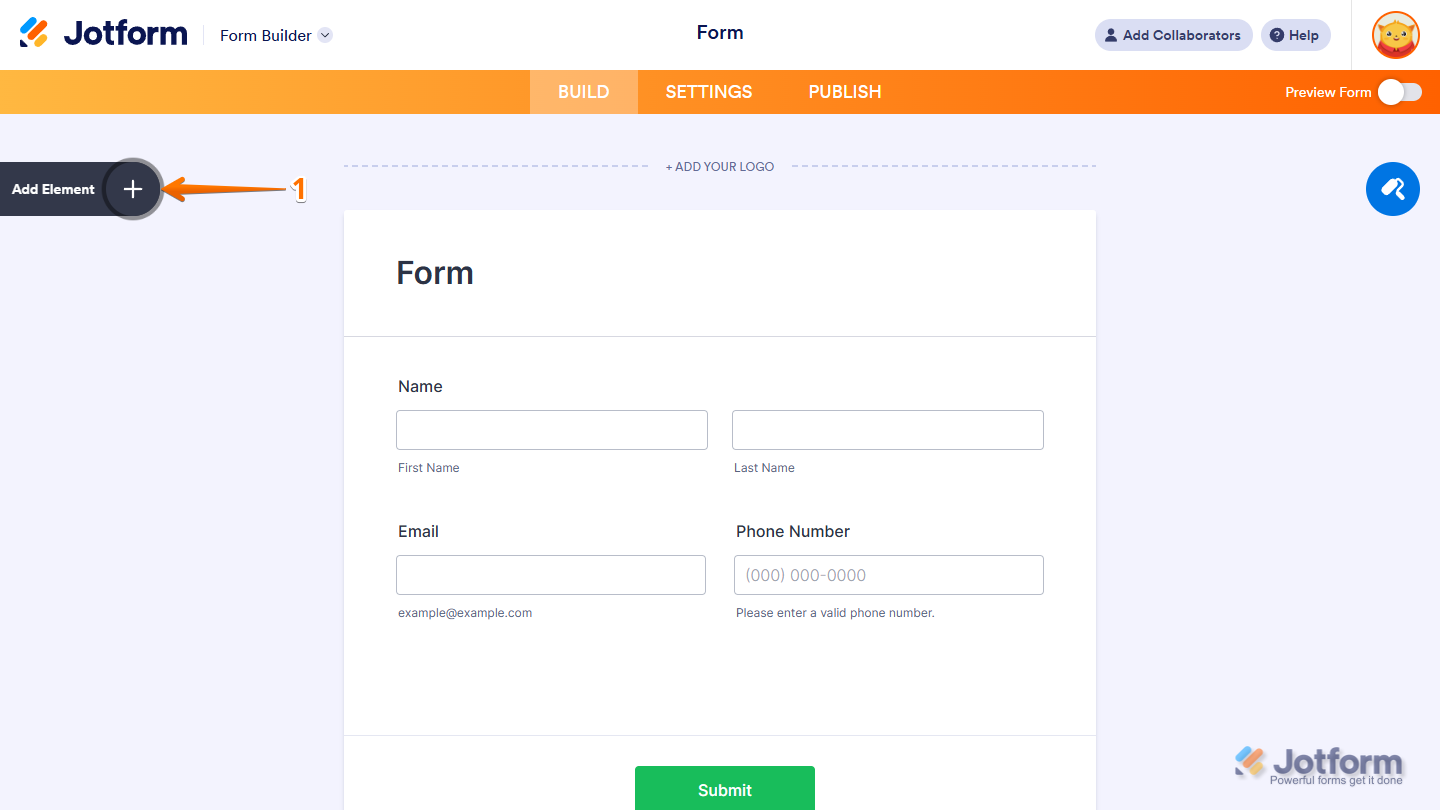
- In Form Builder, click on Add Element on the left side of the page.
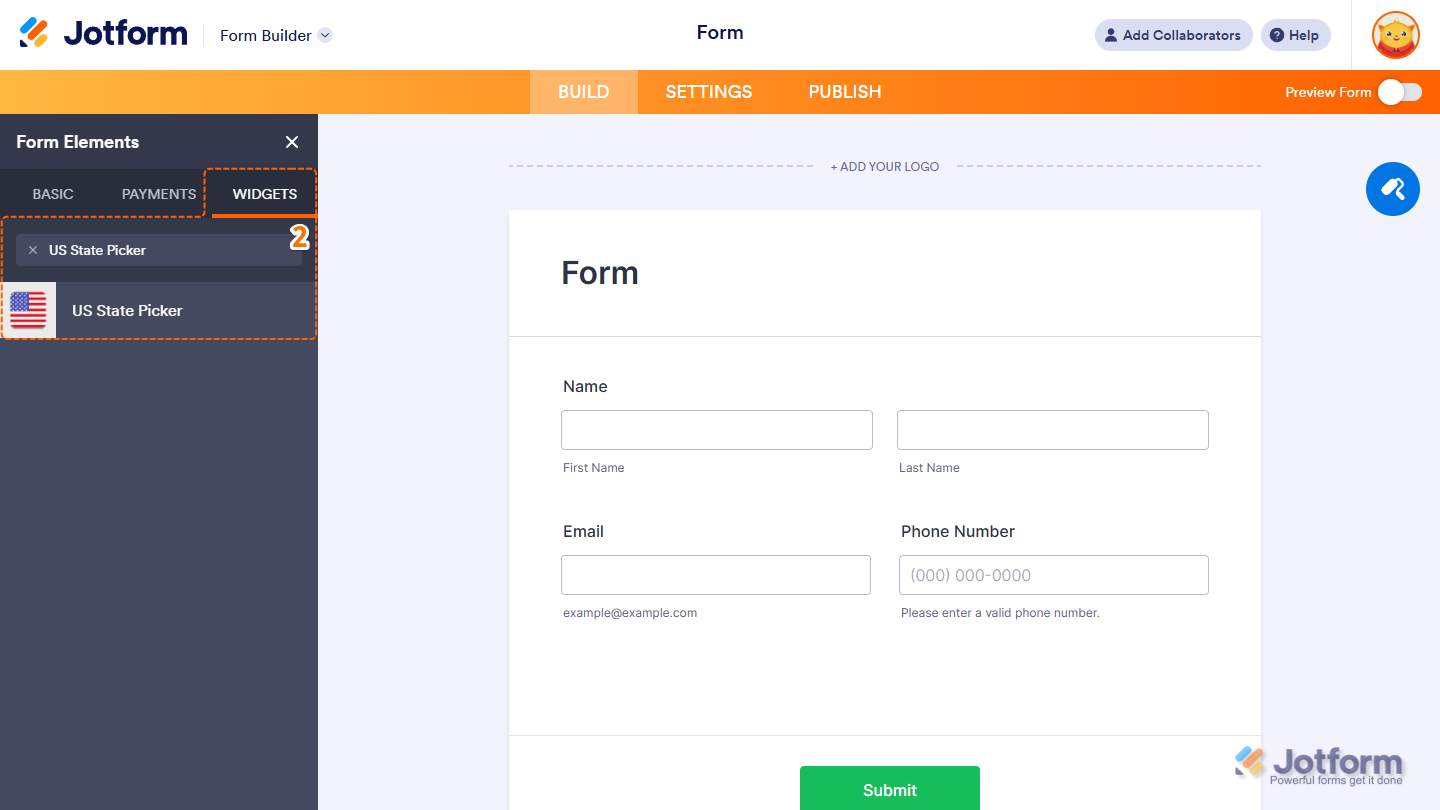
- Now, in the Form Elements menu, under the Widgets tab, search for US State Picker and click to add it to your form. Or, just drag and then drop it to where you want it to be on your form.
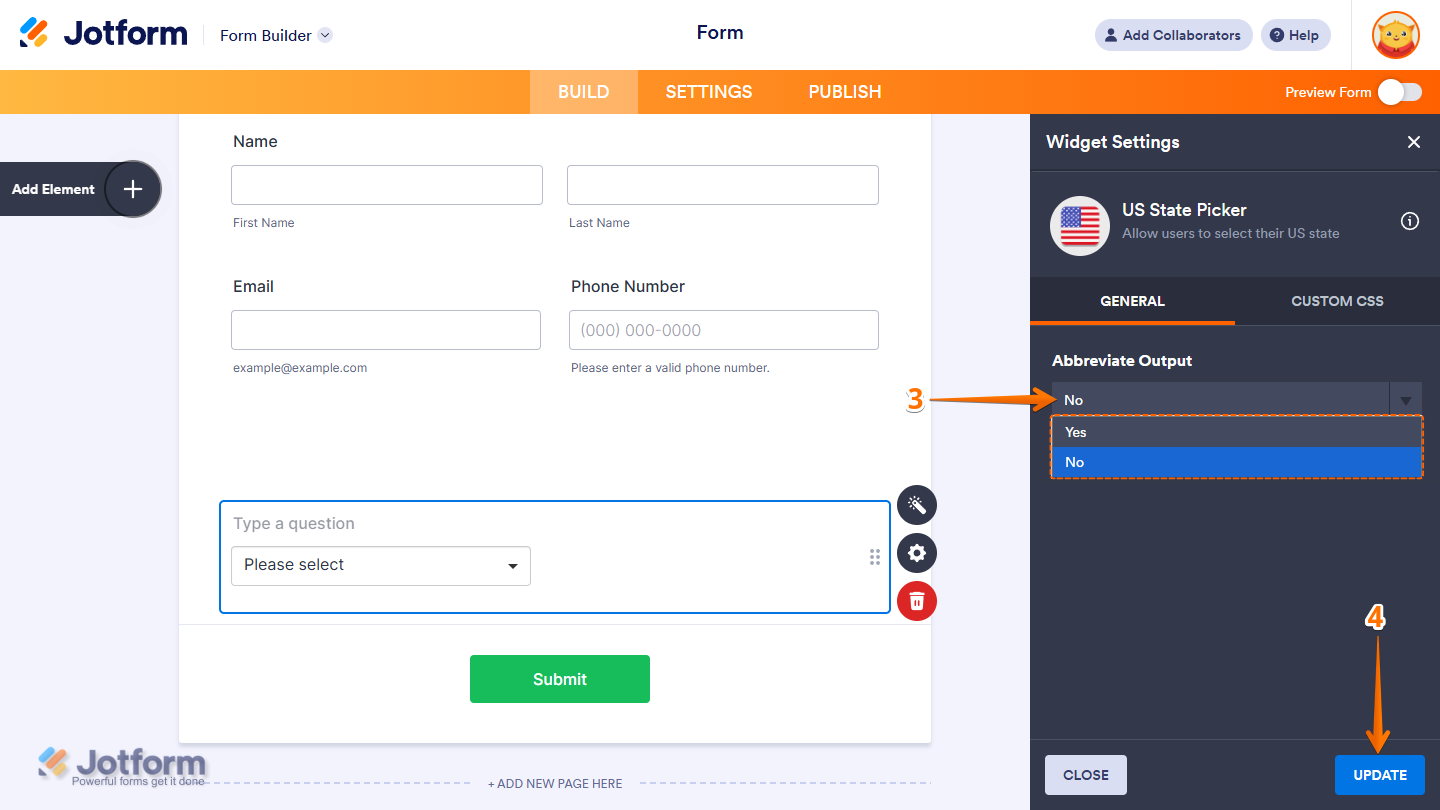
- Next, in the Widget Settings window that opens on the right side of the page, under the General tab, in the Abbreviate Output Dropdown menu select from the following options:
- Yes — The submitted value will be abbreviated. For example, “CA” for “California”.
- No — The full value will be submitted.
- Now, click on Update, and you’re done.
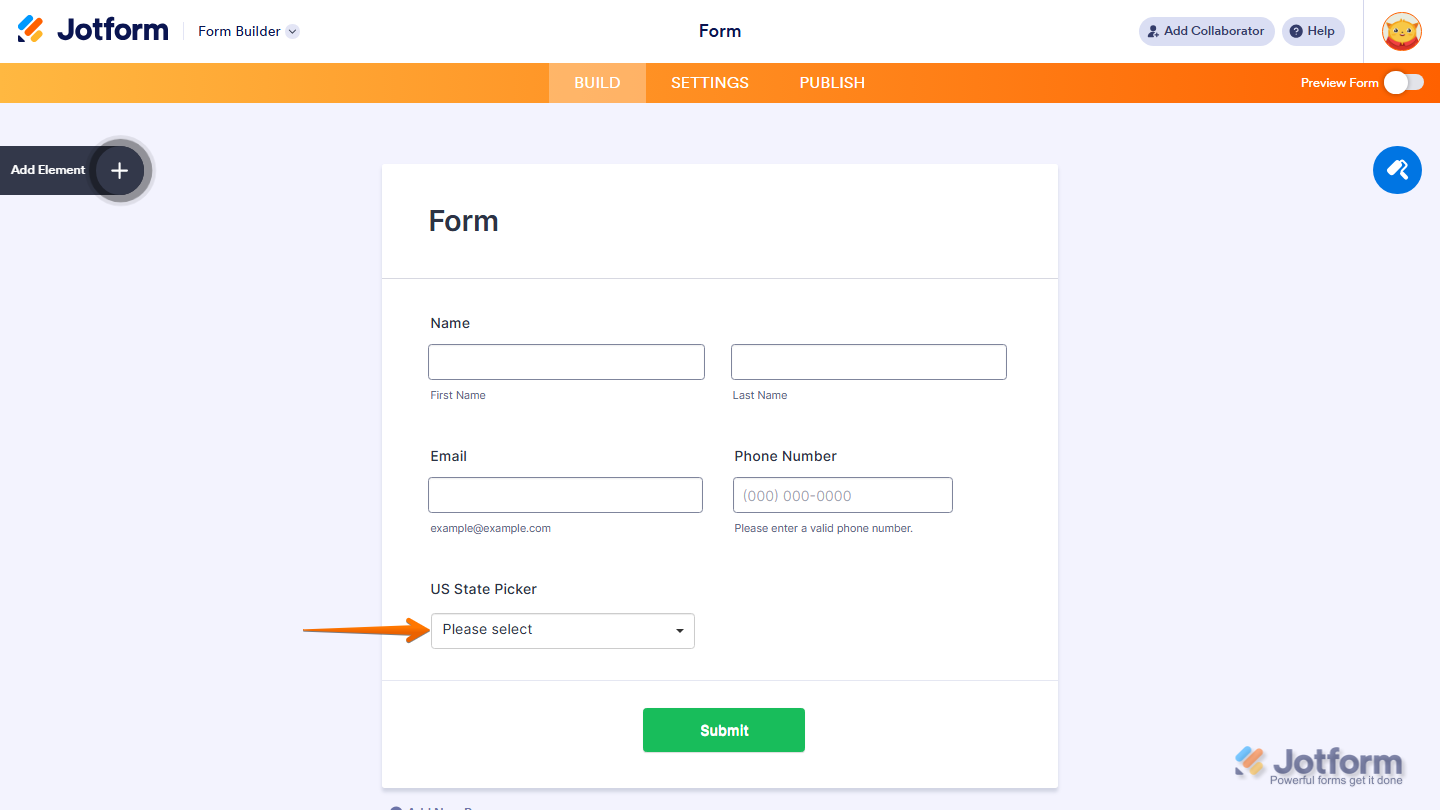
That’s it! You’ve successfully added and set up the US State Picker widget on your form.
Wondering how it looks in action? Check out this Demo Form.
Note
- To style the fields and labels, you can inject custom CSS into the Custom CSS tab in the Widget Settings. To learn how it’s done, see our guide on How to Inject CSS Codes to Widgets.
- You can also configure the widget properties, like alignment, labels, size, visibility, and more, to control how it looks and behaves in your form. Check out our guide on How to Access and Configure the Question Properties of a Widget to learn more.

Send Comment: