Positive customer reviews can make all the difference when someone is deciding where to dine. By displaying your OpenTable reviews on your website, you can showcase real guest experiences, build trust with potential customers, and encourage more reservations—all without sending visitors to another site.
With Jotform’s OpenTable Reviews widget, you can easily display your restaurant’s reviews in a customizable layout that matches your website’s design. In this guide, you’ll learn how to set up the widget and embed it on your website in just a few steps.
Note
To display reviews in the widget, you’ll need a valid OpenTable restaurant URL. Make sure your restaurant listing is publicly accessible so the widget can retrieve the review information.
Creating and Getting Your OpenTable Reviews Widget Embed Code
To embed your OpenTable reviews on your website, you’ll first need to customize the widget and get its embed code. To get going, here’s what you’ll do:
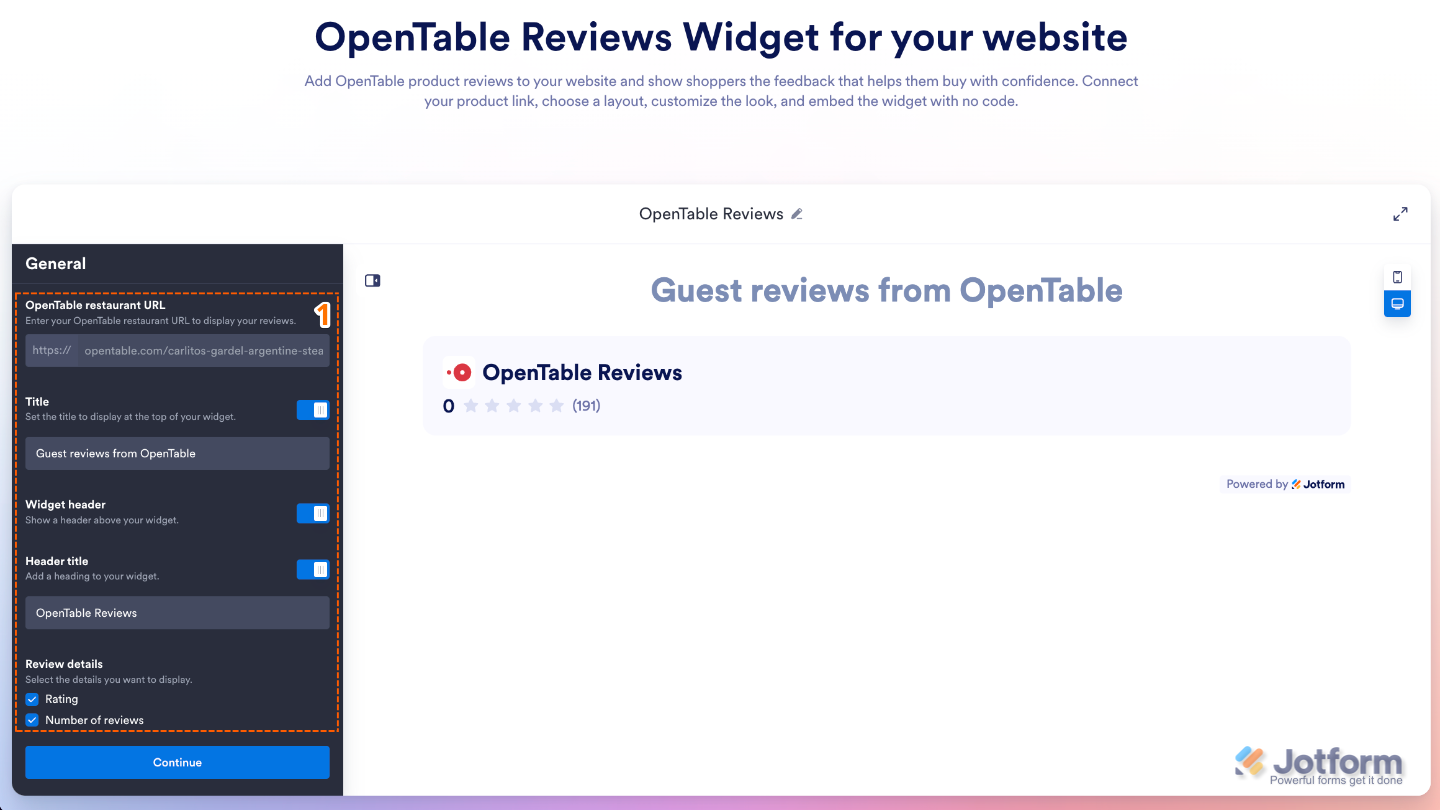
- Go to our OpenTable Reviews Widget page, and in the General menu on the left, set up these things:
- OpenTable Restaurant URL — Enter your restaurant’s OpenTable page URL to import and display its reviews in the widget.
- Title — Give your widget a name to help you identify it in your Jotform Widgets dashboard. This title is for your reference only and isn’t displayed on your website.
- Widget Header — Customize the information displayed at the top of the widget, including the header title and review summary, to give visitors a quick overview of your restaurant’s ratings.
- Header Title — Customize the title displayed at the top of the widget, such as your restaurant’s name or a heading like: Customer Reviews.
- Review Details
- Rating — Show or hide your restaurant’s overall OpenTable rating in the widget header.
- Number of Reviews — Show or hide the total number of OpenTable reviews your restaurant has received.
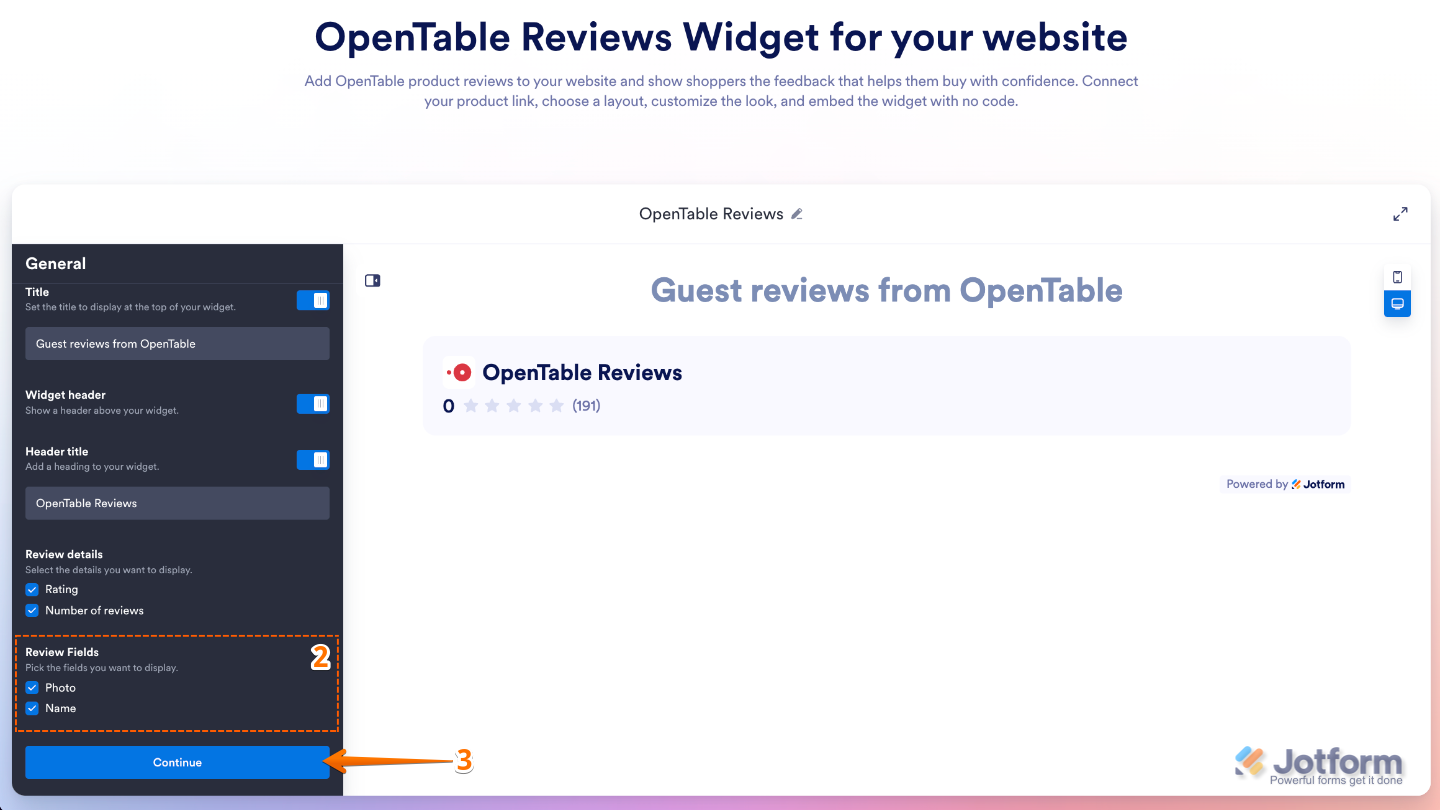
- Then, scroll down to the bottom and continue setting up these things:
- Review Fields
- Photo — Show or hide the reviewer’s profile photo, when available.
- Name — Show or hide the reviewer’s name to make reviews feel more authentic and personal.
- Review Fields
- After that, click on Continue.
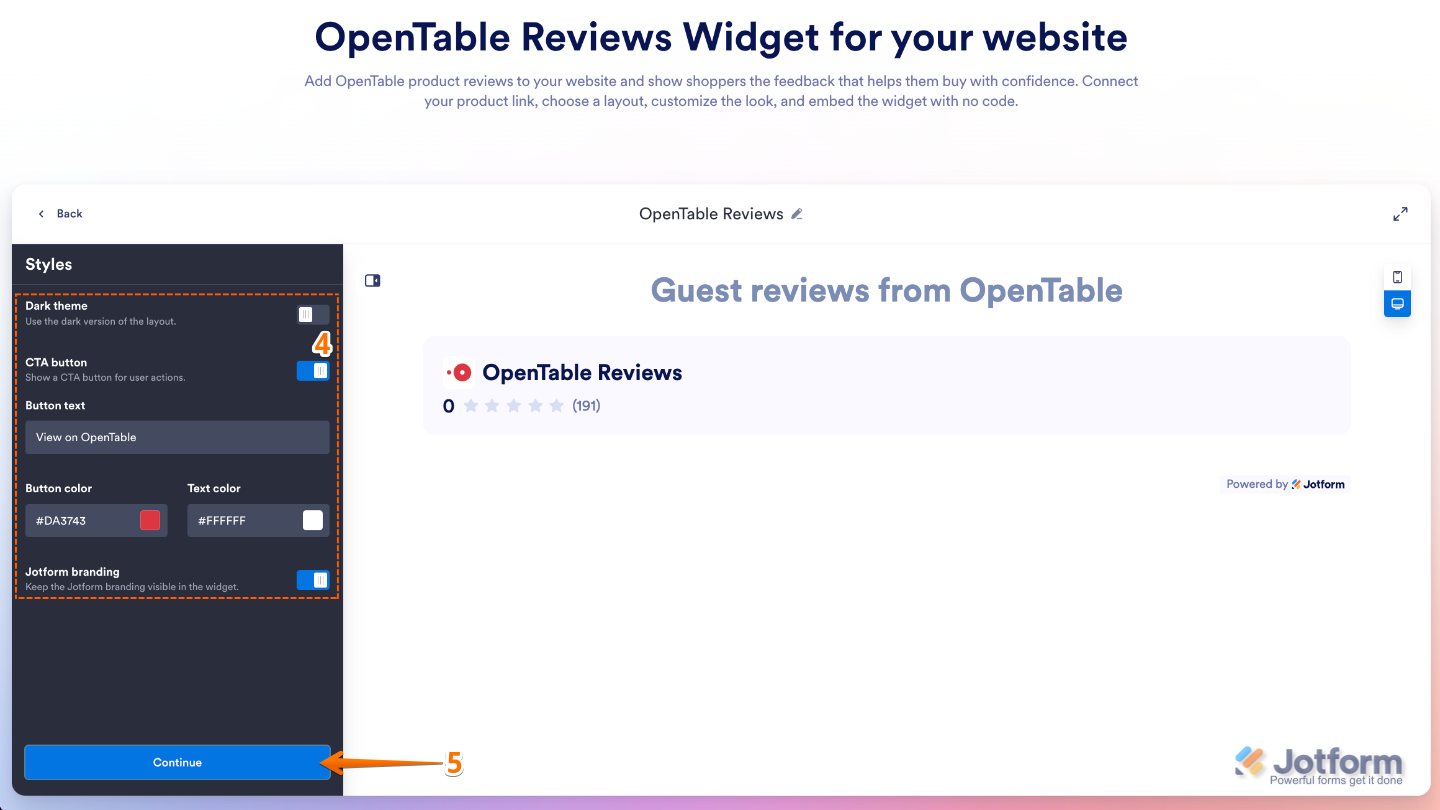
- Next, under the Styles menu, customize these things:
- Dark Theme — Switch the widget to a dark color scheme to better match websites with darker designs.
- CTA Button — Customize the appearance and text of the call-to-action button, making it easy for visitors to view your restaurant on OpenTable or take the next step you want them to take.
- Button Text — Customize the text displayed on the call-to-action button, such as View on OpenTable or Read More Reviews.
- Button Color — Choose the background color of the call-to-action button to match your website’s branding.
- Text Color — Set the color of the text displayed on the call-to-action button.
- Jotform Branding — Show or hide Jotform branding on the widget, depending on your plan and preferences.
- Once you’re done, click on Continue.
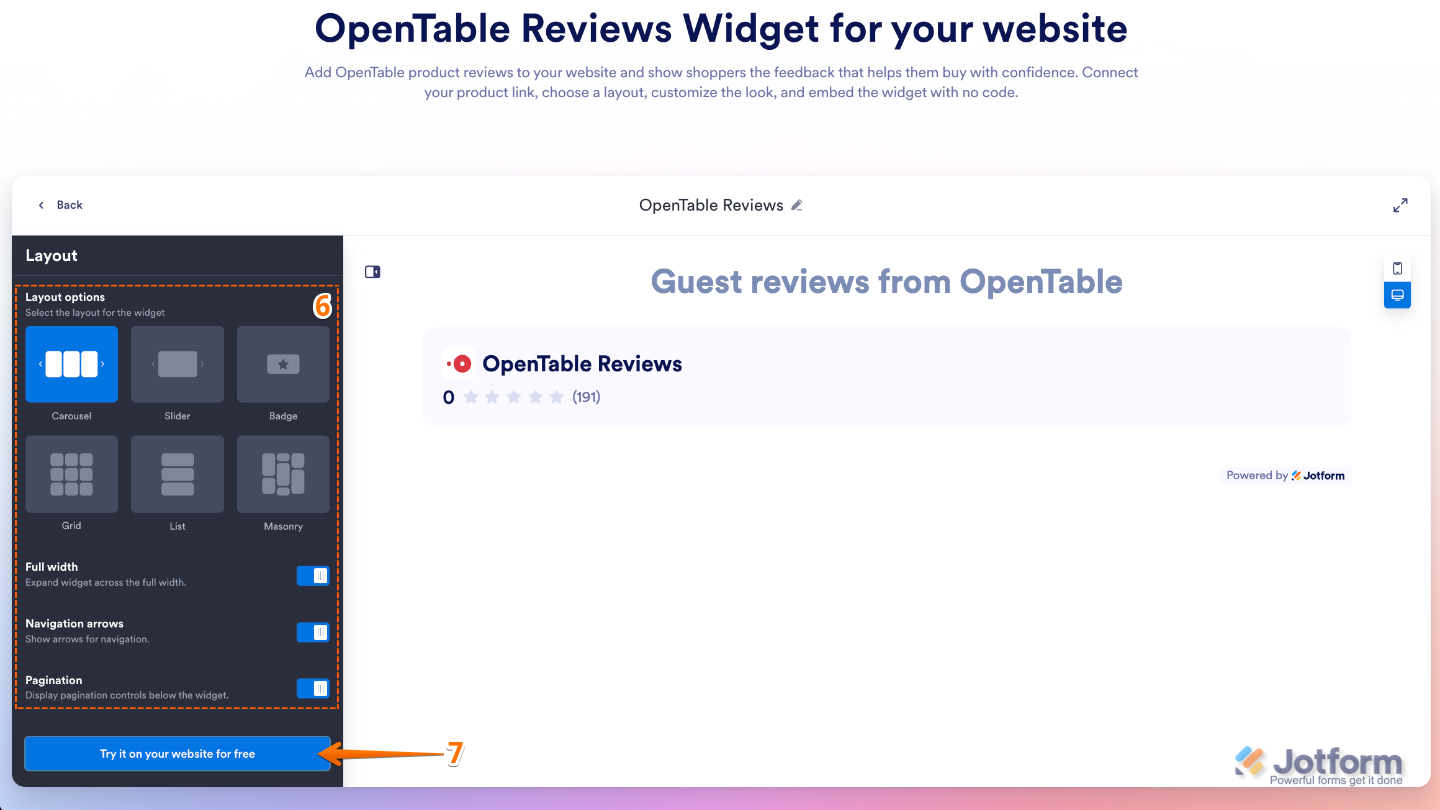
- Now, in the Layout menu, configure these settings:
- Layout options — Choose how your OpenTable reviews are displayed, such as in a list, grid, or carousel layout.
- Full Width — Expand the widget to fill the full width of its container for a more prominent display.
- Navigation Arrows — Show or hide navigation arrows that let visitors browse through reviews when using a carousel layout.
- Pagination — Show or hide pagination controls, allowing visitors to navigate between multiple pages or sets of reviews.
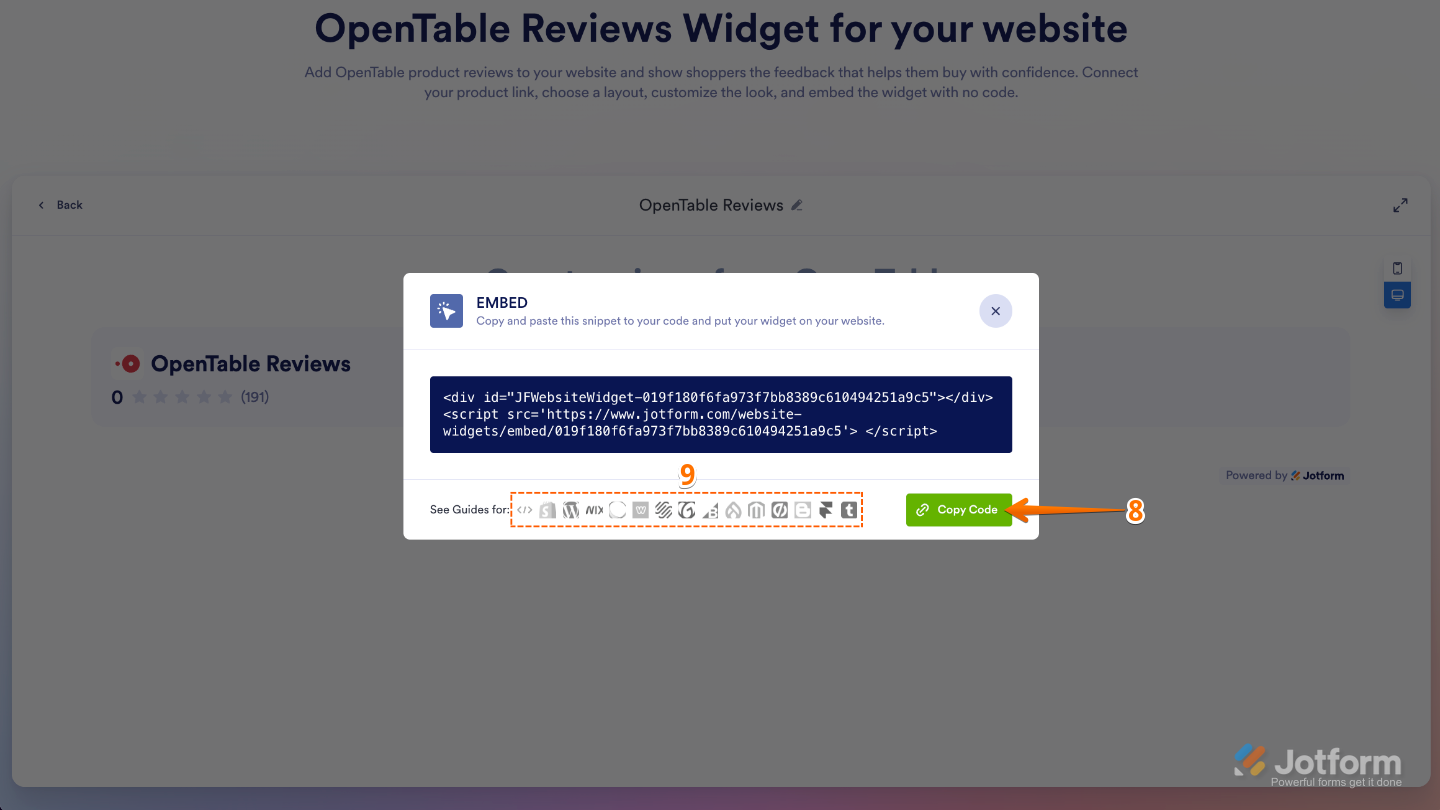
- Once everything’s set, click on Try it on your Website for Free.
Note
If you’re not logged in, you’ll be asked to log in to your Jotform account or sign up for a Jotform account before you can continue using your widgets.
- Finally, in the Embed window that opens, click on Copy Code, and you’re done.
- Or, if your website is built on a supported platform, click on its icon in the bottom-left corner of the Embed window to view platform-specific embedding instructions.
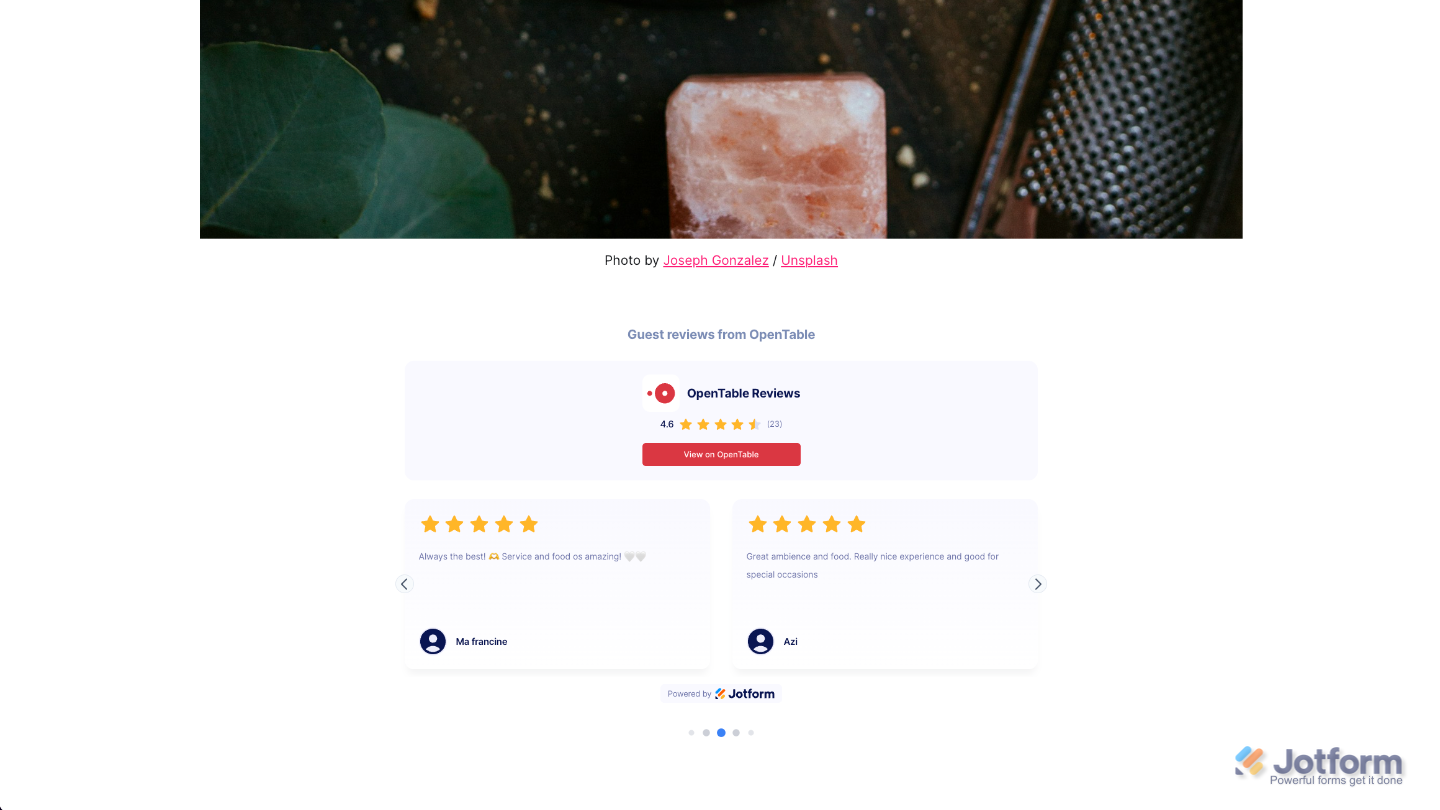
That’s it. Your OpenTable Reviews Widget is now ready to use. Simply copy and paste the embed code into your website, and the widget will automatically display your OpenTable reviews for visitors to see. Take a look at the screenshot below to see how it appears on a sample website.
Note
You can manage your widget anytime from the My Widgets page. For a step-by-step guide on how to do it, check out our full tutorial on How to Manage Website Widgets.
Pro Tips
- Place the widget on high-visibility pages, such as your homepage, reservations page, or contact page, where positive customer reviews can help encourage more bookings.
- Enable the Rating and Number of Reviews options in the widget header to give visitors a quick snapshot of your restaurant’s reputation.

Send Comment: