With Stripe Checkout, you can let your customers choose from different payment options. This is thanks to Stripe’s Dynamic Payment Method feature, which lets you control which payment methods show up when you connect Stripe to apps like Jotform.
When the Dynamic Payment Method is active, Stripe automatically shows the most relevant payment methods based on a customer’s location.
It only takes a minute to set up—here’s how:
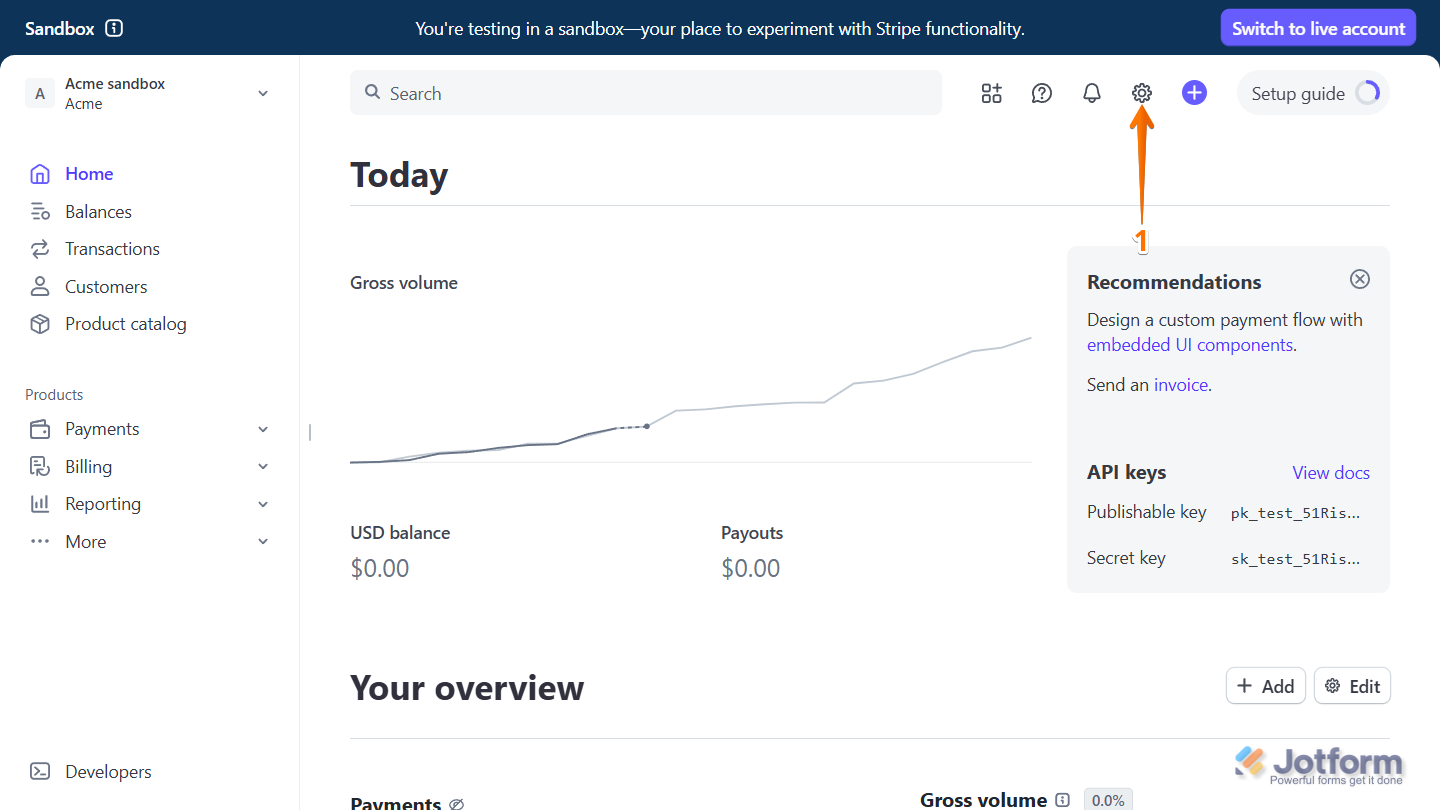
- Login to your Stripe Account and in your Stripe Dashboard, click on the Gear icon on the top-right side of the page.
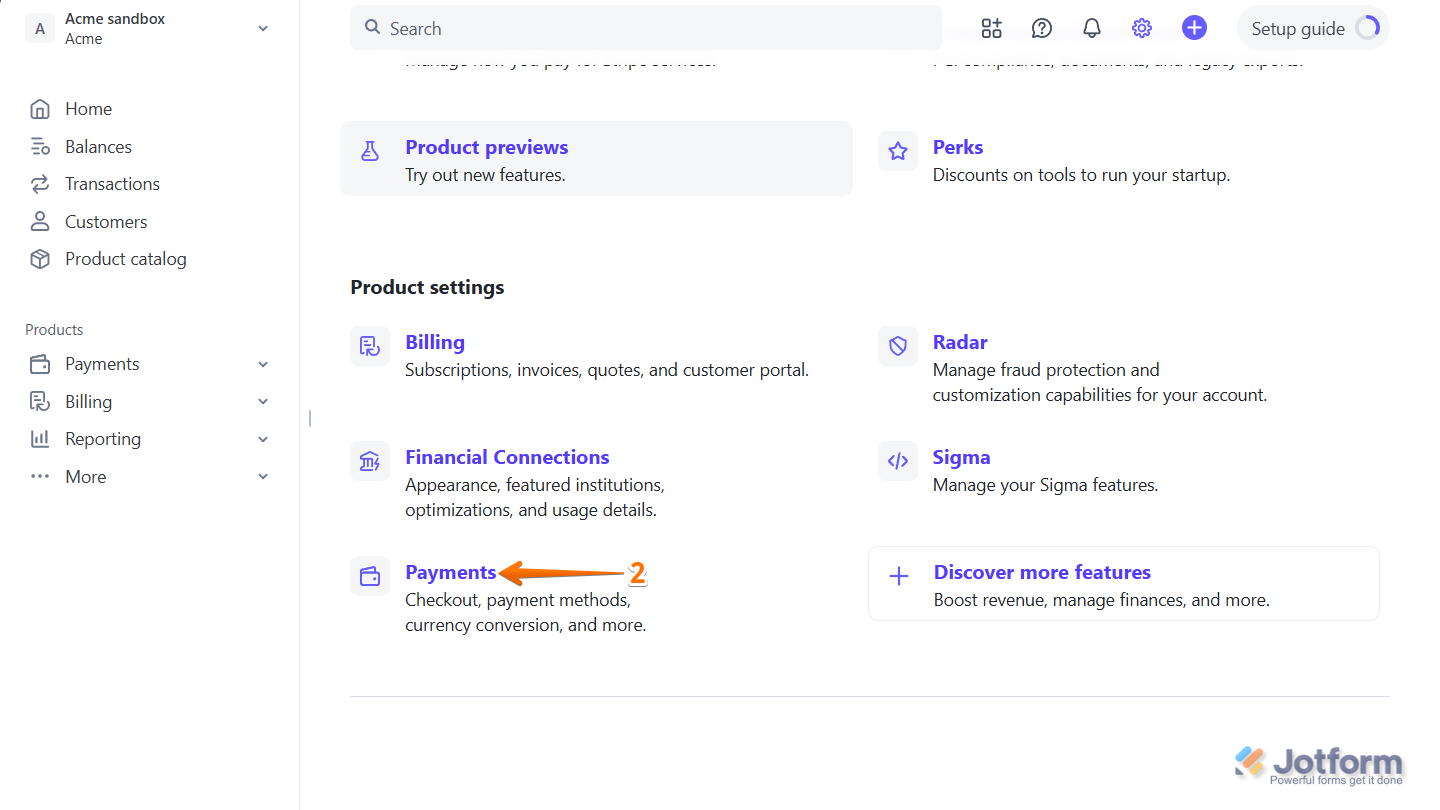
- Then, under the Product Settings section, click on Payments.
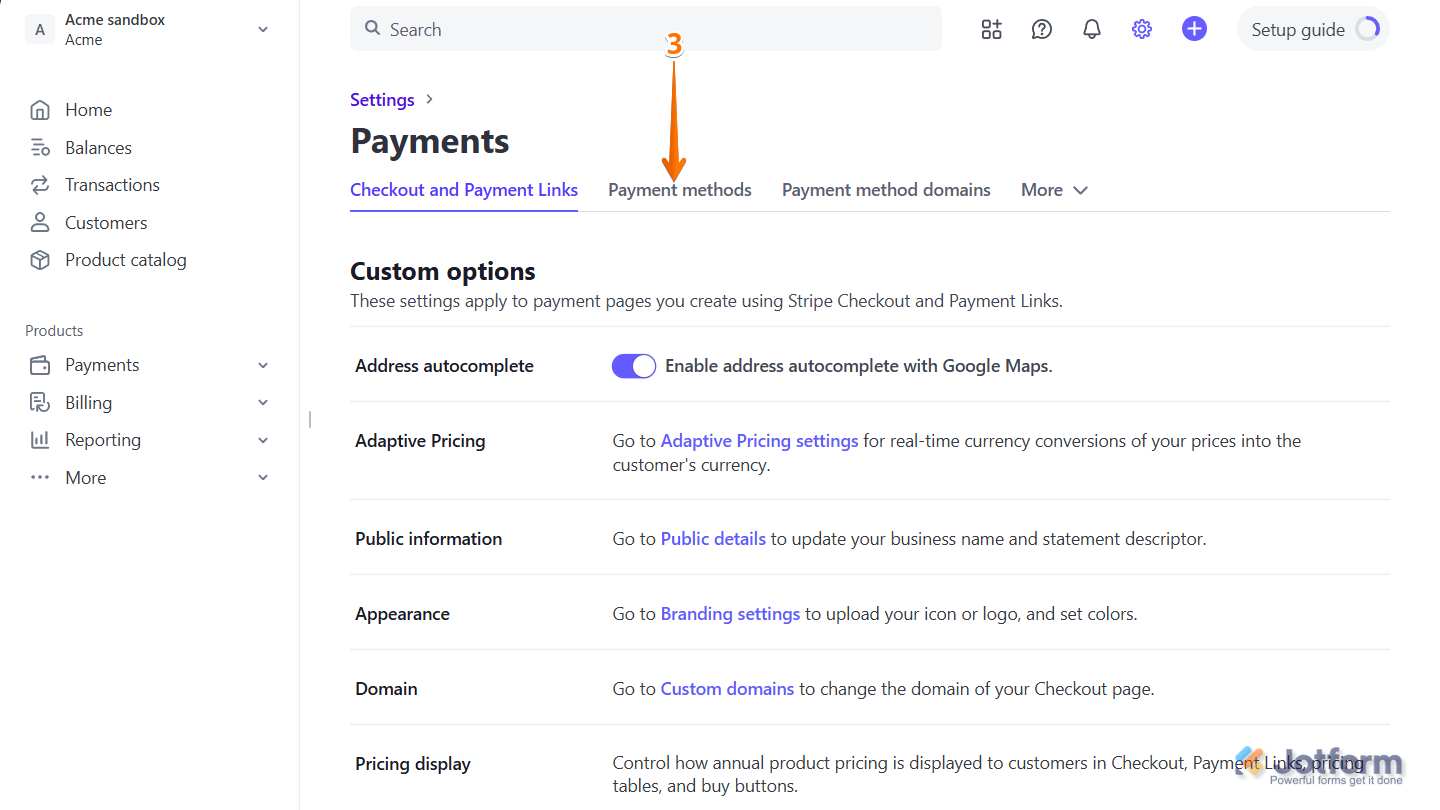
- Next, in the Payments page, click on the Payments Methods tab.
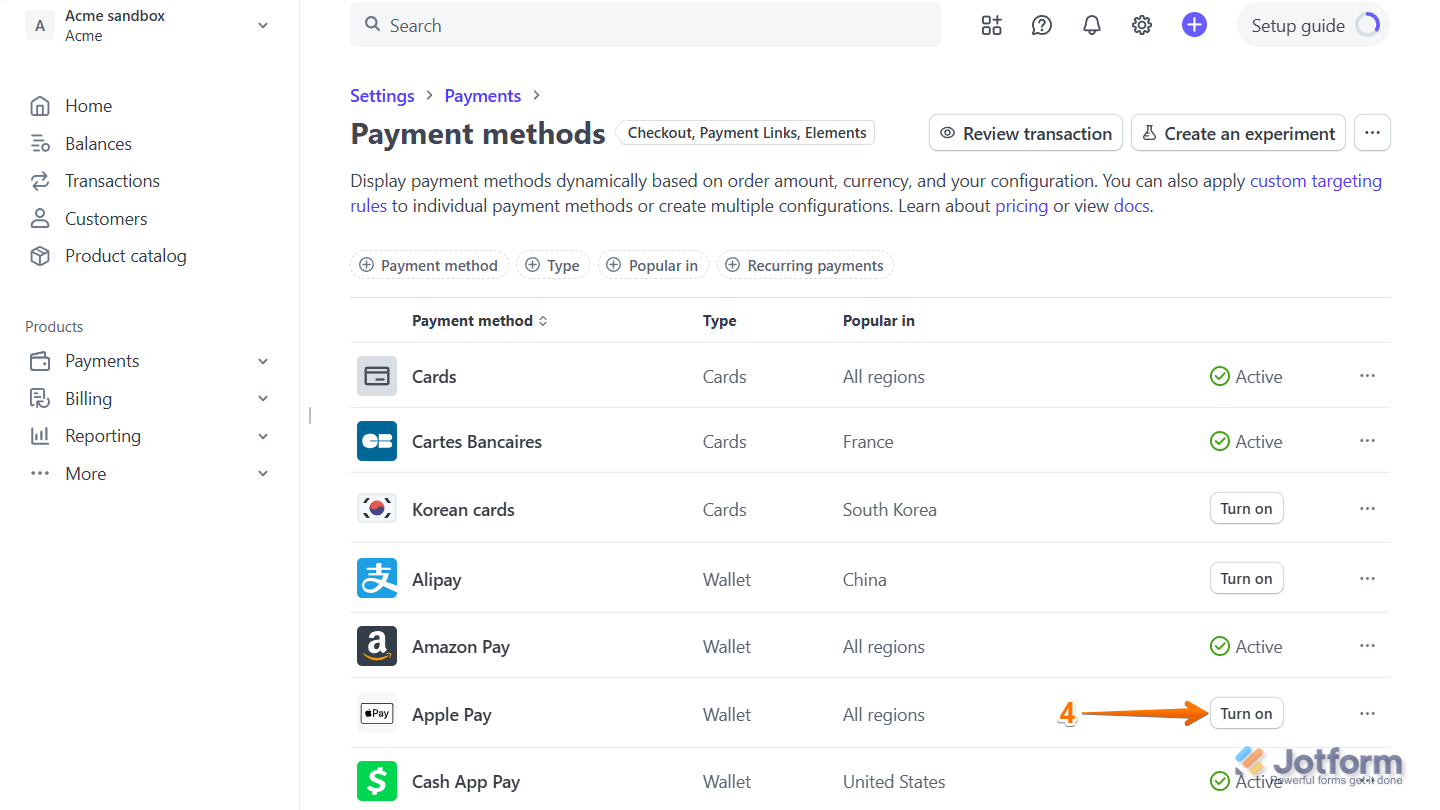
- Now, in the Payments Method page, to enable a payment method, select from the list of inactive payment methods that you want to enable, for example: Apple Pay, and then click on Turn On.
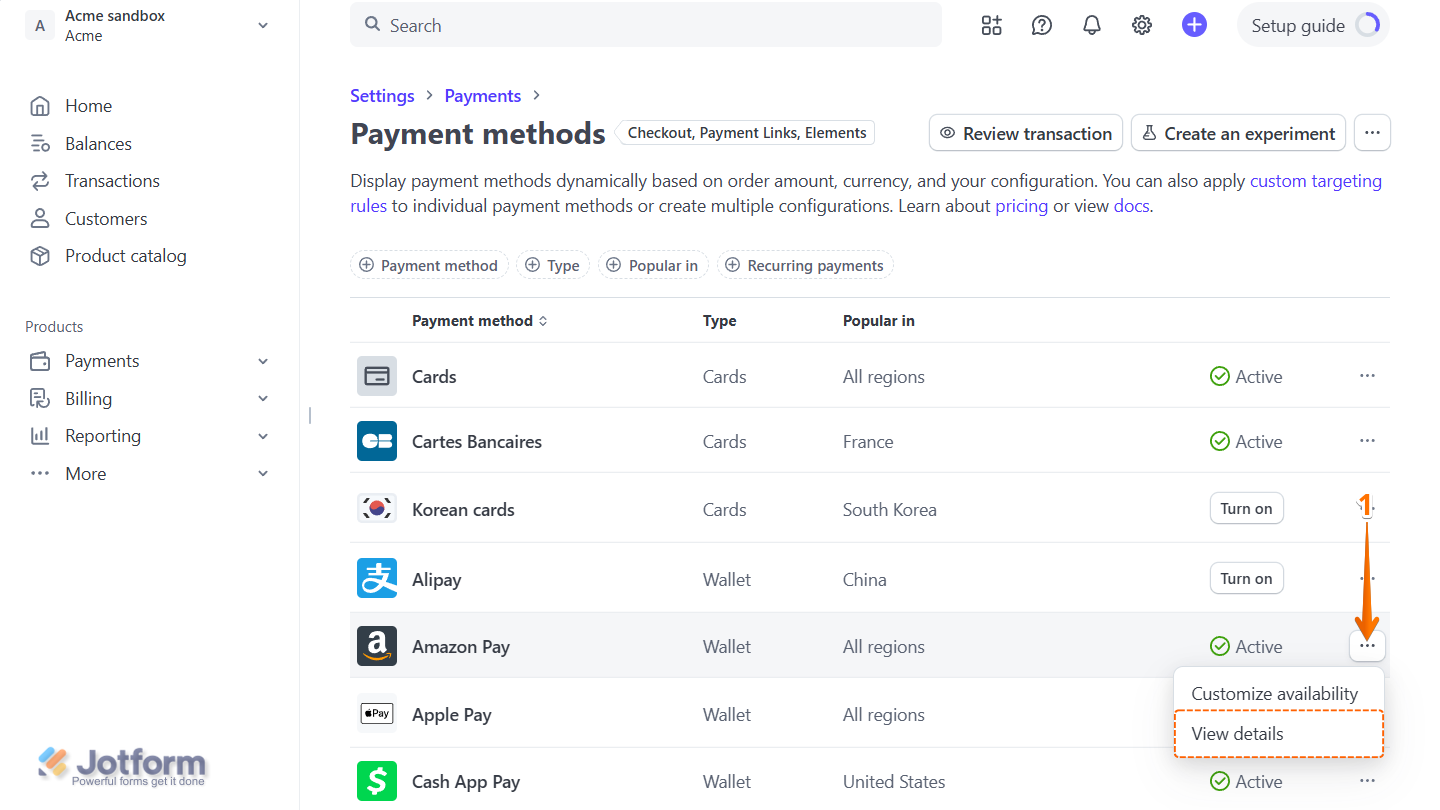
To turn off an active payment method:
- Select from the list of an active payment method, click on Three Dots icon and in the Dropdown menu that opens, click on View Details. For example, Amazon Pay.
- Then, in the menu that comes up on the right, click on Turn Off, and you’re all set.

And that’s it! Your Stripe Checkout payment methods will update instantly based on your selections. Looking for more info? This guide on Dynamic Payment Methods has what you need.
Note
- Steps to turn off a payment method might look a bit different depending on which one you’re trying to disable.
- Some payment methods might also ask you to set up or verify a few things before you can activate them.

Send Comment: