Jotform lets you control how data is displayed in your List element by filtering items based on specific conditions and adding a search bar for easier navigation. This gives you more control over which items are shown while making it easier for users to find the information they need.
Note
To filter the displayed data, your app must have at least one List Element.
Filtering List Element Data
You can filter the data displayed in your List element by adding one or more conditions. Here’s what to do:
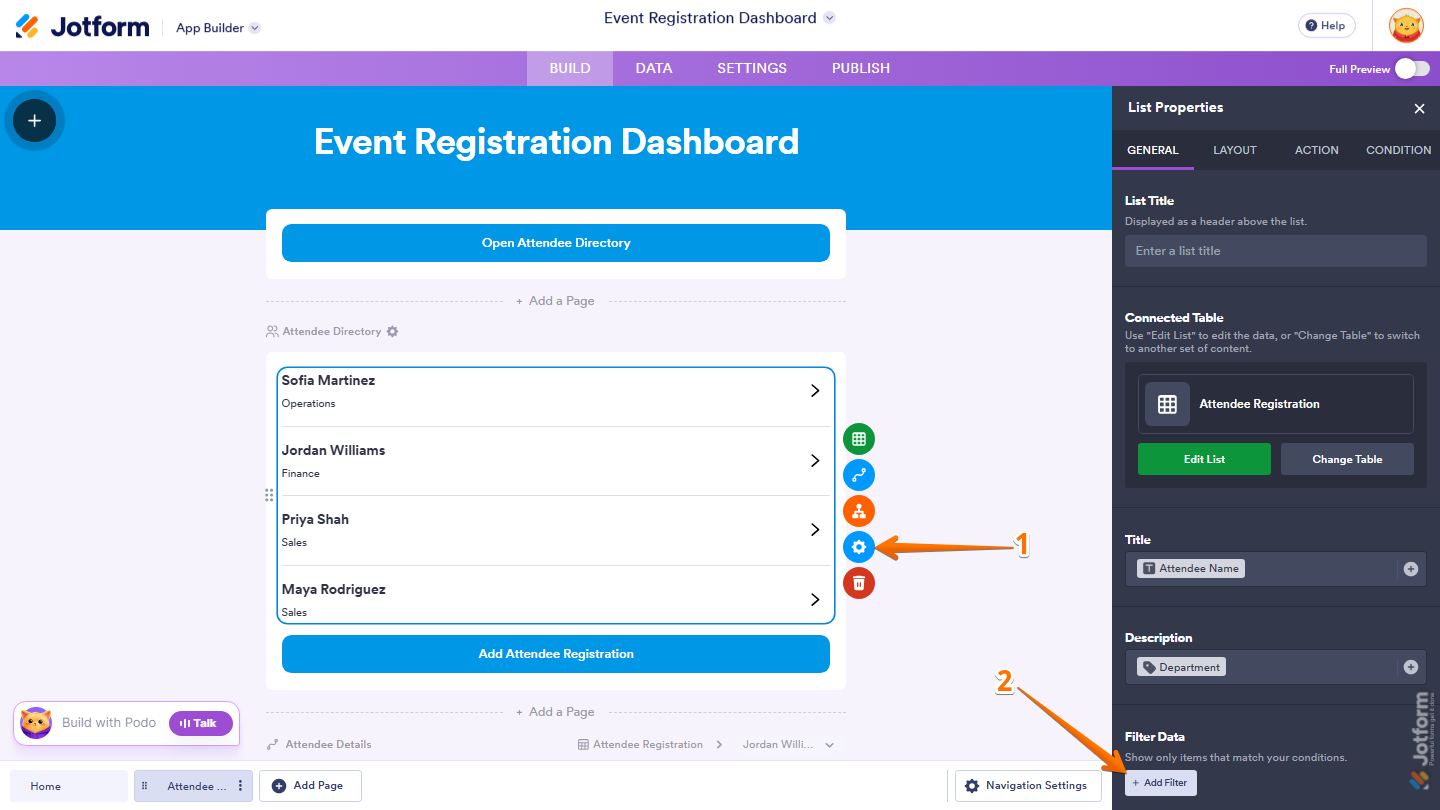
- In App Builder, select the List Element and click on the Gear icon.
- Then, in the List Properties menu that opens on the right side of the page, under the General tab, click on Add Filter.
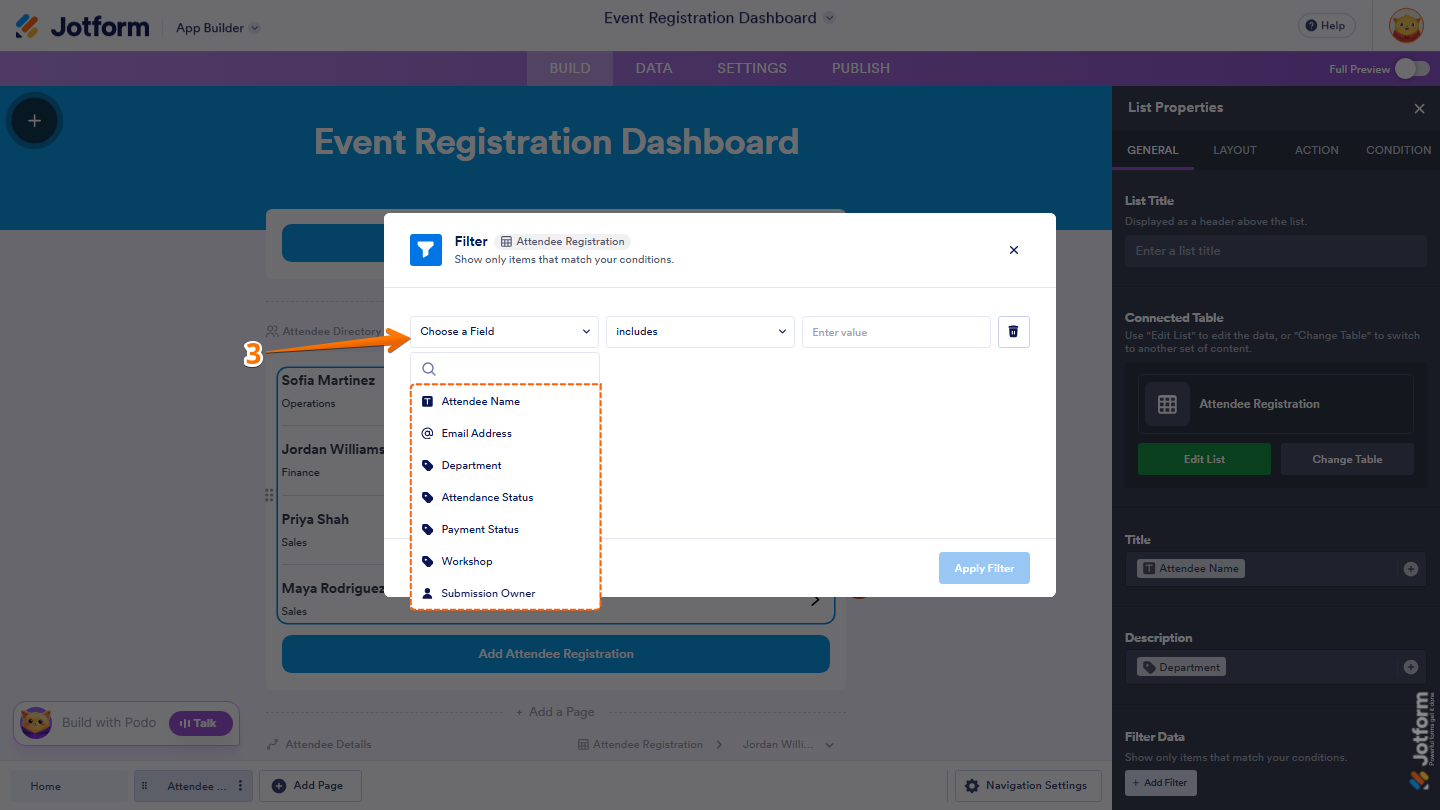
- Next, in the Filter window that opens up, click on Choose a Field, then select a field to filter.
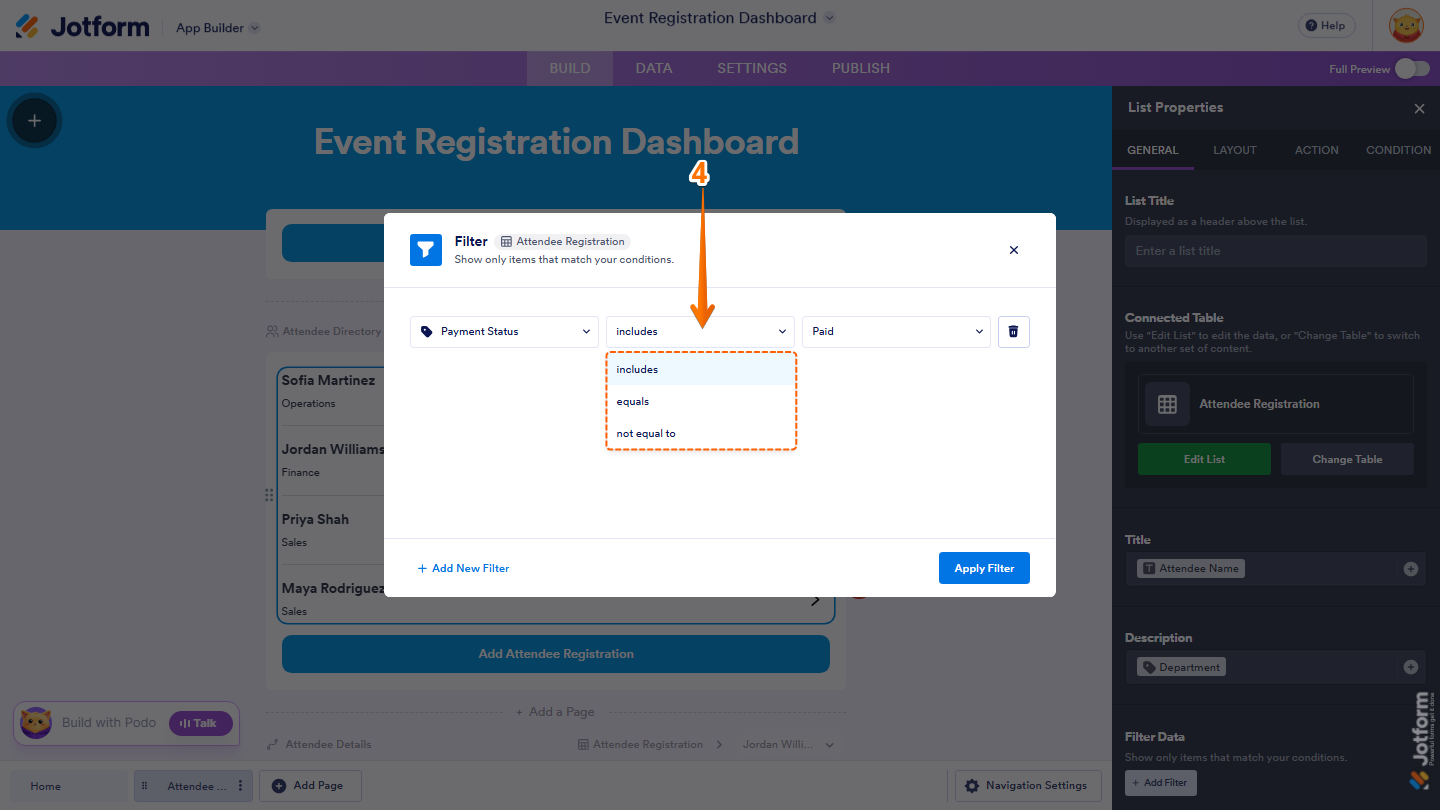
- Now, click on the second dropdown to select the condition you want to apply:
- Includes — Displays items that contain the specified value.
- Equals — Displays items that exactly match the specified value.
- Not Equal To — Displays items that don’t match the specified value.
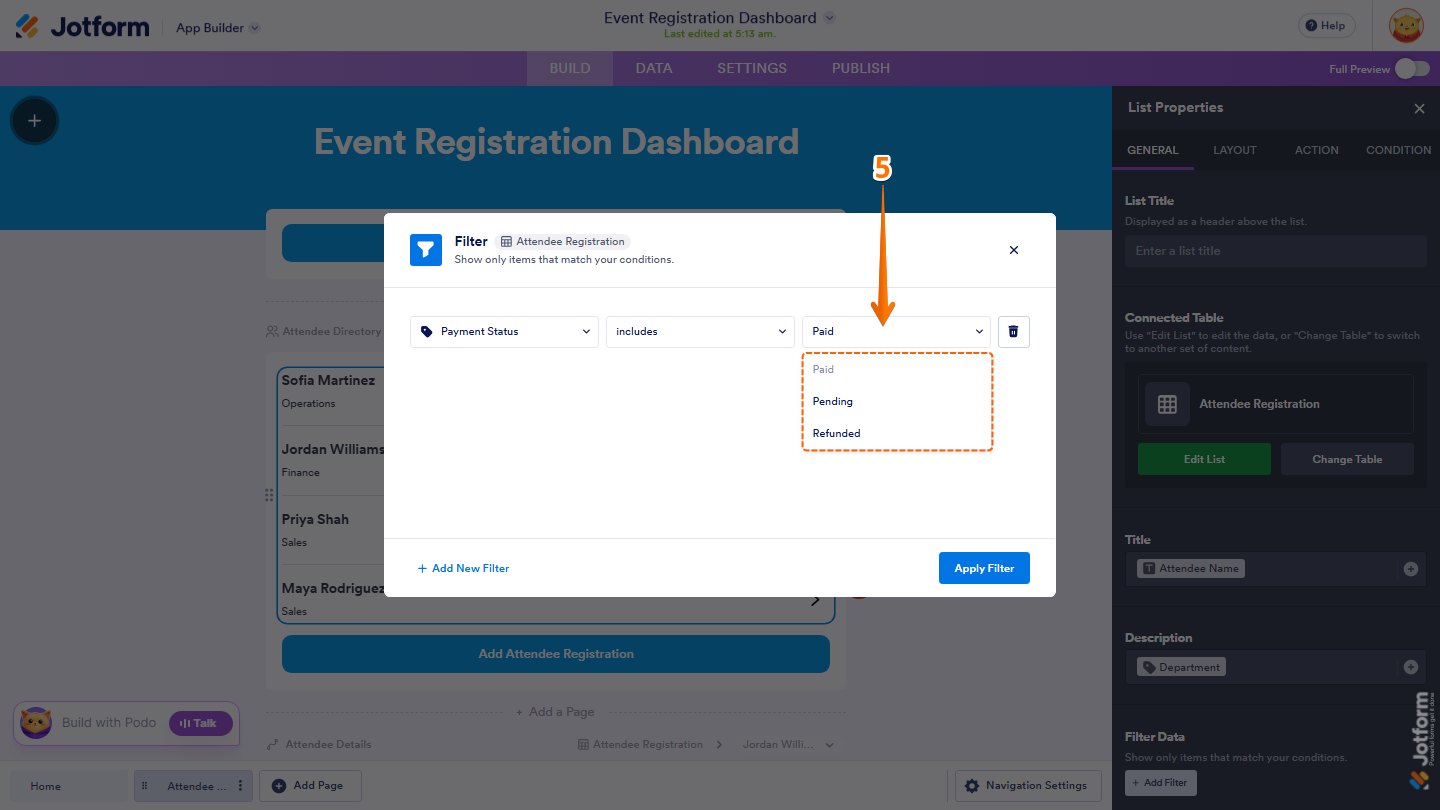
- Then, in the third dropdown or field, enter the value you want or click on the Downward Arrow icon and select the field you want to use as your filter.
- If you want to add another filter condition, click on Add New Filter at the bottom-left corner of the window and repeat steps 3, 4 and 5.
- Once you’re done, click on Apply Filter.
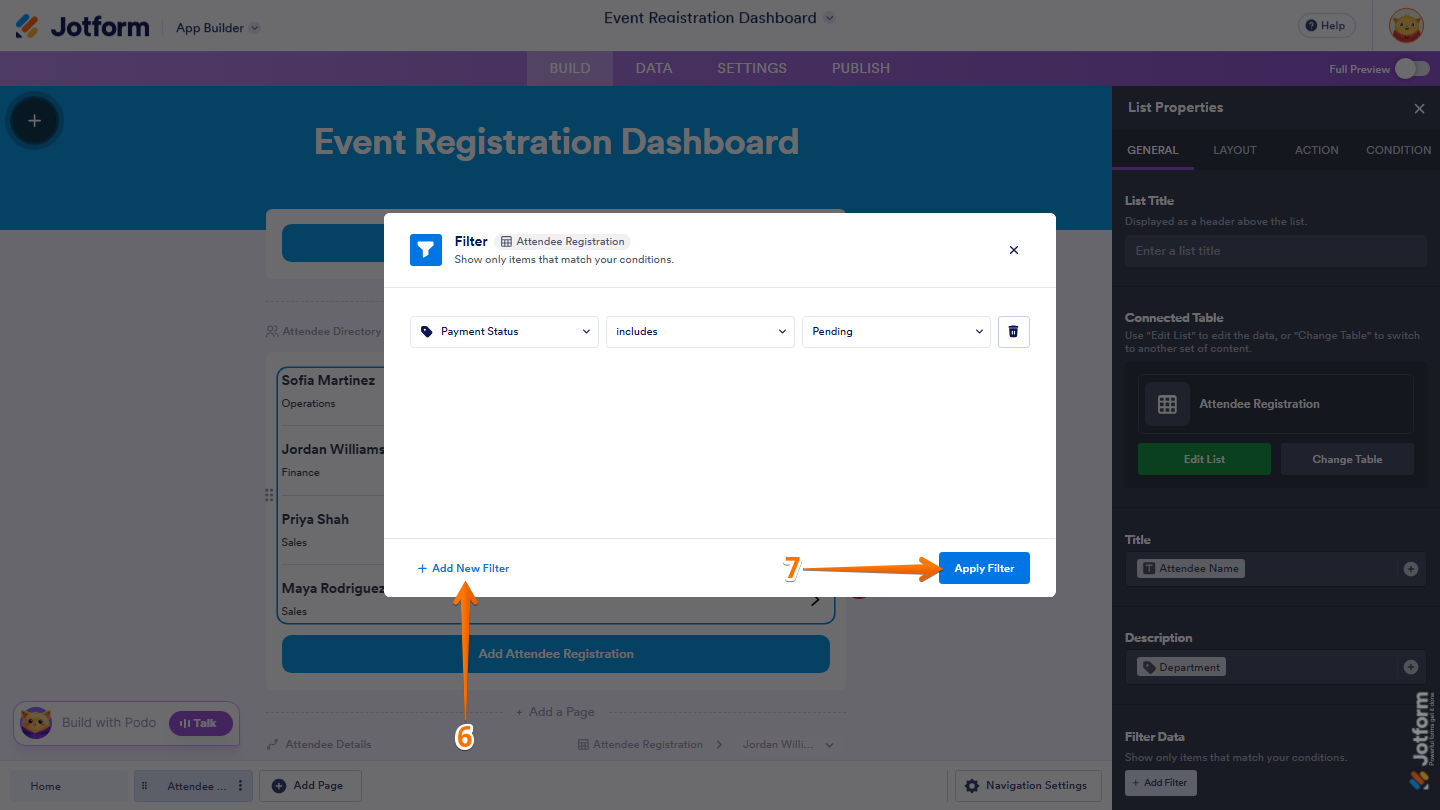
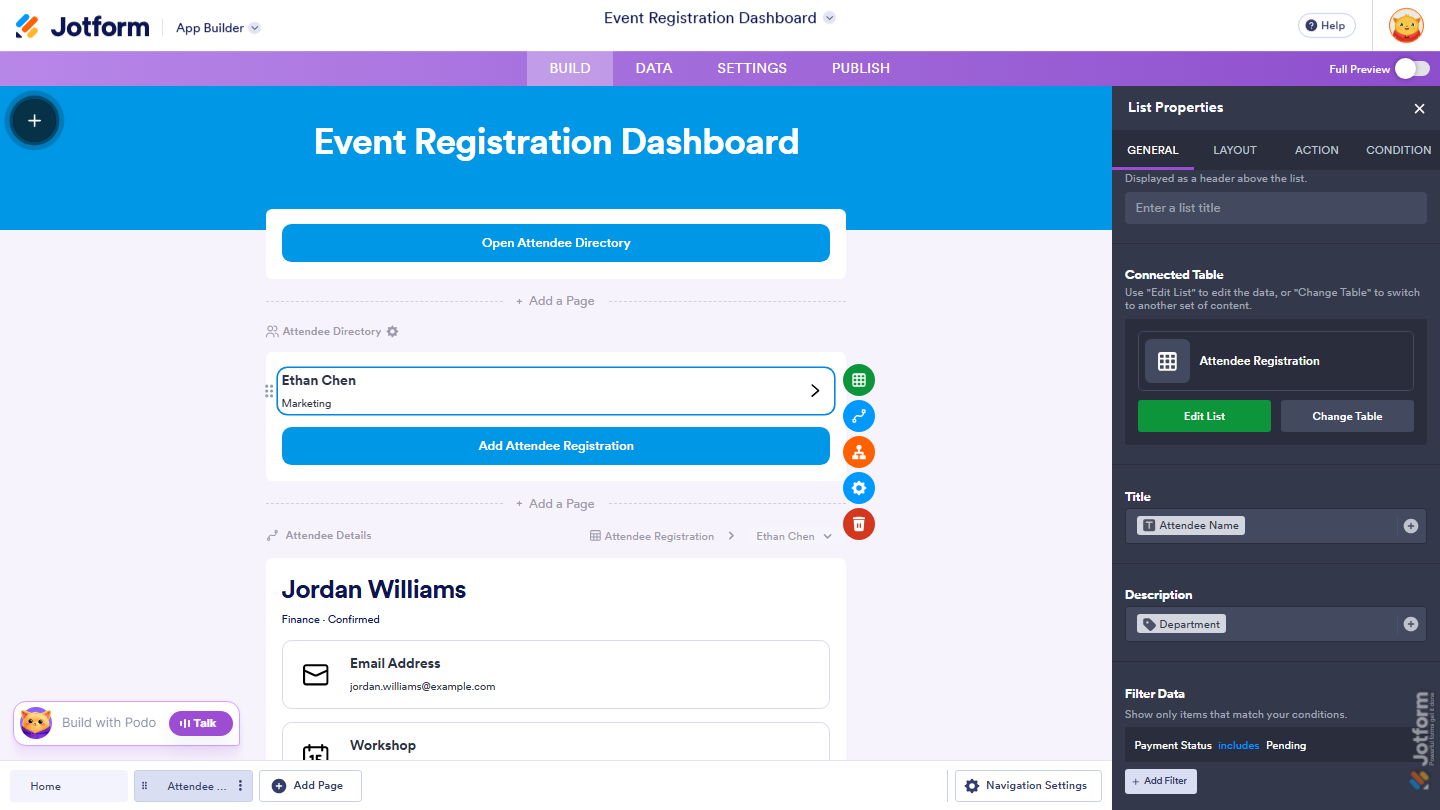
The List will now display only the items that match the applied filter.
Enabling Search for List Element Data
You can also enable a search bar to help users quickly find specific items in the List element. Here’s a quick how-to:
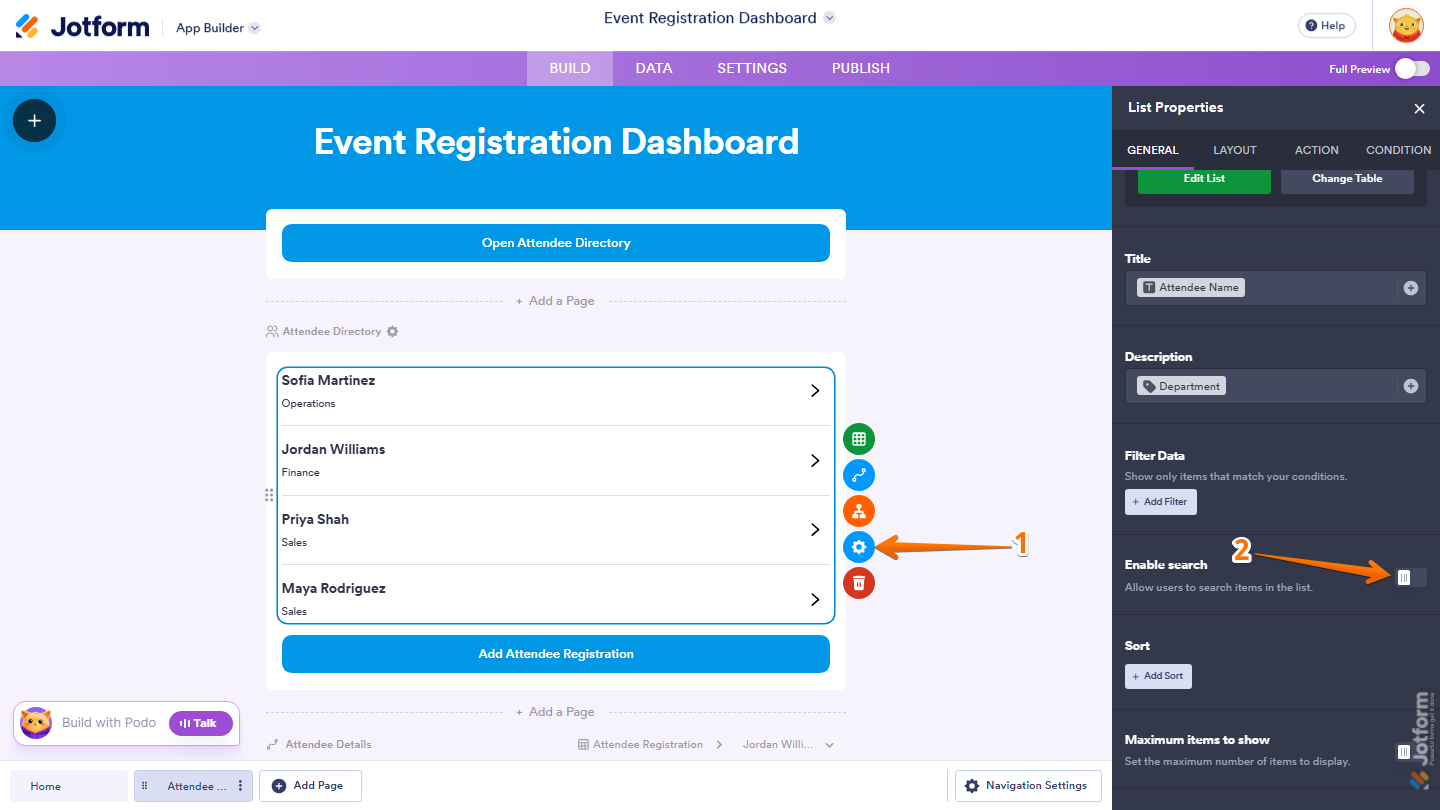
- In App Builder, select the List Element and click on the Gear icon.
- Then, in the List Properties menu that opens on the right side of the page, under the General tab, scroll down to the Enable Search section and toggle it on.
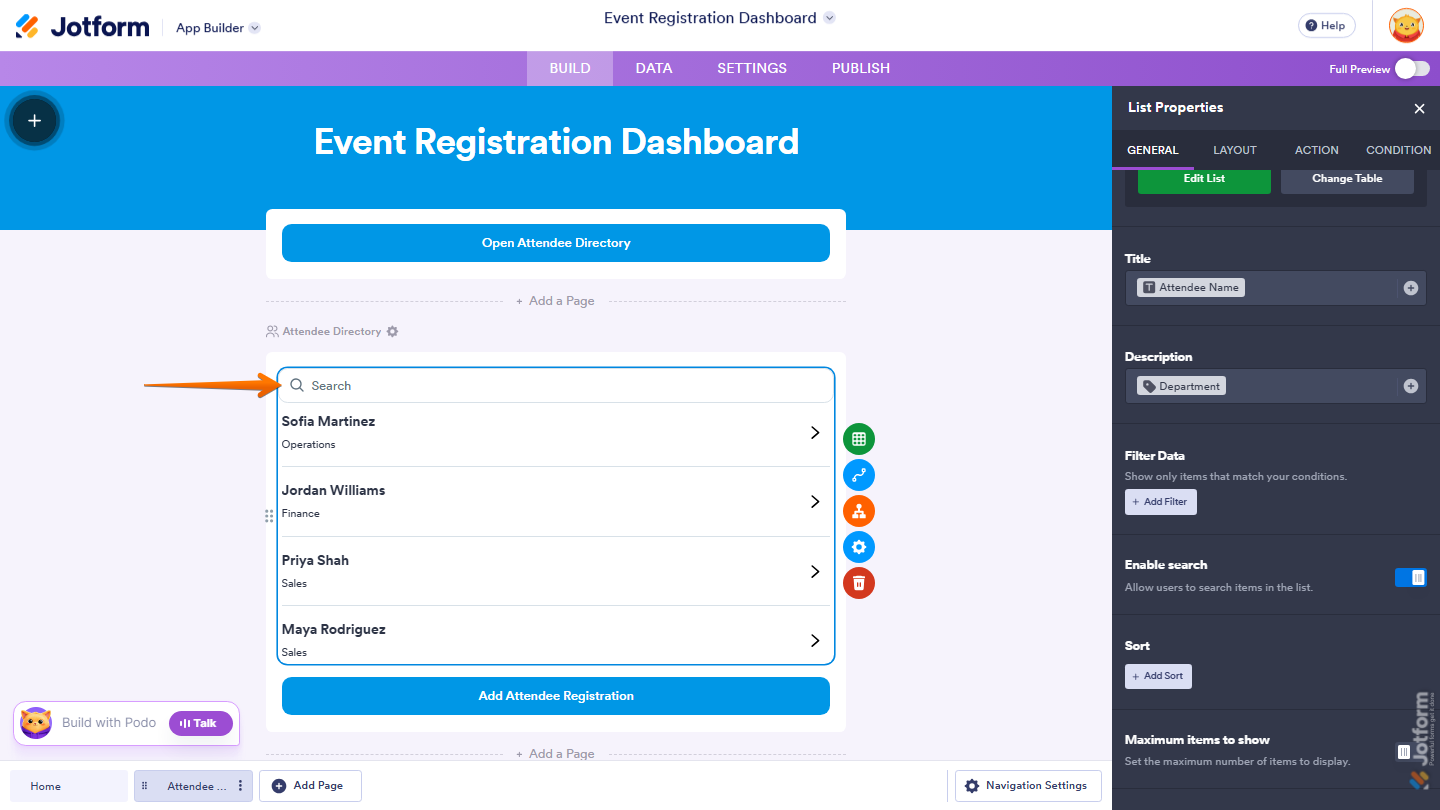
That’s it! A Search bar will now appear above the List element, allowing users to quickly find items by searching the displayed data.

Send Comment: