Jotform makes it easy to prefill your forms using data from Airtable so your form fillers don’t have to enter the same information manually. Prefilling a form automatically pulls existing data from your Airtable records and displays it in the corresponding form fields.
In this guide, you’ll learn how to:
- Connect your Airtable account
- Create Airtable prefill entries
- Manage individual Airtable prefill entries
- Manage multiple Airtable prefill entries
- Manage prefill access permissions
Once your Airtable account is connected, your Airtable records and Jotform fields can work together more smoothly and efficiently. This is especially useful for updating records, editing existing information, or simplifying the form-filling process for your users.
Connecting Your Airtable Account
Before creating Airtable prefill entries, you’ll need to connect your Airtable account and configure your field mappings. Getting started is simple—here’s what to do:
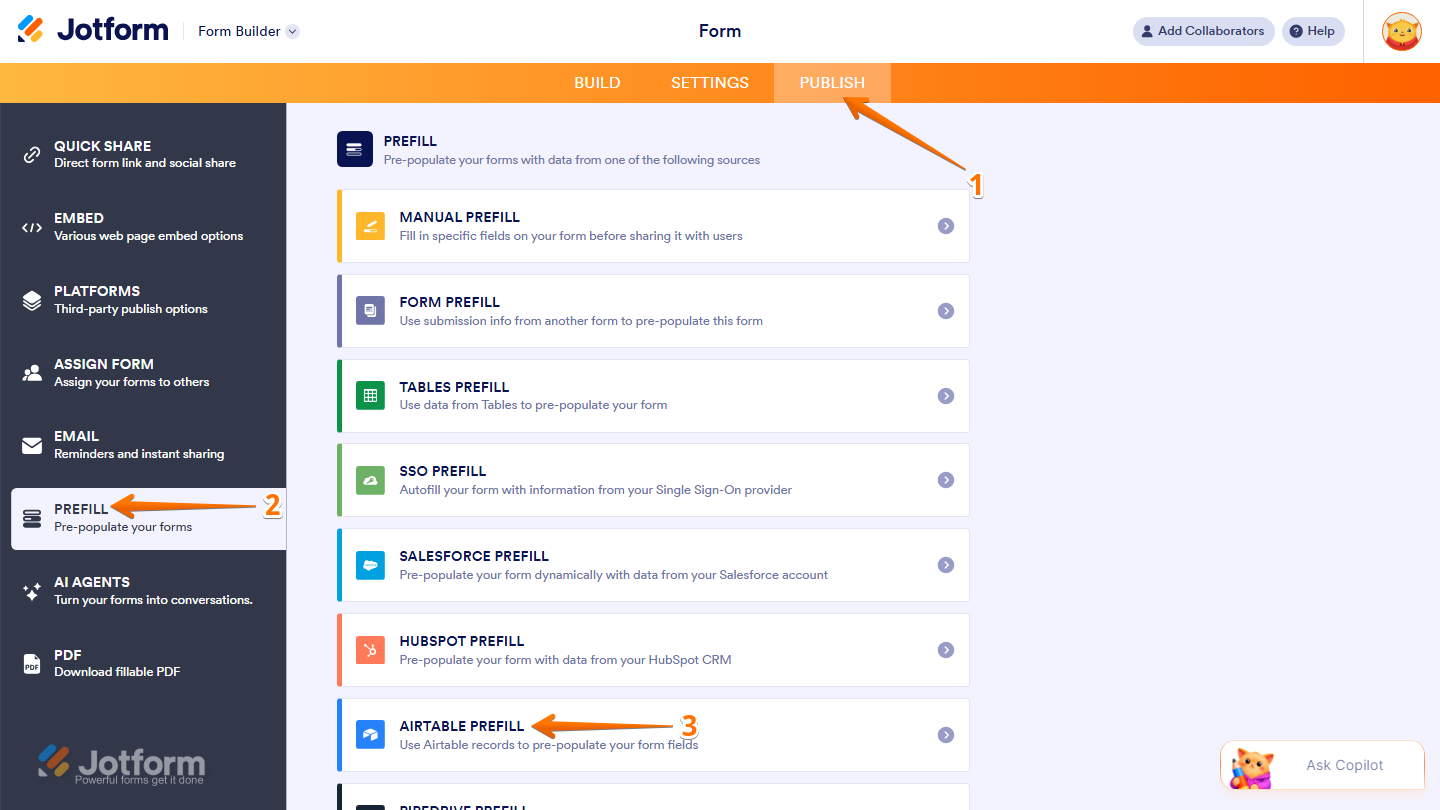
- In Form Builder, in the orange navigation bar at the top of the page, click on Publish.
- Then, in the menu on the left, click on Prefill.
- Now, select Airtable Prefill.
- Next, click on Authenticate and then log in to your Airtable account.
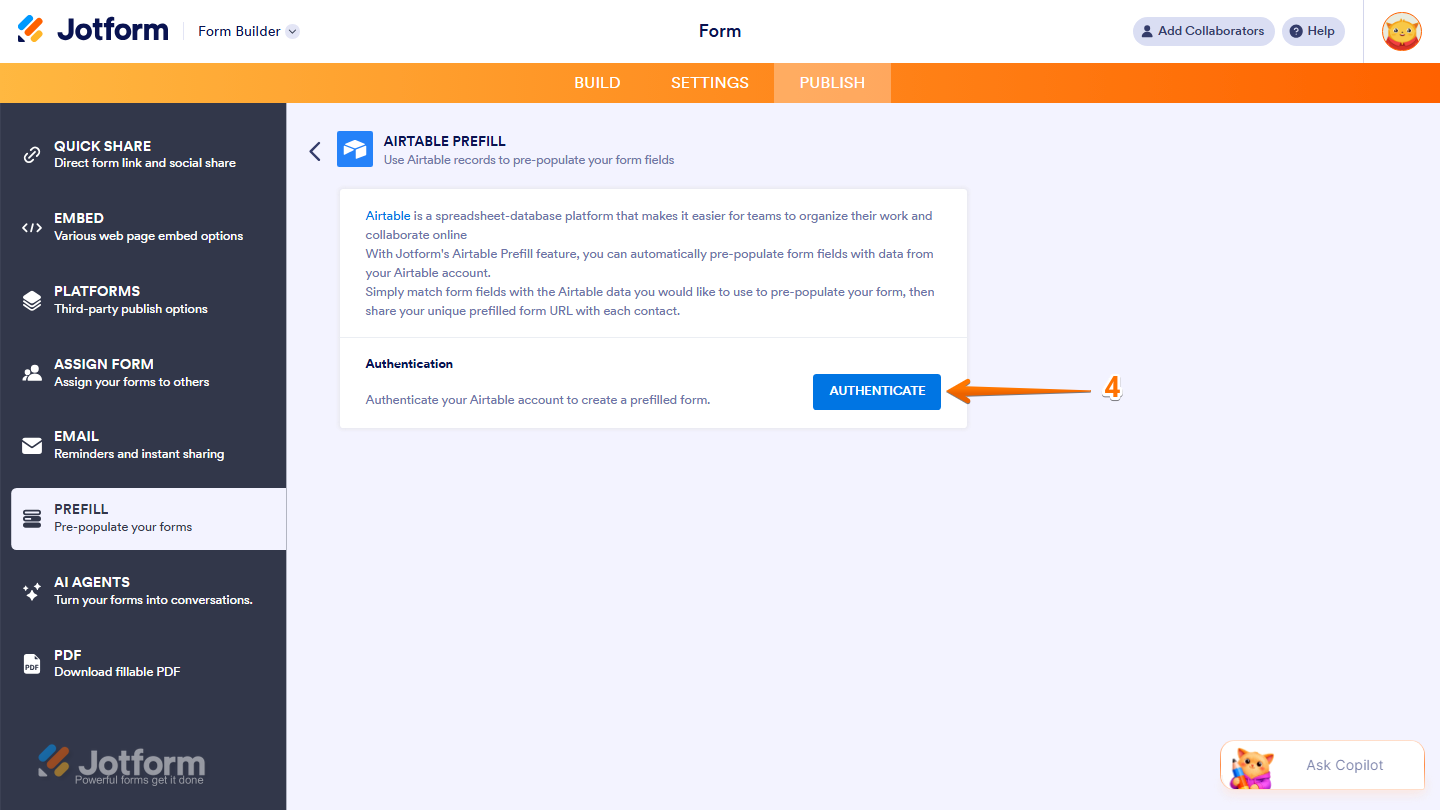
Note
When authenticating or logging in to your Airtable account, make sure that you’ve selected the required resources and bases before granting access.
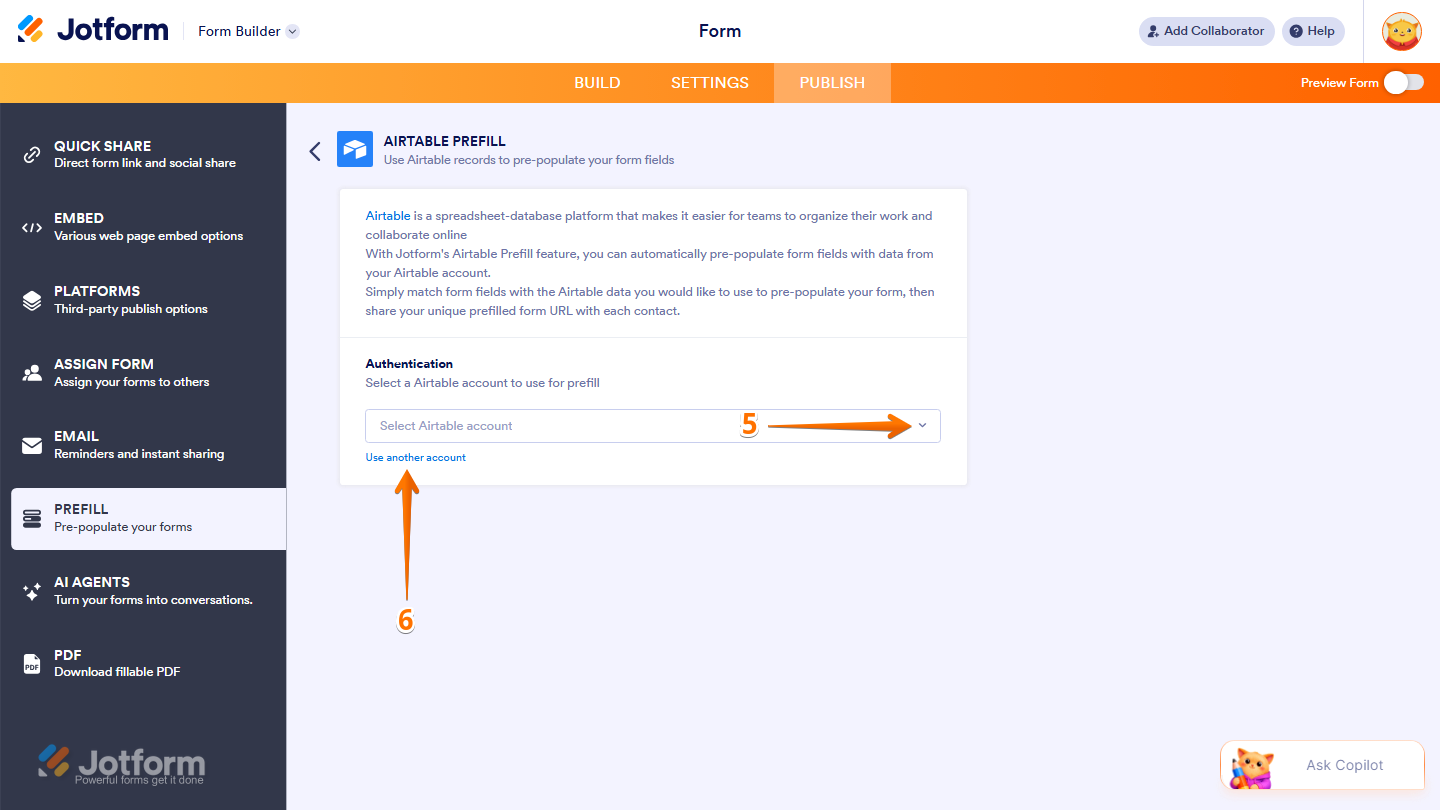
- If you’ve logged in before through one of your other forms, select that Airtable account from the Dropdown menu.
- Or, to use a different one, click on Use Another Account.
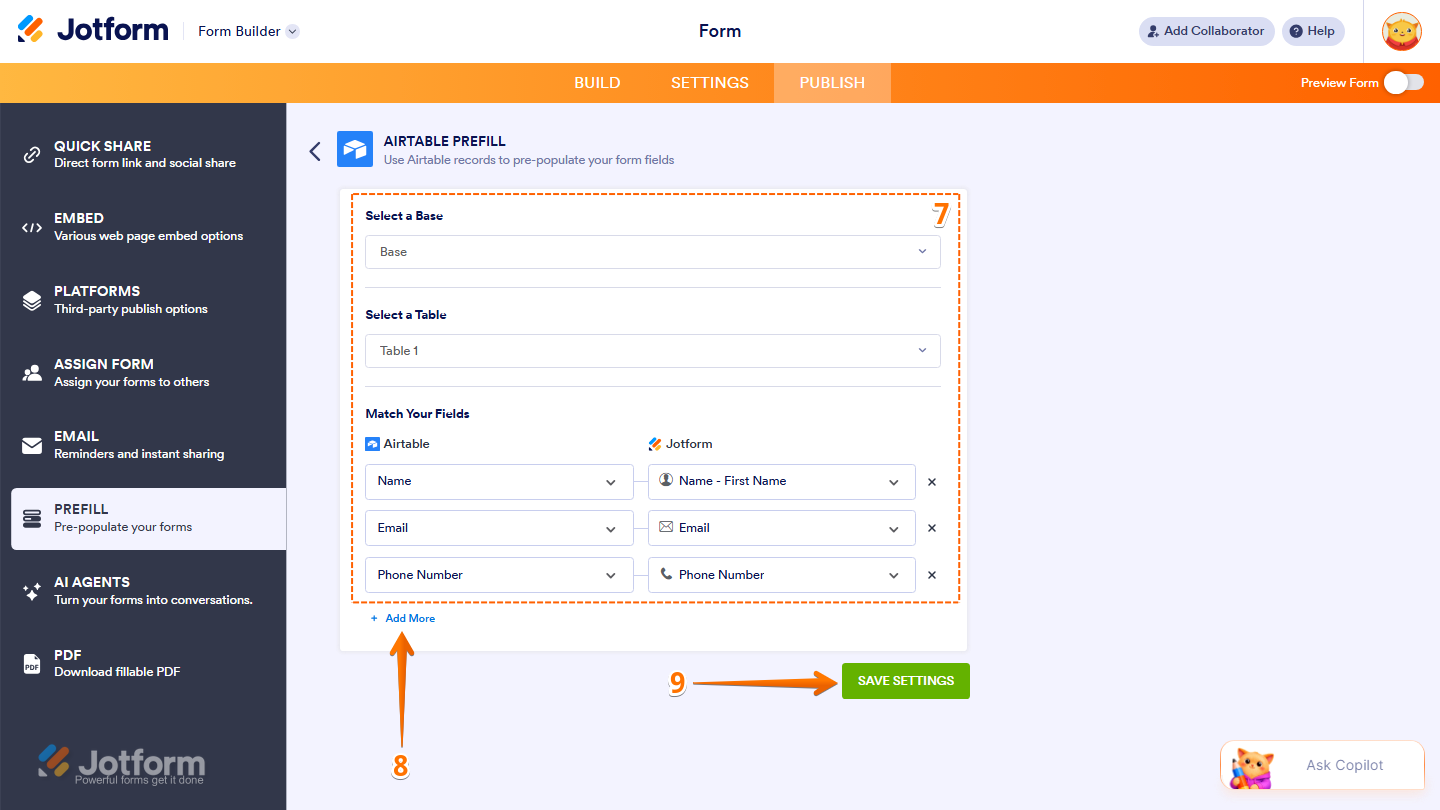
- Now, set up these things:
- Select a Base — Choose the Airtable base you want to connect.
- Select a Table — Choose the table that contains the data you want to use.
- Match Your Fields — Match your Airtable fields with your Jotform form fields.
- To add additional field mappings, click on Add More.
- Finally, click on Save Settings, and you’re done.
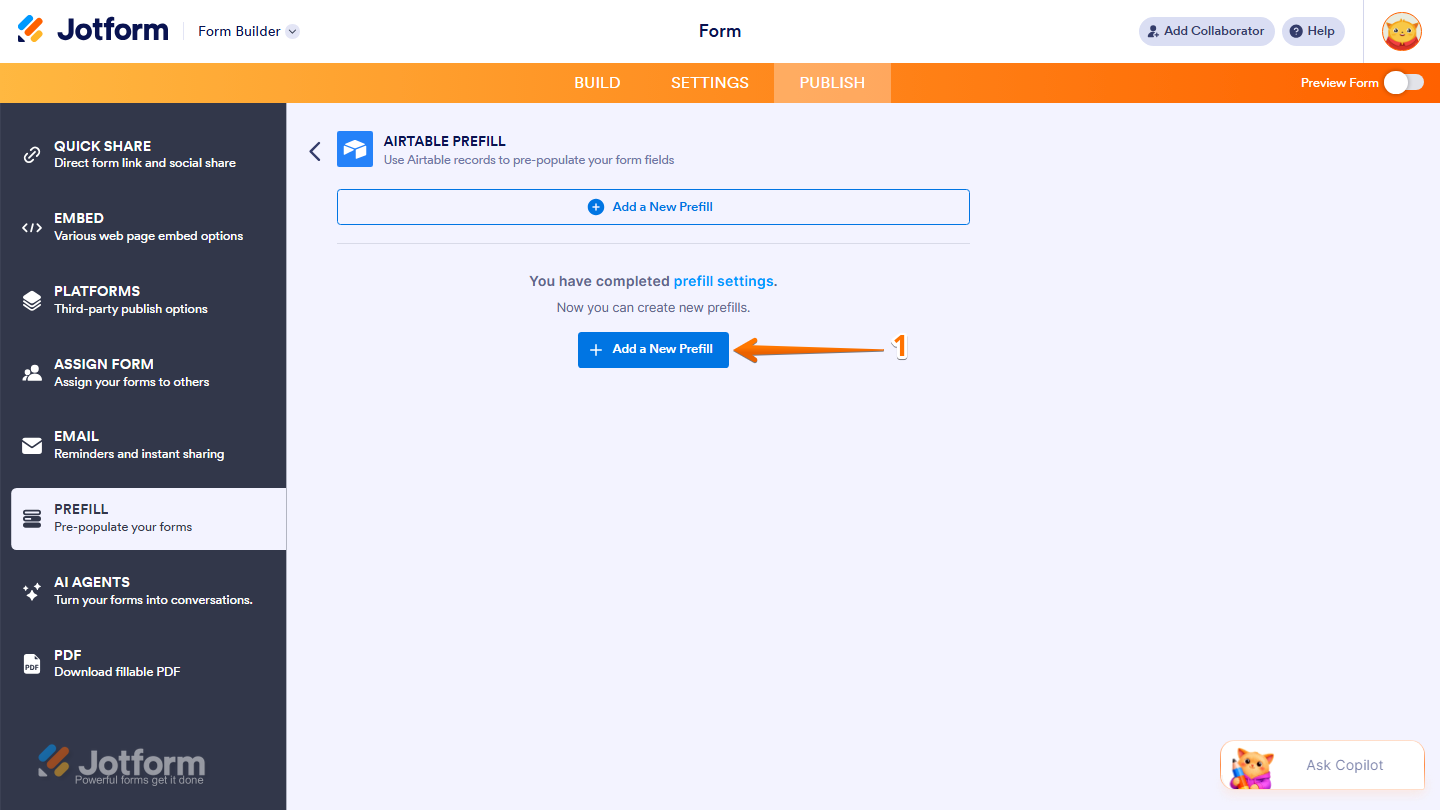
Creating Airtable Prefill Entries
Once your Airtable account is connected, you can create prefilled form entries using your Airtable records. Here’s how to set it up:
- While you’re on the Airtable Prefill page, in the middle of the page, click on Add a New Prefill.
- Next, in the Airtable Prefill window that opens, check the boxes next to the records you want to use as prefill entries.
- Now, click on Create at the bottom-right corner of the window, and you’re done.
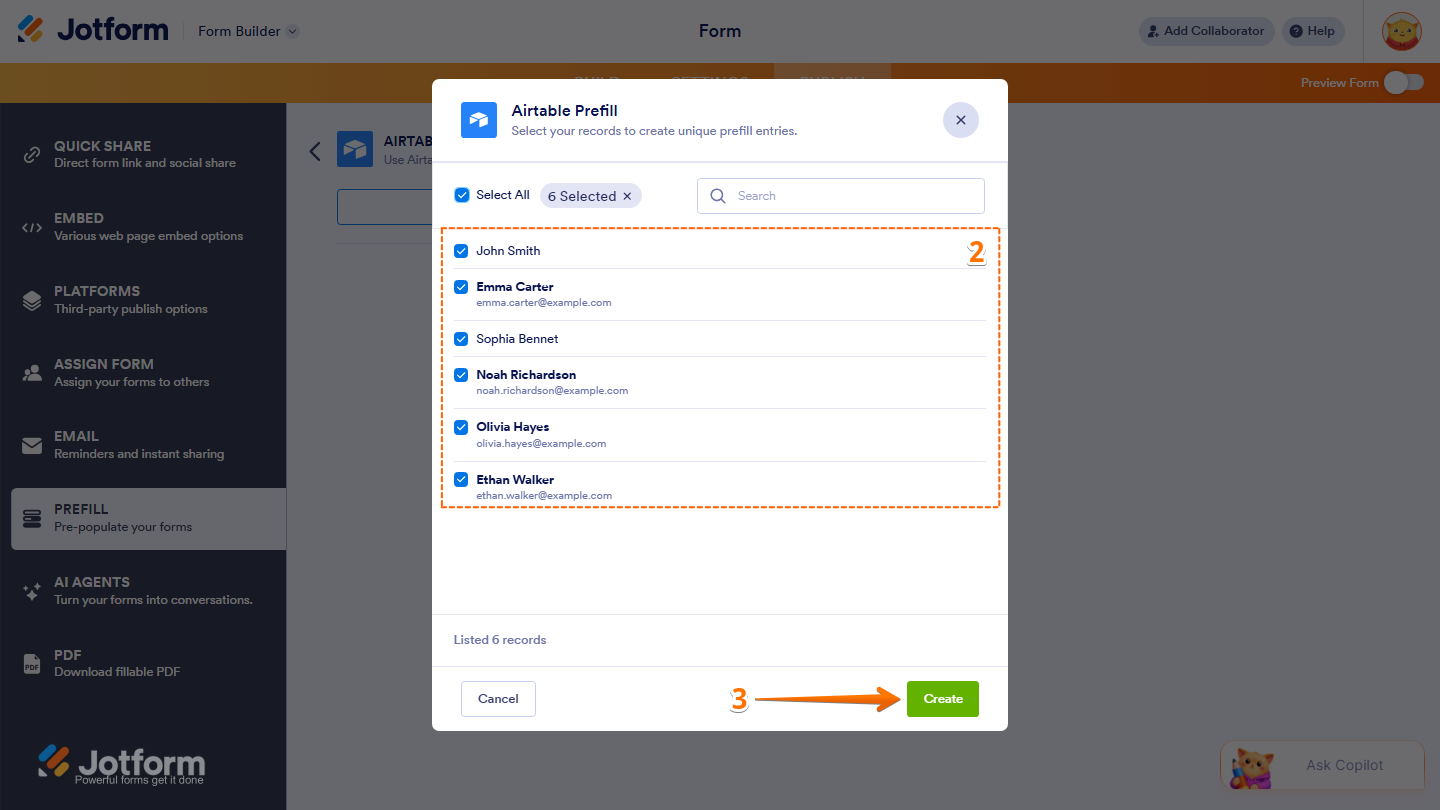
Note
You can select all records at once. But you can only create up to 20 prefilled URLs at a time. If you select more than 20 records and click on Create, Jotform will display a message showing the limit.
Managing Individual Airtable Prefill Entries
If you need to manage several prefill entries at once, you can use bulk actions to save time and organize your entries more efficiently. Here’s how to get going:
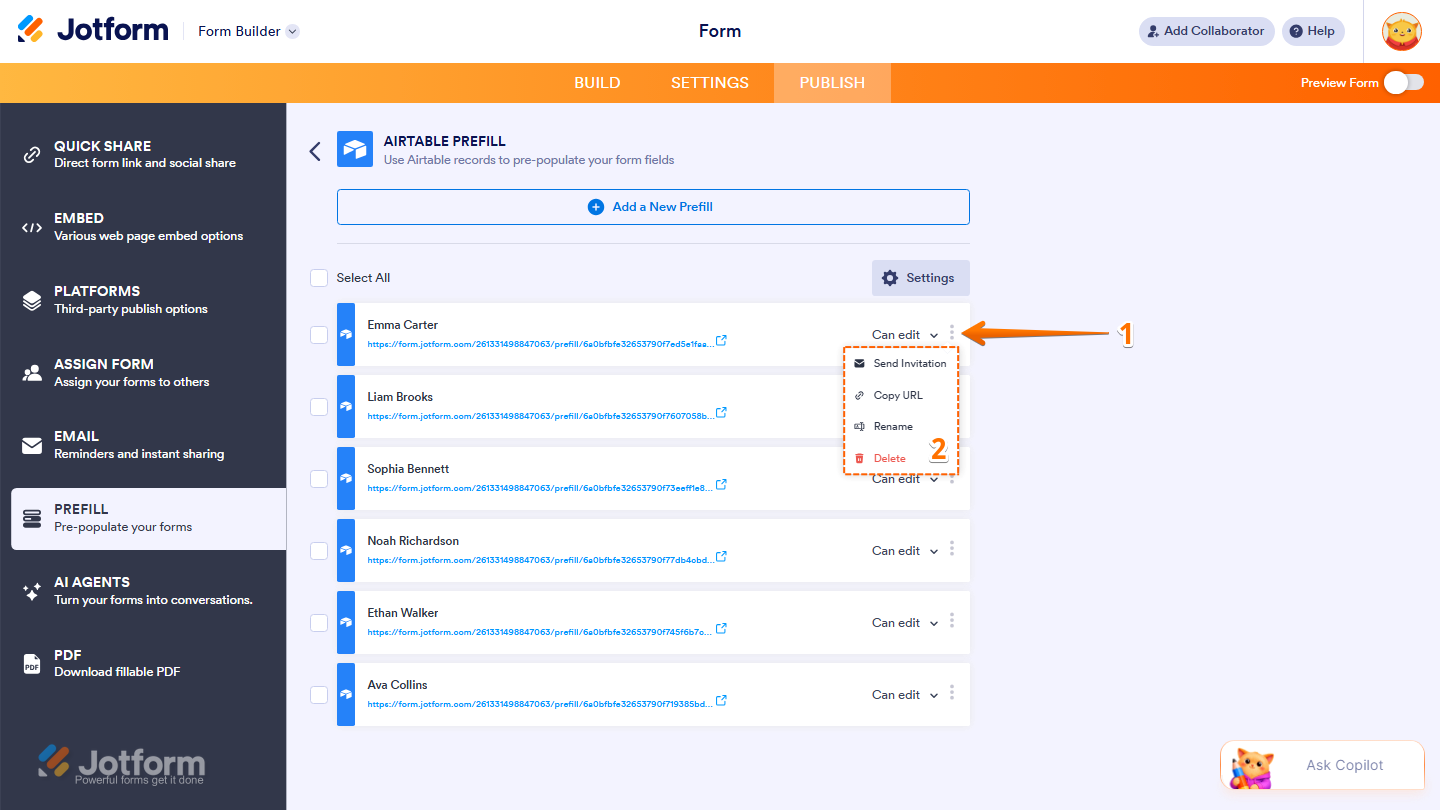
- In the Airtable Prefill page, on the right side of the entry you want to manage, click on the Three Dots icon.
- Then, in the menu that opens, select one of these actions:
- Send Invitation — Send the prefilled form link to recipients by email.
- Copy URL — Copy the prefilled URL to share it manually.
- Rename — Change the name of the prefill entry.
- Delete — Remove the selected prefill entry.
Pro Tip
You can also click directly on the prefilled URL to open and test the prefilled form before sharing it.
Managing Multiple Airtable Prefill Entries
If you need to manage several prefill entries at once, you can use bulk actions to save time and organize your entries more efficiently. Here’s how to get going:
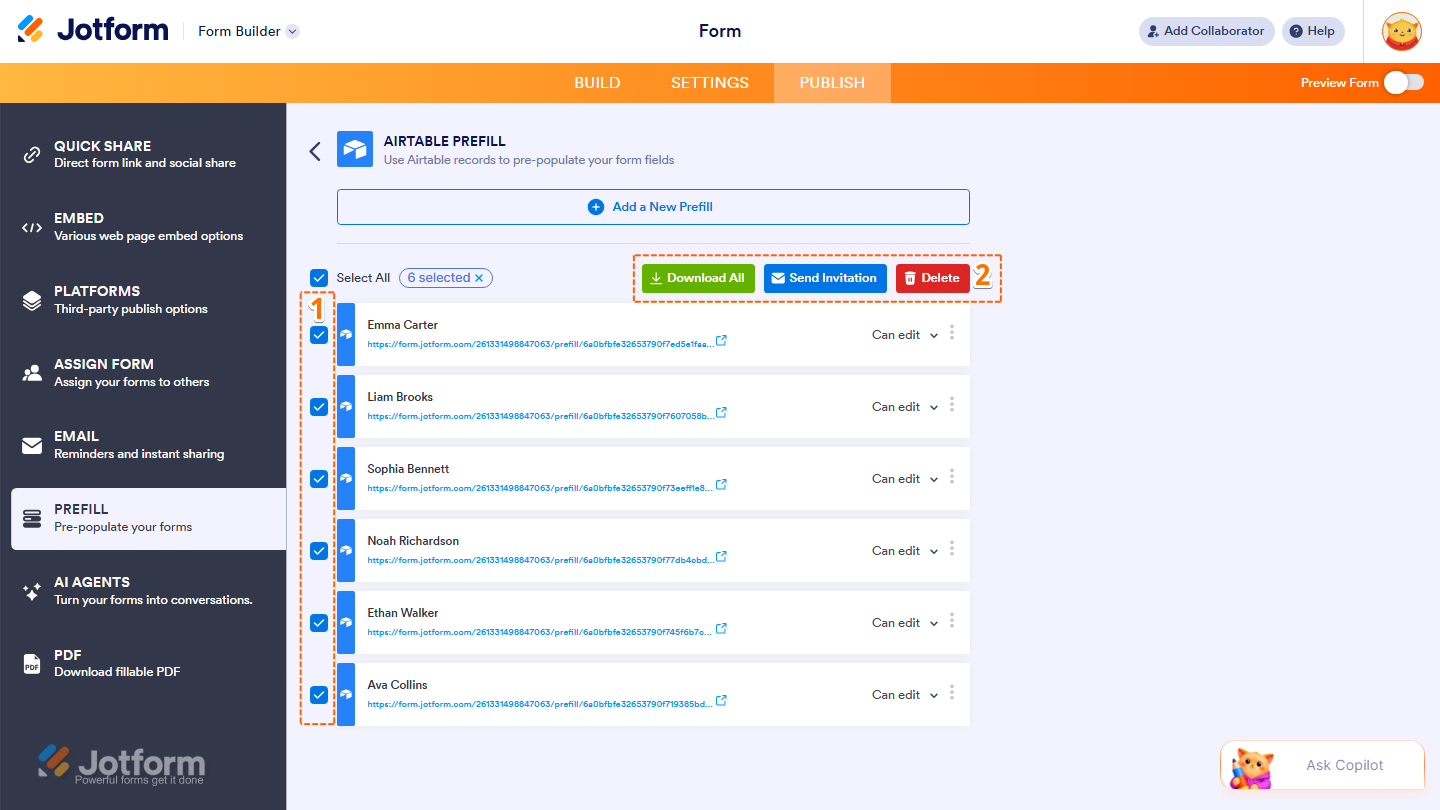
- In the Airtable Prefill page, check the boxes next to the prefill entries you want to manage.
- Then, at the top of the list, select one of these bulk actions:
- Download All — Download all selected prefilled URLs.
- Send Invitation — Send the selected prefilled URLs by email.
- Delete — Remove the selected prefill entries.
Note
You can select all prefilled URLs at once. However, you can only send invitations to up to five (5) recipients at a time. Selecting more than five entries will display an error message.
Managing Prefill Access Permissions
You can also control whether recipients can edit or only view prefilled form data by adjusting the access permissions for each prefill entry. Want to set it up? Just do this:
- In the Airtable Prefill page, on the right side of the prefill entry, click on the Downward Arrow icon.
- Then, select one of these permission options:
- Editable — Recipients can edit the prefilled fields before submitting the form.
- Read Only — Recipients can only view the prefilled fields and cannot make changes.
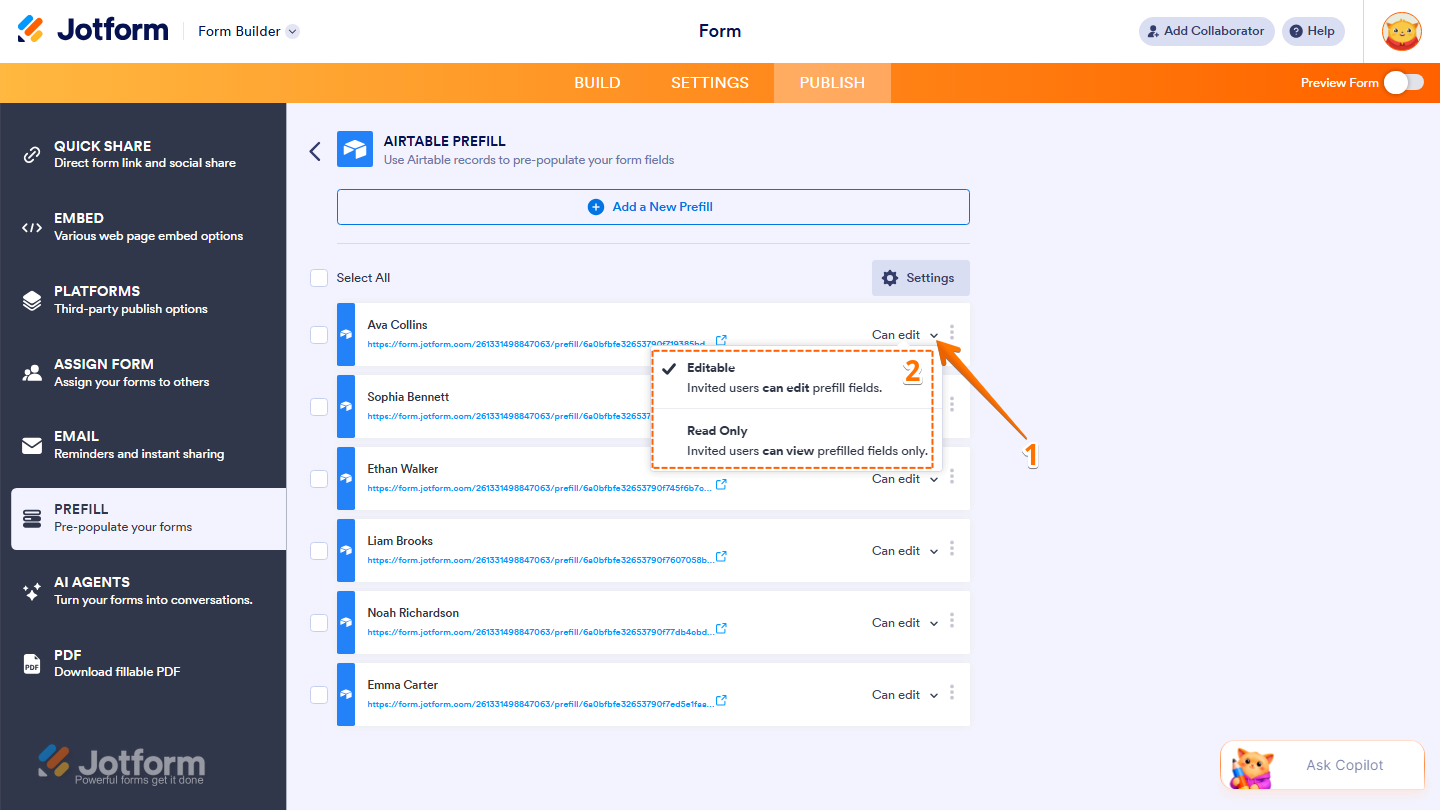
Note
The selected permission will apply only to the specific prefill entry you update.


Send Comment: