Tables allows you to manually send notification or autoresponder emails with data from your table using the Send Email Action Button column, perfect for situations where submissions need review before sending emails. For example, you can send promotional offers to form respondents at a later time based on their submission data or follow-up reminders, such as maintenance appointment notifications or feedback requests after a scheduled visit. Emails can include attachments and relevant information for specific recipients, giving you control over when and what is communicated to ensure accurate and timely communication.
Use these steps to add a Send Email Action Button column to your table:
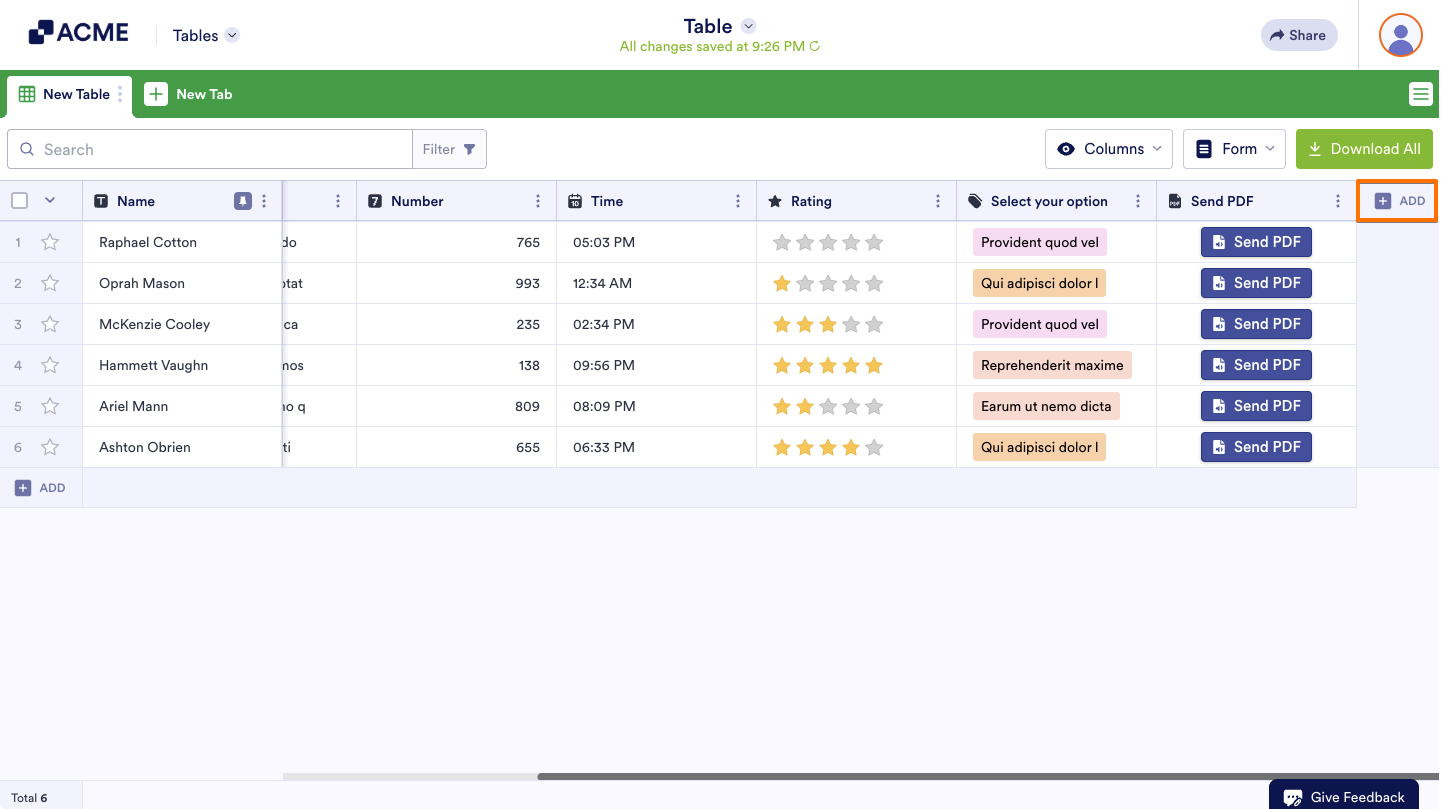
- In Tables, click on the Add button at the end of the table to insert a new column. See How to Add and Organize Columns for more information.
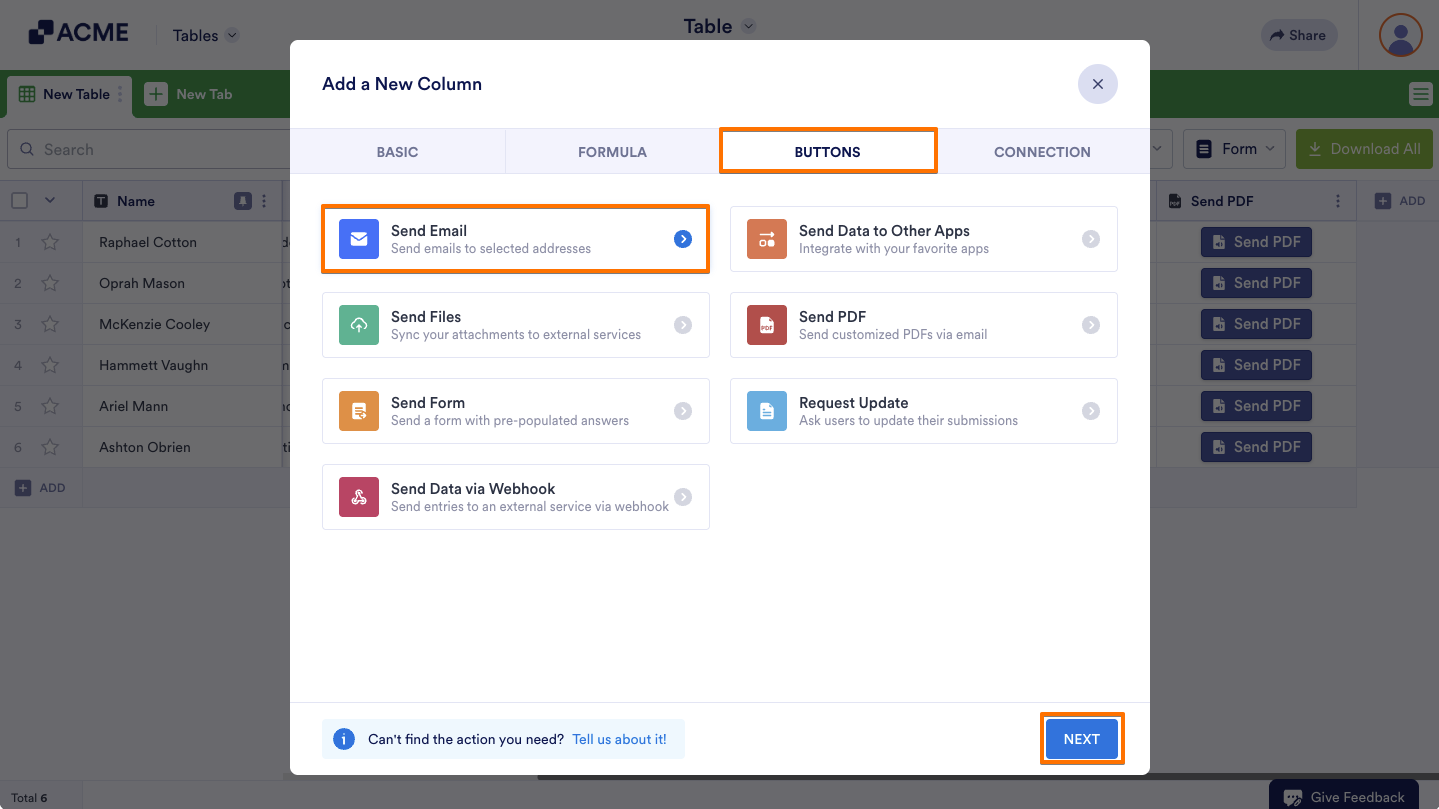
- In the Add a New column window, go to the Buttons tab.
- Then, select Send Email and click on Next.
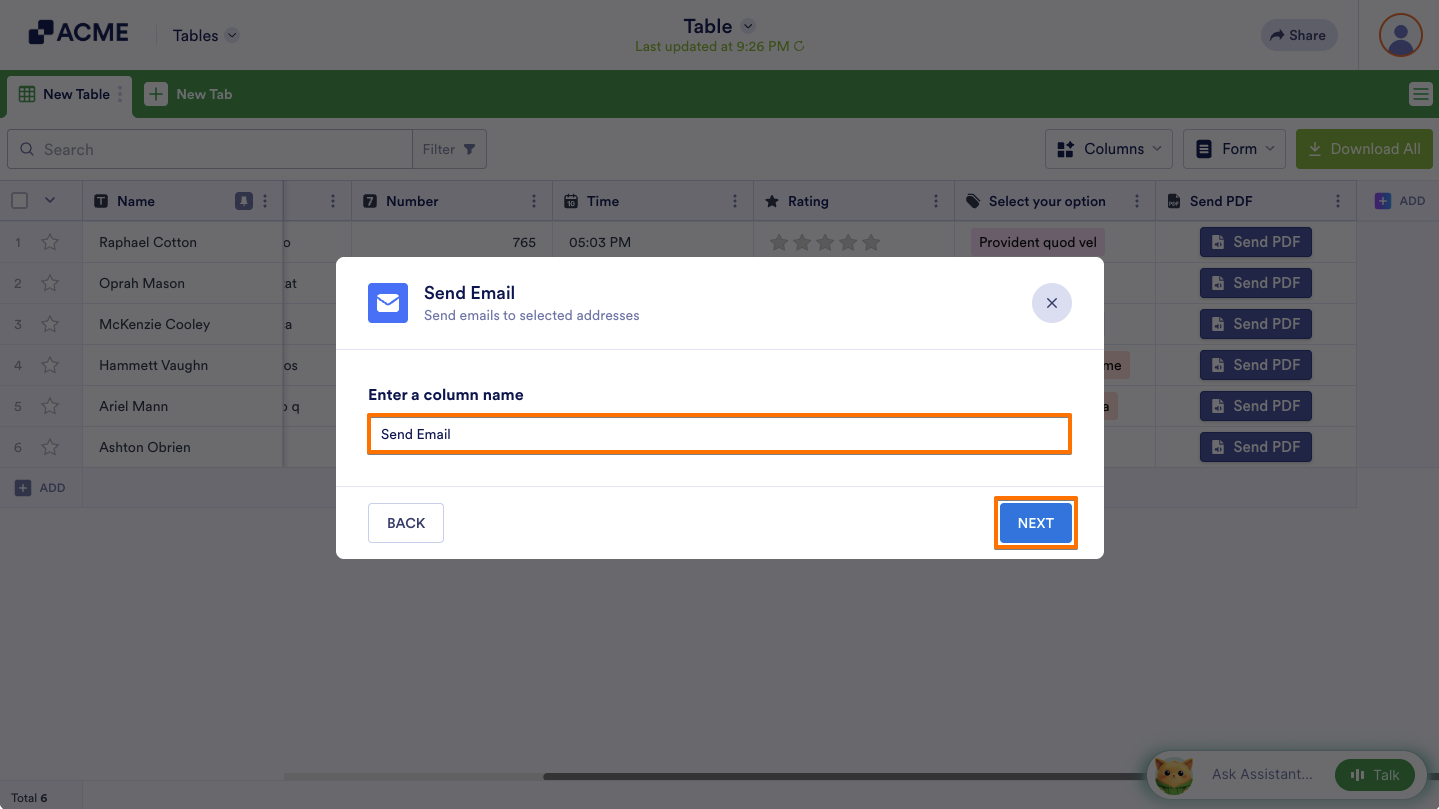
- In the Send Email window, enter a name for your new column, then click on Next.
- On the next screen, click on the Create an Email button at the top to set up a new email template.
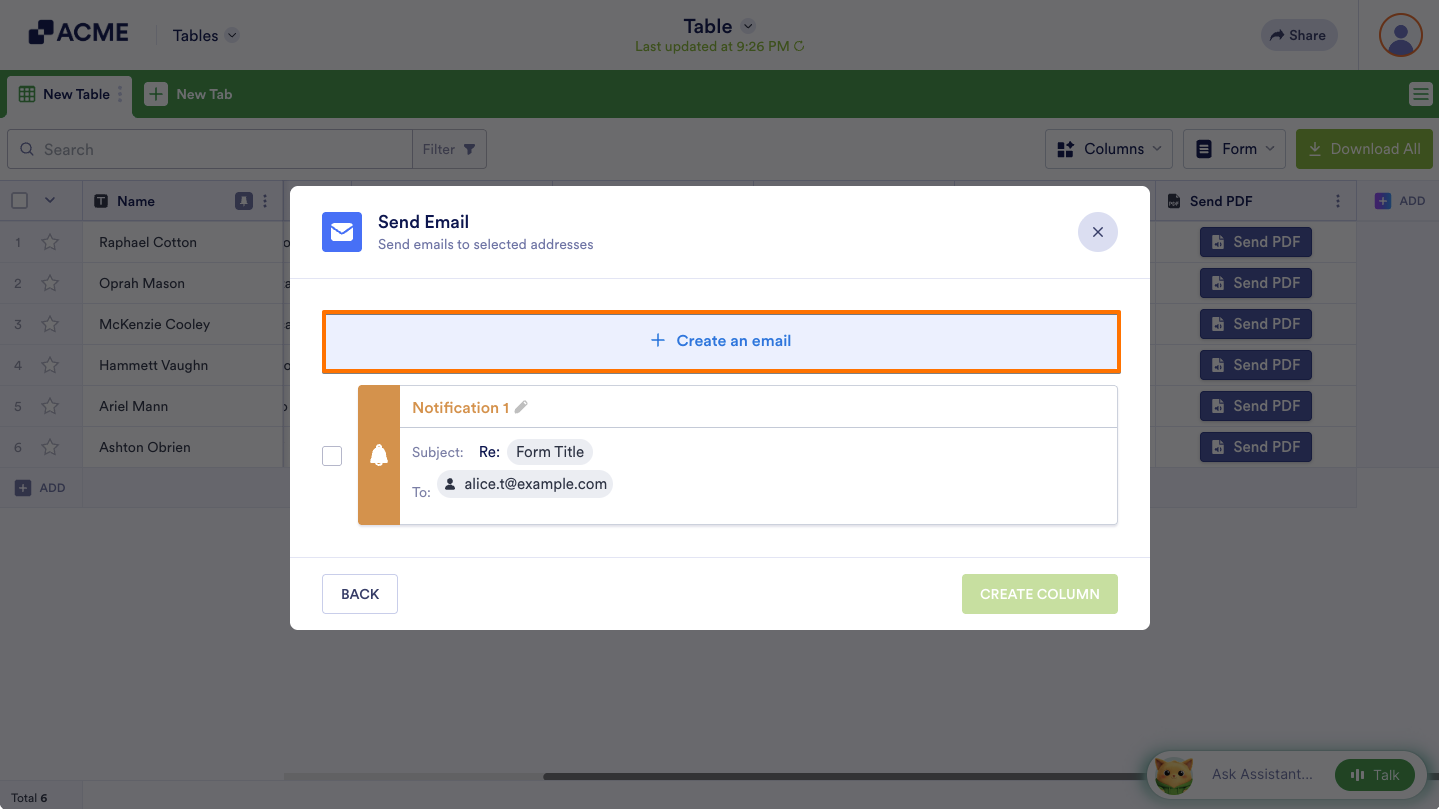
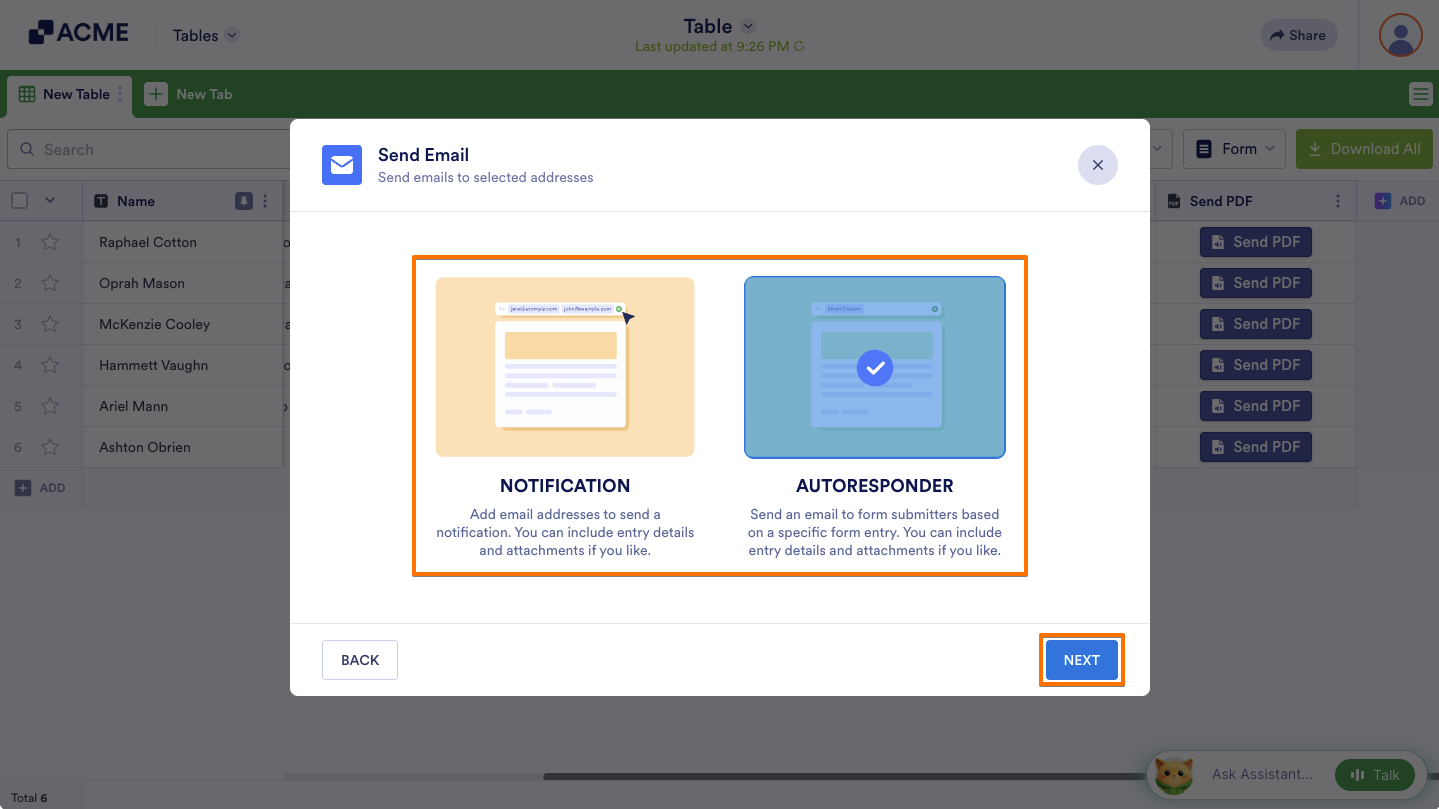
- Then, choose what type of email you want to create and click on Next again.
Note
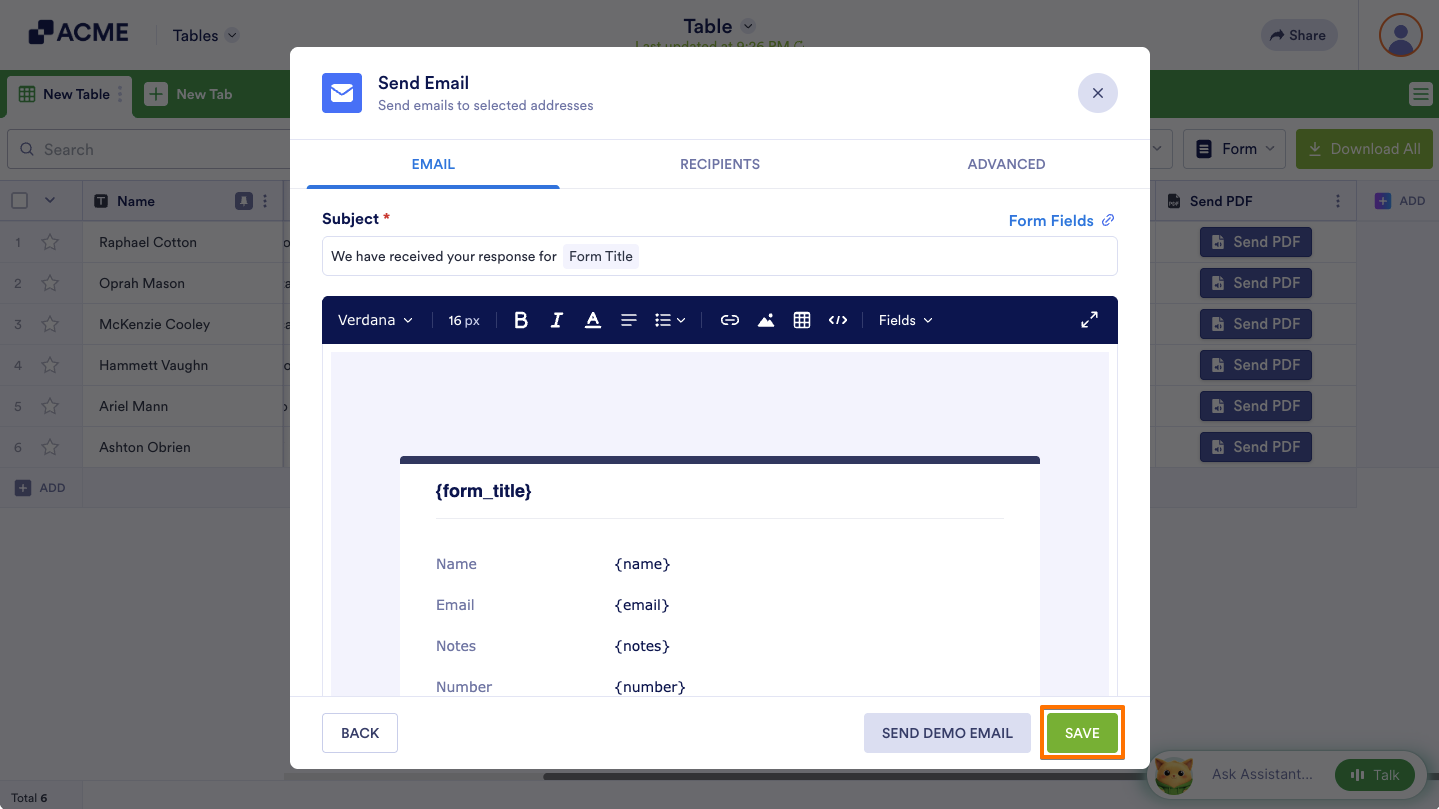
Similar to setting up Notification Emails on your form, you can add or change recipients for notifications or send Autoresponder Emails to form respondents based on specific form entries. You can customize the email content to include entry details, configure email settings, and attach files as needed. For more details, refer to the Explanation of Email Notification and Autoresponder Settings.
- Once you’re done setting up the new email template, click on Save.
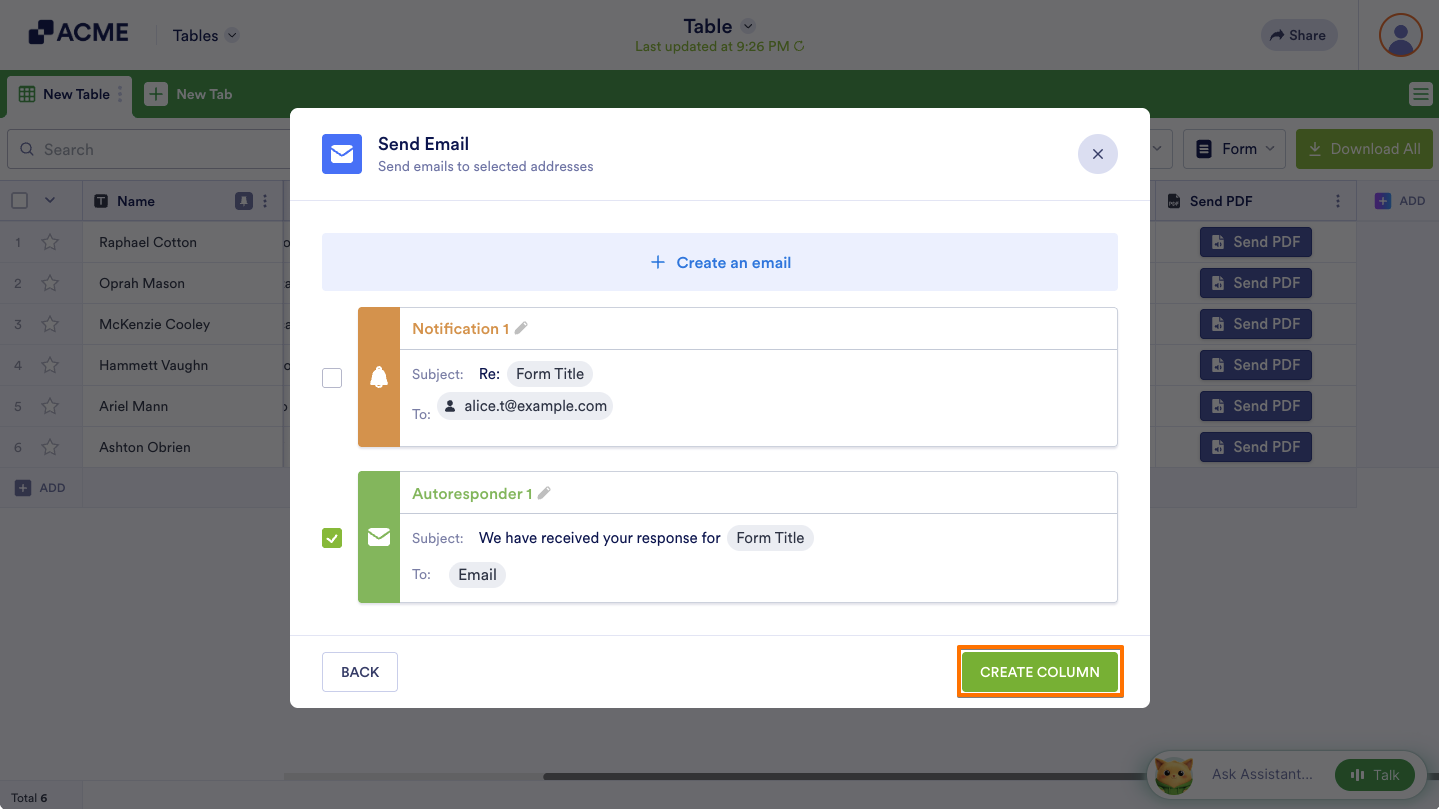
- Newly created email templates will be selected by default automatically. Click on the Create Column button to complete the setup.
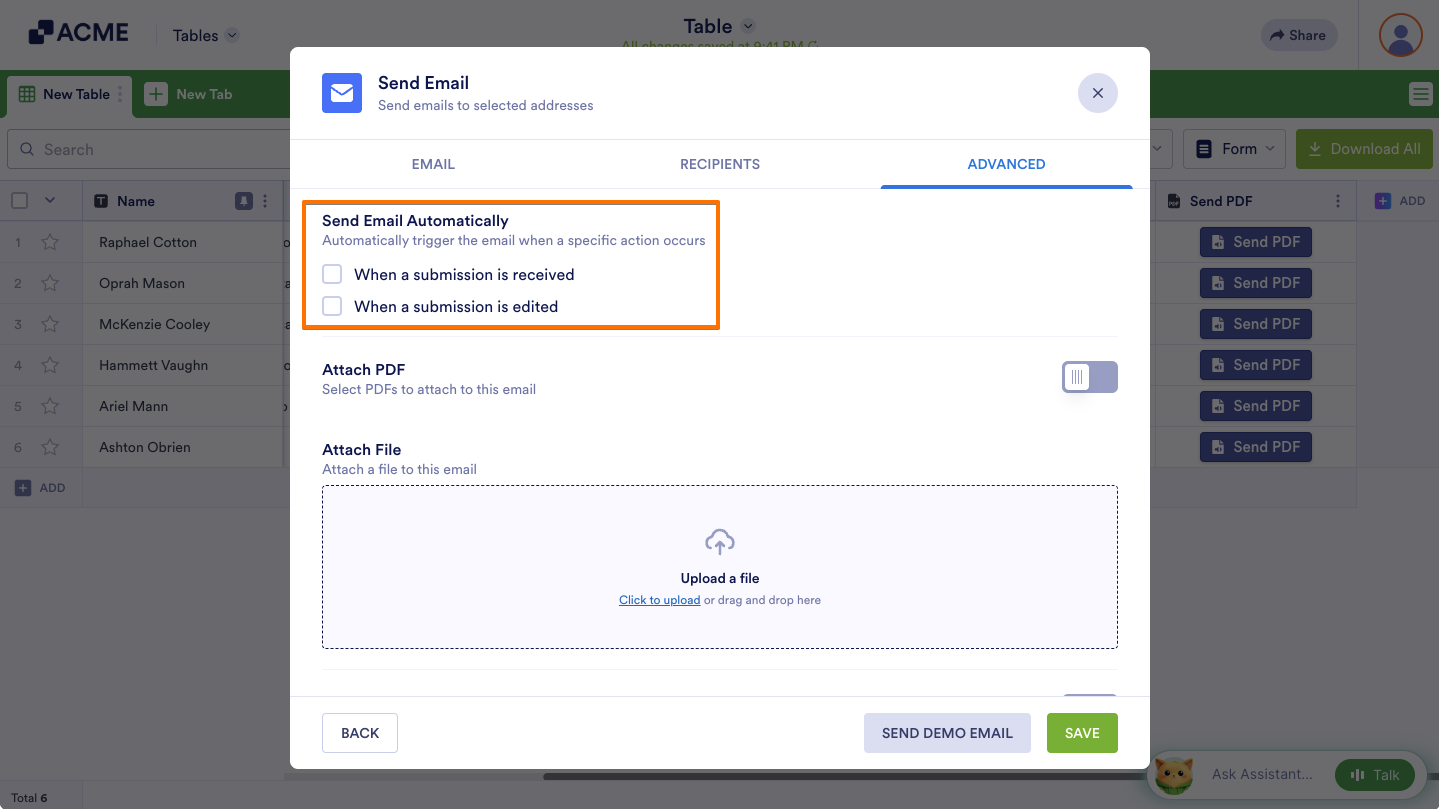
The Send Email Automatically options for Notification Emails and Autoresponder Emails created within Tables are unchecked by default, as they are intended to be sent manually.
You can select multiple email templates for the Send Email action button you’re setting up. You can also choose the email templates you’ve set up on the form connected to your table by checking the box next to them when setting up the Send Email Action Button column. The selected email templates will be sent at once when the action button in your column is triggered.
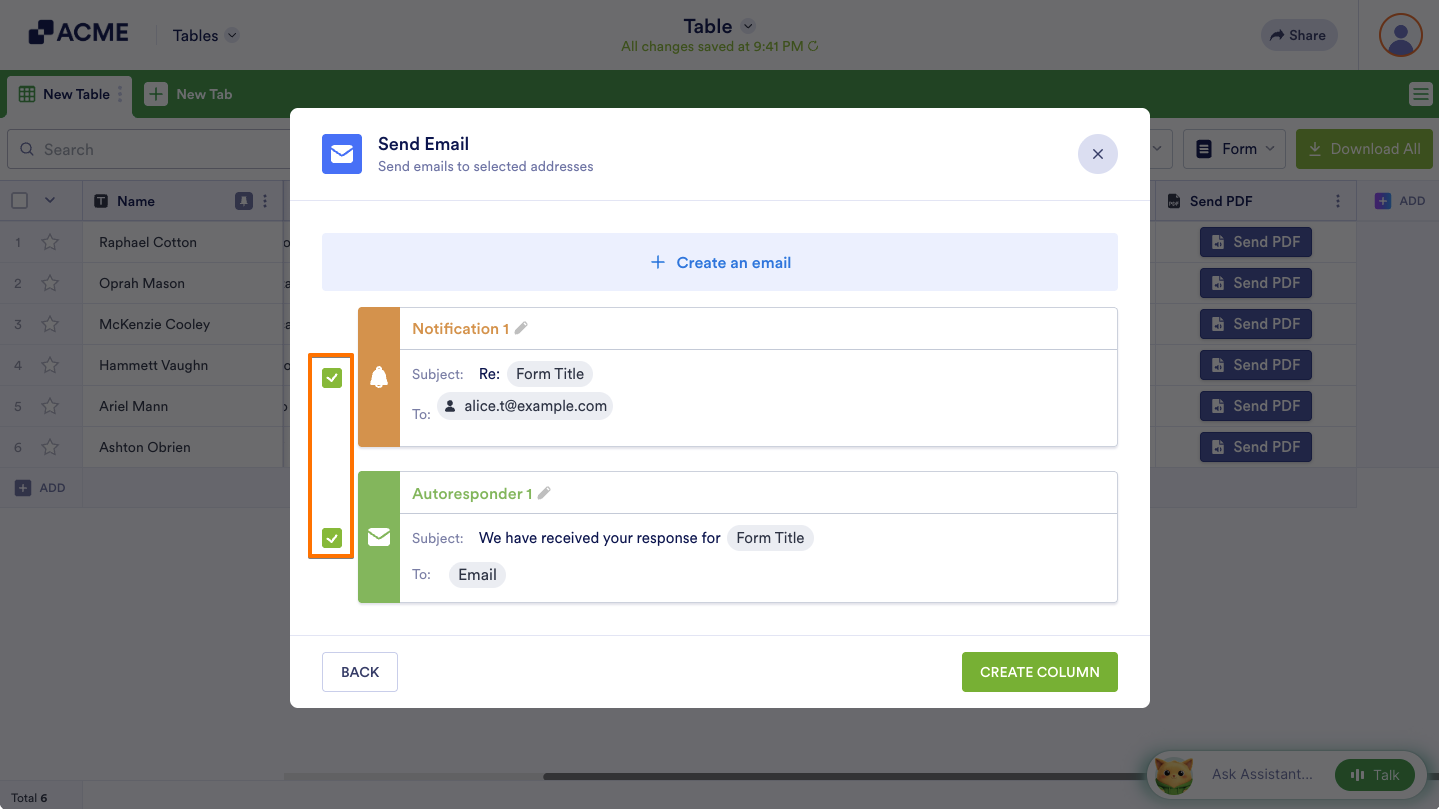
Once you’ve set up the Send Email Action Button column, it’s ready for use in your table. When the button for an entry in that column is clicked, emails will be sent to the recipients specified in the email templates selected in that button’s settings.
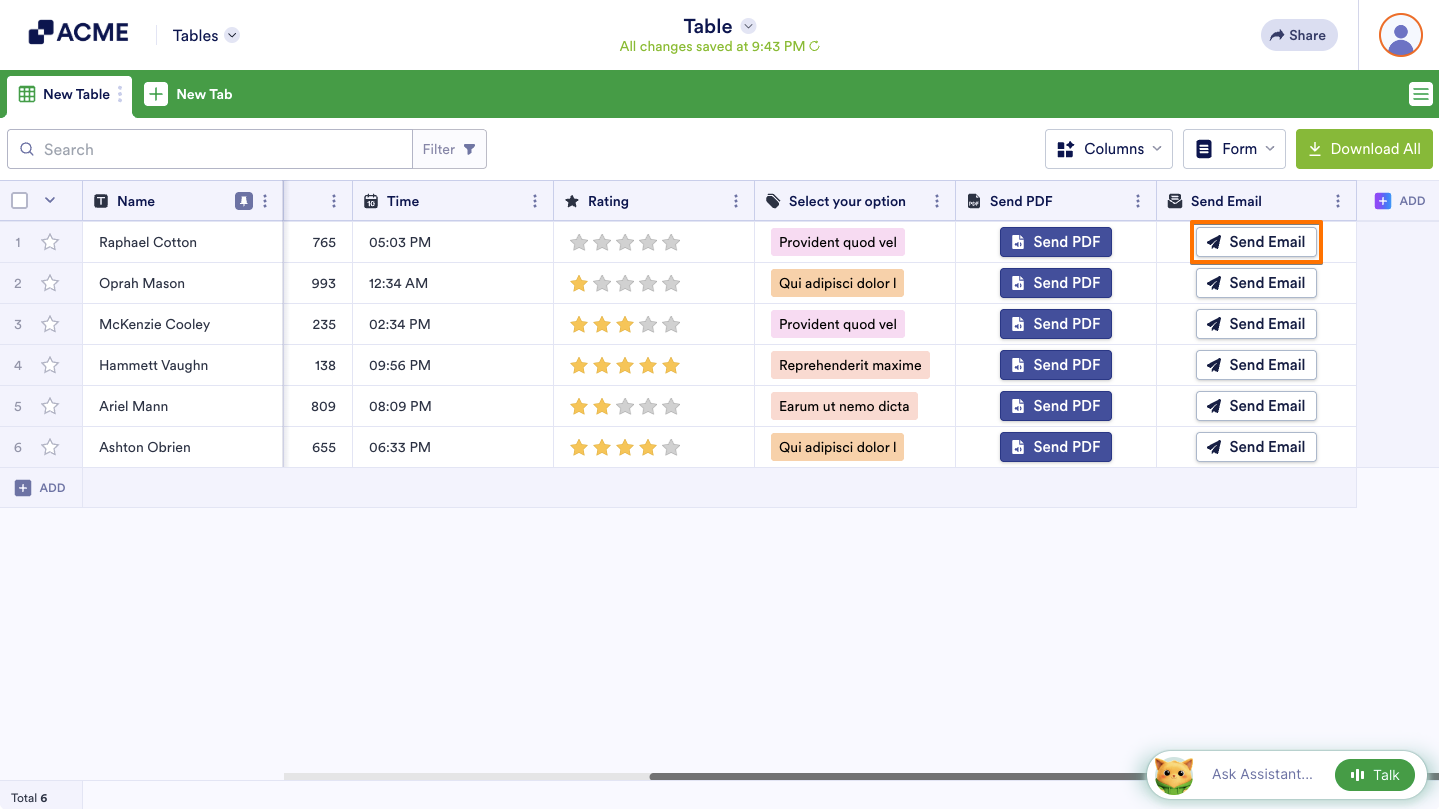
After sending an email, the Send Email button in the column for the corresponding entry changes to show a message with the timestamp indicating when the email was sent. Click on the Downward Arrow icon next to the message, then select Resend to send the email again for that entry if needed. If the button’s settings have been modified, the email will be resent using the new configuration.
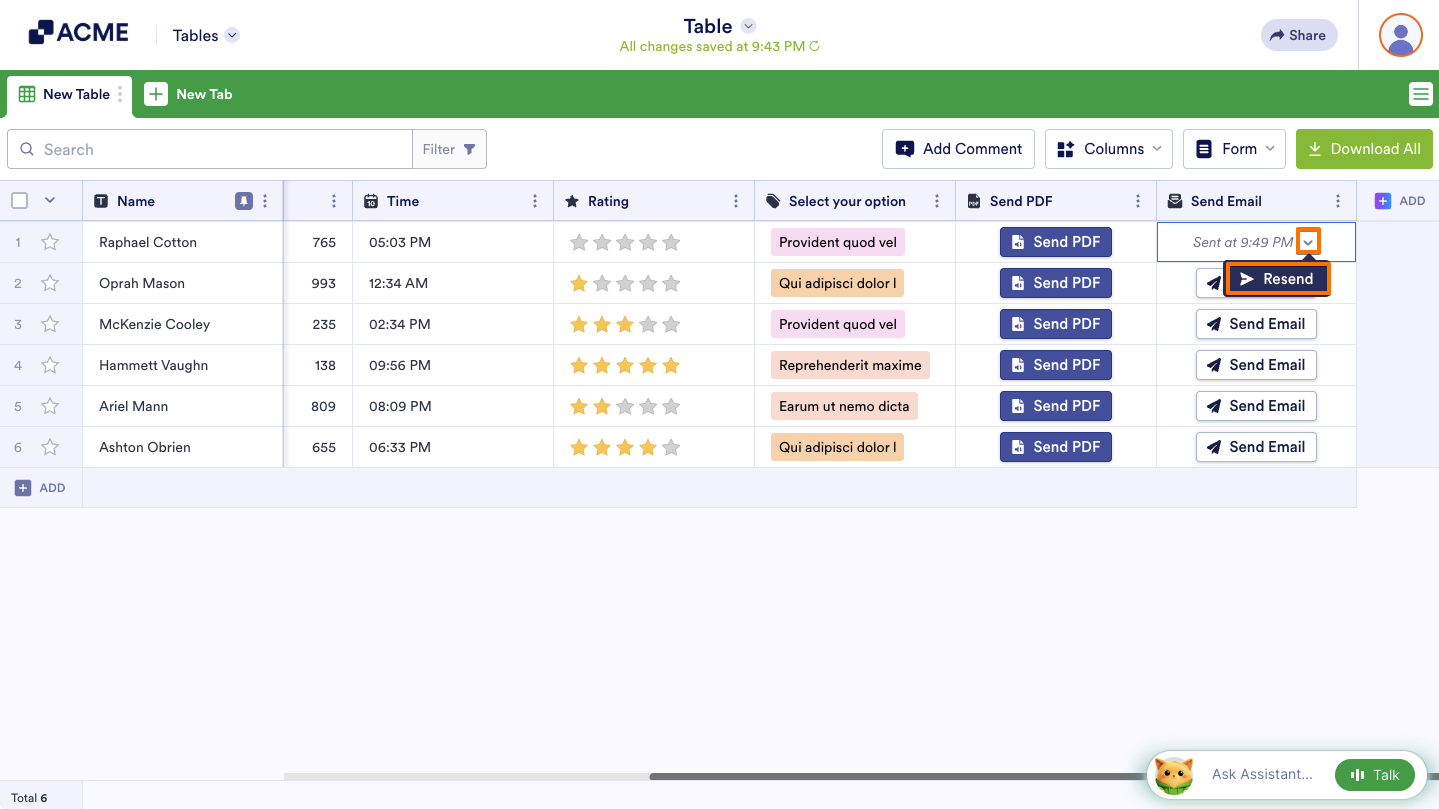
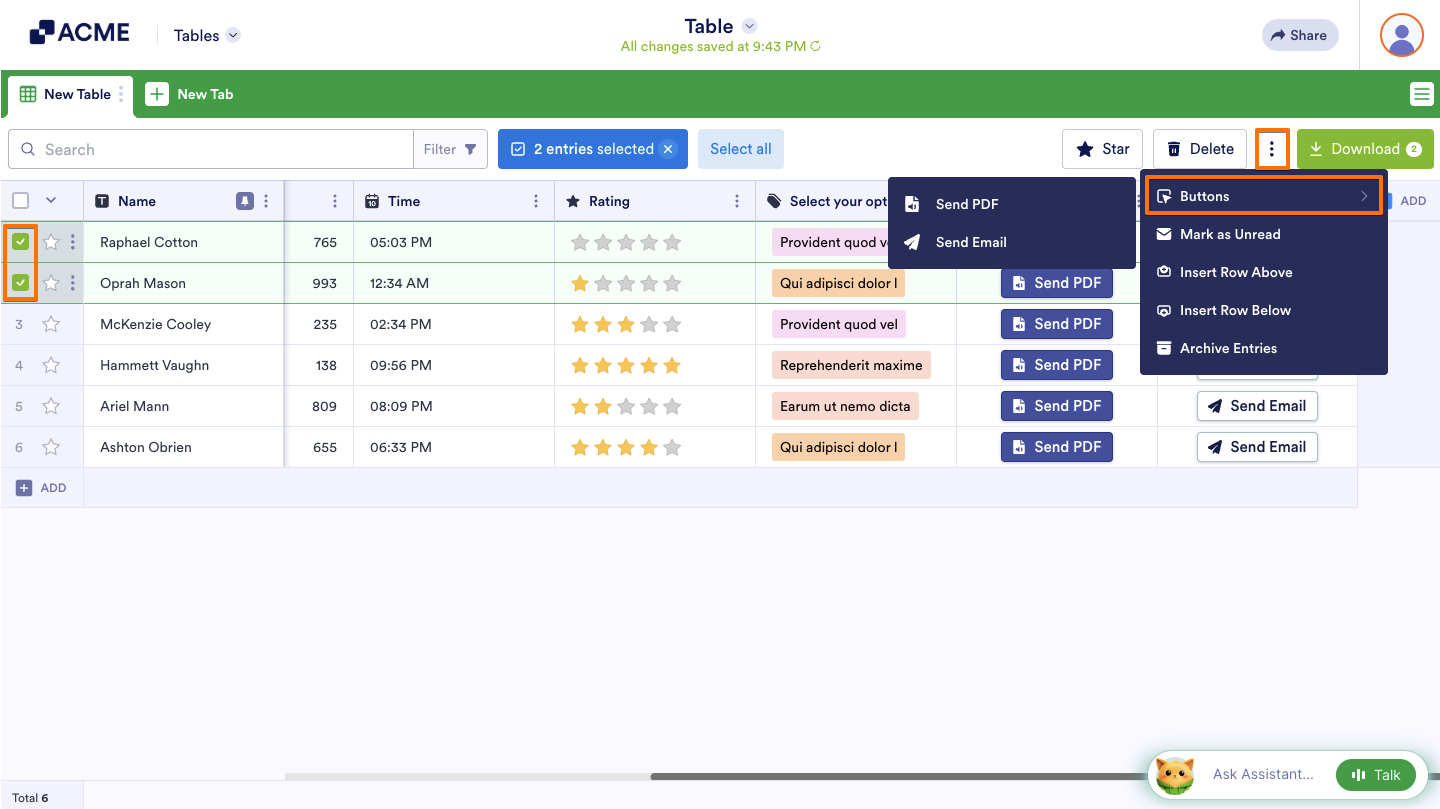
Tables also let you send an email for multiple entries simultaneously, saving time and ensuring consistency. To do this, select multiple entries in your table and click on the Three Dots icon at the top. Then, hover over the Buttons option to open a submenu and select the option for the Send Email button you’ve set up. This method can also be used to resend the email for multiple entries at once.
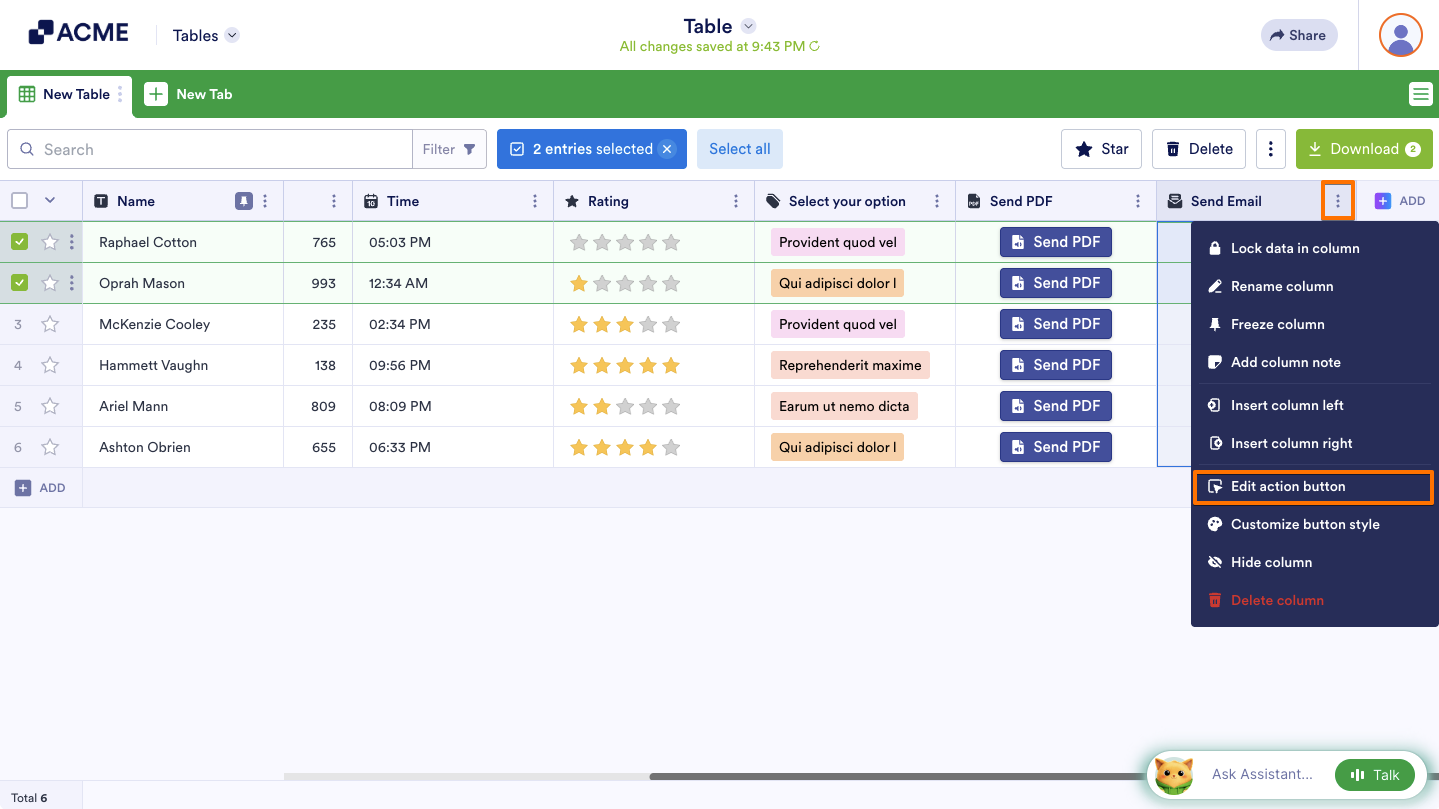
You can reconfigure the Send Email action button in a column if you need to adjust its settings. Click on the Three Dots icon next to the column name and select the Edit Action Button option in the Column menu. This opens the Send Email window, where you can choose different email templates to send or update their settings.
Note
Reconfiguring the button settings does not automatically resend the email or reset the buttons for entries where the email has already been sent. If needed, you can manually resend the emails with the updated settings for those entries.
The Notification Email and Autoresponder Email you created in the Form Builder Email Settings or in the Send Email window in Tables will appear in both locations. Changes you make to an email template will be reflected in both places. For more details, see How to Edit Notification and Autoresponder Emails.
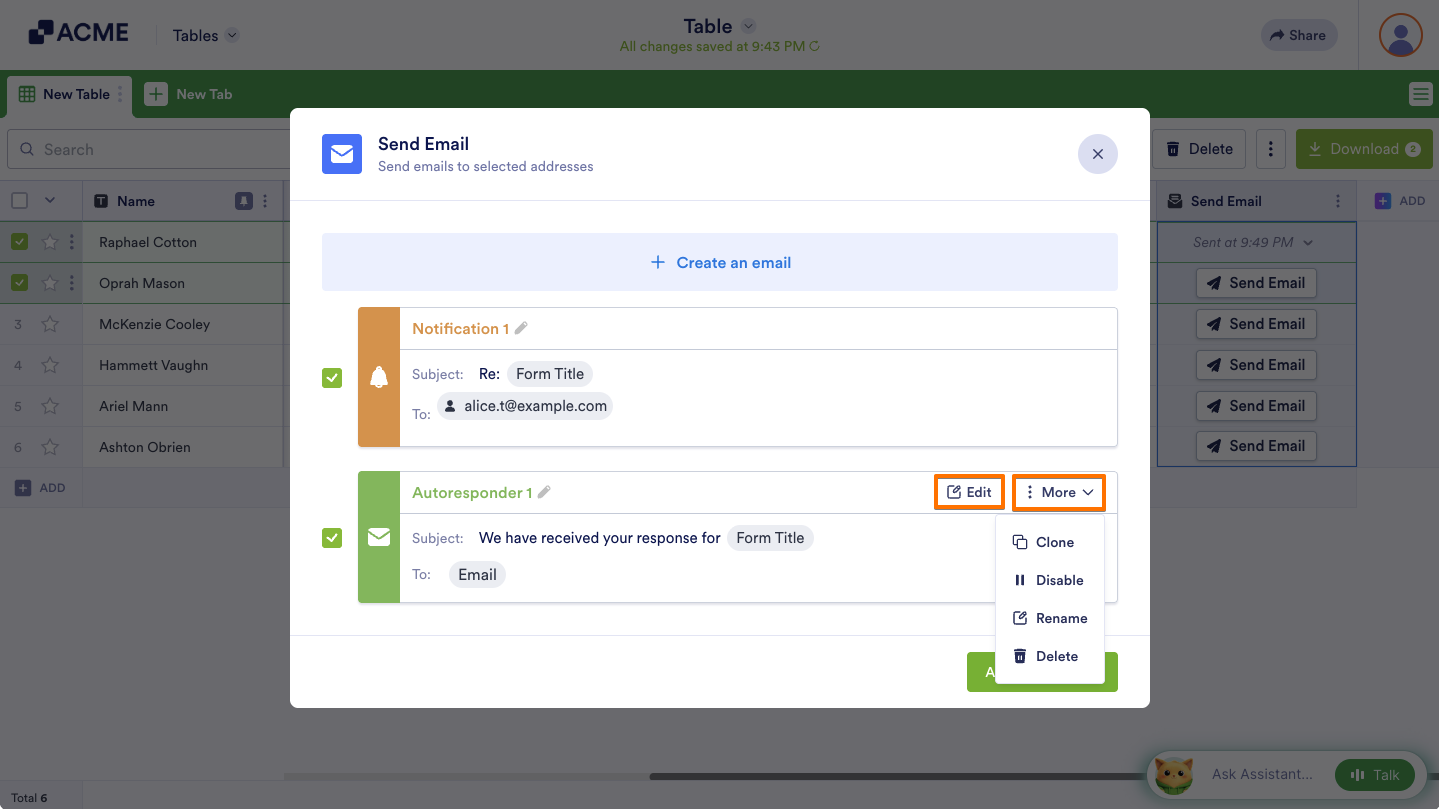
In the Send Email window, hover your mouse over an email template and click on the Edit button on its right to update it. Click on the More button to open the menu for deleting, cloning, and renaming the template.
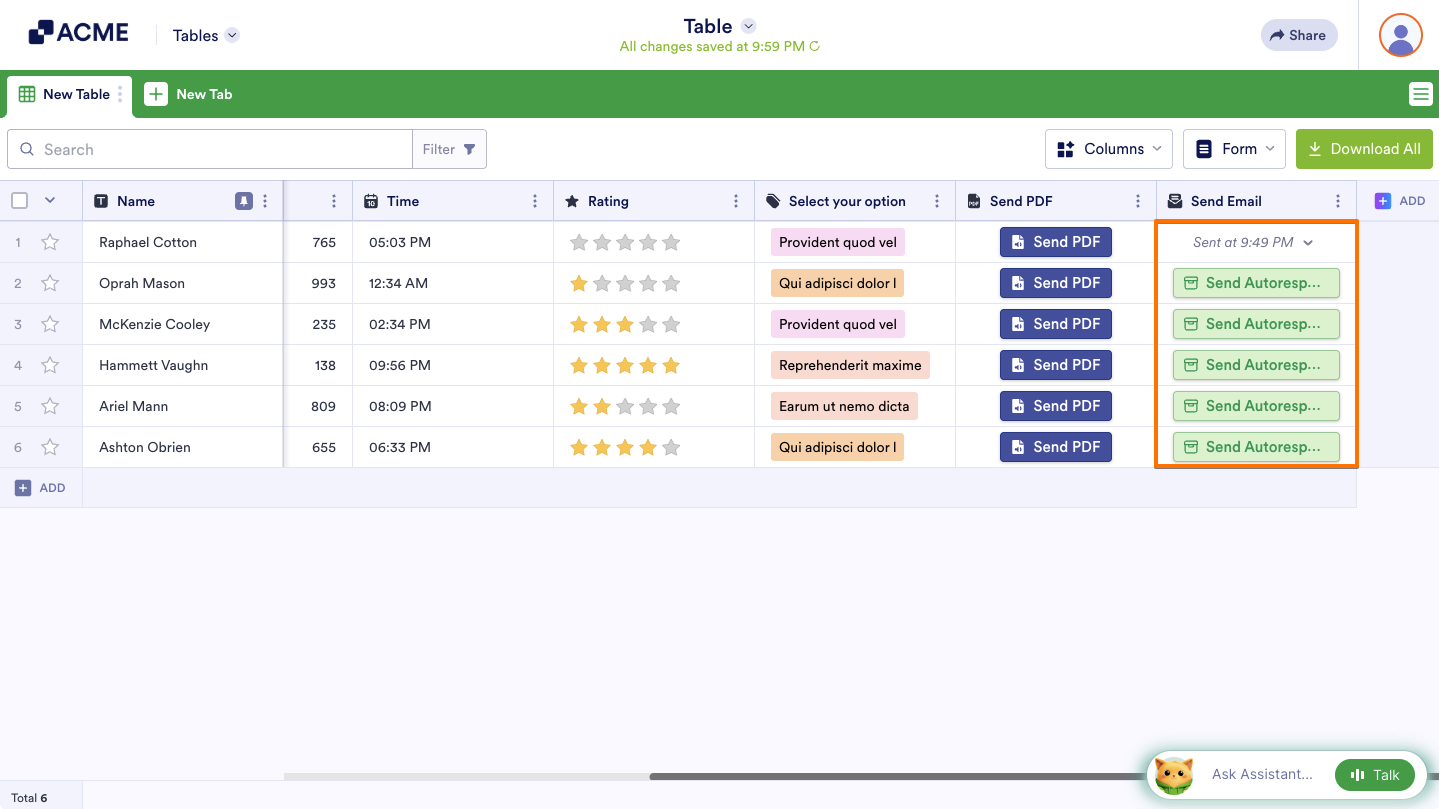
You can customize the appearance of the Send Email button in your table. If your table includes other action buttons, styling the Send Email button can make it easier to distinguish from the rest. For more details, see How to Customize Action Buttons in Tables.
Note
Just like any other columns in your table, you can also add a note to the Send Email Action Button column, which you can later use for reference or clarification. See How to Add Descriptions to Tabs and Columns in Tables.

Send Comment: