With Jotform’s Lob Address Verification widget, you can easily ensure that every address your users submit is accurate, complete, and ready for shipping or billing. It checks and standardizes addresses in real time, helping you avoid delivery issues, failed shipments, and messy data.
Whether you’re collecting customer details, processing orders, or handling billing information, this widget gives you a smoother, more reliable way to capture trusted addresses—so you can focus less on errors and more on getting things where they need to go.
Here are a few ways to use it:
- Validate mailing addresses on order, booking, or request forms.
- Ensure shipments, packages, or documents are sent to verified locations.
- Collect accurate billing addresses on checkout or payment forms.
- Reduce delivery issues for subscription boxes, product orders, or recurring shipments.
- Keep customer records clean and standardized across registration or onboarding forms.
- Prevent typos and incomplete address entries in multi-step workflows.
- Improve the reliability of data collected through surveys, applications, or account update forms.
What You Need for This Setup
You’ll need your Lob Publishable API Key to set up the Lob Address Verification widget. If you’re not sure where to find it, check out Getting Your Lob API Key below.
Configuring the Widget
Whether you’re building a new form or editing an existing one, you can add and configure the Lob Address Verification widget in just a few steps. This is how it’s done:
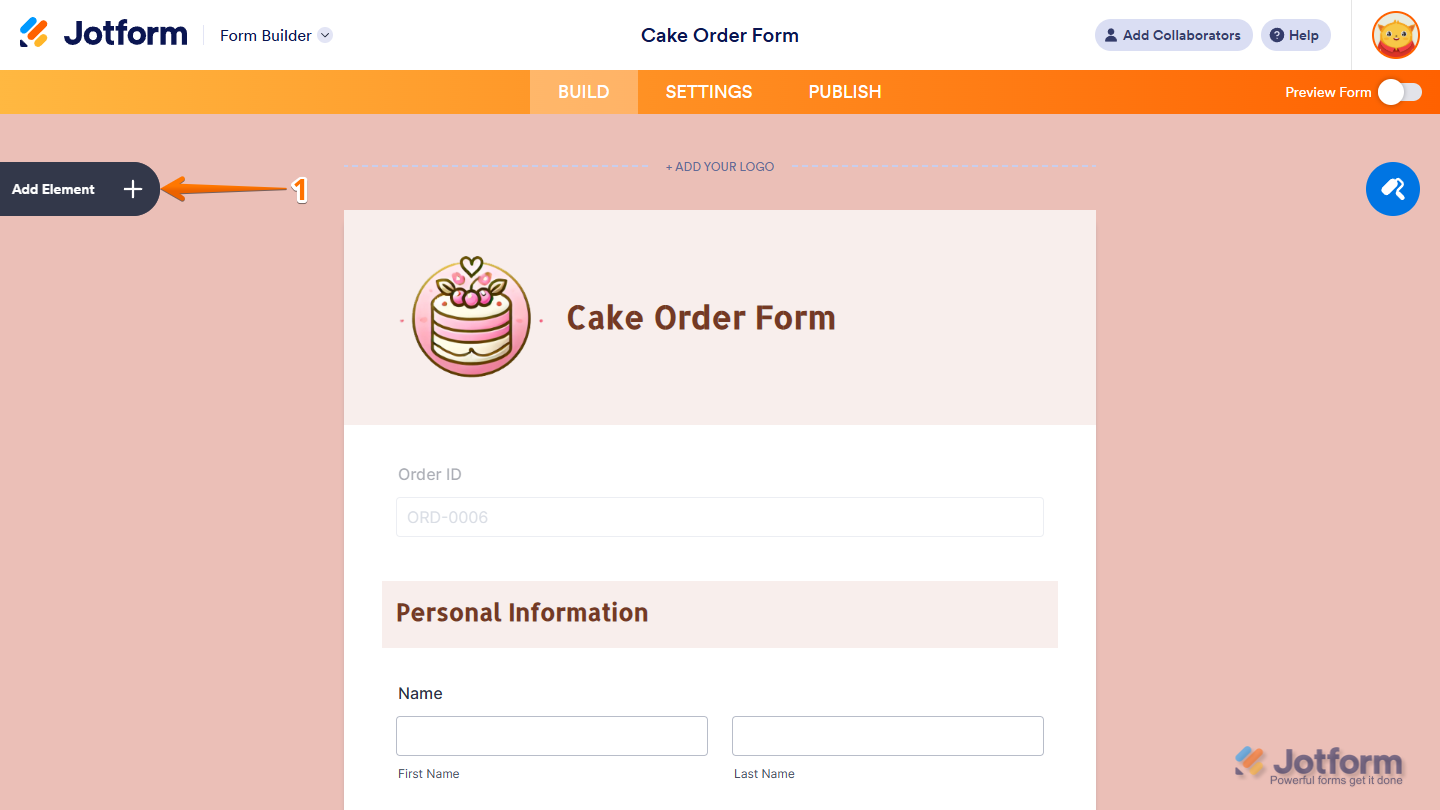
- In Form Builder, click on Add Element on the left side of the page.
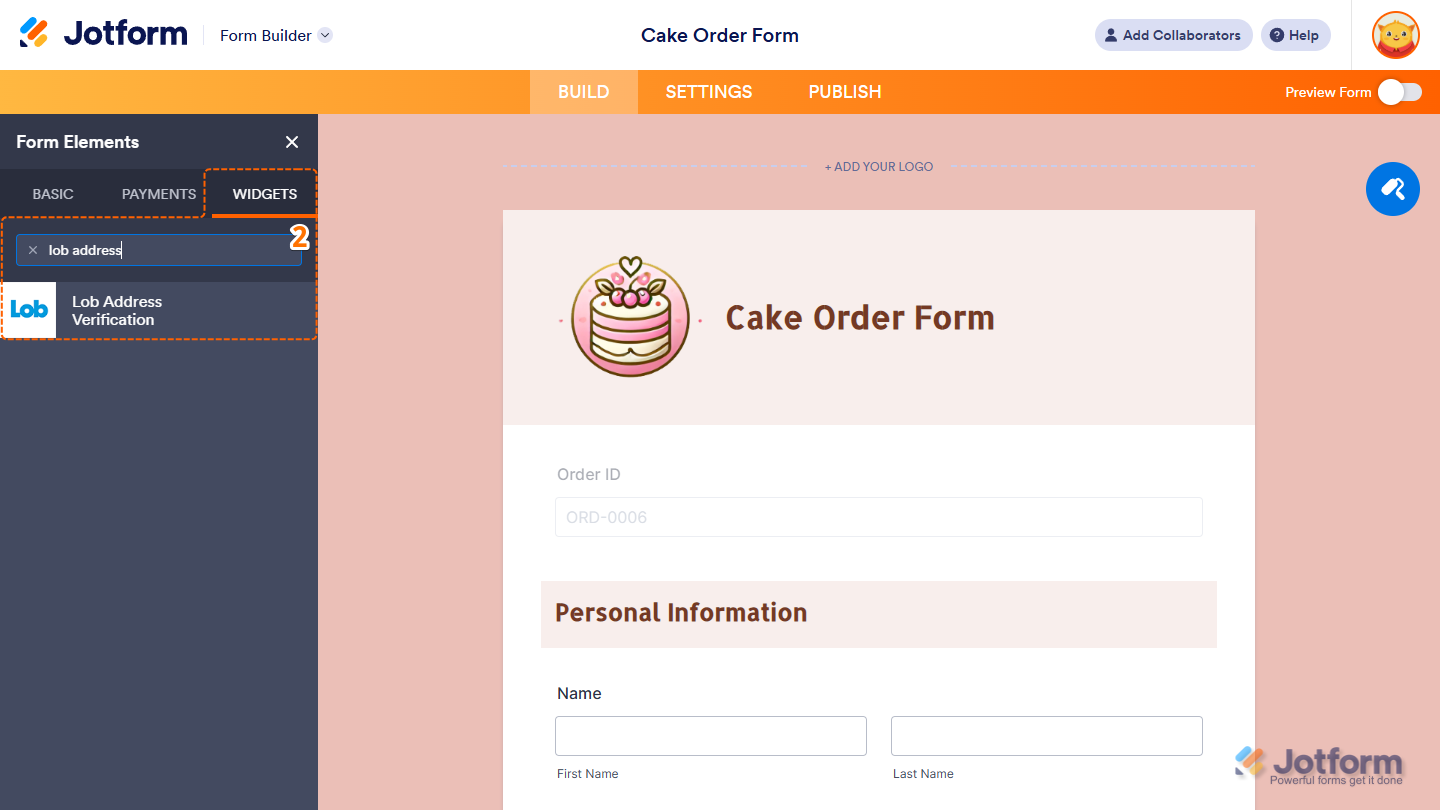
- Now, in the Form Elements menu, under the Widgets tab, search for Lob Address Verification and click on it. Or, just drag and drop it to where you want it to be on your form.
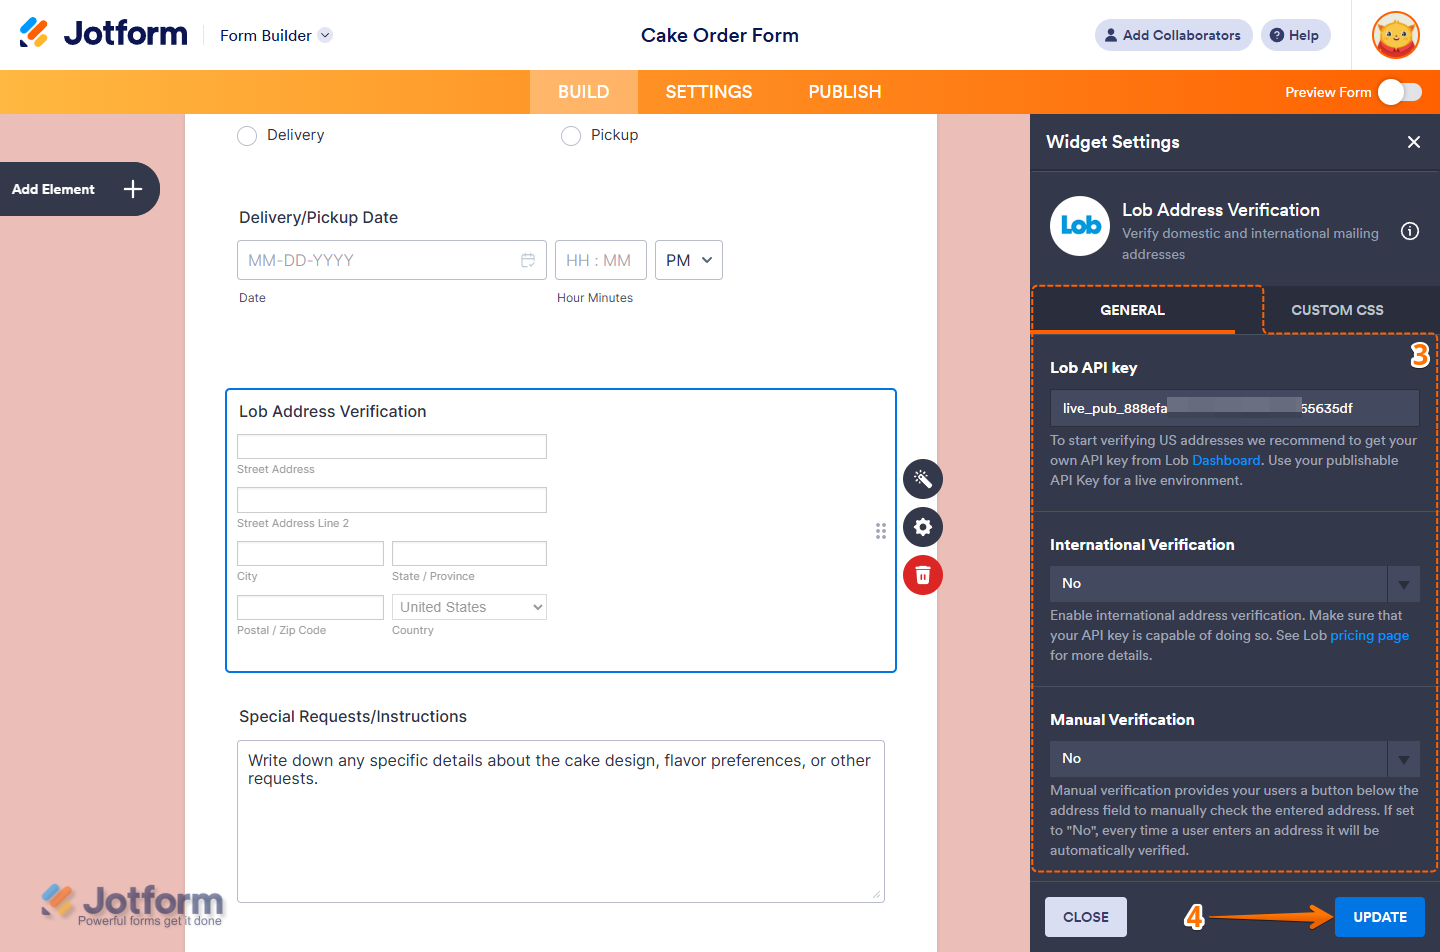
- Next, in the Widget Settings menu that opens on the right side of the page, under the General tab, you’ll see this list of settings you can configure:
- Lob API Key — Paste the publishable API key from your Lob Account in the input box.
- International Verification — Keep it set to No if you want to verify only US addresses. Or, select Yes in the dropdown menu to enable international address verification and allow the widget to check addresses from users in other countries, as long as your Lob API key supports it.
- Manual Verification — Keep it set to No if you want the widget to automatically verify the user’s address as soon as they enter it. Or, select Yes in the dropdown menu to show a Verify Address button that users can use to manually verify their address.
- Once everything’s set, click on Update.
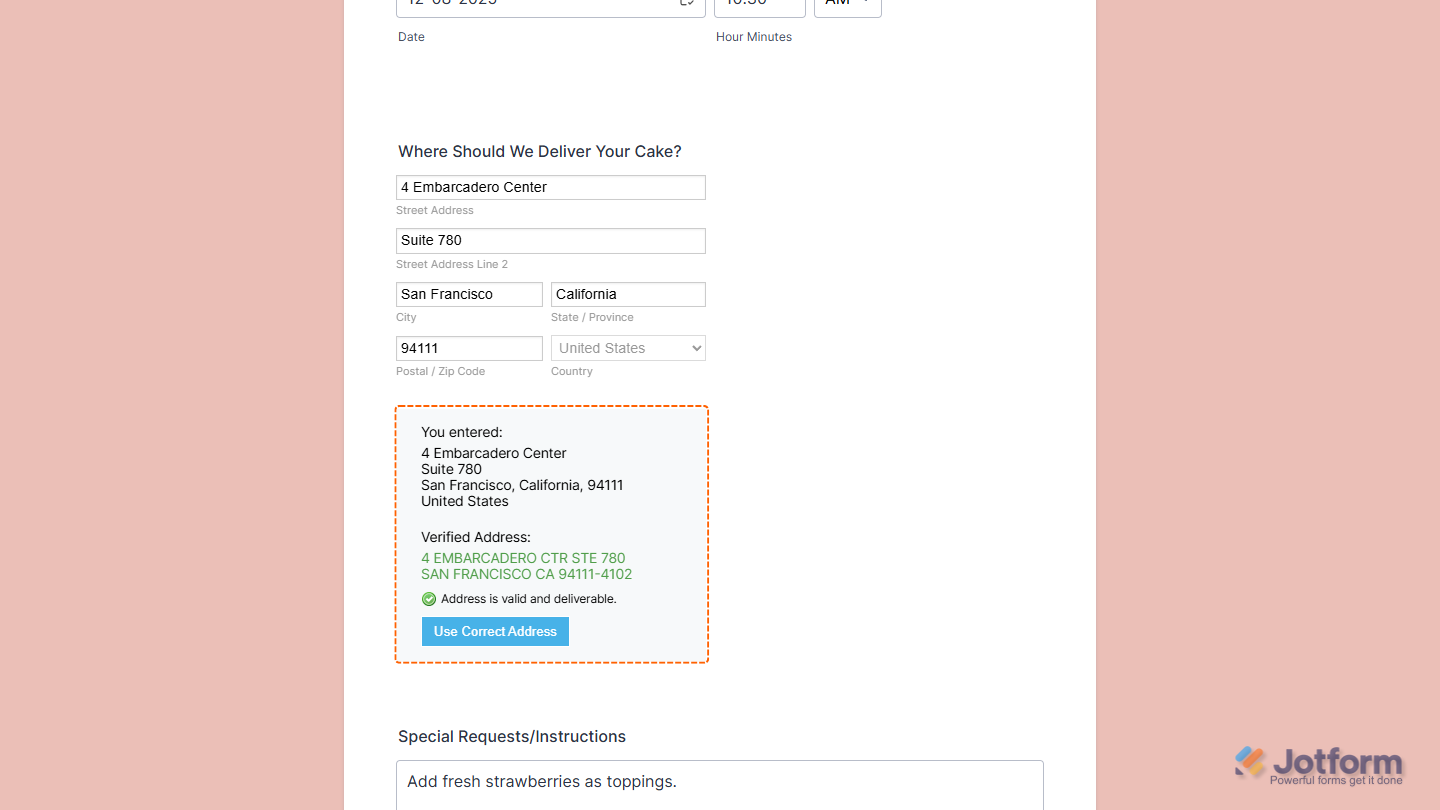
That’s it. Now you’ve added and set up the Lob Address Verification widget on your form. Wondering how it looks in action? Check out this demo form.
Notes
- For advanced styling of the Lob Address Verification widget, you can add your own custom CSS code under the Custom CSS tab in the Widget Settings. Our guide on How to Inject CSS Codes to Widgets walks you through everything.
- You can also configure the widget properties, like alignment, labels, size, visibility, and more, to control how it looks and behaves on your form. Check out our guide on How to Access and Configure the Question Properties of a Widget to learn more.
Getting Your Lob API Key
To set up the widget, you’ll need your Lob publishable API key. Here’s how to get it:
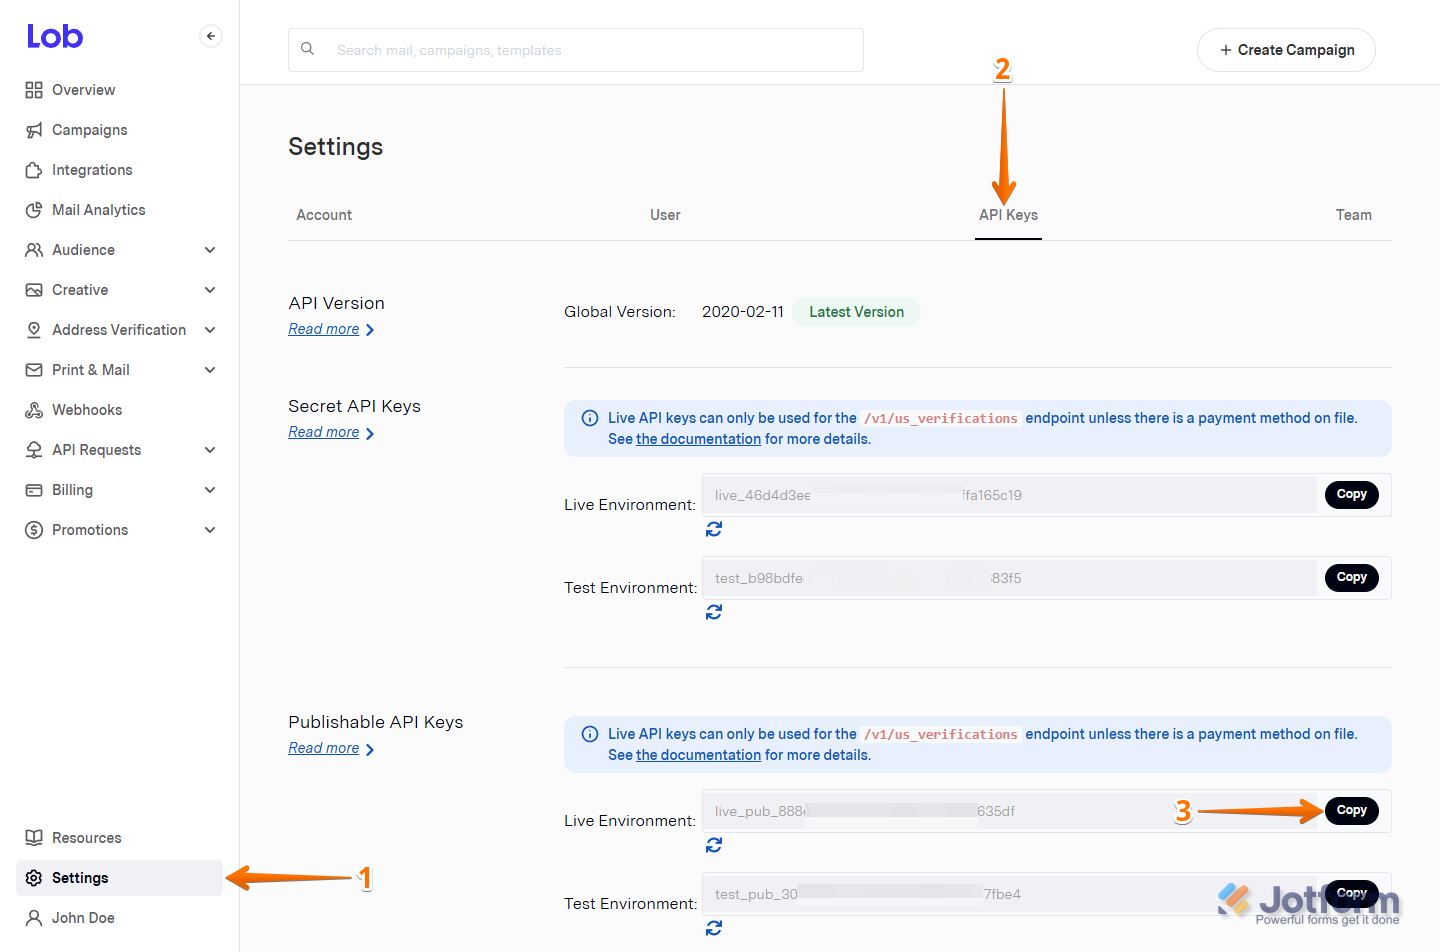
- Log in to Lob and, in the menu on the left side of your Account Dashboard, click on Settings.
- Now, in the Settings section on the right, click on the API Keys tab.
- Then, scroll down to the Publishable API Keys section and, on the right side of your Live Environment API key, click on Copy.
That’s all it takes to get your publishable API key. Now you’re ready to add and set up the widget.

Send Comment: