With Jotform Apps, each List element has its own connected table where you can easily view and manage the data you’ve collected through the app. Using the Data tab, you can access these tables to review submissions, update entries, and export your data whenever you need to.
Note
You’ll only see the Data tab once you’ve added at least one List element to your app.
Whether you need to review, edit, or export your app’s connected data, the Data tab makes it easy to manage everything in one place. You can also use advanced AI columns to enhance your data and keep your information up to date. Here’s how to get started:
Accessing the App Builder Data Tab
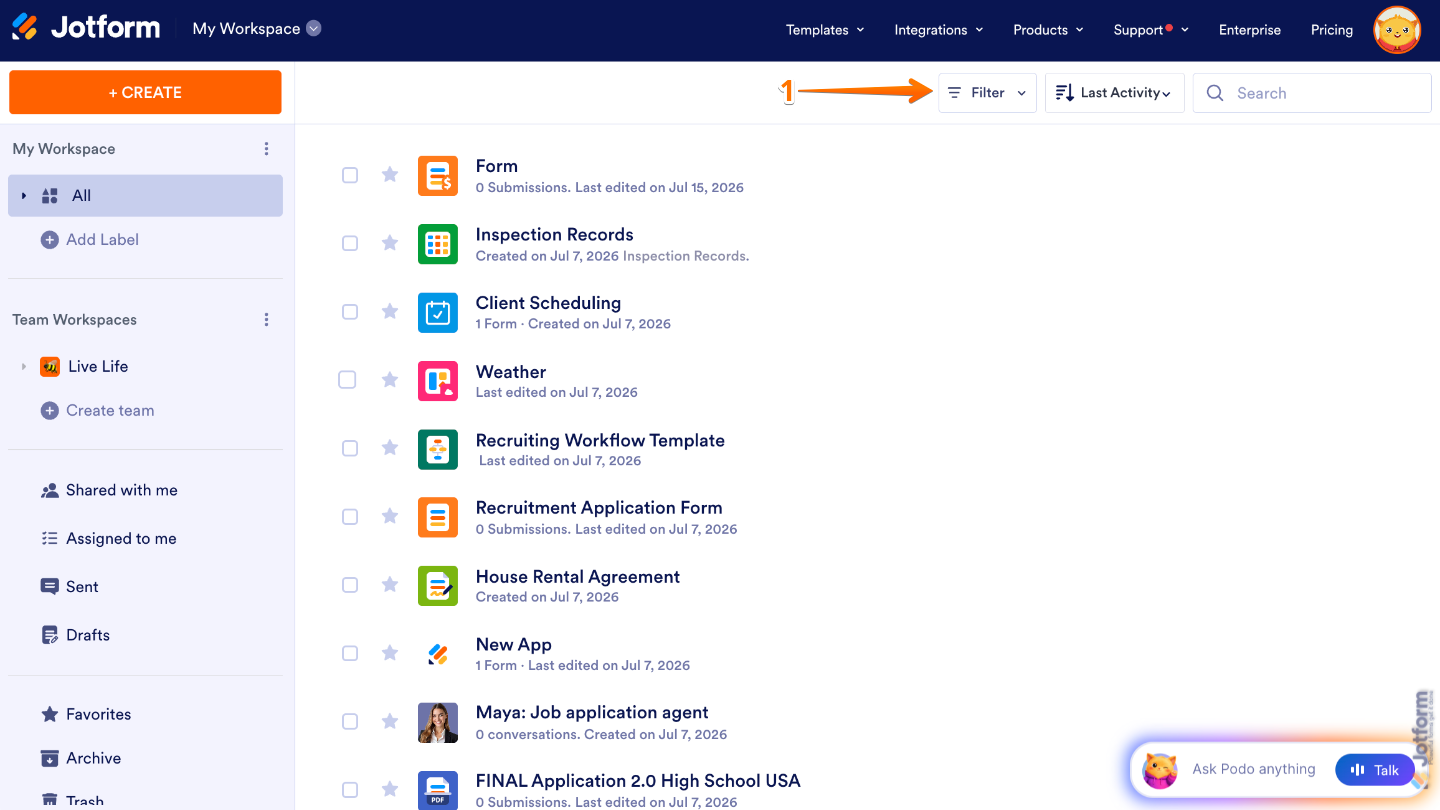
- At the top of your Workspace page, click on Filter.
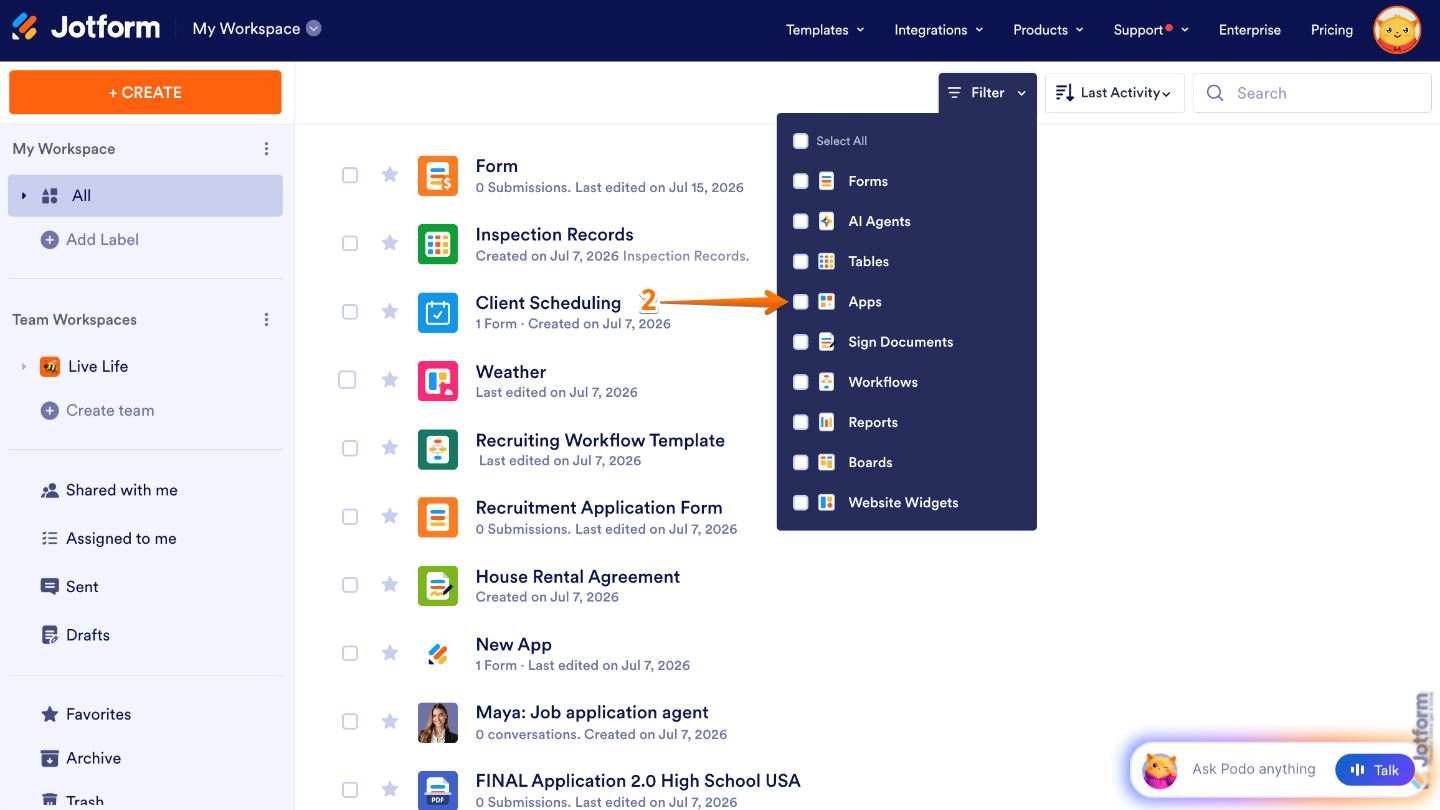
- In the Dropdown menu that opens, tick the box next to Apps so only they’ll be shown on the page.
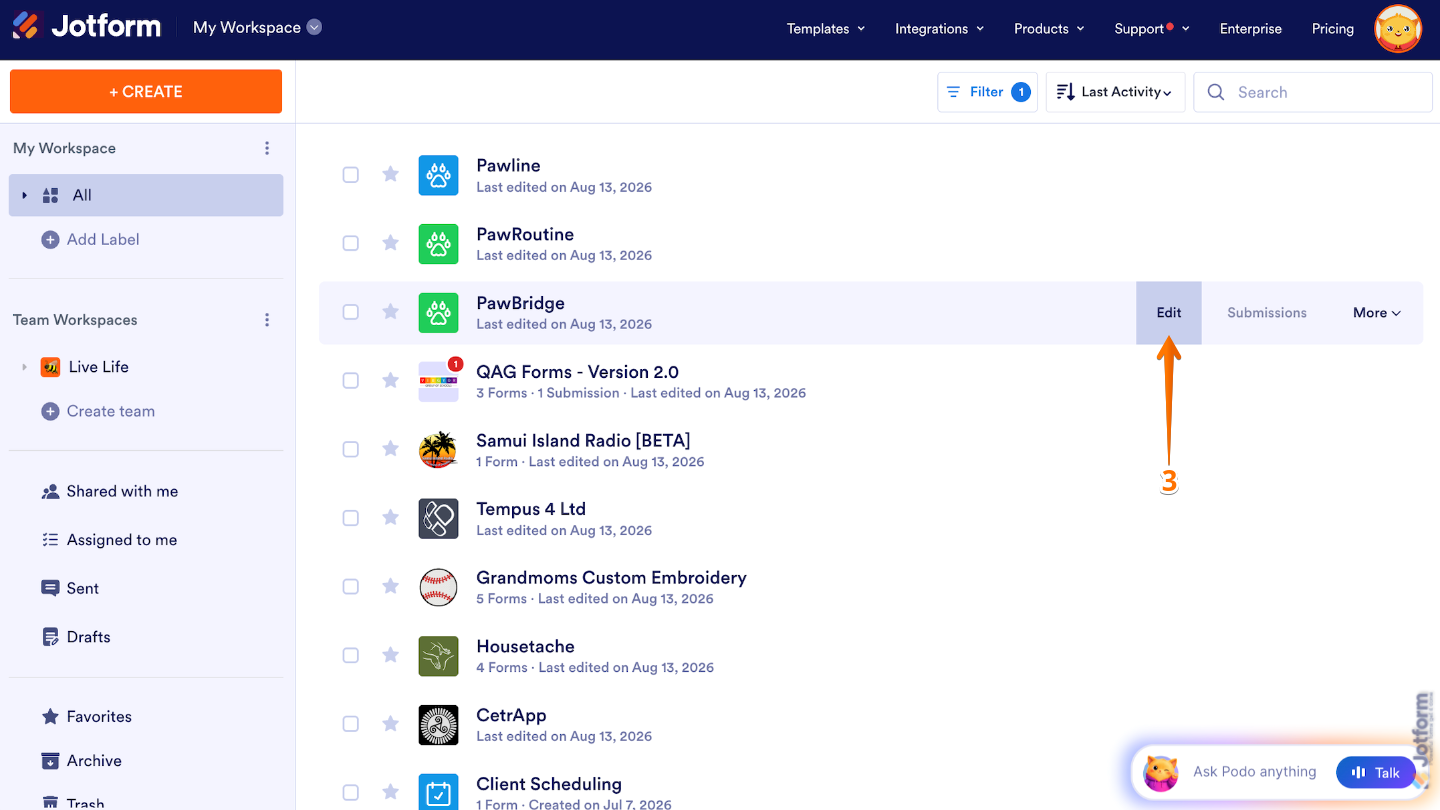
- Then, hover your mouse over the app you want to modify and click on Edit on the right side of the page.
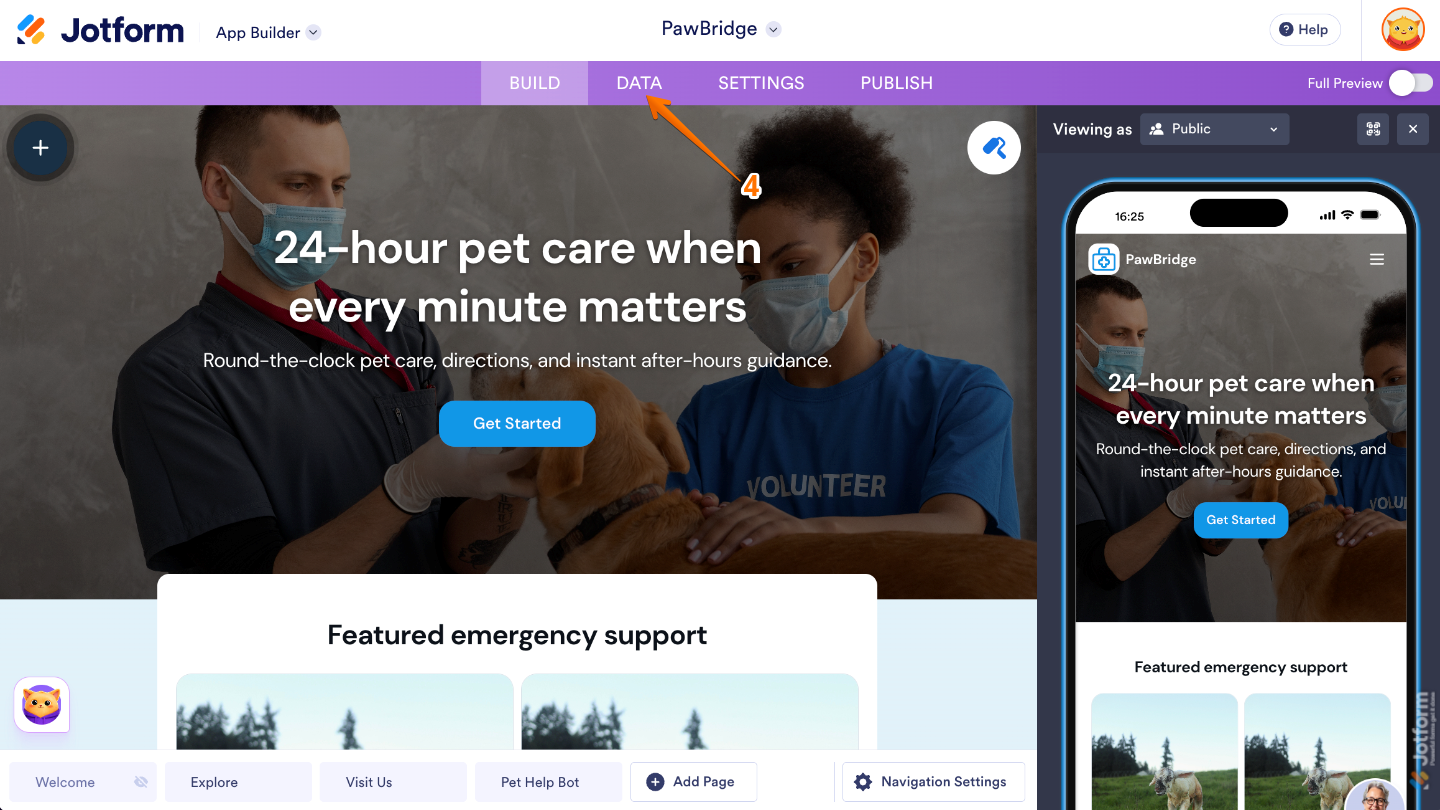
- Now, in App Builder, in the purple navigation bar at the top of the screen, click on Data.
Downloading the App’s Submissions
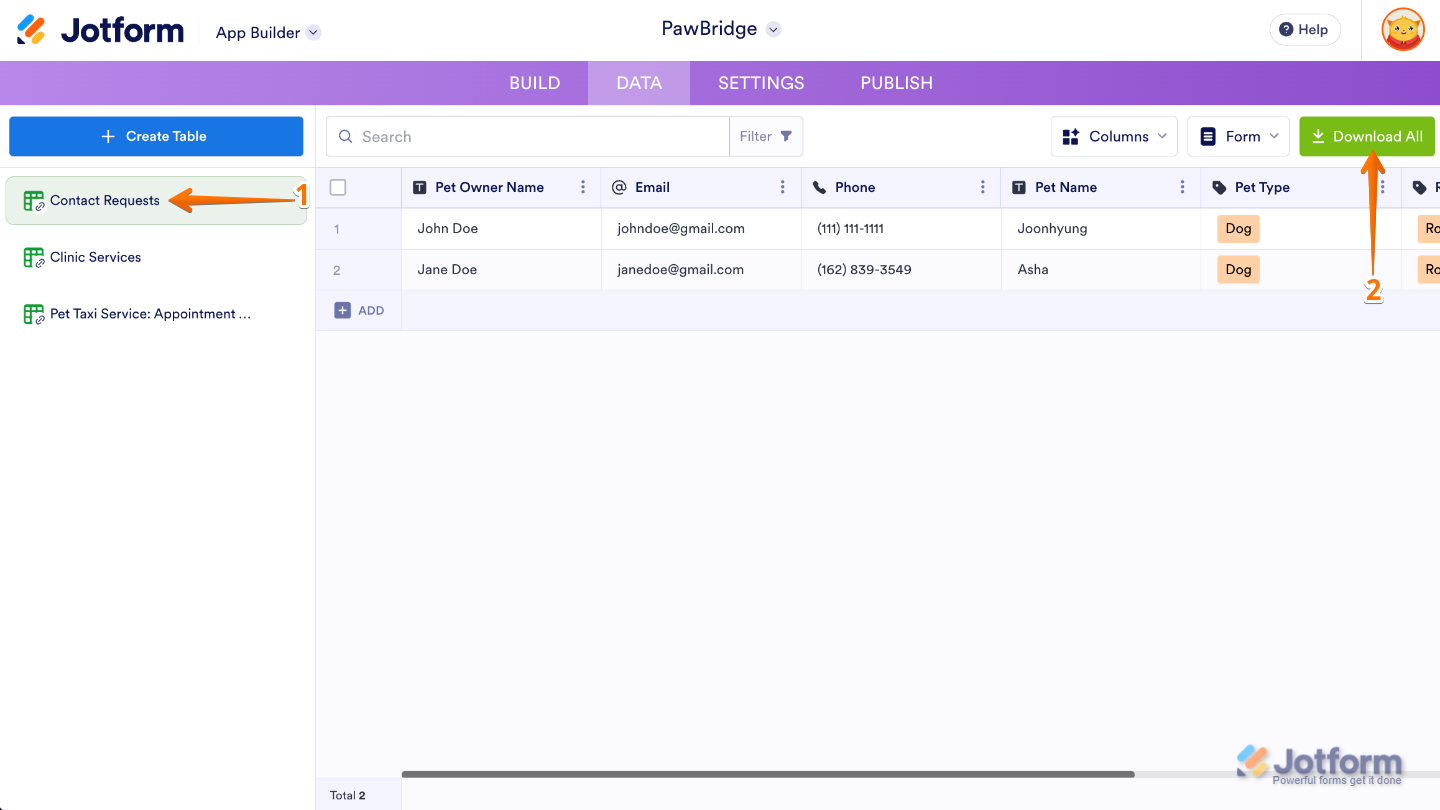
- On the App Builder Data page, select a table from the Table list on the left.
- Then, on the upper-right side of the page, click on Download All.
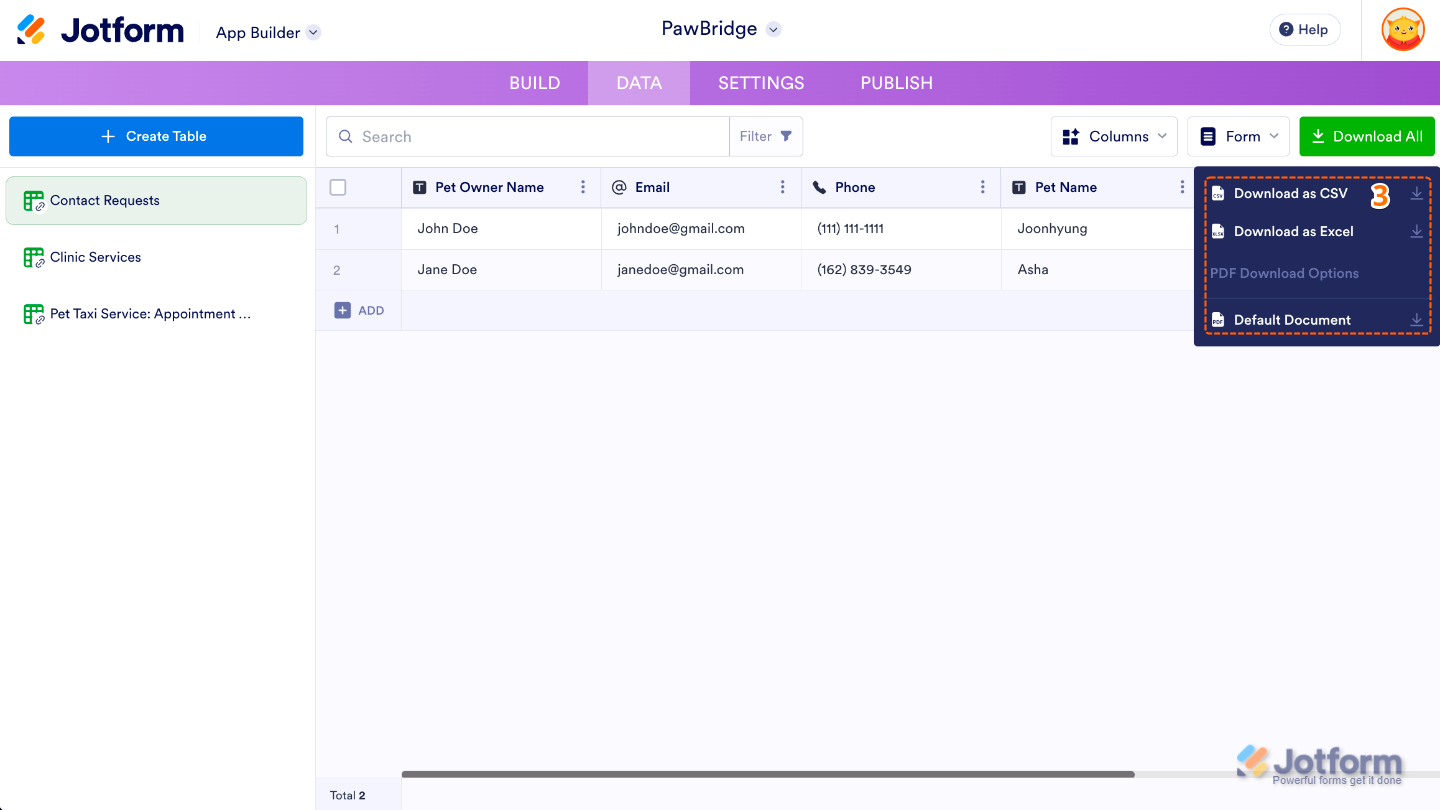
- Now, in the Download Options menu that opens, select the file type you want to download, and It’ll start automatically.
Filtering the App’s Submissions
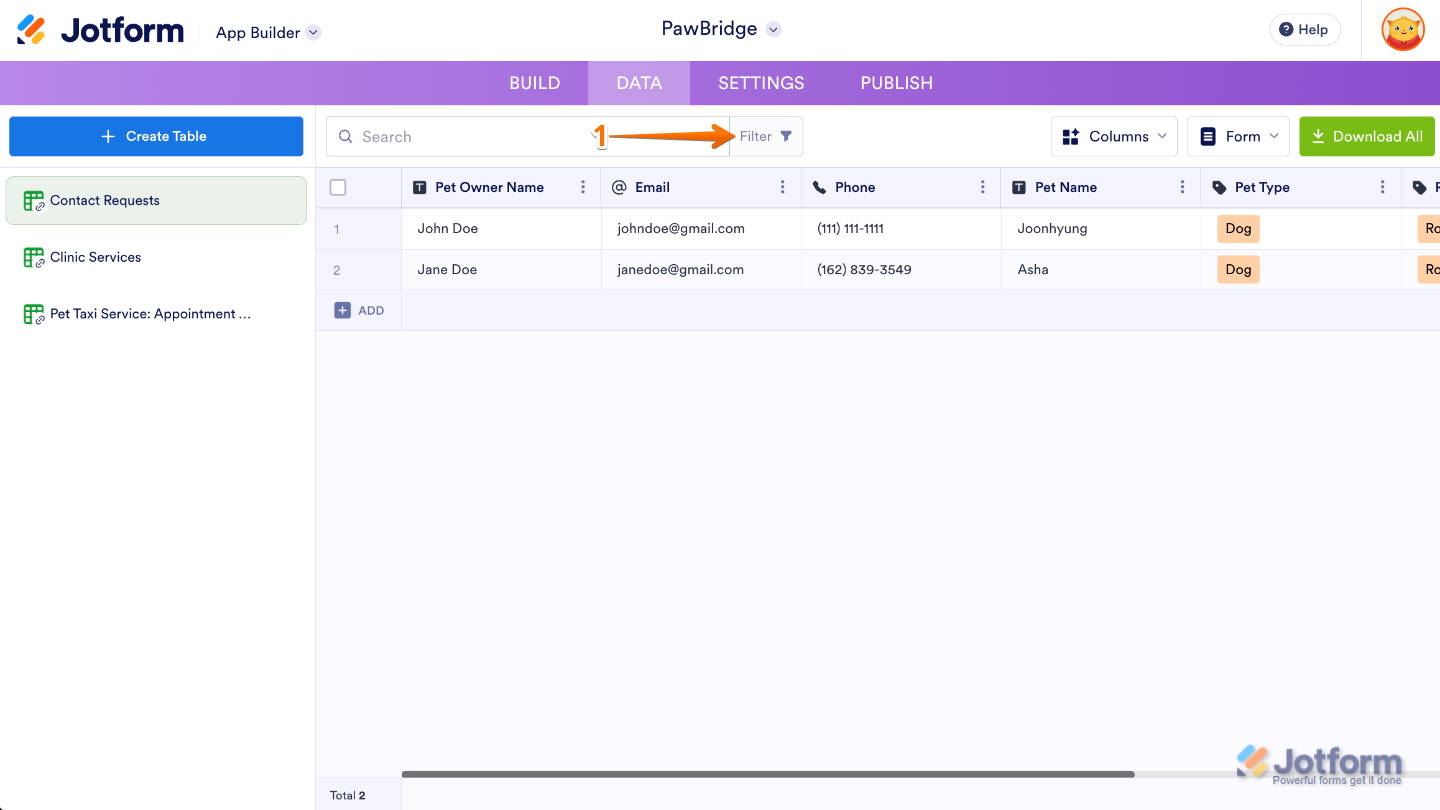
- At the top of the App Builder Data page, click on Filter.
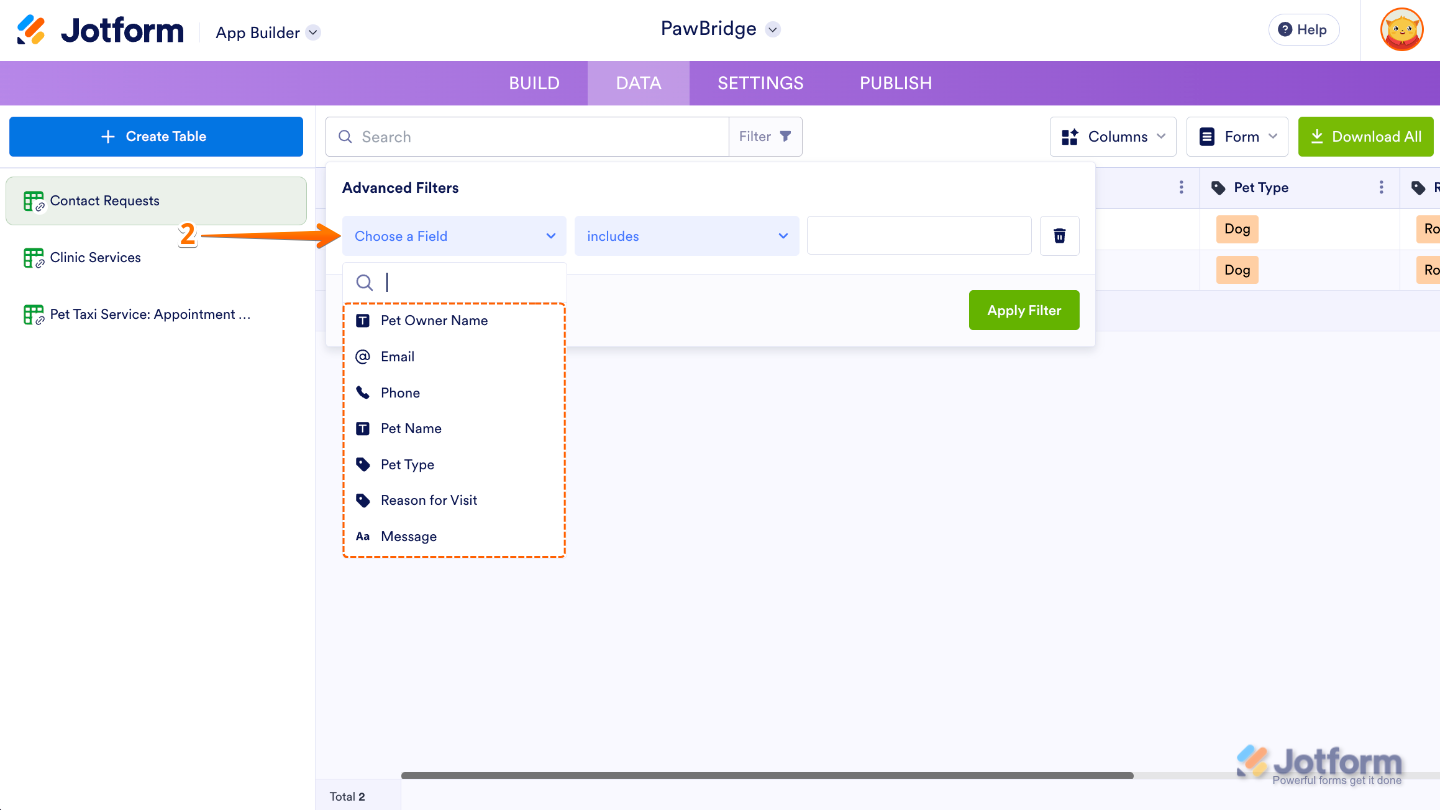
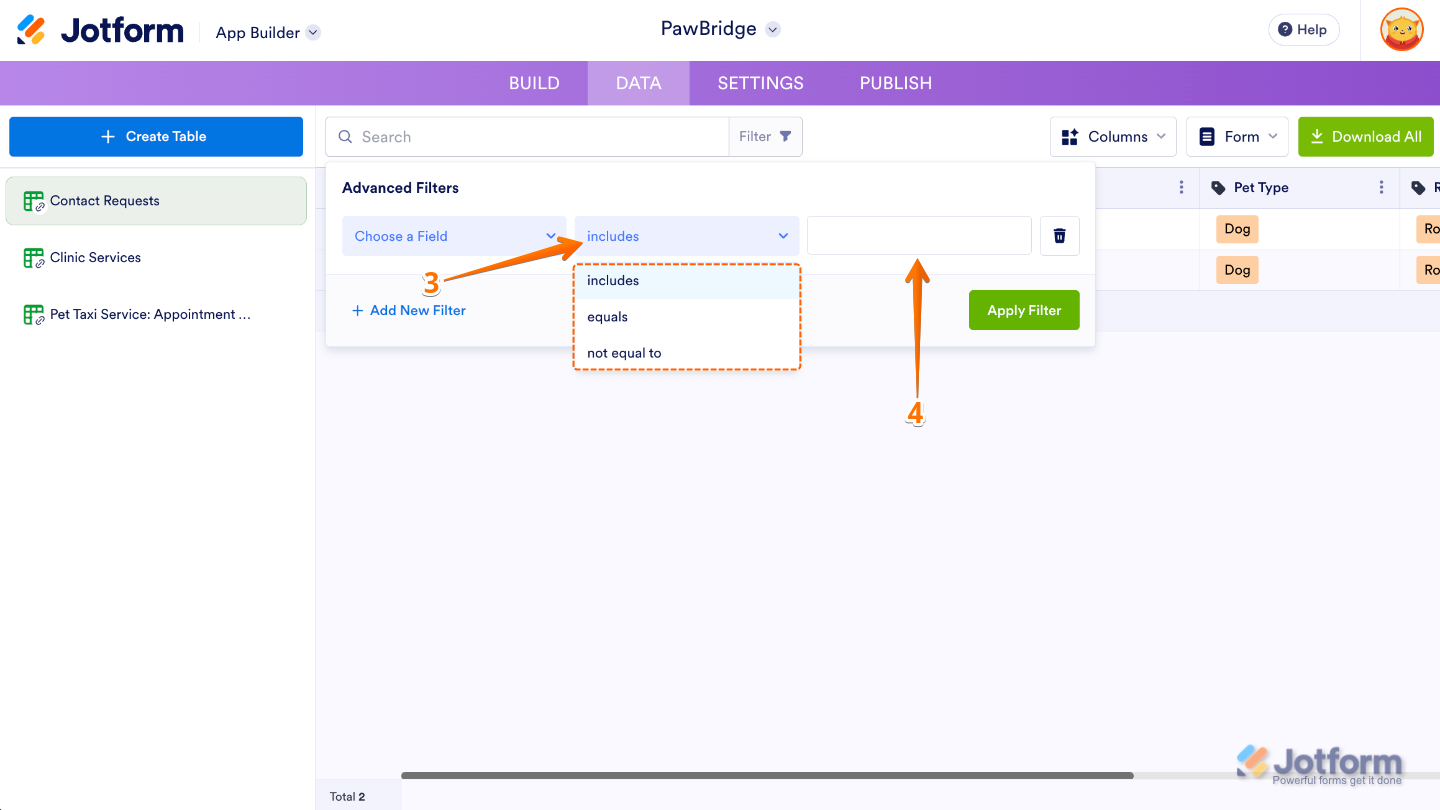
- Under Advanced Filters, click on Choose a Field and select the field you want to filter by.
- Then, select one of these Filter Conditions from the Dropdown menu: Includes, Equals, or Not Equal To.
- Now, on the right side of that, enter the value you want to filter for.
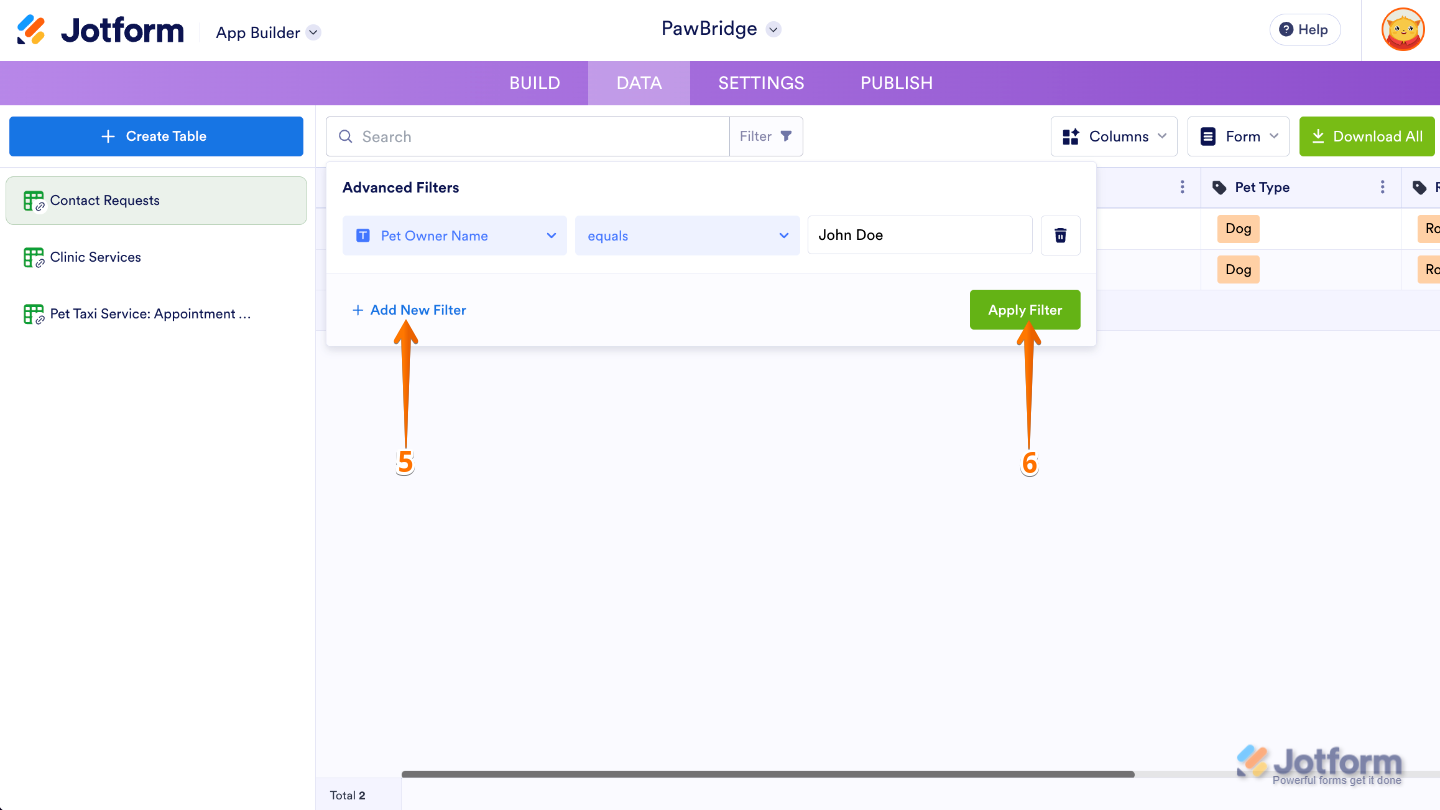
- To add another Filter Condition, click on Add New Filter and then repeat steps 2, 3, and 4 above.
- Once you’re done, click on Apply Filter to view the filtered data.
Editing the App’s Submissions
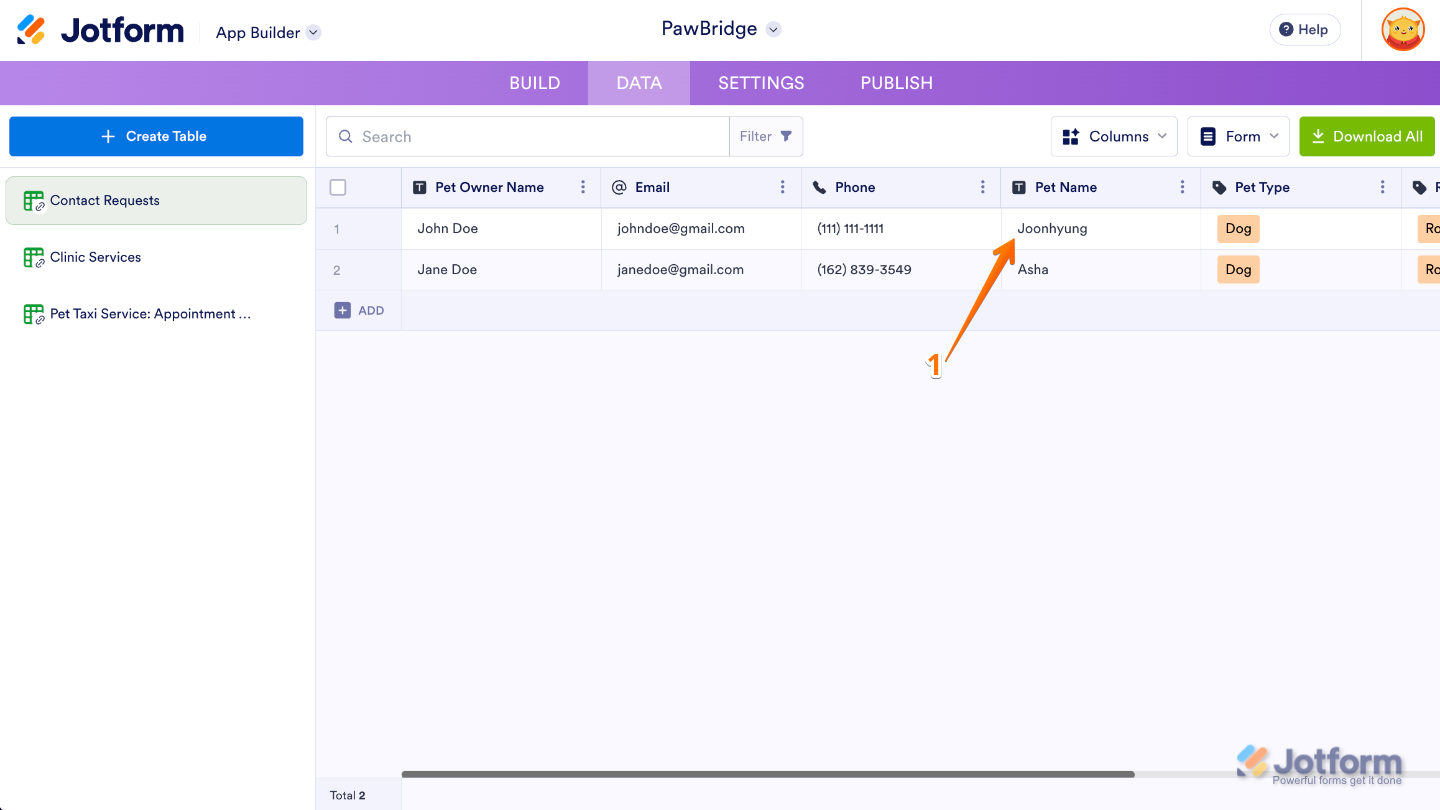
- On the App Builder Data page, click on the cell with the Submission Data you want to edit.
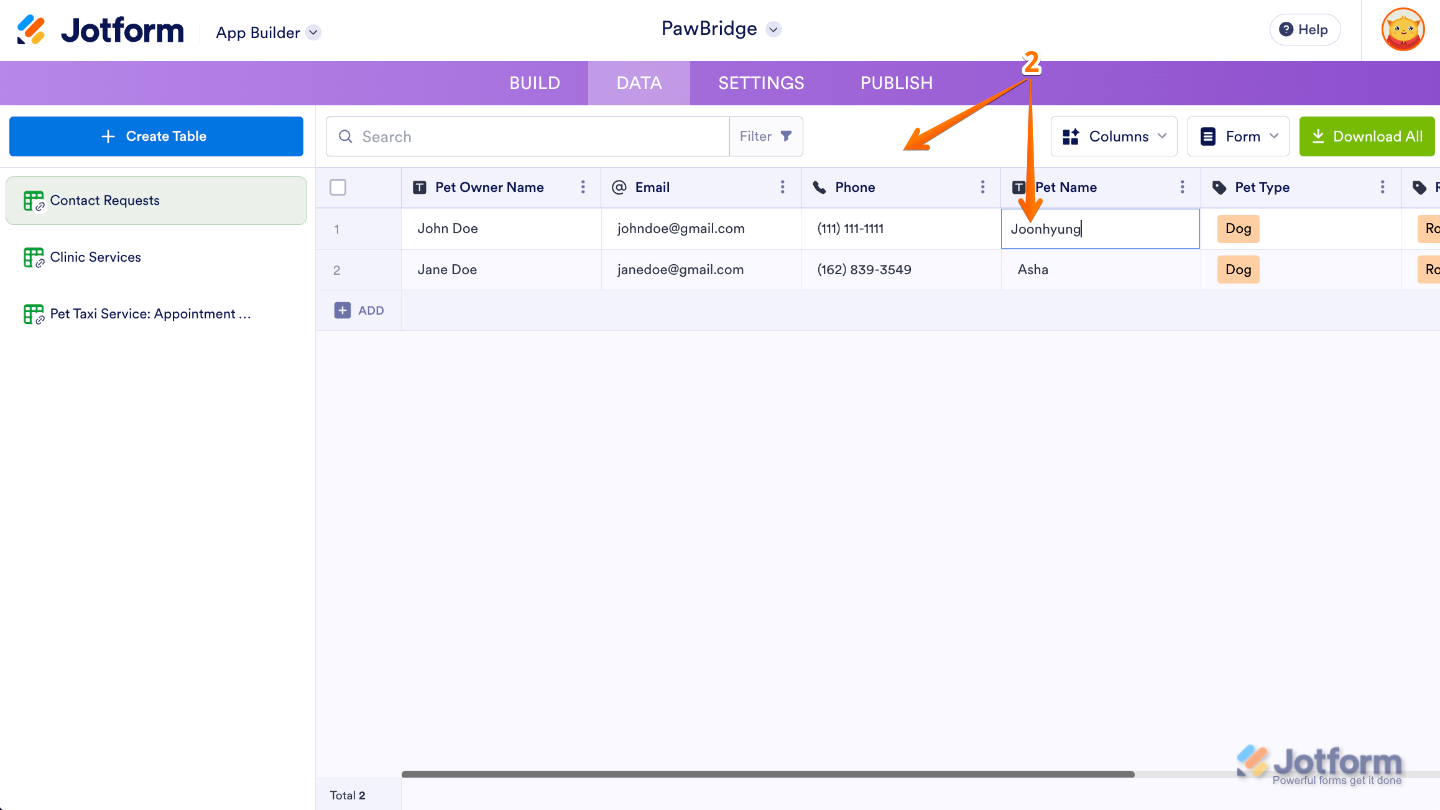
- Depending on the Field type, edit the value directly in the cell or select the correct one, and then click anywhere outside the cell to save the changes.
Deleting the App Submissions
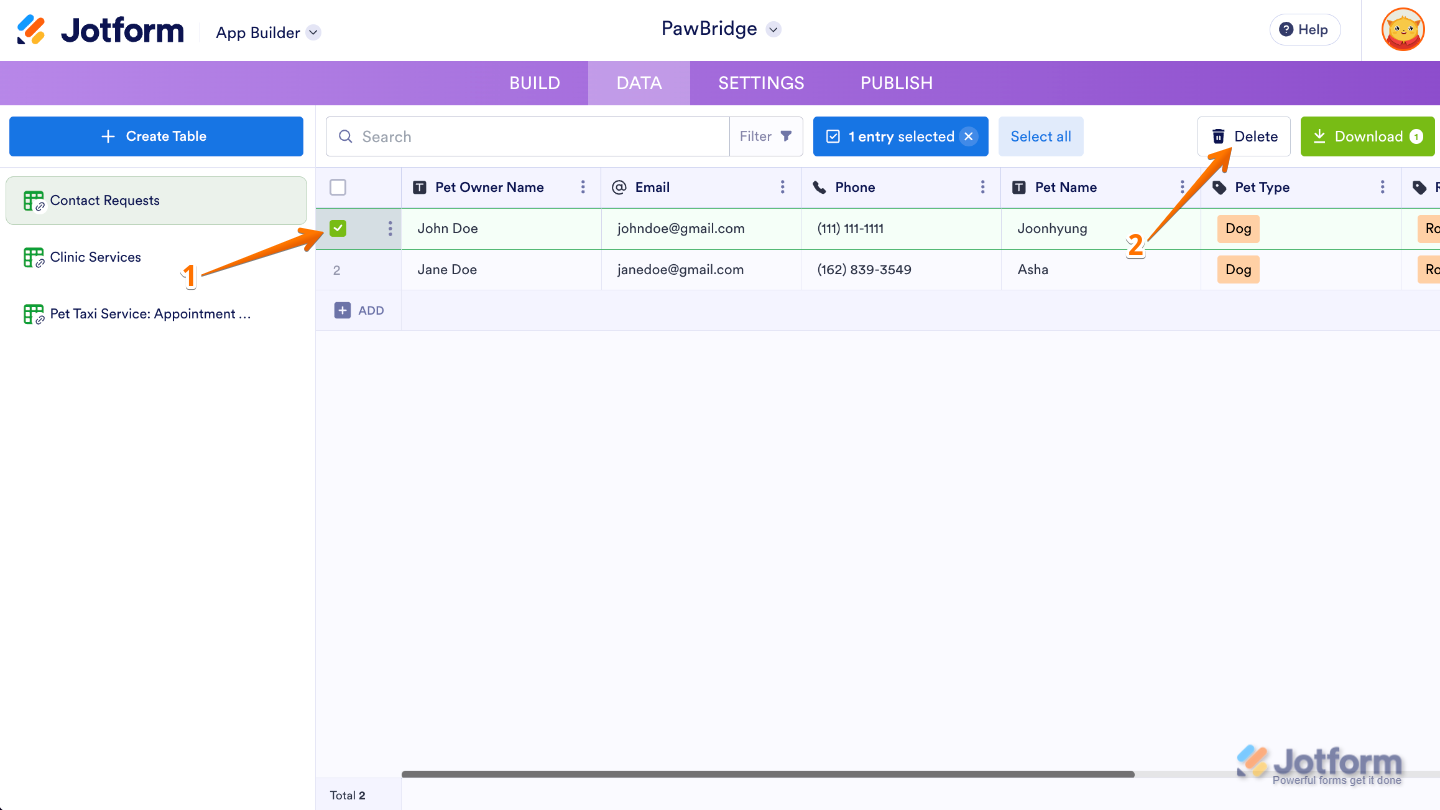
- On the App Builder Data page, select the submission you want to delete.
- Then, click on Delete in the top-right corner of the page.
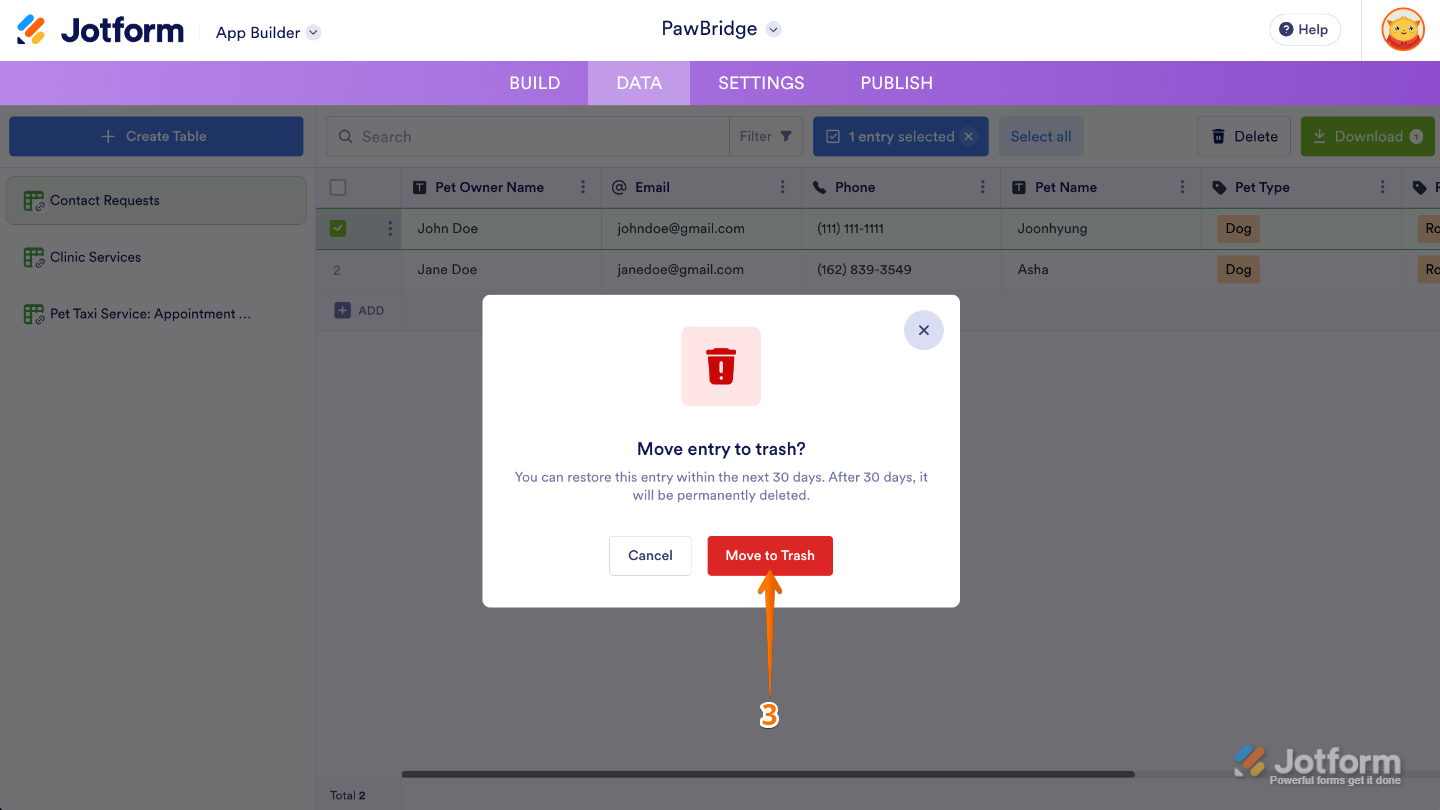
- Now, in the Confirmation window that opens, click on Move to Trash.
Creating a New App Table
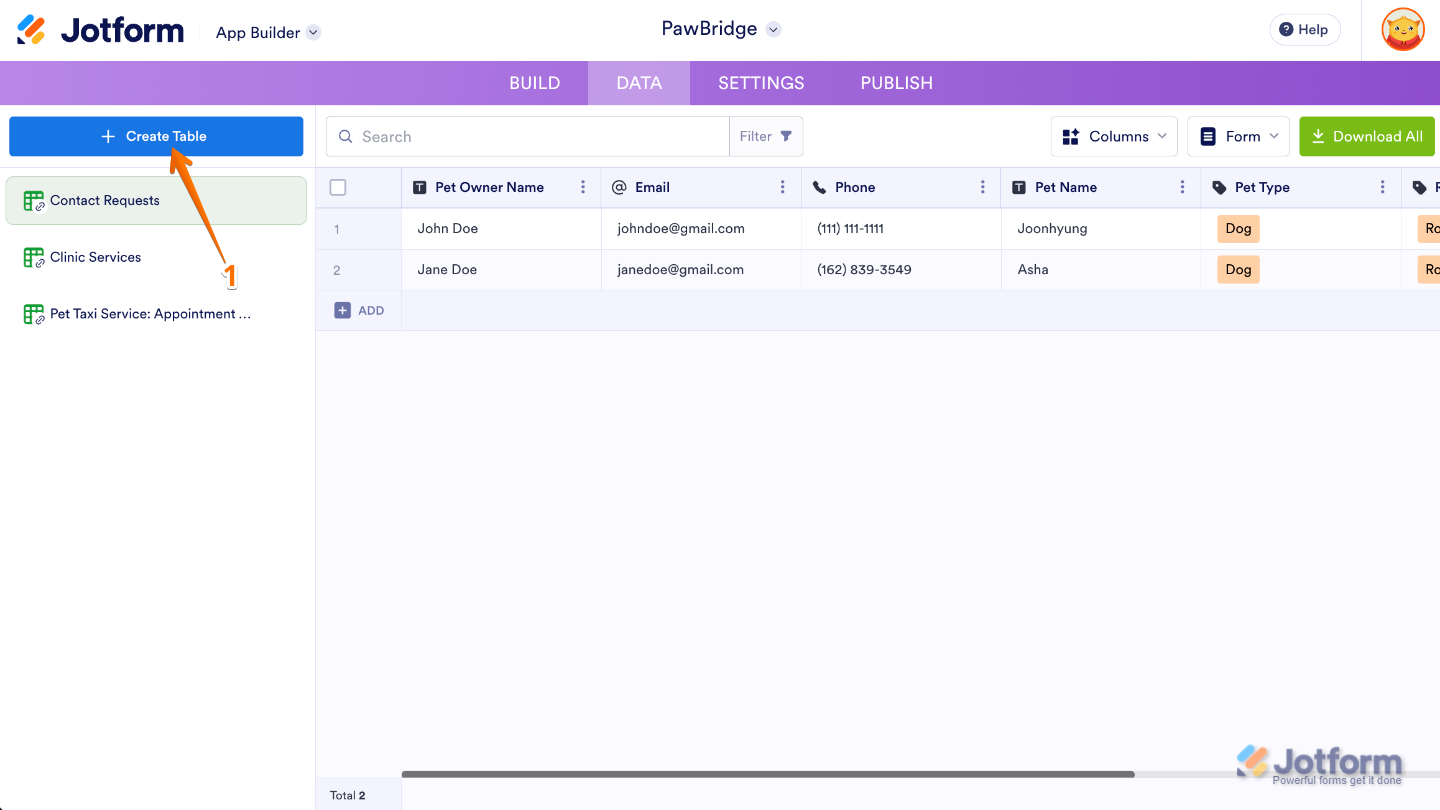
- On the left side of the App Builder Data page, click on Create Table.
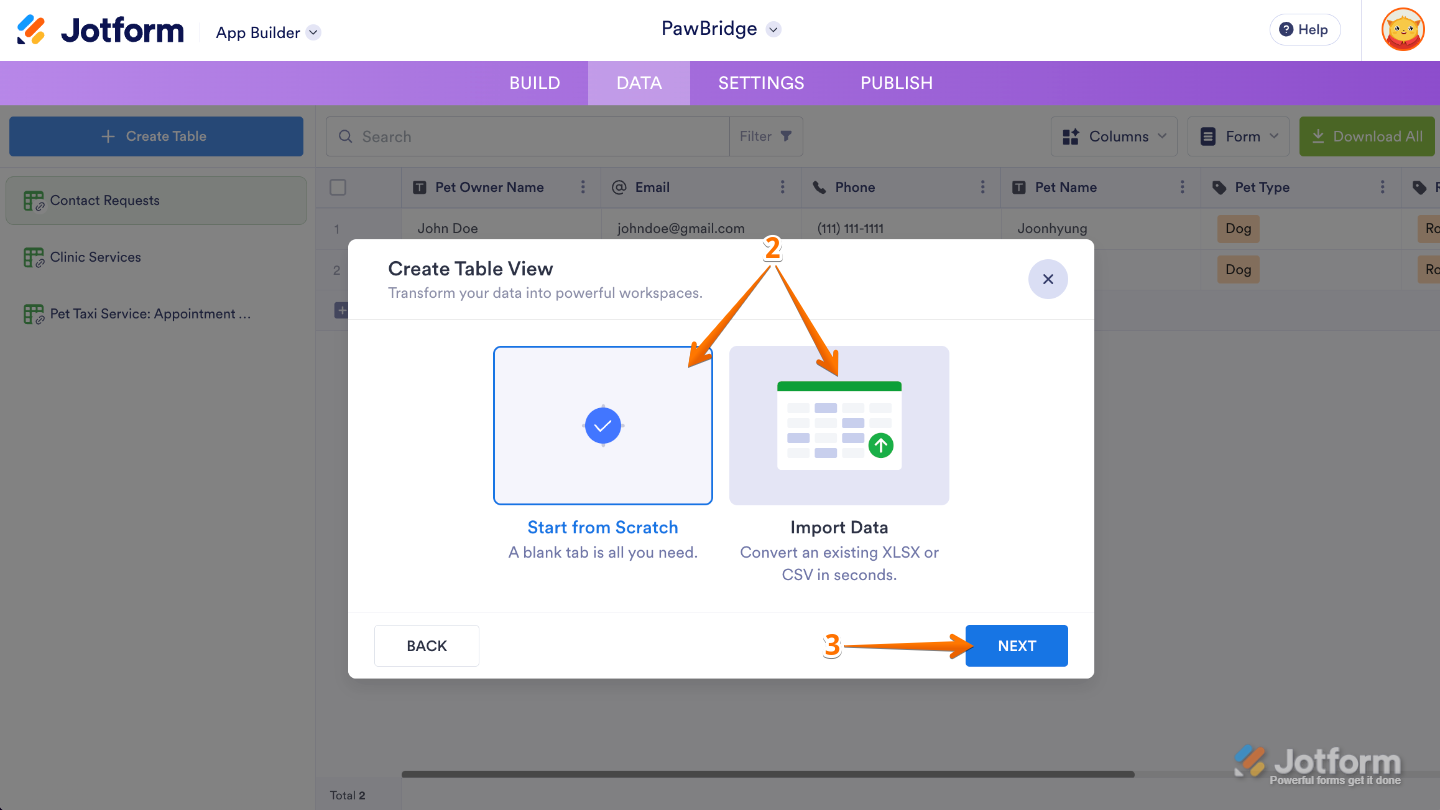
- In the Create Table View window, choose one of these options:
- Start from Scratch — Create a new blank table.
- Import Data — Create a table by importing an existing XLSX or CSV file.
- For example, if you selected Start from Scratch, click on Next.
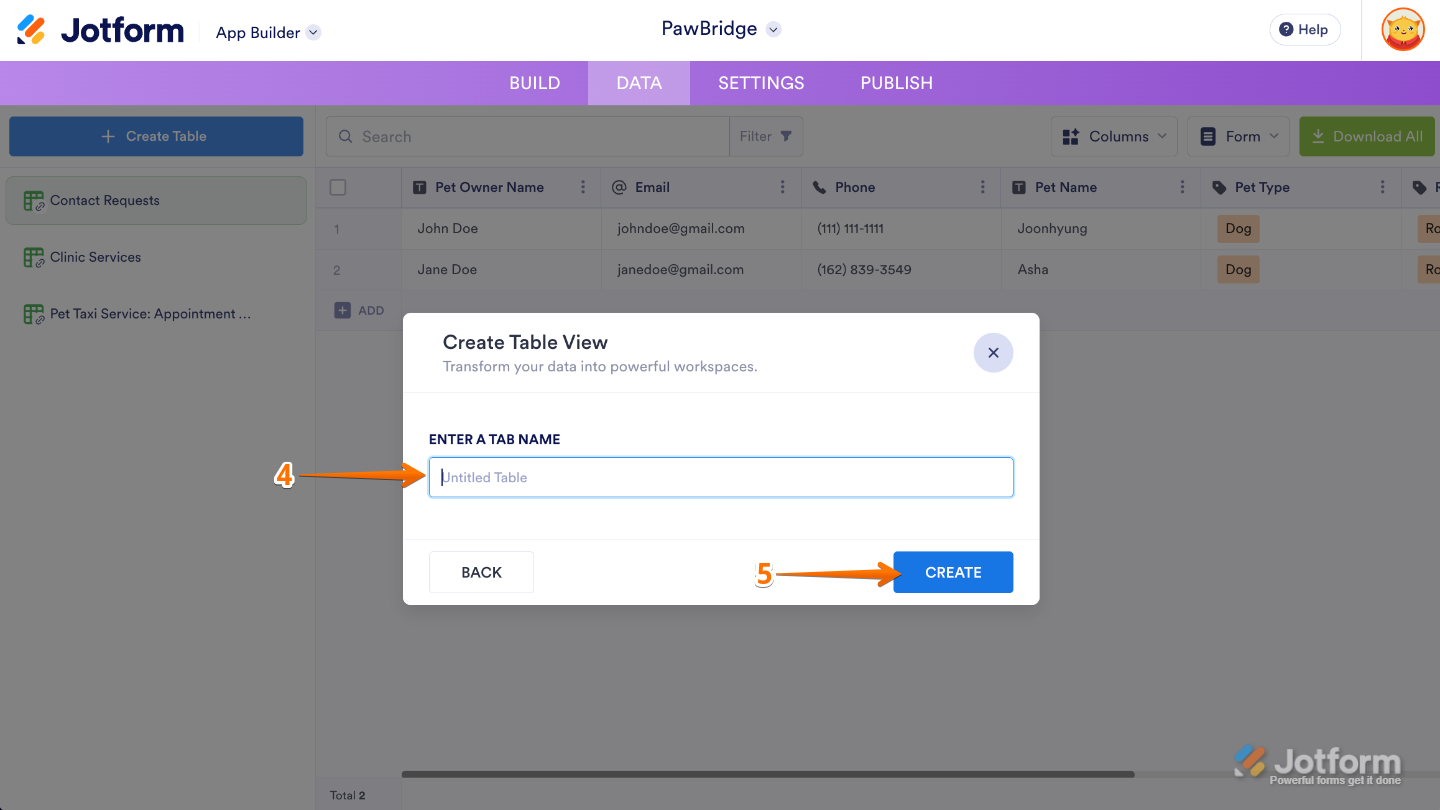
- Now, type a name in the Enter a Tab Name field.
- Once you’re done, click on Create.
That’s it! You now know how to use the Data tab to manage your app’s information and review submissions with ease. You can keep your records organized, make quick edits, and use AI columns to get more insight from your data—all while keeping everything in one convenient place.

Send Comment: