The Approval element in Jotform Workflows allows you to configure and define outcomes for your approval flow. Aside from the default Approve and Deny options, you can add more outcomes if needed and even set up multistep and parallel approvals.
Adding an Approval Element
To use Approval
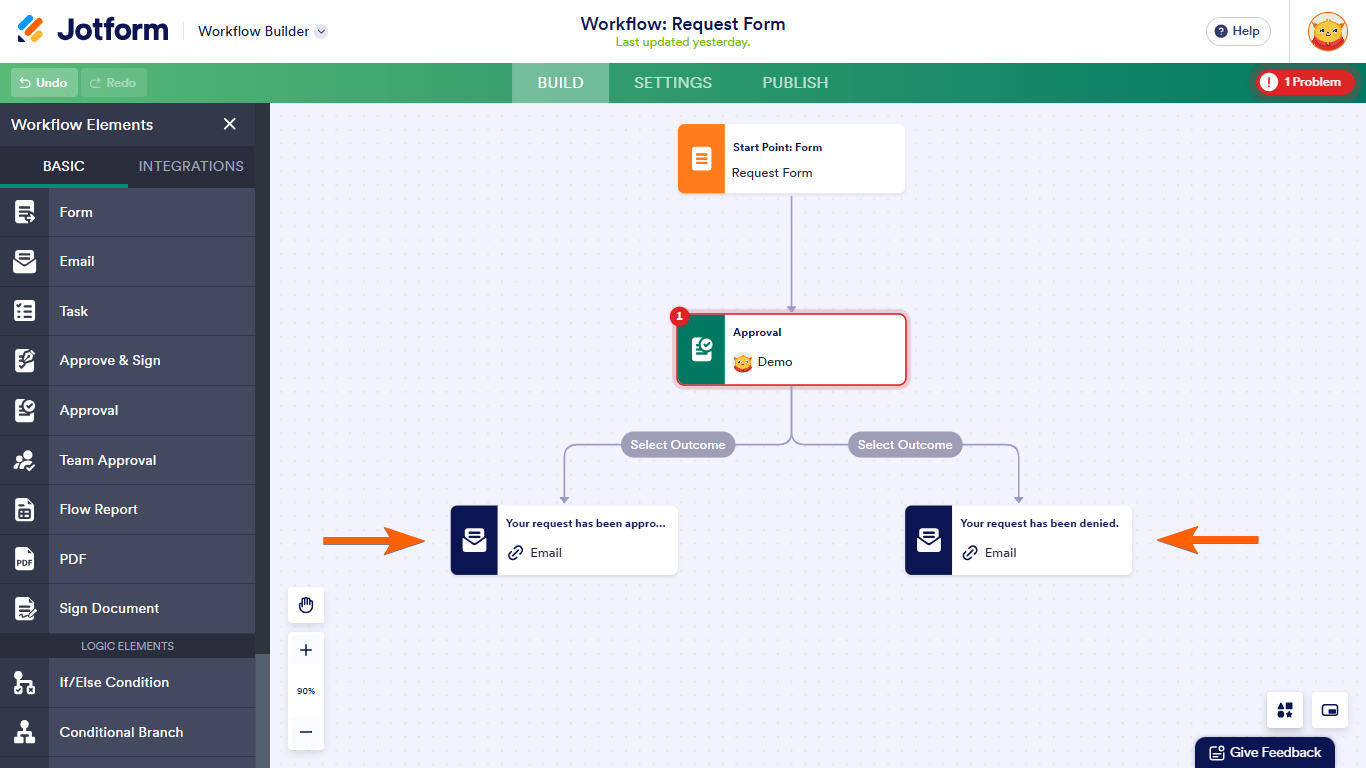
- In the Workflow Builder, add Approval to your flow.

- Add and connect your desired elements for each outcome. See How to Add and Connect Elements in Jotform Workflows to learn more.
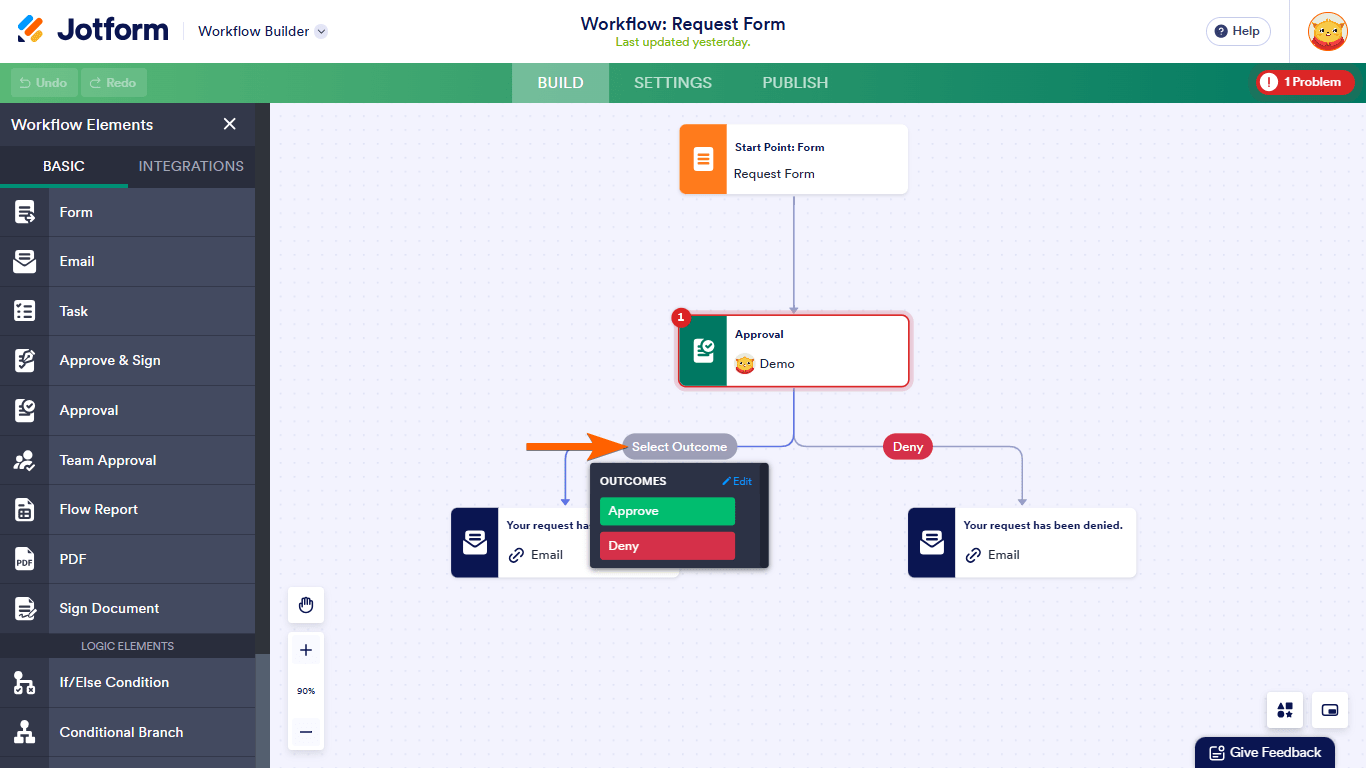
- Assign an outcome for each link. Select Edit in the Outcomes dialog for more options.
- Customize your workflow further if needed.
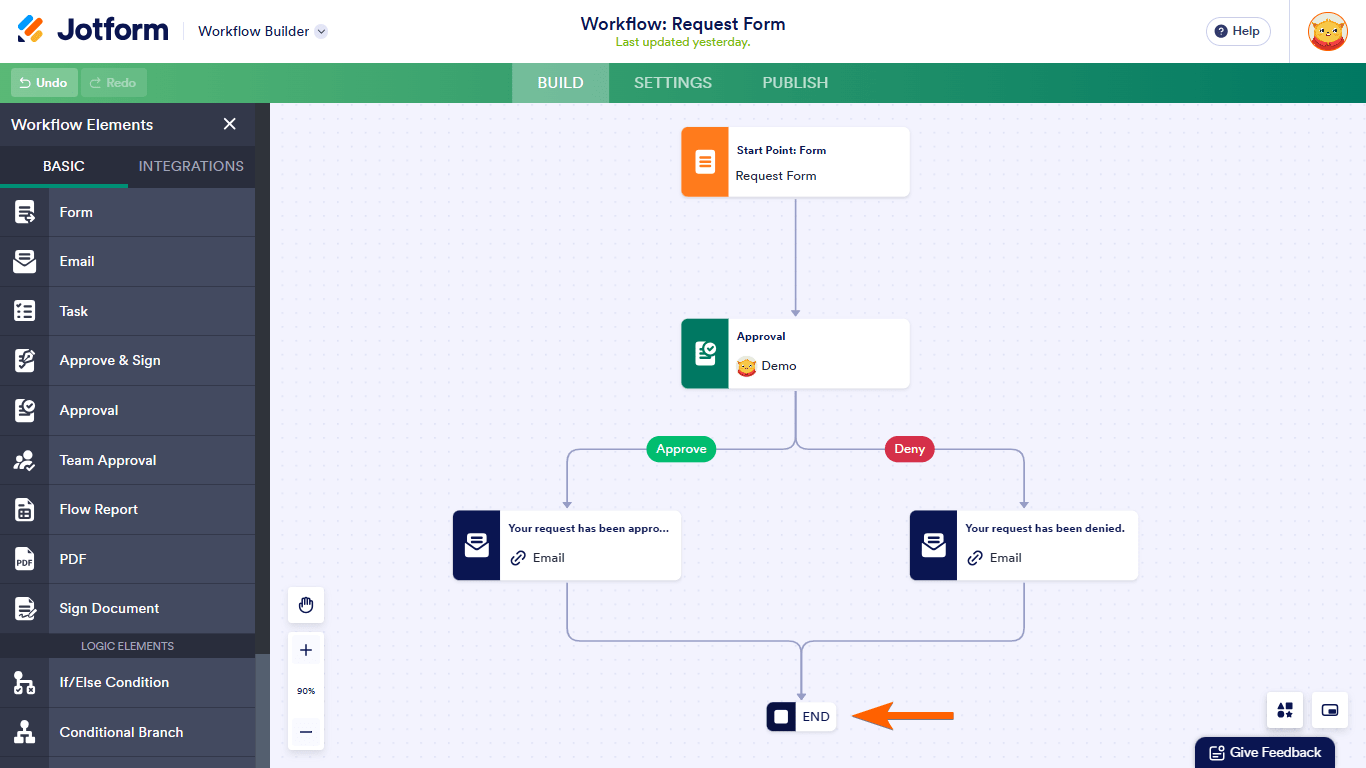
- End your flow to complete the setup.
Configuring Approval
To view properties
- Select the Approval’s gear icon.
- Change your desired settings in the properties panel.
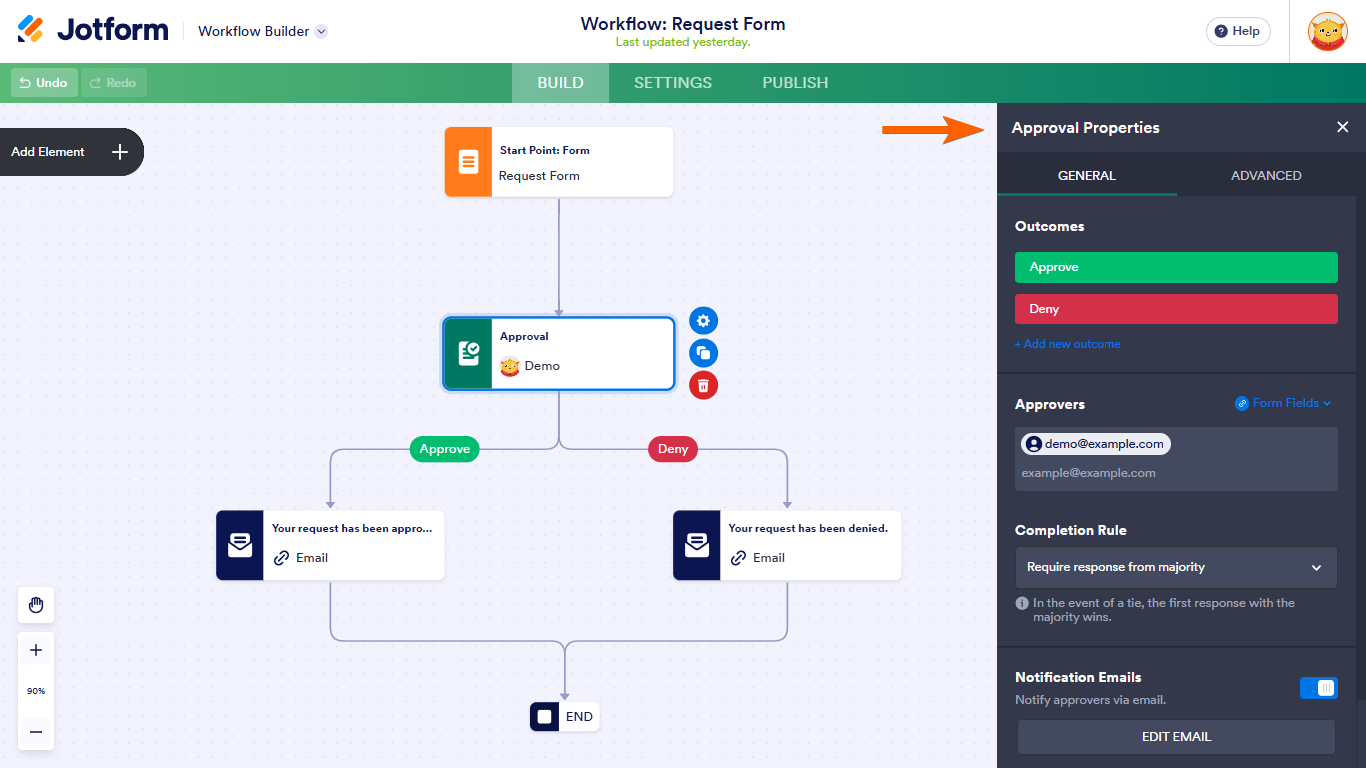
Here are the available options under the General tab:
- Outcomes — Approve and Deny are the default outcomes. Add more custom response options by selecting Add new outcome. Change an outcome’s color by hovering over it and selecting the ink drop icon.
- Approvers — Set to your email address by default. You can specify the approver’s email address or map it to your form’s email fields using the Form Fields dropdown.
- Completion Rule — If you have multiple approvers, you can set the outcome’s completion rule.
- Notification Emails — Notify approvers via email. Select Edit to customize the email sent to your approvers.
- Require Login for Approver — Turn off this option if you don’t need your approvers to log in to their Jotform account to complete their tasks. Using account-based approval or requiring login is highly recommended so your approvers can track their activities through Jotform.
- Go to the Advanced tab to view more options.
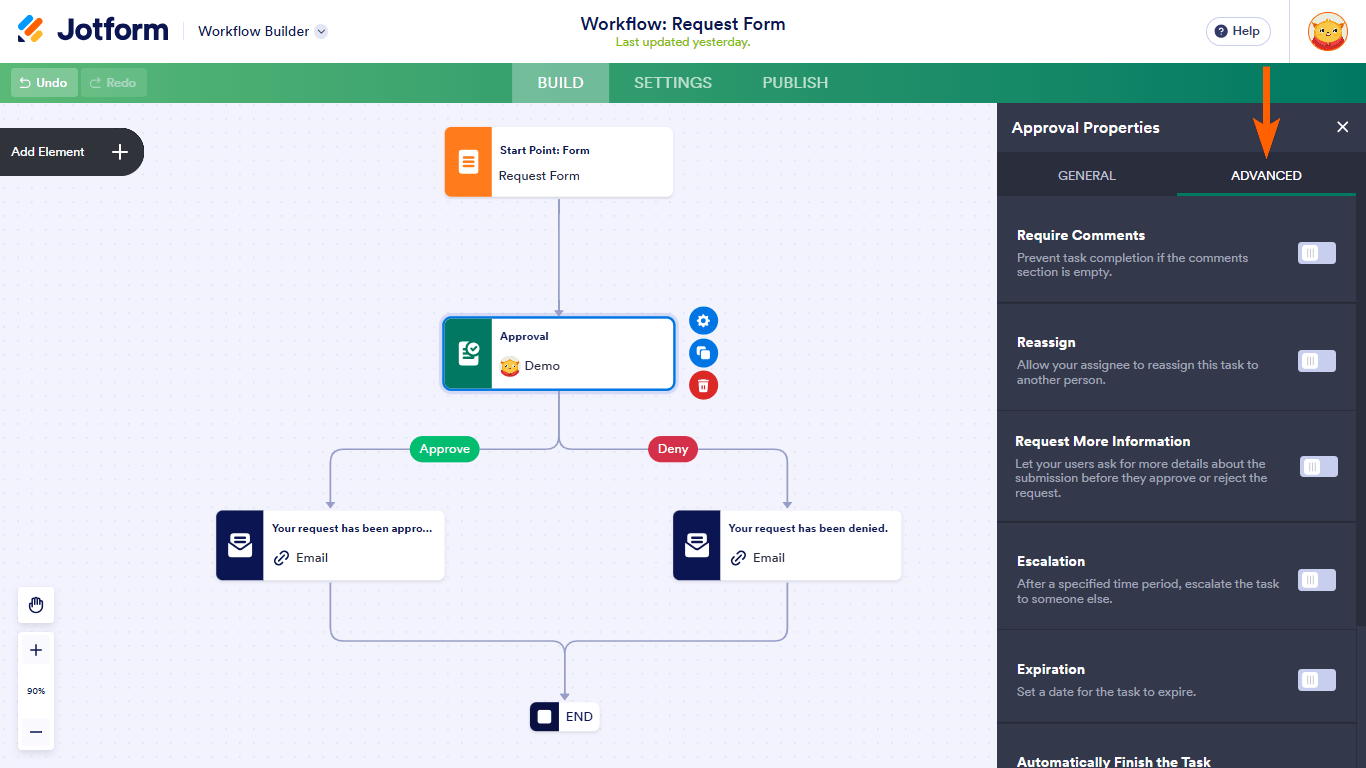
Here are the available options under the Advanced tab:
- Require Comments — Require your approvers to comment on the request in Jotform Inbox to complete the task.
- Reassign — Allow your approvers, in Jotform Inbox, to reassign their task to another person.
- Request More Information — Allow your approvers, in Jotform Inbox, to ask for more details about the submission before they approve or reject the request.
- Escalation — Automatically send the request to someone else if the primary approver fails to complete the task within the allowed period.
- Expiration — Set the approval request to expire automatically after a certain period or on a specific date.
- Automatically Finish the Task — Set the approval to automatically select an outcome after a certain period or date.
- Send Reminder Emails — Send periodic reminders to your approvers to complete their tasks.
All changes are automatically saved.

Send Comment:
16 Comments:
June 2, 2025
Can you set the flow to automatically approve based on a field in the form and the responce?
May 27, 2025
Can someone without a subscription be an approver? When a form is submitted, it is sent to me (I have an account) and an external approver. I have the ability to approve or deny, however, there is no option for an external to approve. As a result, the workflow ceases.
April 14, 2025
how can I have the approval form directed to different approvers depending who and from what county fills out the form?
February 1, 2025
Can I create a menu of comments from the responder? So that we can collect data about denial?
October 23, 2024
I have a question about multistep approval workflow.
Let's assume in a 3-step series approval, the first two approves, and the final approver rejects with a comment. Now after the responder Edits and rectifies the submission, I don't see an option to resume the workflow from the third step, since first two are already approved.
The only I see is to Enable or Disable restarting the workflow. Enabling starts from step 1 and disabling doesn't kick in the workflow at all.
Please help.
July 12, 2024
HOW CAN CHECKER IN MY APPROVAL FLOW ENTER DETAILS IN FORM FEILDS WHICH WERE HIDDEN FROM REQUESTER AND FORWARD IT TO AUDITOR
August 2, 2023
During multiple approvals, I see majority of the Approval status is shown in final status. For example, 2 persons approved and one person denied, I see the status as approved and vice-versa. Is there any functionality where the status is marked as denied when even one approval is denied?
May 4, 2023
Why am I only able to link PayPal/Venmo to my JF?
February 1, 2023
If you set up the escalation period, can the primary approver still respond after the escalation date?
That is, if the escalation is 5 days, can the original approver still approve on the 6th or 7th day?
May 18, 2022
Can this approval flow be used to send patients a prefilled forms to complete and have reminder emails sent until the forms are done?
May 17, 2022
Da quando è stato aggiornato il menù di approvazione non è più possibile disabilitare l'opzione di approvazione tramite login. Non c'è alcun modo per approvare senza dover effettuare il login?
April 26, 2022
I have my approval process set to approve and sign. When she receives the approval email, she clicks on approve but it' not giving her a place to sign anymore.
Help please, Thanks!
October 31, 2021
Can I set a branch that allows me to schedule a calendar zoom meeting as an option?
September 21, 2021
Hello,
I'm in the process of setting up a workflow/approval/denial process. We have agencies fill out grant applications that others rate. Is there a way to connect a rating tool (already have a form for this)? Or is there another way that we can have someone rate an application in numerical values that add up to a total when they submit their rating? I don't see a set up for this.
August 27, 2021
How do I turn the approval process off?? I was exploring the site and now it's stuck!!! I NEED TO GET OUT OF IT.....help!
July 31, 2021
Way too complicated for us! We want every submission to be approved. This is flow is a head ache!