DotNetNuke or DNN is an easy-to-use, feature-rich content management system with best-in-class security, extensibility, and ecosystem.
Note
This user guide was published using DNN’s Evoq Content CMS. Embedding may be different for their other platforms.
This user guide was published using DNN’s Evoq Content CMS. Embedding may be different for their other platforms.
Similar to other CMS, adding a Jotform form to your DotNetNuke page is straightforward. Please find the steps below.
Getting the Embed Code for DotNetNuke
- In the Form Builder, go to the Publish tab.
- Click Embed on the left.
- Under the default embed, click the Copy Code button.
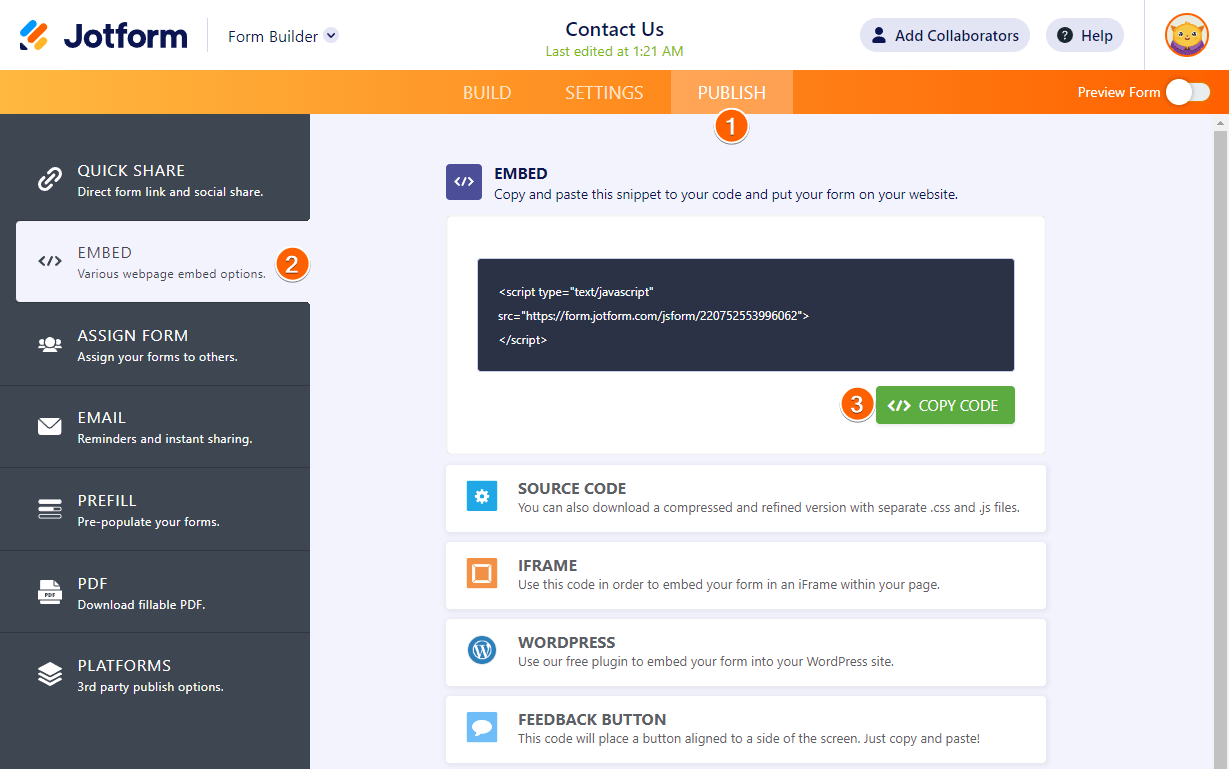
You now have your form’s embed codes.
Adding Form to DotNetNuke
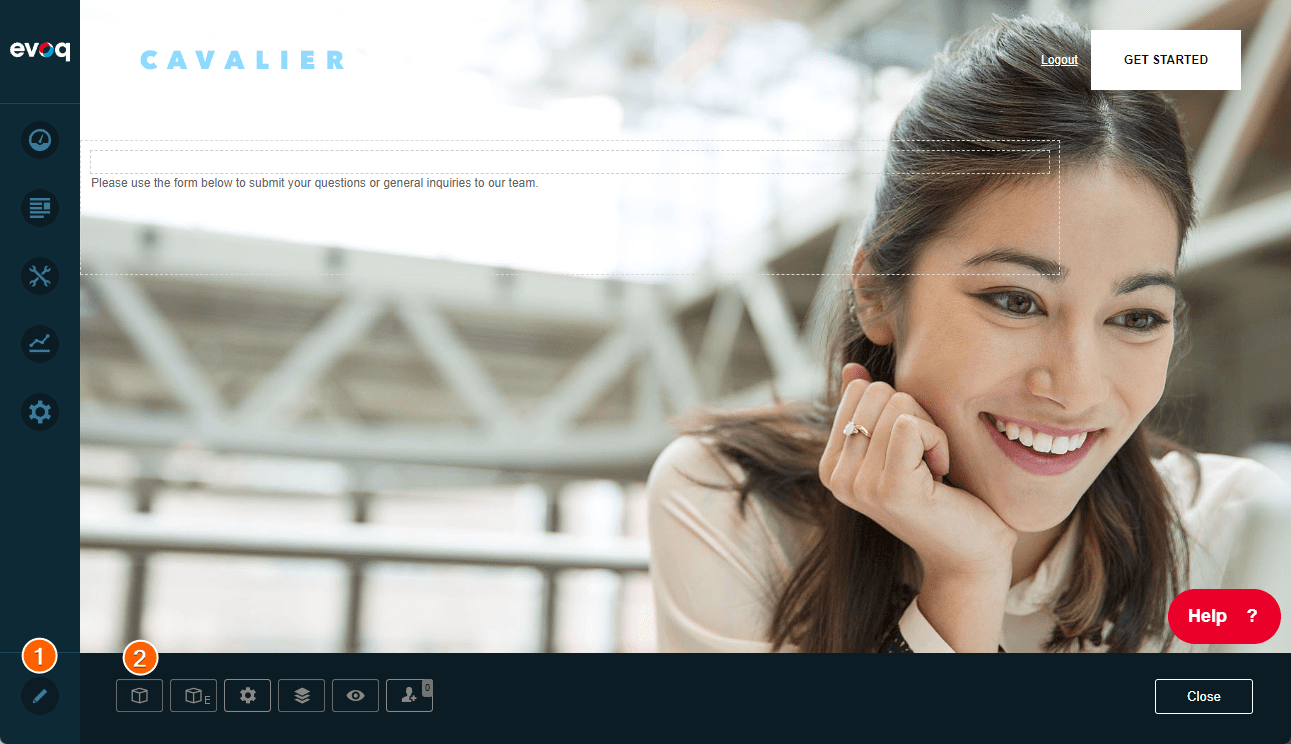
- Log in to your DotNetNuke account.
- View your website, and click the page where you wish to add the form. If you haven’t created the page yet, add one by following this article from DotNetNuke.
- Assuming you’re already logged in, click the Edit (pencil icon) at the bottom-left side to edit the page.
- Click the Add Module button once edit mode is active.
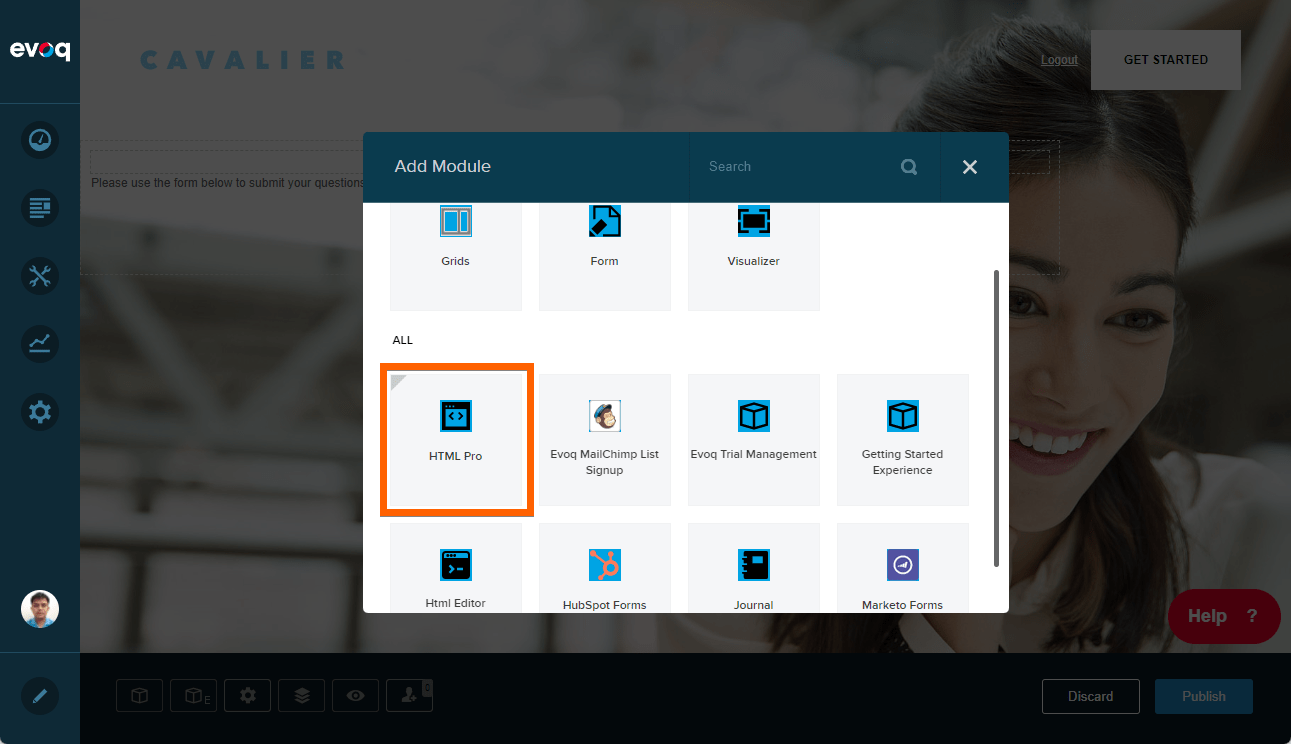
- Click HTML Pro from the list of options. You will see the module floating in the editor.
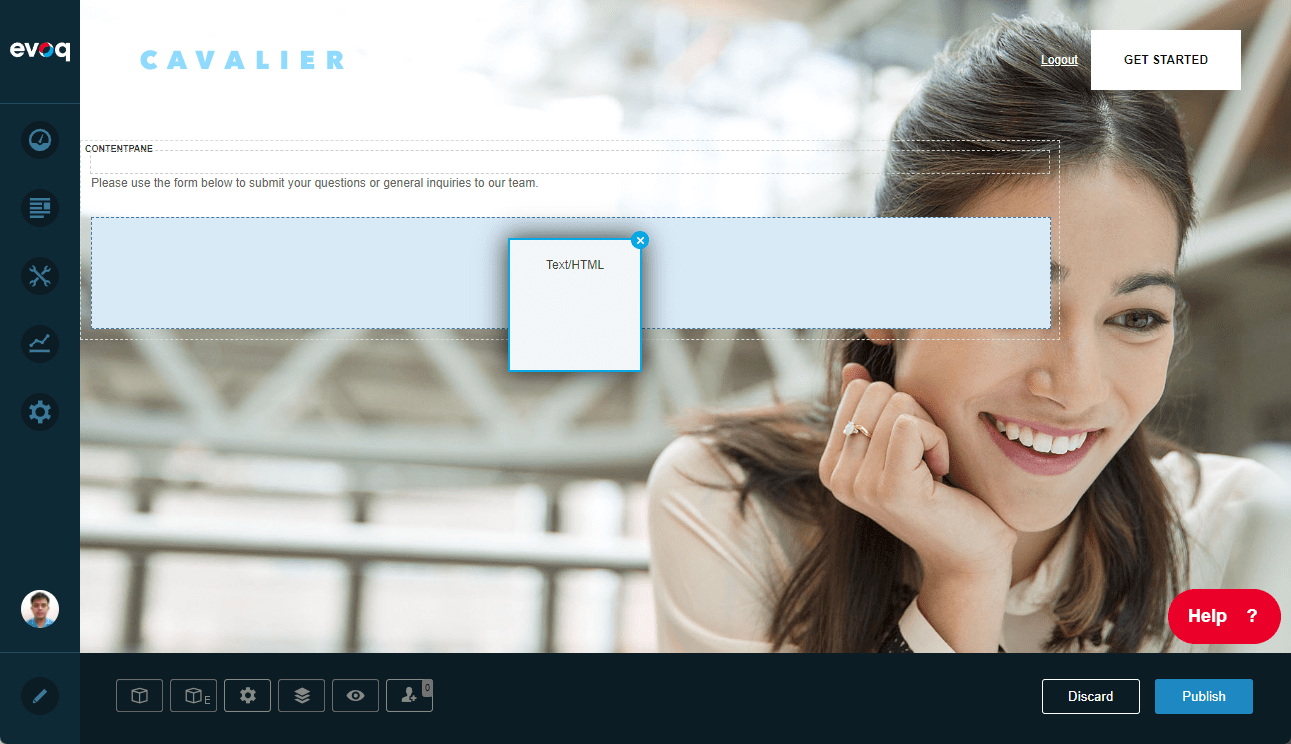
- Drag and drop HTML Pro to the section/content pane where you want to display the form. You should see the HTML editor after.
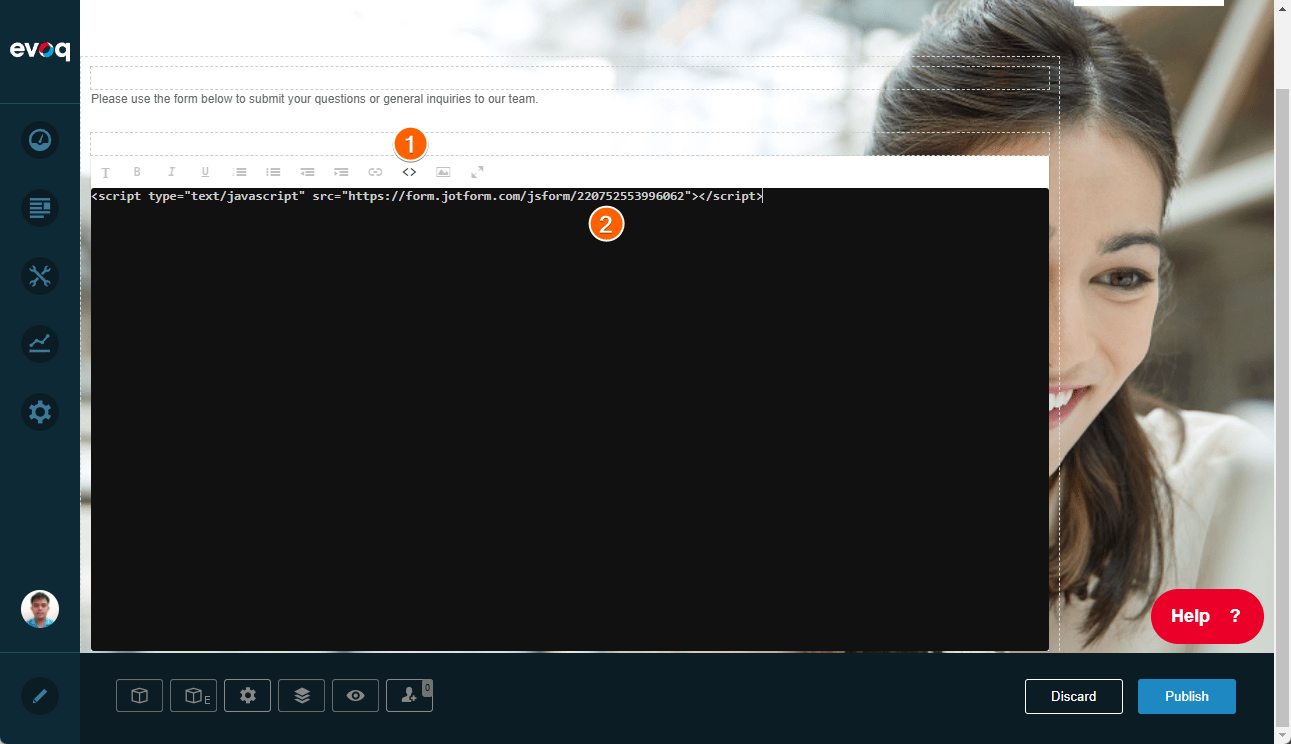
- At this stage, click the HTML icon from the editor. You should see the other tools grayed out, and the HTML box turns dark.
- Paste your form’s embed codes in the HTML box.
- Click outside of the HTML editor to save your changes. You won’t see the form while the edit mode is active.
- Click the Publish button on the bottom-right of the page to save the changes and disable the edit mode. At this moment, you should see the form displayed on the page, and that’s it.

Send Comment: