With the free Ziggeo Video Recorder widget, you can let users record and upload videos directly through your form. Powered by Ziggeo’s award-winning video API, this widget supports live recording, playback, re-recording, screen capture, and even automated transcription—all without leaving your form.
Here are a few ways to use it:
- Capture videos and screen recordings with Ziggeo
- Allow users to view and re-record their videos
- Set expiration dates and time limits
- Add automatic audio transcription as subtitles
- Tag videos for easier search and organization in your Ziggeo dashboard
Whether you’re starting fresh or updating a form, adding and setting up the Ziggeo Video Recorder widget takes only a few steps. Here’s a quick how-to:
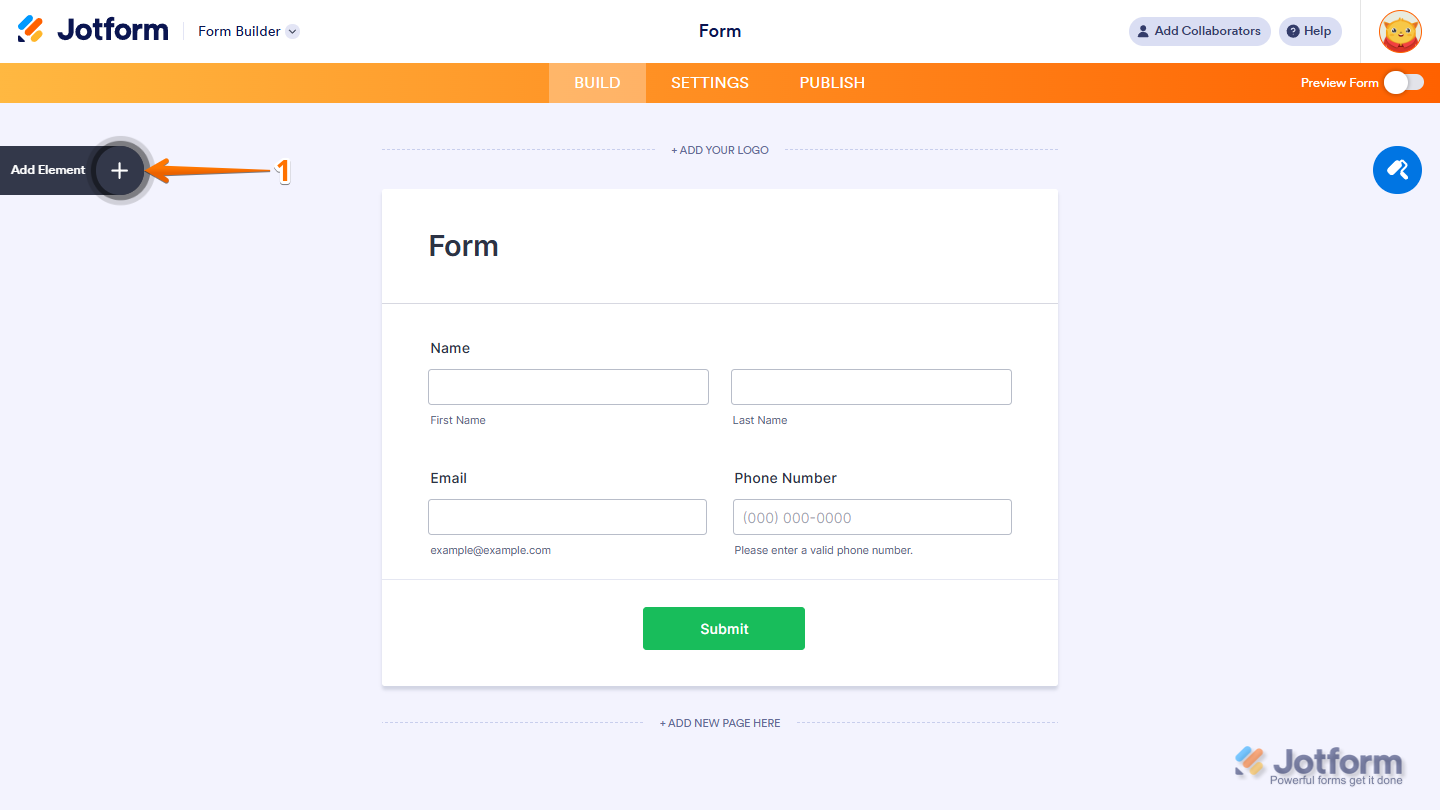
- In Form Builder, click on Add Element on the left side of the page.
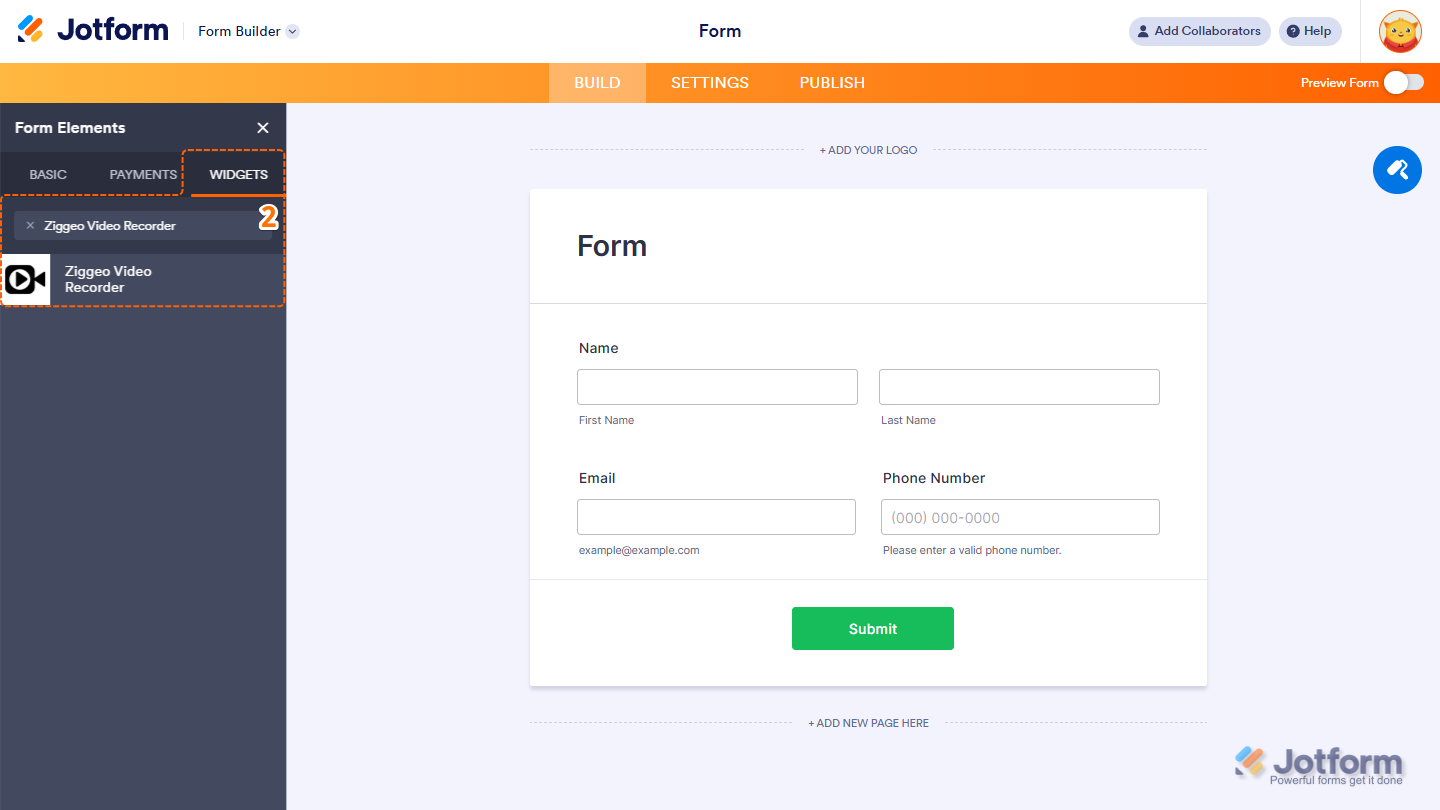
- Now, in the Form Elements menu, under the Widgets tab, search for Ziggeo Video Recorder and click on it. Or, just drag and drop it to where you want it to be on your form.
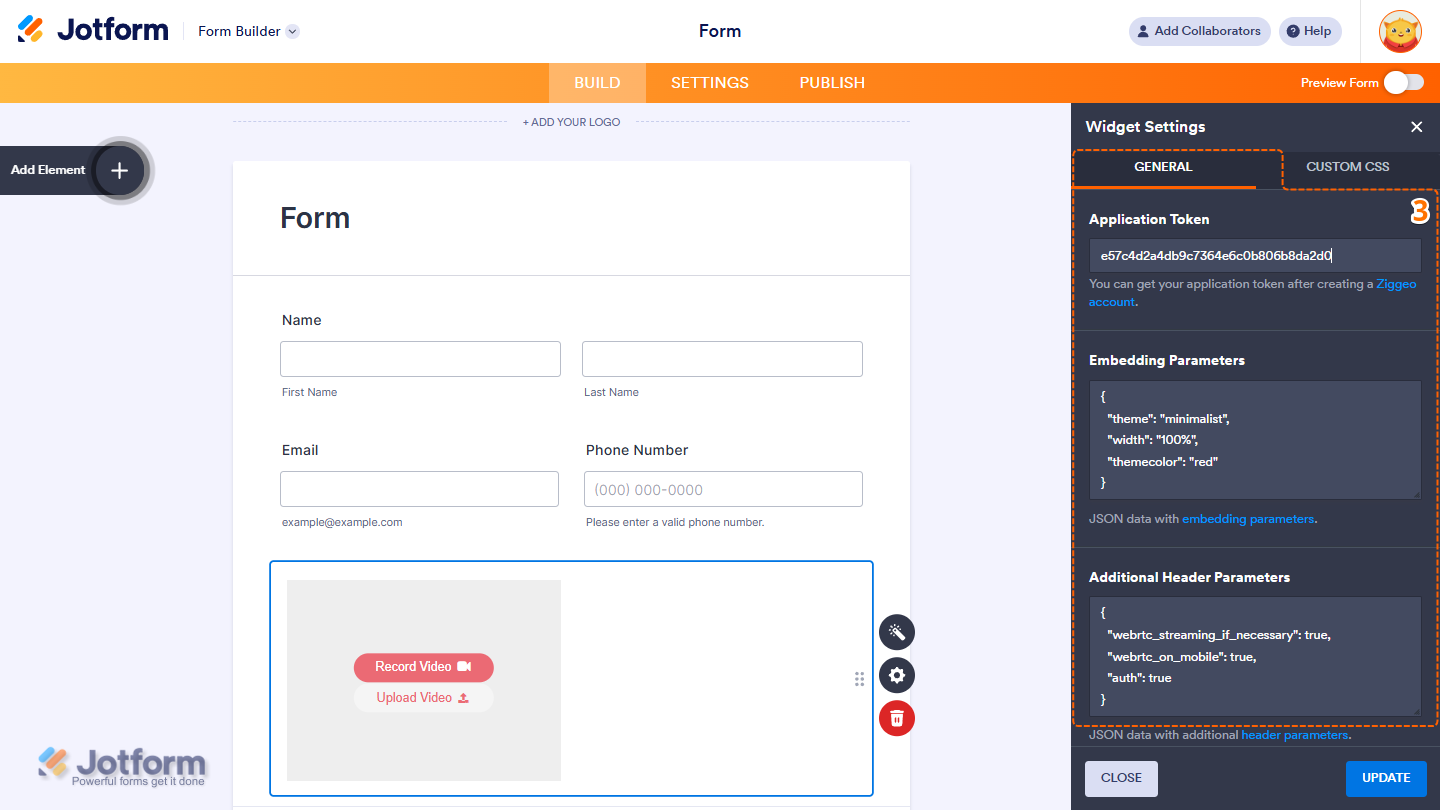
- Next, in the Widget Settings window that opens on the right side of the page, under the General tab, set up these things:
- Application Token — Paste your Ziggeo Application Token. You can get this from your Ziggeo Dashboard after creating an account.
- Embedding Parameters — If you want to customize how the recorder looks or behaves, you can enter JSON embedding parameters here. The widget already includes default settings, so you can leave this blank unless you need a custom setup.
- Additional Header Parameter — Add extra JSON header parameters only if your workflow requires them. This is not needed for standard use.
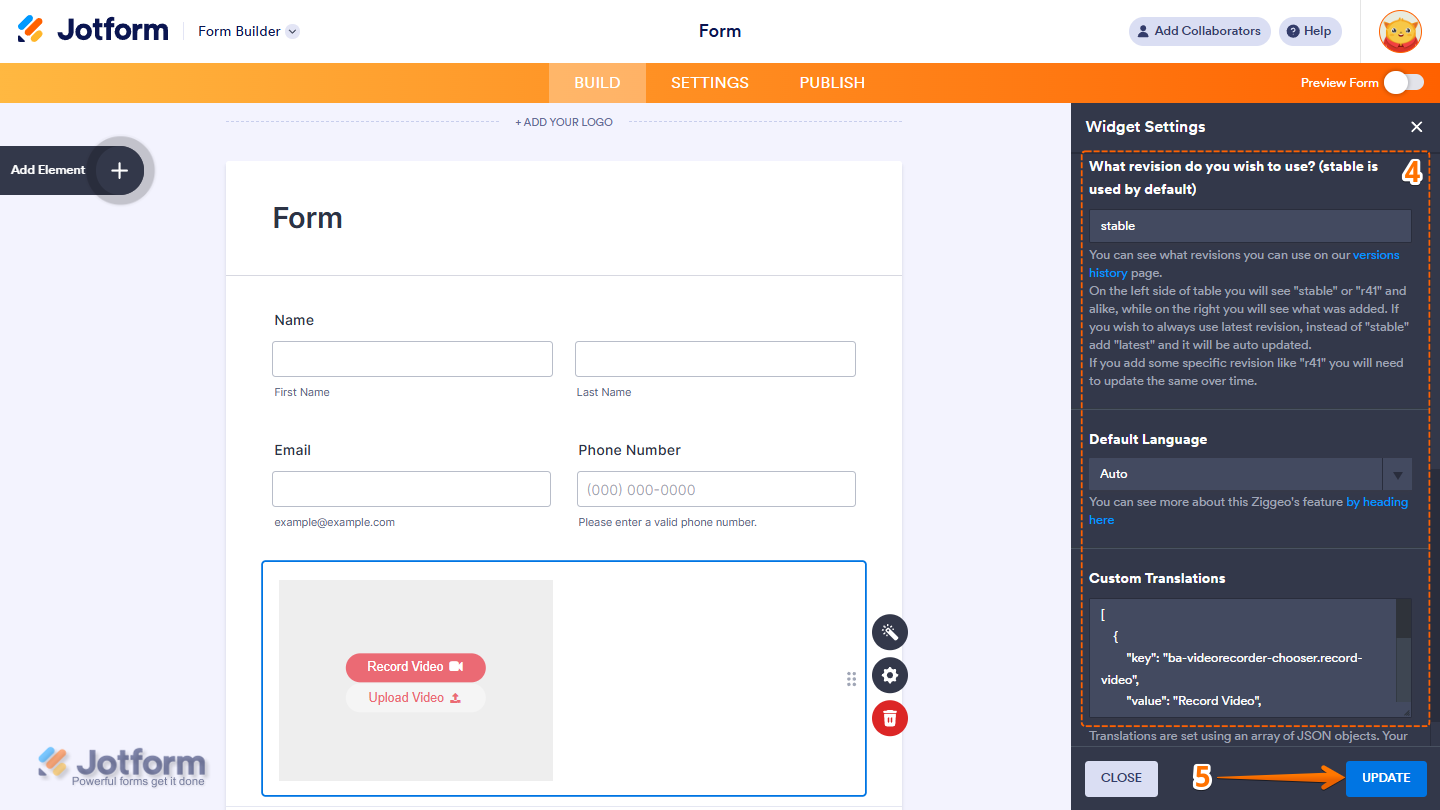
- Then, scroll down to the bottom and continue to set up these settings:
- Revision Version — Choose which Ziggeo revision to use. “Stable” is used by default and is recommended for most users. “Latest” automatically updates the widget to the newest version. You can also enter a specific revision (e.g., “r41”), but this requires manual updates over time.
- Default Language — Select the default language for the recorder interface.
- Custom Translations — Add your own translations using valid JSON. Only needed if you want to override Ziggeo’s default interface text.
- Once everything’s set, click on Update.
That’s it. You’ve successfully added and set up the Ziggeo Video Recorder widget on your form.
Note
- For advanced styling of the Ziggeo Video Recorder widget, you can add your own custom CSS code under the Custom CSS tab in the Widget Settings. Our guide on How to Inject CSS Codes to Widgets walks you through everything.
- You can also configure the widget properties, like alignment, labels, size, visibility, and more, to control how it looks and behaves on your form.
Accessing Ziggeo Recorded Video Links
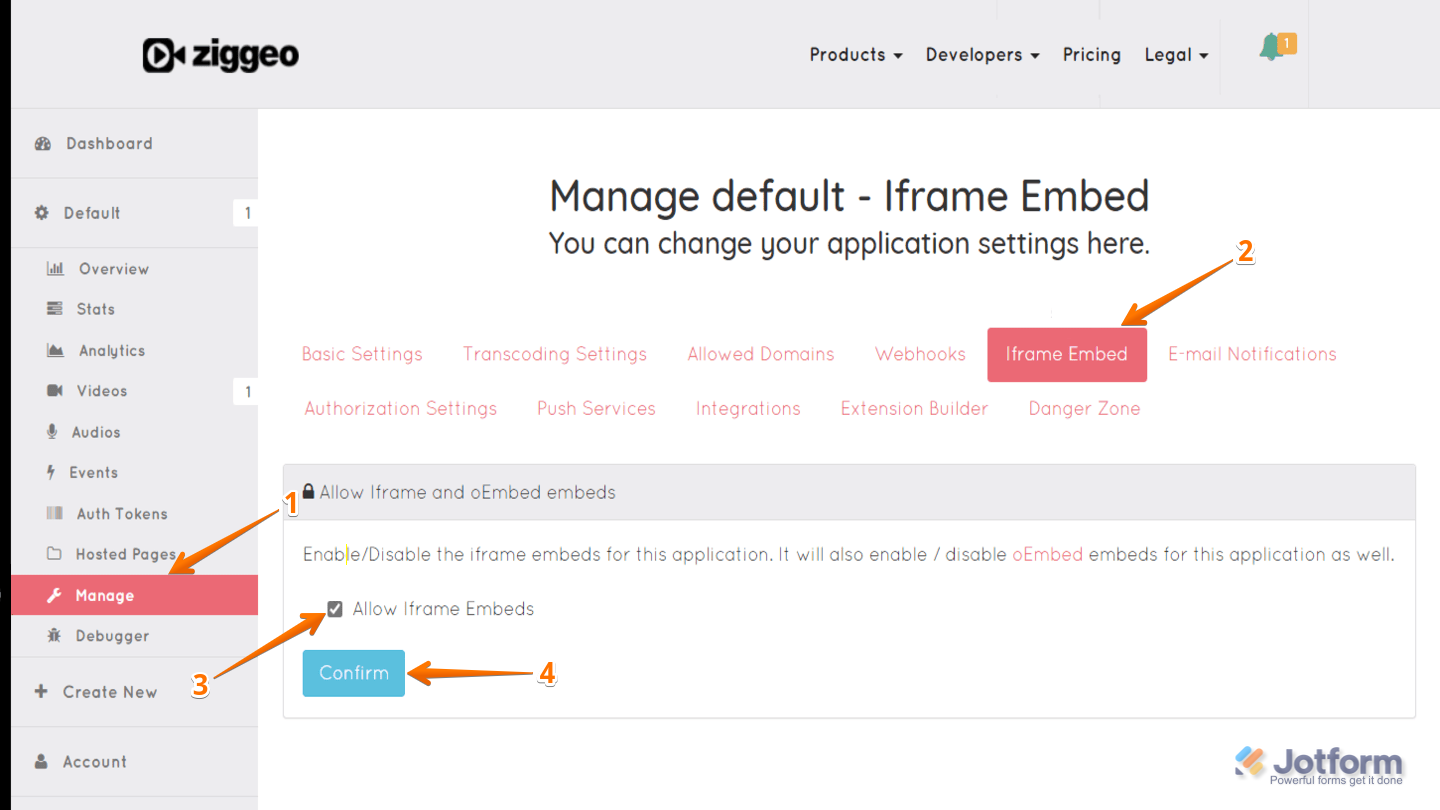
Submitted videos are hosted and transcoded by Ziggeo. In addition to viewing the videos in your Ziggeo dashboard, you can also access the video links directly in Jotform Tables. To allow access to the video links in Tables, you’ll need to enable iframe embeds in Ziggeo. Here’s what to do:
- In your Ziggeo Dashboard, in the menu on the left, click on Manage.
- Then, in the menu in the middle of the page, select the iFrame Embed option.
- Now, put a check on Allow iFrame Embed.

Send Comment:
1 Comment:
August 14, 2020
Hi, I did this and it is not working.
Is this video recorder still a service that you use?