With Jotform, you can easily make form filling faster and less repetitive for your users. The OCR Autofill widget turns information from supported documents into form-ready data, allowing respondents to take a photo or upload a file instead of entering everything manually. This helps create a smoother experience for applications, registrations, intake forms, and other document-based submissions.
It’s a simple way to make forms more convenient to complete while helping you collect cleaner and more consistent responses.
Here are a few ways to use it:
- Prefill customer, employee, or applicant information from uploaded documents.
- Speed up insurance claims, onboarding forms, and verification requests.
- Help users complete long forms with less manual typing.
- Collect cleaner data from IDs, receipts, licenses, and other records.
- Reduce repetitive data entry in document-based workflows.
- Create a faster and more convenient submission experience for respondents.
Note
The OCR Autofill widget is available in both Classic and Card Forms. You can check out our guide on When to Use Card Forms to learn more.
Whether you’re building a new form or editing an existing one, you can add and configure the OCR Autofill widget in just a few steps. This is how it’s done:
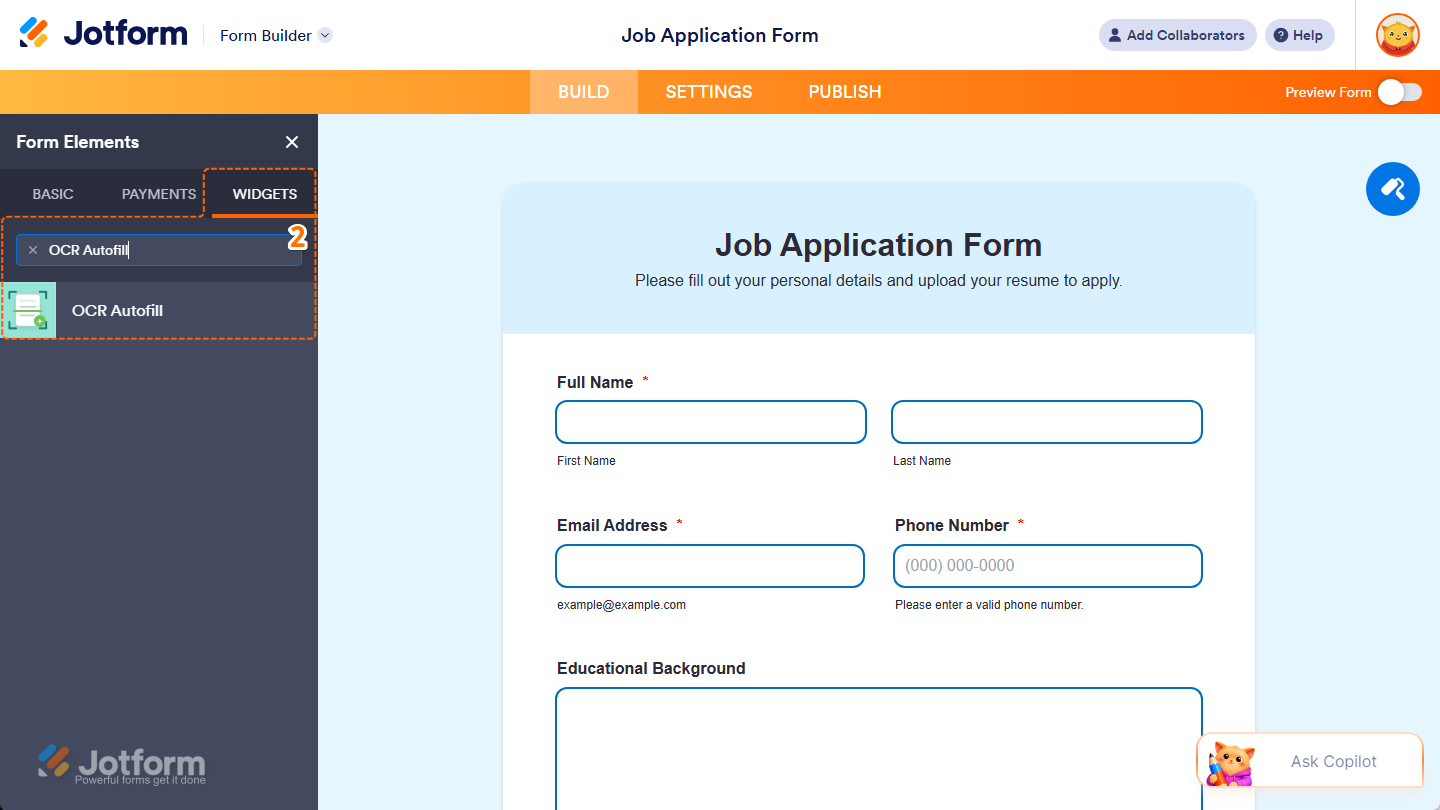
- In Form Builder, click on Add Element on the left side of the page.

- Now, in the Form Elements menu, under the Widgets tab, search for OCR Autofill and click on it. Or, just drag and drop it to where you want it to be on your form.
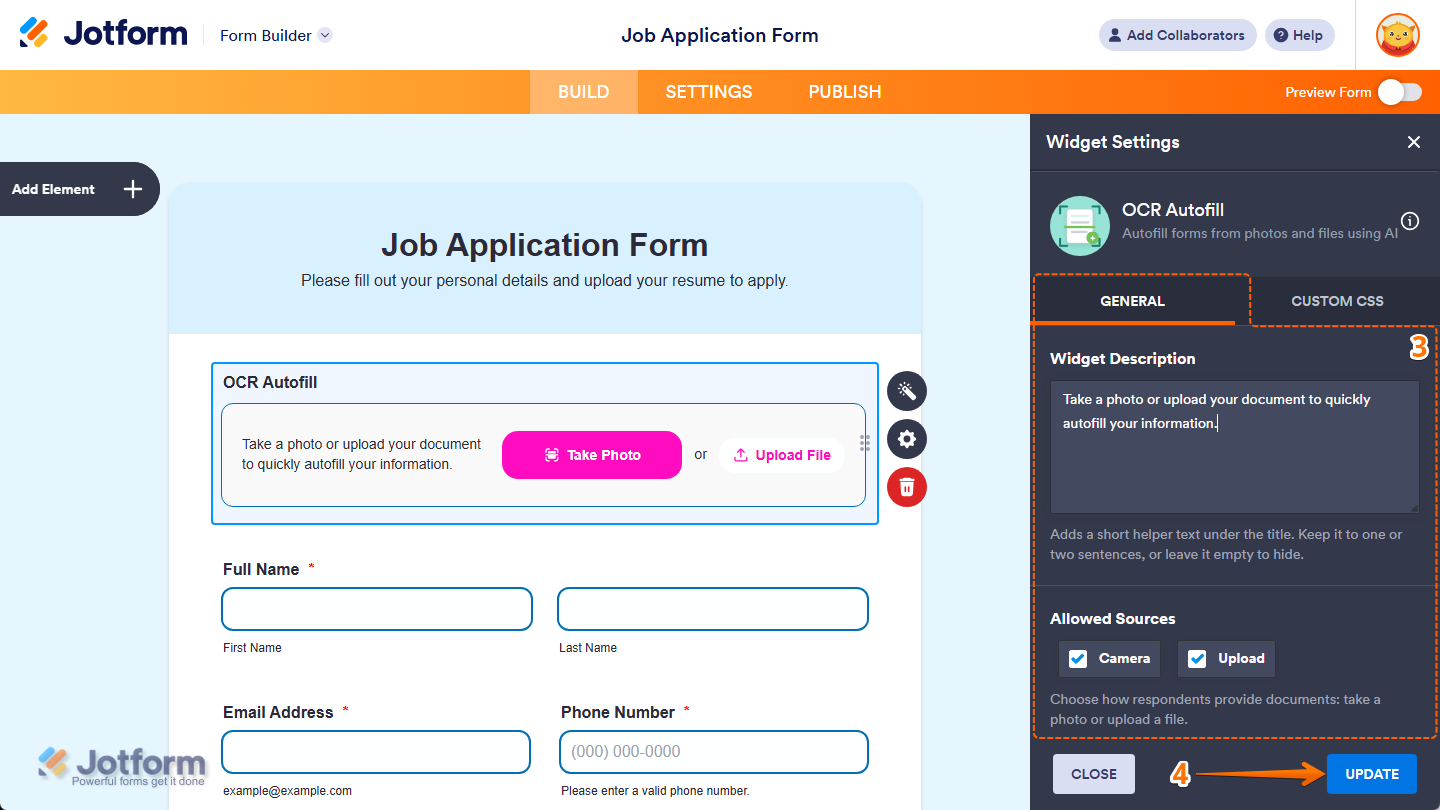
- Next, in the Widget Settings menu that opens on the right side of the page, under the General tab, you’ll see this list of settings you can configure:
- Widget Description — Keep the default helper text in the input box if you want it to remain next to the Take Photo and Upload File buttons and guide respondents, delete it to hide the helper text, or enter a new one to replace it.
- Allowed Sources — Keep the checks in the boxes next to Camera and Upload if you want to let respondents use both options, or remove one to limit how they can provide documents by taking a photo or uploading a file.
- Once everything’s set, click on Update.
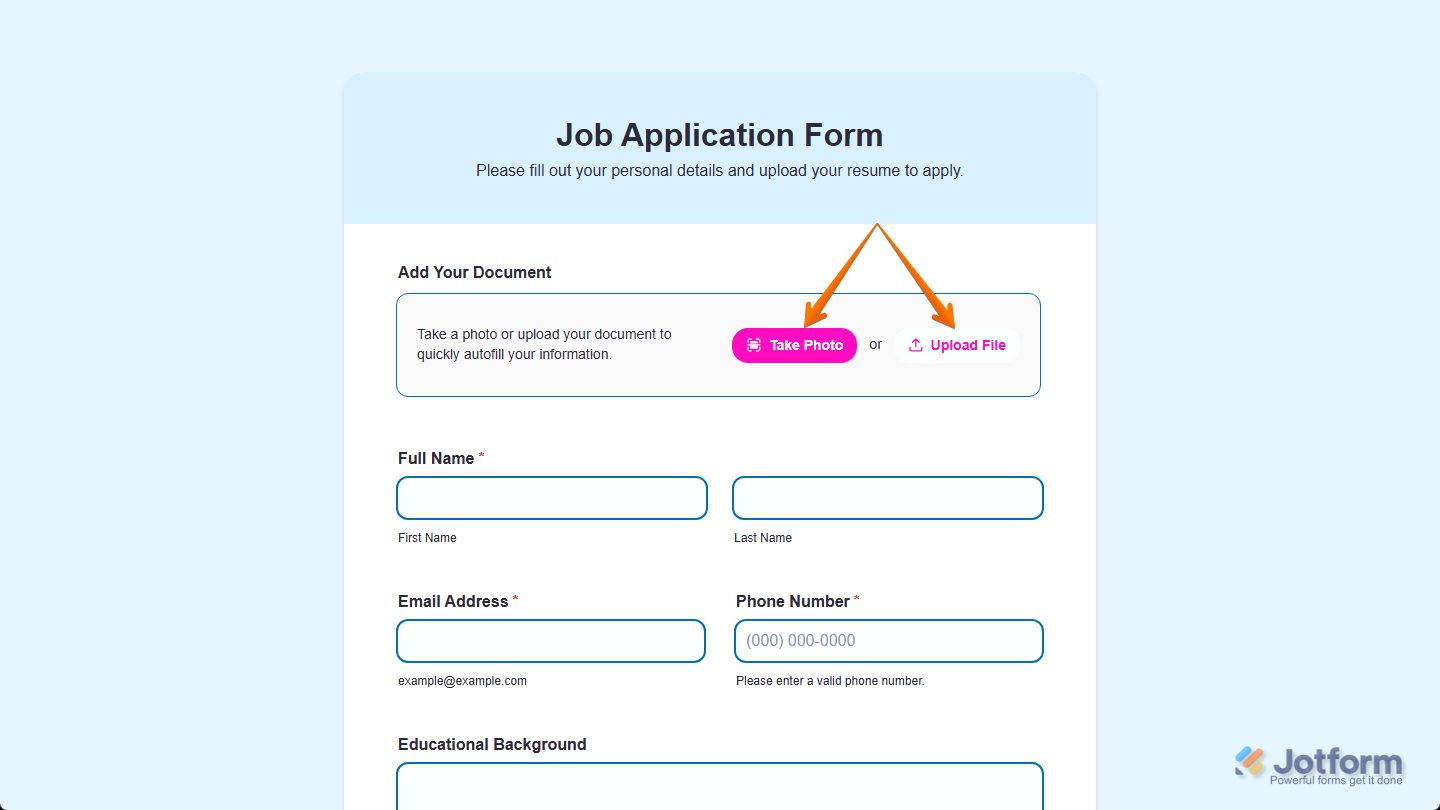
That’s it. You’ve successfully added and set up the OCR Autofill widget on your form. Users can click on the Upload File button on the widget to upload a supported document or the Take Photo button to capture an image of the document and autofill matching form fields.
Note
Users can upload supported documents in PDF, JPG, and PNG file formats.
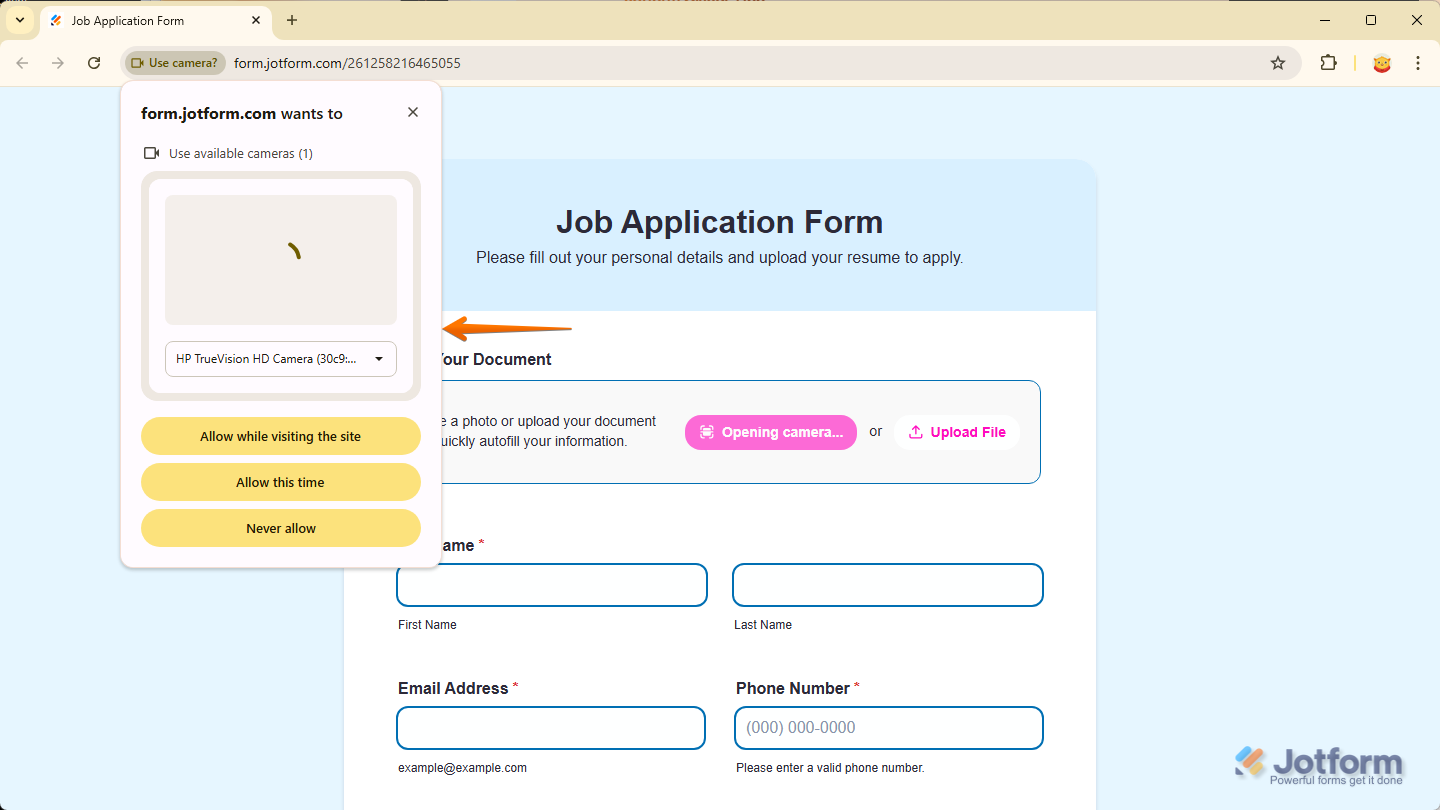
When users open the form and use the Take Photo button of the OCR Autofill widget for the first time on their device, they’ll be prompted to allow camera access through their web browser. Once permission is granted, they won’t see the same prompt again on that device.
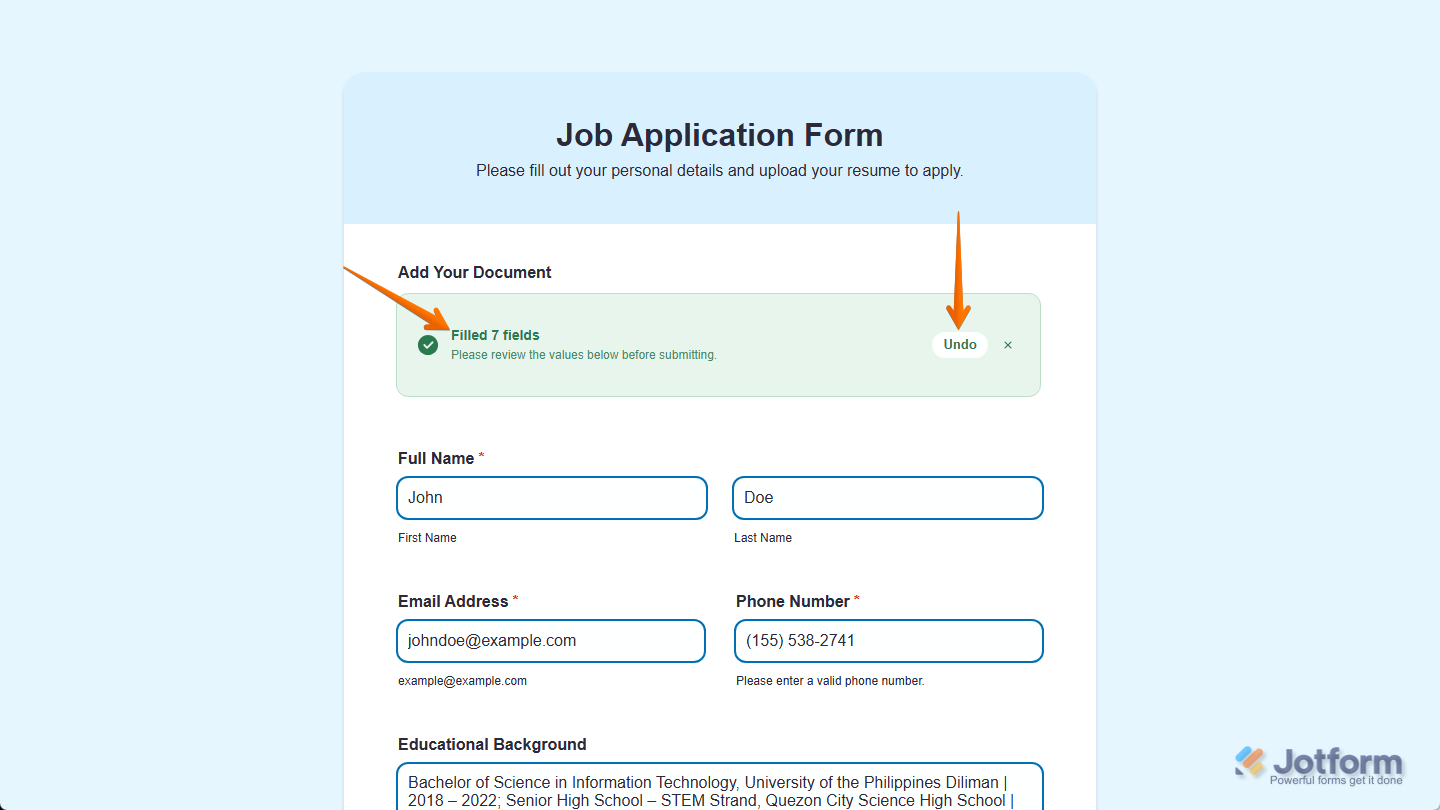
Once you’ve uploaded your file or captured a photo of your document and the process has completed, the widget will display the number of fields it filled. You can click the Undo button if you want to redo the autofill process.
Wondering how it looks in action? Check out this demo form.
Notes
- For advanced styling of the OCR Autofill widget widget, you can add your own custom CSS code under the Custom CSS tab in the Widget Settings. Our guide on How to Inject CSS Codes to Widgets walks you through everything.
- You can also configure the widget properties, like alignment, labels, size, visibility, and more, to control how it looks and behaves on your form. Check out our guide on How to Access and Configure the Question Properties of a Widget to learn more.

Send Comment: