Sign’s Bulk Send feature allows you to send the same Sign Document to multiple recipients at once. Instead of sending documents individually, you can upload a CSV or Excel file containing recipient information and send signature requests in bulk.
This guide explains how to prepare your recipient list, upload it to Sign, configure signer information, and send your documents.
Bulk Sending Sign Documents
Before you begin, make sure you have a Sign Document ready to send and a CSV or Excel file containing your recipients’ names and email addresses.
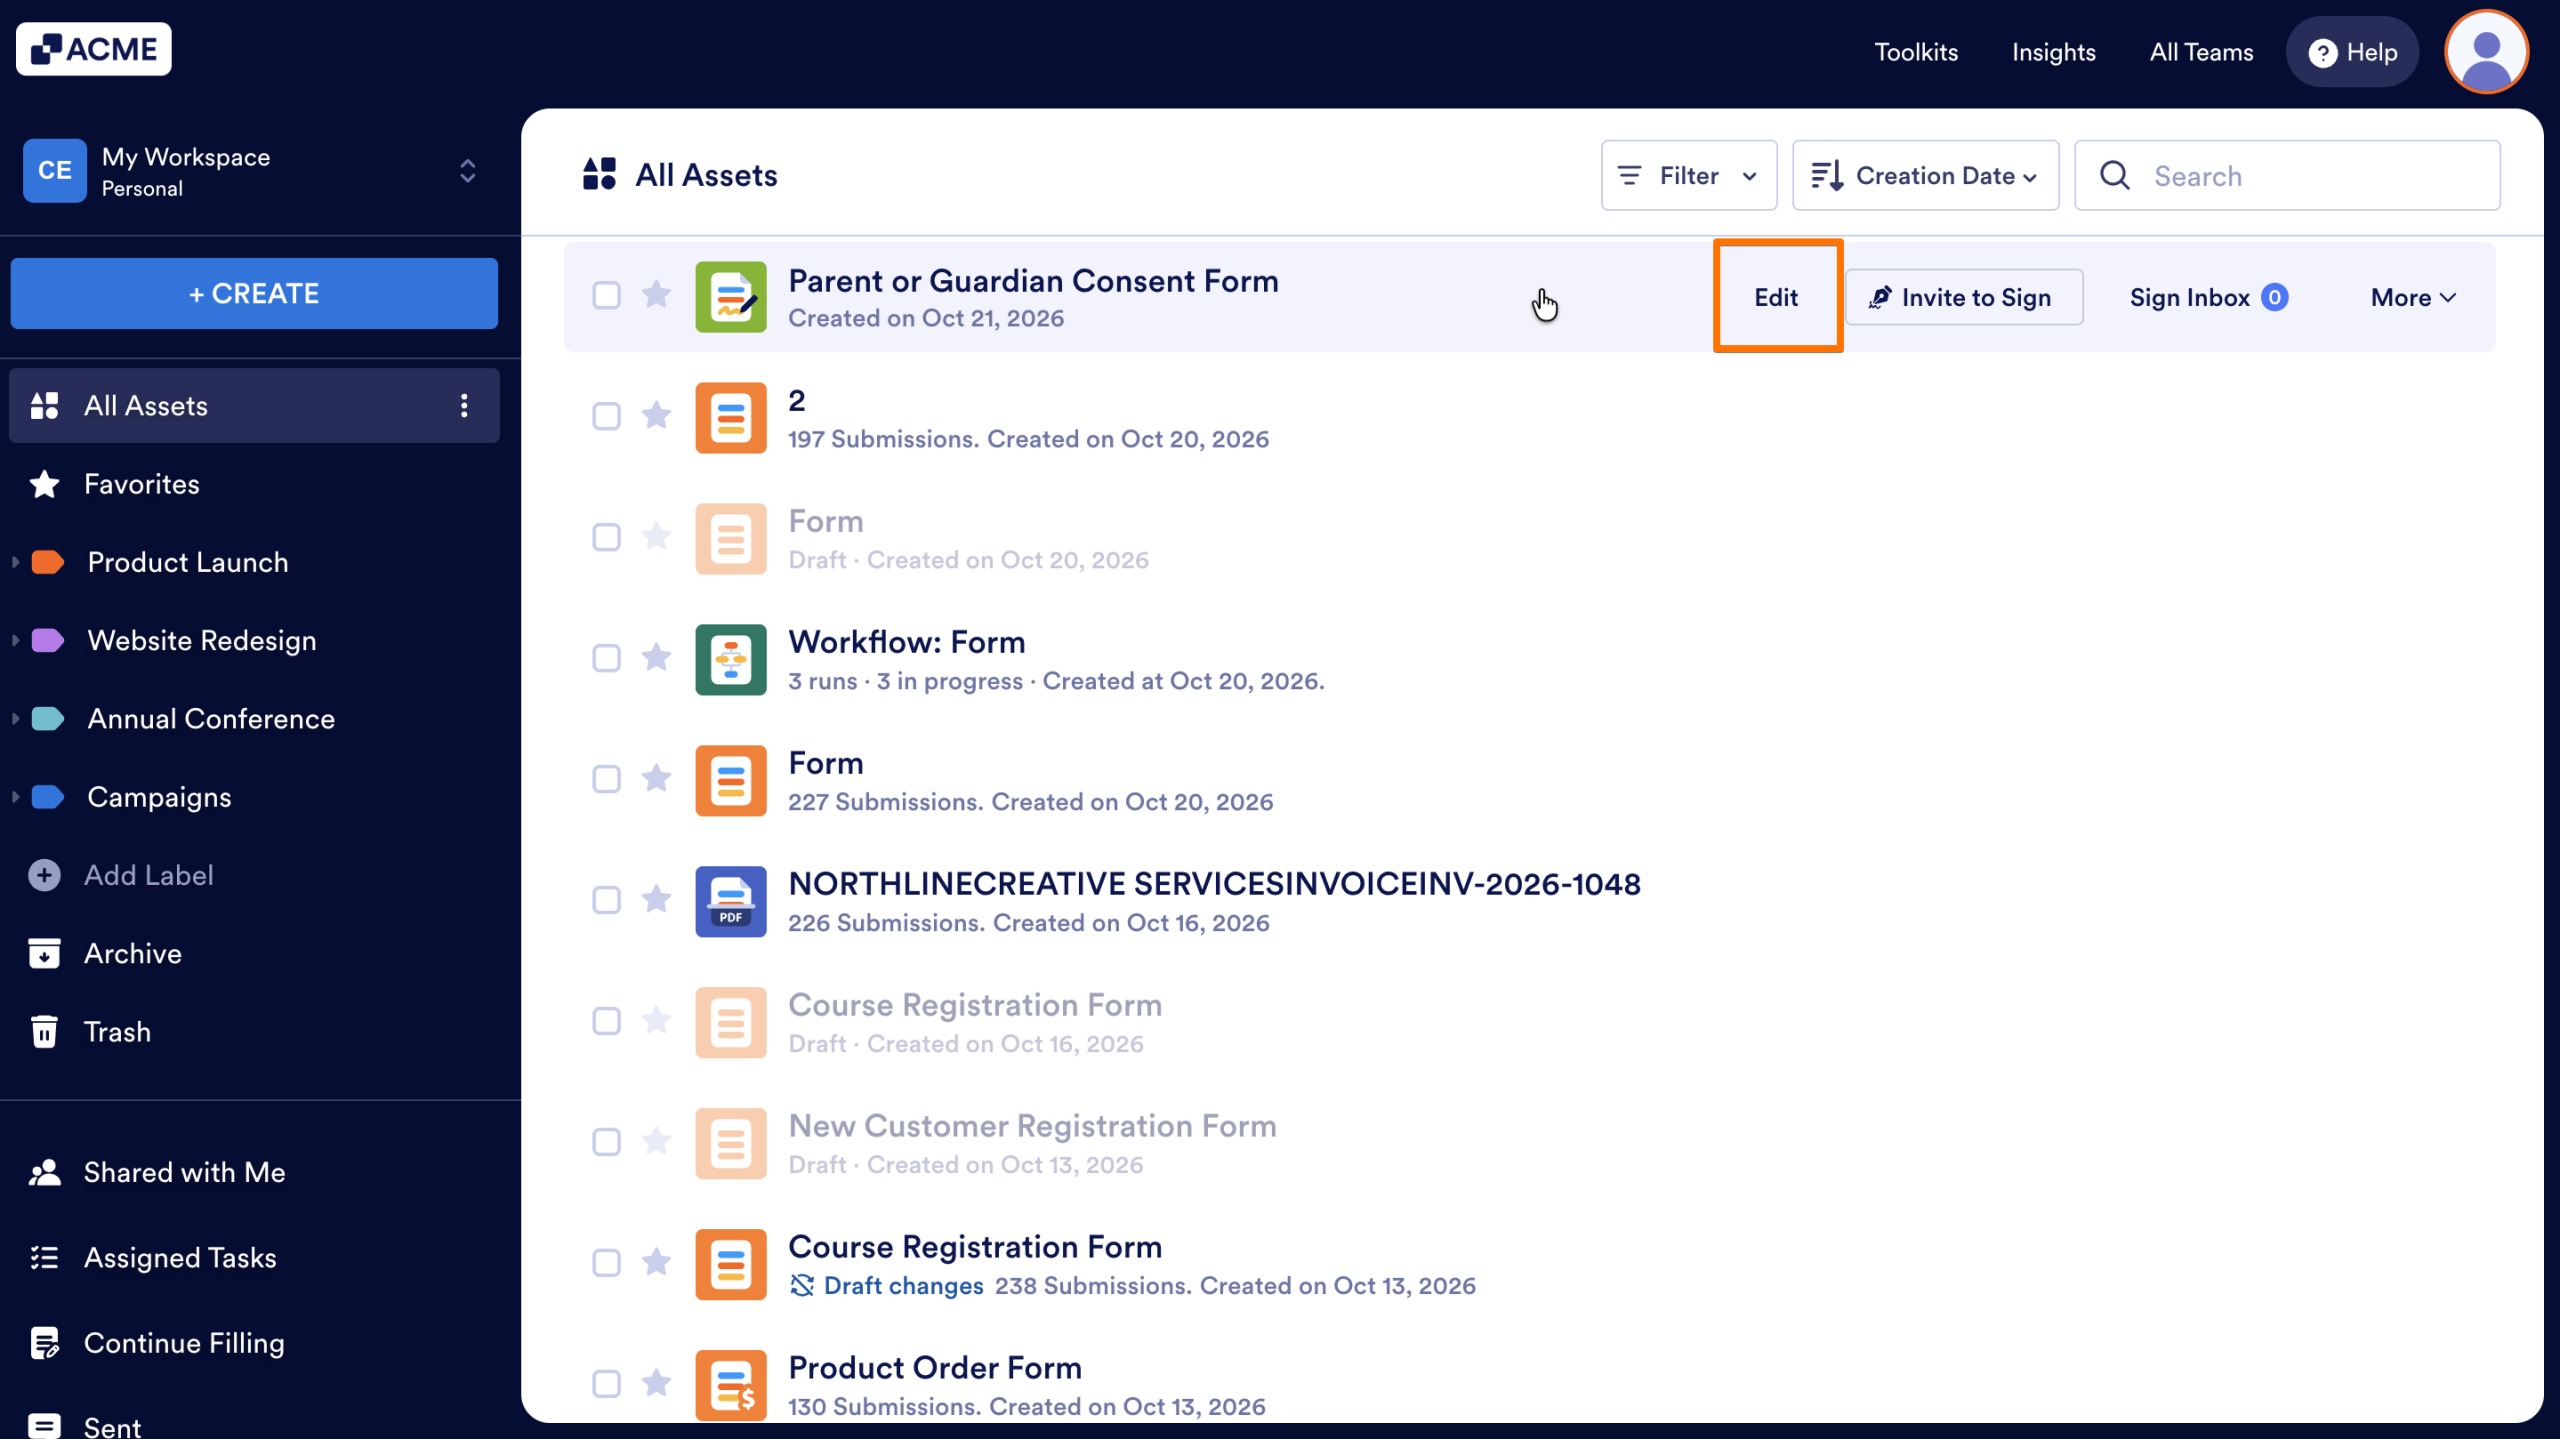
- In Workspace, hover over the sign document you want to send and click on Edit.
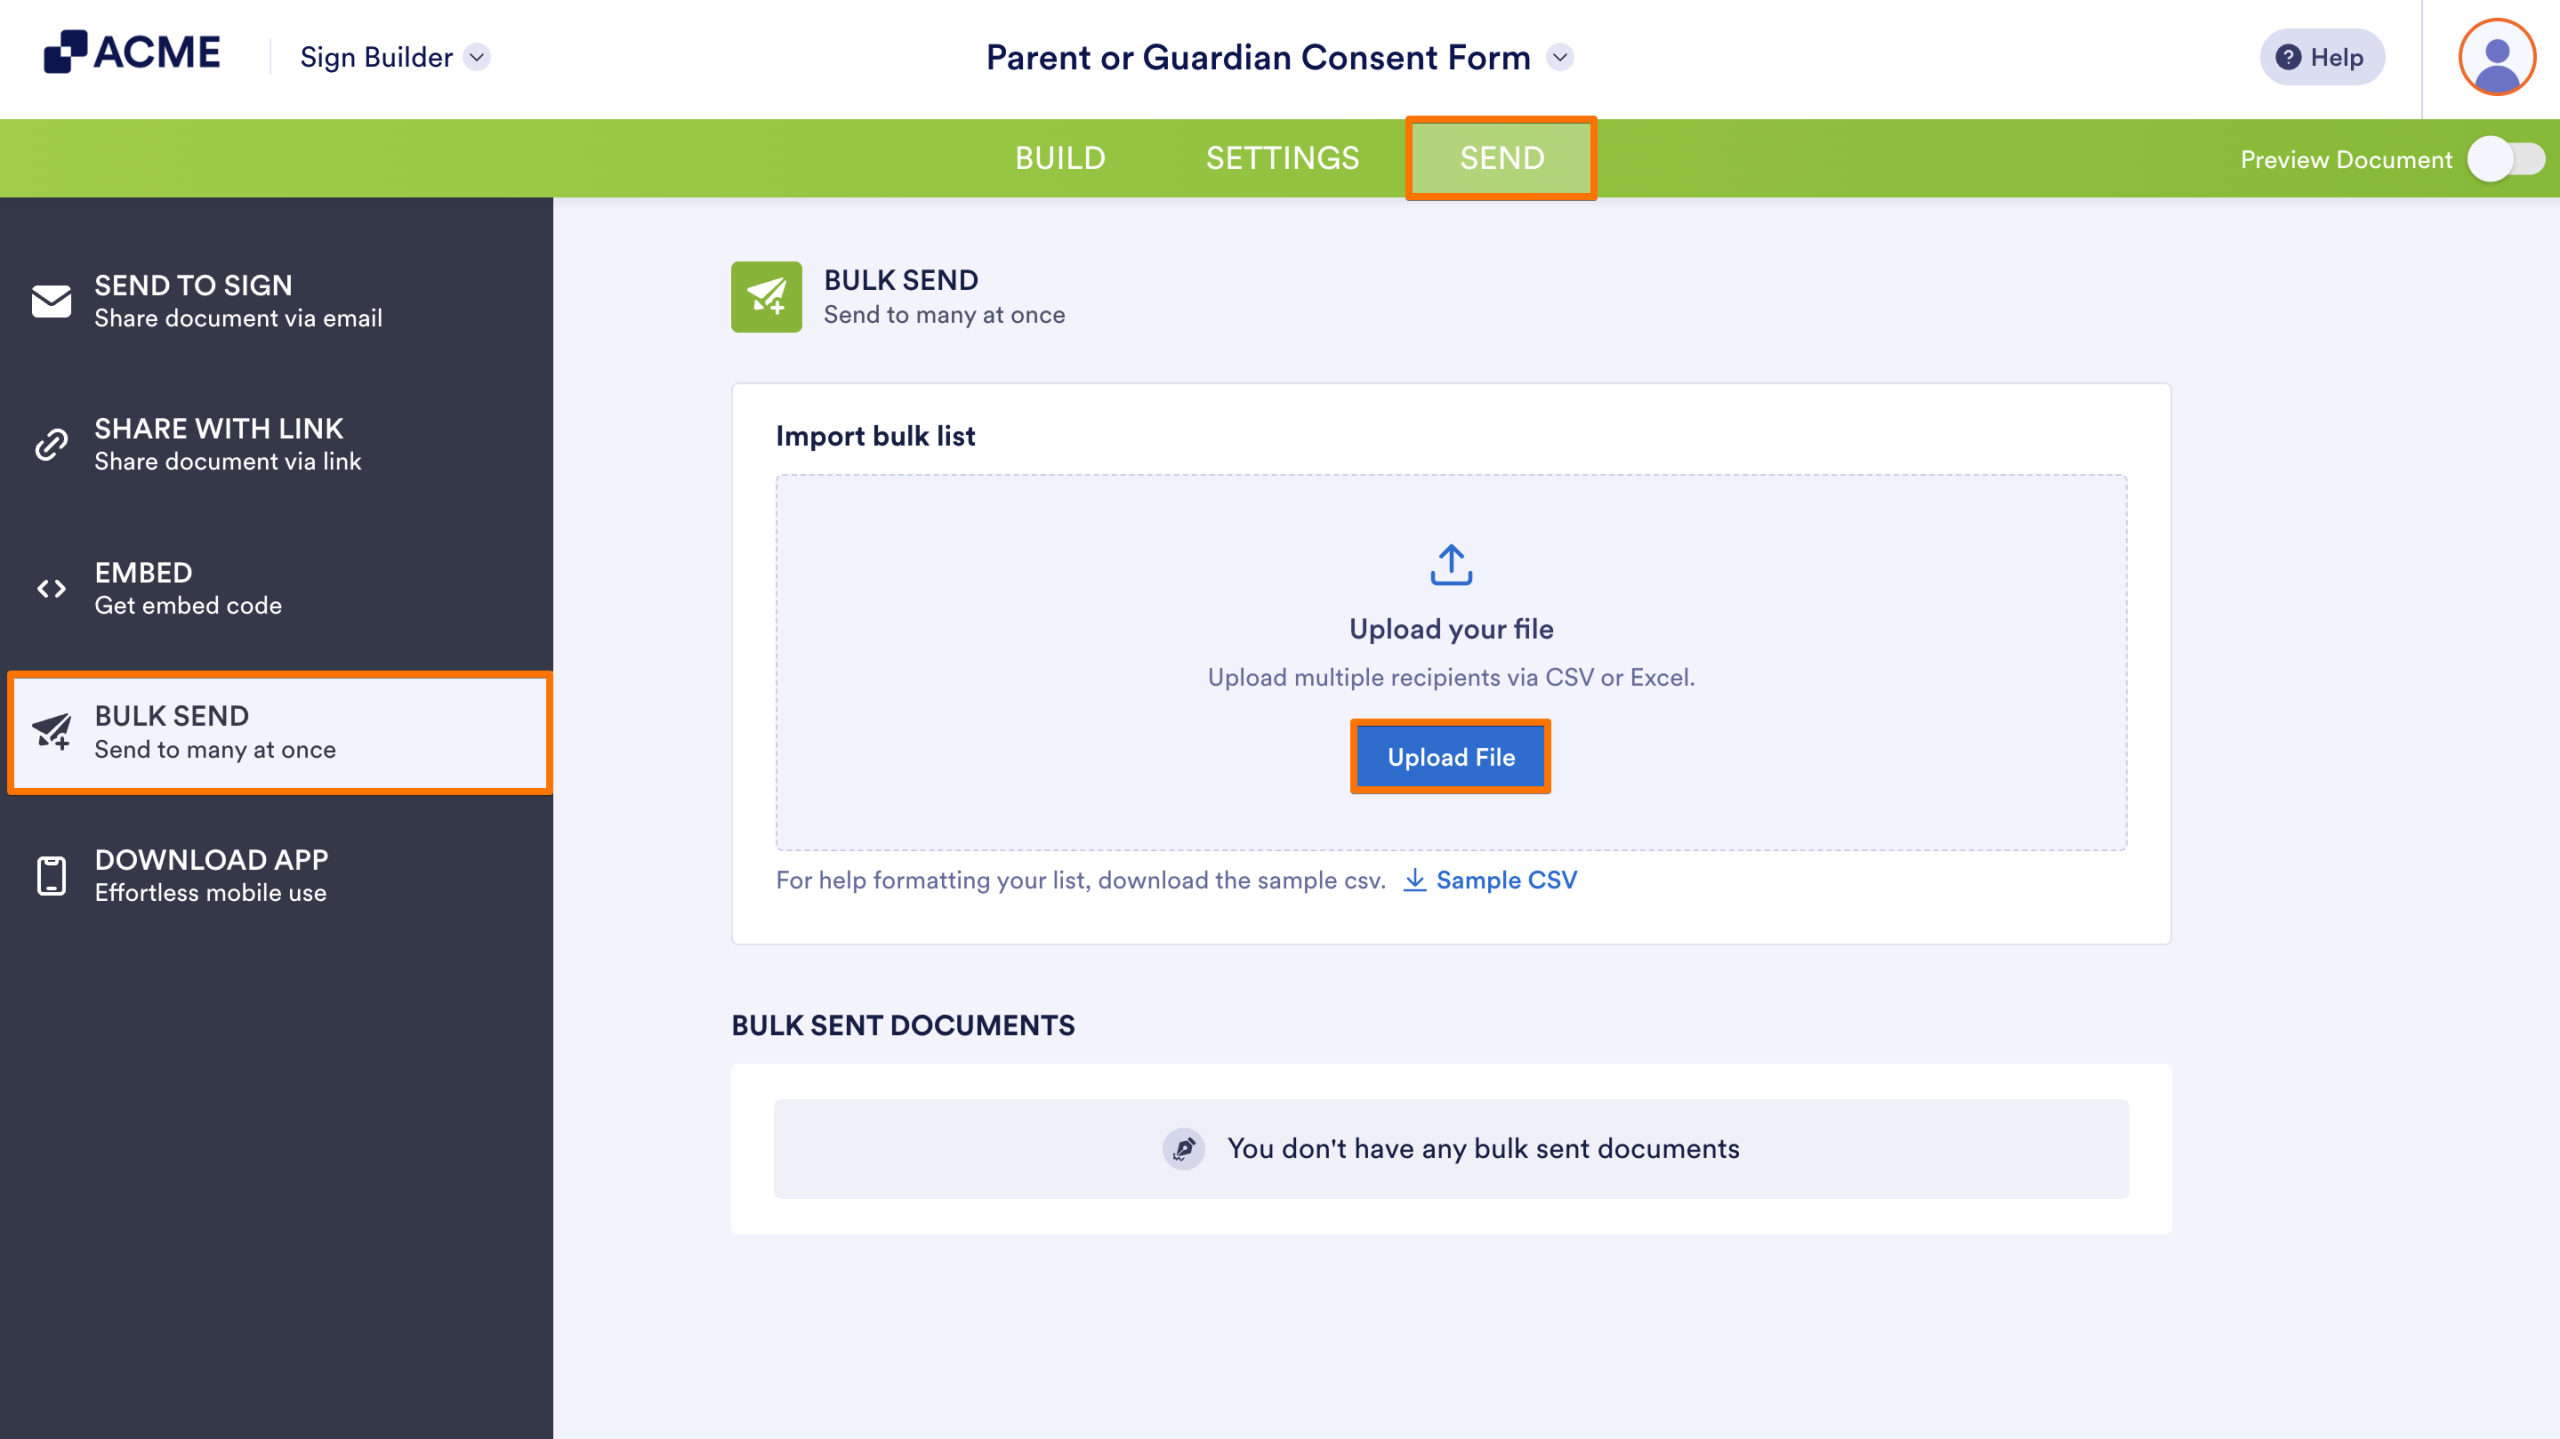
- In Sign Builder, click Send in the navigation bar at the top.
- Select Bulk Send from the menu on the left.
- Under Import bulk list, click Upload File and select the CSV or Excel file containing your recipients.
Note
If you need help formatting your recipient list, click Sample CSV to download a template.
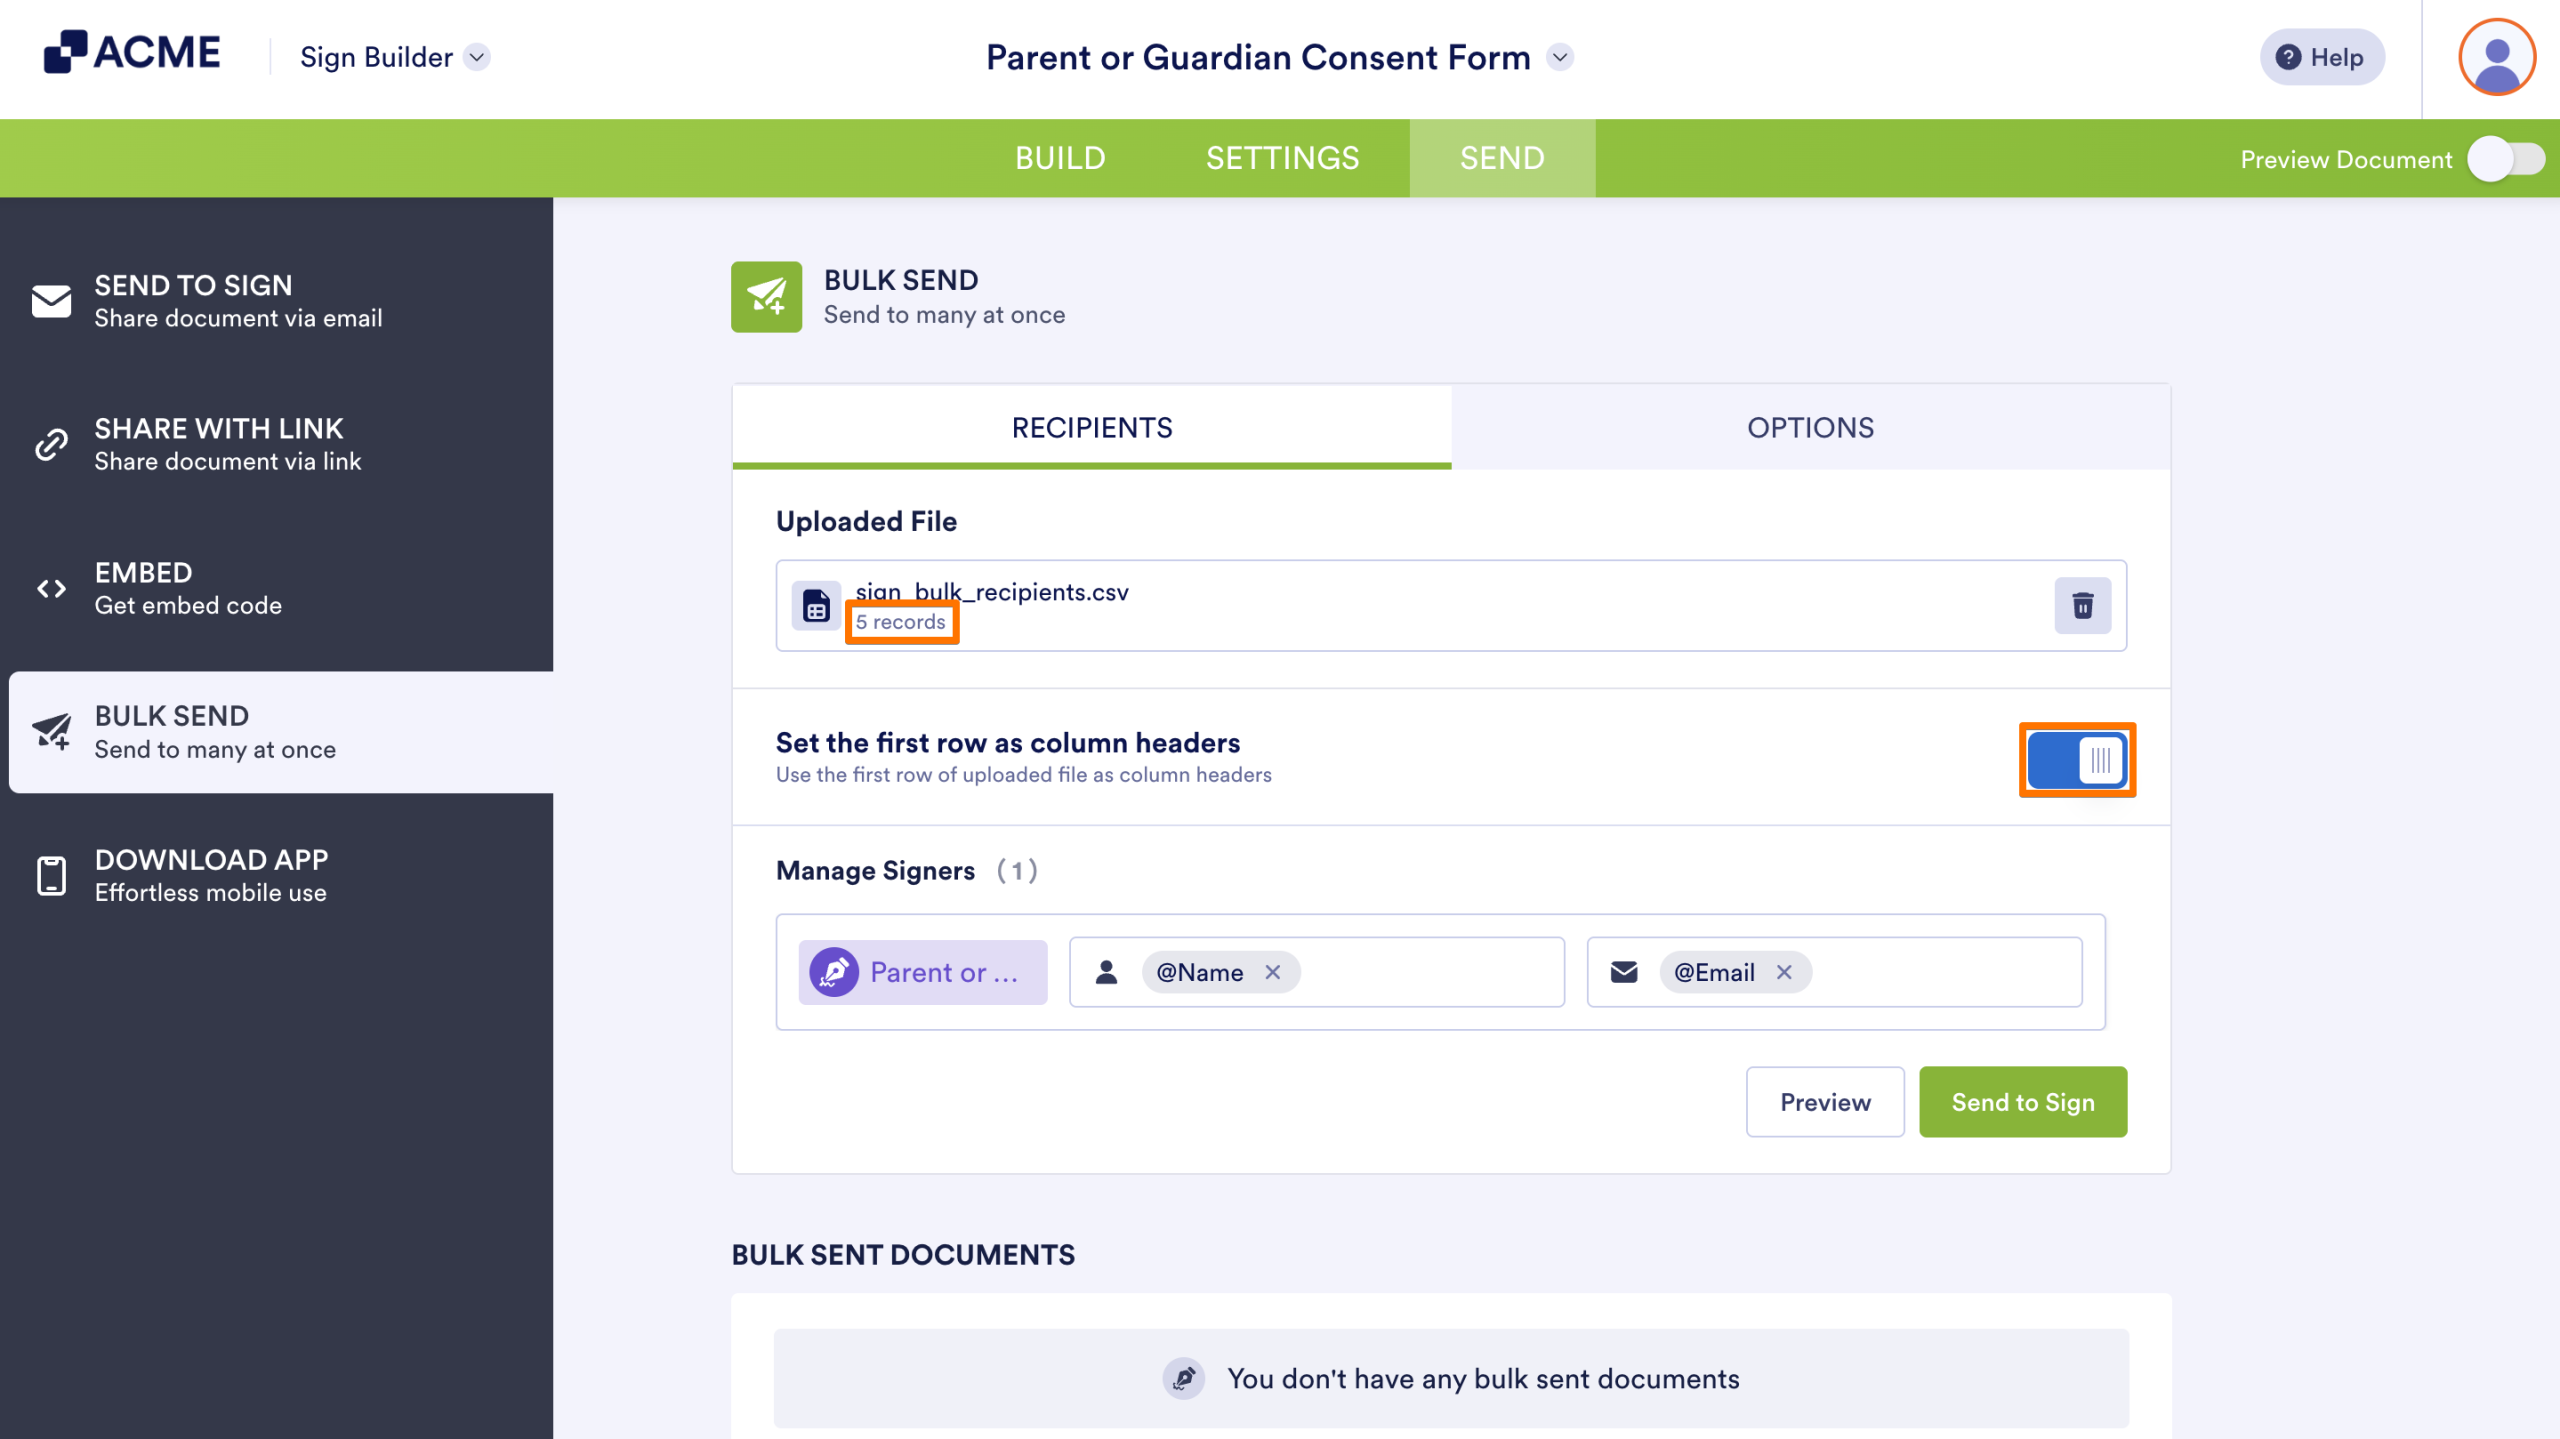
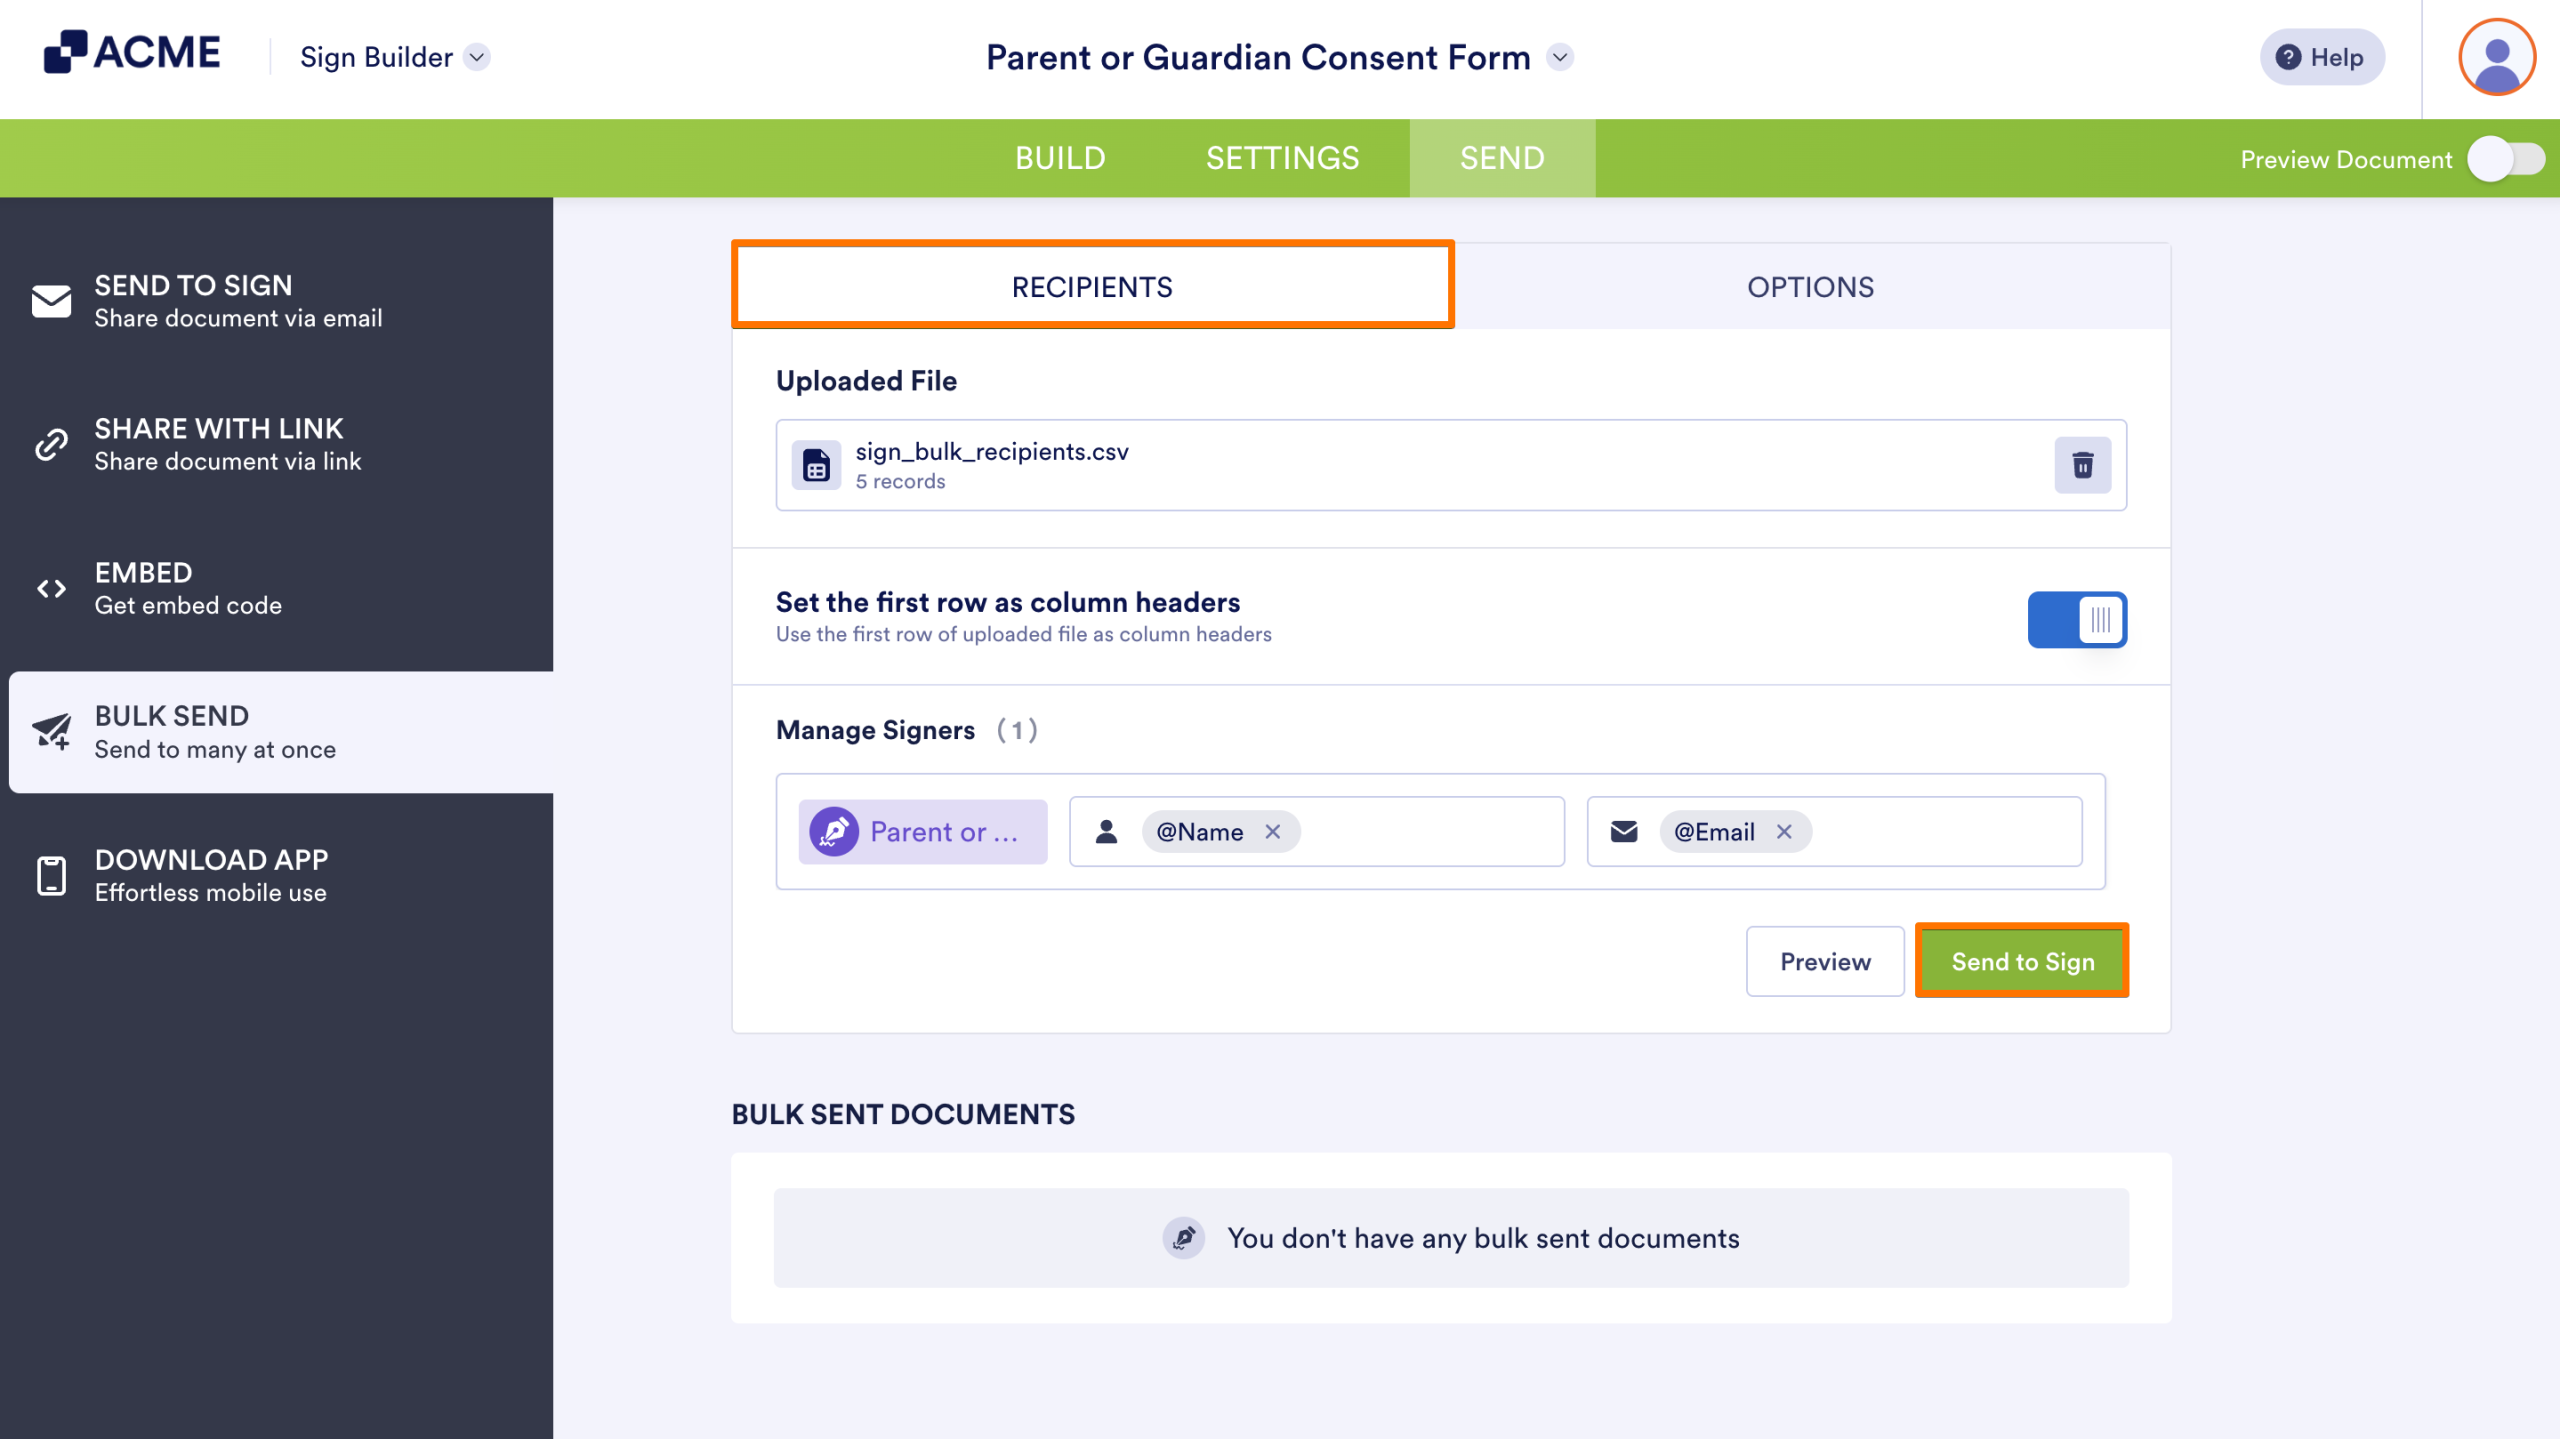
- Next, confirm that the correct file has been imported and check the number of records.
- Enable Set the first row as column headers if the first row of your file contains column names.
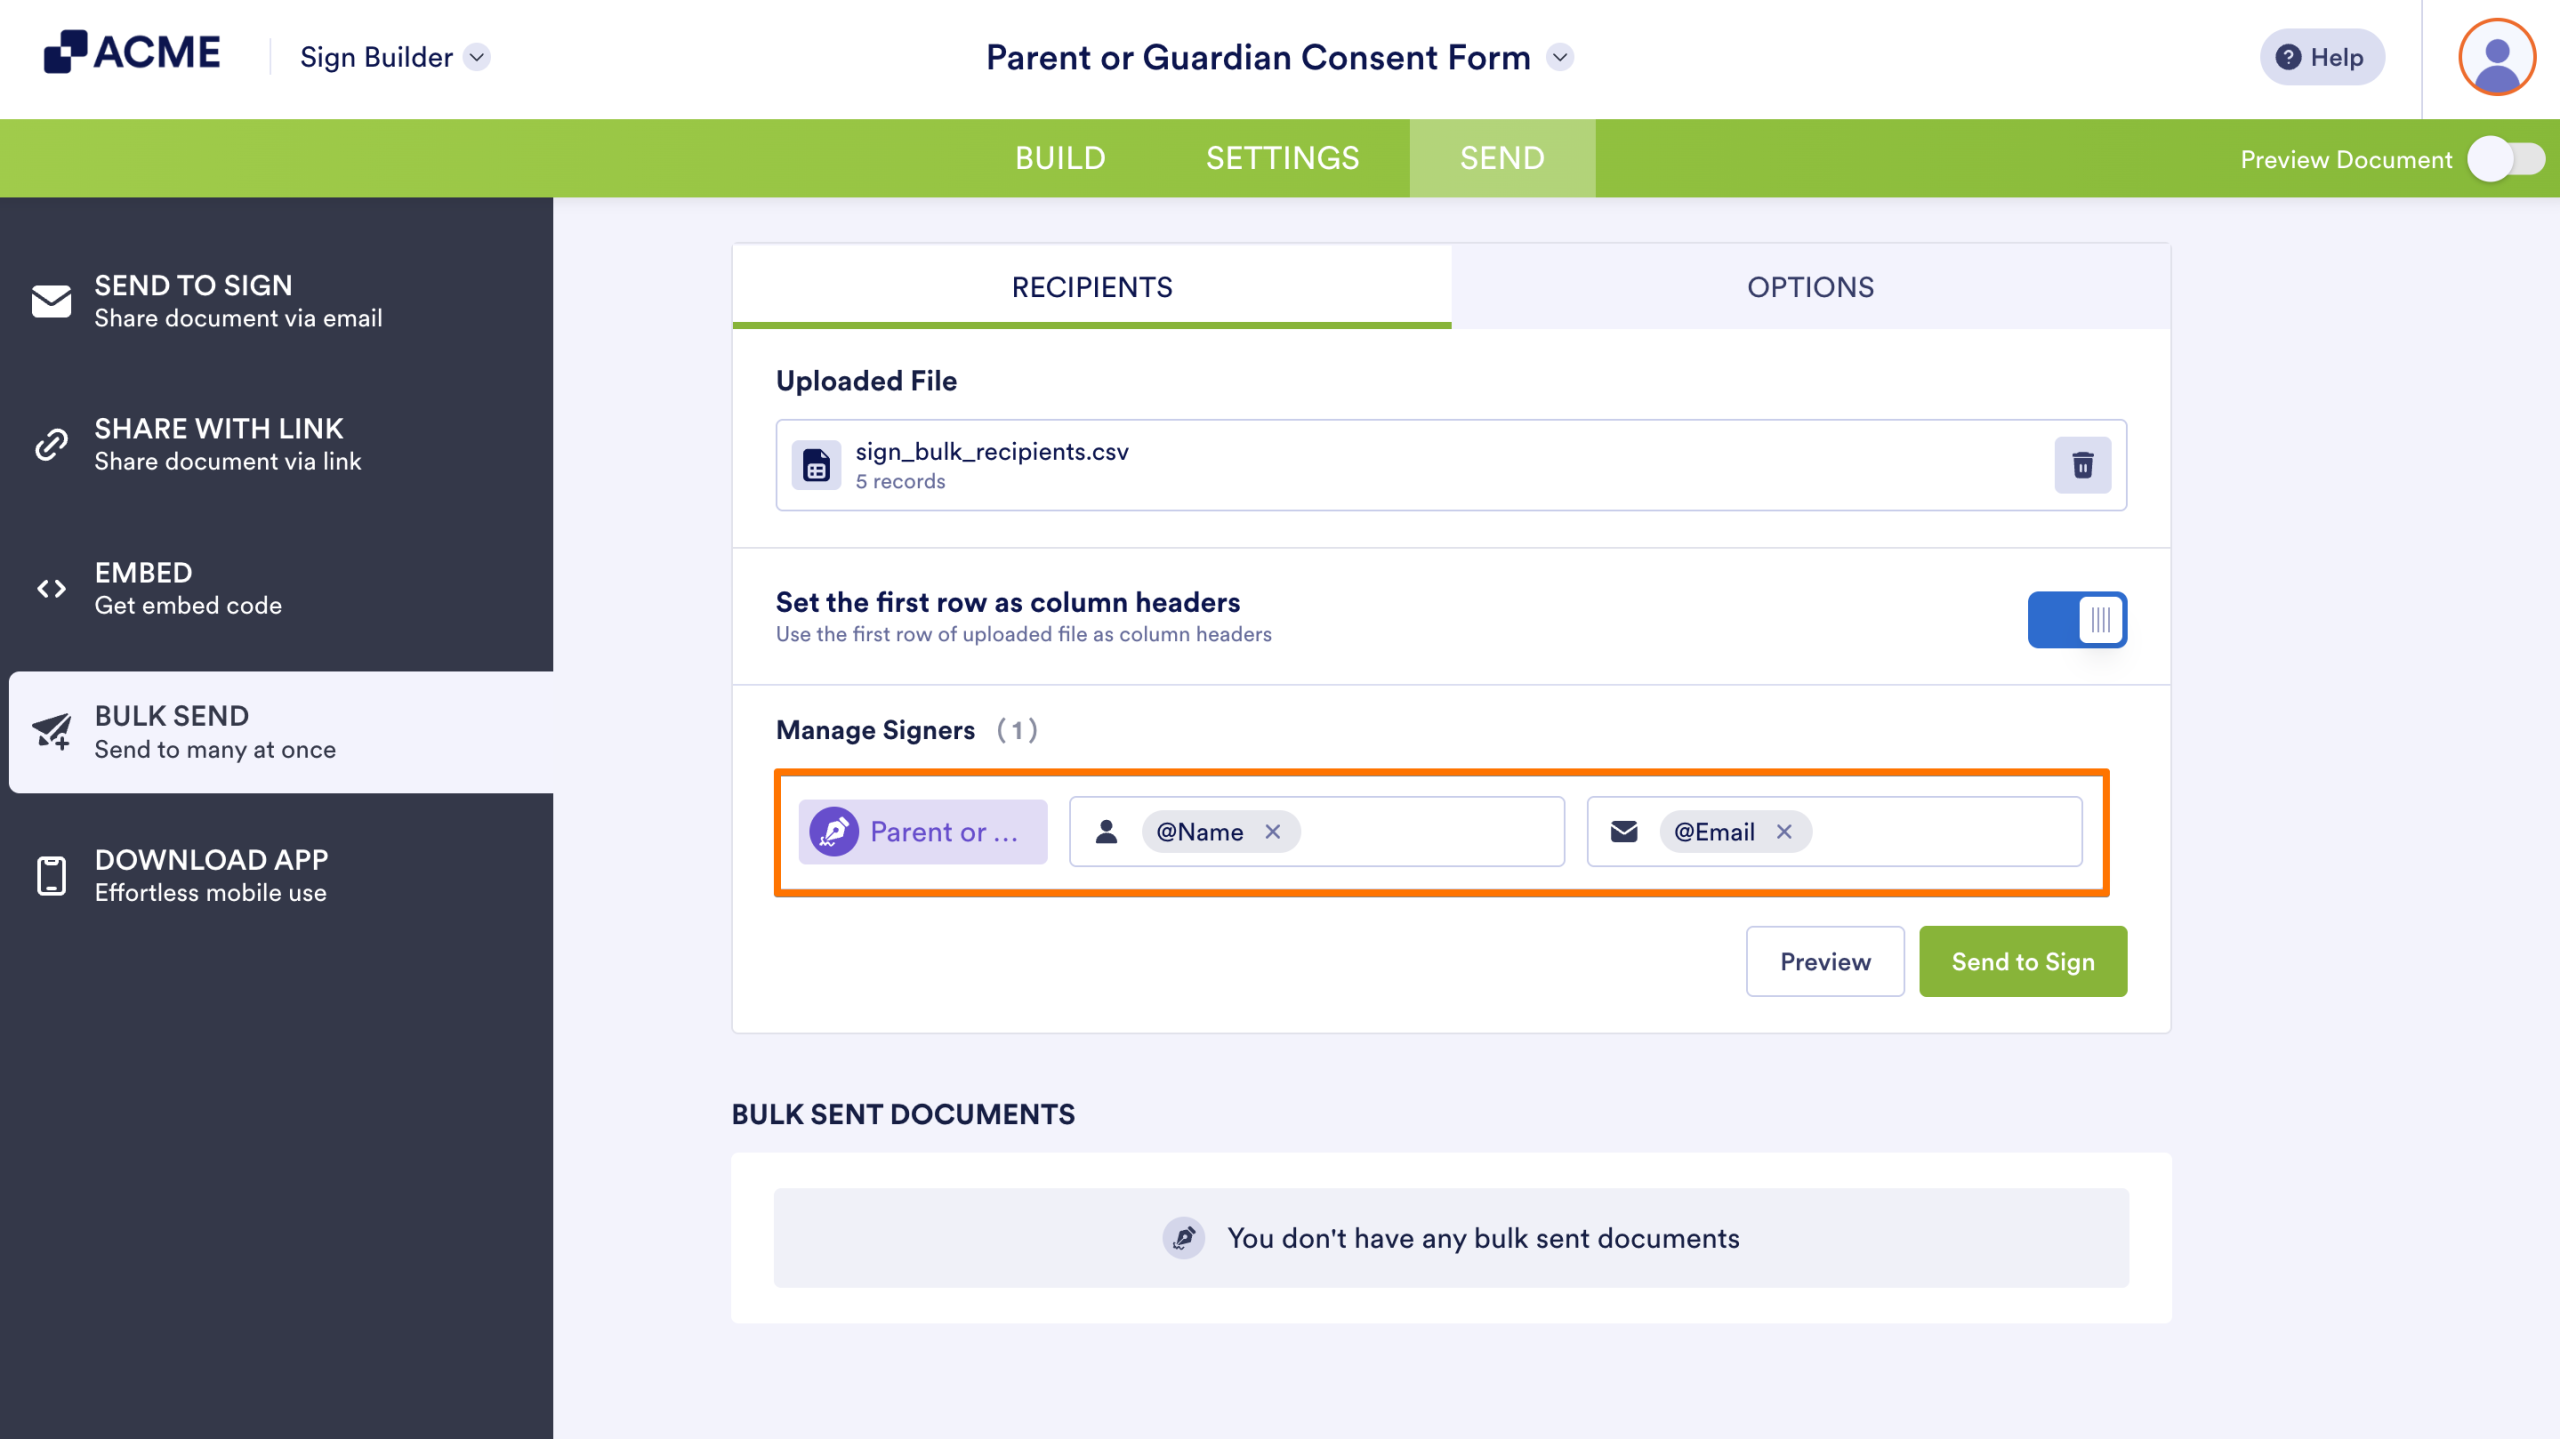
- Under Manage Signers, match the appropriate columns from your uploaded file to each signer’s Name and Email fields.
Note
If your document contains multiple signers, make sure the corresponding information is assigned to each signer.
- Click Preview to review the recipient information before sending.
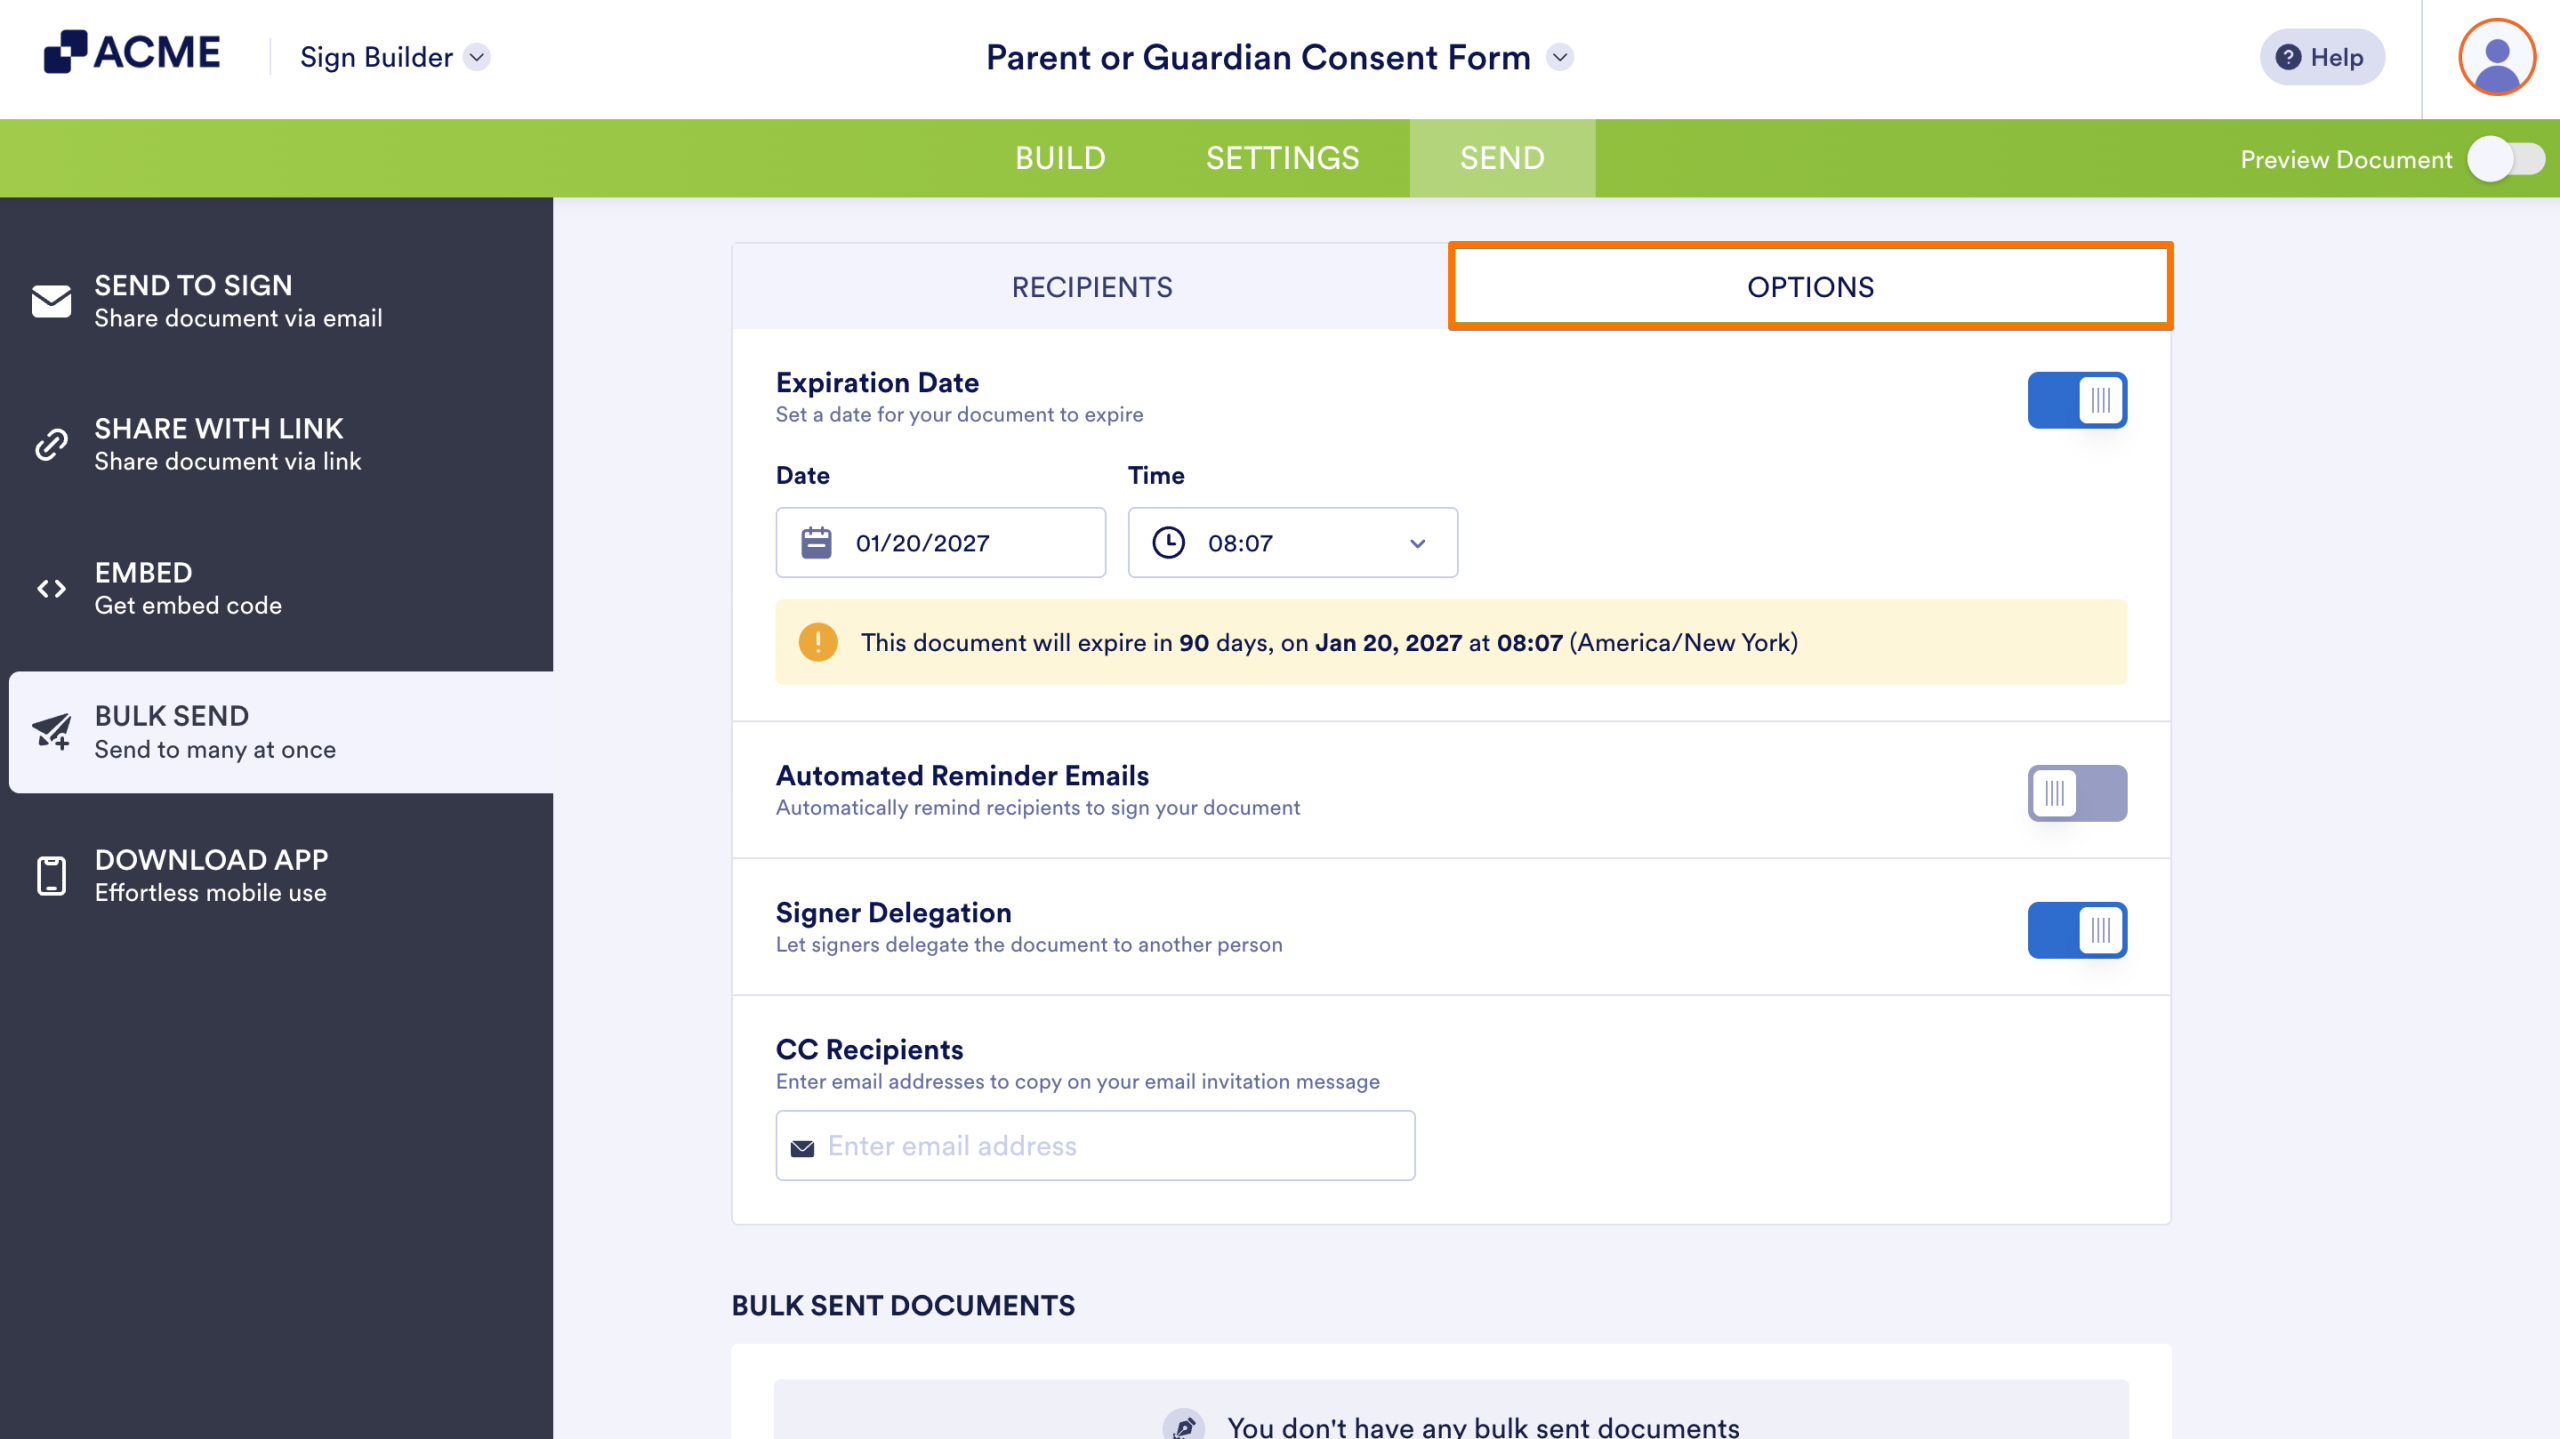
- Open the Options tab to review and configure the available sending settings.
- Return to the Recipients tab and click Send to Sign to initiate the bulk sending process.
Viewing Bulk Sent Documents
After initiating the bulk send, you can return to the Bulk Send menu to access the Bulk Sent Documents section. Hover over a bulk sent document and click on the Track button to see individual document status.
Tip
Before sending, double-check the email addresses and signer assignments in your uploaded file to ensure that each document is sent to the intended recipient.

Send Comment: