People can get busy and need to remember to take approval actions, so sending them reminders is important to keep the approval workflow moving. One of the components of Jotform Workflows is the ability to remind people of their pending tasks in the overall approval process.
Here are the steps to setting up an approval reminder email in your workflow:
- In Workflow Builder, click on the Gear icon on the right of the Approval or Approve & Sign element.
- Next, go to the Advanced tab of the Approval Properties.
- Scroll down to the bottom and toggle the Send Reminder Emails to the On position.
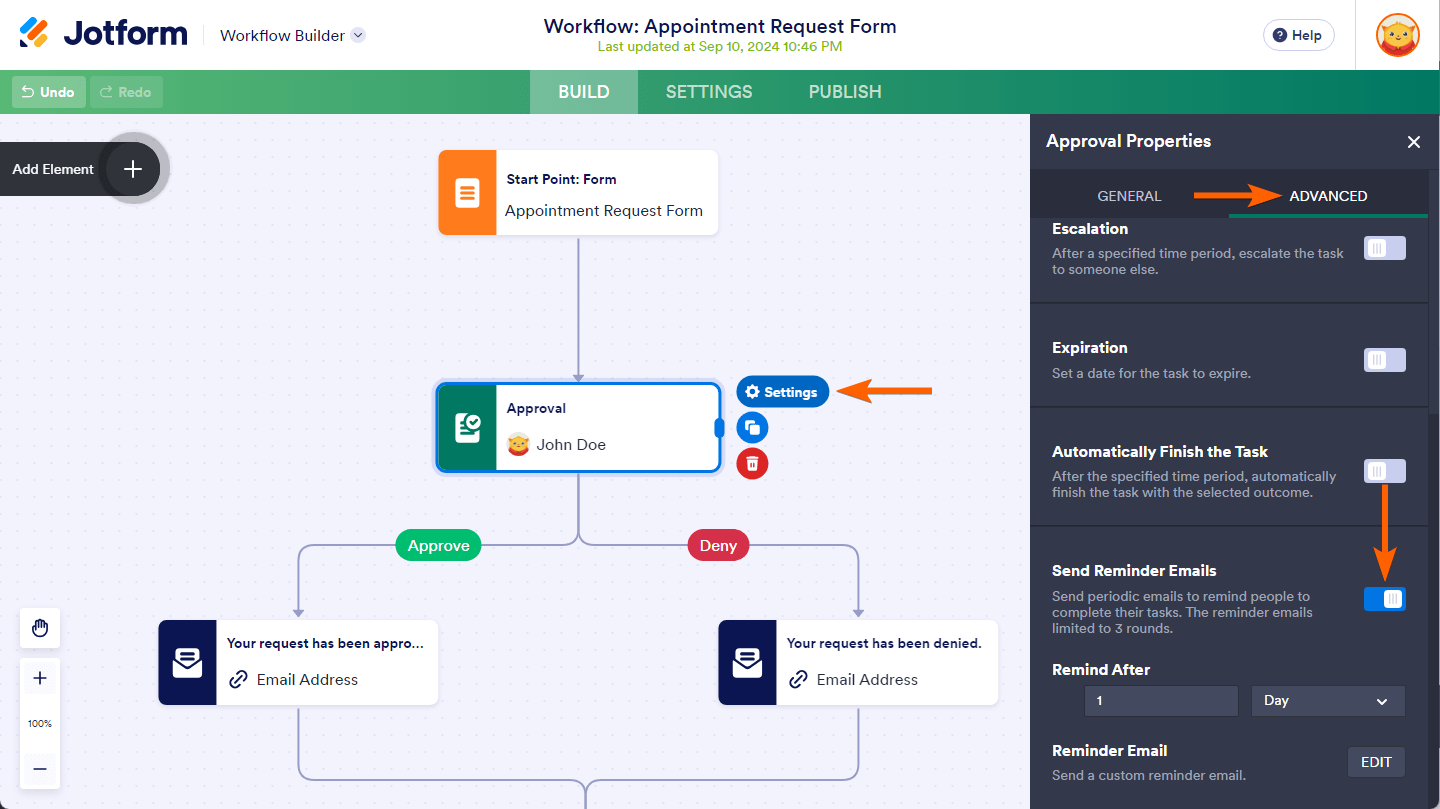
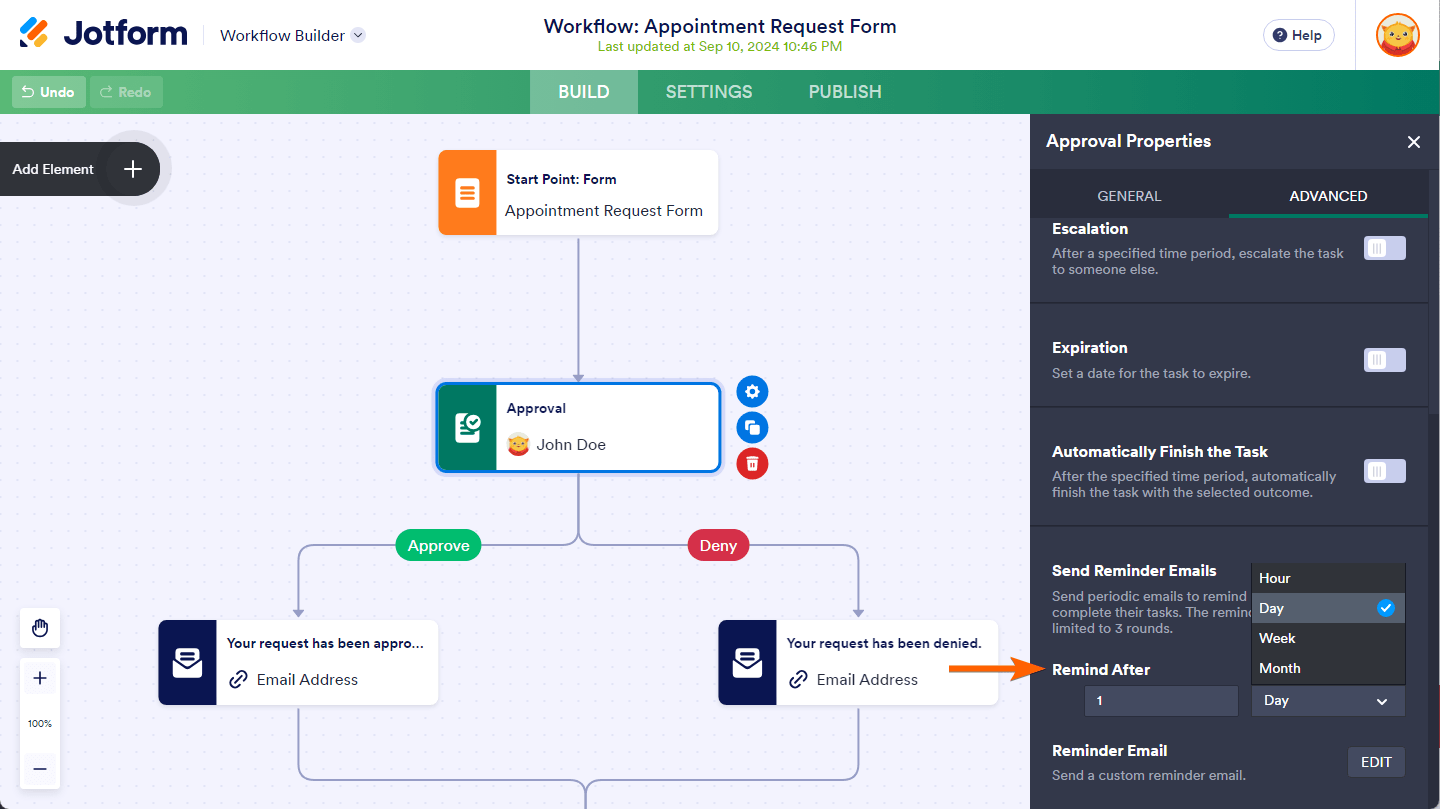
- Under Remind After, enter a number in the first box and select Hour, Day, Week, or Month schedule in the dropdown menu next to it to set a time interval for the approval reminder emails.
Approval Reminder Email Properties
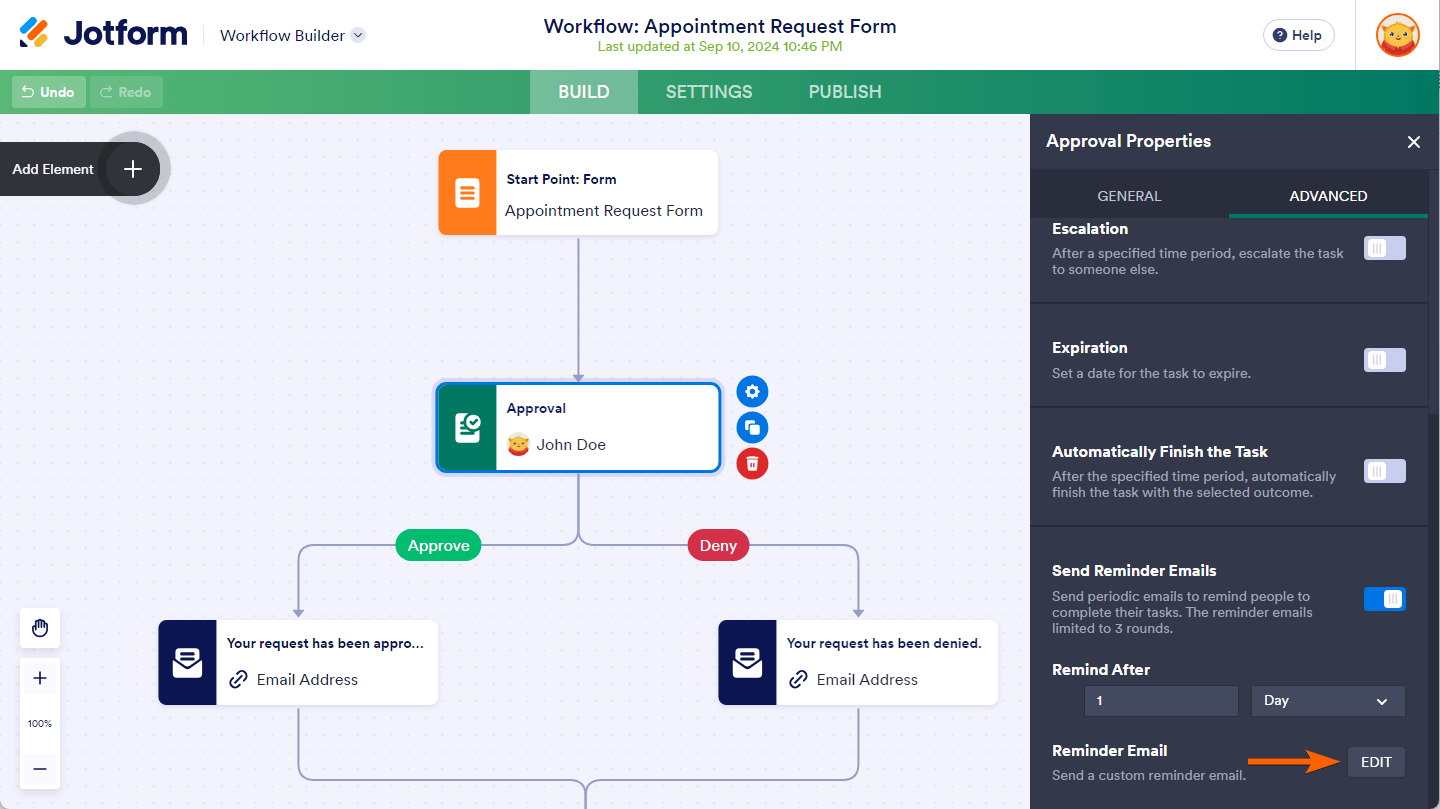
You can customize the approval reminder email in the Approval Reminder Email Properties. To access it, click the Edit button that appears at the bottom when you toggle on the Send Reminder Emails property.
You’ll find three tabs in the Approval Reminder Email Properties window: Email, Sender, and Advanced.
Note
You must click on the Save button in the Approval Reminder Email Properties window for changes to take effect.
On the Email tab, you can personalize the subject and content of the approval reminder email. To make it more engaging, use the Form Fields dropdown menu to include form field values in the Email Subject and Email Content. Add approval comments from the Approval Fields dropdown menu.
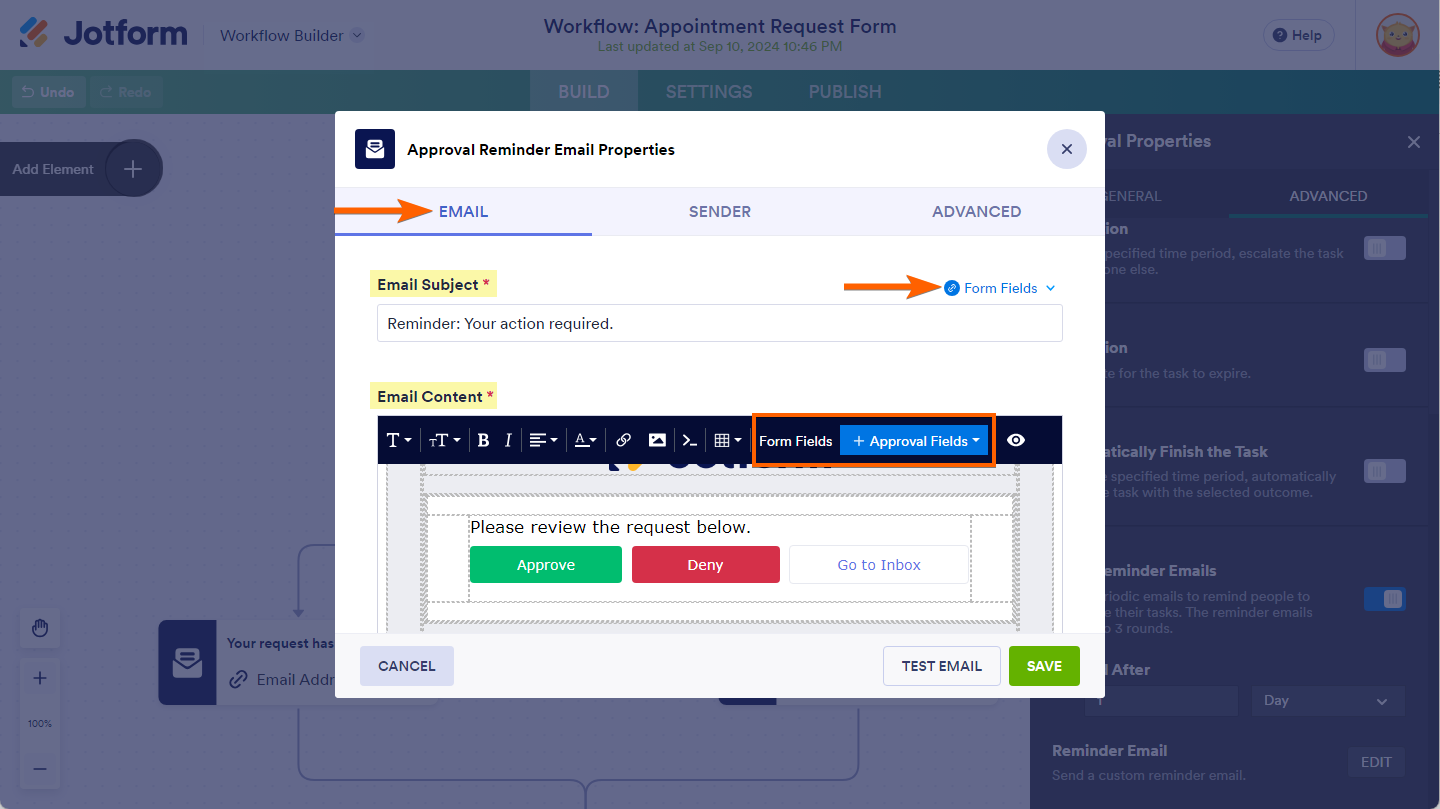
Show/Hide Approval Actions. To include or remove the Approval and Go to Inbox buttons in the approval reminder email, click on the Eye icon in the editing toolbar, then check or uncheck the box to the left of the approval actions in the dropdown menu.

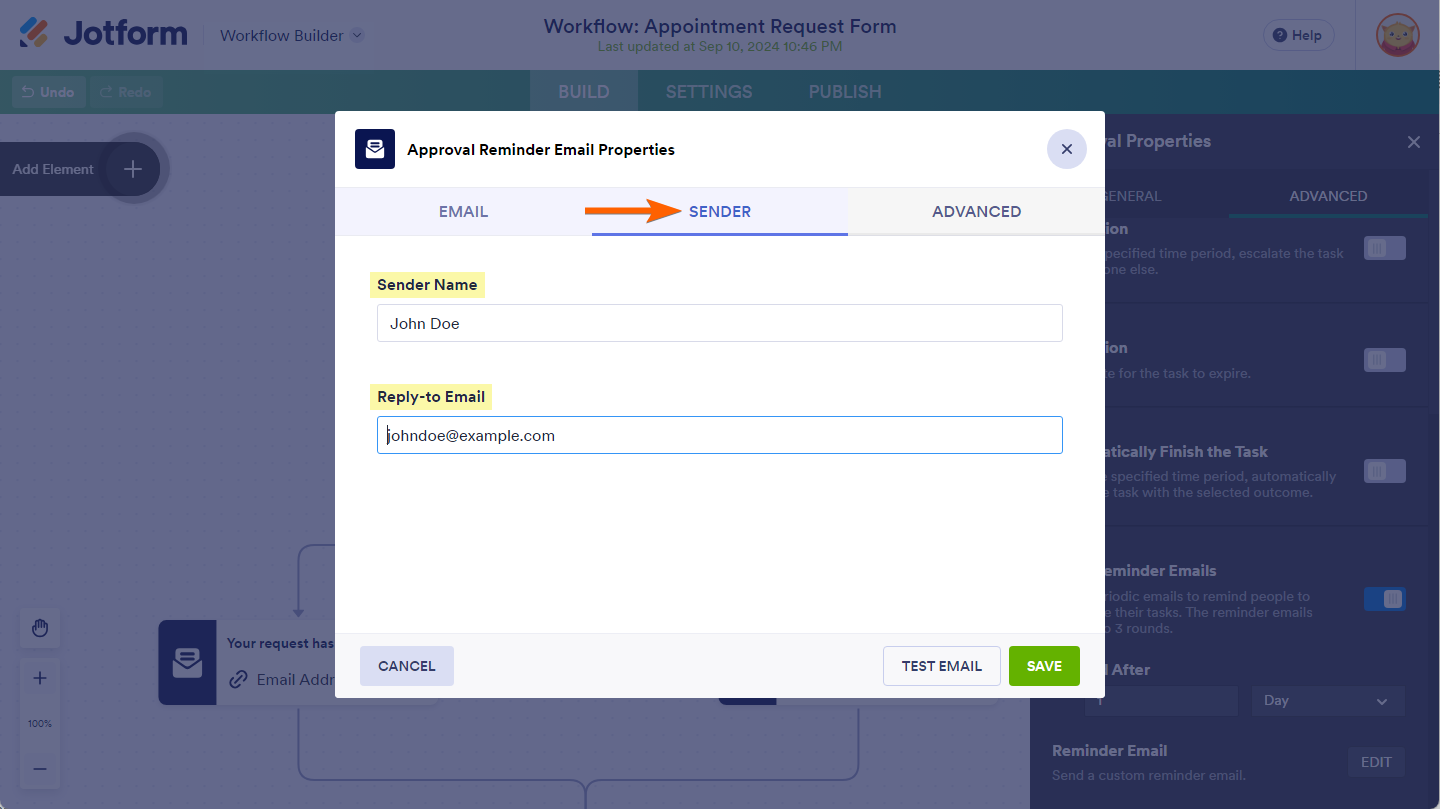
Sender
You can specify the sender name and reply-to email for the approval reminder email on the Sender tab. Enter the details in the Sender Name and Reply-to Email fields, respectively.
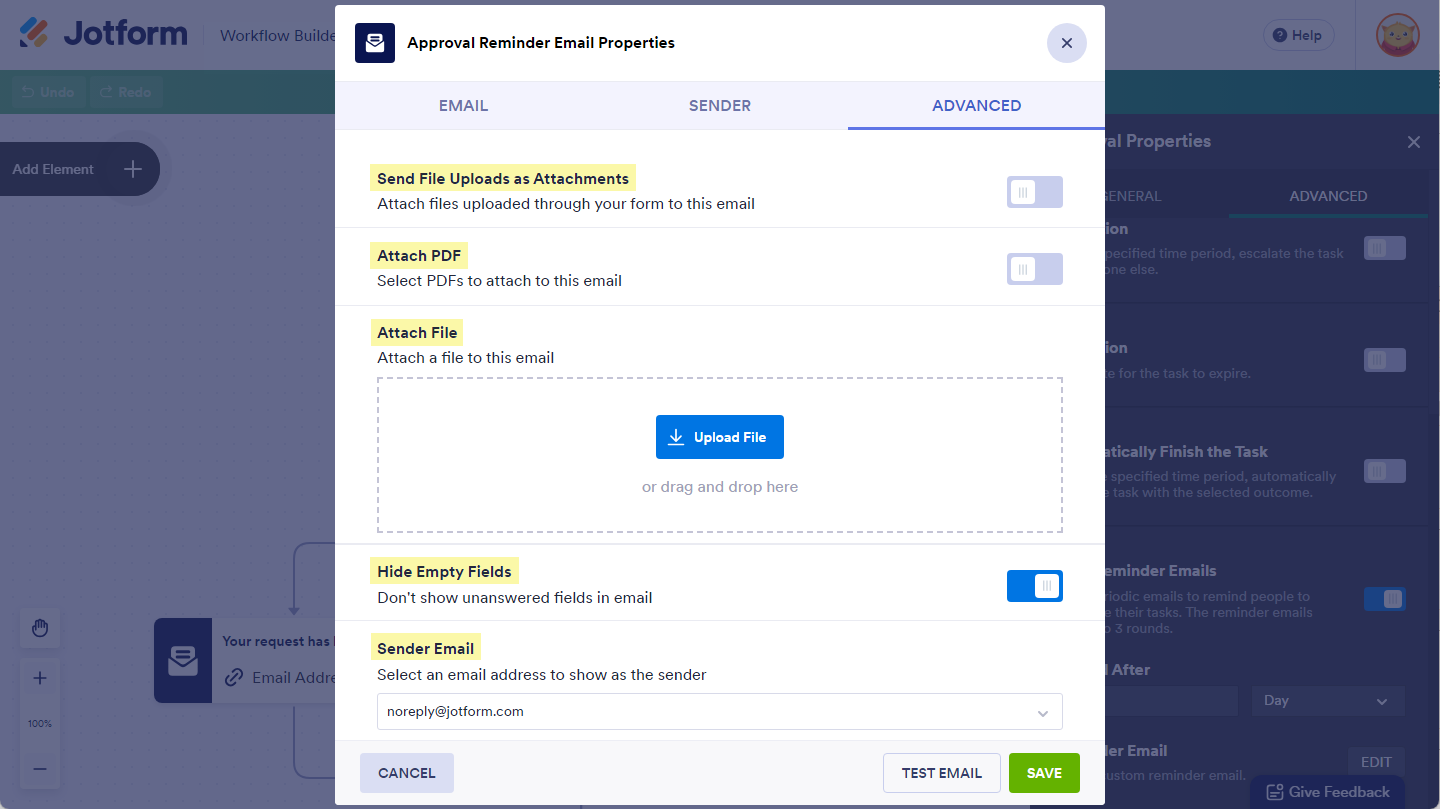
Advanced
On the Advanced tab, you can manage different file attachment options for the approval reminder email. Additionally, you can automatically hide empty form fields in the email content and set your preferred sender email address.
Note
There is a 5 MB limit for attachments on emails sent from Jotform’s default sender email address. If the total size of all files exceeds that limit, they won’t be attached to the approval reminder email.
Here’s a summary of what each Advanced setting for Approval Reminder Emails does:
- Send File Uploads as Attachments — Enable this to include files uploaded to your form as attachments to the approval reminder email.
- Attach PDF — Enable this to send the PDF copy of the submission to the approval reminder email as an attachment.
- Attach File — This allows you to upload and attach external files to the approval reminder email.
- Hide Empty Fields — Keep this enabled to exclude form fields that were left empty during submission from the approval reminder email content.
- Sender Email — Initially set to one of Jotform’s default sender email addresses. You can select a custom sender email address by adding it to your account using SMTP. See How to Set up SMTP for a Form for additional information.
Note
The Hide Empty Fields option only works for the data table that is part of the default approval reminder email template. You can still add text, new rows, and additional columns to the table, but remember to keep the original Field Label and Field Tag columns intact.

Send Comment:
2 Comments:
March 3, 2025
With these reminder emails, can you set up specific days of the week that the reminder does not get sent out? (ex. Monday-Friday)
May 20, 2023
good