

To put it simply, Salesforce’s customer relationship management (CRM) software is essentially a giant database where you can manage any kind of information. Salesforce allows you to store information in one place, so you can follow up on leads, manage projects, and eliminate data silos.
Salesforce makes it possible to connect all your data by keeping it in the cloud, meaning any contact information the sales team collects for leads can be seen by the marketing team; thus, giving your teams more insight into each other’s work and increasing collaboration.
Getting the data from a contact form into Salesforce is necessary to make connections with contacts and, ultimately, make sales. But manually entering that data is a pain.
Jotform for Salesforce solves this problem. You can easily collect contact information with Jotform and automatically save it in your Salesforce database.
In this post, we’re going to talk about how to manage contact information in Salesforce and how to use Salesforce and Jotform to automate the process of turning your raw data into something useful.
Using a Jotform for Salesforce template
Want to automate your data-collection process in a matter of minutes? Of course you do!
Use one of Jotform’s 150 Salesforce templates to create a contact form. They are already integrated with Salesforce and mapped to Salesforce objects, so it’s a breeze to set up.
If you can’t find a template that fits your needs, you can use Jotform’s drag-and-drop Form Builder to create a form from scratch and tailor it to your liking — within Salesforce. You just have to manually map form fields to your Salesforce objects.
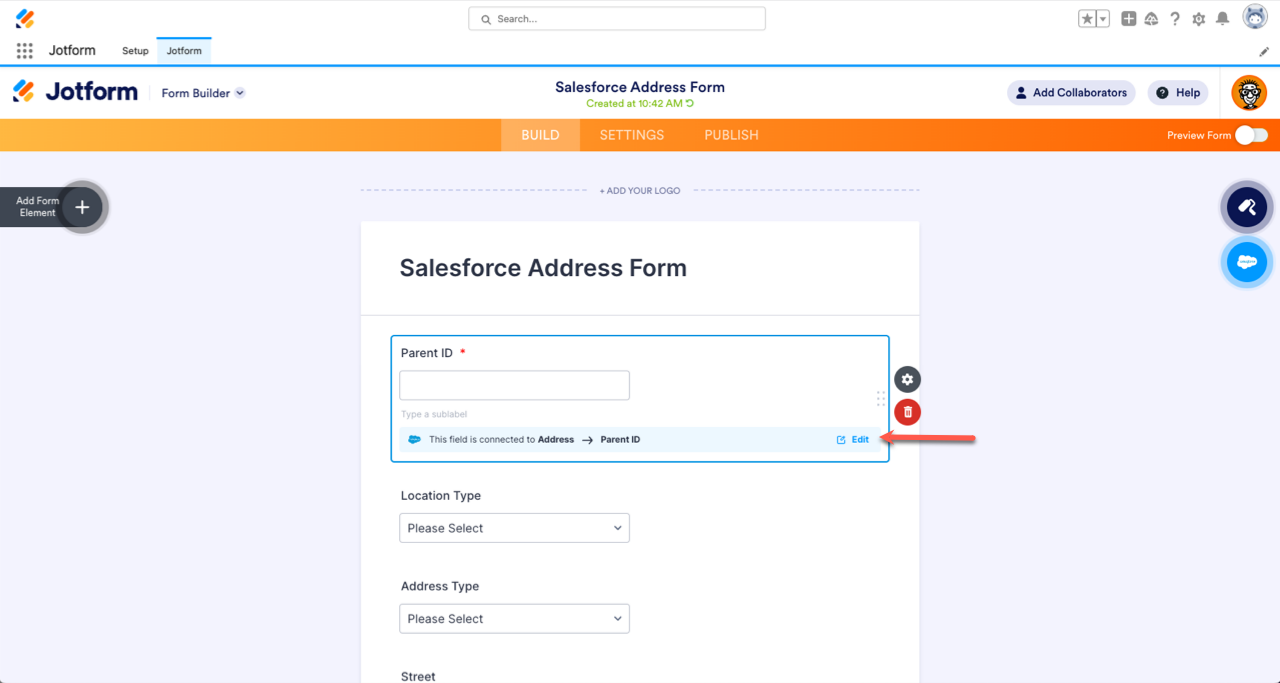
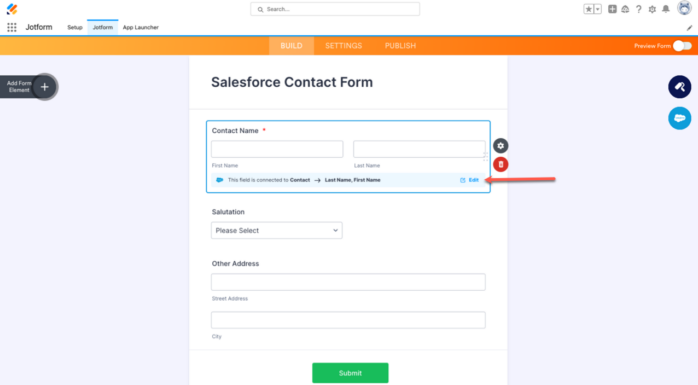
Luckily, once you’ve signed into Jotform for Salesforce, all you have to do is go to the Form Builder tab, click the cloud icon, and easily map your form fields to objects. You’ll know everything is mapped properly when you see a message indicating which Salesforce object the field is connected to.
How to submit contacts to Salesforce
To start with a little Salesforce vocabulary, an object is like a table of the data you collect (i.e., name, phone number, address). A record is a row in that table, and a field is a column. Once you create a few records, you’ll have a database. You can create custom objects and use objects that are already in Salesforce to create new records with your Jotform integration, but more on that later.
Keep on reading to learn how to automate contact collection and Salesforce data entry.
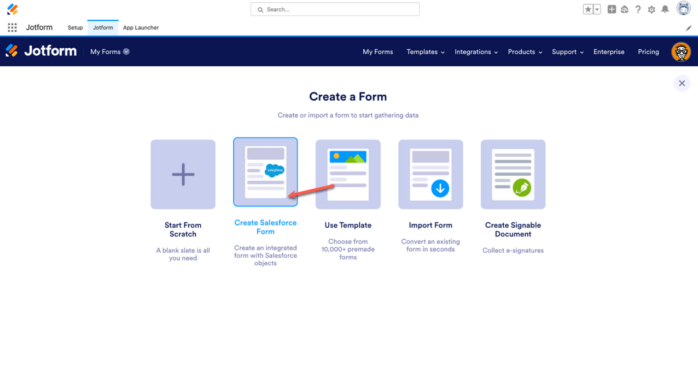
- When you create your form in Salesforce, make sure you select Create Salesforce Form.
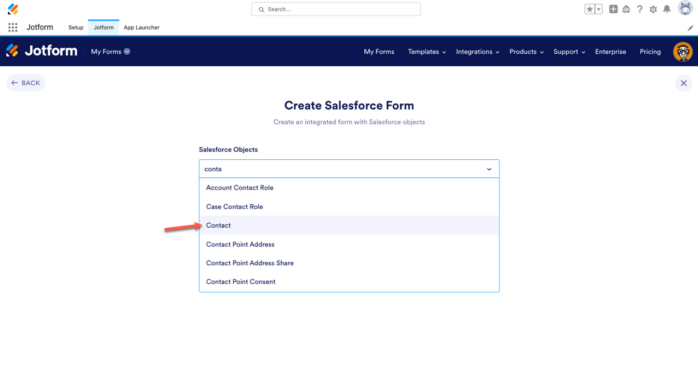
- Search for and select Contact from the Salesforce Objects dropdown menu.
- Select all the fields you want to add to your contact form. At least one field will already be marked as required so the automation can work properly.
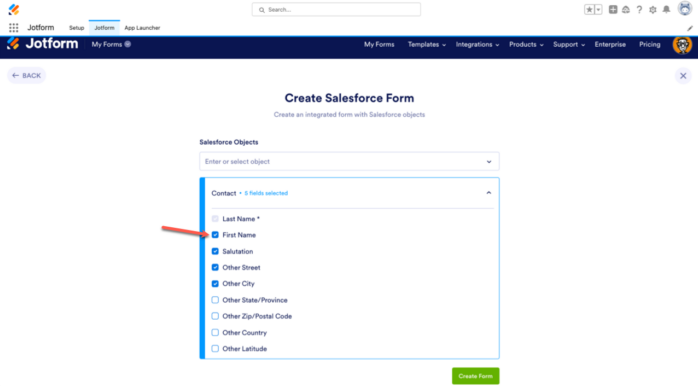
- Click Create Form, then click on your elements to make sure they’re connected to Salesforce.
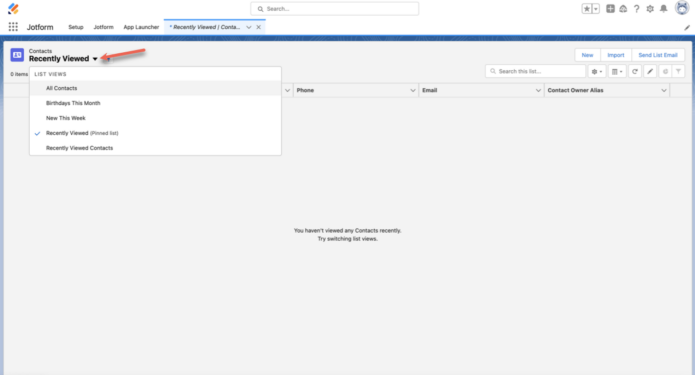
How to find your contacts in Salesforce
- After your submitters fill out your form, go back to Salesforce and click the 9-dot menu to open the App Launcher. Then search Contacts.

- Open the dropdown, and select All Contacts.
Tracking contacts with Jotform Tables
If you’re looking for another way to track your contacts or perhaps need a backup option, you can always check Jotform Tables. When you set up a form and collect information, that information is automatically recorded in Jotform Tables. And if you need a backup to track the projects that arise from the collection of contacts, you can easily customize your table to see where your coworkers or employees are with a task or if someone needs to follow up again.
With Jotform for Salesforce, you don’t have to leave Salesforce to view tables. All of Jotform’s functions are available in Salesforce. So getting to your backup information is hassle-free. To view your information in Jotform Tables, go to My Forms and select a form.
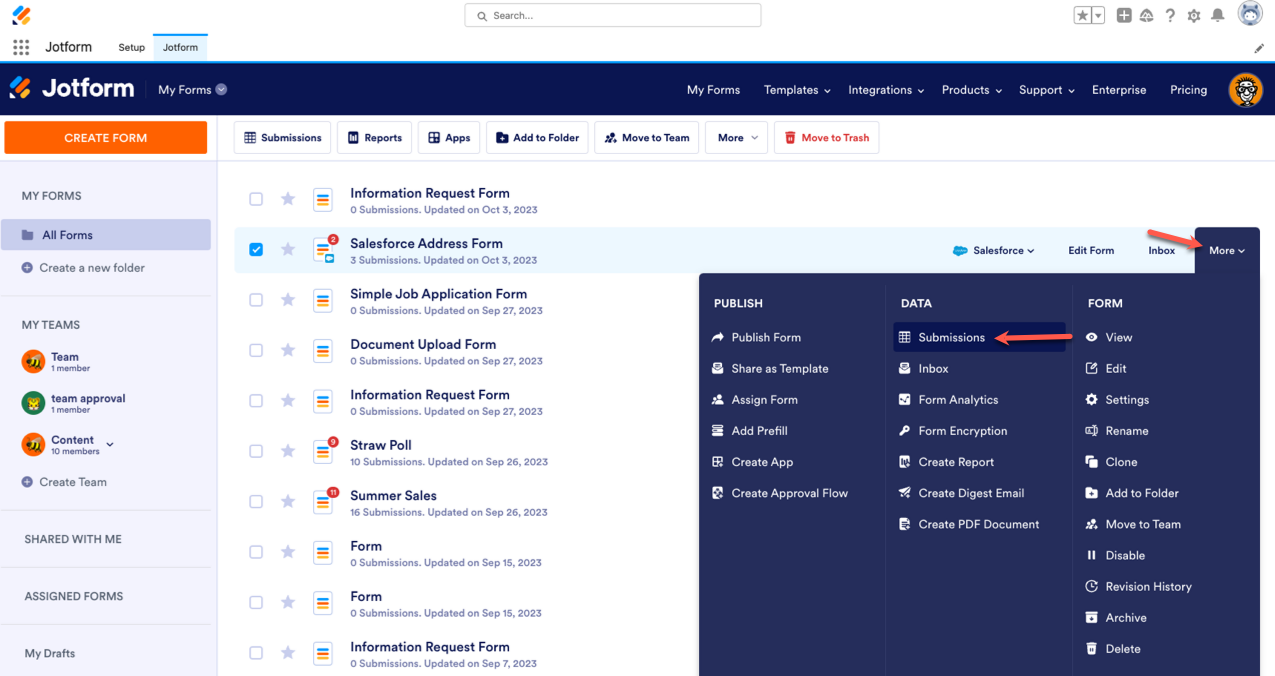
Click the More dropdown and select Submissions. There, you can see all your submissions and easily track them in one place.
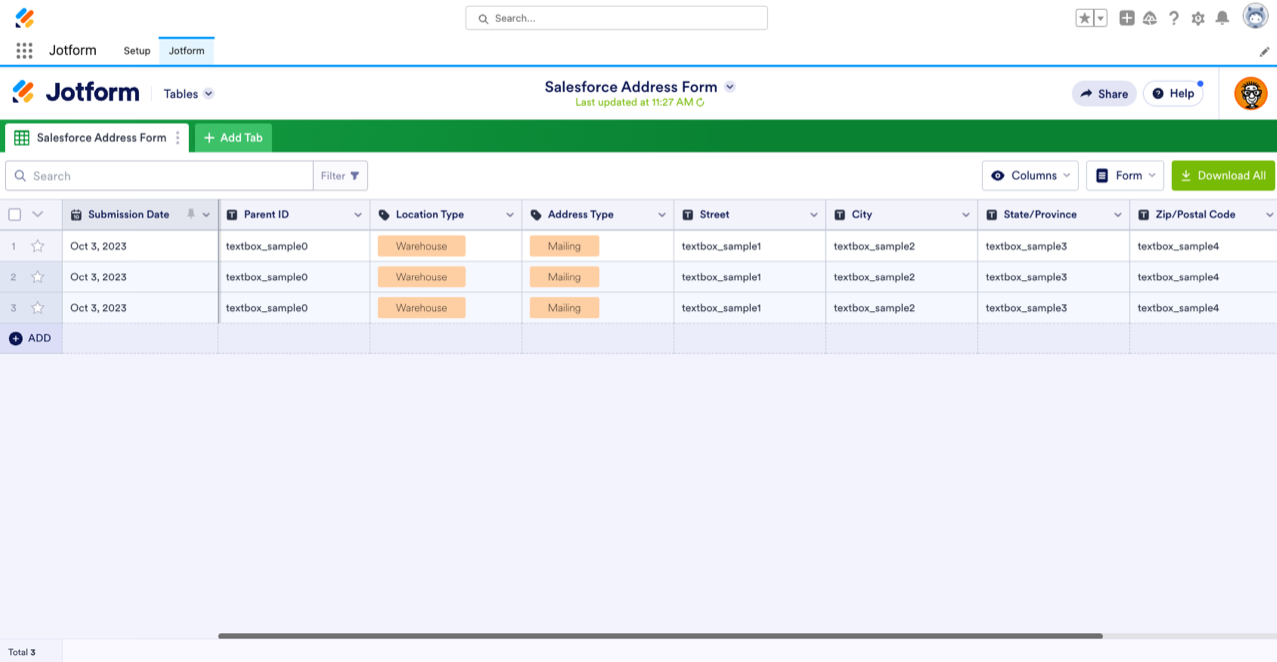
Even though using Jotform in Salesforce AppExchange to collect contacts will be the most efficient way to keep your data in one place, having a backup option never hurts. You can even add your own rows and columns to help keep track of contact submissions.
Now, whenever you need to collect contact information for sales, leads, marketing emails, etc., all you have to do is send them a form, and all your information will automatically populate in Salesforce.

Send Comment: