The Sign Builder does not allow you to customize an uploaded document, so if you want to have a document you can edit to match your branding, Jotform suggests using a Sign Template as it is customizable to your preference.
Using a Sign Template
The step to using a Sign Template is the same as using a PDF Template or a Form. Here’s how:
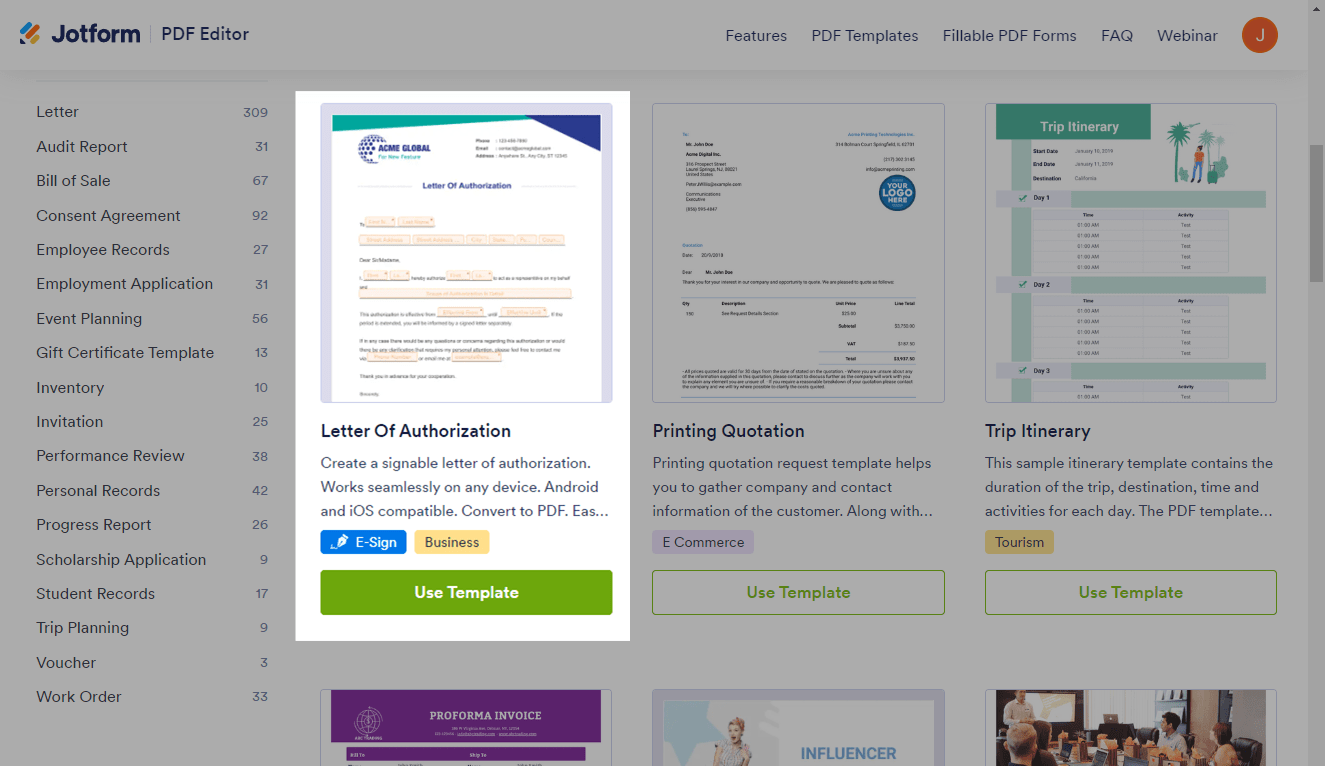
- Go to the PDF Template page.
- Look for templates tagged as an E-Sign or go to this link https://www.jotform.com/pdf-templates/e-sign.
- Once you have found the template, click the Use Template button. At this step, the page will redirect you to the Sign Builder.
Customizing the Sign Template
Customizing the Sign Template is similar to when you customize your PDF document through the PDF editor. Below are the steps to do that:
- In the Sign Builder, click the Edit Template button on the right side of the page. The page will load the PDF Editor for you but through its Sign form. It has a different set of options unique to the Sign Builder.
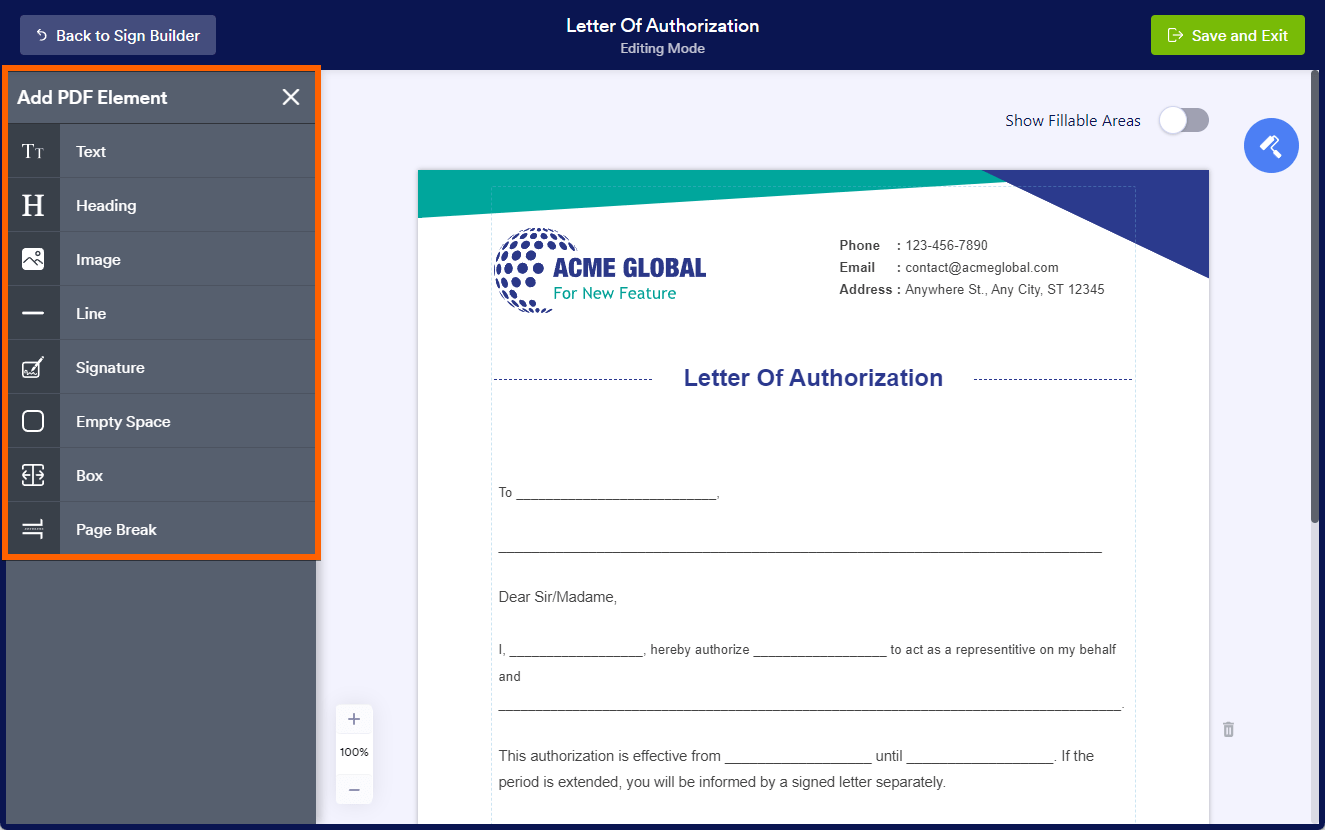
- Click the Add PDF Element button to add additional elements to the template. As shown in the image below, you can add the following:
- Text
- Heading
- Image
- Line
- Signature
- Empty Space
- Box
- Page Break
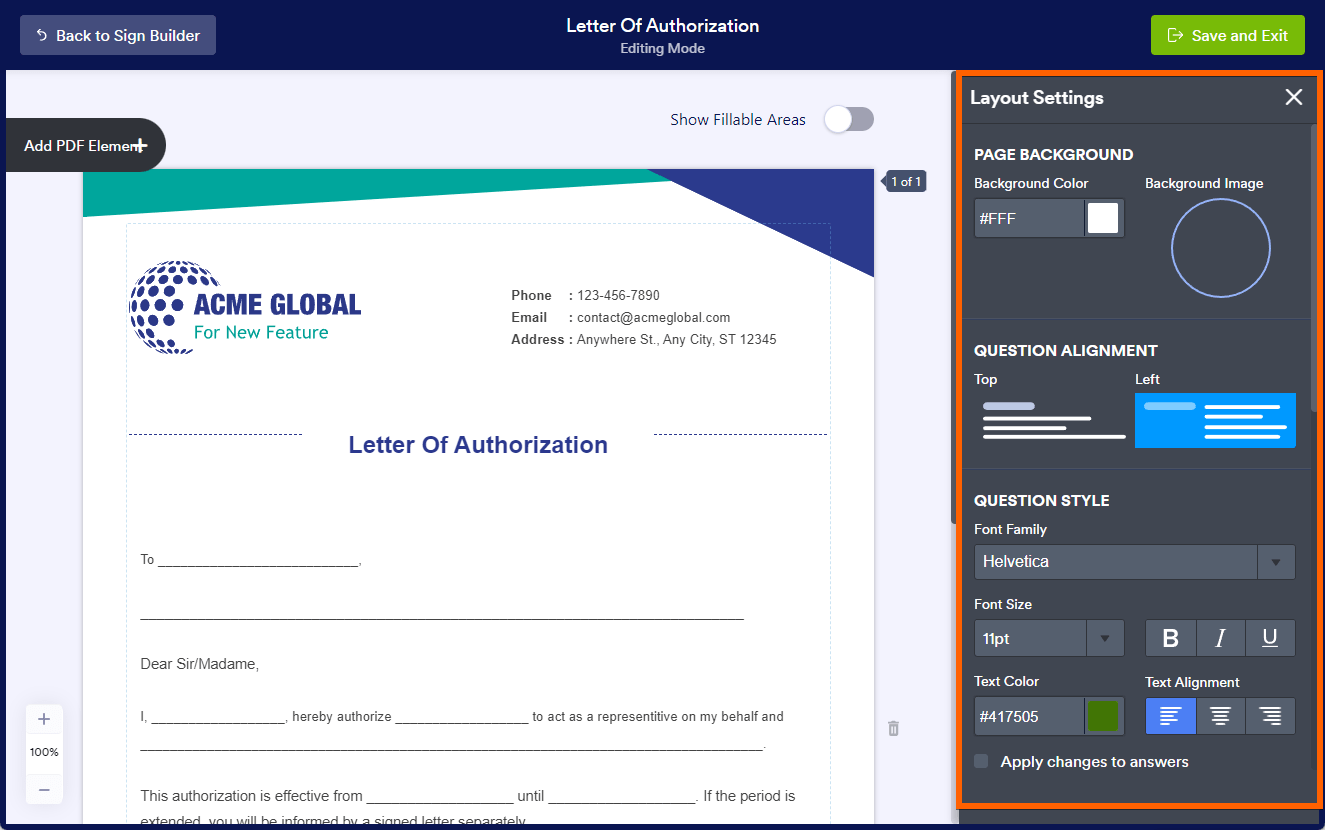
- Click the Layout Settings (paint roller icon) on the right side to change some layouts. You’ll find the following options:
- Page Background — You can have a different background color and image for the PDF document.
- Question Alignment — This alignment only applies to Form Fields.
- Question Style — This changes the appearance of the headings and labels of the elements.
- Answer Style — This changes the appearance of the texts in your document.
- Line Spacing — You can choose Compact, Medium, and Large.
- Show Page Numbers — Check the box to show the page numbers. When checked, you can select the position of the page numbers.
- Margins — Input a custom margin or use the default.
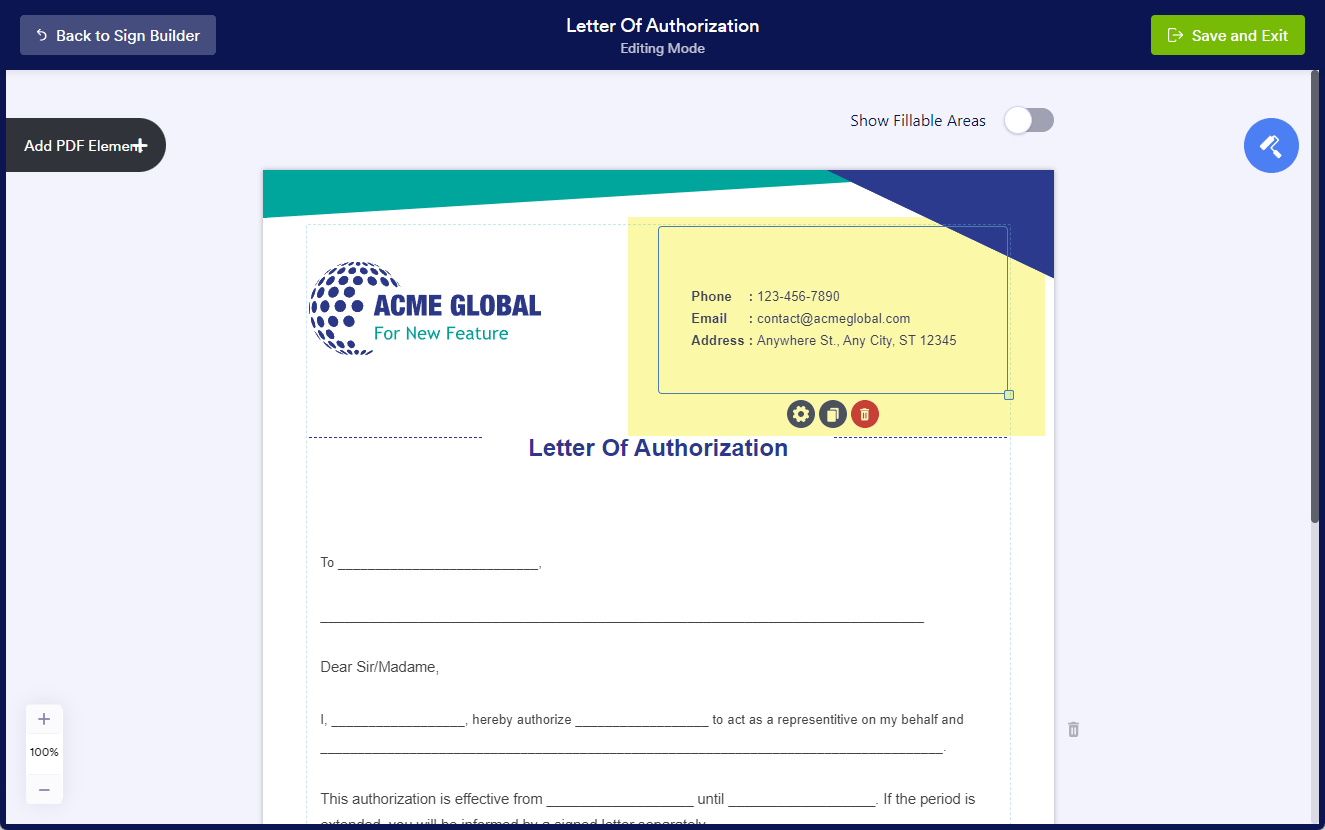
- Lastly, click or double-click an element to edit its settings. For example, to edit the company details, double-click the text block.
- Finally, click the Save and Exit button at the top-right side of the editor to save your changes and go back to the Sign Builder. That’s it!
Now that you’re equipped with the knowledge to customize your documents seamlessly, take the next step in optimizing your processes.
Send my document for signature
File type is not allowed.
Maximum file size limit exceeded. (5MB)
Something went wrong.
Disclaimer: The information provided in this guide is for general informational purposes only and is not intended to constitute legal advice. While we strive to keep the information accurate and up-to-date, laws and regulations vary by jurisdiction and can change frequently. Should you have specific legal questions about any of the information on this site, you should consult with a licensed attorney in your area.


Send Comment:
2 Comments:
343 days ago
Is it possible to connect a sign document to a submission table so that data from a form populates into it? we need to send agreements out to multiple people and would want organization name, address, date, approved amount etc to automatically pull into the agreement so they can sign it.
More than a year ago
So when this is signed there's a simple request for people to sign up. If we have a paid for service why does this branding show up? And how can we get rid of it?