Jotform Sign is Jotform’s automated solution for collecting electronic signatures. Its Signing Order feature will let you automate your workflows and effortlessly move through signature collecting processes. Jotform Sign will relieve you of the time and effort it takes to collect wet signatures.
Creating Signable Documents on My Forms Page
You can create a Signable Document through the My Forms page by following the normal Create Form flow. Here’s how:
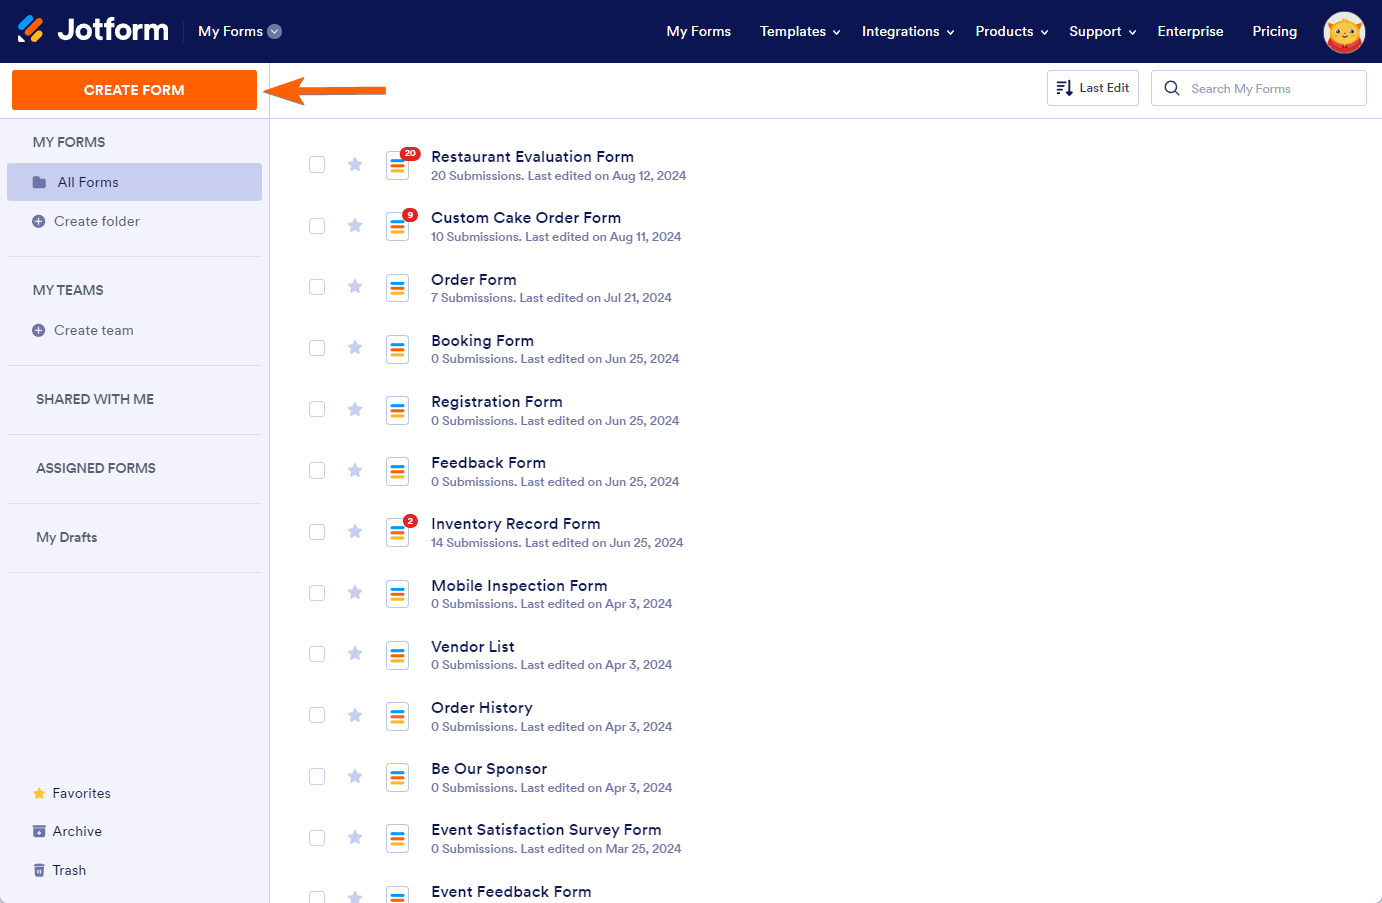
- On the My Forms page, click the Create Form button.
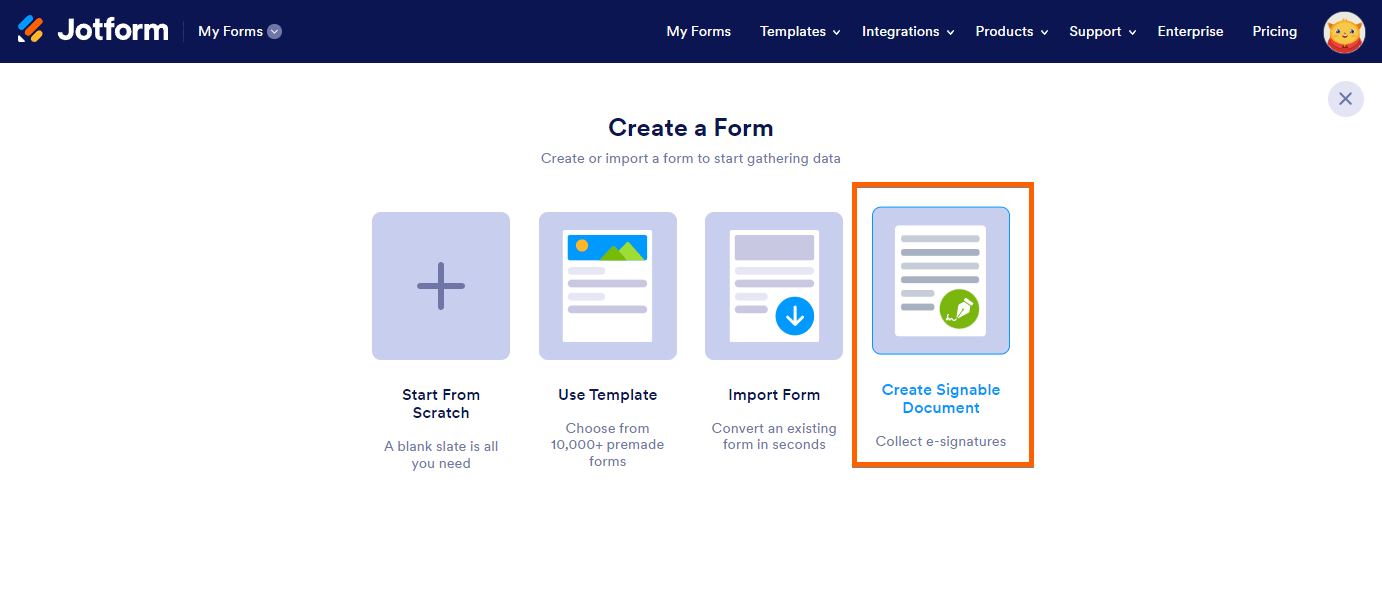
- Click the form layout that says Create Signable Documents.
Creating Signable Documents on My Sign Documents Page
You can also go directly to the My Sign Documents page to create the Signable Document. Here’s how:
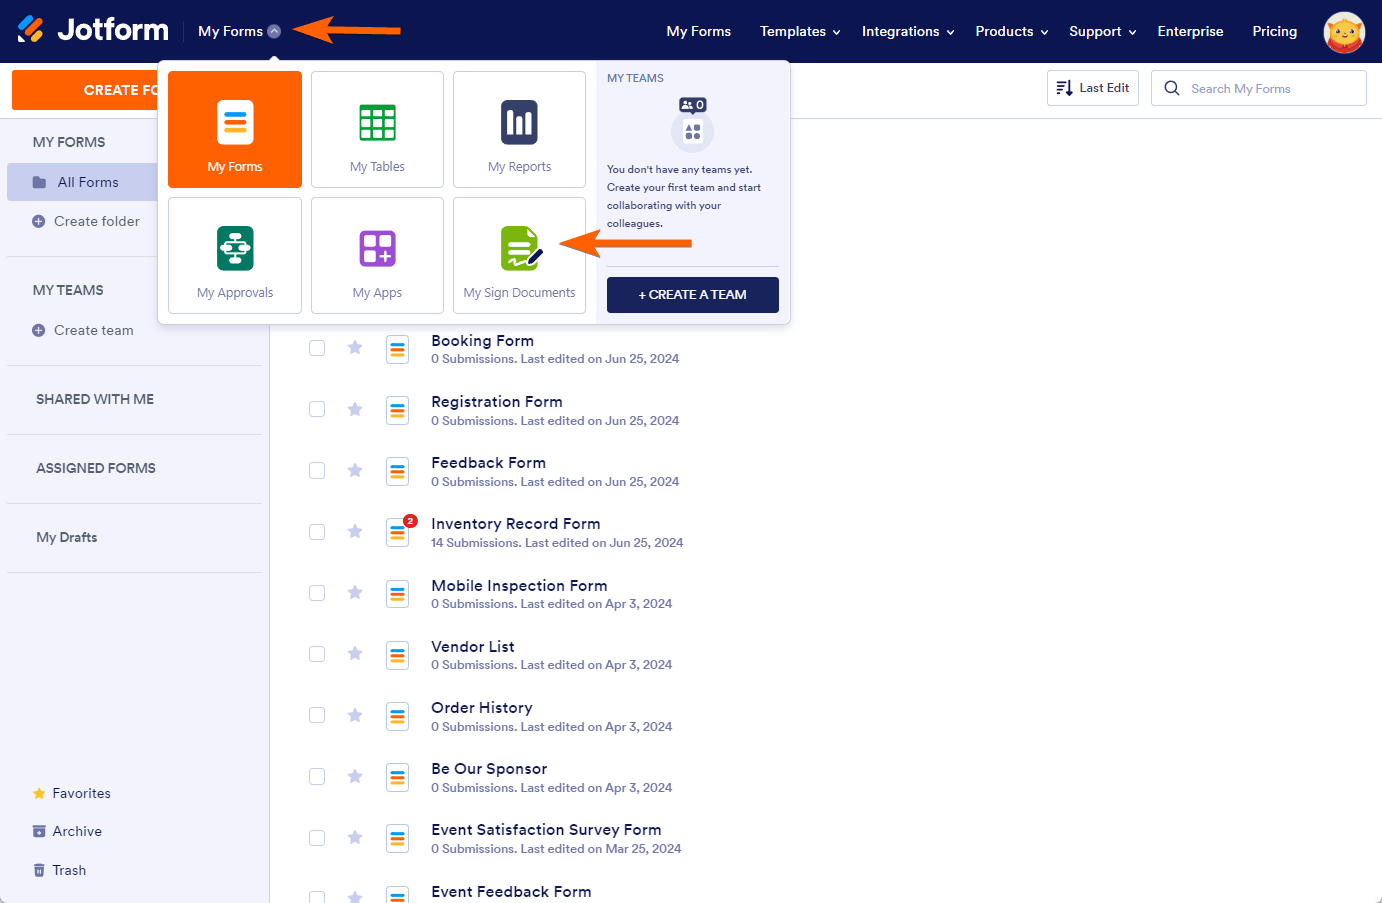
- Go to the My Sign Documents page. You can navigate to this page by clicking the Product Selector near the Jotform Logo in the main navigation bar, as shown in the image below.
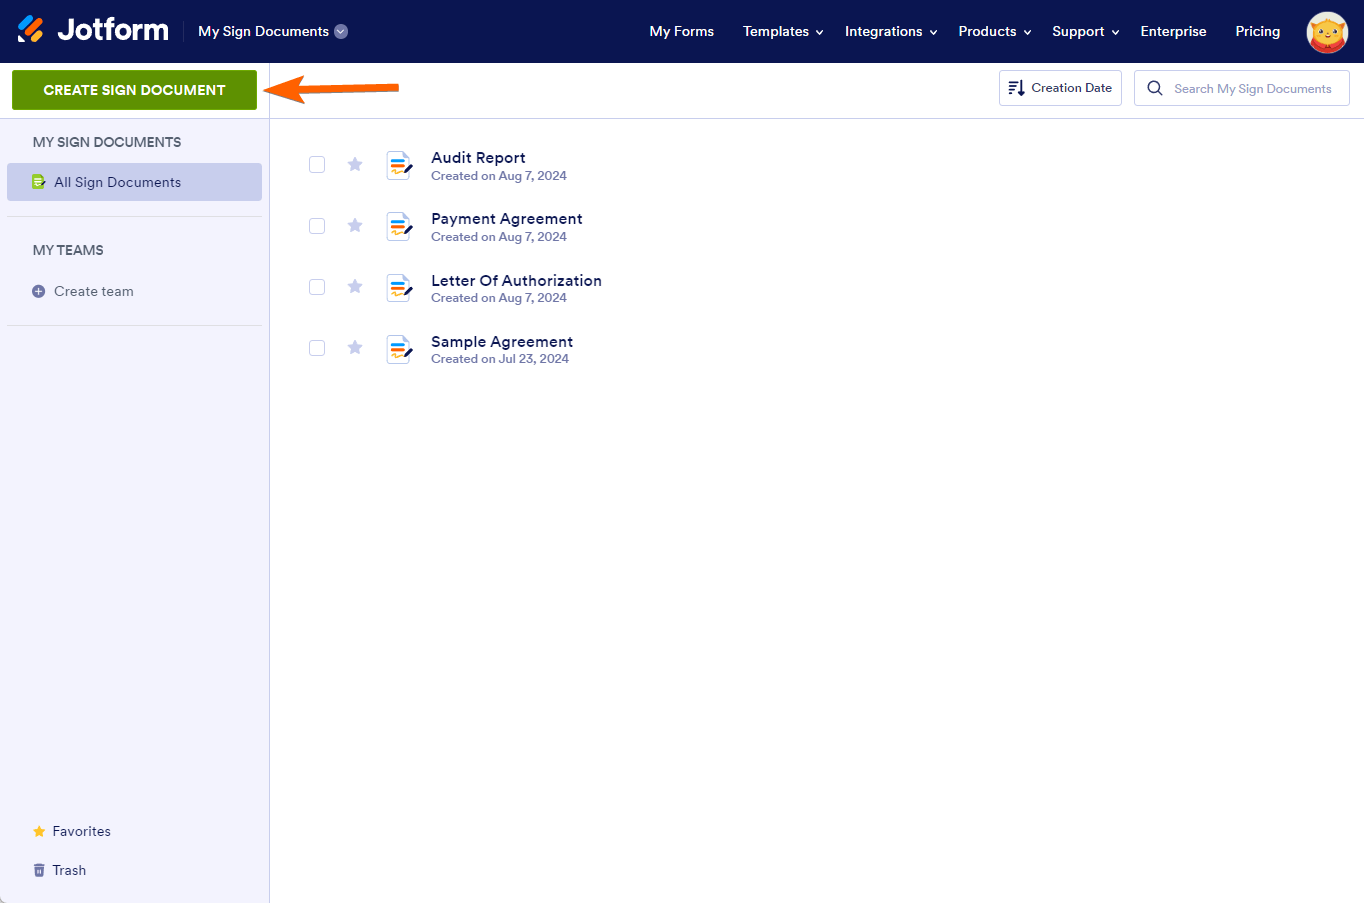
- Now, click the Create Sign Document button.
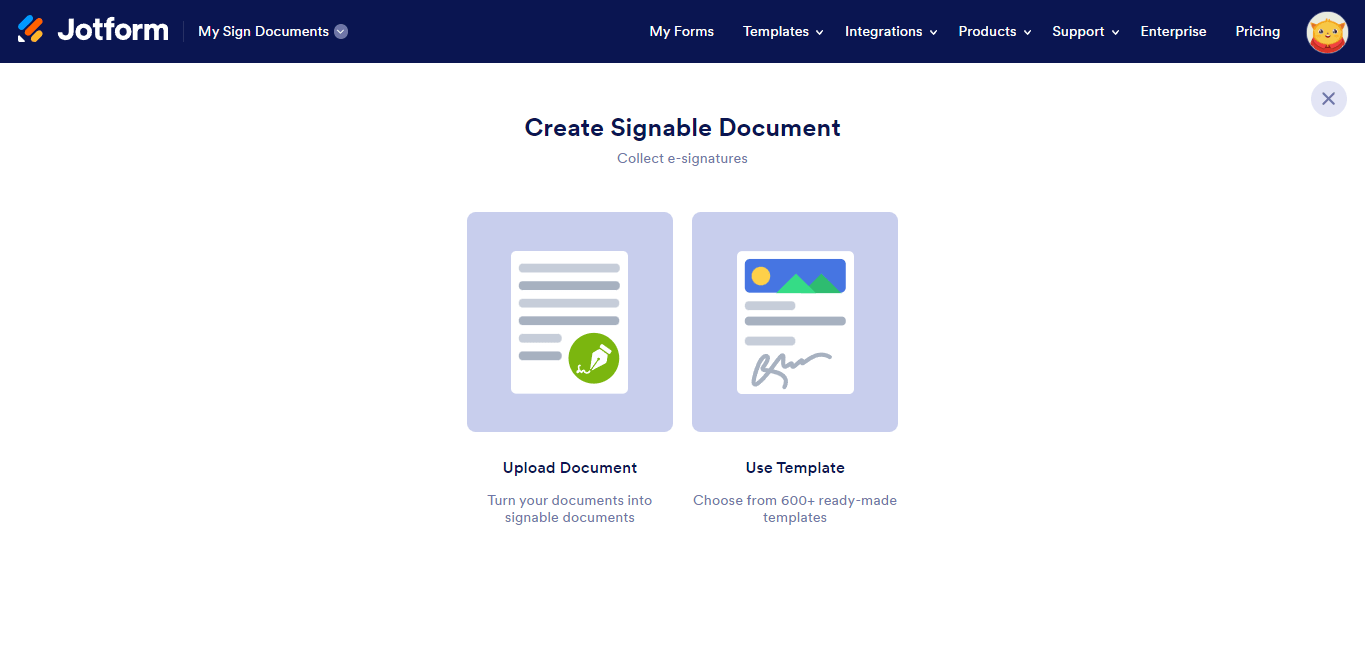
- Choose whether to Upload a Document or Use a Template.
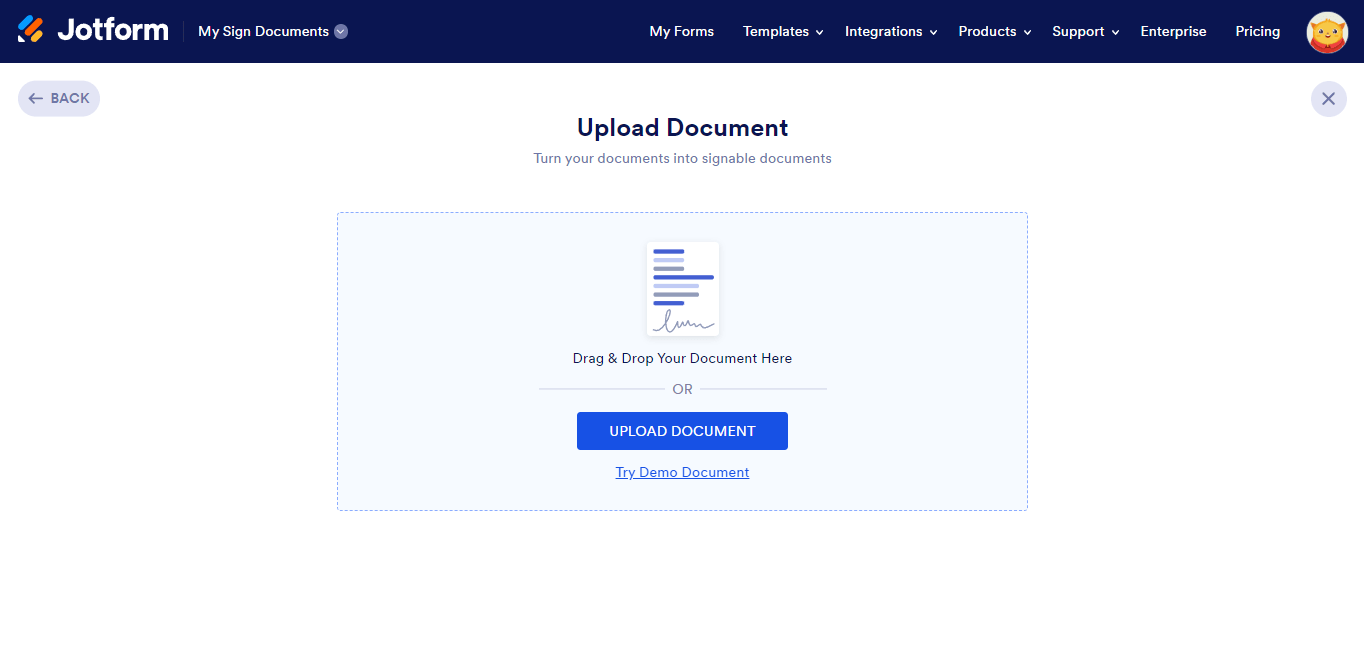
If you’ve chosen to upload a document, you will be prompted to upload it to the page. You can either drag and drop the document from your computer or click the Upload Document button to do so. Additionally, you can click Try Demo Document if you want to try it out before you start uploading your own documents.
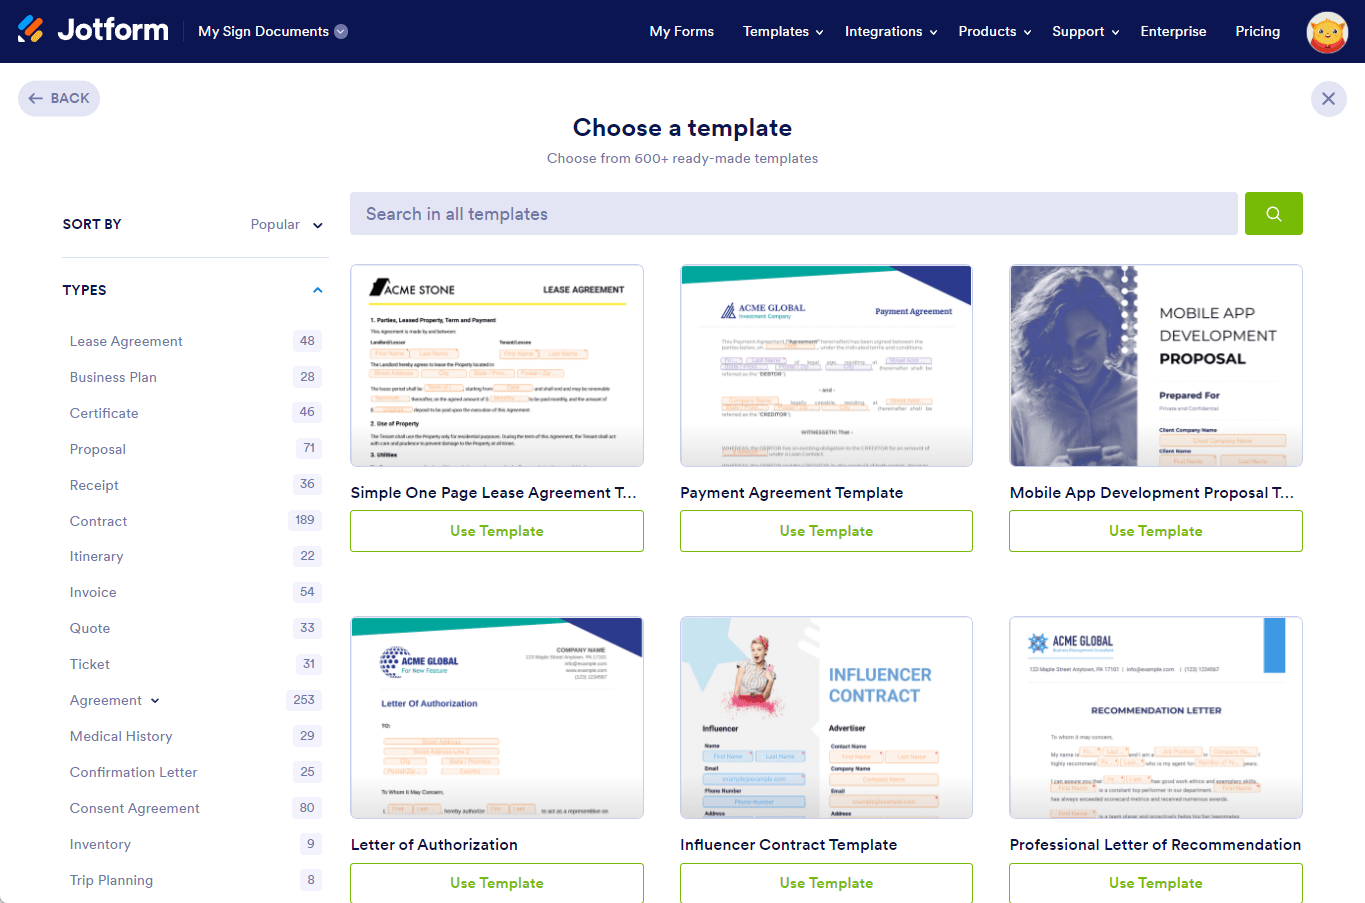
If you’ve selected to use a template, you must select it from the template’s page, as shown below. Click the Use Template button to create the signable document.
Building the Signable Document
After uploading the document, Jotform Sign Builder will scan it and identify any possible fields or areas to be filled and signed. To continue building the document, do the following:
- Click the Detect Fields button on the banner that comes up right after the Sign Builder has loaded the document.
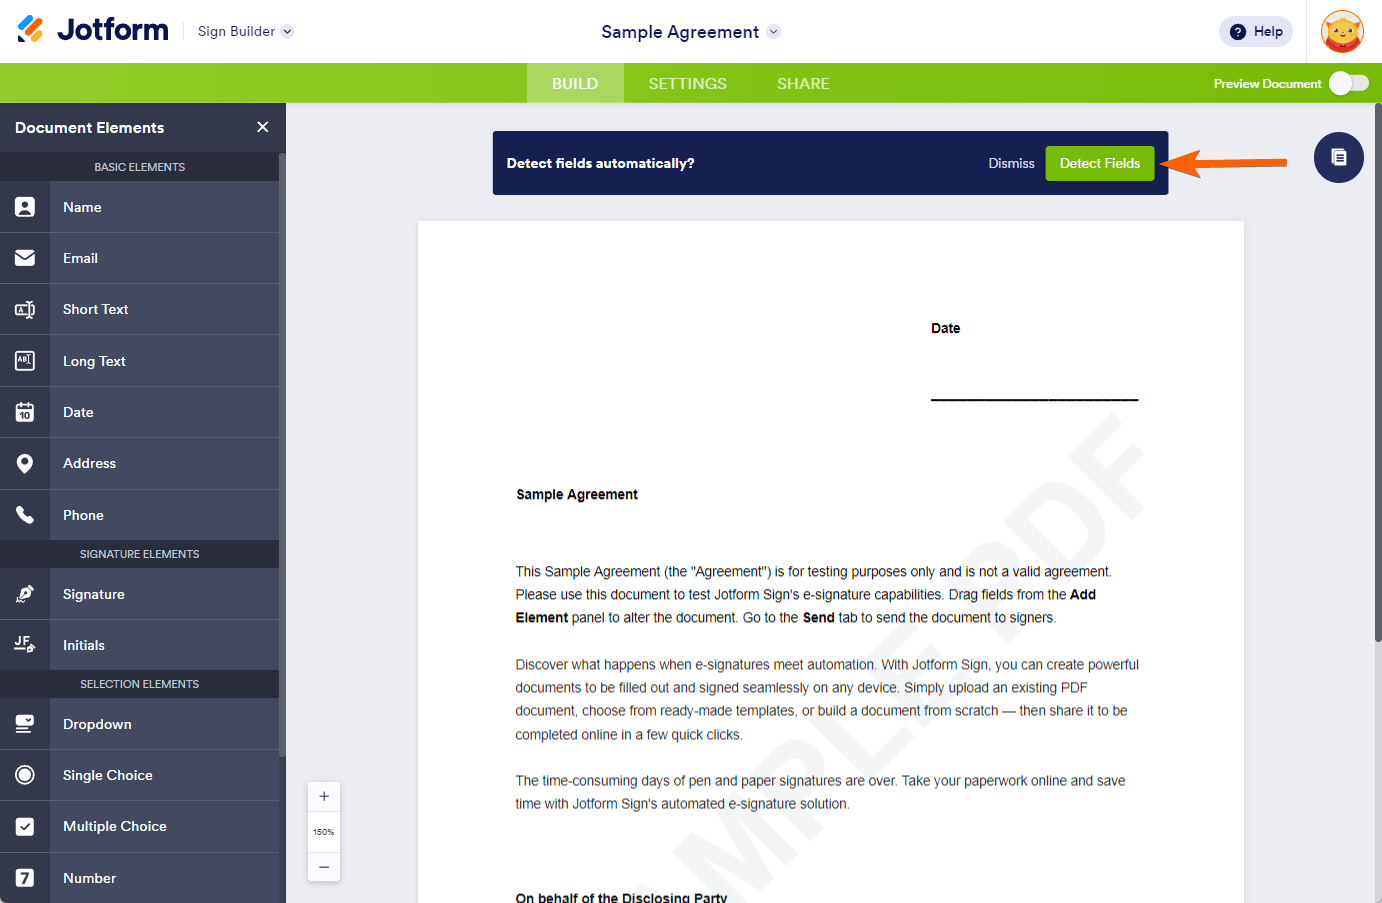
- Jotform Sign Builder has detected the fields at this stage. Click on the Add Elements button to add more fields to the document that are necessary or have not been detected.
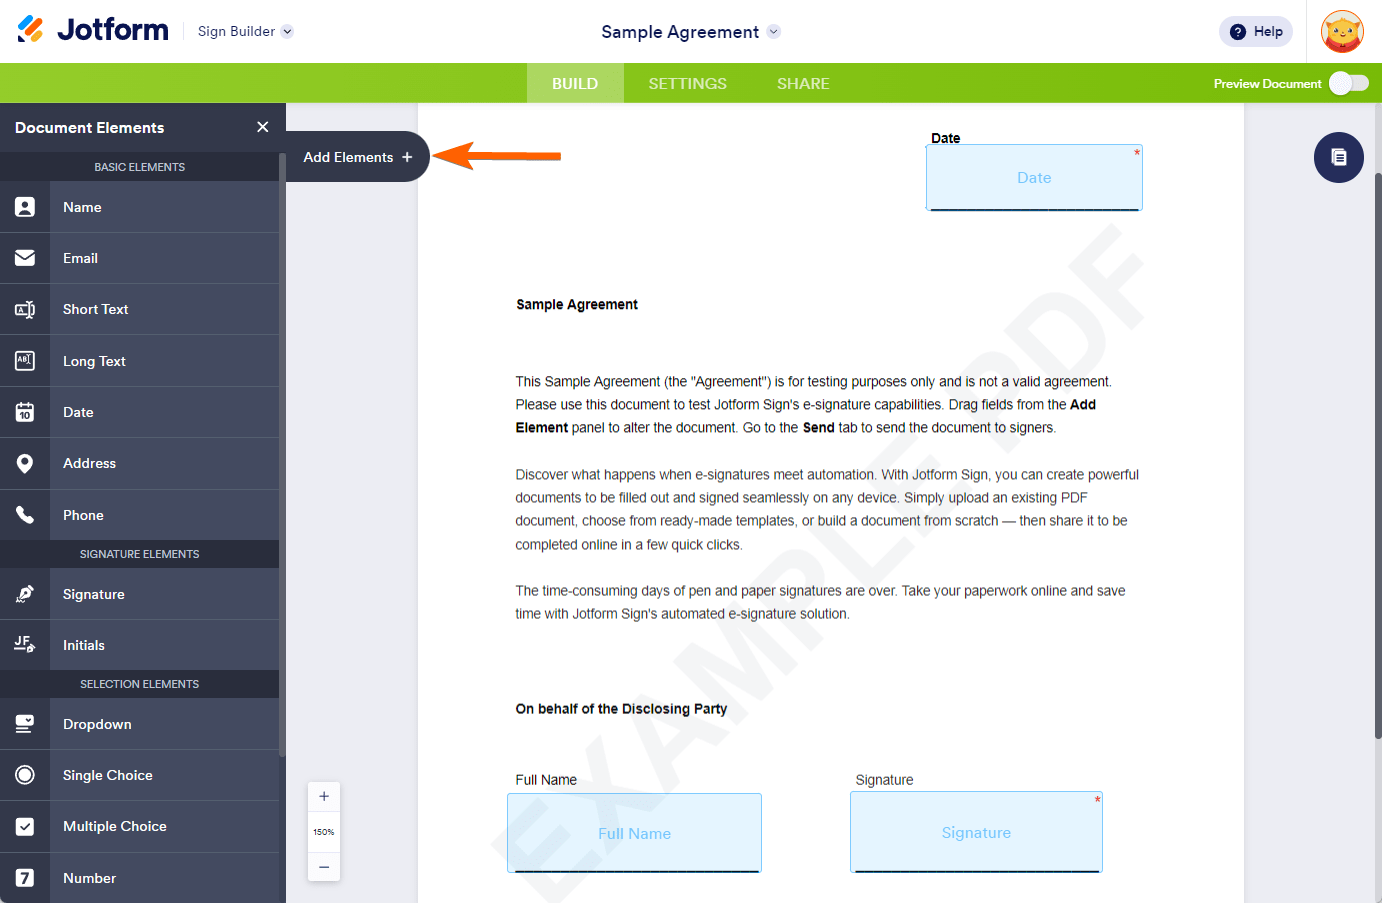
- Now, click the detected/added fields to assign them to the signers, which includes you.

- Click the Add New Role button to add more signers to the signable document.
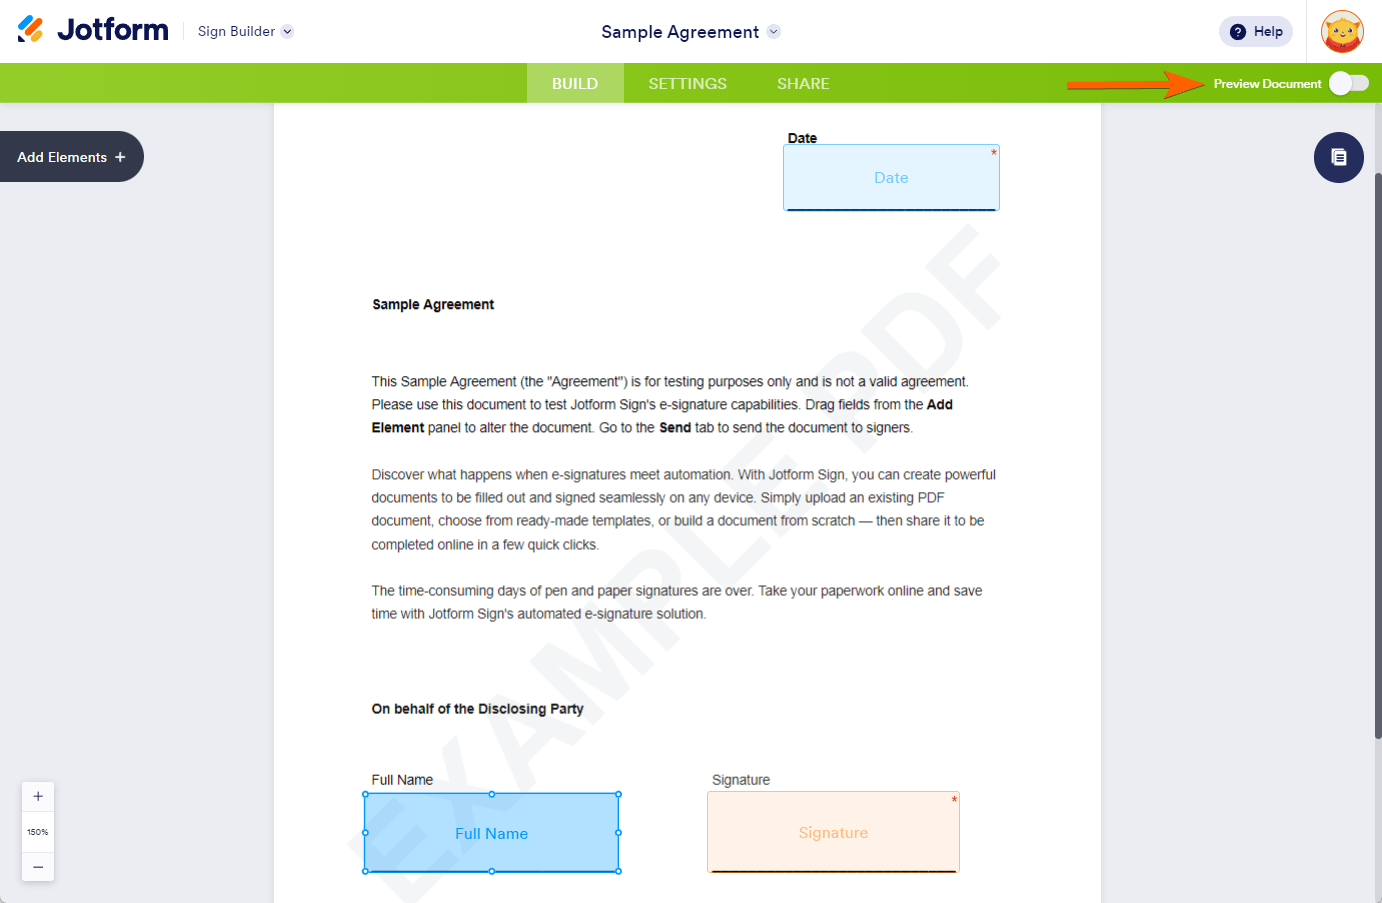
- Now, toggle the Preview Document switch on the right side of the Sign Builder to preview your document and make sure it looks good before assigning it.
Sharing Documents with Signers
You have multiple ways to share the document for signing. You can send it to Sign, Share it with Link, or Embed.
Send to Sign
With this sharing option, you must fill in the details of the signers. Additionally, you can toggle and set the following properties:
- Signing Order — Toggle this option to control who gets to sign your document first. When toggled, you can then drag to change the order of the signers.
- Access Code — Click the key icon to set an access code for the signer. They cannot open the document to sign without it.
- Message — Click the speech icon to add a message before sending the document.
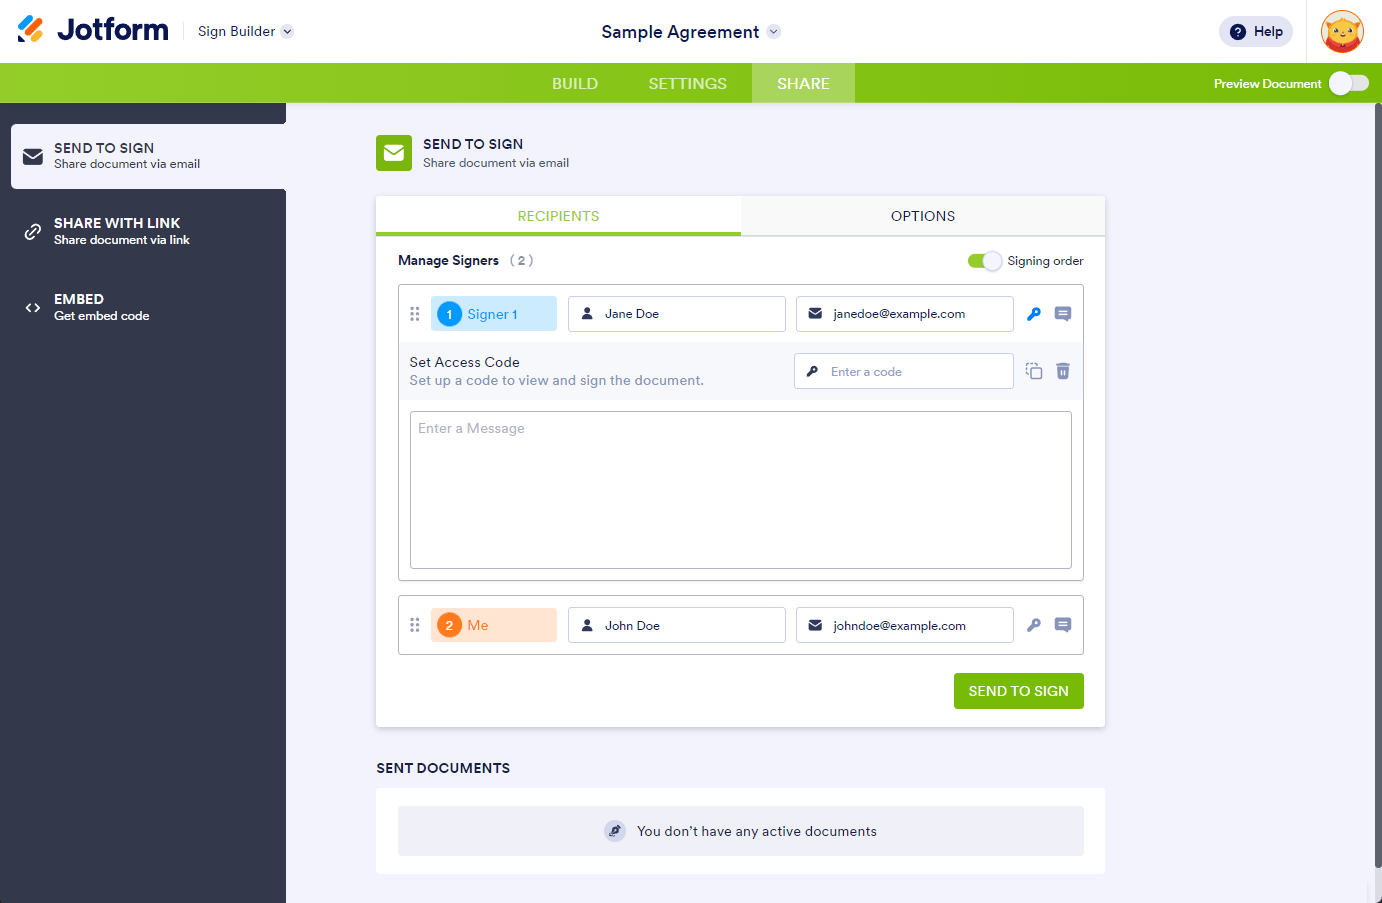
Click the Send to Sign button to finally send the document to the signers. Each signer will receive a unique URL that will expire after 7 days.
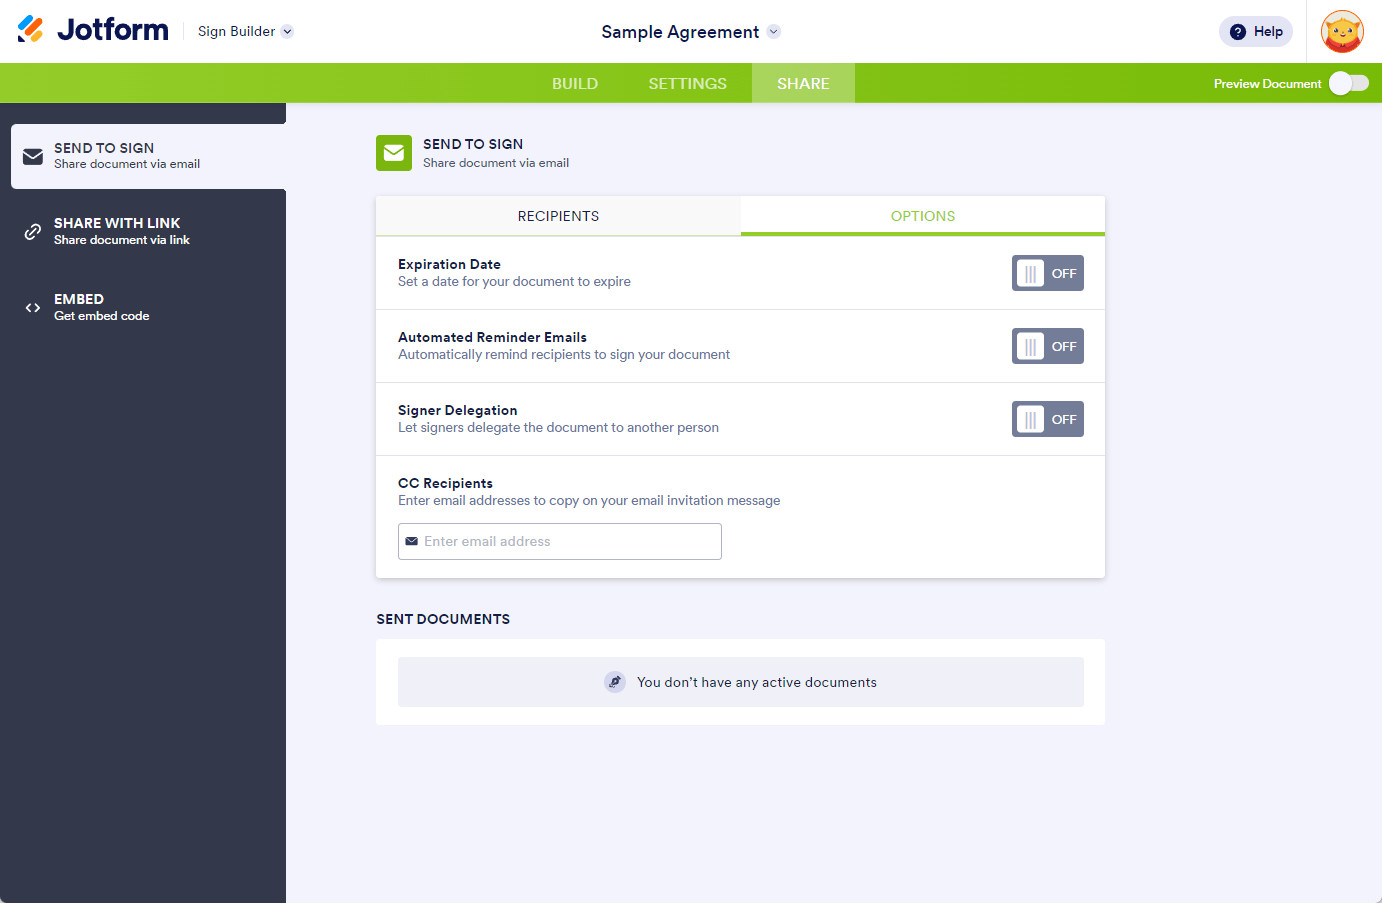
Under the Options tab of the Send to Sign window, you can optionally toggle and set the following:
- Expiration Date — Turn this on to set a date for your document to expire.
- Automated Reminder Emails — Toggle this to automatically remind recipients to sign your document.
- Signer Delegation — Turn this on to let signers delegate the document to another person.
- CC Recipients — You can also send a copy of your invitation to someone. Enter their email addresses to do so.
Share with Link
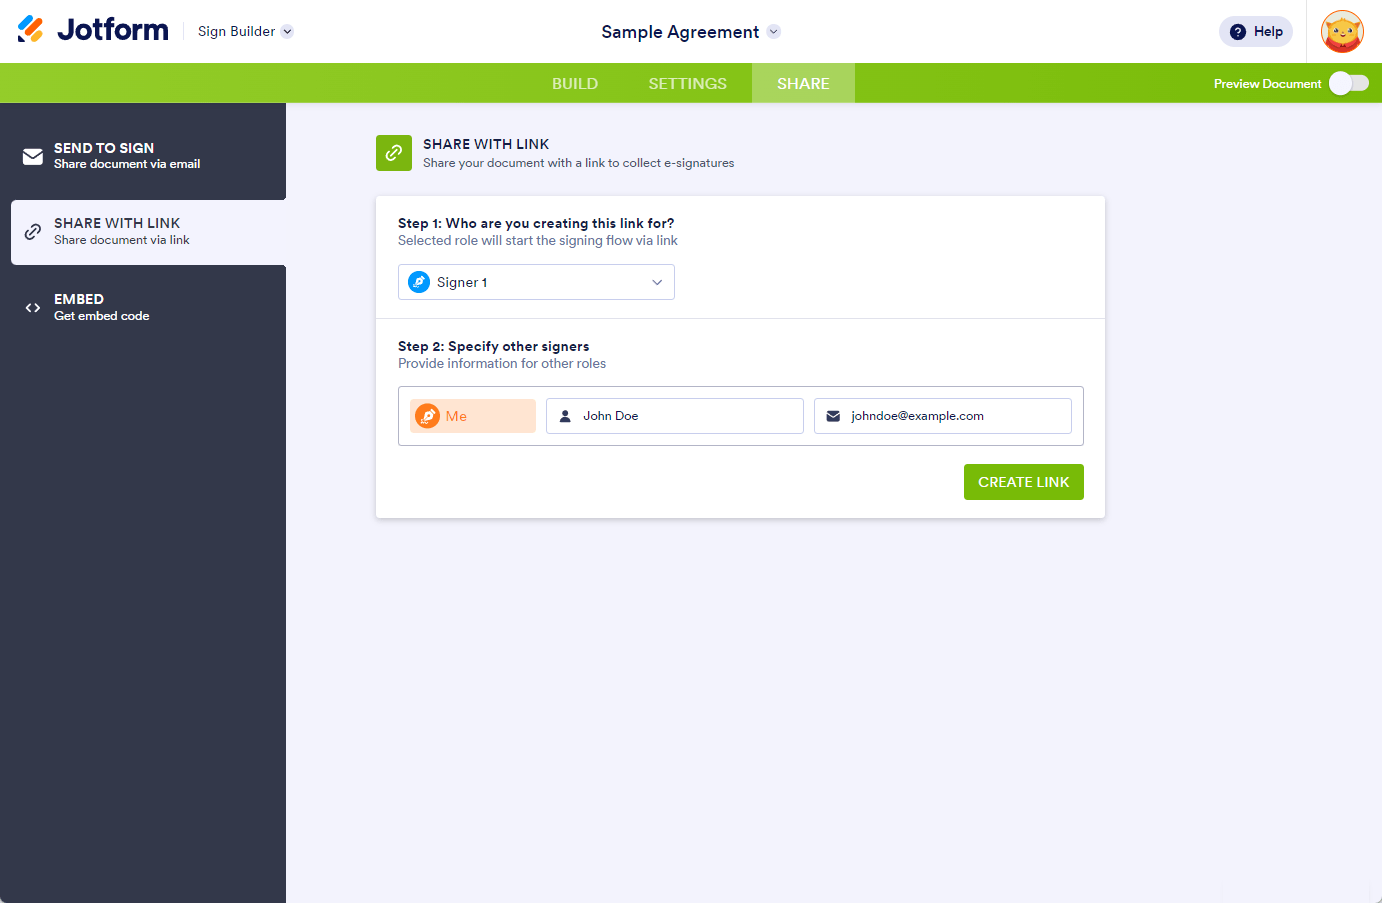
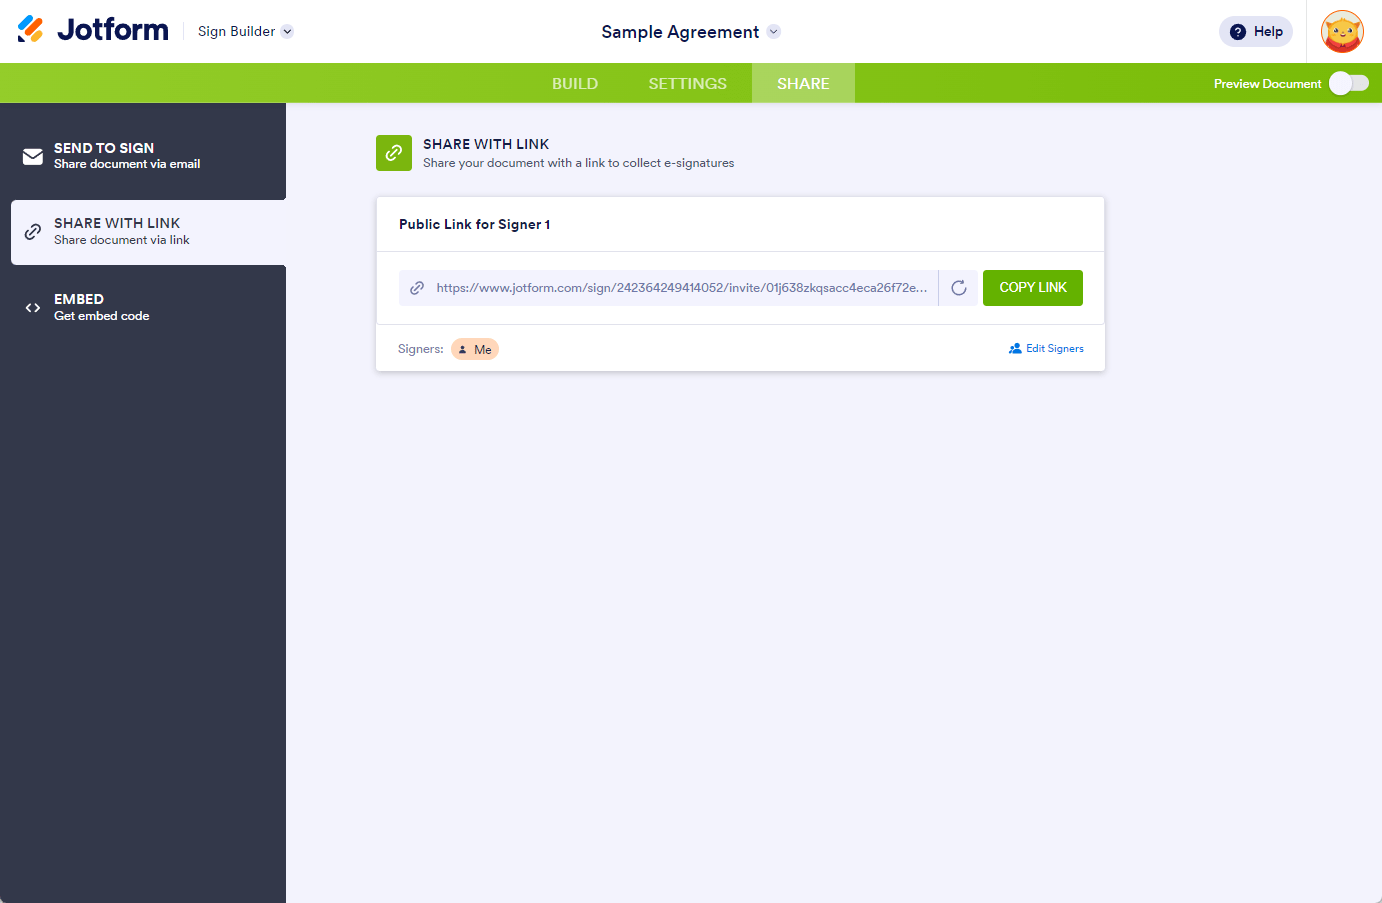
With the Share with Link option, you must first select the signer that would start the signing flow and specify the other signers accordingly. Click the Create Link button to finally create the shareable link for the signers. Copy the link and start sharing it.
Embed
The Embed option is connected to the Share with Link. It starts with the first signer and next for the other signer(s). It will generate an iframe embed code. You can preview the embed frame by clicking the preview (eye icon).

Send my document for signature
File type is not allowed.
Maximum file size limit exceeded. (5MB)
Something went wrong.
Tracking Documents
Tracking documents is vital as it lets you easily see where your documents are in the workflow process. This will help you identify bottlenecks, who to follow up with, and ensure signatures are complete.
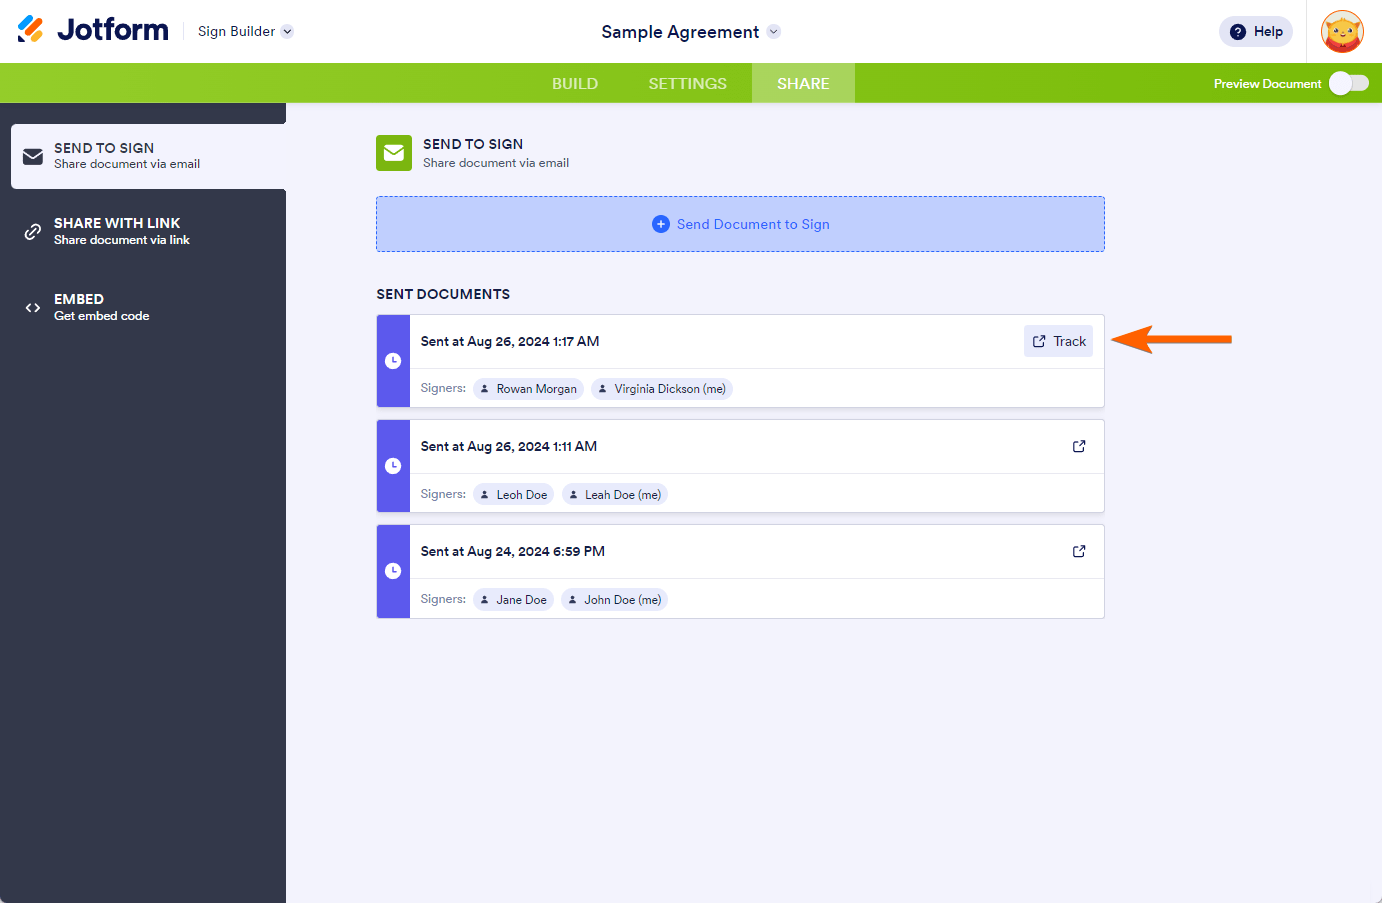
You can track the documents through the Send to Sign tab. Hover on each Sent Document, and click the Track button to open the Sign Inbox.
Viewing the Audit Trail
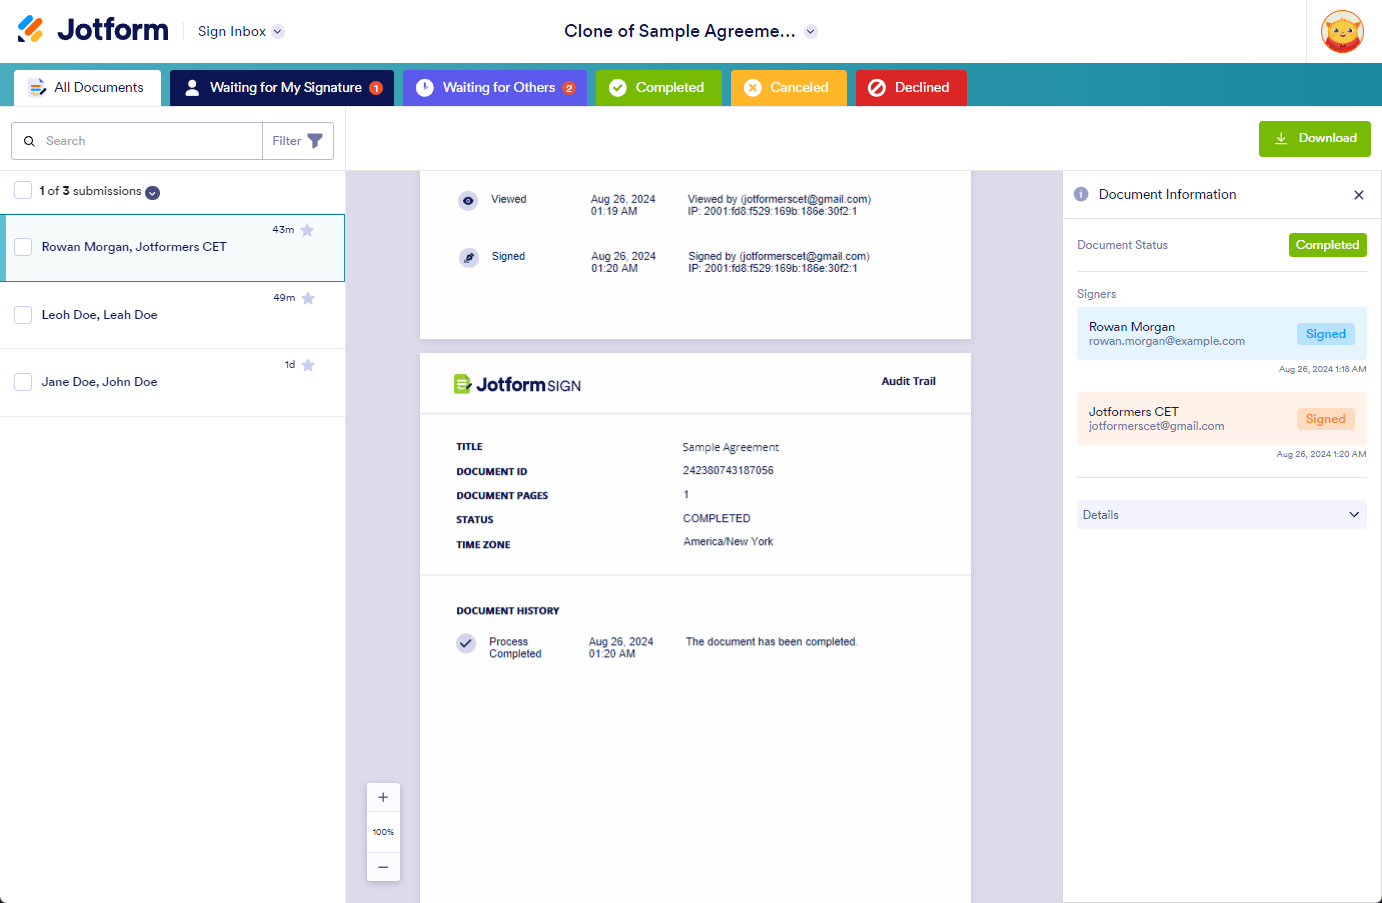
Once the workflow is complete, everyone involved will receive a confirmation email with an audit trail. The audit trail is essentially an at-a-glance record of who signed your document and when. The audit trail will be incredibly helpful in tracking workflows and making sure all of the appropriate parties have signed your document. You’ll also be able to view the audit trail in Sign Inbox at any time.
Now that you’re equipped with the knowledge of how Jotform Sign operates, it’s time to put it into action and experience the ease of collecting signatures firsthand.
Disclaimer: The information provided in this guide is for general informational purposes only and is not intended to constitute legal advice. While we strive to keep the information accurate and up-to-date, laws and regulations vary by jurisdiction and can change frequently. Should you have specific legal questions about any of the information on this site, you should consult with a licensed attorney in your area.

Send Comment:
13 Comments:
93 days ago
how to delete an unwanted signed document
201 days ago
Is it possible to delete signed forms once you no longer need them to help clean up the inbox? Or a way they can be moved into a file folder or something?
232 days ago
1. When I send invitation to Jotform Sign, can I change the sender name and email address to my business name and official email address?
2. Can I change the email content of the invitation email and after signing it successfully? Like I can do it for Jotform forms.
275 days ago
QUAL A QUANTIDADE DE ASSINATURA MÁXIMA UM ÚNICO DOCUMENTO PODE TER?
298 days ago
When does the signature go back to zero each month. I hit 100 tonight so when does it go back down?
298 days ago
Hi. How can I upload my signature from an image file, or copy it as an image into the document. I don't want to write my signature via the mouse pad.
Thank you
More than a year ago
Is it possible to set up it up to not send everyone a copy once it is signed. I need the people who have signed it to not have access to the completed document.
More than a year ago
How does this change with HIPAA accounts? There are some rules and requirements that don't apply or are different.
More than a year ago
Is there a way to customize the confirmation email that someone receives when they submit the form?
More than a year ago
Is there a way to set a limit on Signed Form submissions, like you can within your Form settings?
More than a year ago
Recipient receives email from "Jotform" and is reluctant to click on any links for possible phishing. Anyway to change the sender's email instead of it saying "Jotform?" Can I change it to my company name?
More than a year ago
this looks good, but what about reading e-mail addresses & names from a table to avoid typing into the form.
More than a year ago
what we need to do at alesi for this training is to have multiple students sign a SINGLE document, a 'sign-in' sheet.
does jotform sign support this?