
If you’ve ever tried matching a Google Forms response to a payment, email, or customer record and realized there’s no clear way to tell them apart, you understand the frustration this creates. As your submissions pile up, they can quickly lead to confusion, delays, and errors.
Unique IDs solve this problem by giving every form response a reliable reference point. Then you can easily track responses, avoid duplicates, and connect entries across systems.
While Google Forms doesn’t natively generate unique IDs, there are several ways to create your own. This article explains how to send unique codes through Google Forms via add-ons, Google Sheets formulas, and third-party integrations such as Jotform’s Unique ID Widget so you can easily track and organize responses.
Additional resources for using Google Forms
Can you automatically generate unique codes in Google Forms?
Google Forms does not have a native feature that generates or assigns custom unique codes for each submission. The good news? It’s easy to create codes yourself..
And that’s a smart idea, because automatically generated, unique IDs make tracking submissions, organizing responses, and preventing duplicate responses almost foolproof.
Using codes also makes connecting responses across users and systems easier. This allows you to link form data to payments, emails, or internal systems, which is helpful as response volume and workflow complexity grow.
How to send unique codes in Google Forms
Depending on how much control you need, there are two practical ways to generate and assign unique codes. We’ll walk you through both so you can choose the one that fits your workflow.
Method 1: Use the Form Publisher add-on
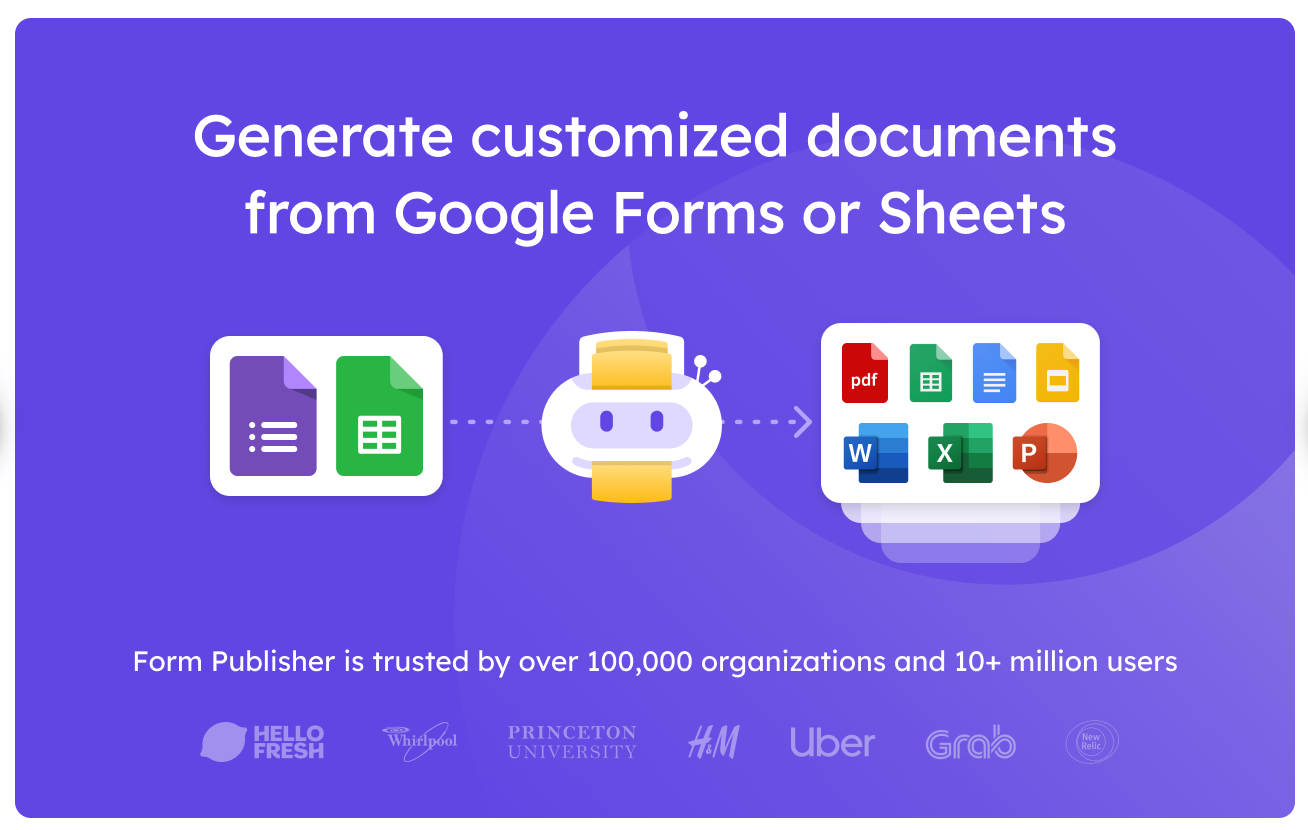
The Form Publisher add-on has a built-in marker you can use to generate IDs without leaving Google Forms. Here’s how to set it up to in Google Forms:
- Open your Google Form and click the three dots at the top right. Under Get add-ons, search for and install Form Publisher.
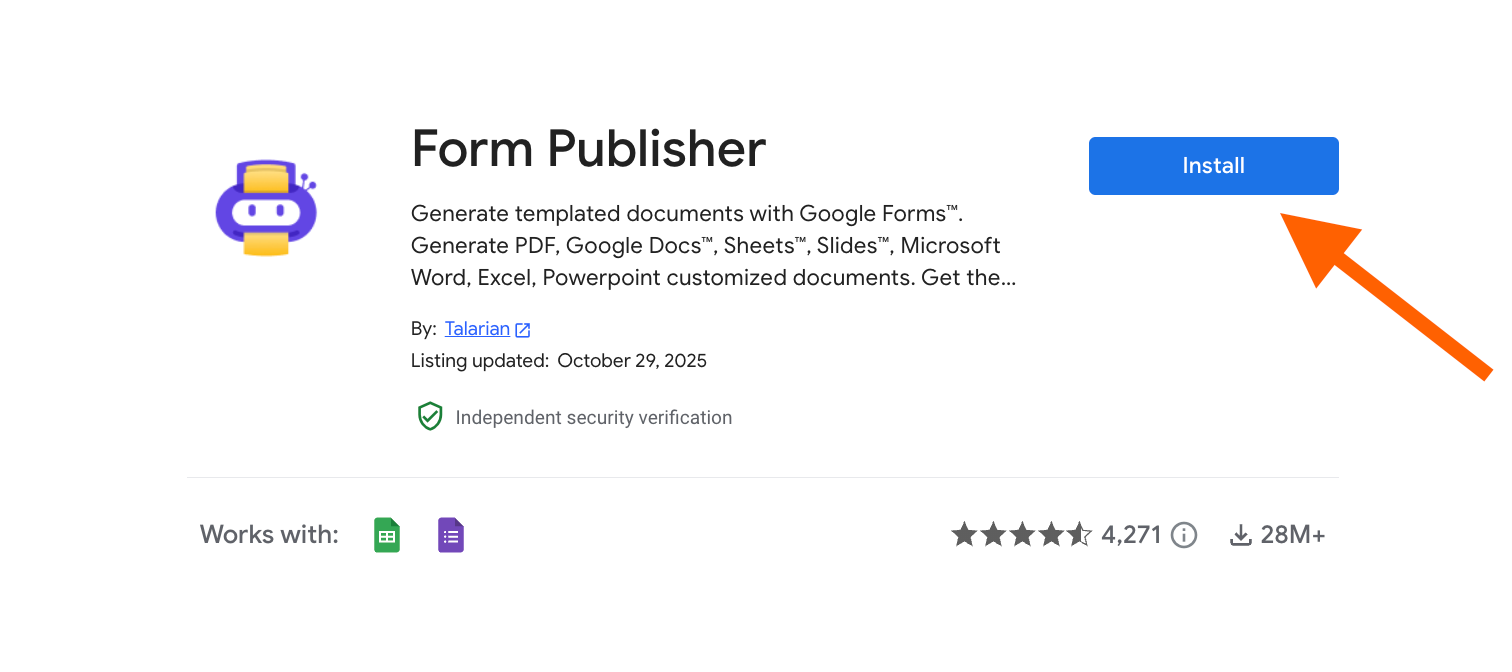
- Launch the add-on and go back to your form. Click Add-ons (the puzzle icon), and select Form Publisher, then Open.

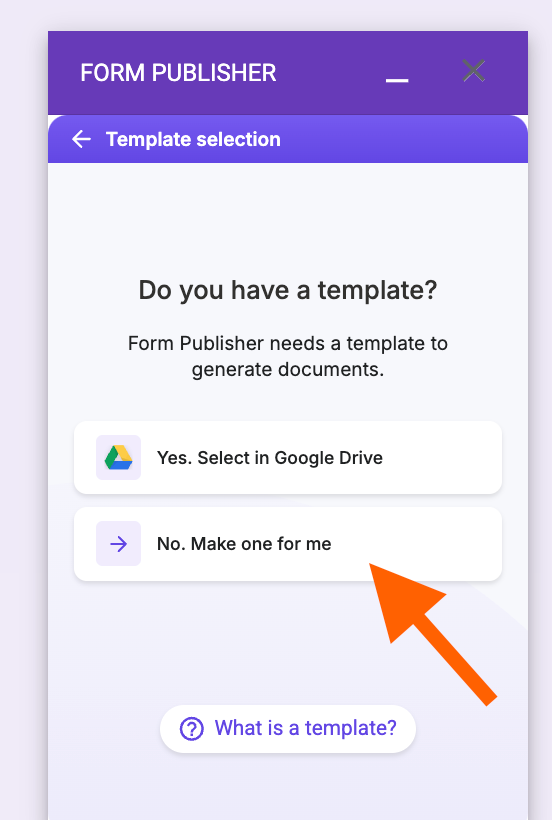
- Start the setup wizard. Choose Merge a form and follow the guided setup to connect your form to a Google Doc, Sheet, or PDF template.
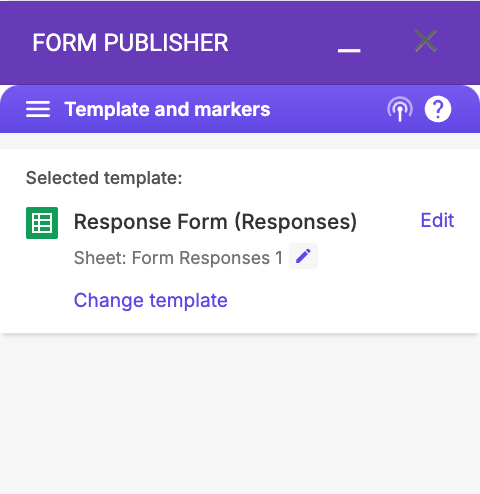
- In your Google Form, launch Form Publisher and go to the Templates and markers screen to ensure the template you’d like to use is selected.
- Go to Naming convention and select what you’d like to use.
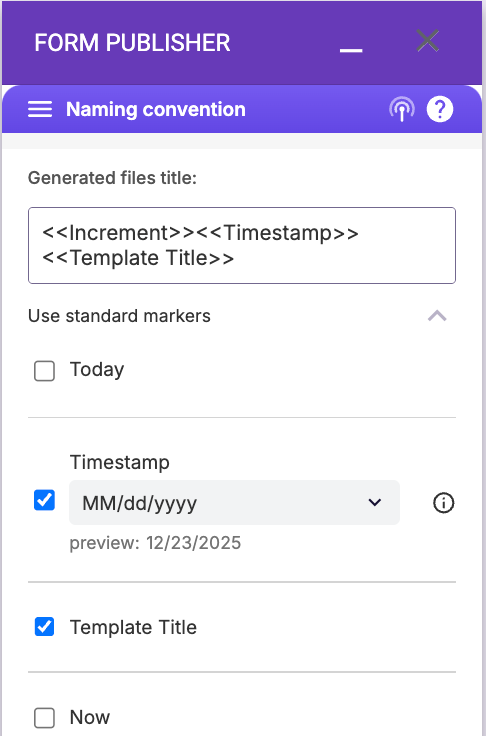
- In your Docs/Sheets/Slides template, insert the increment where you want the unique ID to appear.

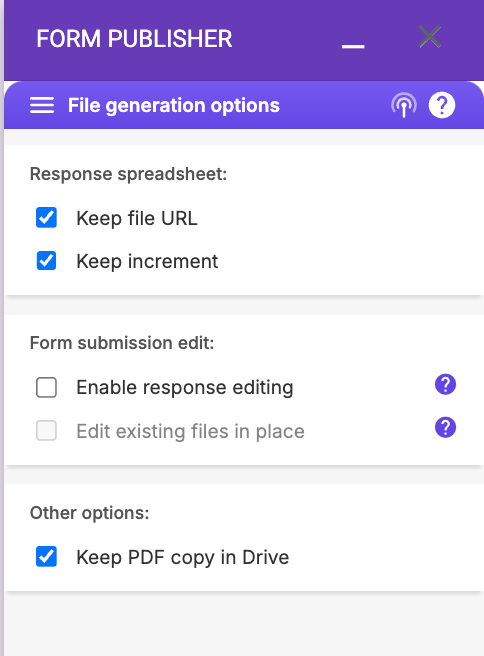
- In Form Publisher’s File generation options, keep the option that saves the submission increment enabled so it creates a new column in the linked response sheet. Each new submission will get its own increment value in that column, giving you a per-row ID you can use for lookups, filters, or reconciliation. You can use the increment column as your unique reference for each submission.
Once enabled, every form submission is automatically assigned a unique identifier, making tracking, referencing, and organizing responses much easier, without any manual work.
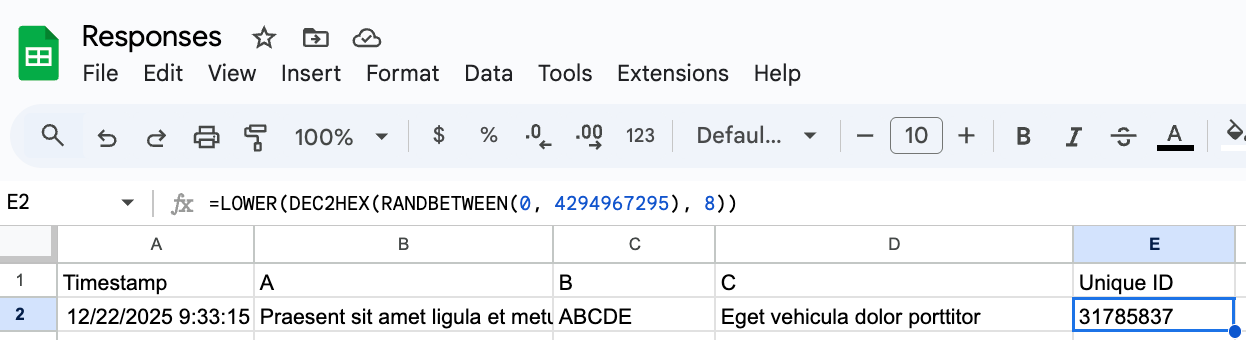
Method 2: Use Google Sheets to generate unique IDs
Instead of using Form Publisher to send unique codes through Google Forms, you can automatically generate unique codes in Google Sheets by attaching your Google Forms identifier to a response spreadsheet and using formulas.
For example, you can use formulas for combining time stamps or row numbers, or you can use the UNIQUE() and TEXT() functions to create an ID column for each submission.
This approach gives you full control over the ID format, again making it easier to track, organize, and reference form submissions across users, emails, payments, and your internal systems.
Here’s how to set it up:
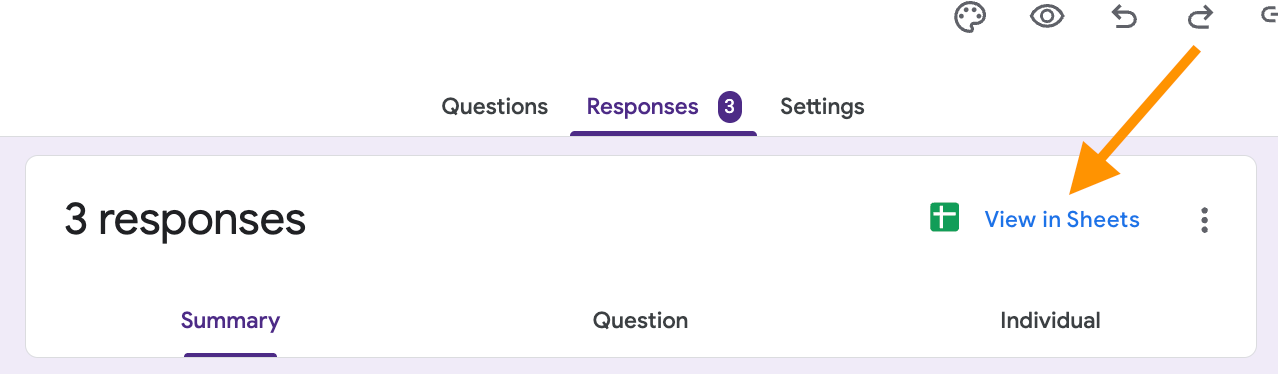
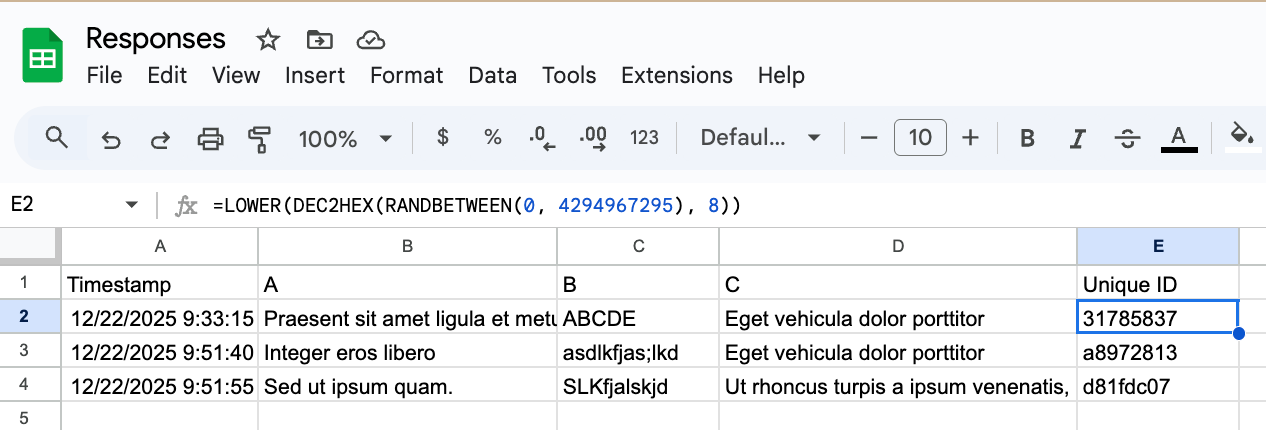
- Link your Google Form to a Google Sheet through the Responses tab. Once linked, all submissions will be saved automatically in the sheet.
- Add a new column named Unique ID.
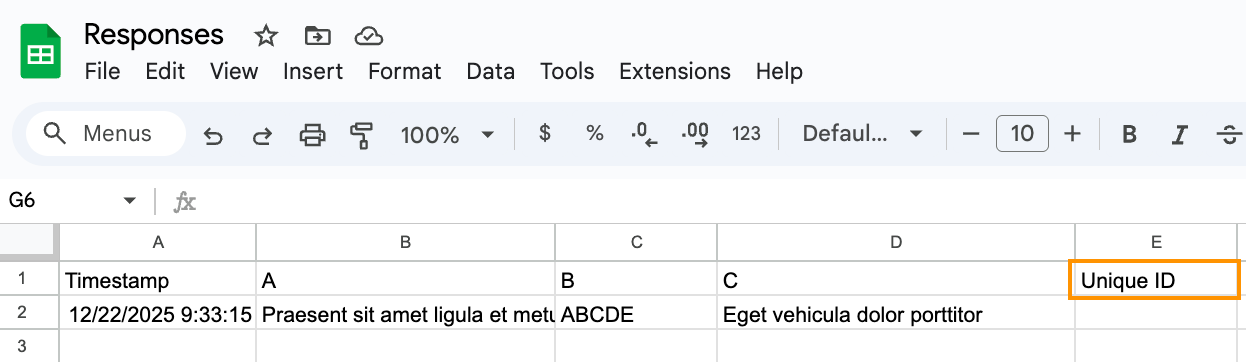
- In that column, enter a formula to generate a unique ID.
- Each new submission will automatically populate with a unique ID in that column.
Create and send unique IDs easily with Jotform

While Form Publisher and Google Sheets can generate unique IDs for forms, the better option, which costs nothing, is Jotform’s Unique ID Widget.
With Unique ID, getting a code is simple. There’s no need to install Google Forms add-ons or know complex formulas.
The Unique ID widget allows you to attach an alphanumeric ID code to every form submission you receive, providing a unique identifier for every booking, purchase, or order and making it easier to organize submissions and quickly access them in your records.
The widget can
- Generate invoices for orders or deliveries.
- Issue receipts for shop or restaurant purchases.
- Create booking reference numbers.
- Send support tickets.
How to generate unique IDs
With Jotform’s Unique ID Widget, you can generate a custom ID that can be used to create a sequential order number, invoice number, registration code, ticket ID, or any other identifier you need to track and organize submissions. (This code is different from the default Google Forms unique submission ID.)
Here’s how to do it:
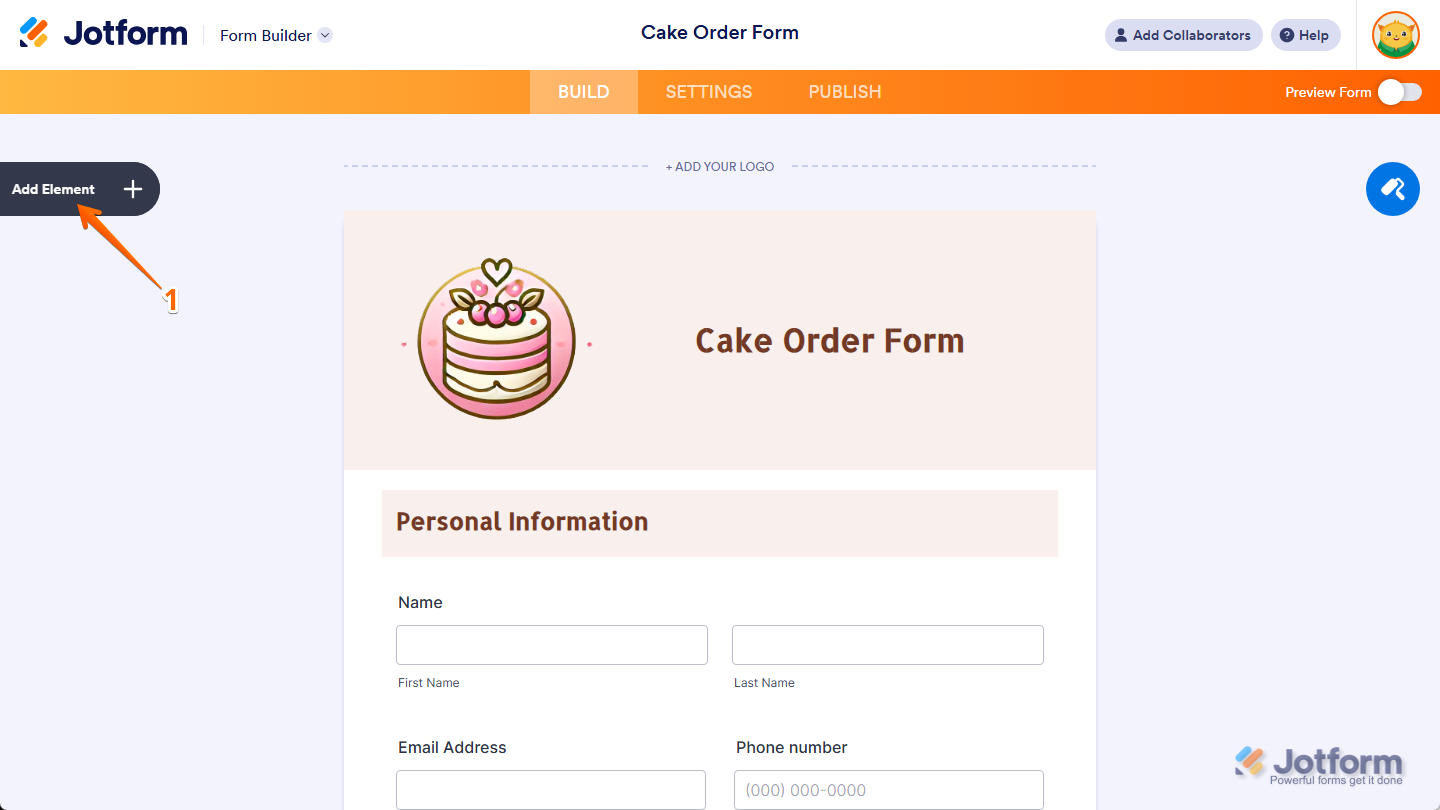
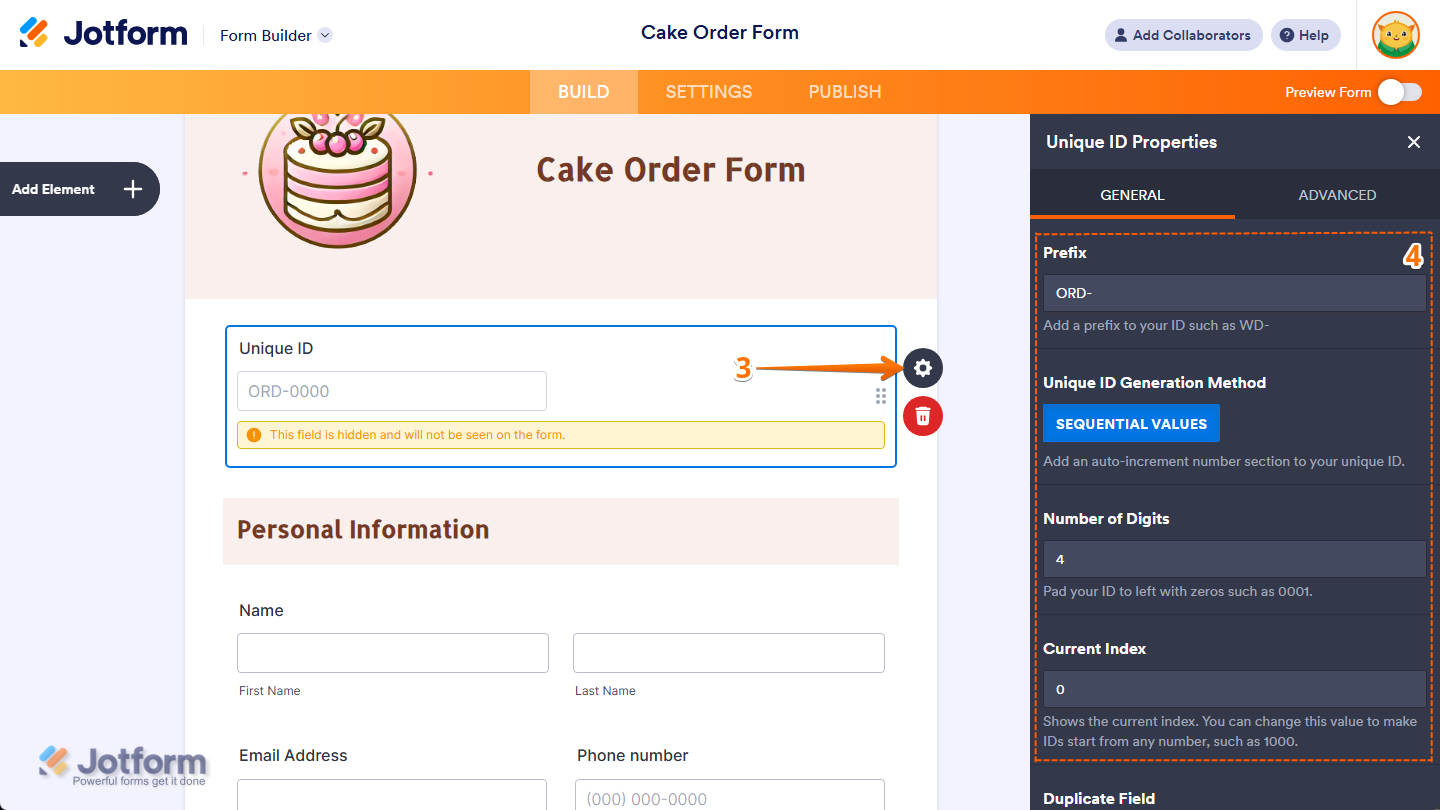
- In Form Builder, click on Add Element on the left side of the page.
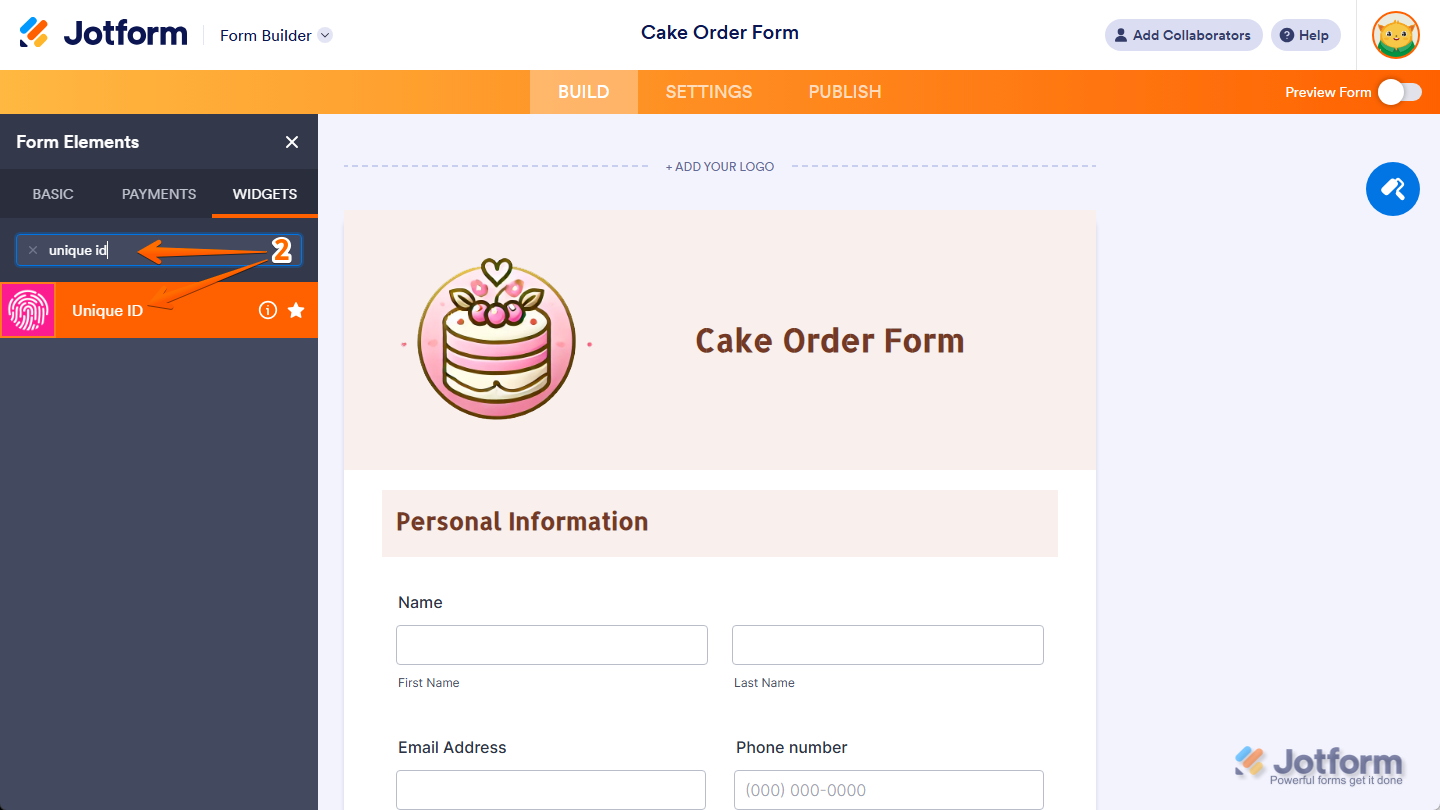
- In the Form Elements menu under the Widgets tab, search for and select Unique ID. Or just drag and drop it where you want it to appear on your form.
- On the right side of the Unique ID widget, click on the Gear icon.
- In the Unique ID Properties window, configure the following properties:
- Prefix: This adds a fixed set of characters at the beginning of each unique ID. For example, using ORD- as the prefix would generate IDs ORD-0001, ORD-0002, and so on.
- Unique ID Generation Method: This automatically generates a unique number for each submission using a sequential counting method. This setting always uses sequential values and can’t be changed.
- Number of Digits: This sets how many digits the numeric portion of the ID should have. The number is padded with leading zeros if needed. For example, setting it to four will give you 0001, 0002, etc.
- Current Index: This displays the current value in the sequence. You can update this to start your IDs with any number, such as 1000, which would make the next ID 1000, then 1001, and so on.
You can learn more about adding unique codes here.
Choosing the best tool for automatic ID generation
Though Google Forms doesn’t generate custom unique IDs by default, reliable alternatives exist! Tools such as Google’s Form Publisher add-on and Google Sheets formulas allow you to create and manage IDs with flexibility and control.
But for businesses that want the simplest no-code solution, Jotform offers built-in unique ID generation right out of the box with no extra tools, setup, or formulas, so you can start tracking and organizing submissions right away.
Pro Tip
If you want a more complete form platform with less configuration, try Jotform’s Unique ID Widget today. You’ll see how its simplicity and built-in features make it easier and faster than other methods.
Unique ID FAQs
Google Forms doesn’t allow you to embed custom code (HTML, CSS, or JavaScript) inside a form. However, you have two options, depending on what you’re trying to achieve. You can
- Embed a Google Form on a website.
- Add limited “logic” without code.
If you need true custom code, advanced logic, or custom IDs within the form itself, platforms such as Jotform are better suited for your needs.
Google Forms doesn’t allow you to use HTML, CSS, or JavaScript to build questions or layout, so you can’t create a true Google Form from HTML code. Here are three alternatives to consider in order to create unique codes in Google Forms:
- Build a form in HTML and submit it to Google Sheets.
- Embed a Google Form in an HTML page.
- Use Google Forms API. (This is built by sending structured requests rather than using HTML code.)
This article is for anyone who uses Google Forms and needs a simple way to track submissions reliably, prevent duplicates, and connect form responses to payments, emails, or internal records as workflows and response volumes grow.


")


")

: Which form builder is better for you?")


: Which is better for you?")


")

Send Comment: