
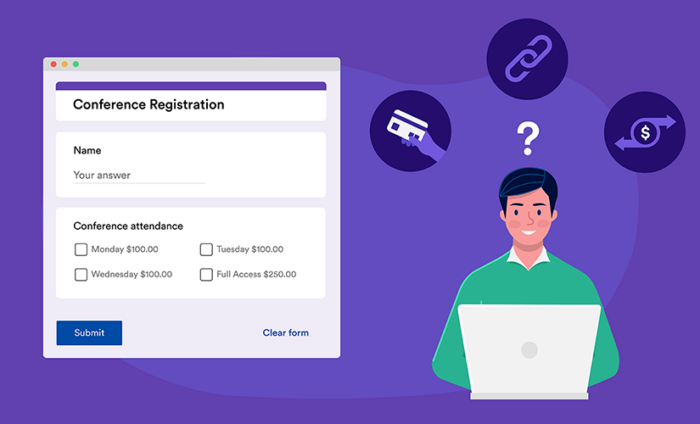
Google Forms is a user-friendly platform for creating custom forms and distributing them to your audience. It supports collecting payments, too — though you’ll have to add a payment link or use a third-party integration, as the platform doesn’t have native payment processing capabilities.
So, if you’re looking to create something like a free online order form with payment processing, there are a few extra steps you’ll have to take. Here’s what you need to know about creating Google Forms with payment links or built-in payment integrations.

Option 1: Use a third-party Google Forms add-on
Google Forms payment integration is as easy as installing a third-party add-on like Payable Forms. Once done, you’ll connect Google Forms with a payment processor and add payment functionality to your existing forms.
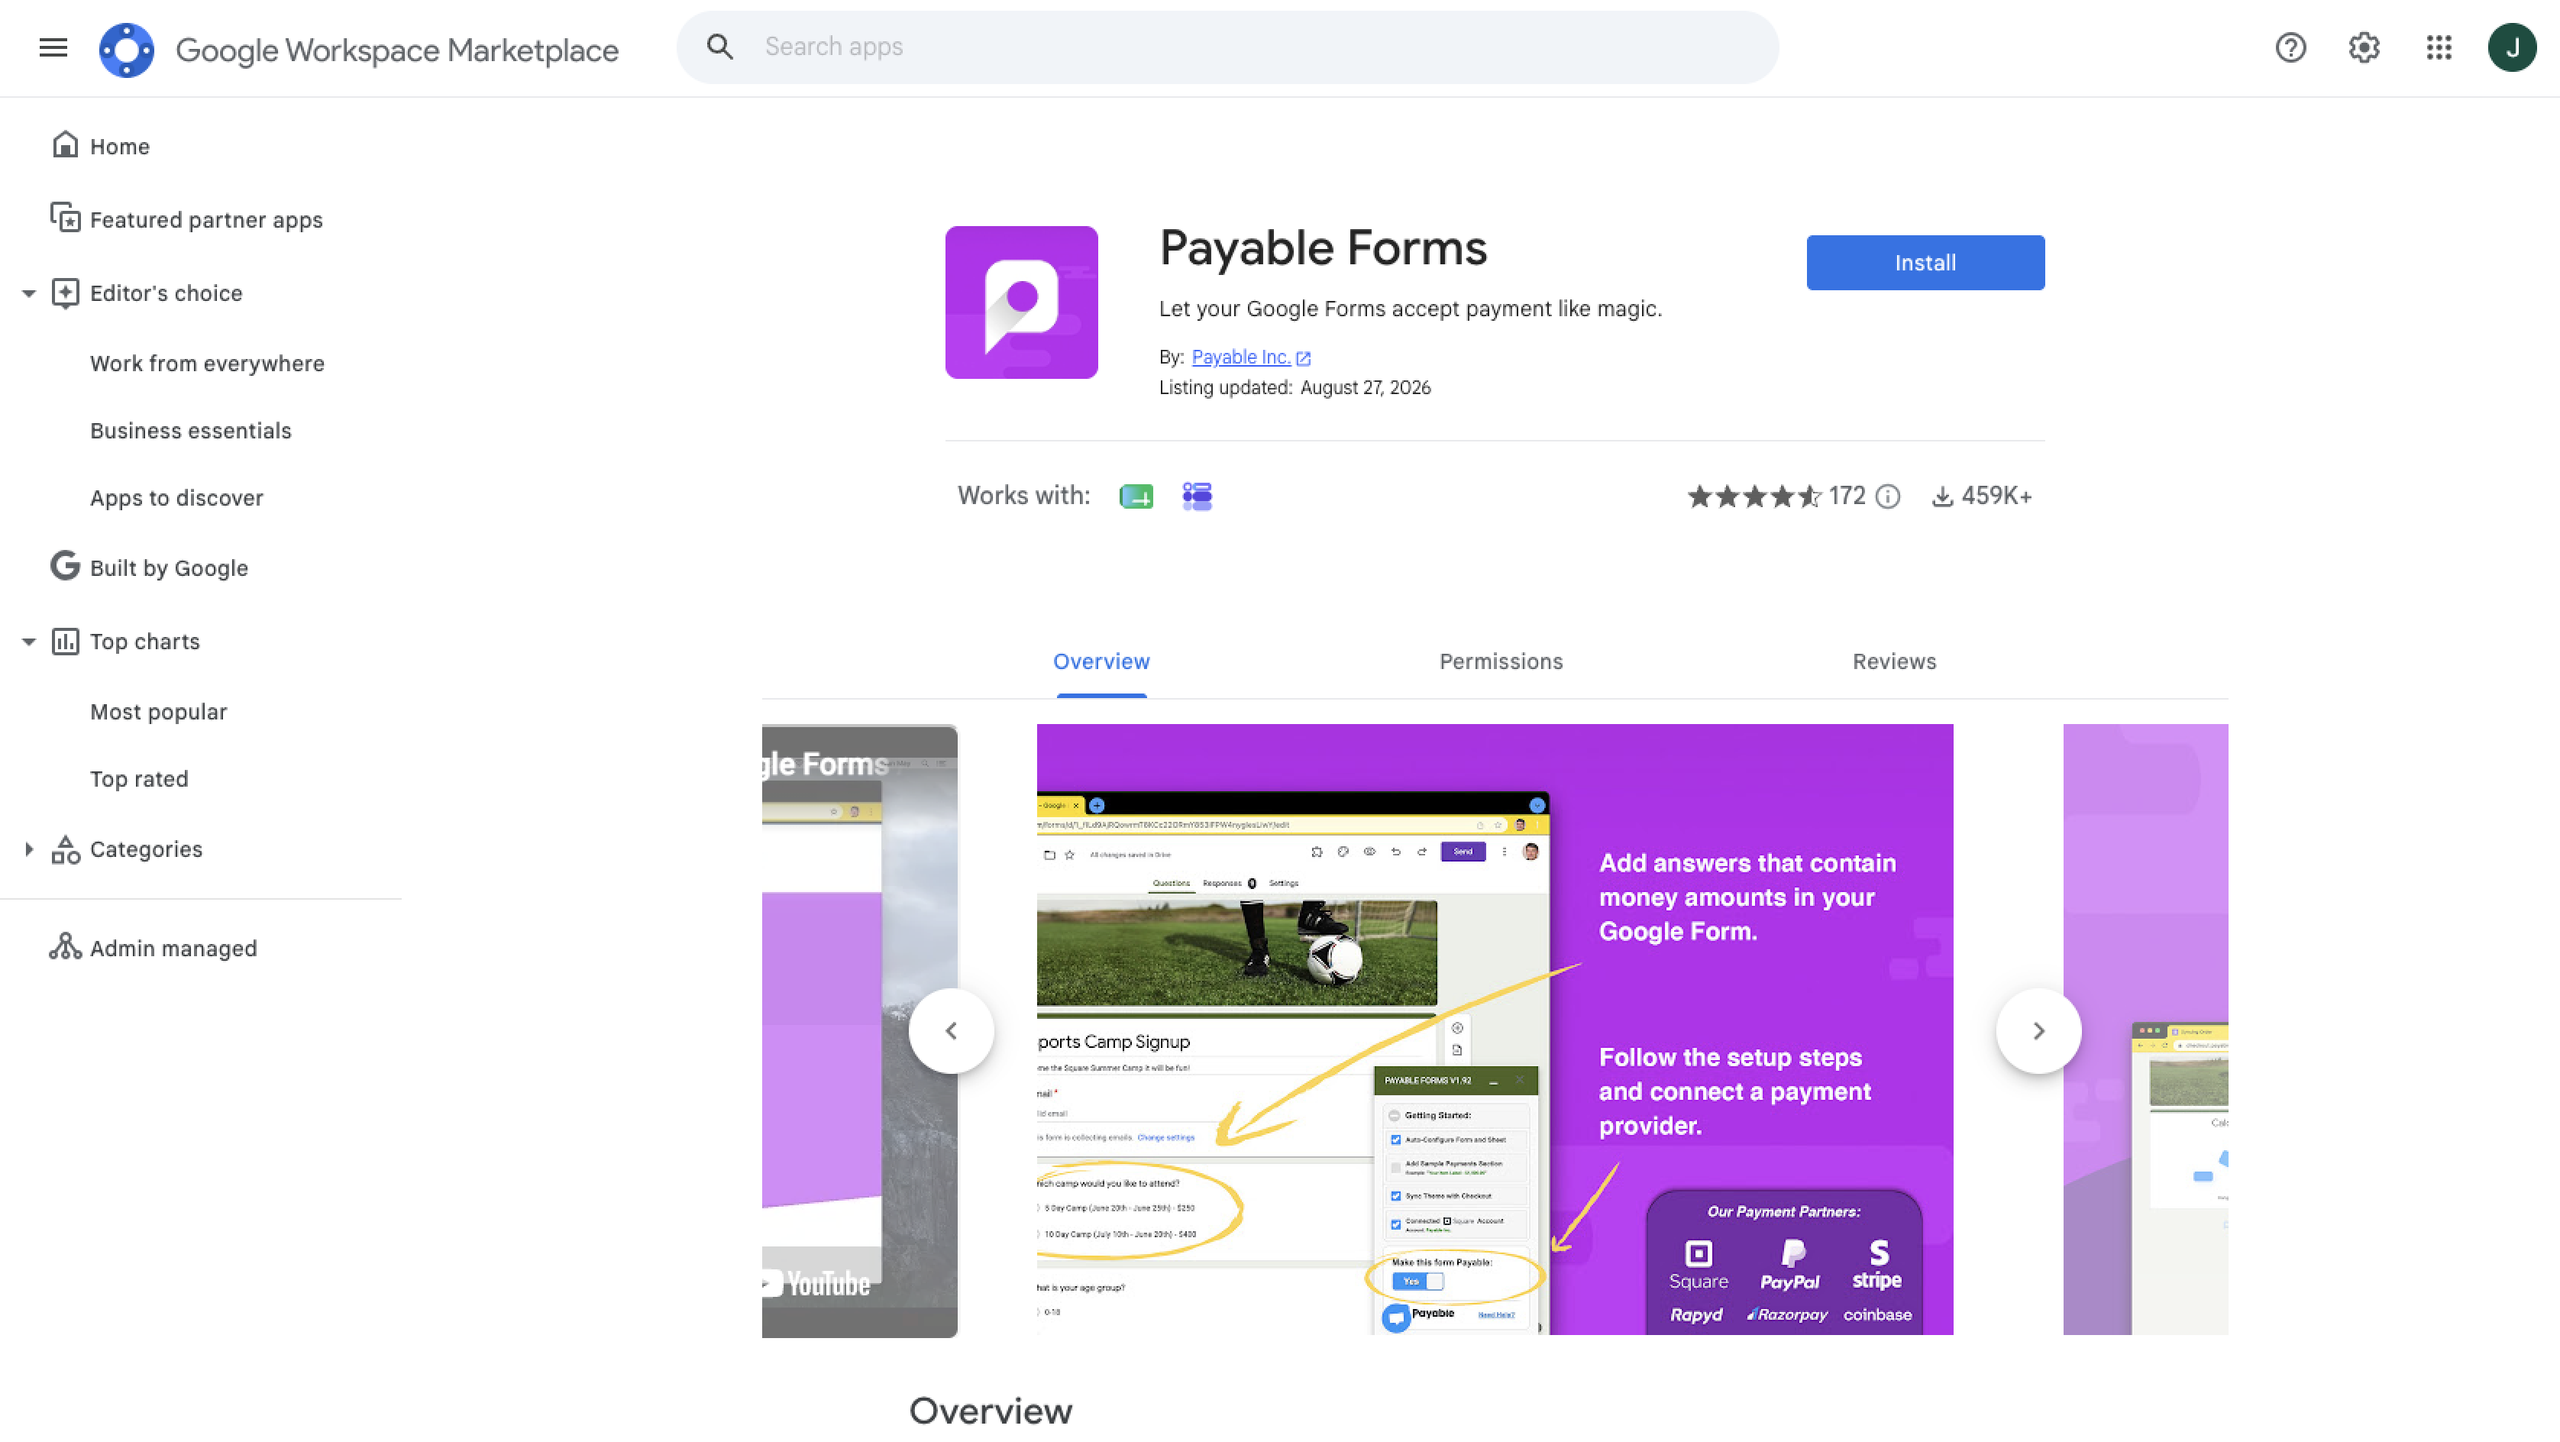
Payable Forms is available through the Google Workspace Marketplace. It integrates your forms with providers such as PayPal, Stripe, Square, Rapyd, or Razorpay.
For a deeper walkthrough, check out Jotform’s guide on how to use Payable Forms. But for now, let’s look at how you can install this third-party app with Google Forms.
Step 1: Install Payable Forms
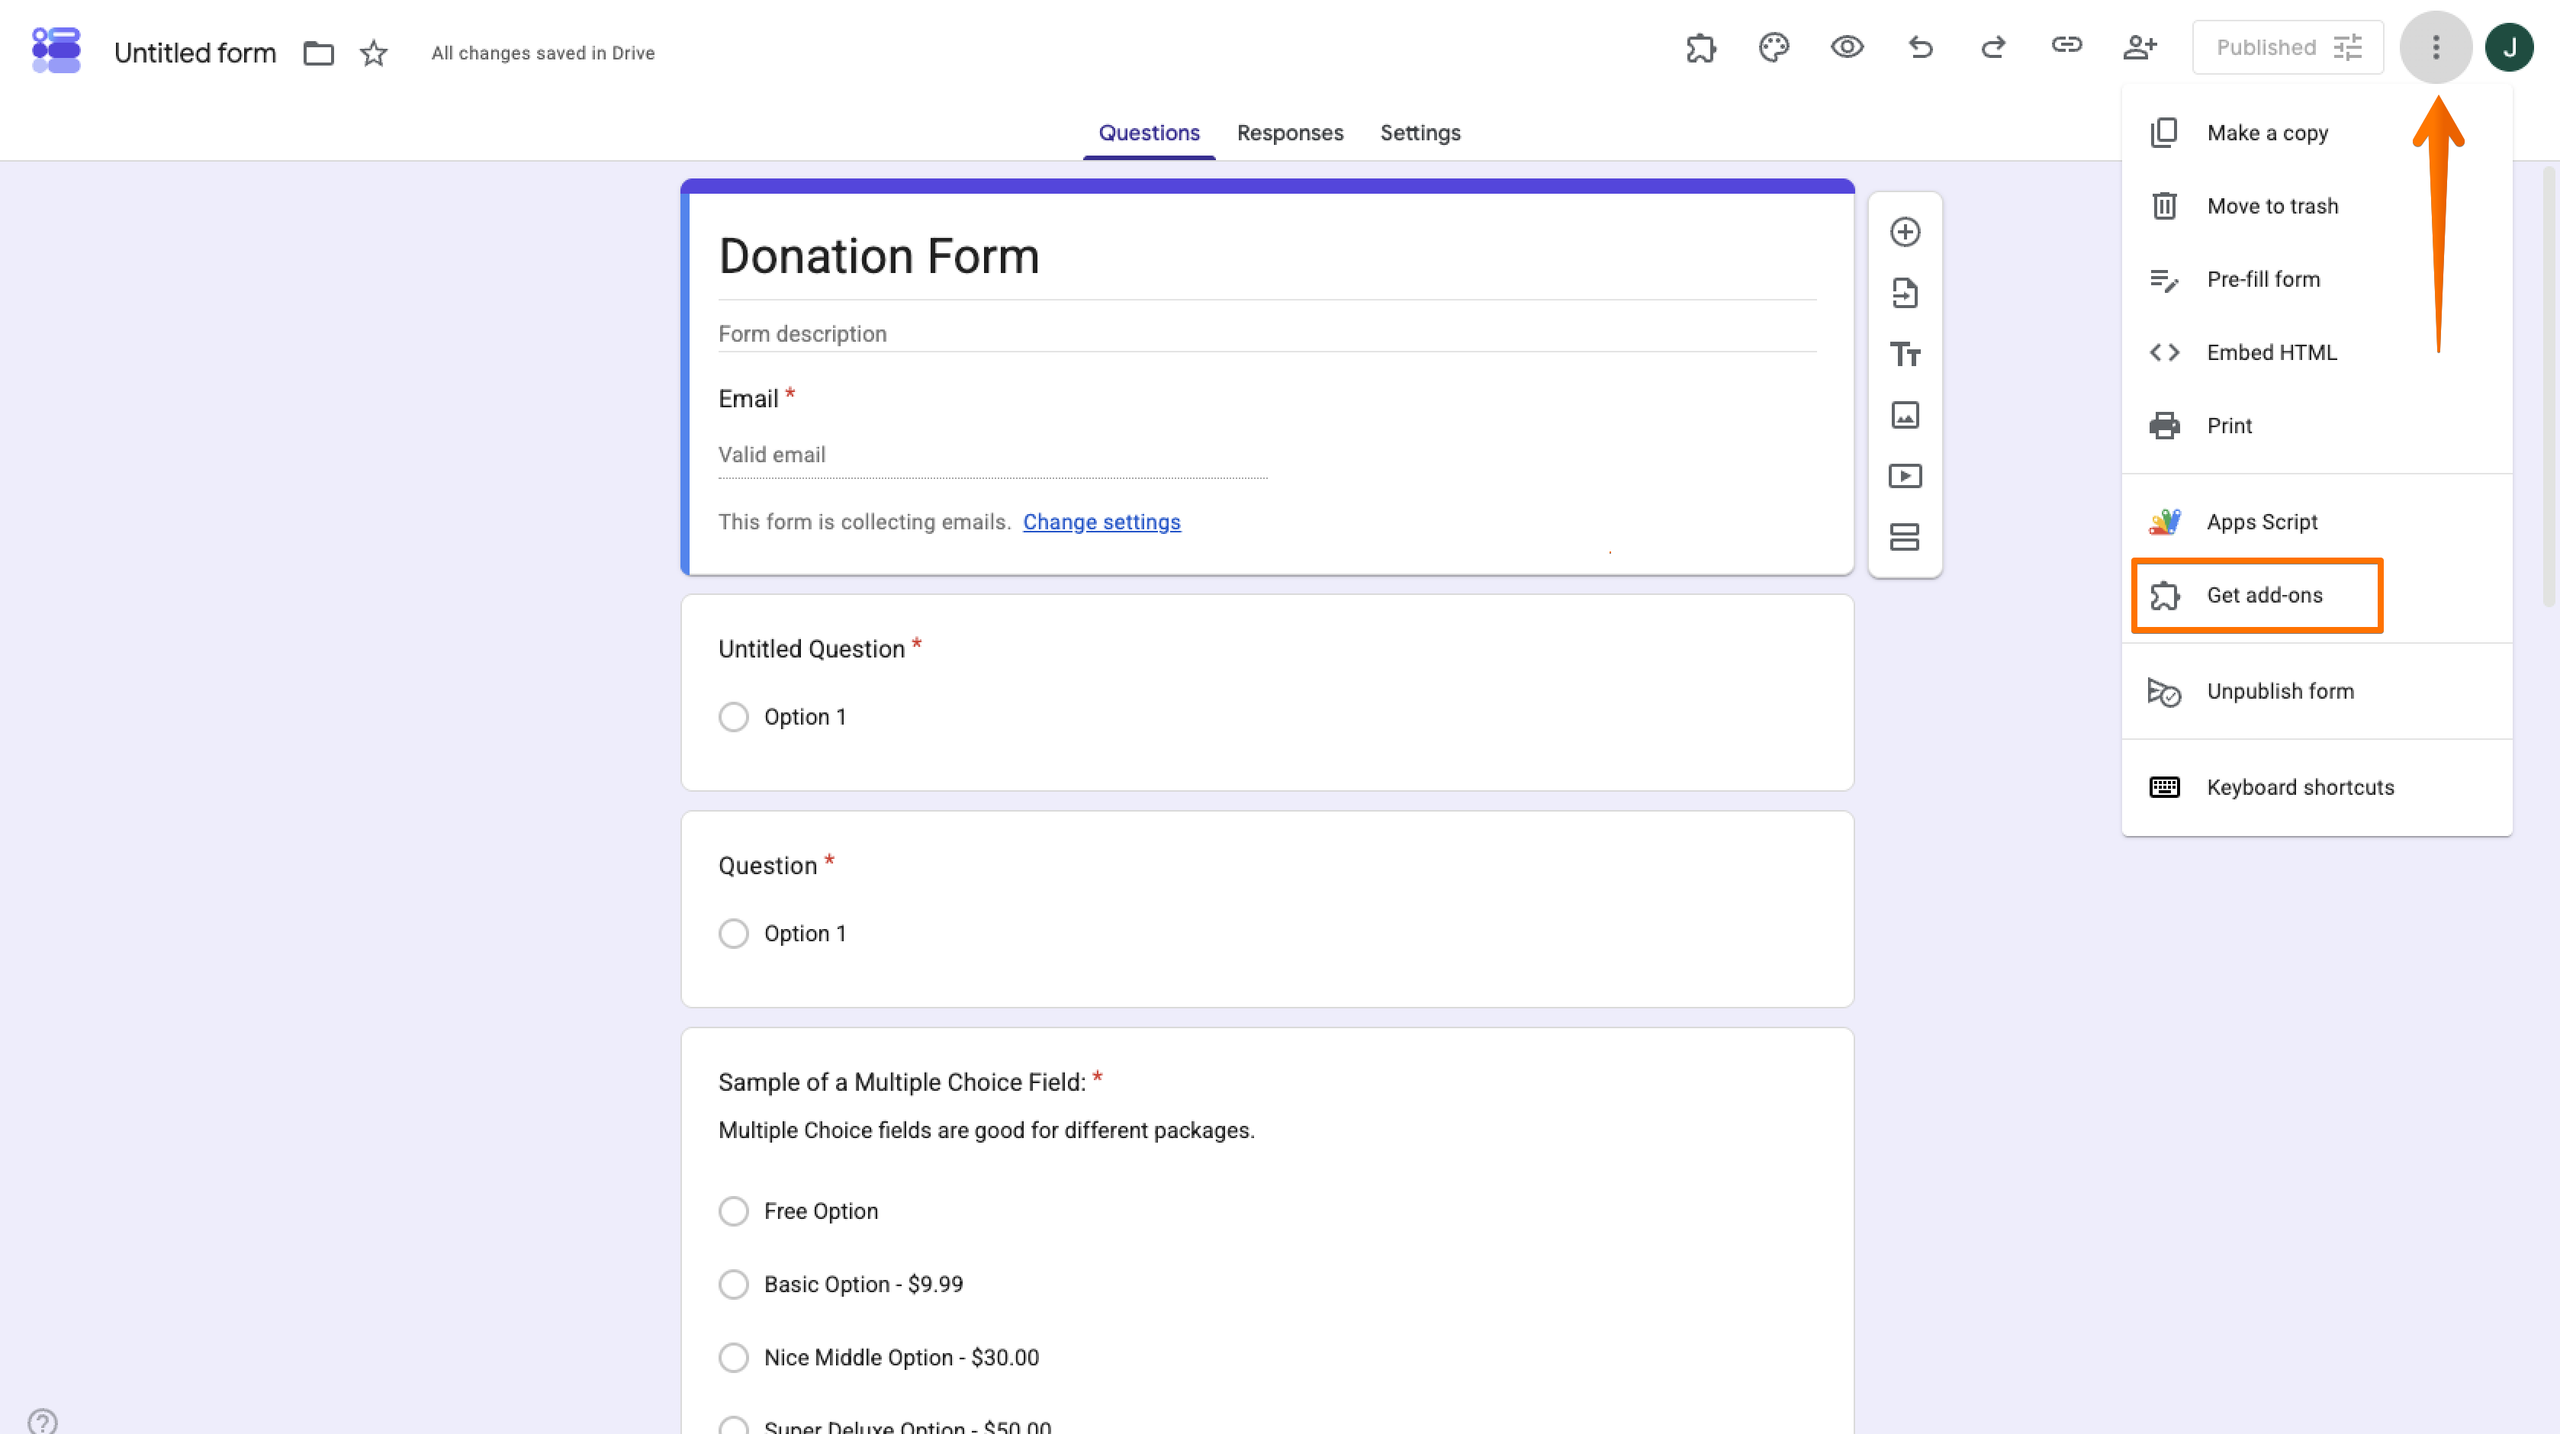
Open the Google Form you’re working with for payments. Select the menu under the three dots and search for Payable Forms. Alternatively, you can go straight to the Google Workspace Marketplace and search for Payable Forms. Follow the prompts for installation.
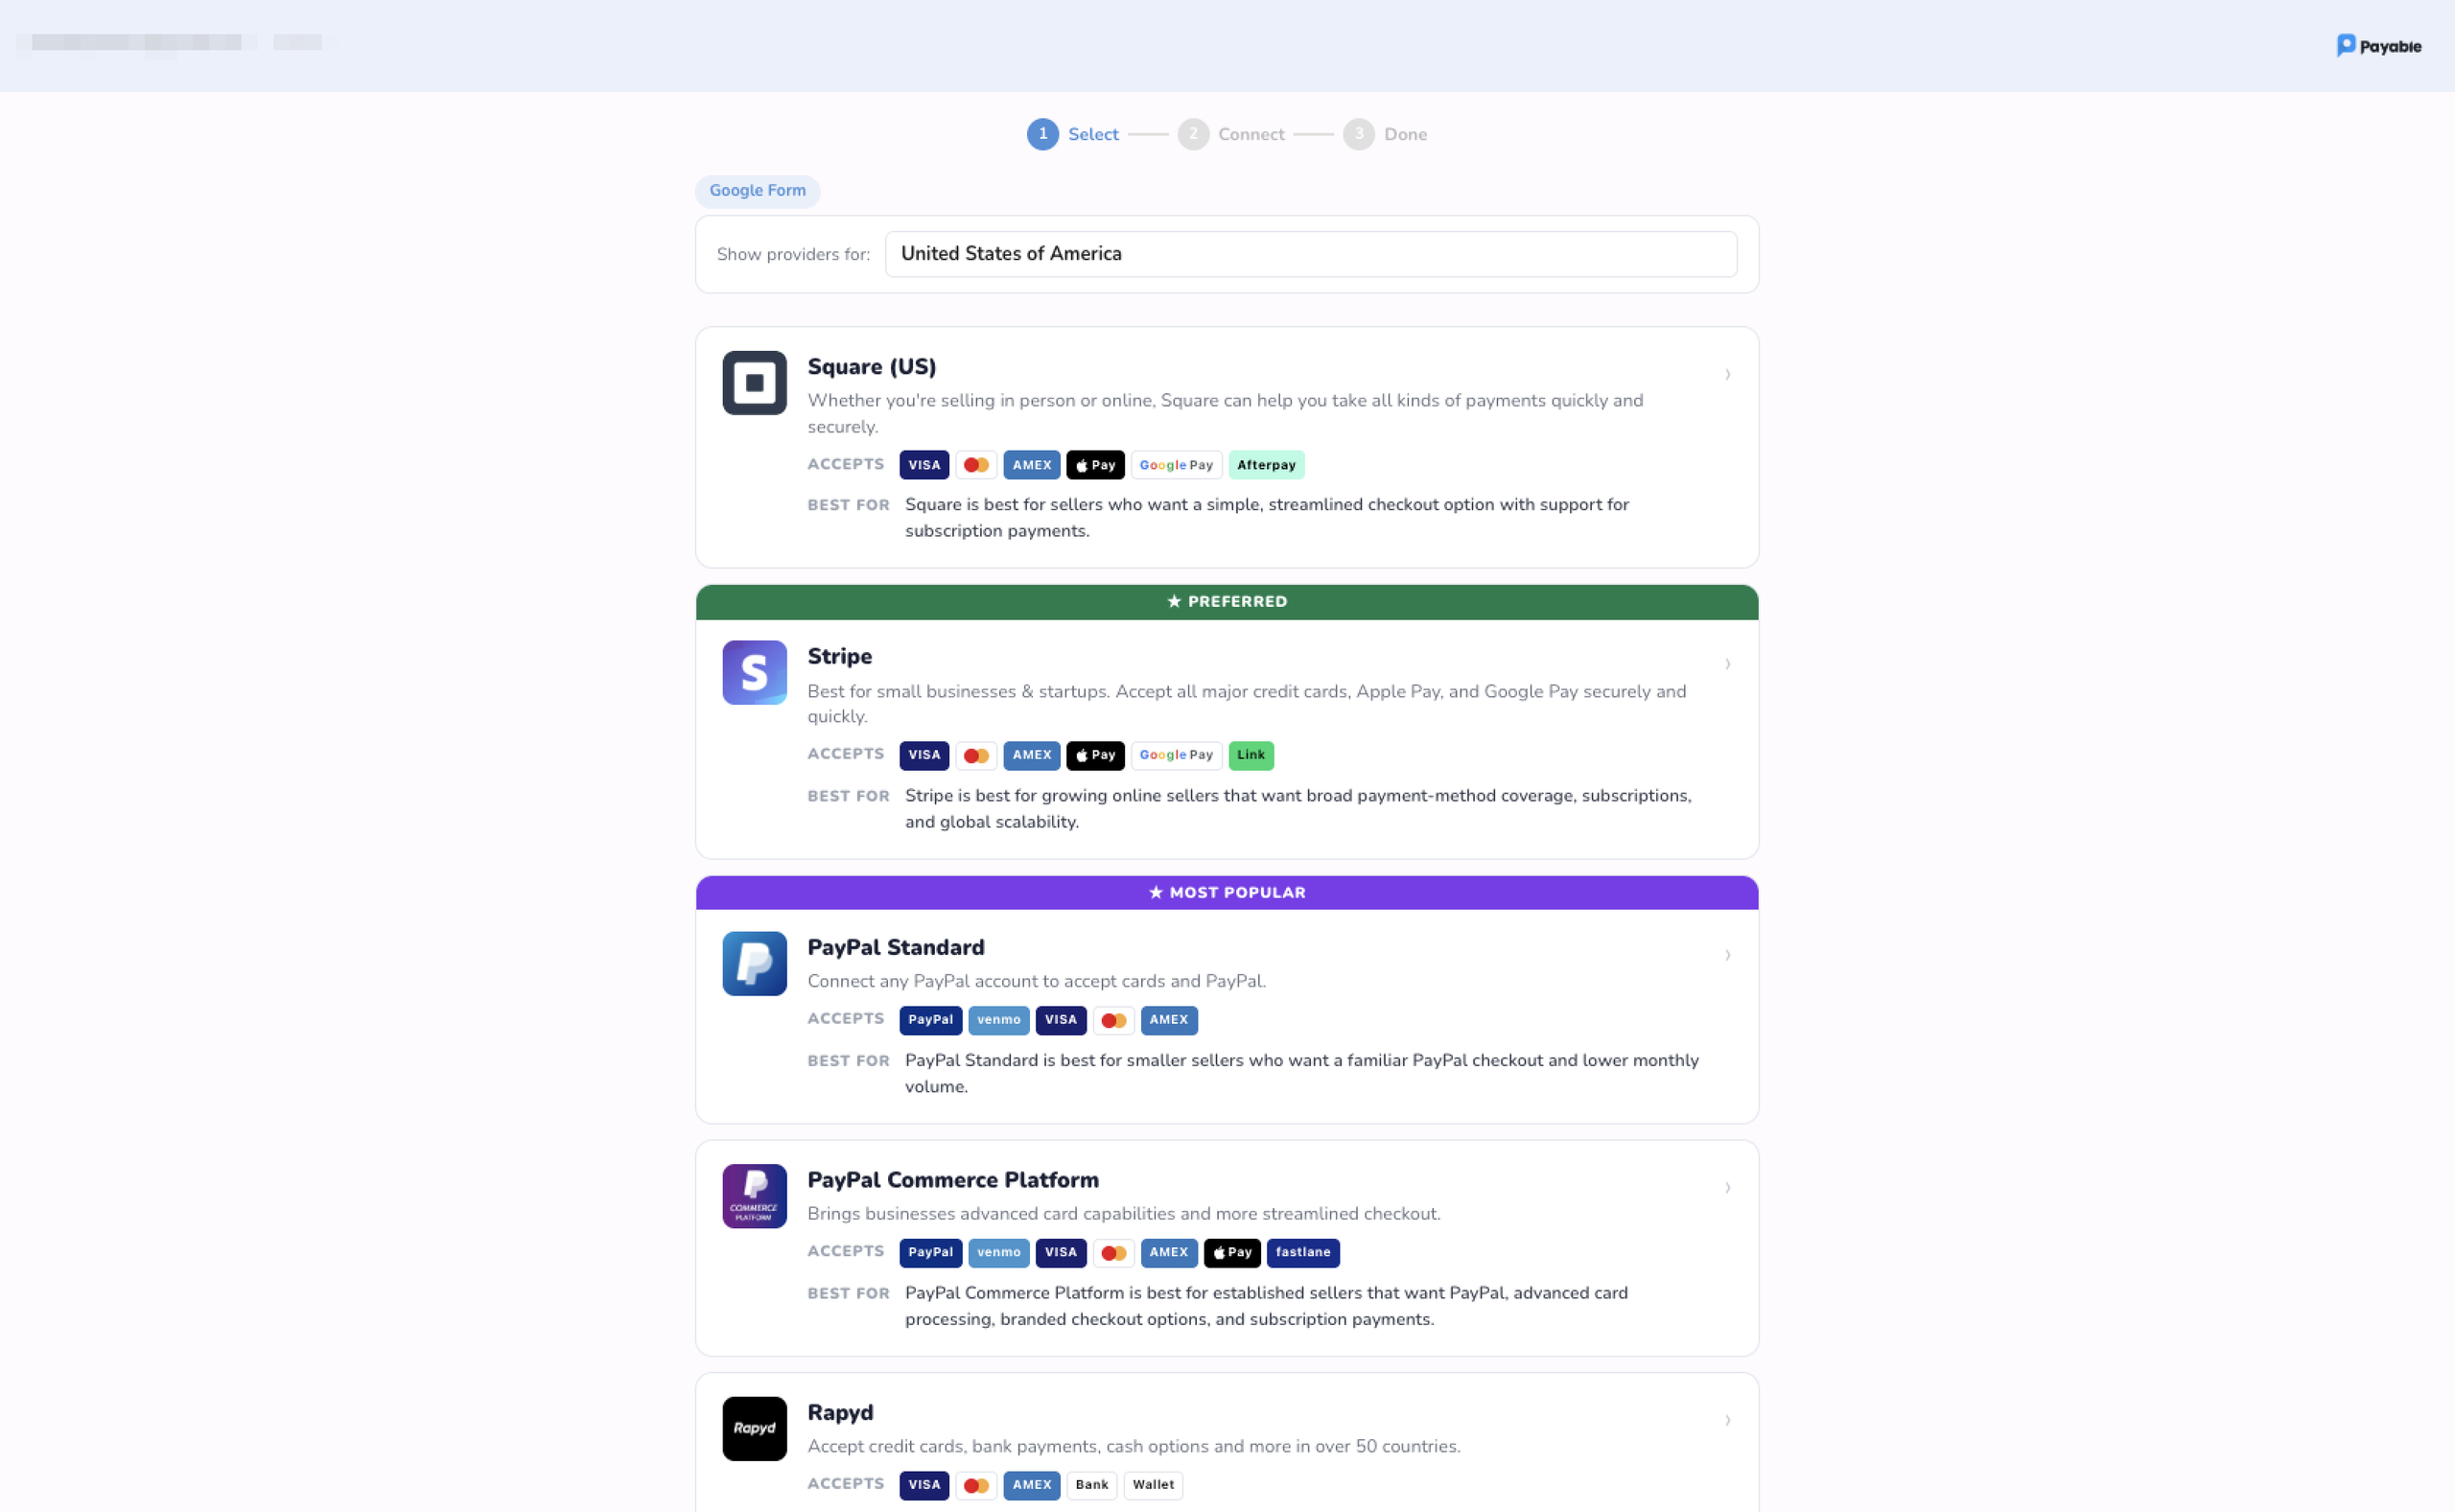
Step 2: Connect your payment processor
Once you install Payable Forms, you’ll be prompted to connect your payment provider. A few options are listed in the screenshot, but additional integrations are available.
Step 3: Configure and test your form
Finish setting up your form. Use the Payable Forms add-on to incorporate payment processing directly into the form. Publish the form and test it to ensure the payment function is working properly.
Pros and cons of a third-party add-on
The benefits of using a third-party app like Payable Forms are that it
- Allows you to keep your existing workflow
- Connects Google Forms with several popular payment processors
- Keeps payment information connected with your form responses
- Works well if you already rely heavily on Google Workspace
The downsides include that it
- Adds another tool to your workflow
- Creates a separate checkout experience
- Requires additional setup
- Can add fees beyond your standard payment processor charges
Don’t want to create your forms from scratch? Let another add-on from the Google Workspace Marketplace do the hard work for you. With Jotform’s intuitive AI Form Builder, you can simply provide a prompt, and the add-on will create a custom form in Google Forms. You can even import questions from other files or export questions to use elsewhere.
Option 2: Add a payment link in the confirmation message
You can also accept payments without installing an add-on. Go to your preferred service, such as PayPal or Stripe, and create a payment link. Then, place that link in your Google Form’s confirmation message. This approach is useful for simple, low-volume transactions.
Here’s how it works:
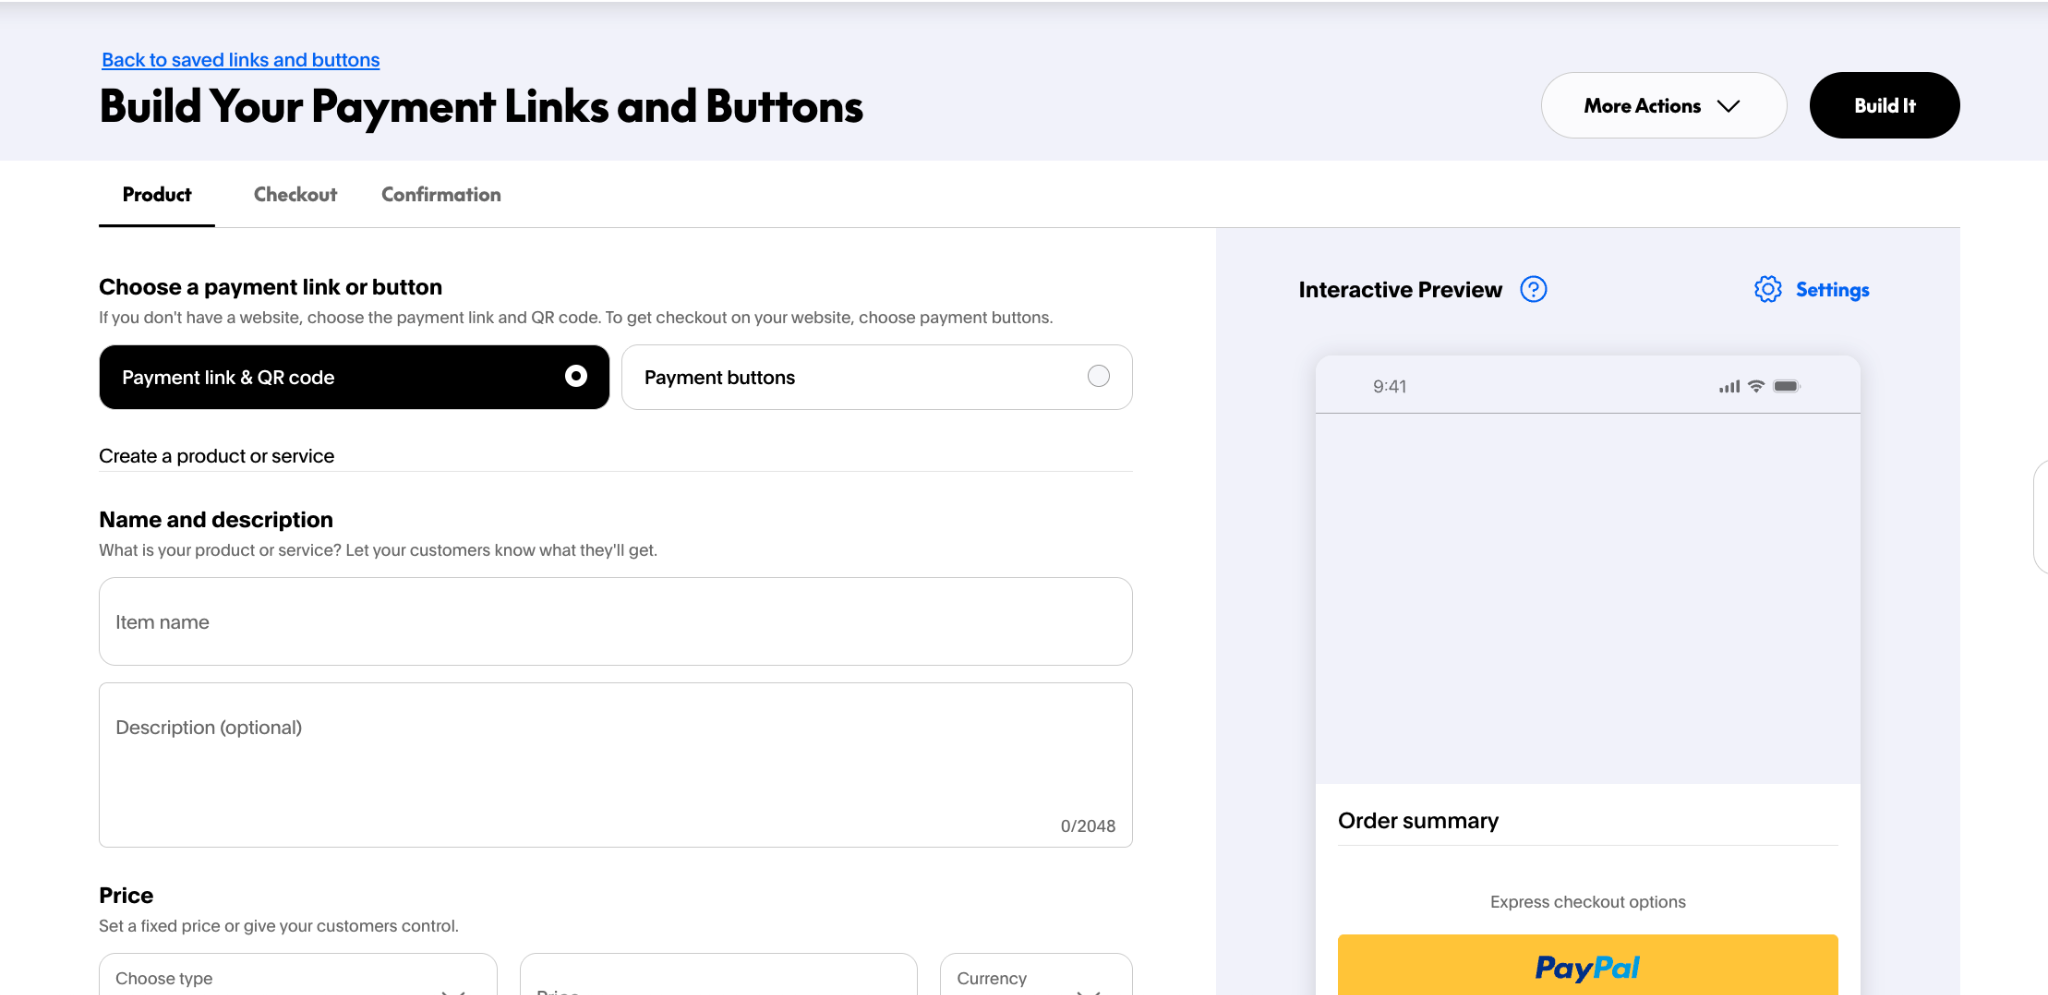
Step 1: Create your payment link
Create a payment link through your preferred payment provider. Google Forms PayPal links and Google Forms Stripe links are two of the most popular options.
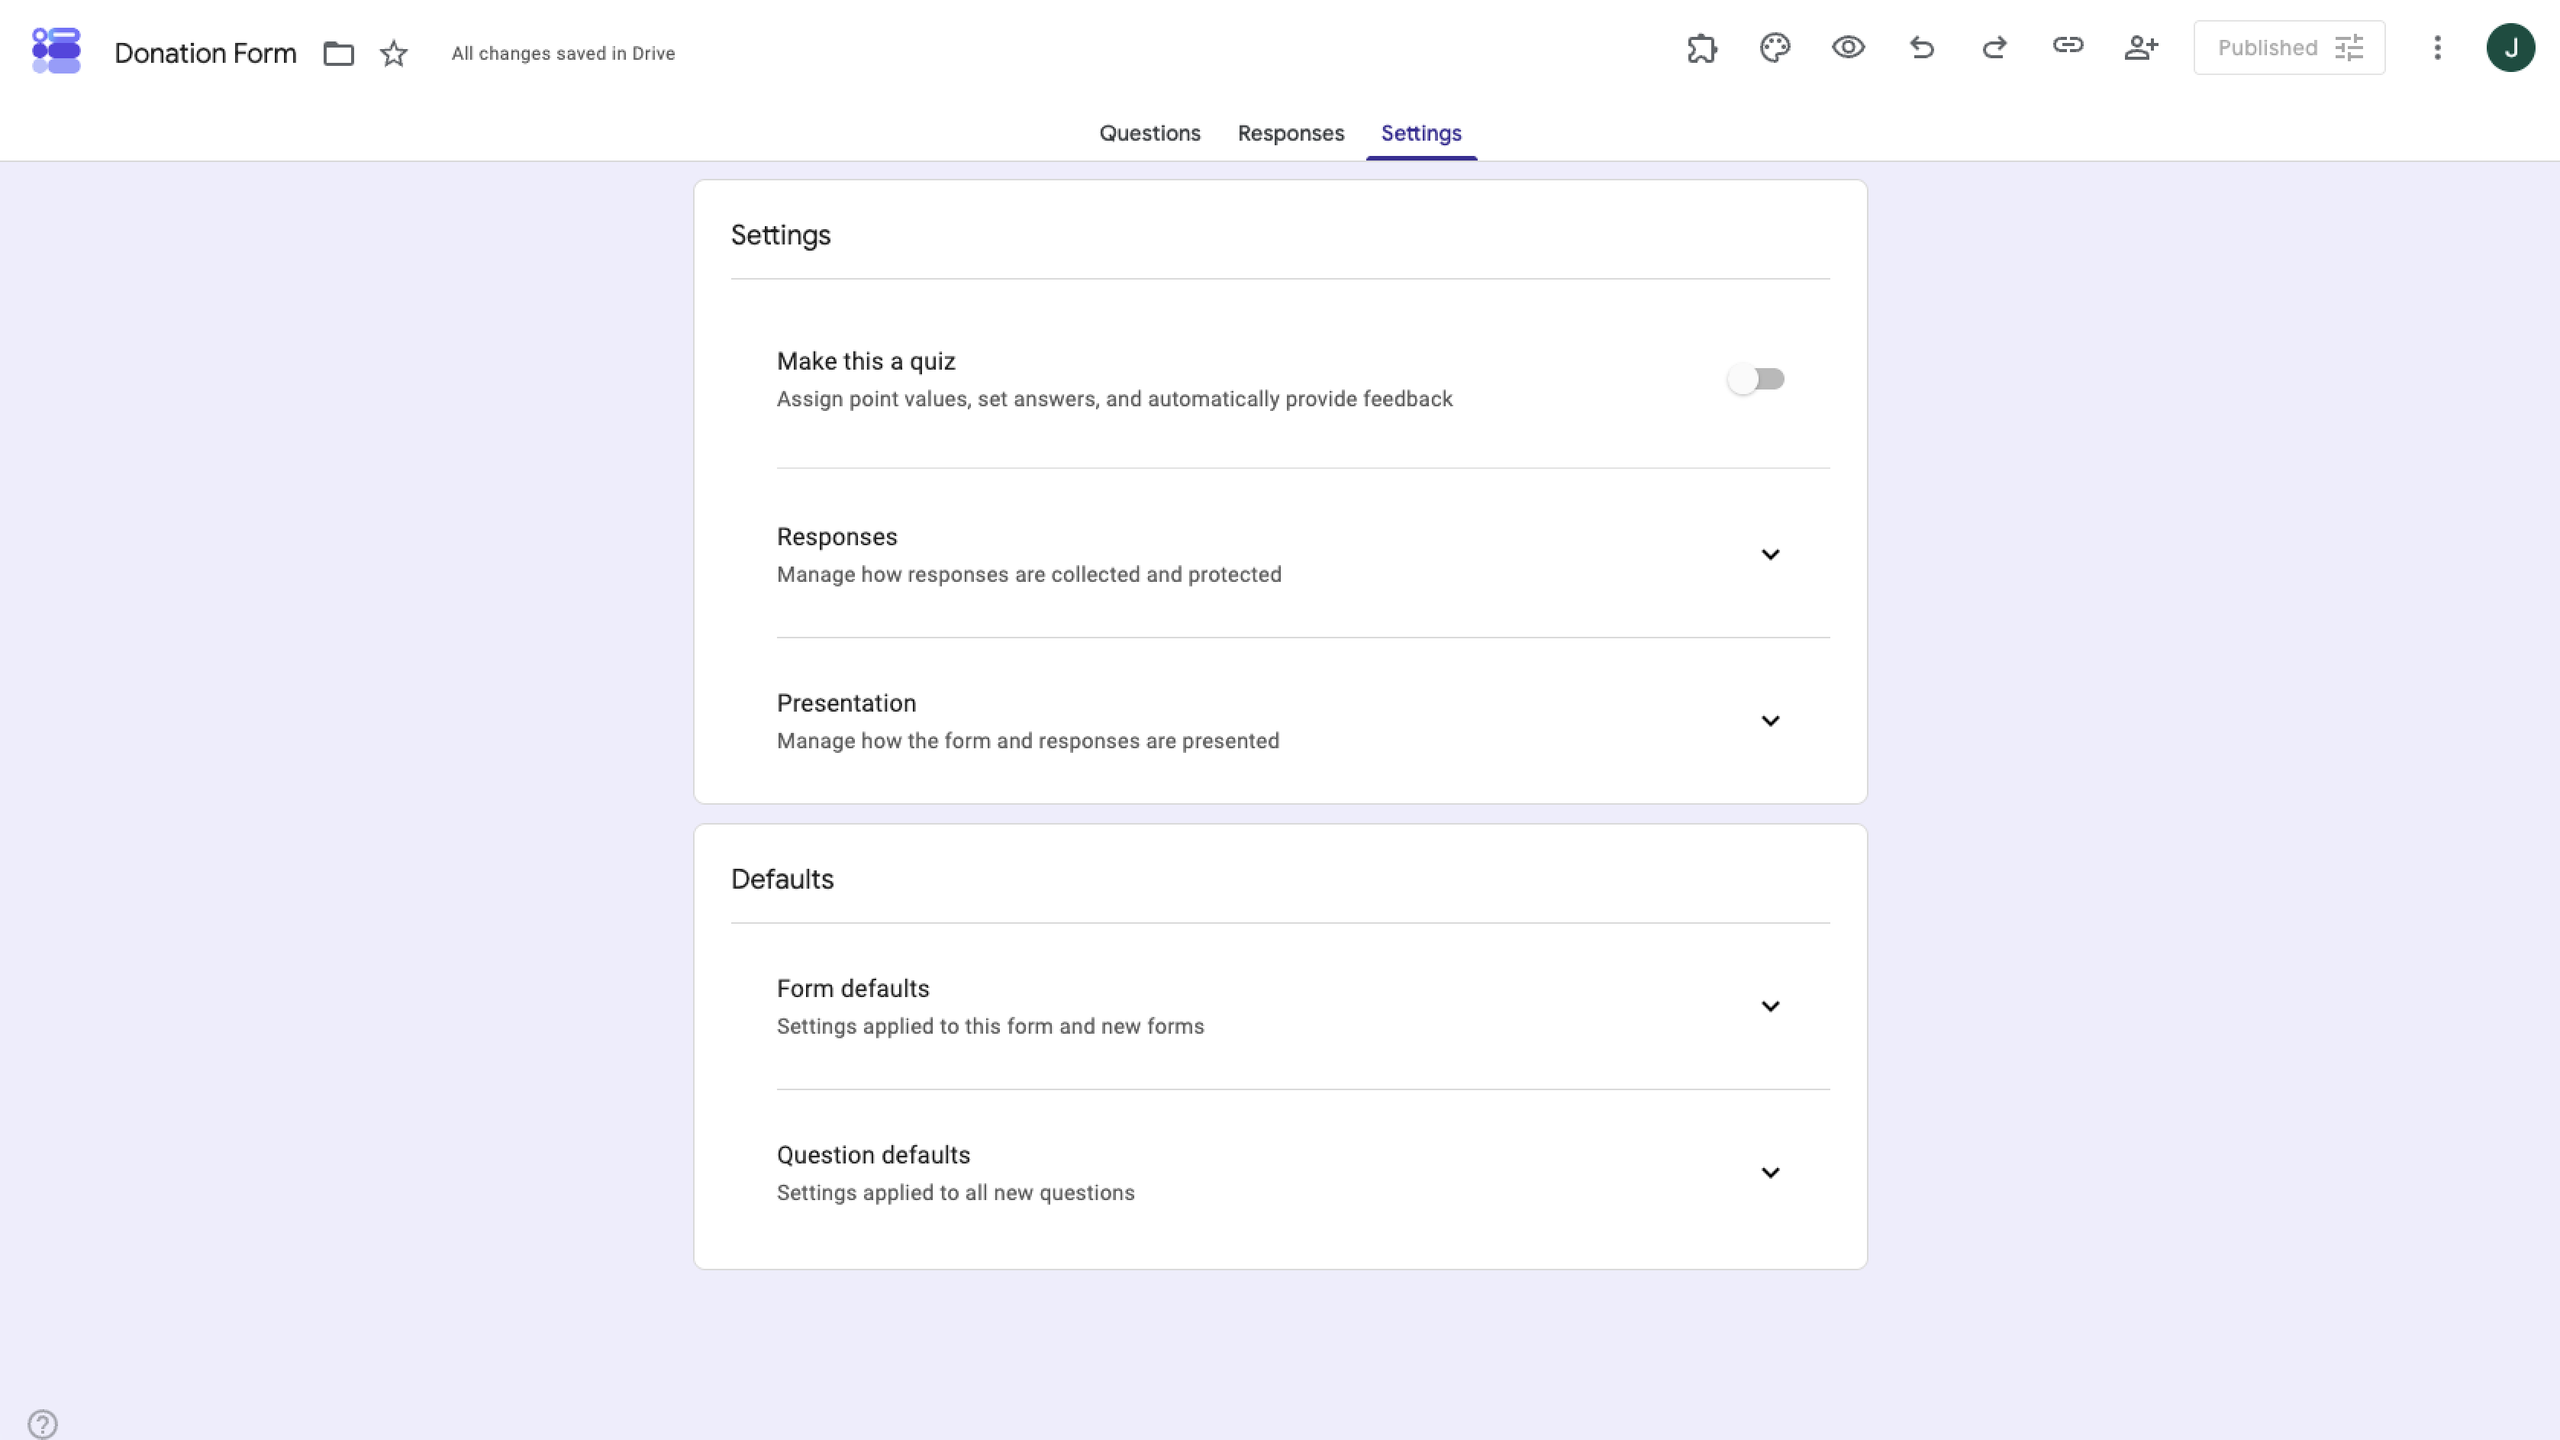
Step 2: Open your Google Forms settings
Open your form and select Settings. Under the presentation options, find the confirmation message that appears after someone submits the form.
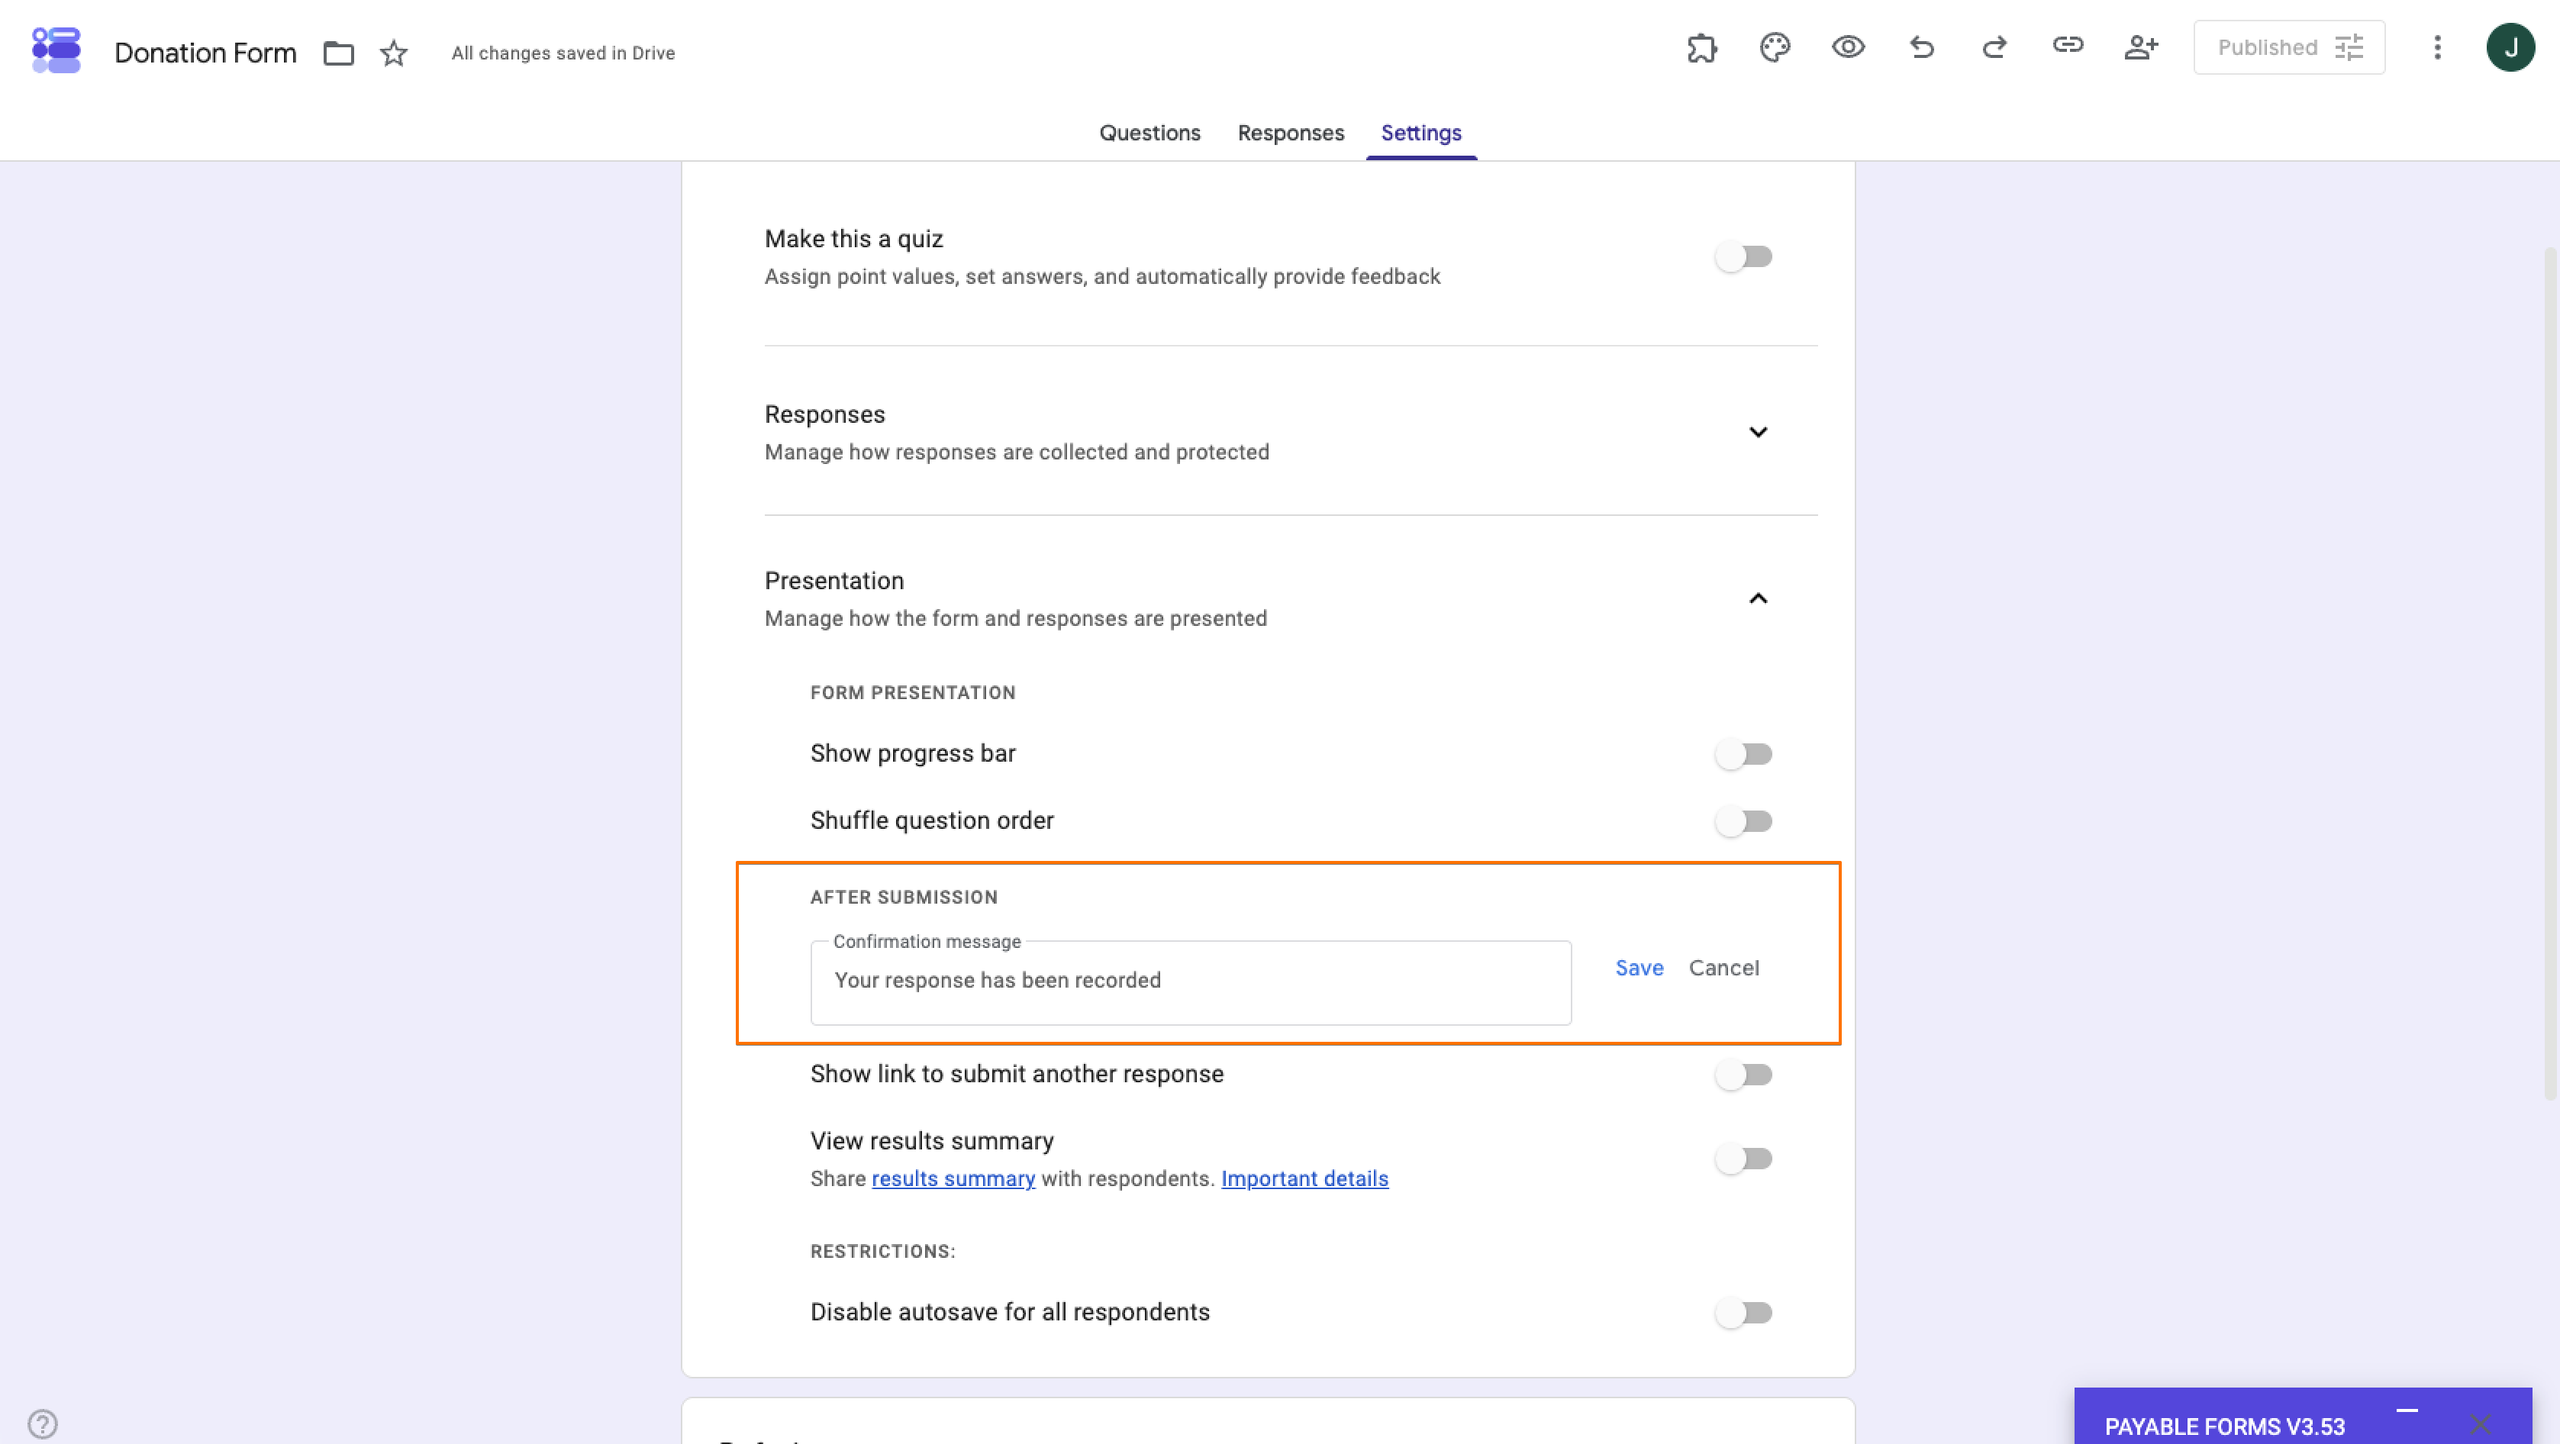
Step 3: Add your payment link
Write a confirmation message that explains how respondents should pay, then add your payment URL. Save your settings and submit a test response to make sure the link works.
Pros and cons of adding a payment link
There are benefits and drawbacks to any workaround payment solution, including something as simple as adding a payment link. The pros are that it
- Costs nothing to add to Google Forms
- Requires no third-party add-on
- Works with payment links from services such as PayPal
- Takes only a few minutes to set up
The drawbacks are that it
- Separates payment from the form submission workflow
- Requires customers to complete another step
- Creates more manual payment tracking work
- Makes it easier for someone to submit the form without completing the payment (the biggest concern)
Google Forms supports this basic link-out approach through its confirmation message tab. You can explore Jotform’s guide to using Google Forms if you want to learn more about the platform before deciding whether you need a payment solution.
Why force add-ons when you have Jotform?
If you want to collect information and payments in one streamlined process, you don’t need to force Google Forms into a job it wasn’t designed to handle. Jotform gives you a native payment form experience that lets you collect customer information, calculate orders, and accept payment through the same form.
Depending on the payment gateway you choose, customers may complete payment directly within the form or may be redirected to the payment provider. Jotform supports both types of payment integrations.
Jotform also offers some of the best Google Forms add-ons, including payment integrations and form templates. It has ready-made payment and order forms that you can customize and embed on your website. For example, you can explore an Online Donation Form, a Restaurant Order Form, or a Donation Form Template to see how Jotform handles different payment and collection needs. These examples can help you choose a starting point before building your own form.
Here’s how to use Jotform to accept payments with forms.
Step 1: Create your Jotform
Start with a blank form or choose one of Jotform’s order form templates. Our platform also includes several payment form templates. You can customize the fields, branding, products, prices, and other details with our drag-and-drop builder.
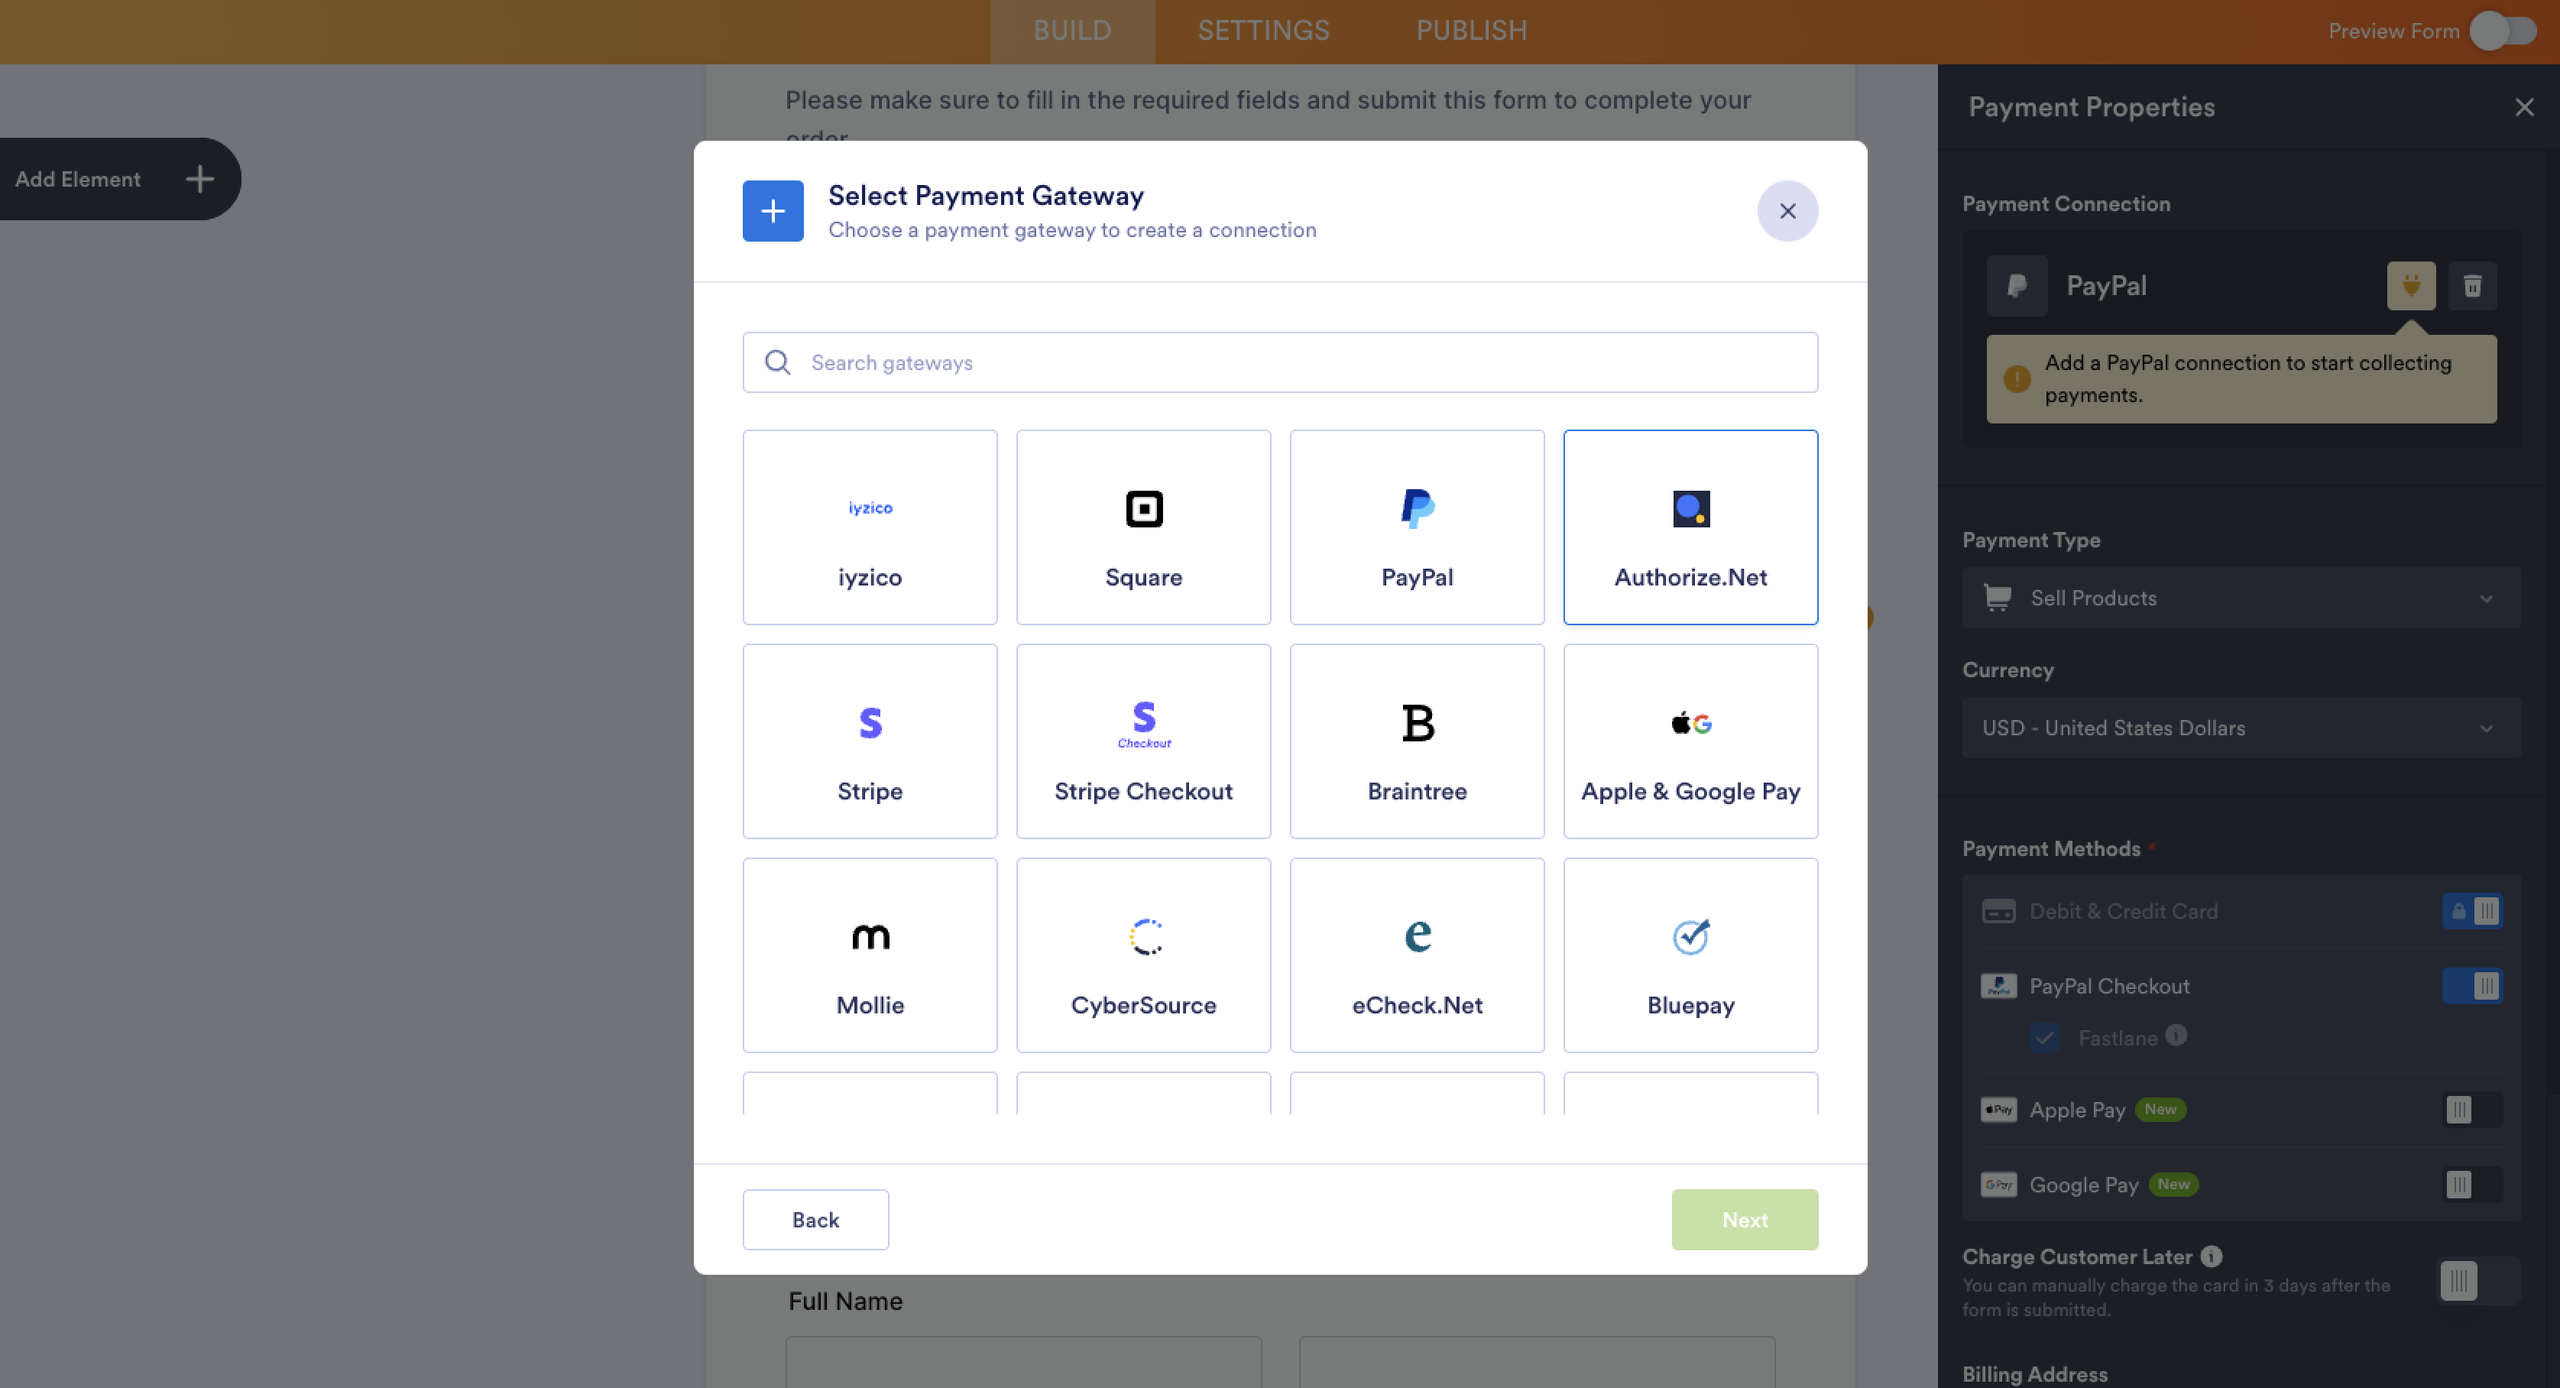
Step 2: Add your payment gateway
Select the payment element, open the Payments section, and choose your preferred payment processor. With over 40 payment processor integrations, Jotform supports the most popular payment platforms used today (see our online payment gateway comparison table to explore them all).
What’s more, Jotform doesn’t charge additional transaction fees for payments collected through its forms. Keep in mind that you will still pay any standard processing fees charged by your selected payment provider.
Jotform is also PCI DSS Service Provider Level I compliant — the highest level of PCI DSS certification for service providers. Standard payment integrations rely on payment partners to process credit card information, while Jotform maintains its own PCI DSS compliance.
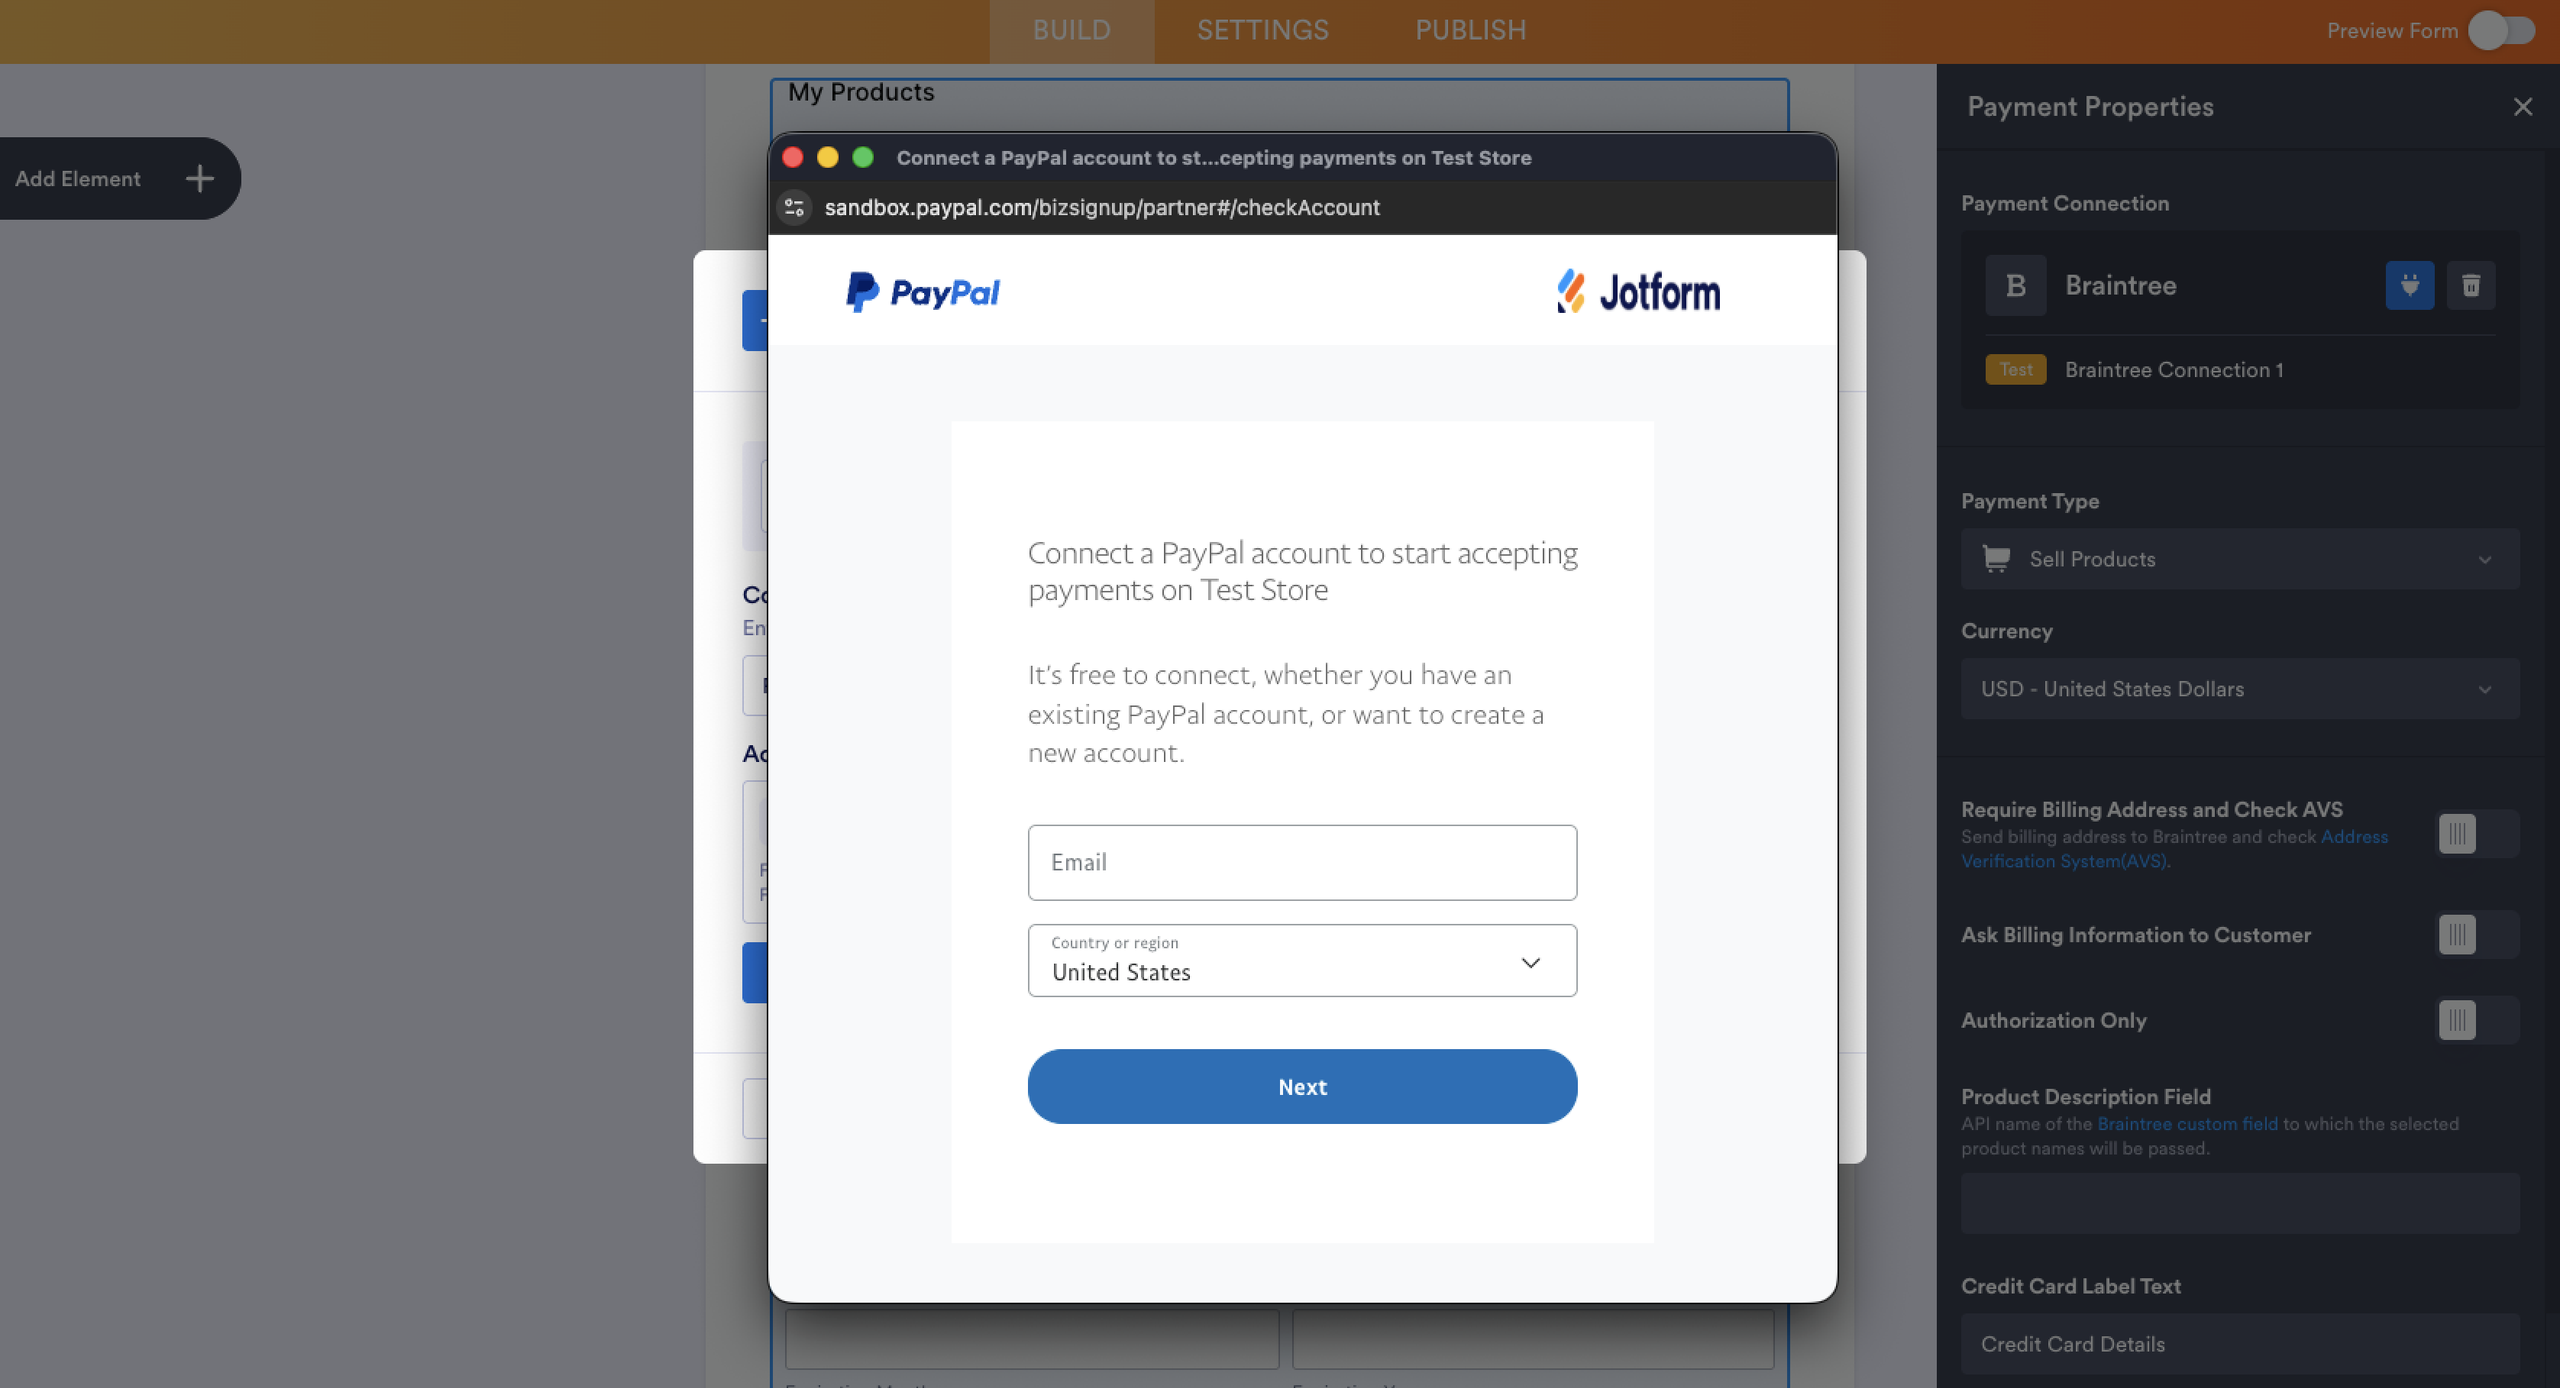
Step 3: Authenticate and publish
Authenticate your payment account, test your form to make sure everything works correctly, and then publish and share the form with customers.
But why stop there? Jotform gives you several tools beyond basic payment collection. If you sell multiple products or services, Jotform Store Builder helps you create a frictionless online store experience. You can also add features that Google Forms doesn’t provide natively — for example, Jotform Sign lets you collect electronic signatures alongside payment information. That combination can help when you need the recipient to sign an agreement, waiver, or authorization before completing a purchase.
If you need more functionality, explore Jotform’s form widgets. There are dozens of widgets that add elements to support your workflows, so you don’t have to build everything from scratch.
Make the switch from Google Forms
Jotform is packed with tools, features, templates, and widgets that can make your forms more engaging and versatile. From our QR code generator for online forms to our form calculation widget, Jotform is here to help businesses connect with audiences through the power of interactive forms. Jotform also offers file upload form templates, which are a powerful tool for acquiring user-generated content from your audience.


Ready to migrate Google Forms to Jotform? Our platform makes it easy to transition so that you don’t have to start over. Move your existing forms into our platform, which is designed to handle payments and more. Explore Jotform today.
This article is for small business owners, nonprofits, and event organizers who want to collect orders, donations, or registration fees but are hitting a wall with Google Forms’ limitations.




























































































Send Comment:
4 Comments:
April 4, 2024
Not that hard easy to do.
December 4, 2022
We have used the Payable Forms Add-On you mention and link to in this article with our Google Forms for a monthly mowing membership for a year or so now.
Overall it works great, we use it for subscriptions and seasonal instalments as well as one time payment. Would recommend 👍
August 1, 2022
You say there aren't any extra fees, great I thought. So I set up a Jotform and started collecting the data and payments. Only to find there WERE extra fees. I had to pay Jotform $34 to be able to collect only 100 payments. Even more if we went over that number. This should have been made clear in the article because once I had published the form and people started completing it, I had no choice but to pay the fee even though it wasn't disclosed when setting it up. Very disappointed that you 'forgot' to mention the fees in this article.
February 28, 2022
Nice one.