HubSpot is a customer relationship management (CRM) platform with all the software, integrations, and resources you need to connect your marketing, sales, content management, and customer service. HubSpot’s connected platform can help you focus on your customers and grow your business faster.


To create prefill URLs with data from your HubSpot Contacts and Companies lists
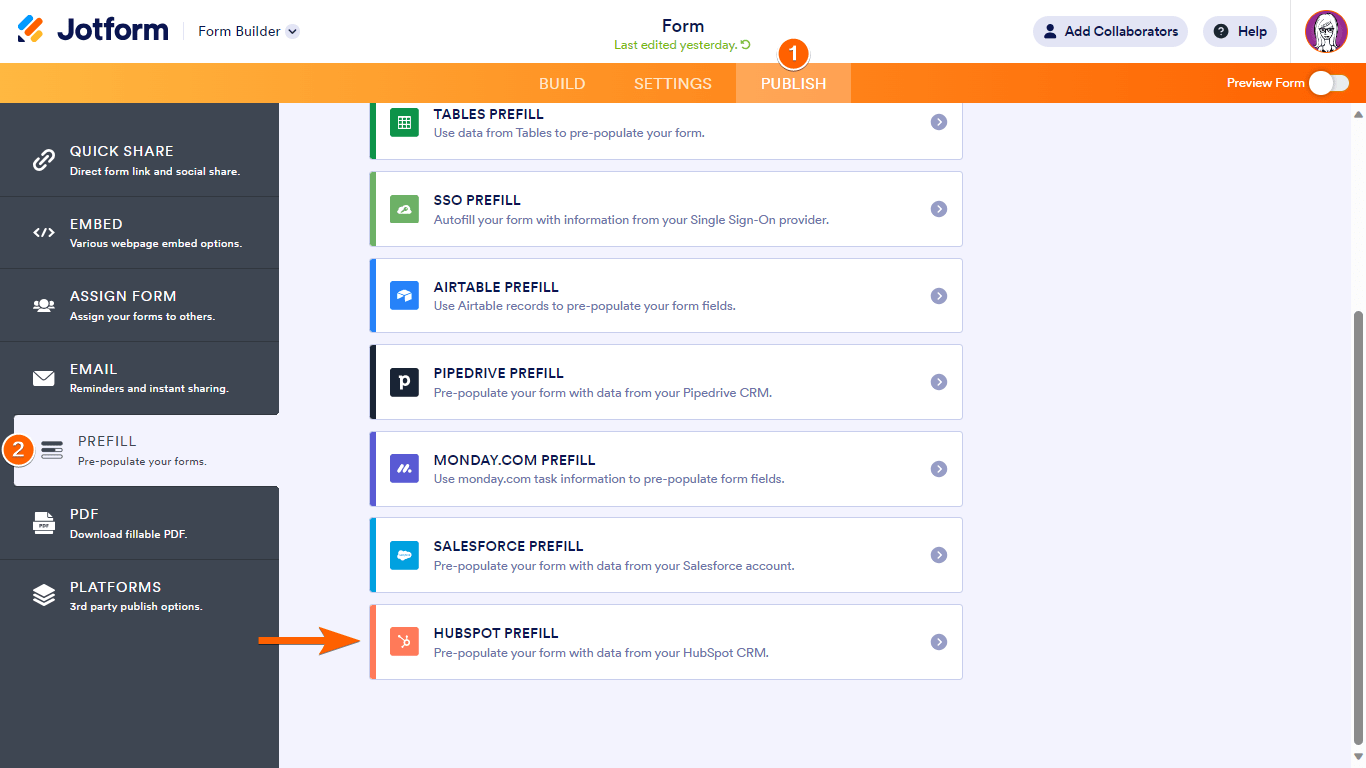
- In the Form Builder, select Publish at the top.
- Go to Prefill on the left, then select HubSpot Prefill.
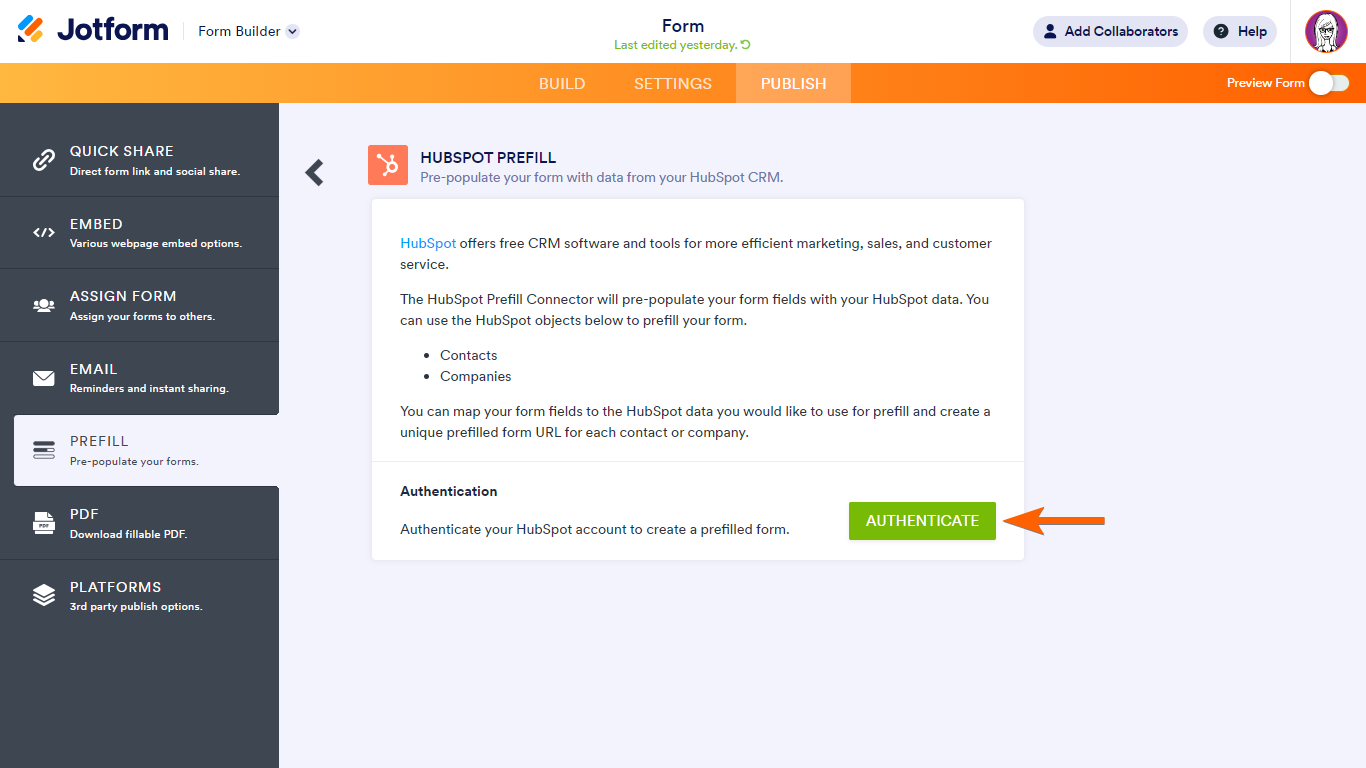
- Authenticate or choose your HubSpot account.
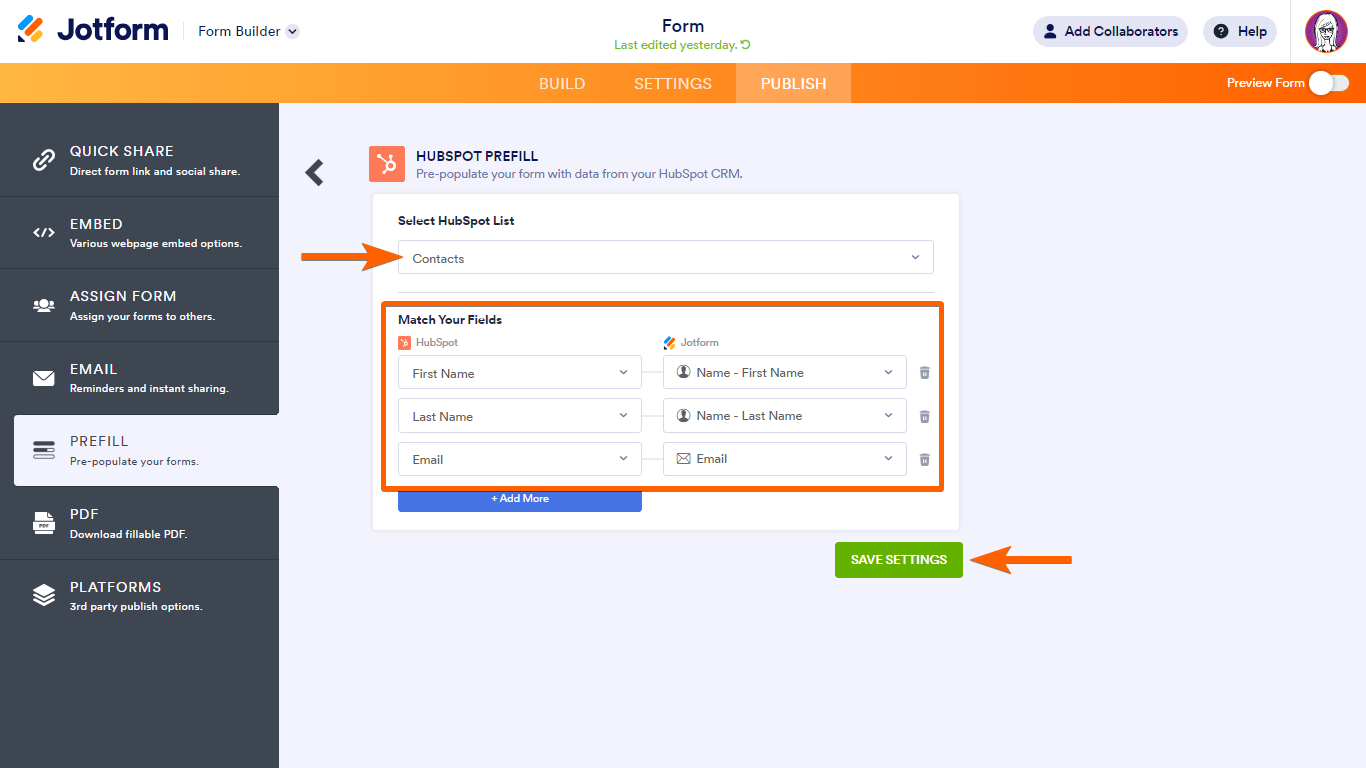
- Choose your HubSpot list, then map your HubSpot fields to your form fields. HubSpot supports the following fields:
- Text fields — Name, Email, Address, Short Text, Long Text
- Number fields — Phone, Number
- Selection fields — Dropdown, Single Choice, Multiple Choice, Scale Rating, Spinner
- Select Save Settings at the bottom when finished.
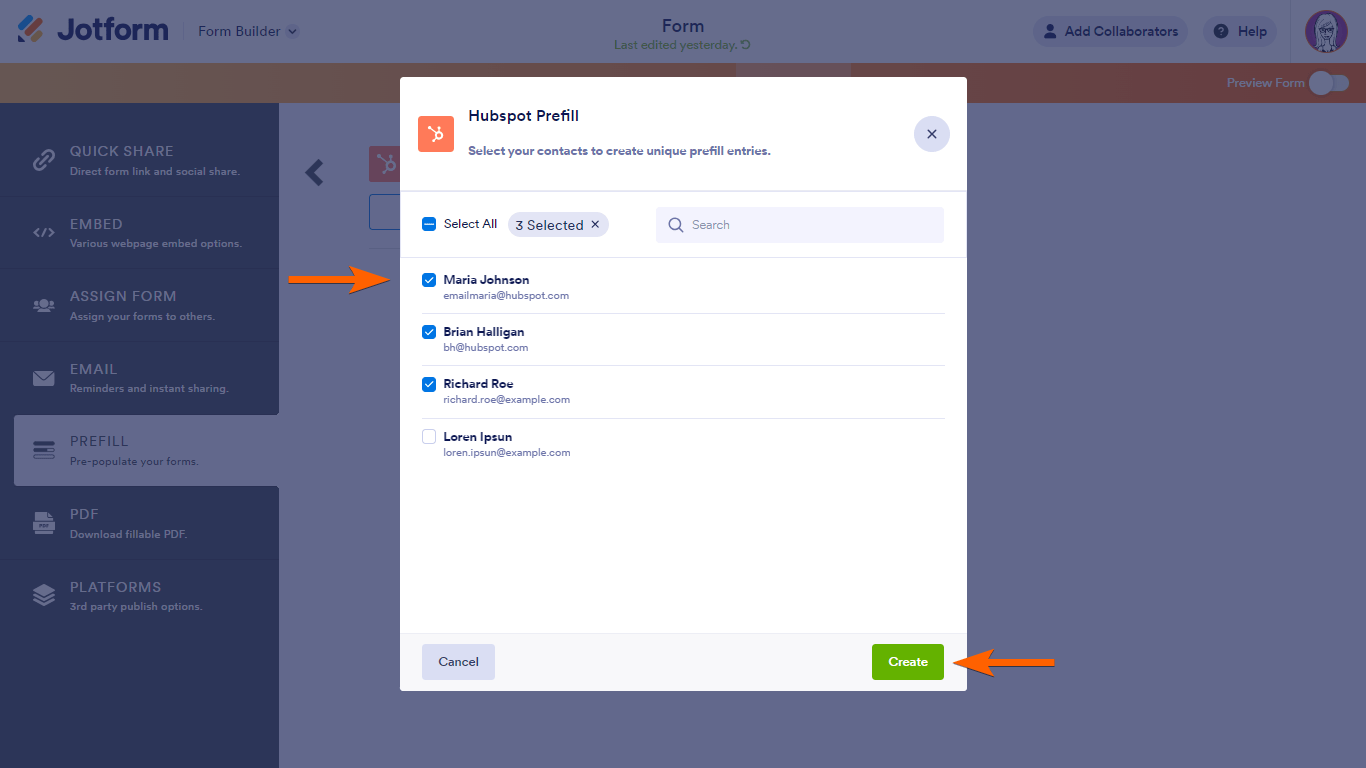
- To create prefill entries, select Add a New Prefill.
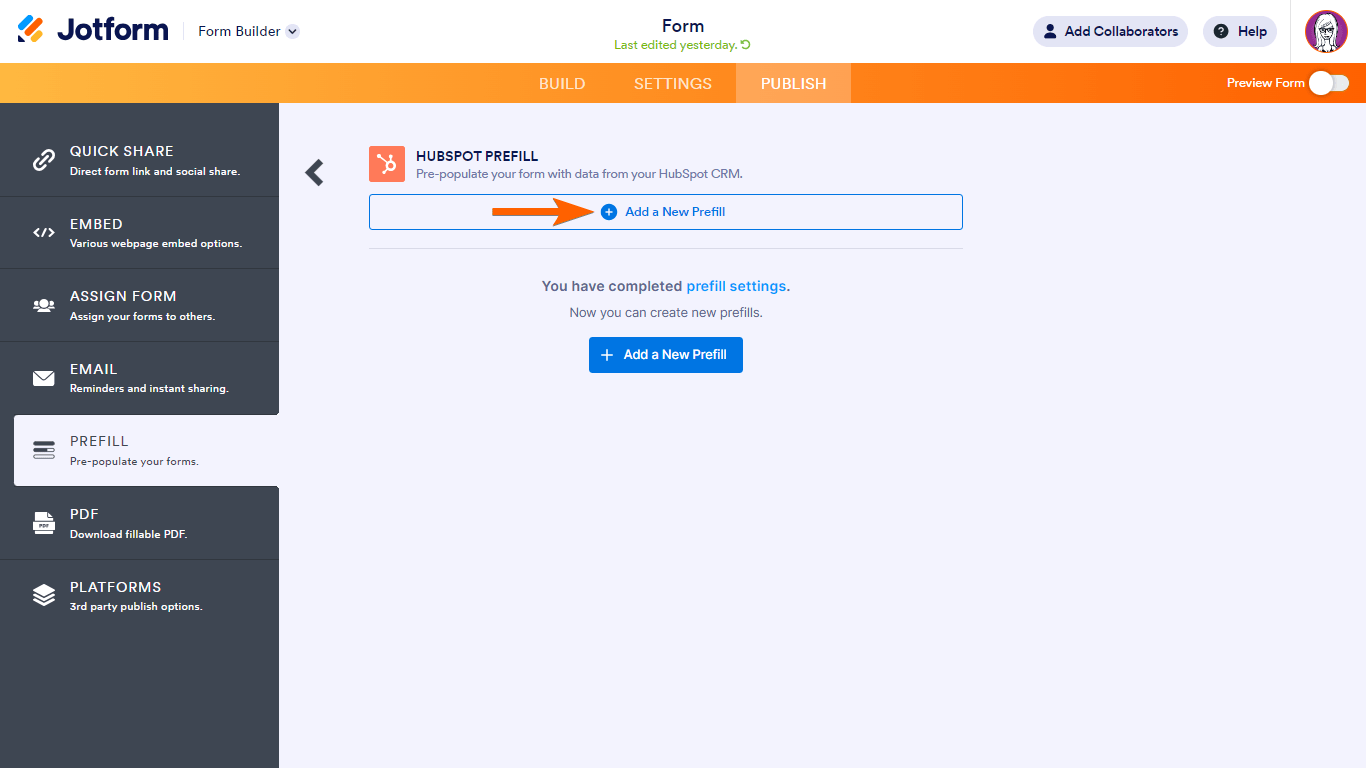
- Choose your desired records to use, then select Create.

Notes
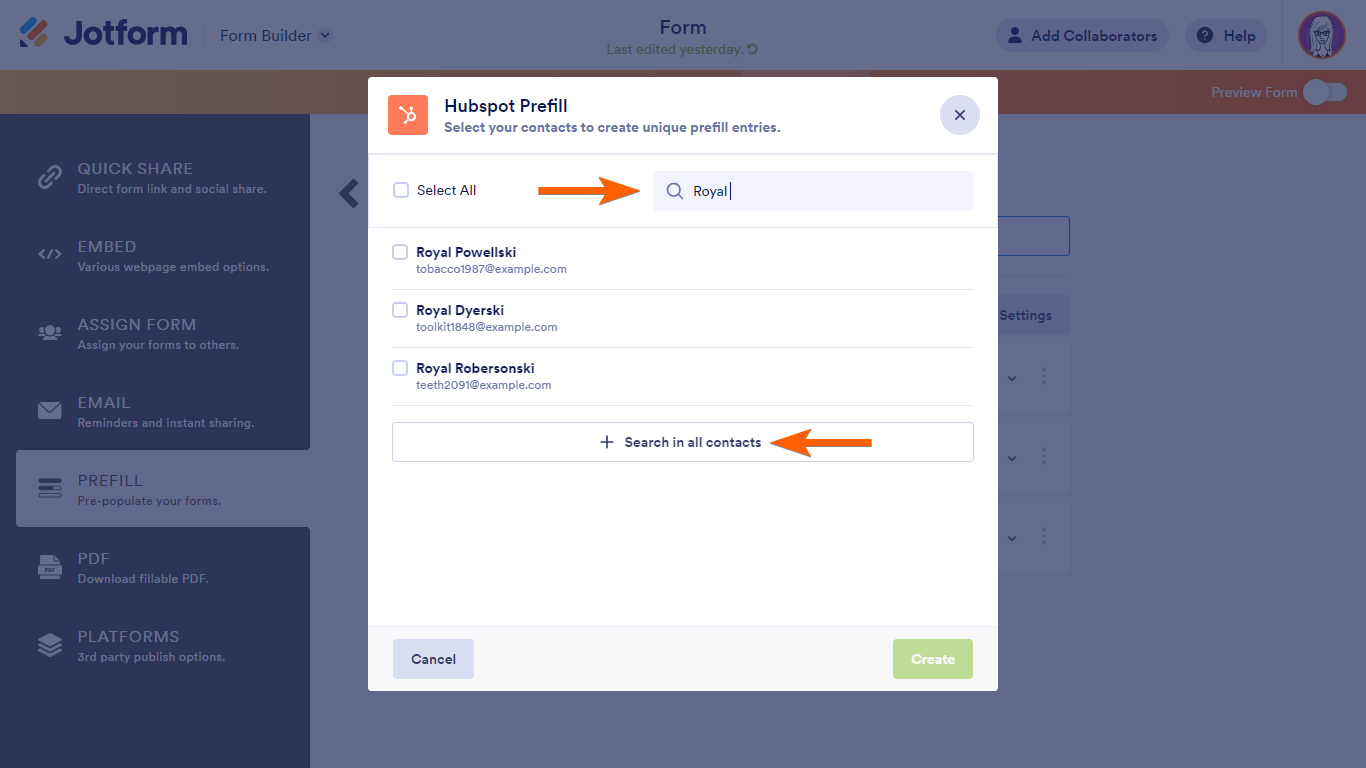
- Only the first 2500 records from HubSpot will be loaded. To fetch more, select Load More.
- The search bar only filters the loaded records. For accounts with more than 2500 records, select Search in all Contacts to search all records from HubSpot.
- You can only create 20 prefill entries at a time.
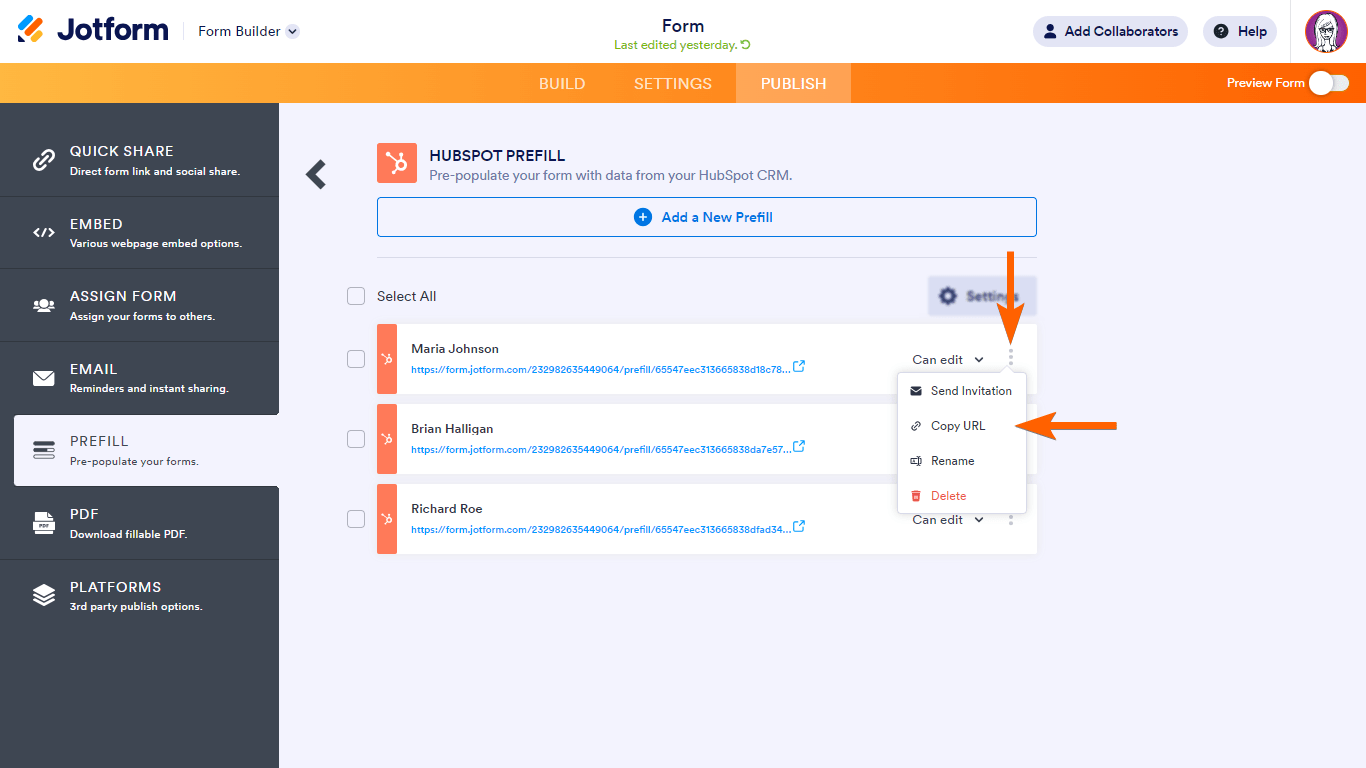
- To share your form with the prefill data, open a prefill entry’s menu, then choose how you would to share your link.
Managing Your Prefill Entries
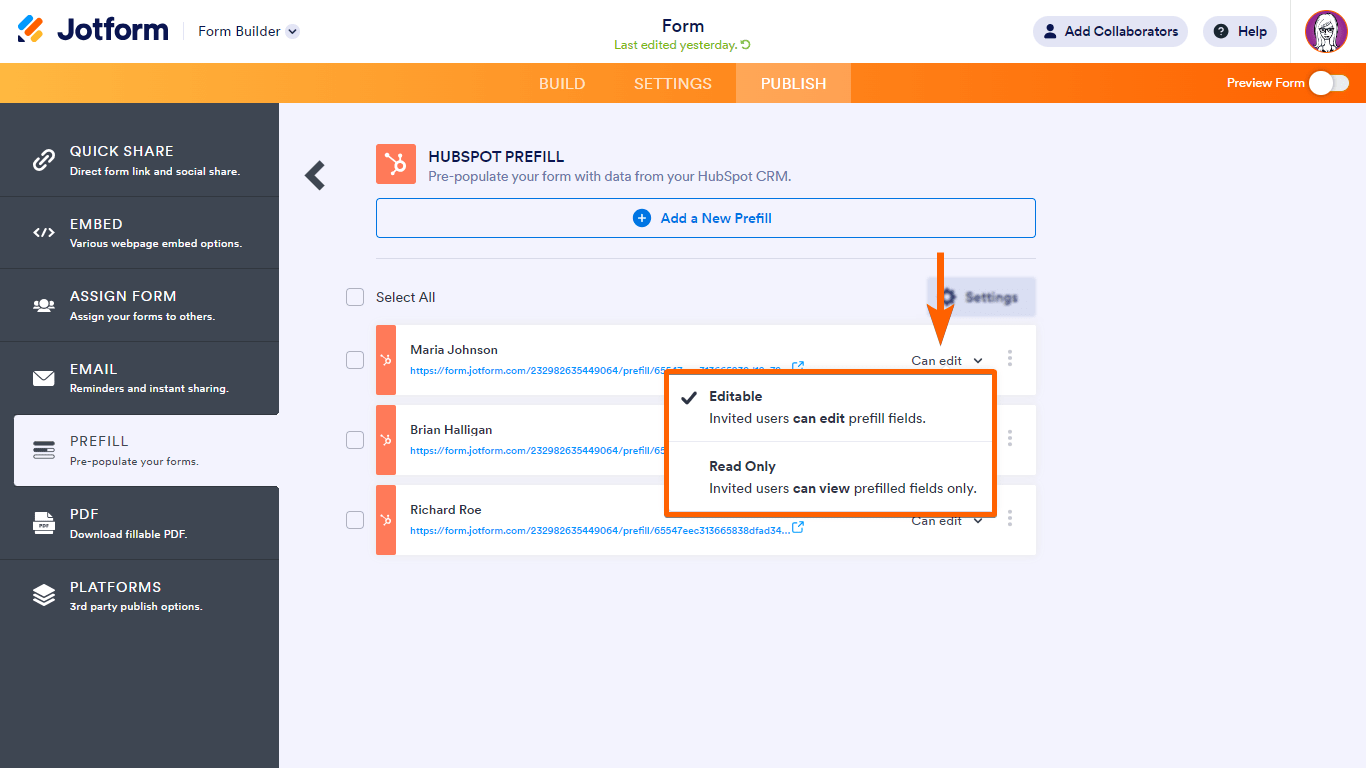
You can set each of your prefill entry’s permission to Editable where your form fillers can change the prefilled fields’ values or Read Only where the prefilled fields on your form are locked.
Selecting your prefill entries shows bulk action buttons for the selected items.
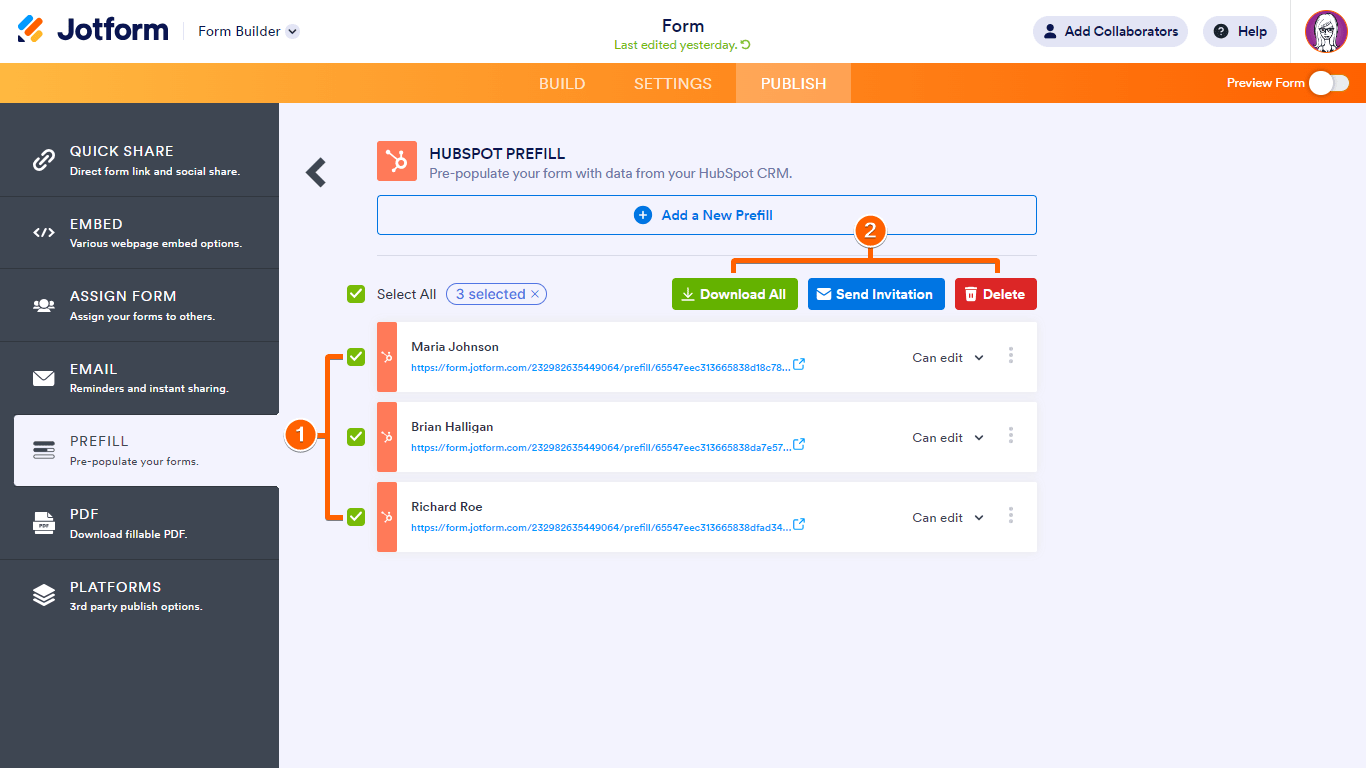
Here are the available options:
- Download All — Export the entries to a CSV file.
- Send Invitation — Send the entries to up to five people via email.
- Delete — Delete the entries.


Send Comment:
1 Comment:
April 15, 2025
Does this work in Jotform sign ie for Contracts, or just Forms/Form builder?