Jotform’s Address element helps you collect complete and structured location details in your form, including street, city, state, and postal code. It organizes address inputs into clear fields, making submissions easier to fill out and more consistent.
Here are a few ways to use it:
- Collect full mailing or shipping addresses.
- Organize location details into structured fields.
- Reduce errors in address submissions.
- Support delivery, registration, or contact forms.
Whether you’re building a new form or editing an existing one, you can add and configure the Address Element in just a few steps. This is how it’s done:
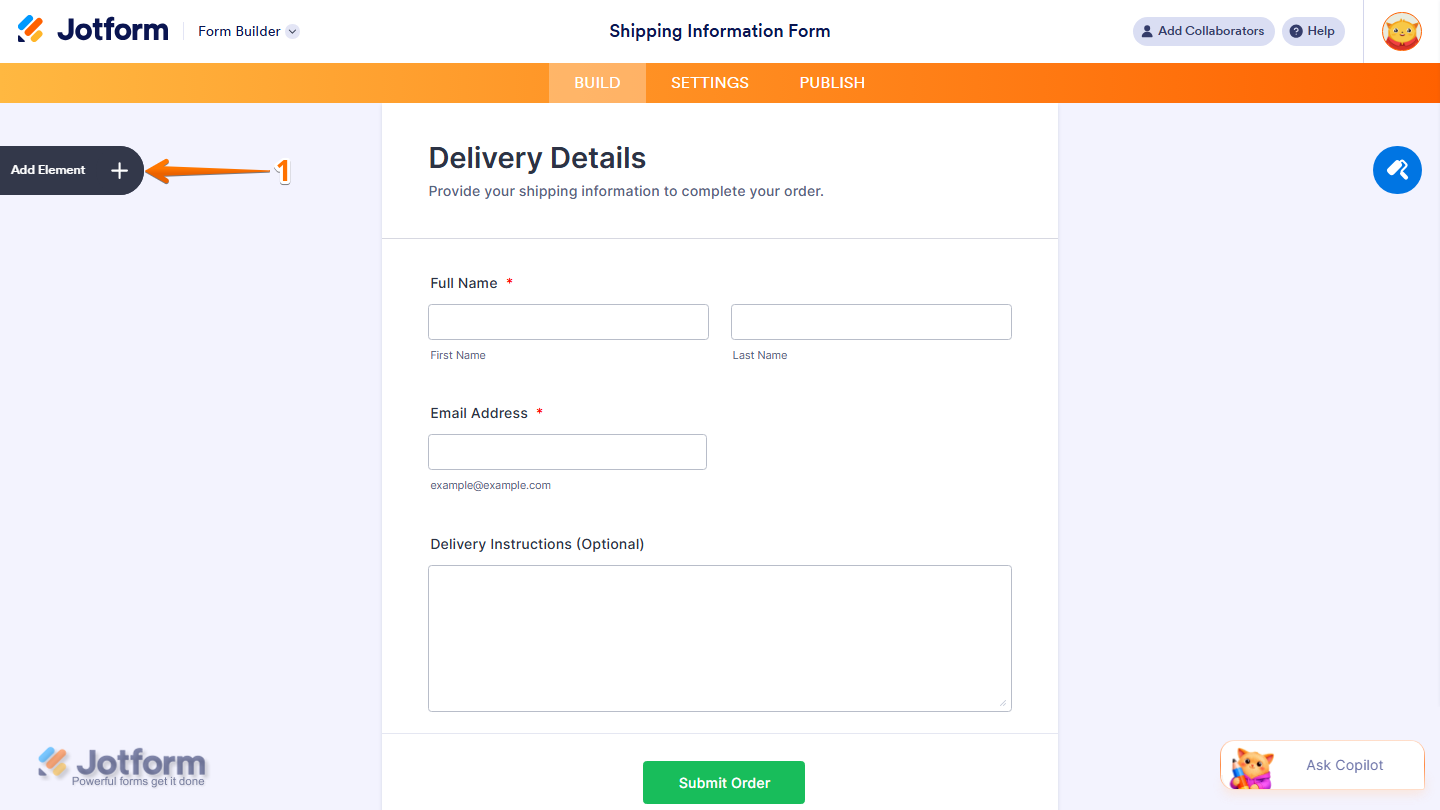
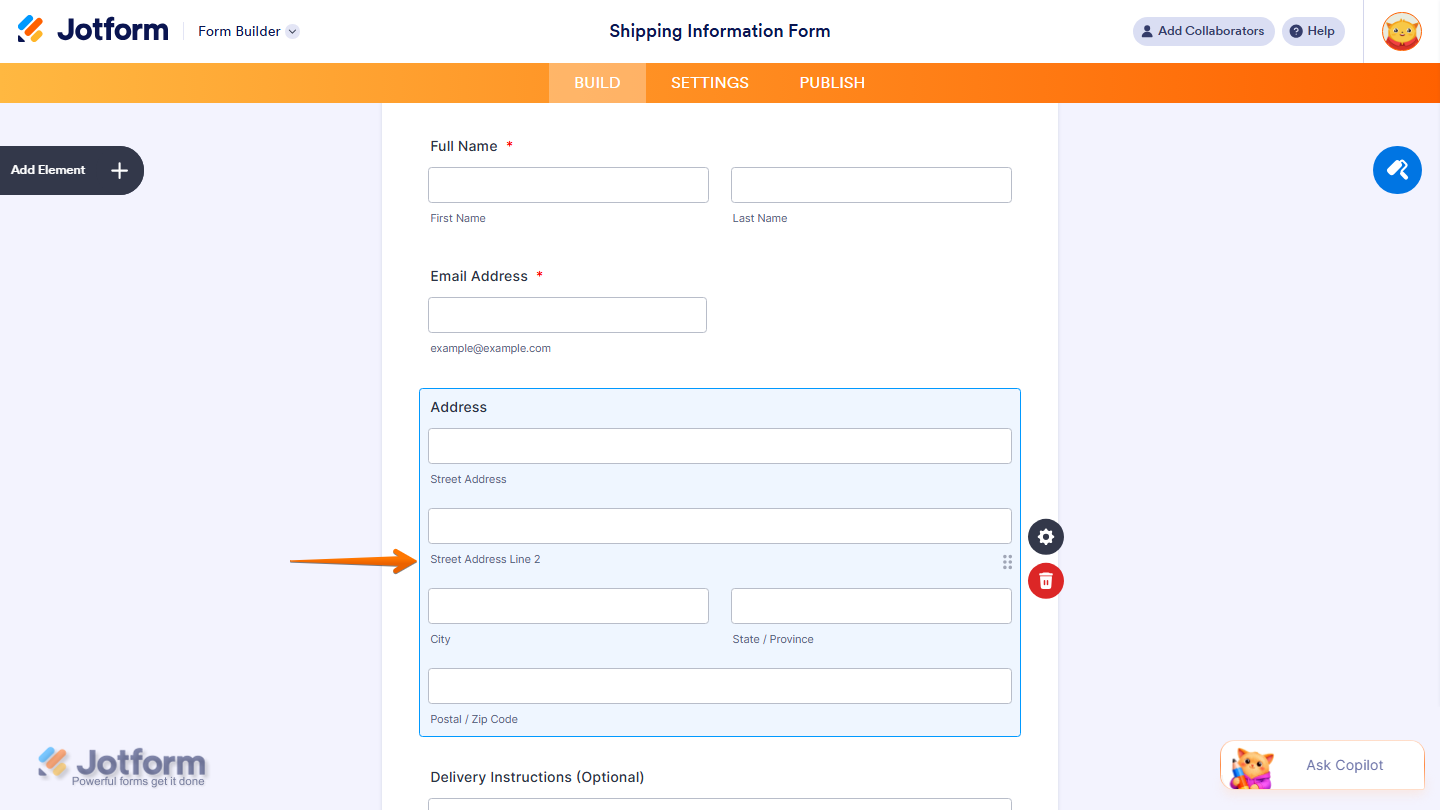
- In Form Builder, click on Add Element on the left side of the page.
- Now, in the Form Elements menu, under the Basic tab, click on Address. Or, just drag and drop it to where you want it to be on your form.

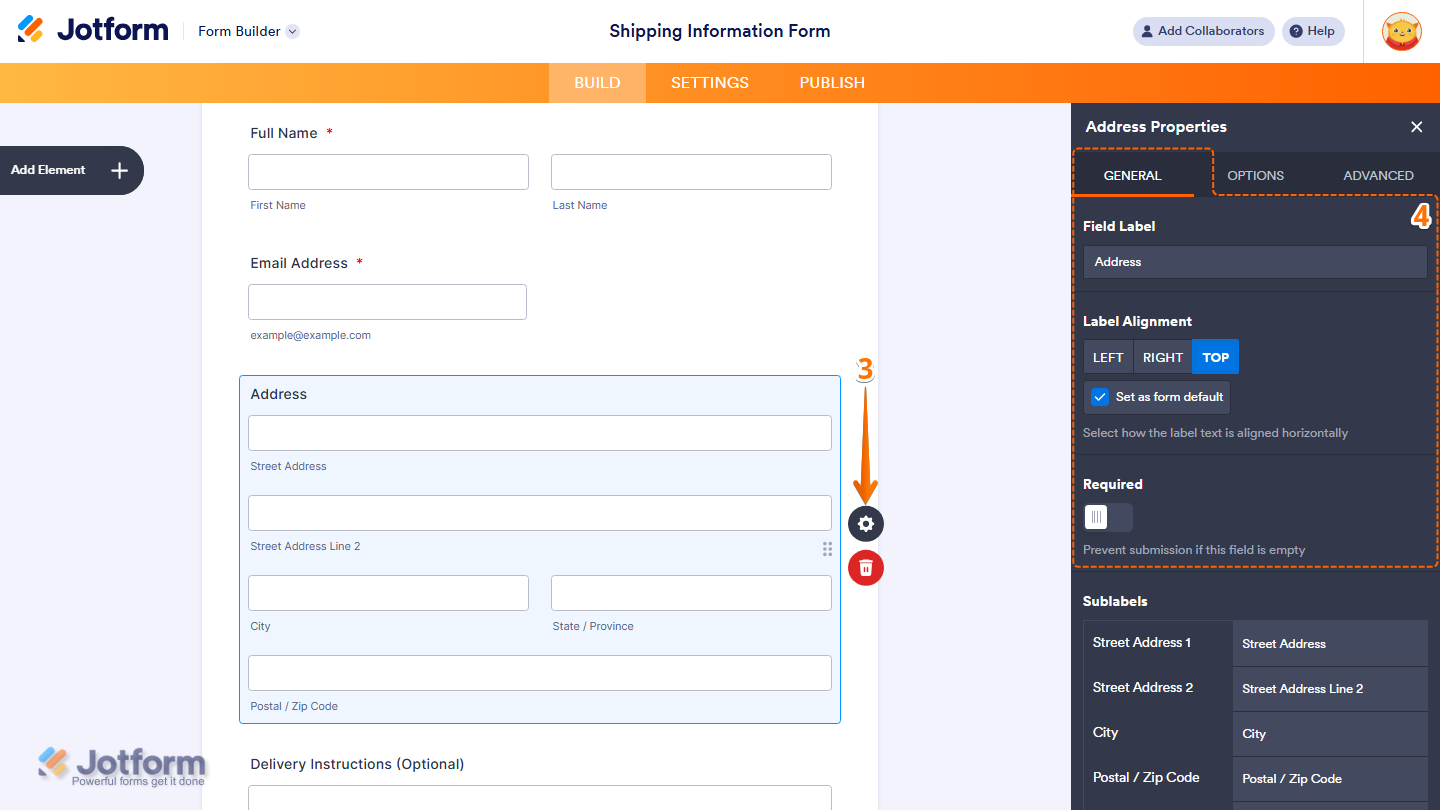
- Next, click on the Gear icon to open the Address Properties menu on the right side of the page.
- Then, under the General tab, set up these things:
- Field Label — Enter the label that will appear above the address field on your form.
- Label Alignment — Choose how the label is aligned. Options include Left, Right, and Top. Check Set as form default to apply this alignment to all fields on your form.
- Required — Toggle this on to prevent form submission if this field is left empty.
- Now, scroll down to the bottom to continue setting up these things:
- Sublabels — Customize the labels for each address sub-field. The following sub-fields are available:
- Street Address 1 — Label for the first street address line.
- Street Address 2 — Label for the second street address line.
- City — Label for the city field.
- Postal / Zip Code — Label for the postal or zip code field.
- State / Province — Label for the state or province field.
- Duplicate Field — Click on Duplicate to create a copy of this field with all its saved settings.
- Sublabels — Customize the labels for each address sub-field. The following sub-fields are available:

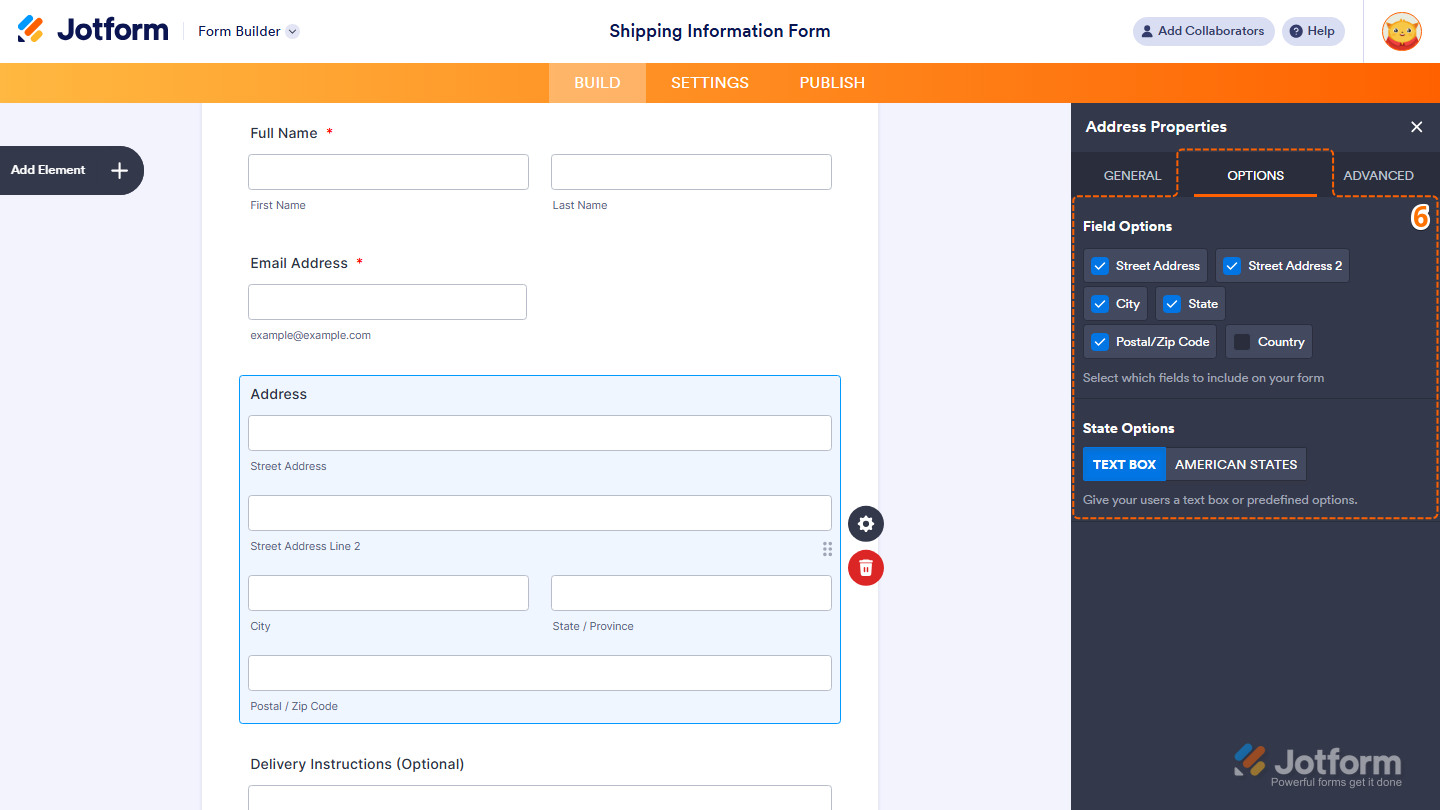
- Next, click on the Optionstab and select what you want to do:
- Field Options — Choose which address sub-fields to include on your form. You can check or uncheck the following:
- Street Address
- Street Address 2
- City
- State
- Postal/Zip Code
- Country
- State Options — Choose how the State field is displayed. Options include:
- Text Box — Lets form fillers type in their state freely.
- American States — Shows a dropdown list of US states for form fillers to select from.
- Field Options — Choose which address sub-fields to include on your form. You can check or uncheck the following:
- Now, click on the Advancedtab and fill in these details:
- Placeholder — Add example text inside each address sub-field to guide form fillers on what to enter. You can set placeholders for the following sub-fields:
- Street Address 1
- Street Address 2
- City
- State / Province
- Postal / Zip Code
- Hover Text — Add a short description that appears when a user hovers over the field.
- Shrink — Toggle this on to make the field smaller in size.
- Placeholder — Add example text inside each address sub-field to guide form fillers on what to enter. You can set placeholders for the following sub-fields:

- Finally, scroll down to the bottom and continue to configure these things and you’re done.
- Hide Field — Toggle this on to hide the field from form fillers.
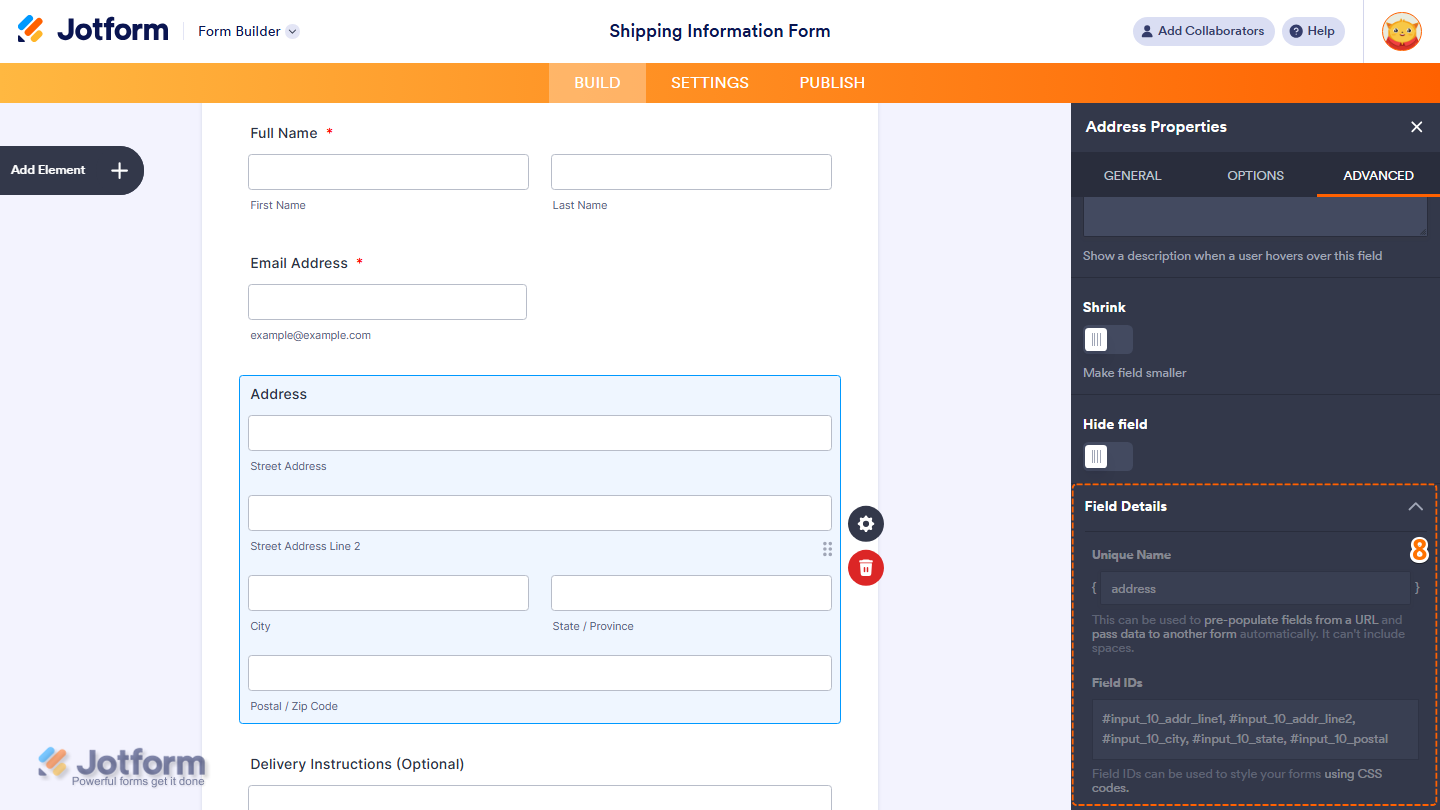
- Field Details — View additional technical information about the field.
- Unique Name — The unique identifier for the field, which can be used to pre-populate it from a URL or pass data to another form automatically.
- Field IDs — The CSS selectors for each address sub-field, which can be used to style them with custom CSS.
Note
Any changes you make to the element are automatically saved.
That’s it! You’ve successfully added and set up the Address element on your form. With the right configuration, you can collect complete and well-structured address details, making it easier to organize submissions and ensure accuracy for delivery, registration, or contact purposes.
You can explore how it looks with this demo form.

Send Comment:
2 Comments:
December 23, 2025
Can we set default values?
November 12, 2022
I am unable to map this widget in a prefill table?