Jotform makes it easy to organize your form by displaying fields side by side in multiple columns. Using form columns can help reduce scrolling, save space, and create a cleaner layout for your form fillers.
Before using columns, you’ll need to shrink the fields you want to display on the same row. You can also choose how many columns to show and control where specific fields start on a new line.
Shrinking Your Form Fields
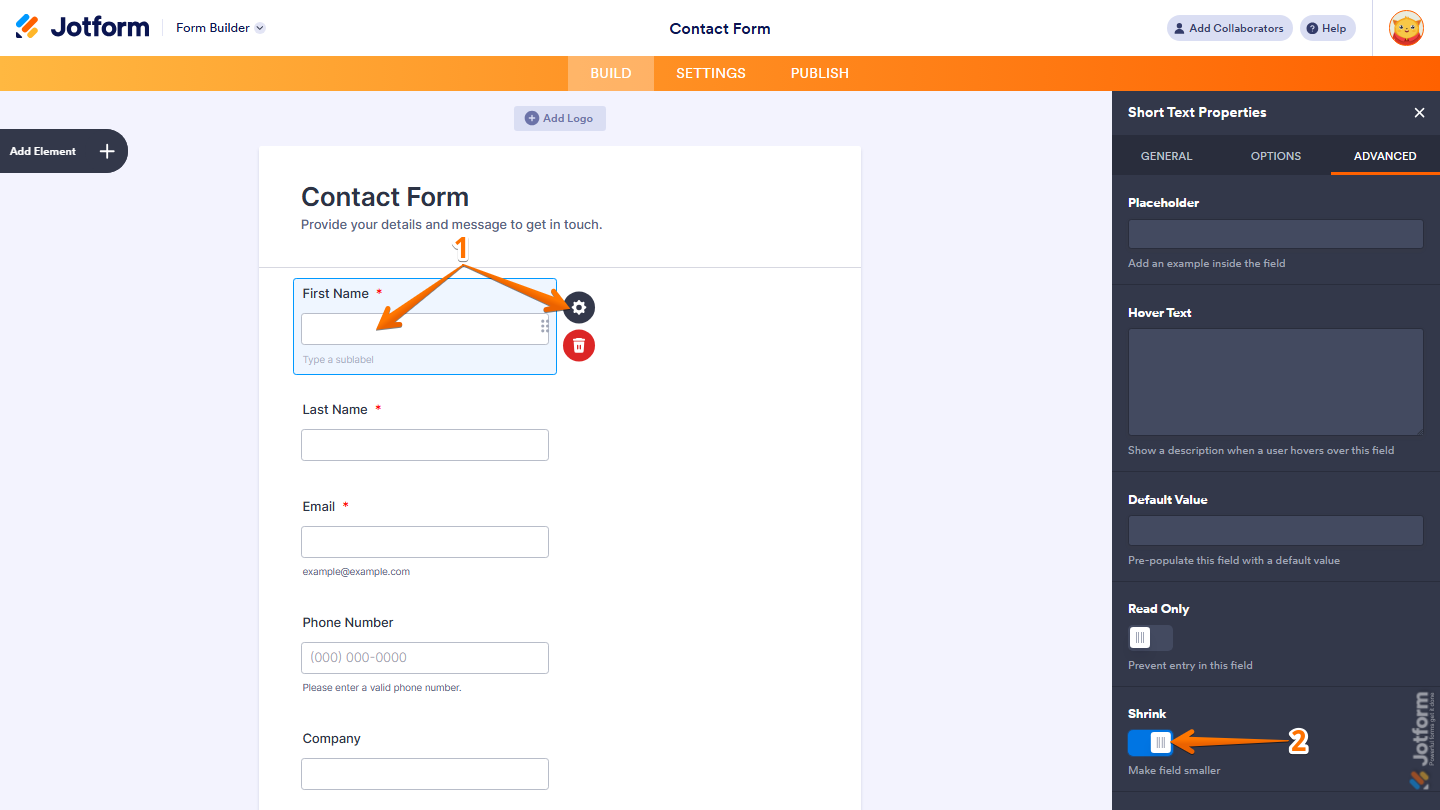
Before you can create multiple columns, you’ll need to shrink the fields you want to display side by side. Here’s how:
- In Form Builder, select the element you want to shrink, and then click on the Gear icon.
- Then, in the menu that opens on the right side of the page, under the Advanced tab, toggle on Shrink, and you’re good to go.
Repeat these steps for any additional fields you want to display in the same row. Once you’re done, you can proceed to enable columns for your form layout.
Enabling Form Columns
Once your fields have been shrunk, you can choose how many columns to display on your form. Here’s how to set it up:
- In Form Builder, in the upper-right side of the page, click on the Paint Roller icon.
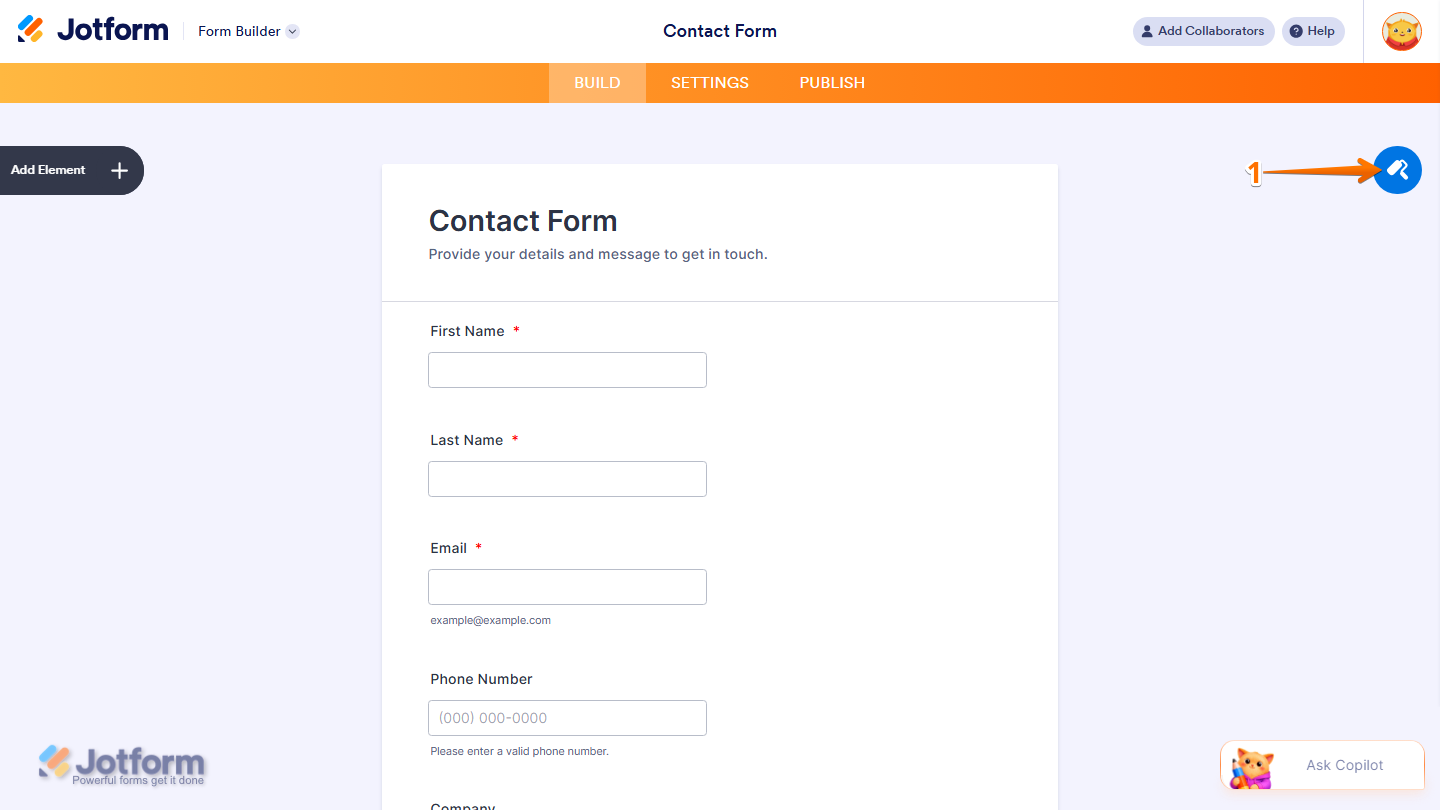
- Then, in the Form Designer menu that opens, click on Advanced Designer.
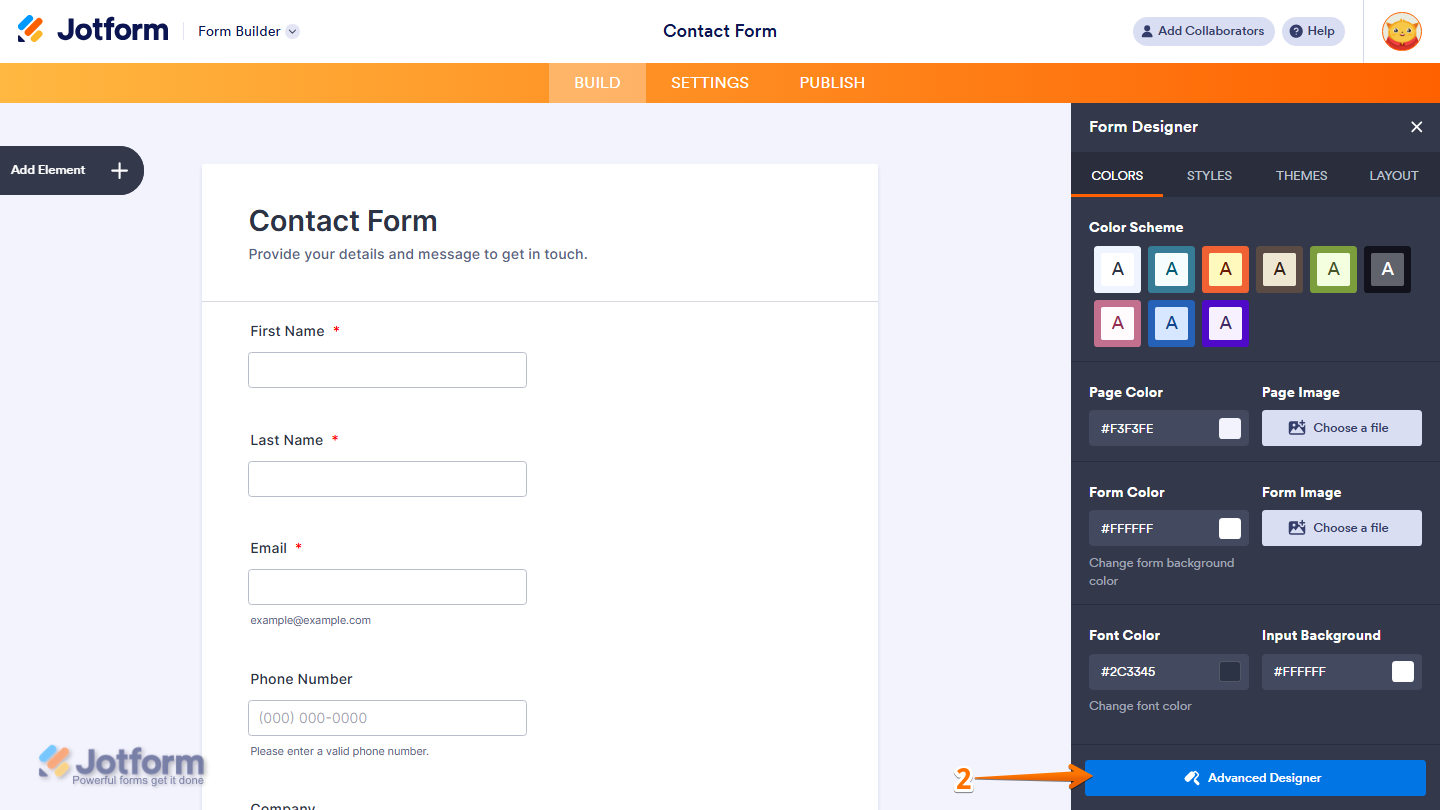
- Now, in the Advanced Form Designer, in the upper-right side of the page, click on the Paint Roller icon.
- Next, in the Advanced Designer menu, under the Design tab, click on the Form Layout section to expand.
- Then, tick the Enable Columns checkbox.
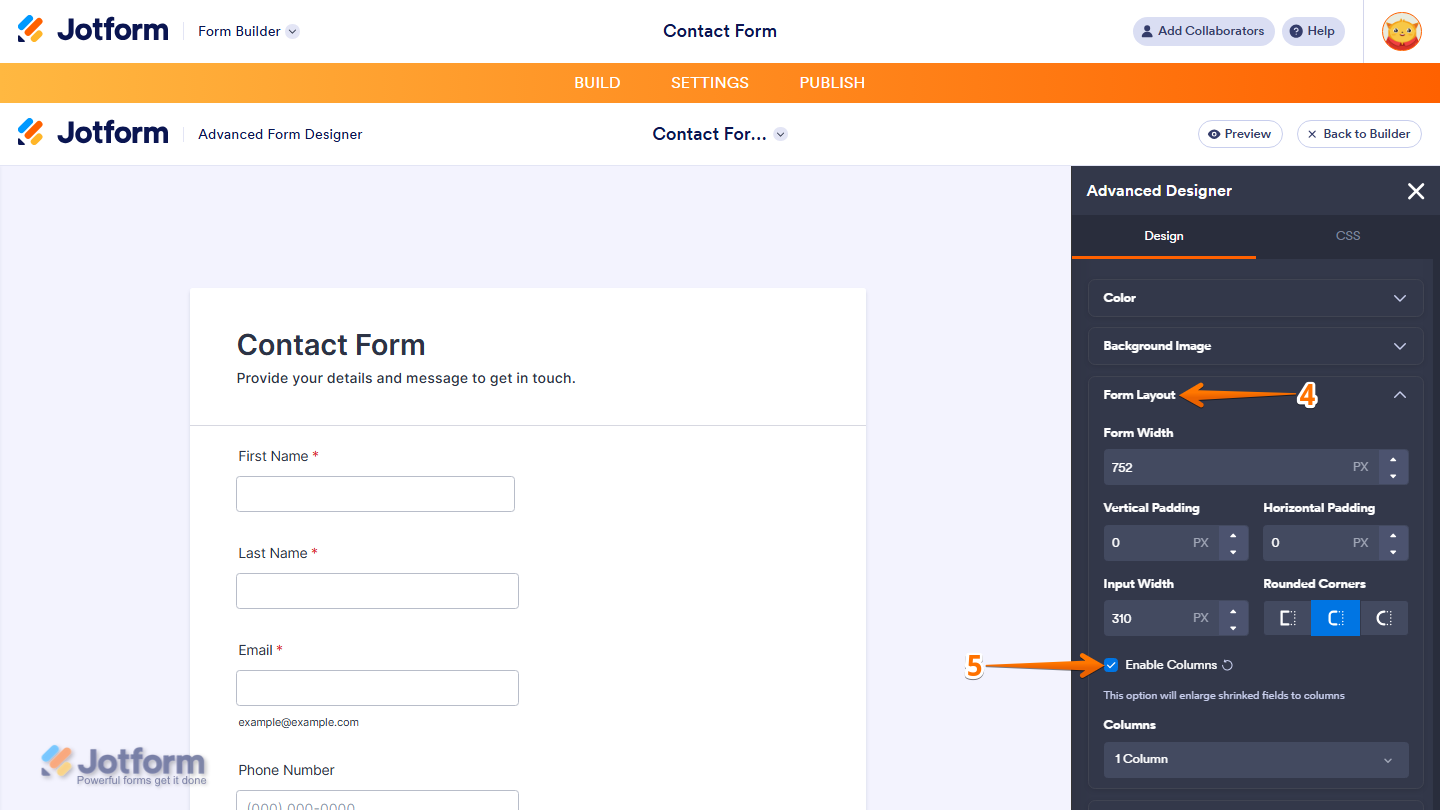
- Now, click on the Dropdown menu under the Columns section, and select the number of columns you want to use for your form layout and you’re done.
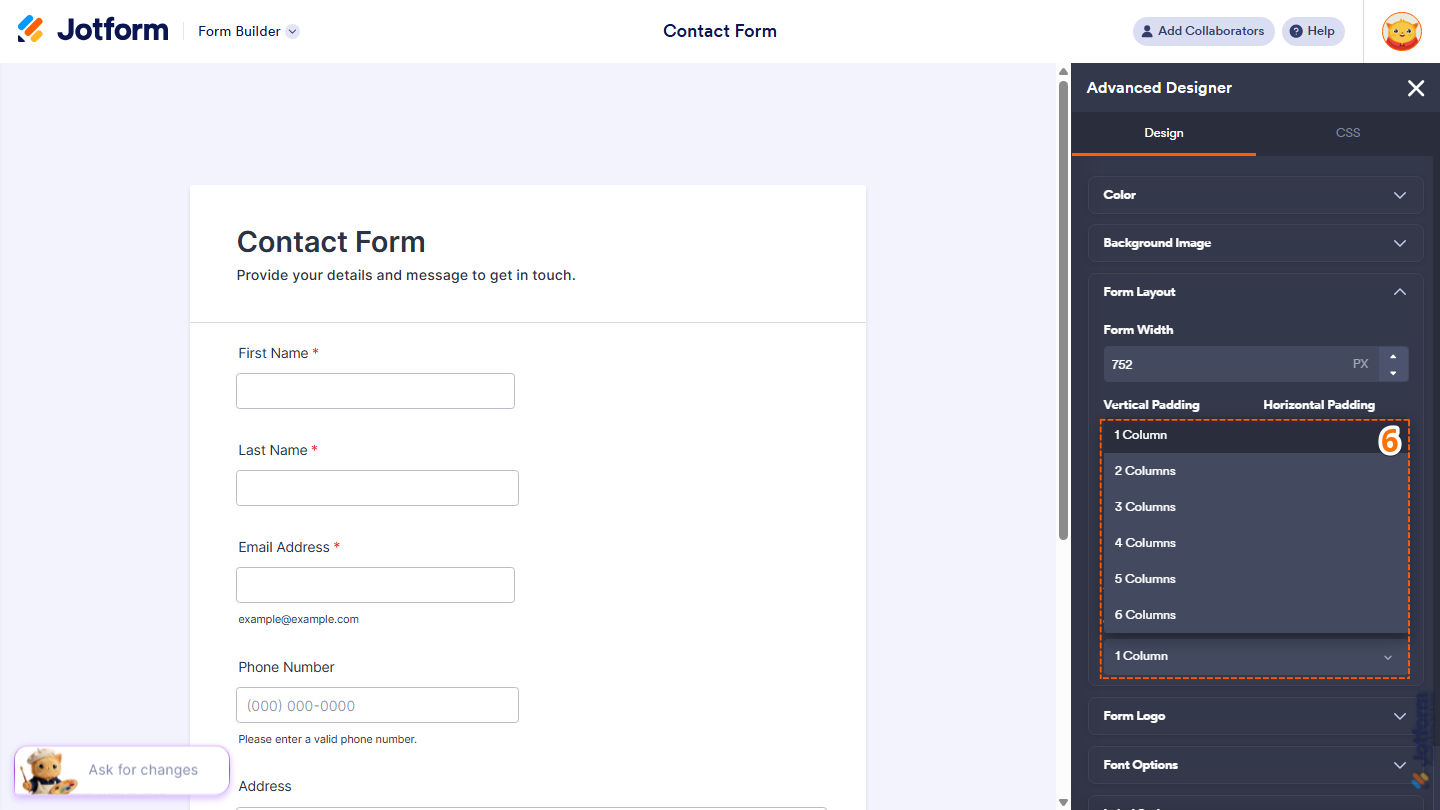
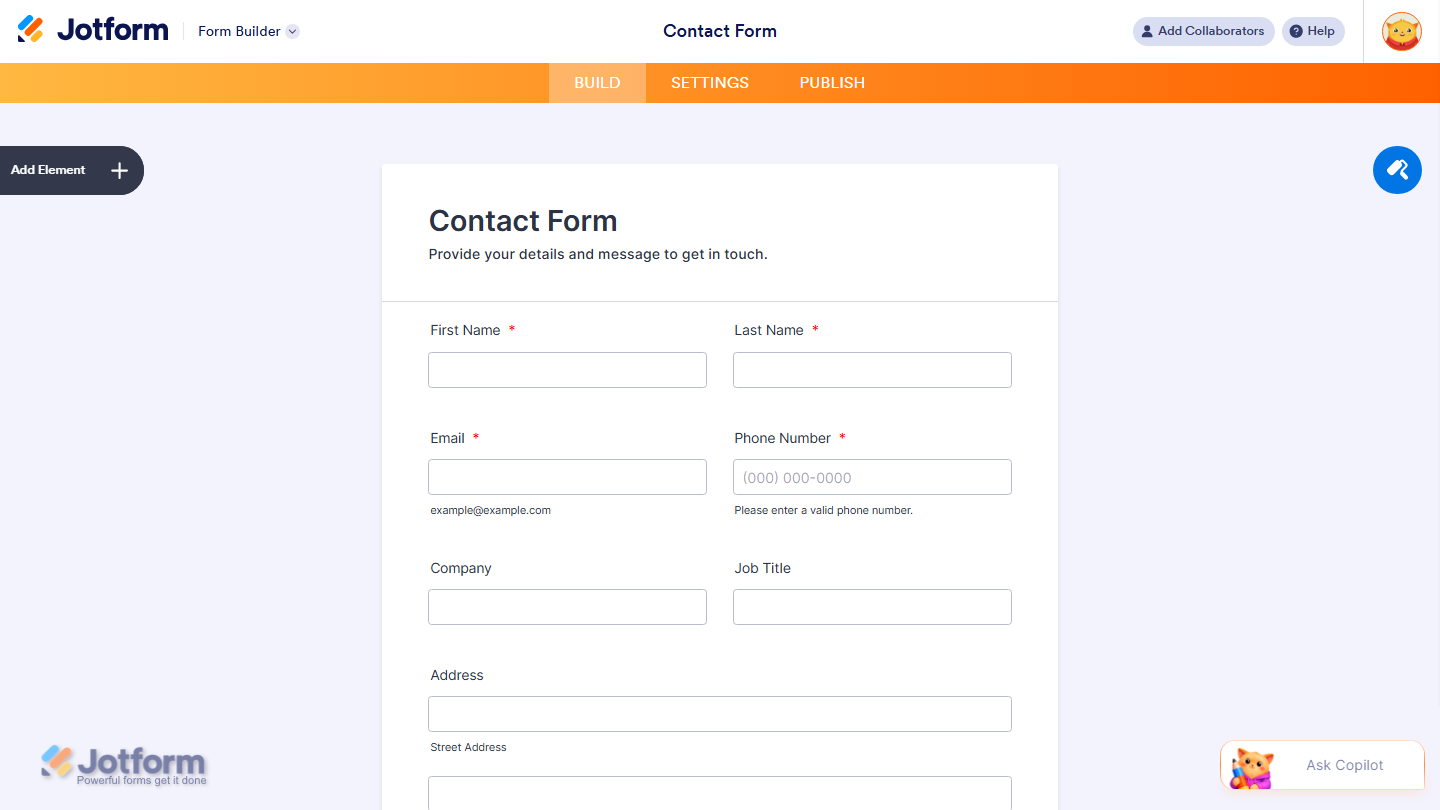
And that’s it! Shrunk form fields will automatically be arranged into the selected number of columns, helping you create a more compact and organized form layout. Here’s how it’ll look:
Note
The Enable Columns option works with fields that have the Shrink setting enabled. Fields that are not shrunk will continue to span the full width of the form.
Move a Field to a New Line
If you’re using multiple columns but want a specific field to start on a new row, you can use the Move to a New Line option. Here’s the quick way to do it:
- In Form Builder, select the element you want to shrink, and then click on the Gear icon.
- Then, in the menu that opens on the right side of the page, under the Advanced tab, scroll down and toggle on Move to a New Line and you’re all set.
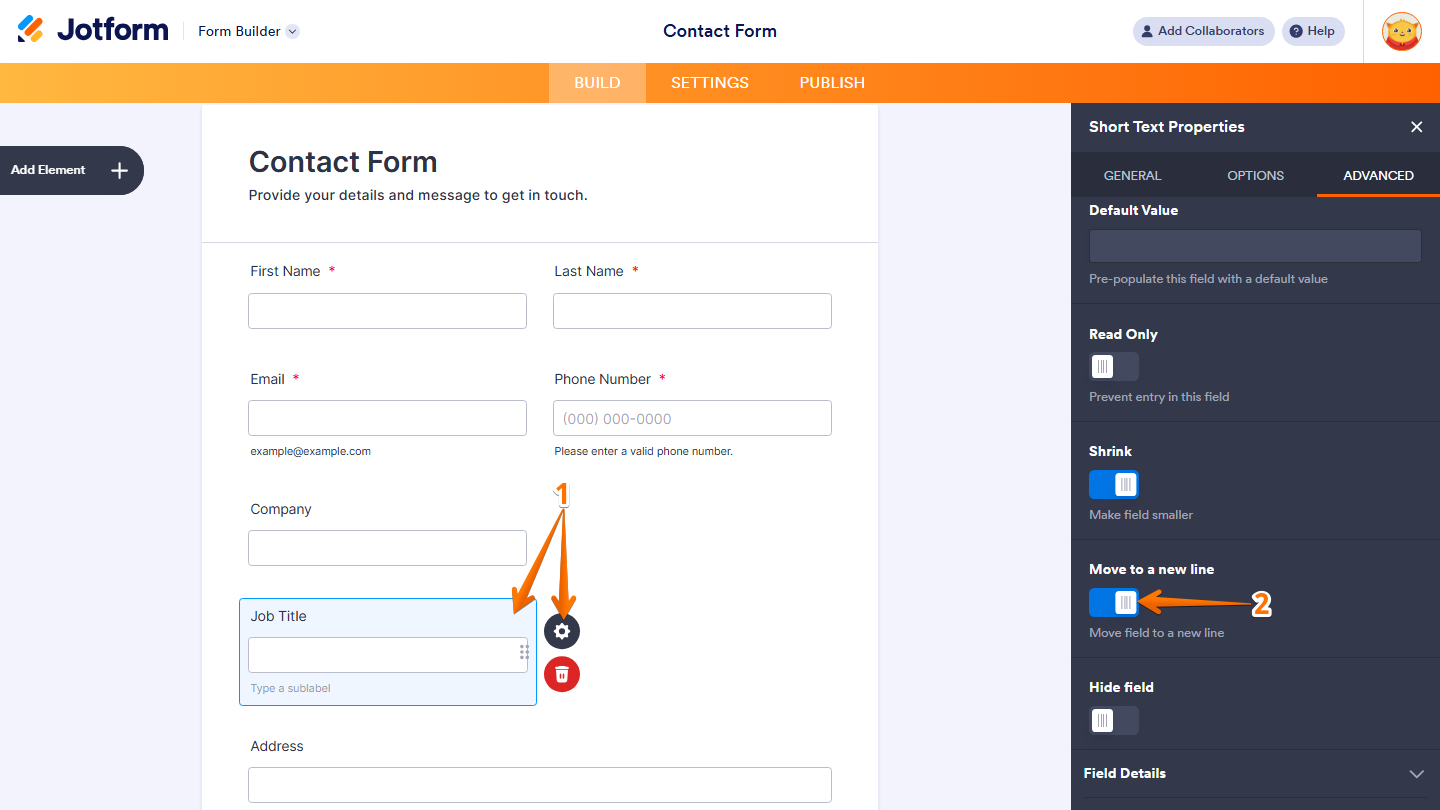
The selected field will start on a new row, even when form columns are enabled.
Note
- The Move to a New Line option is only available for fields with Shrink enabled.
- If your columns don’t appear correctly, try increasing your form width or reducing the width of larger fields. Field width and label positioning can affect how columns are displayed.

Send Comment:
9 Comments:
March 28, 2024
cant stack elements in the same column, kind of ridiculous in 2024
August 27, 2022
Absolutely love this! Looks like many of the previous issues were resolved. My only wish is you could customize the number of columns per row.
December 4, 2020
The advanced Designer ' Enable form Columns' does not show up ...
Shrink columns work but they won't let you stack multiple questions.. it's only one for one paired.
May 20, 2019
Wow why is it so hard to do easy things. Been here 2 days trying to figure out how to simply mimic elements in a template to add more Sections. the Cmd+c should work better than it currentky does.
March 29, 2019
Have to agree with other comments, the shrink column feature isn't enough. You need to be able to have multiple columns often.
The lack of support for this feature has me going to another provider, sorry.
February 10, 2019
Why only 2 columns!! For the price you charge, you would think your team could handle this. Your slogan should be... "Jotform, build forms the way we want you to!"
December 14, 2018
You really need a lay person answering these questions. Your CSS capabilities don't show any of the text, so that's pointless because you can't find the line you want to edit. You say if one field "just won't budge," to widen the column, BUT YOU DON'T SAY HOW TO WIDEN THE COLUMN. Again and again, I can never find a simple two-second answer to aligning columns in these forms so that they're not all over the place. It drives me crazy.
November 12, 2018
if you have a multi page form, how do you set it so the form columns apply only to one of the pages?
March 24, 2017
On my version, there is no enable form columns. Below "Make this form responsive" there is nothing.