An approval process allows a reviewer to approve or deny a submission, entry, registration, or request. This guide covers a general guideline for building a workflow. Note that an approval flow starts with a form. To get started, create your first web form with Jotform.


How to Create an Approval Flow
You can build an approval flow easily with Jotform Workflows. You can turn your online forms into custom automated approval flows without coding. Just drag and drop to add approvers, emails, conditional branches, and more to your approval process.
To create an approval flow
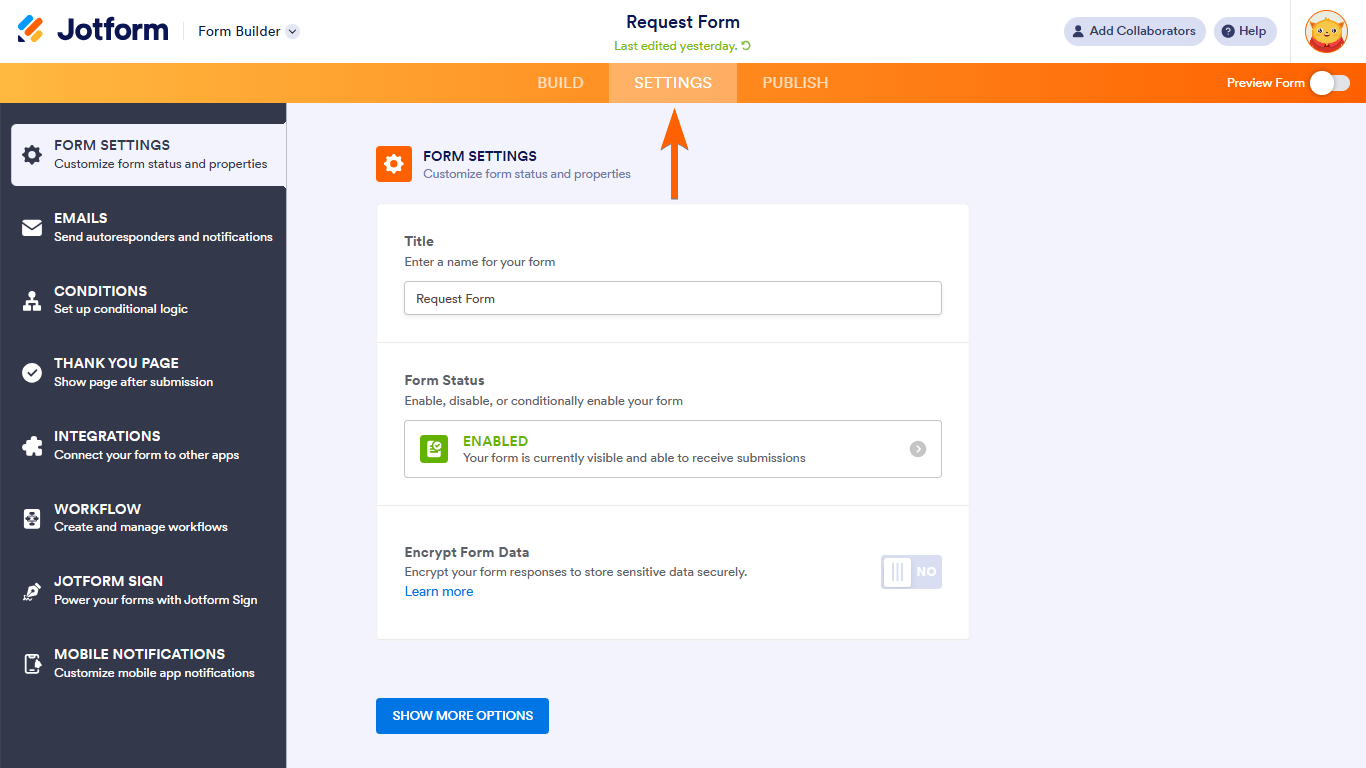
- In the Form Builder, go to Settings at the top.
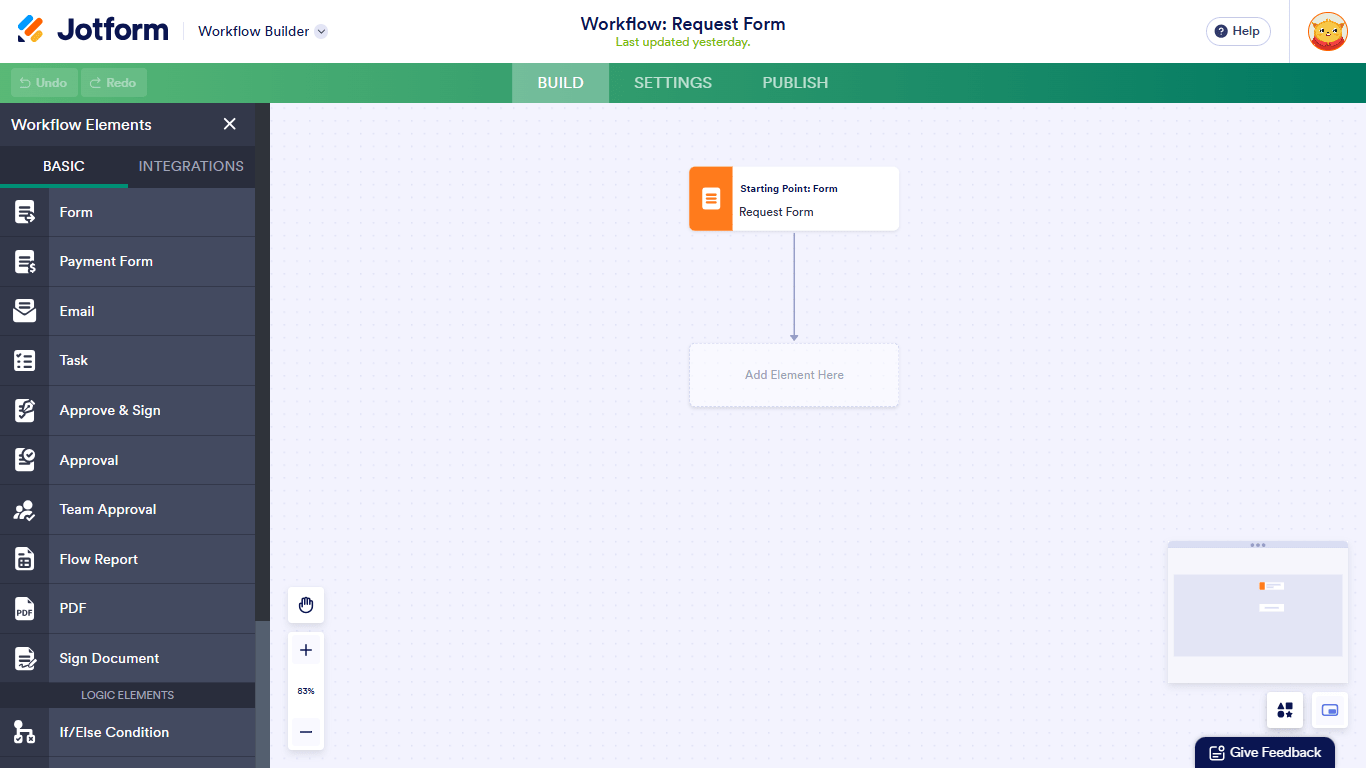
- Go to Workflow on the left, then select Create Workflow.

This will open the workflow builder where you can start customizing your flow.
Here’s a demo form to try out a basic approval process with Jotform Workflows. To learn more, see How to Create an Approval Flow With Jotform Workflows.
The Old Method for Creating an Approval Process Workflow
Note
The information below is the old method for creating an approval workflow. The process is now streamlined and made easy with Jotform Workflows, but the old method may still be useful.
Below are some key features and options that you can use to build an alternative approval process on your own. Here’s a typical use case to give you an idea of how it works:
- The customer submits a form.
- Manager A receives it via email and reviews the entry.
- Manager A confirms and approves it by editing the submission and re-submitting it.
- Manager B (or someone else) receives another email after Manager A’s approval.
- The customer gets an email about whether he’s approved or denied.
With the scenario above, one key ingredient is the emails. Regardless of how long the approval process is (e.g. if two or more managers need to check and review the submission), it all boils down to notifying the intended recipient before or after a submission gets approved or denied.
In theory, these are all the features you need to make this work:
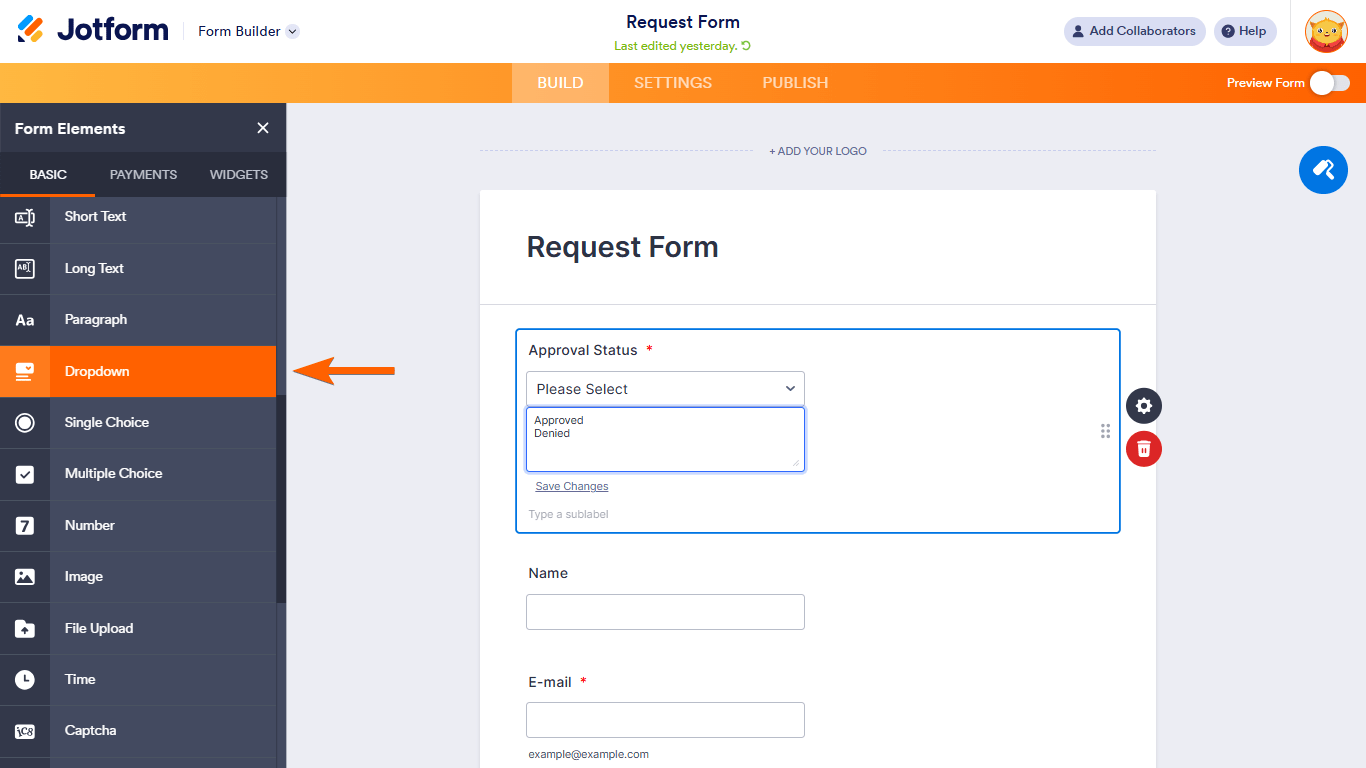
- A hidden field will serve as the approval status. A dropdown is recommended.
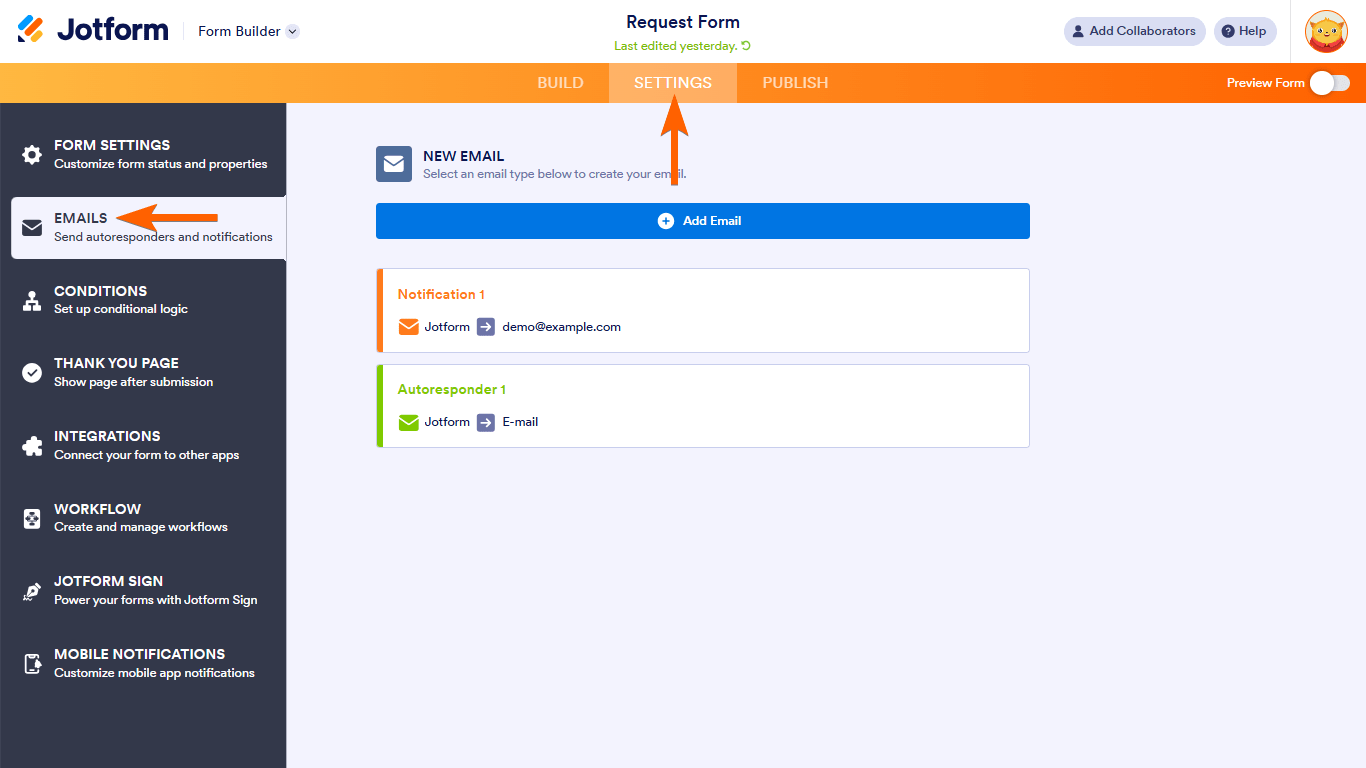
- Notifications will be used to email managers, staff, or anyone needed in the approval process.
- Autoresponders will be used to send emails to your customers. You may create different Autoresponder templates for approved or denied customers.
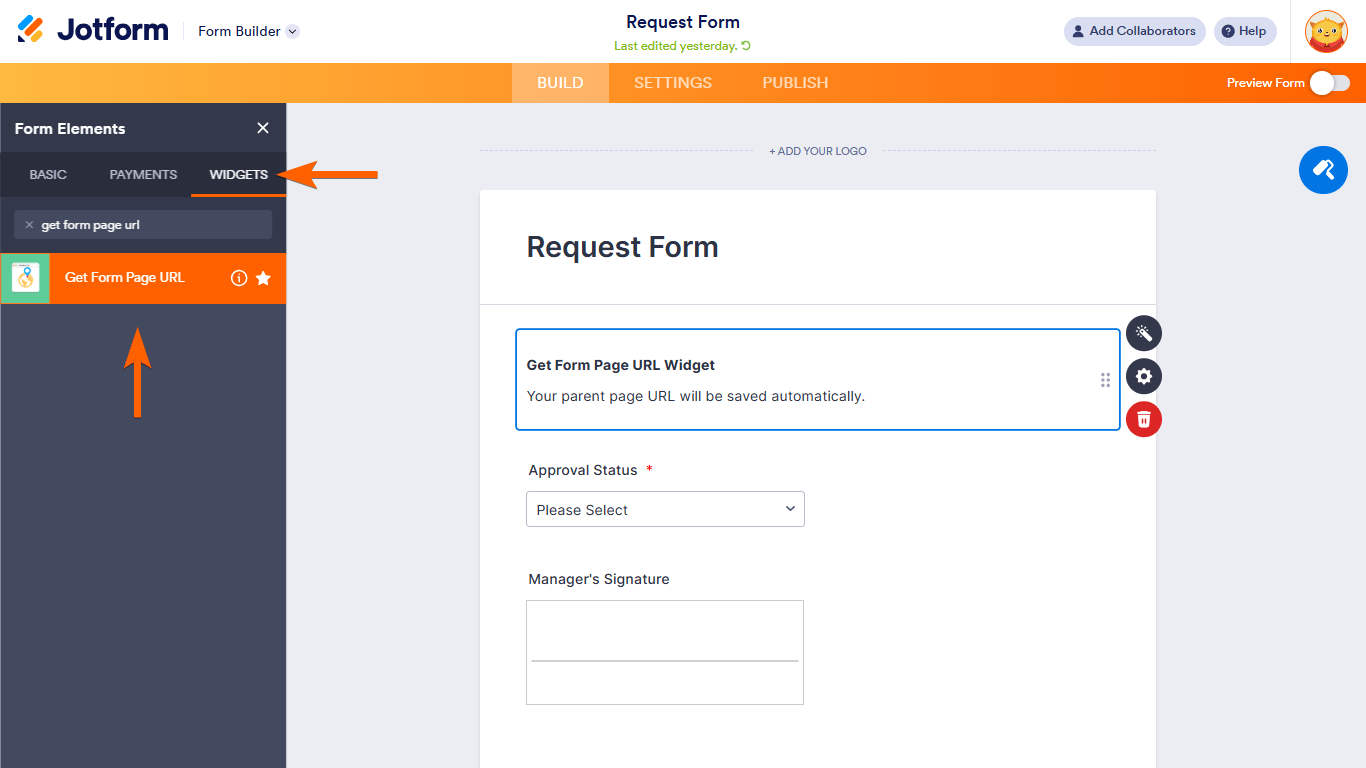
- Get Form Page URL will be used with conditions and a signature field as a part of the approval process if necessary.
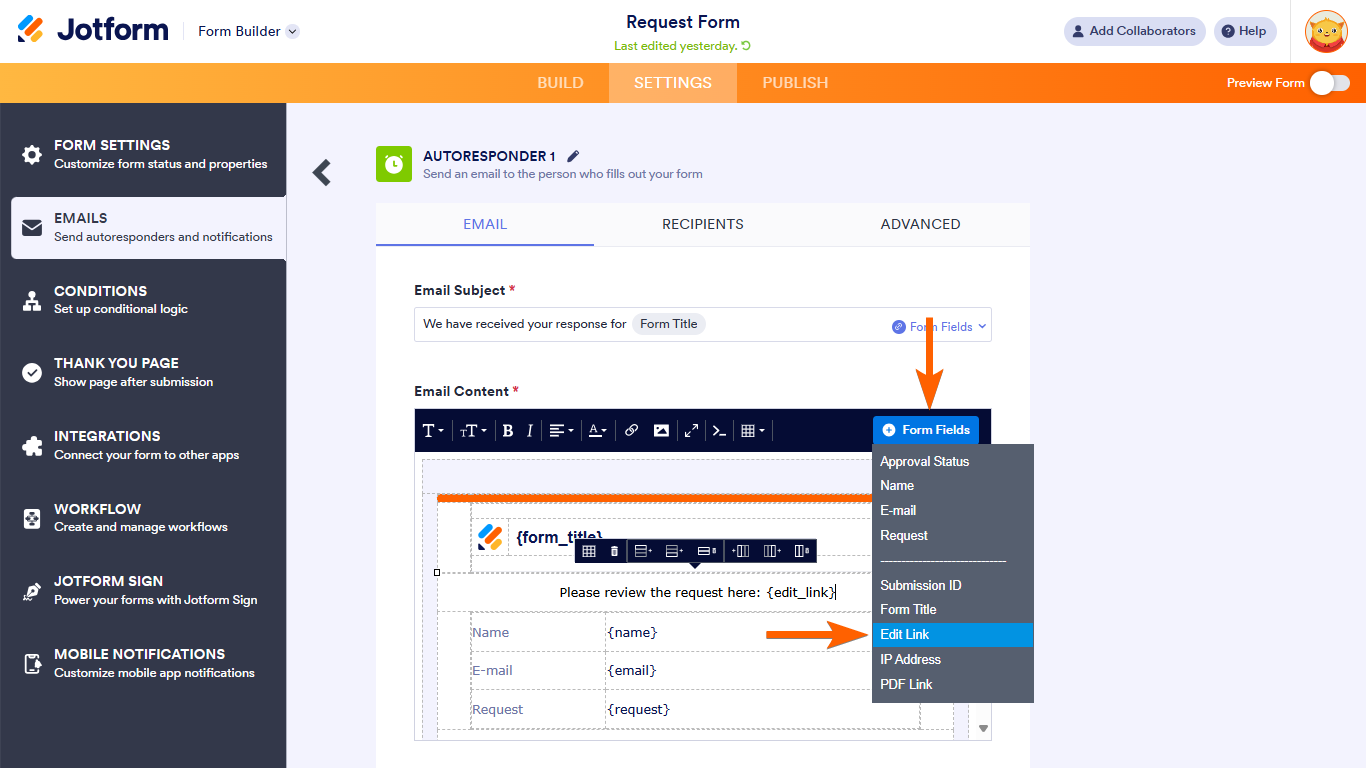
- The submission’s edit link will be used with conditional logic to trigger an action based on the URL where the form is being filled out.
- Conditional Logic will be the core of the entire workflow.
To set up the approval flow
- In the Form Builder, add a Dropdown element to your form with Approved and Denied options.
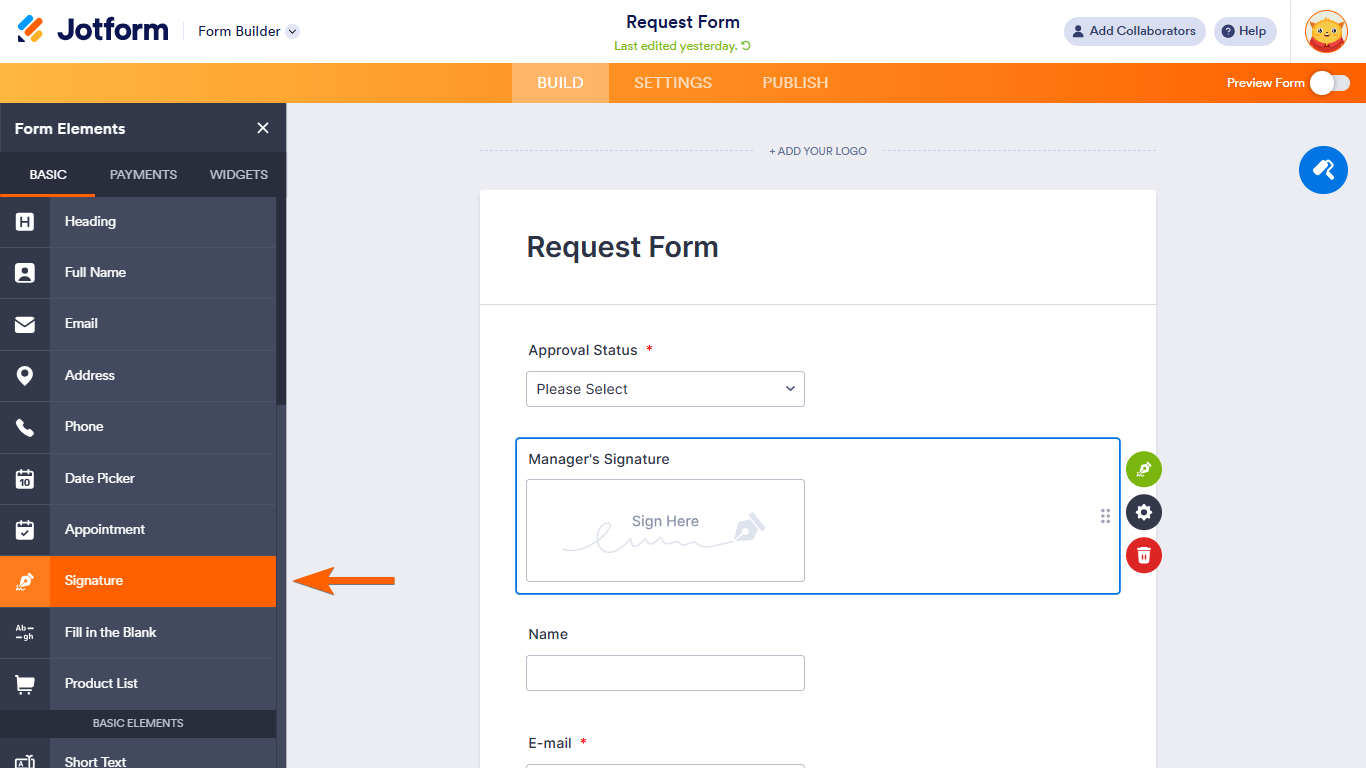
- Add a Signature element to your form if your approval process requires an e-signature from your approvers. You can also use any of the signature widgets.
- Add a Get Form Page URL widget to your form.
- Set up your Notifications and Autoresponders at your discretion. These email templates will be used later on with conditional logic.
- Add the submission edit link to your emails for the reviewers.
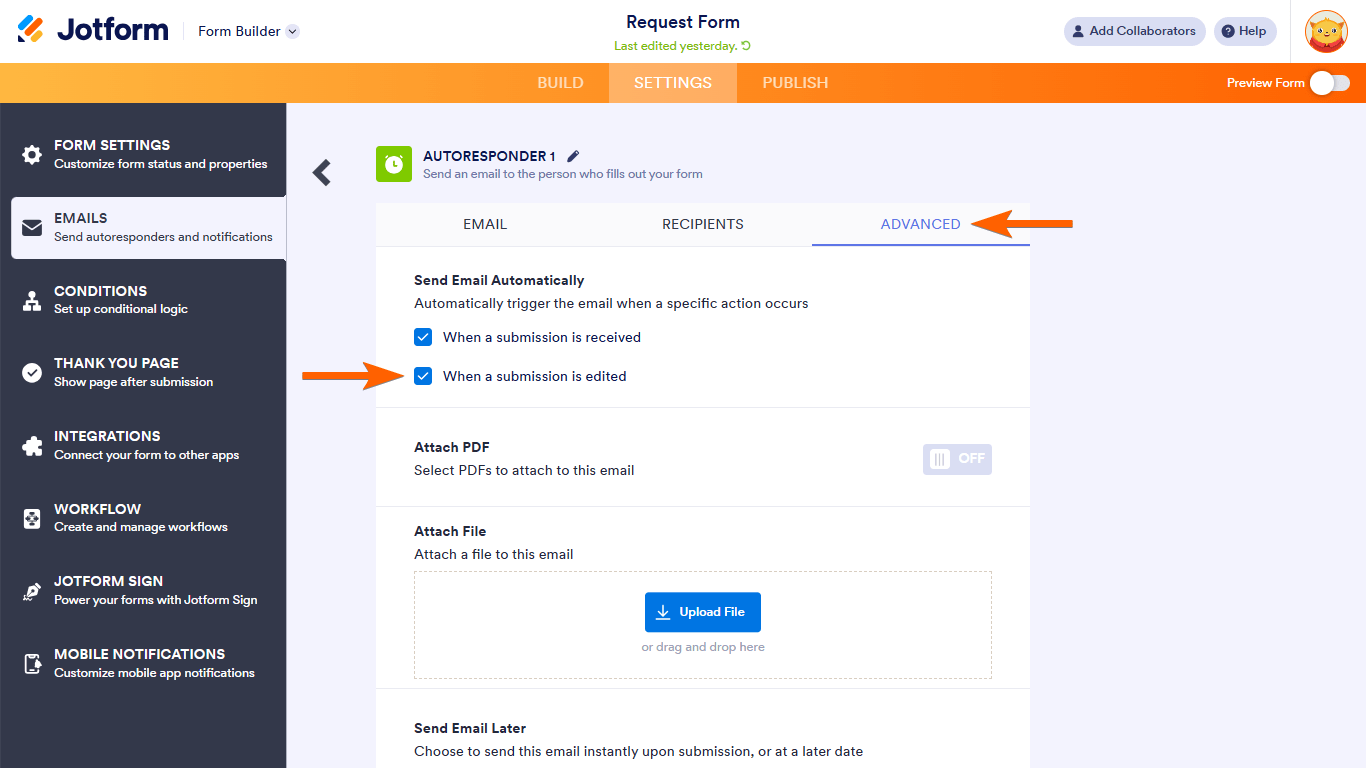
- Configure your autoresponders to send emails automatically when a submission is edited.
- Lastly, set up your conditional logic.
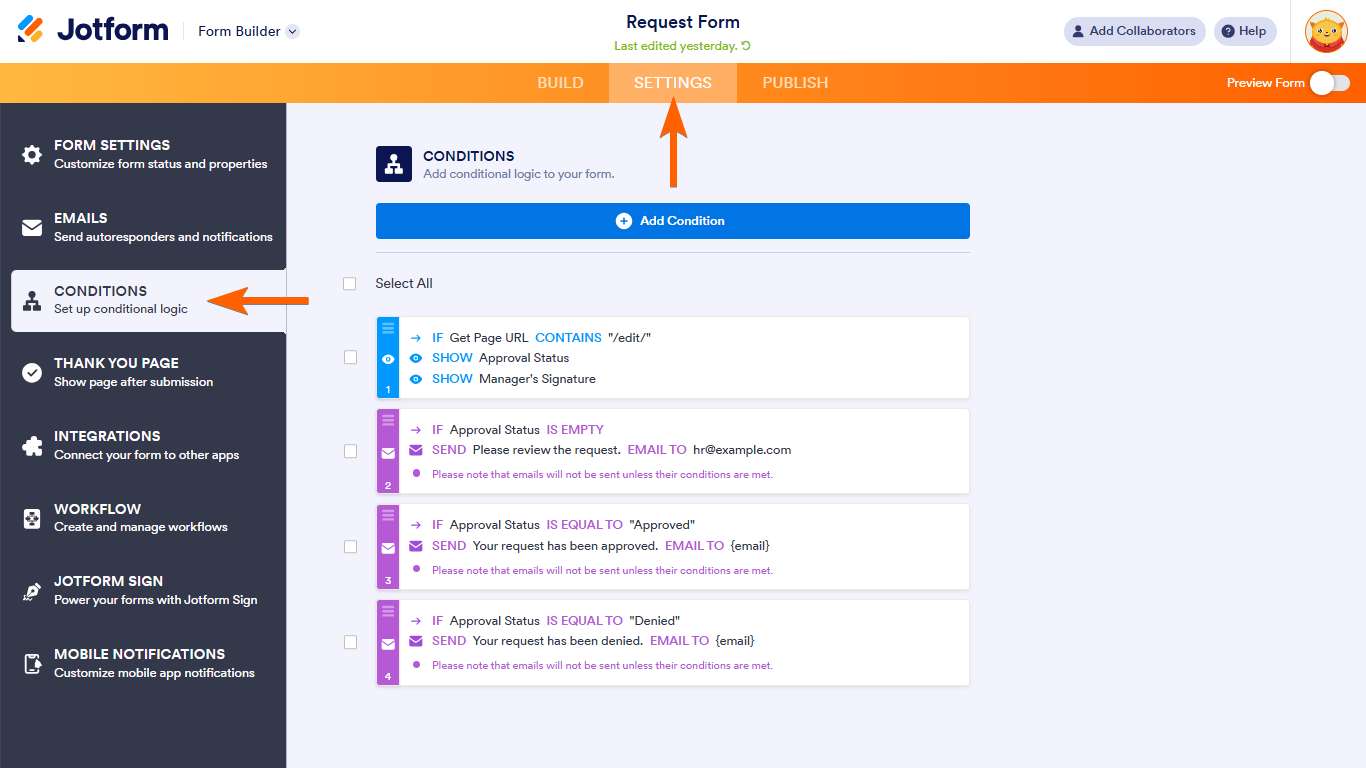
The conditions highly depend on how you want your approval process to work. Here are some possible scenarios and the needed conditions to make them happen:
- To send an autoresponder email to the form submitter once approved or denied, use a Change Email Recipient condition. See How to Send Emails Conditionally to learn more.
- To show the hidden Approval Status and Signature fields once the approver views the entry through the edit submission link, use a Show/Hide Field condition. See How to Show or Hide Form Fields When Editing Submissions for more information.
Here’s a demo form to see what it looks like. Since this is a fairly advanced topic, it’s recommended that you’re familiar with how conditions work. To better understand, you can clone the demo form.


Send Comment:
43 Comments:
October 5, 2023
Hi,
We're trying to build an approval process that has a semi-approval, as we have a submission area where someone can type multiple items and only some of them may be approved. Is it possible to have the selected items removed/highlighted in the approval process as not approved while the rest are?
Thanks
August 4, 2023
Is it possible that if some request is rejected it doesn't submit to google sheets database?
I have the same query as Kevin, I want it not to be sent to my googlesheet if rejected
July 18, 2023
Is it possible that if some request is rejected it doesn't submit to google sheets database?
December 12, 2022
Hi,
I would like to add notes in an approval/denial of a form into the email in the approval process however it is saying in the email settings that there are no approval fields.
How do i create this ability to comment/add an approval field.
Cheers,
Meg
November 18, 2022
Can I set up an approval process where for instance if the name is John Smith it will go to supervisor A, but it the name is Jane Doe is would go to supervisor B etc?
July 28, 2022
Hi, does "The Old Method for Creating an Approval Process Workflow" require an Approval process? or is the Old Method used instead of an Approval process?
May 26, 2022
I am attempting to have two people be approvers, with only one signature being needed. So,
(Manager A signs OR Manager B signs) ----> Approve/Deny email is sent
But then how can I have access expire for the other once one manager has signed off? Right now the approval flow is working correctly and pushing the approval through with only one email. My problem is that the other optional signature is still shown as "Pending". Can I fix this?
January 7, 2022
How can I make it possible for two people to sign a document?
Once a person signs the form, and it's approved, then I must be able to add my signature to make it legitimate.
October 15, 2021
Hi JotForm. When user submit the form, there is an email will send to manager. If manager approved, MS Flow will create item in sharepoint and otherwise go to end workflow. The question is: how to catch the "approved"/"rejected" action from manager on MS Flow?
Thanks
September 21, 2021
Hi Jotform. I would like to know is that possible to create approval form that is automatically pop up message APPROVE or DENIED based on the field that my customer click ? I am gonna build form for student health declaration that they need to answer before coming to school. So the question will be like :-
Example :
Question 1 : are you having fever ?
If student answer YES, then after the student submit the form, automatically they get answer approve or deny WITHOUT need approver to view the form.
Can you advise ? Thank you.
July 9, 2021
When viewing submissions, it keeps telling me "submission not connected to approval flow" and I have to manually do it, even though I connected the entire approval flow to the form. Assist please.
June 24, 2021
Dear Support team,
I would like to know if second approval is doable.
Let's say, a form has been submitted from a user, and then a approver denied it because of some missing fields or wrong data. As soon as it is denied, the user will get the email with edit link to edit the corresponding fields to be approved. Once the user re-submits the form with the edits, the approver gets second approval email to review and approve it.
Would it be possible?
June 16, 2021
Is it possible to modify the approval status from Approved to Deny (or vice versa)?
May 21, 2021
We already subscribe to Jotform can we build an Approval workflow using the subscription that we have?
April 20, 2021
hi , may i know how to setup the second approval ? i know only set up if only one approval..how about the second approval? please assist.thanks
April 18, 2021
My question is similar to deanborst's, but it's the opposite.
I'd like to enter some information on to the form and send it to a customer.
Customer enters more information and signs
Their submission triggers an email to send them two more forms (or a link to them).
I thought the answer to deanborst's question would help me, but clicking on it gives me a 404 error.
March 7, 2021
I want to have the specific sections shown only to who should be filling them (teacher section is shown to the teacher, parent section shown to parent, and admin section shown to admin)
February 17, 2021
I am trying to use this to make my process.
I would like
Customer to fill out form and submit
Me to fill our rest of form and sign.
Send back to customer to review and sign.
Is there an easy way to do this?
January 22, 2021
Taking this approval one step further, can we integrate with a payment processor for those forms that are approved after been edited? e.g we are enrolling students into courses they have to pay for however some have outstanding fees from the previous course.
So once enrolled our finance dept need to check if any O/F apply and adjust the tool cost and payment schedule. Then approve the form, this then needs to be sent back to the student to be signed and paid for through an integrated payment processor or API and payment provider??
Is this currently possible.... formstack have approvals built-in but cannot trigger a payment processor after approval.
January 7, 2021
I am trying to set up a form that must be signed electronically by a parent, teacher, and administrator. I have done all of the steps except setting up the conditions, which will need to go to different parents and teachers each time the form is filled out. I am the administrator, so that will be the same, can you let me know step by step how to create this in my jotform.
Thank you
December 12, 2020
How can I collect multiple printed names along with their signatures to a PDF form that I already have uploaded onto a jotform?
September 16, 2020
Hi,
I cloned the form. Submitted the answers. Redirected to Thank you page.
But the are some issues:
1. The submissions view is empty.
2. I also didn't receive the NOTIFICATION WITH EDIT LINK
Please assist.
Lev
September 7, 2020
I cloned the demo form as recommended and it does not work for me. It looks there is a condition on the signature that is no longer working or setup that could be causing the problem.
July 29, 2020
Do you guys have any forms with a multi-level approval that I could test out?
For instance if after Manager A approves, it goes to Manager B who also needs to approve/deny it before Manager C would receive the completed version?
July 9, 2020
There's a native, easy to use integration for creating approval workflows around Jotforms