As of May 2024, the integration with First Data is no longer available. However, you can still collect payments with our 30+ other payment processors.
First Data is a customizable solution that provides customers with a seamless and familiar online buying experience. They can provide you with everything you need to set up an online store and expand the scope of your business with global payments, mobile-ready checkout, and comprehensive security. It simplifies the connections that make commerce possible for merchants, financial institutions, and their customers.


Note:
Jotform’s First Data integration uses the Payeezy Gateway API. Payeezy is only available for US-based merchants. Unfortunately, you can’t use the integration if you’re not registered with First Data’s Payeezy payment platform.
Adding and Setting up First Data in the Form
Create your form if you don’t have one yet, or edit your existing form where you want to integrate First Data and follow the steps below.
- In Form Builder, click the Add Form Element button.
- Go to the Payments tab.
- Click First Data from the list, or drag and drop it to add.
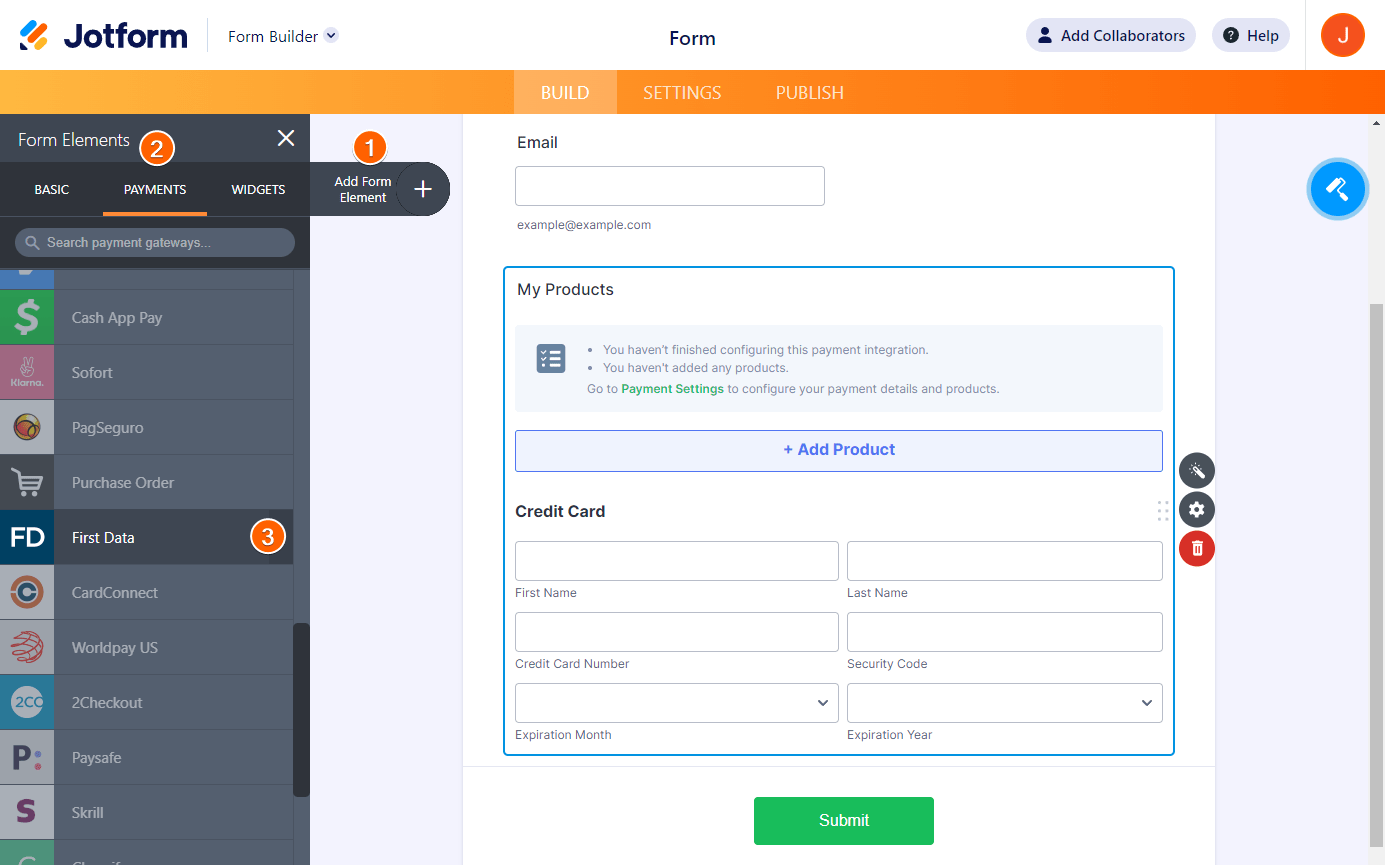
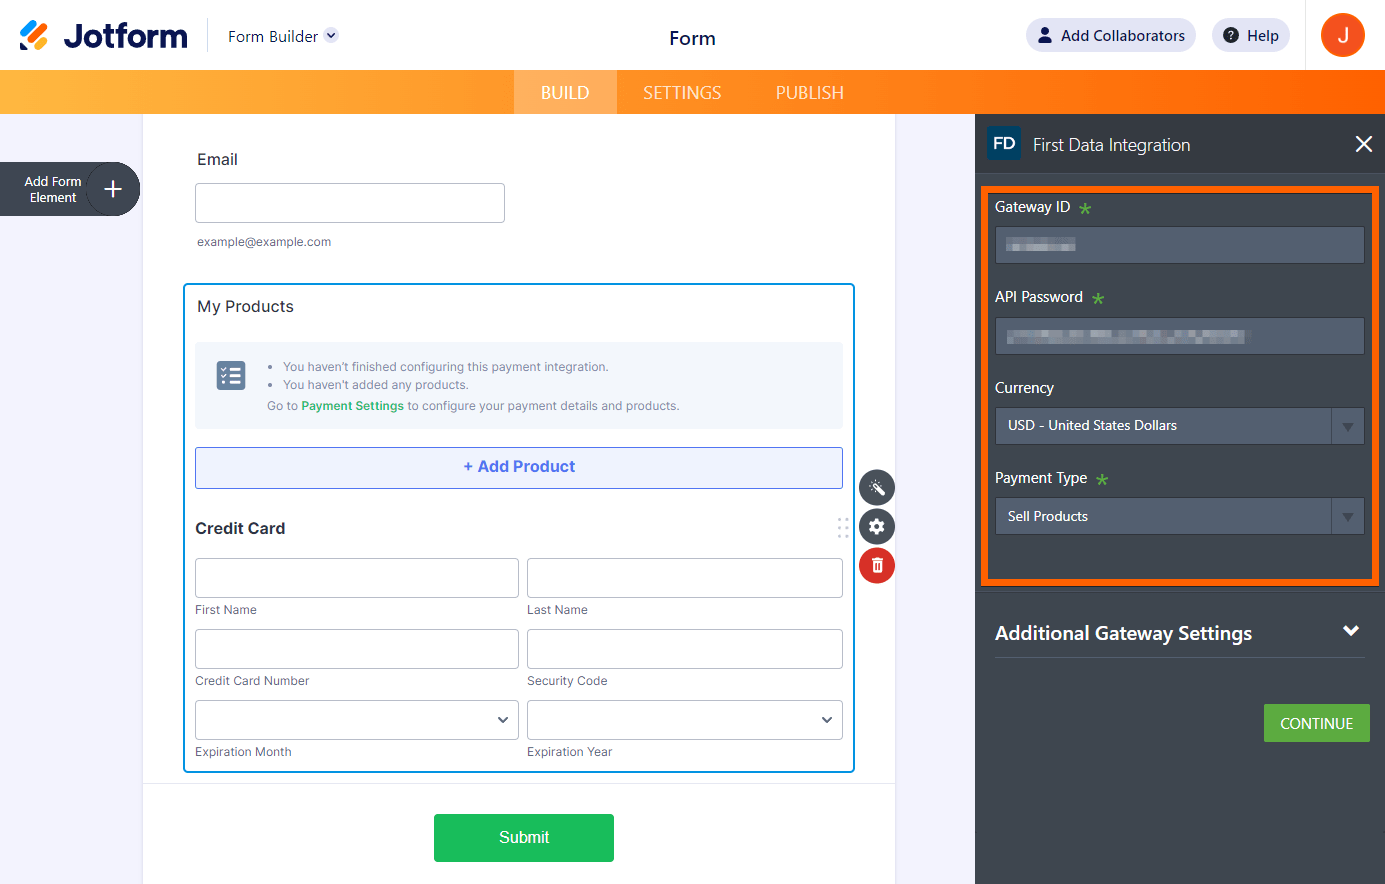
- In the Payment Settings, set up the following:
- Gateway ID
- API Password — You can get the Gateway ID and API Password from your First Data Terminal settings. See the below steps.
- Currency — First Data supports all currencies available in Jotform’s payment integrations.
- Payment Type — With First Data, you can Sell Products, Collect Donations, or allow user-defined amounts.
Did you know?
You can open the Payment Settings by clicking the Wand icon on the right side of the First Data gateway.
- If you choose Sell Products from the Payment Type, click the Continue button to add your product items. Otherwise, click the Save button to complete the integration.
See also:
- Setting Up Your First Order Form
- How to Add Options to Payment Forms
- How to Add a Coupon Code to Payment Forms
- How to Add Tax to Your Payment Form
- How to Add Shipping Costs to Payment Forms
- How to Generate an Invoice for Your Payment Form
Getting your Gateway ID and API Password from First Data
As mentioned above, you can get both Gateway ID and API Password from one of your First Data Terminals. Here are the steps:
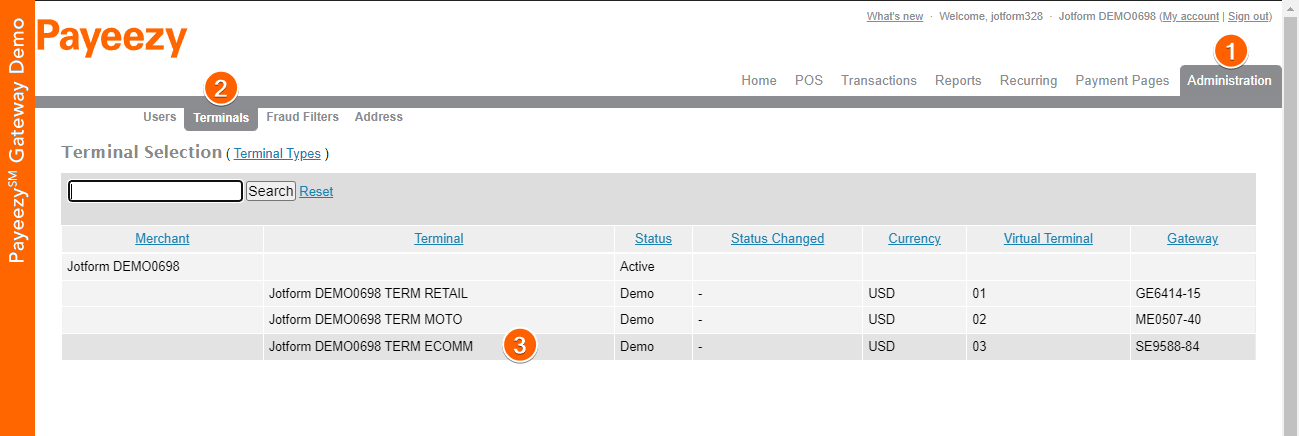
- In your First Data Payeezy dashboard, click the Administration at the top-right of the main navigation.
- Choose and click Terminals from the Administration options.
- Look for the terminal you want to use in your First Data integration, and click it.
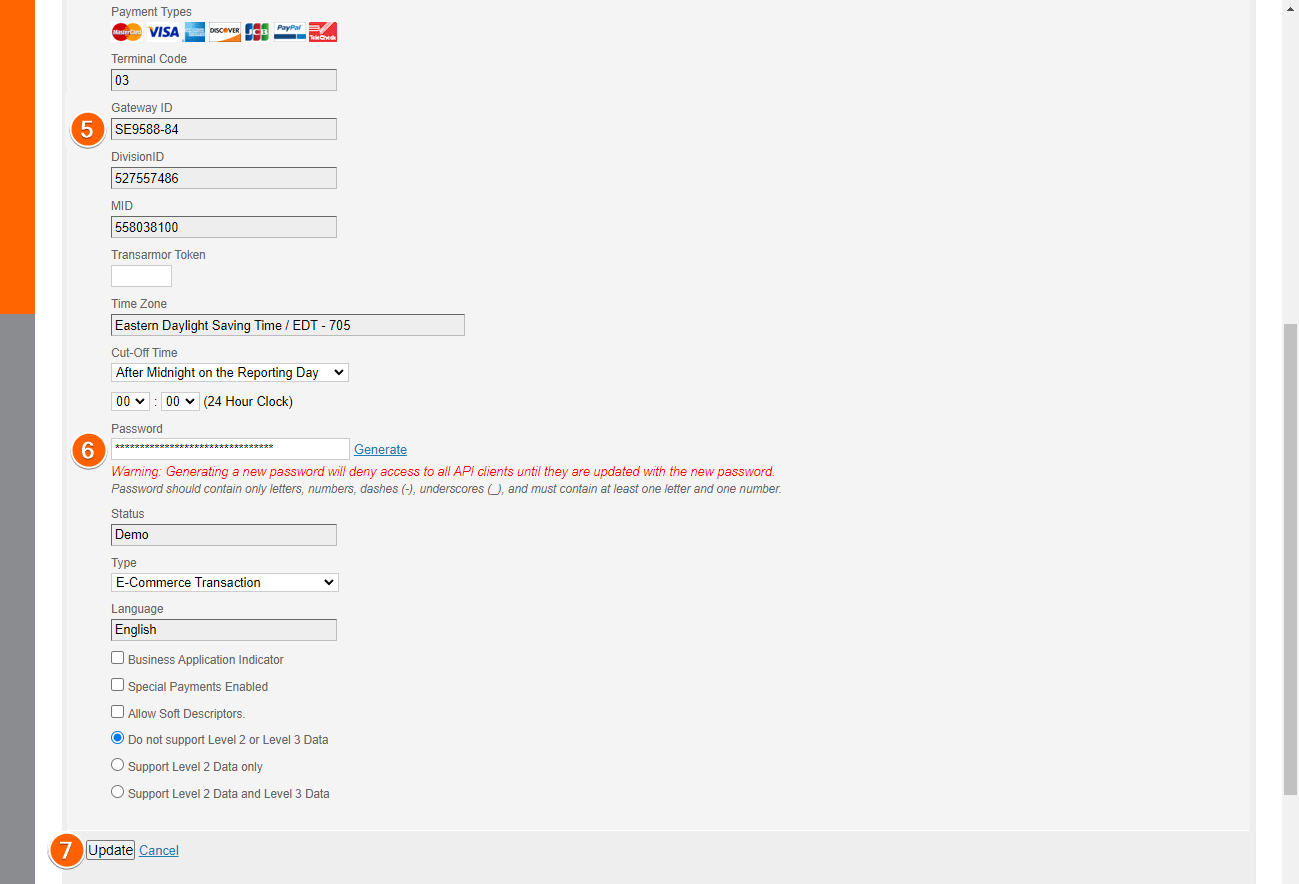
- Copy the Gateway ID.
- Type in your password or click the Generate link in the Password section. Save or copy the generated password.
- Finally, click the Update button to save the password.
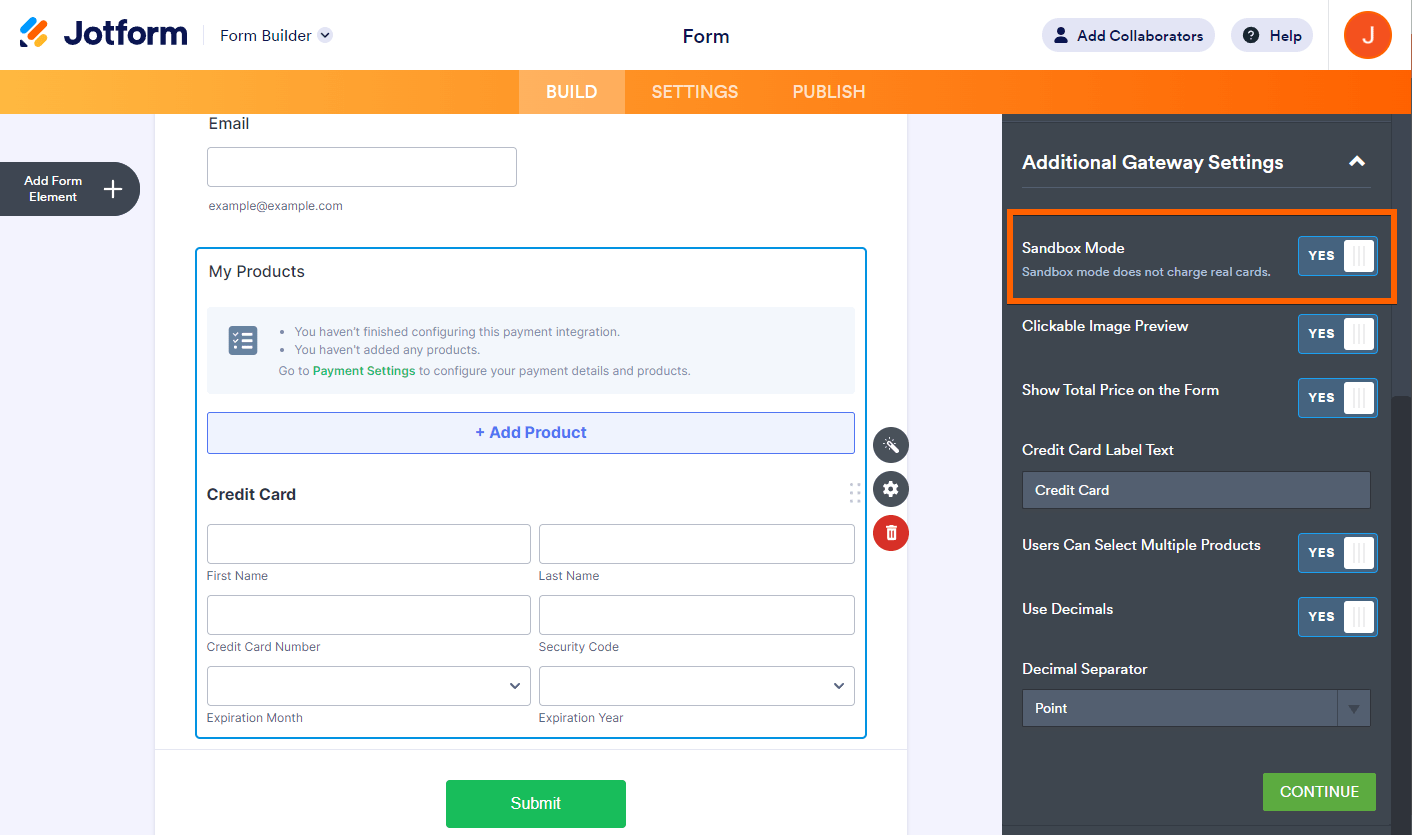
Testing First Data Integration
Register a Sandbox account with First Data and use the Sandbox credentials in the Payment Settings. Next, ensure that the Sandbox Mode is toggled to Yes under the Additional Gateway Settings of the First Data integration. Visit Payeezy Gateway Demo Accounts for more details.

Send Comment: