Jotform makes it easy to accept secure online payments by connecting your forms with trusted payment gateways like CardPointe (CardConnect). With its PCI-validated point-to-point encryption (P2PE), CardPointe helps protect sensitive card details while keeping the payment experience smooth and reliable for your customers.
With Jotform’s CardPointe integration, you can easily collect payments for a wide range of needs—whether you’re selling products or services, accepting donations, or handling custom payments for events and registrations. It’s a practical solution for businesses, nonprofits, and professionals who want a simple, secure way to get paid online, without adding unnecessary friction for their customers.
What You Need for This Setup
- CardPointe Merchant ID — This is the unique merchant account identifier assigned to your business in your CardPointe account. If you’re not sure what this is, check out this support article from CardPointe on Managing Your Account to learn more.
- CardPointe API Username and Password — This isn’t your account username and password. It’s the username you set for the Gateway API Credential and the password you generated for it in your CardPointe account. If you’re not sure how to get those, check out this CardPointe Support article on Creating Credentials to learn where to find them.
Adding and Setting Up the CardPointe Payment Field
Adding CardPointe to your form lets you start accepting secure online payments quickly and efficiently. By properly configuring the integration, you can ensure transactions are processed smoothly and payment details are handled safely.
Whether you’re setting up a new form or updating an existing one, integrating your form with CardPointe takes no time at all—here’s how:
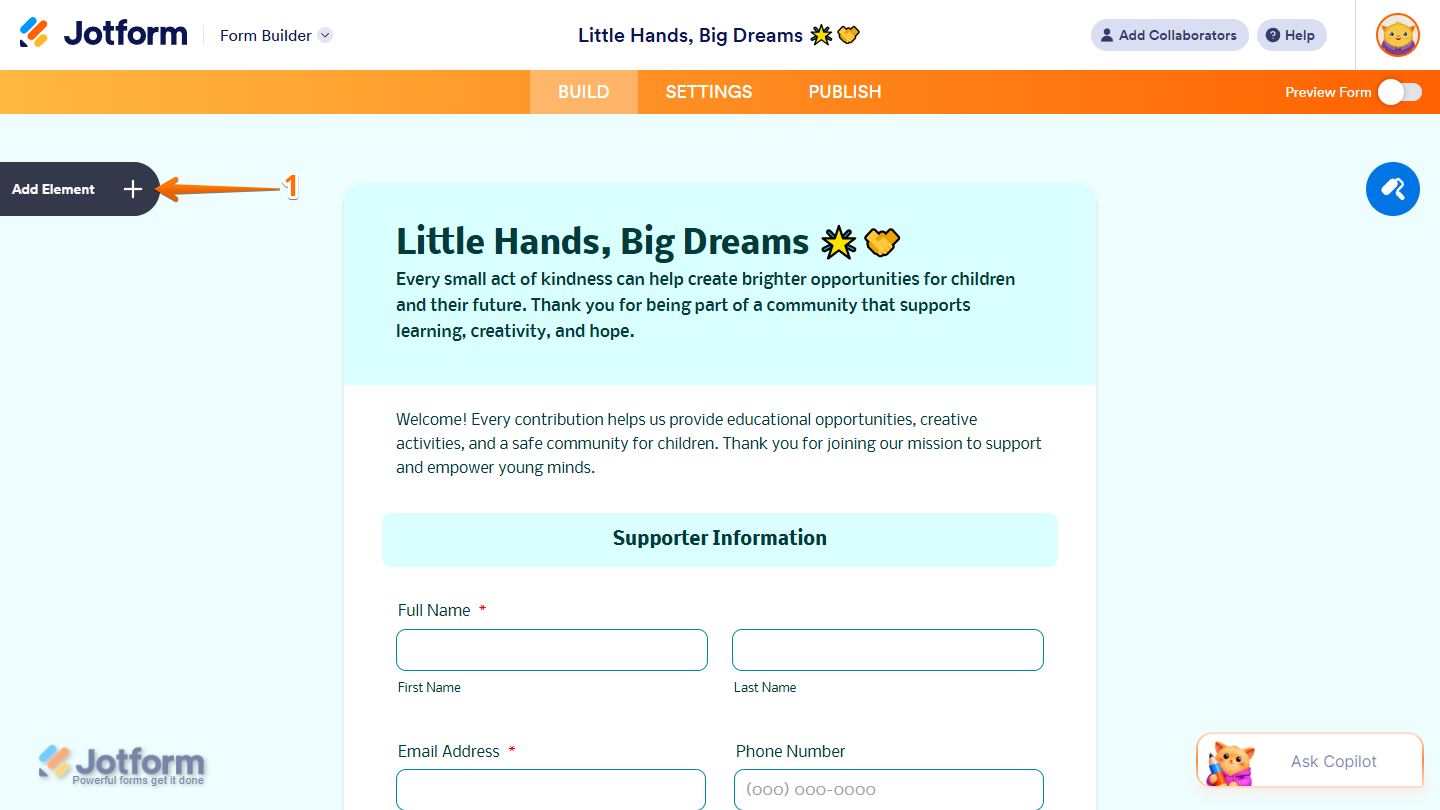
- In Form Builder, click on Add Element on the left side of the page.

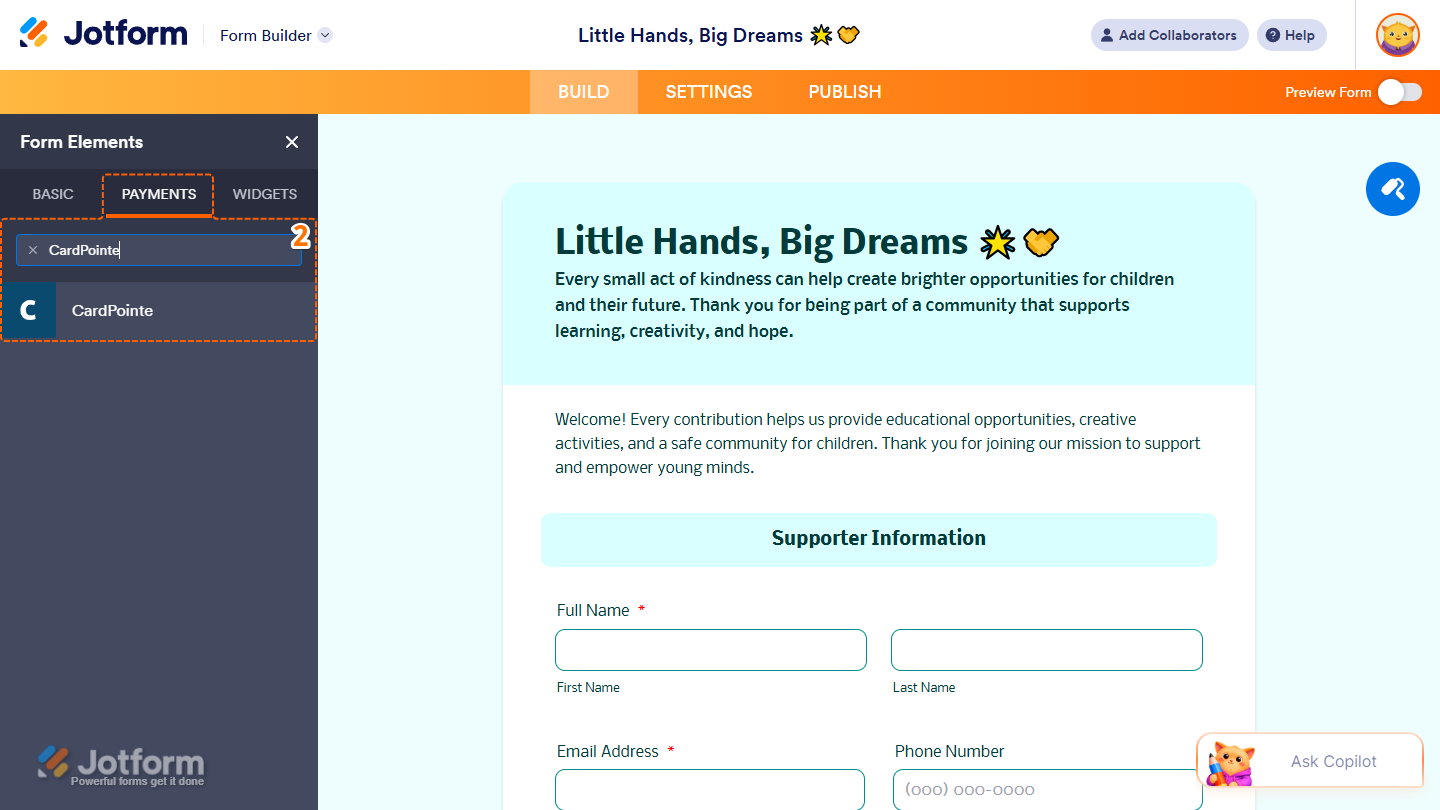
- Now, in the Form Elements menu, under the Payments tab, search for CardPointe and click on it. Or just drag and drop it to where you want it on your form.

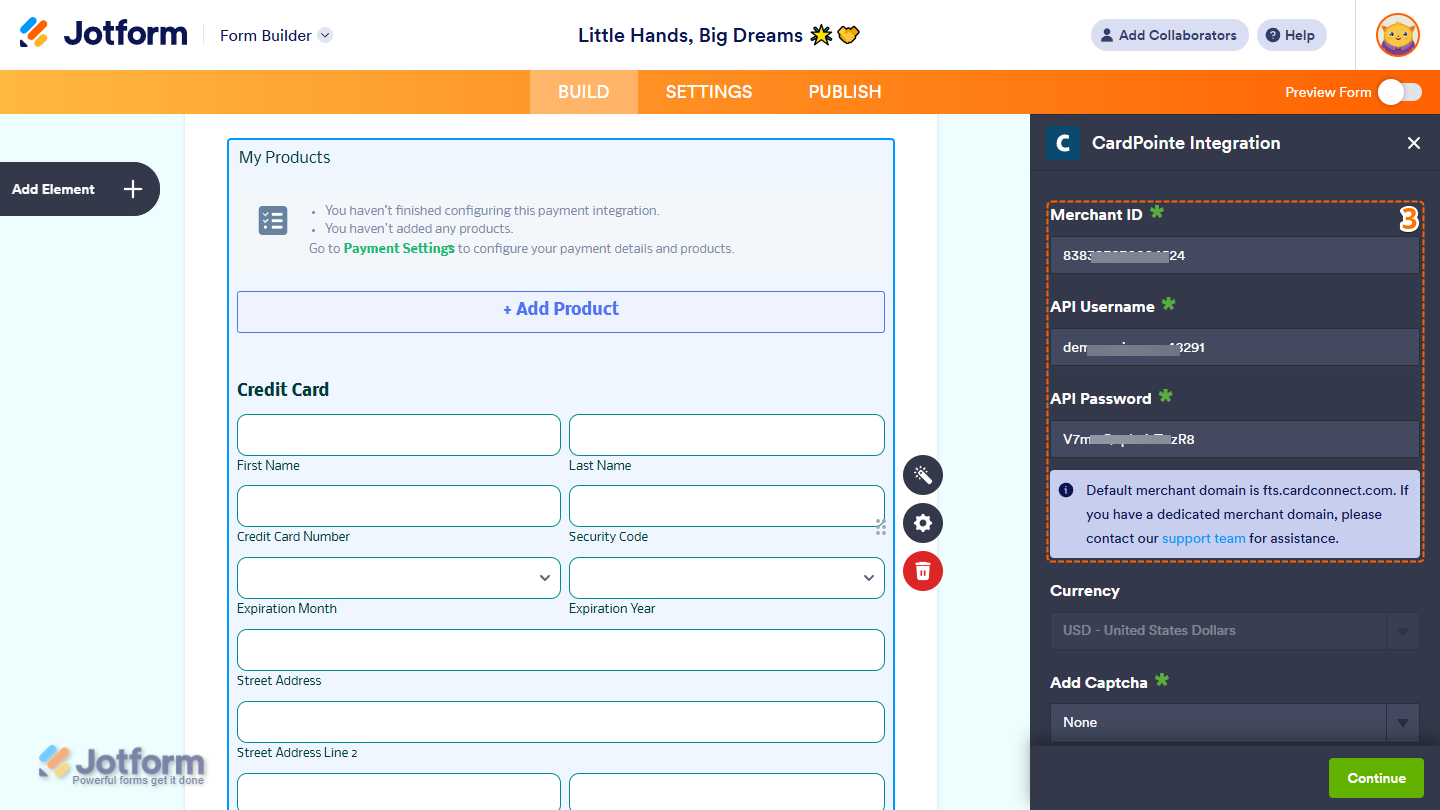
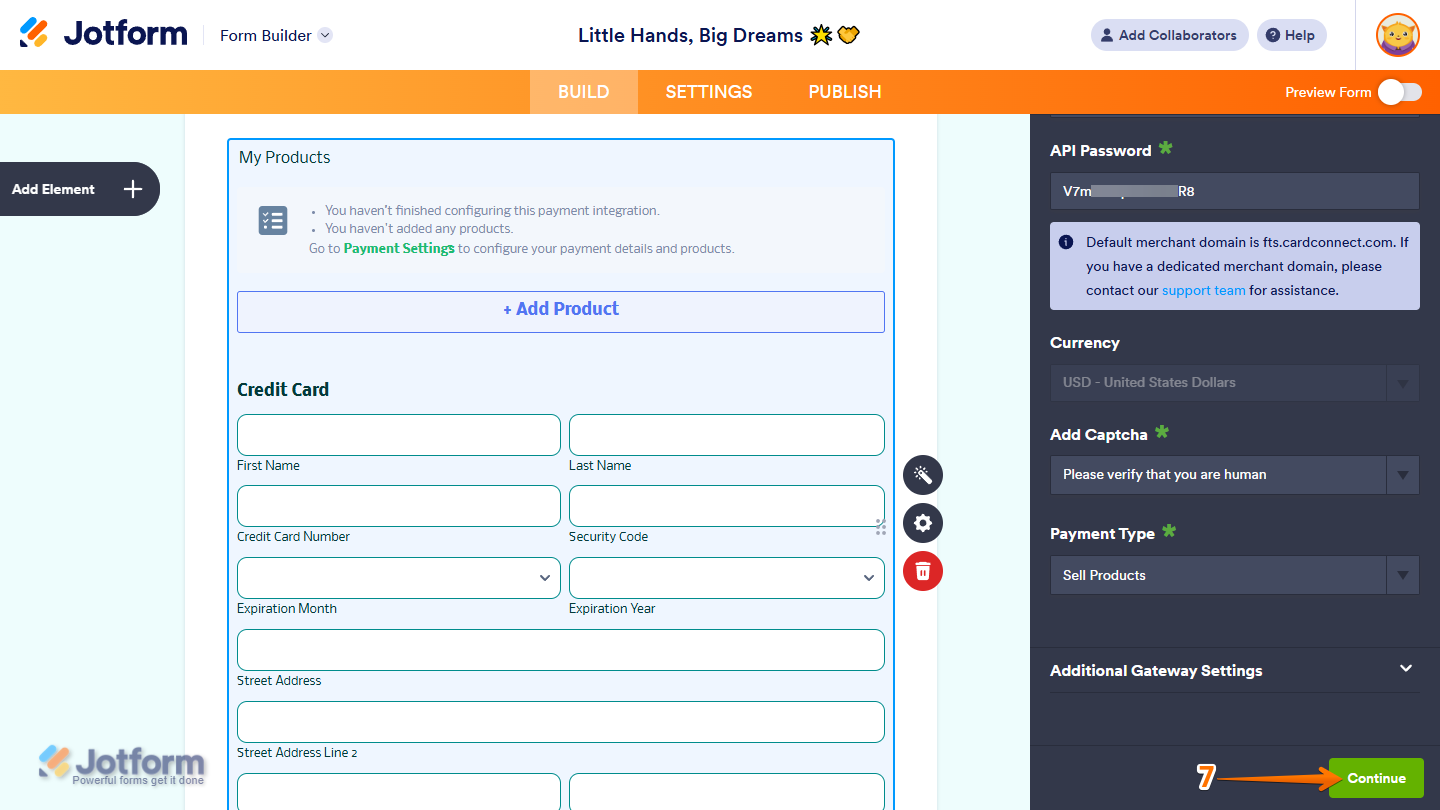
- Next, in the CardPointe Integration window that opens on the right side of the page, enter the Merchant ID from your CardPointe account, the API Username, and the API Password associated with it.
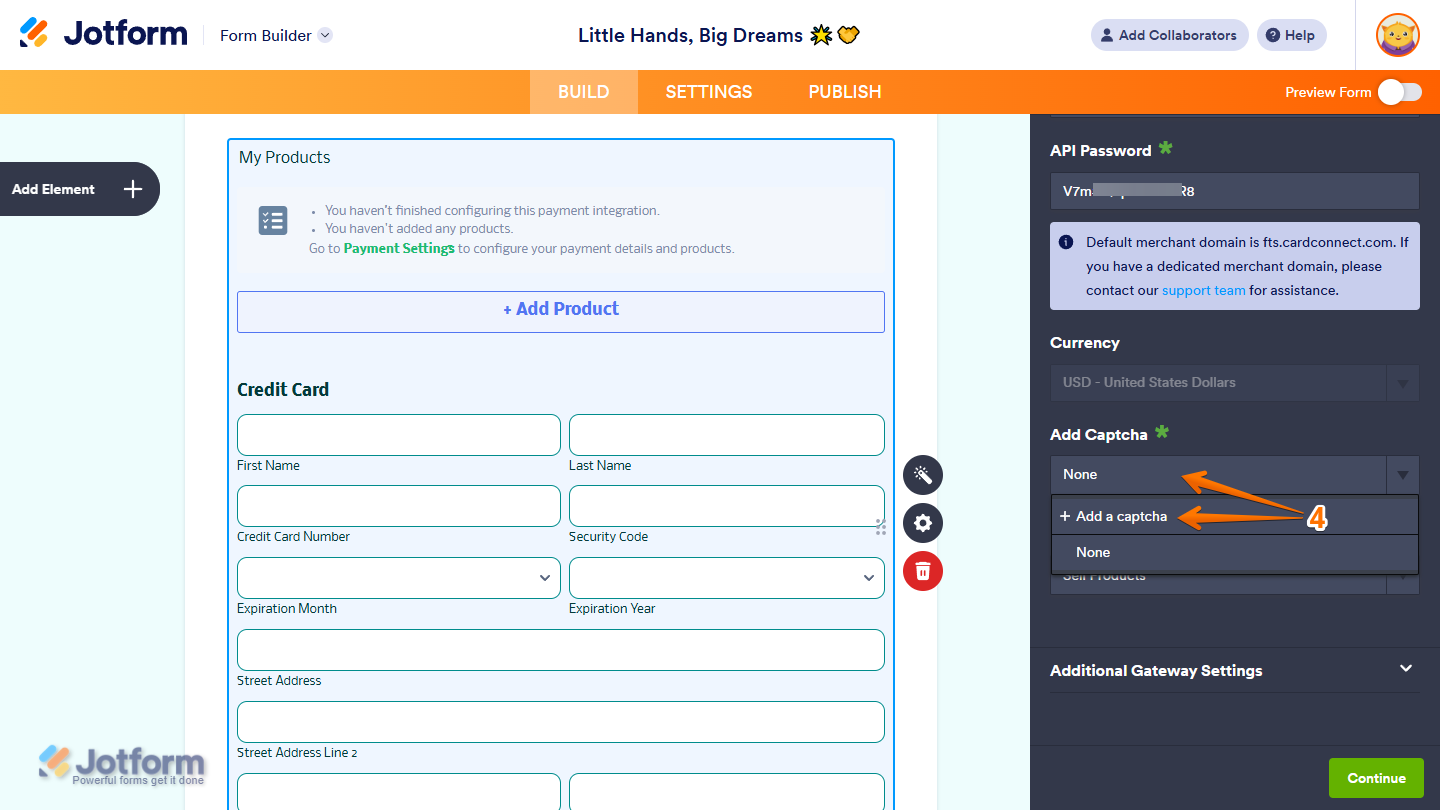
- Then, scroll down and click on the Add Captcha dropdown, and then select the Captcha field on your form. Or, click on Add a Captcha in the Dropdown menu that opens to add one and select it.
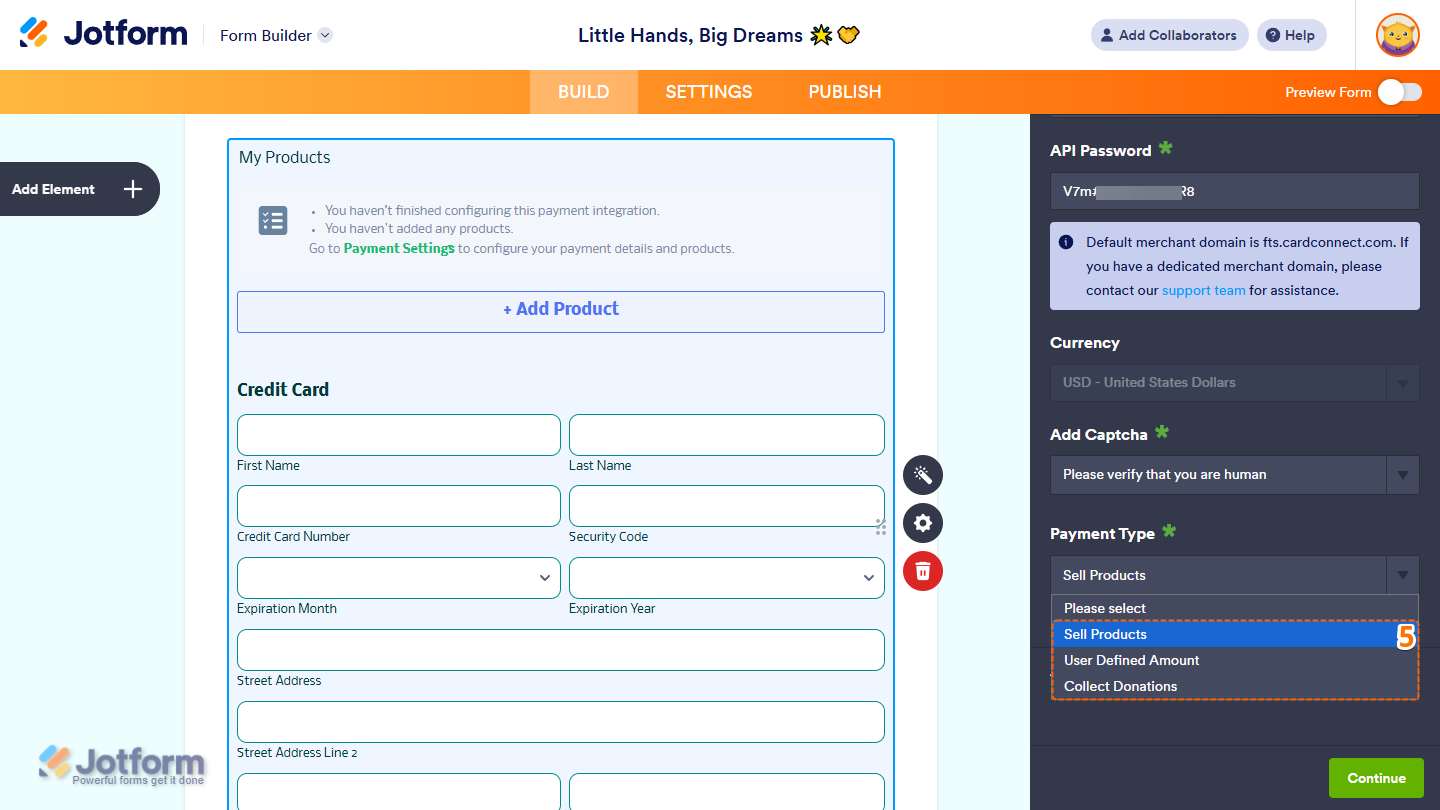
- Now, in the Payment Type Dropdown menu, select what you’d like the payment to be processed for:
- Sell Products — This is selected by default. Use this to sell physical or digital goods at a fixed price, allowing customers to make a one-time purchase.
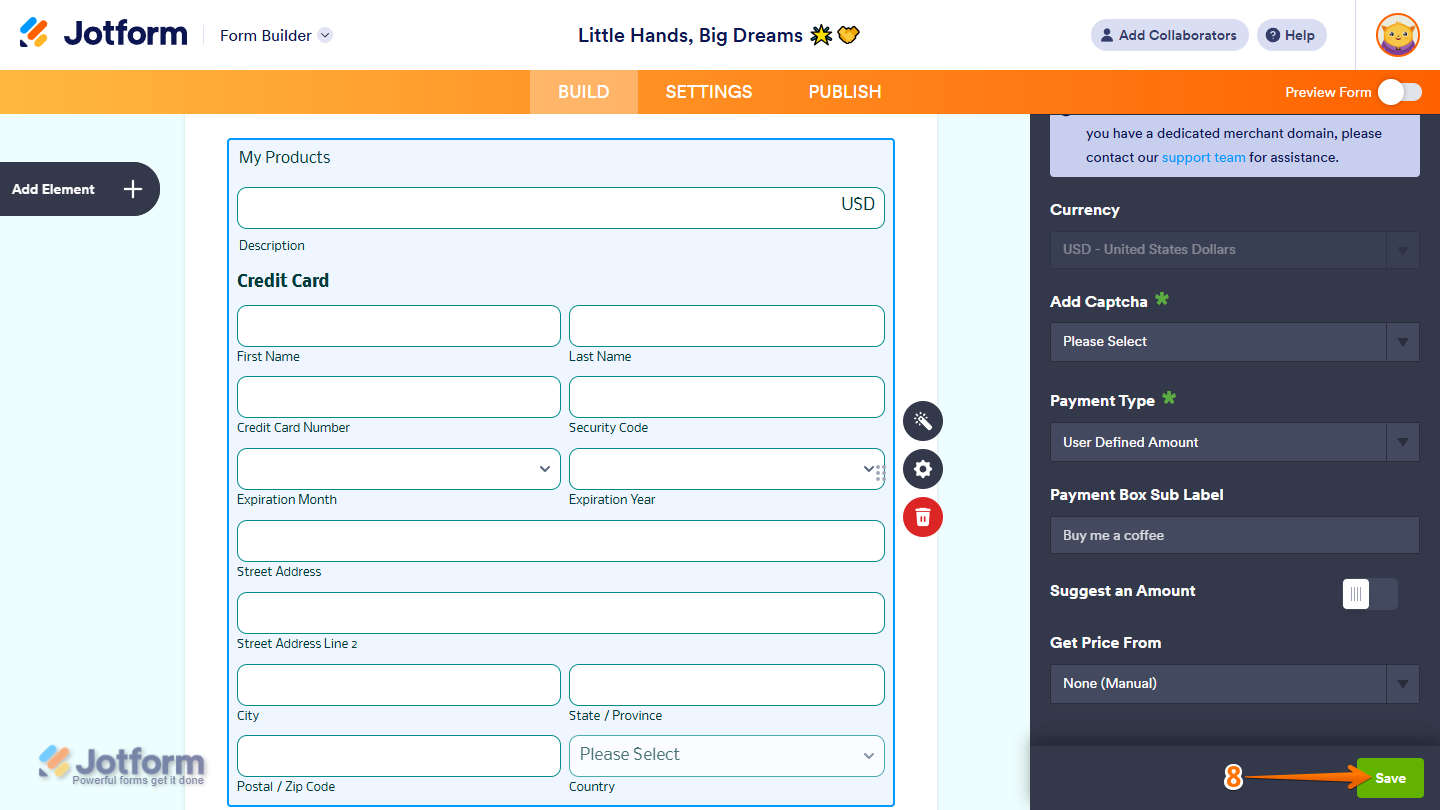
- User Defined Amount — This lets customers enter the amount they want to pay. It’s useful for tipping, custom amount pricing, or flexible payments.
- Collect Donations — Select this to accept voluntary contributions, commonly used for fundraising, nonprofit support, or charitable causes.
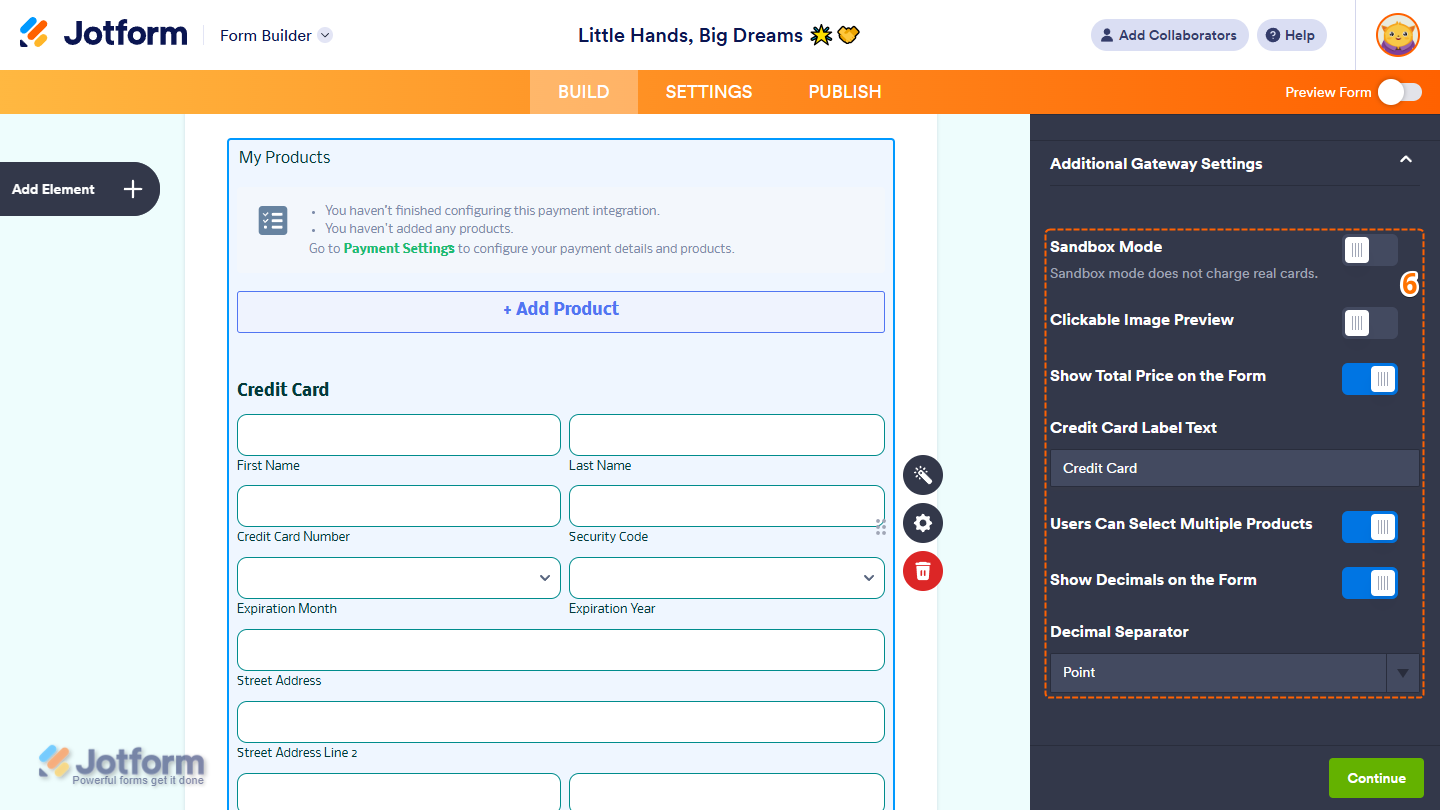
- Then, expand Additional Gateway Settings, and you’ll see this list of options you can adjust based on the payment type you chose:
- Sandbox Mode — Enables testing transactions without processing real payments.
- Clickable Image Preview — This is only available with the Sell Products payment type and is enabled by default. You can toggle this off to prevent customers from enlarging product images.
- Show Total Price on the Form — This is only available with the Sell Products payment type and is enabled by default. You can toggle this off if you want to hide the total price of selected products on your form.
- Credit Card Label Text — This allows you to change the heading of the Credit Card fields in your Payment field.
- Users Can Select Multiple Products — This is only available with the Sell Products payment type and is enabled by default. You can toggle this off if you want customers to select only one (1) product per submission.
- Show Decimals on the Form — This is only available with the Sell Products payment type and is enabled by default. You can toggle this off to hide decimals on both the item prices and the total amount.
- Decimal Separator — When decimals are shown on your payment field, you can select between a period, which is used in English-speaking countries, or a comma, which is used in many European countries.
Note
You can obtain your Sandbox Merchant ID, API Username, and API Password for your account by contacting CardPointe Support through their Support Center page.
- Once everything is set for the Sell Products payment type, click on Continue to start creating products for your payment field.
Note
When setting up your products, you might also want to check out these guides:
- Then, for the User Defined Amount and Collect Donations payment types, just click on Save at the bottom.
Note
When you use the User Defined Amount and Collect Donations payment types, you can enter a description that’ll appear under the payment box on your form. You can also provide a suggested amount and set it as a minimum or get the price from a Form Calculation widget, which is useful when you want to pass a calculated amount to your payment field instead of getting it from users. You can check this guide on How to Pass a Calculation to a Payment Field to learn more about it.
That’s it. Your form is now ready to securely accept payments through CardPointe (CardConnect), helping you provide respondents with a smooth and reliable checkout experience.
Setting Up a CardPointe (CardConnect) Reusable Payment Connection
Reusable Payment Connections is a feature that lets you set up Payment Processor Integrations, like CardPointe, once with the same payment gateway credentials and configuration and use them across different assets in your account, such as Forms and Apps.
Whether you are creating a new form or updating an existing one, you can add a payment field to your form and set up a CardPointe Reusable Payment Connection in a few easy steps. Here’s how to do it:
- In Form Builder, click on Add Element on the left side of the page.
- Now, in the Form Elements menu, under the Payments tab, search for CardPointe and click on it. Or just drag and drop it to where you want it on your form.
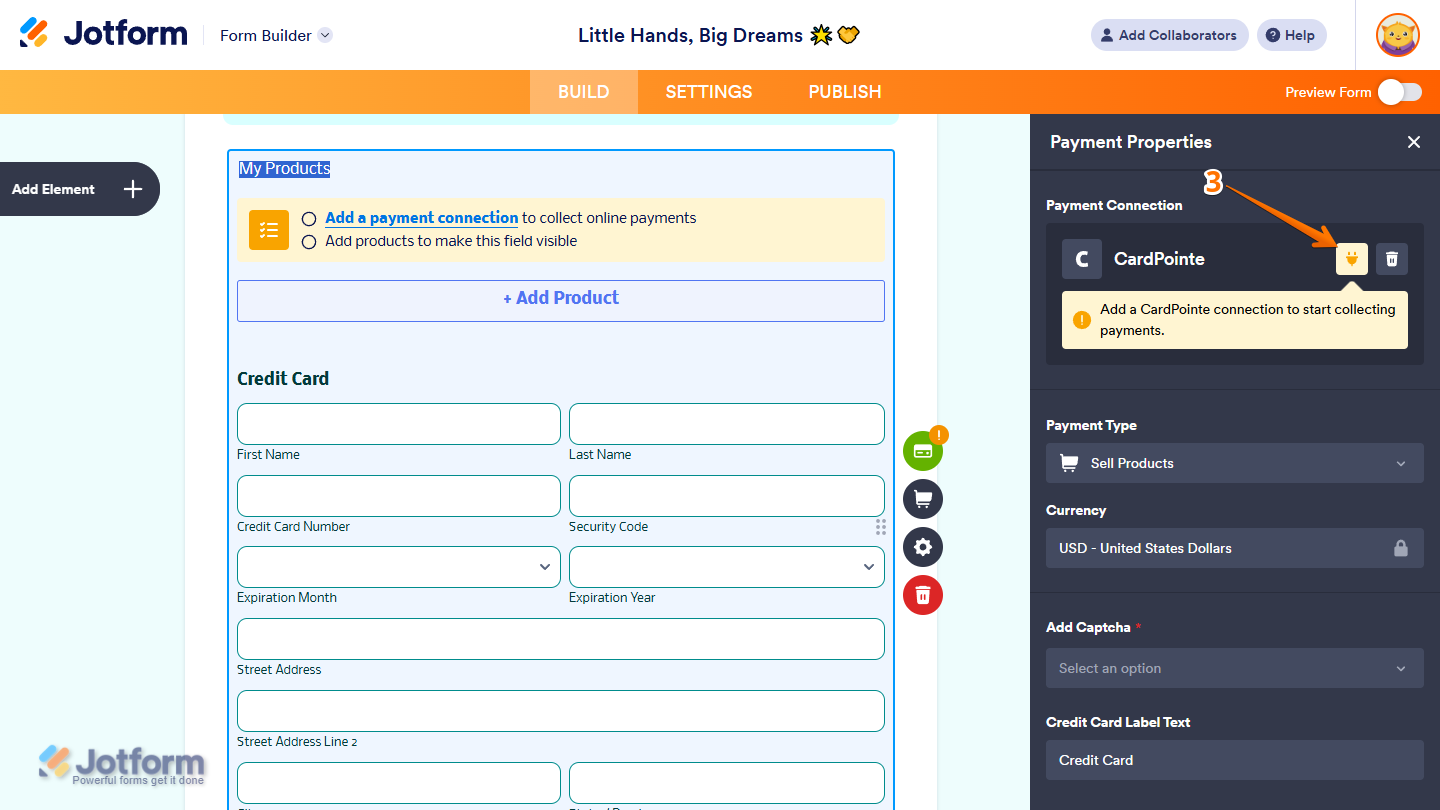
- Then, in the Payment Properties menu that opens on the right side of the page, click on the Plug icon.
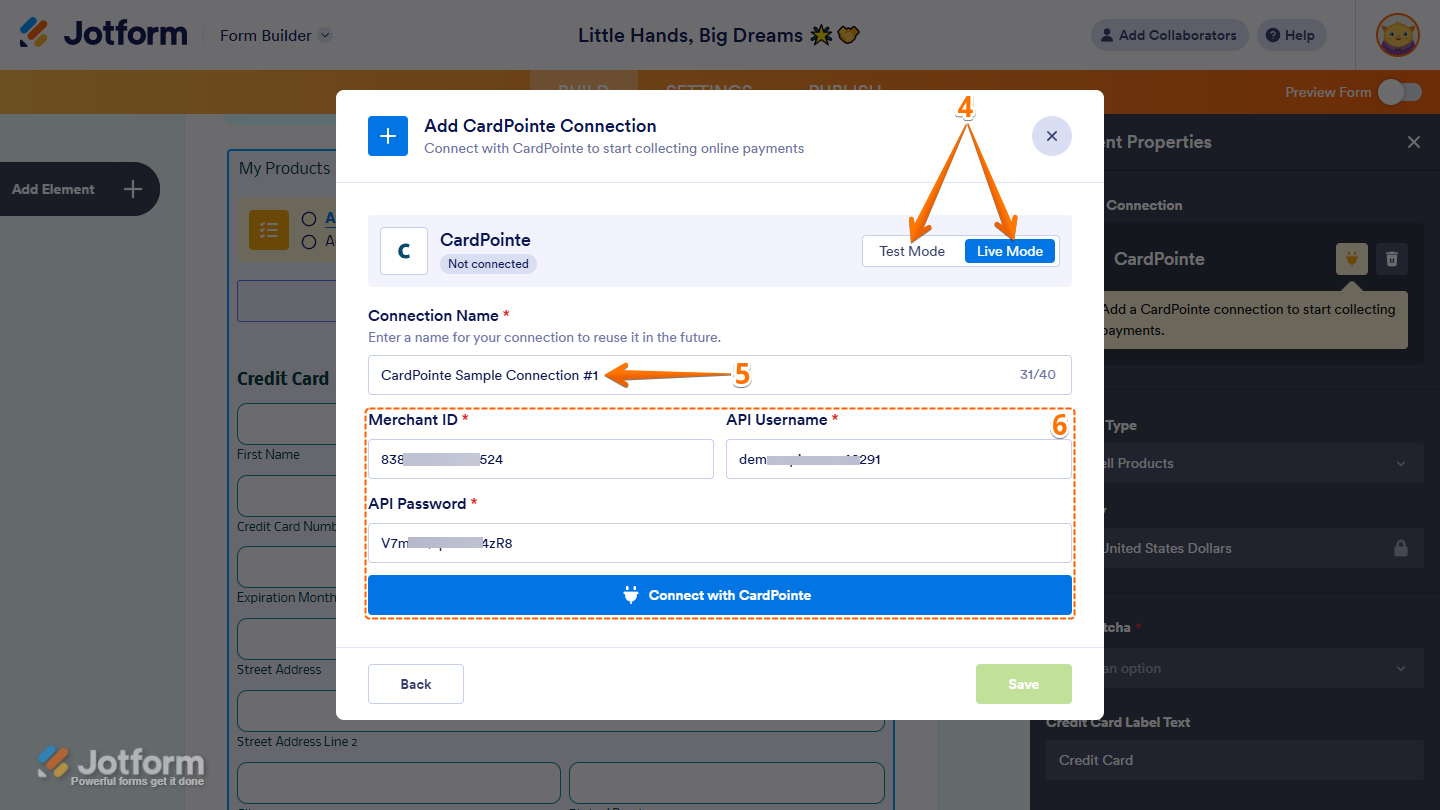
- Next, in the Add CardPointe Connection window, click on Test Mode or Live Mode at the top to select which environment you’re adding a payment connection for.
- Then, in the Connection Name section, enter a name you haven’t used in other reusable payment connections in your account, if there are any.
- After that, enter the Merchant ID, API Username, and API Password from your CardPointe account and then click on Connect with CardPointe.
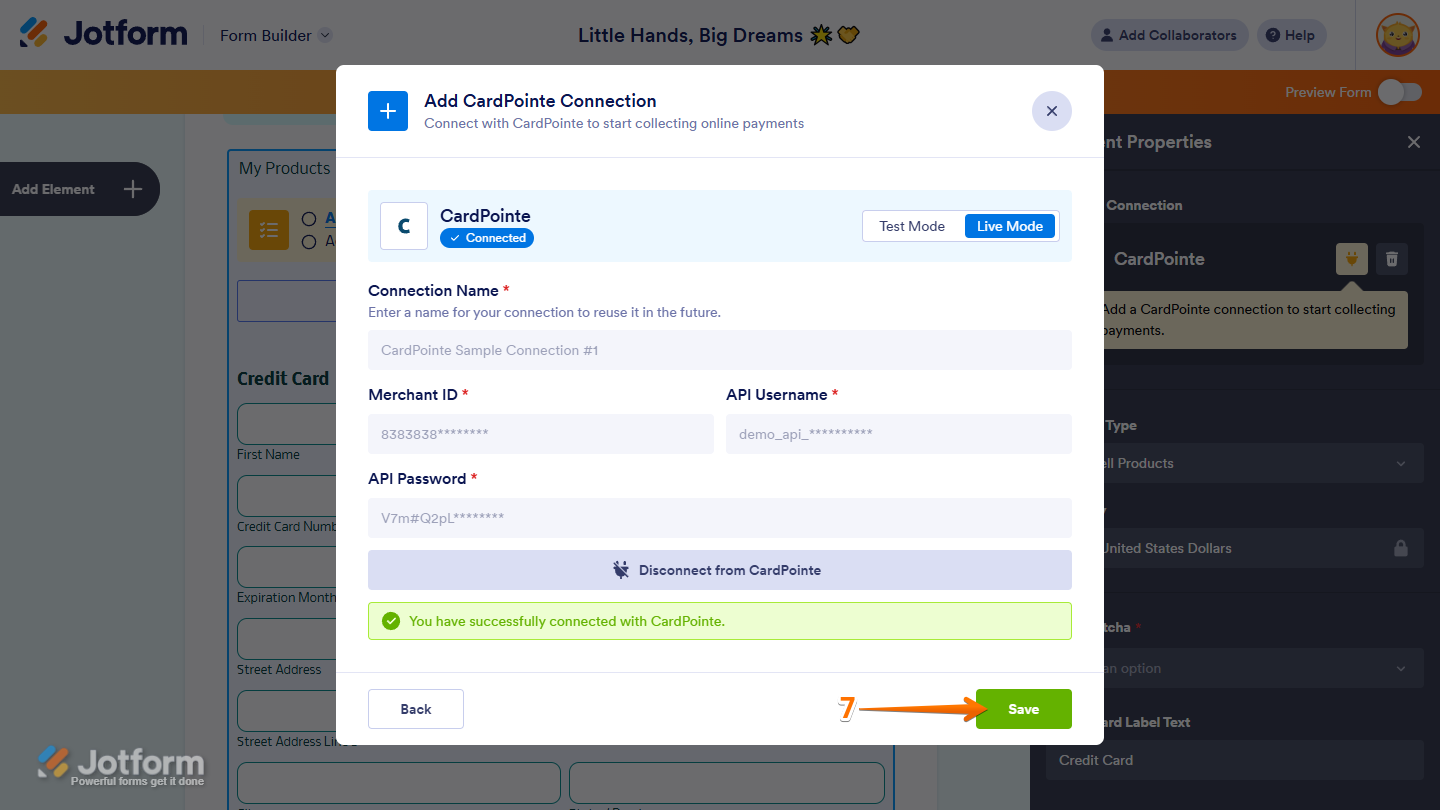
- Once it is connected successfully, click on Save at the bottom to add the reusable payment connection to your account.
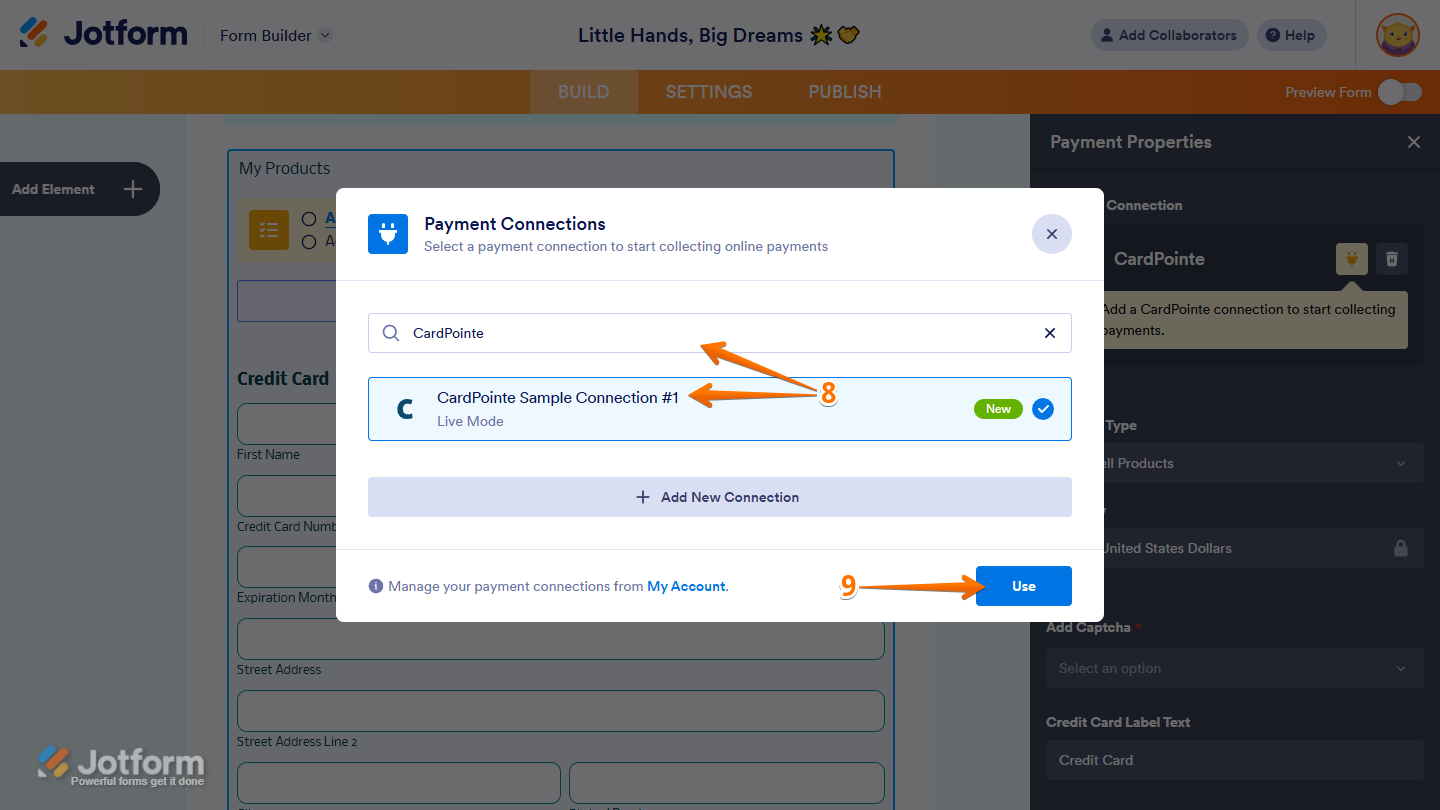
- Then, in the Payment Connections window, click on the CardPointe payment connection you’ve just added to select it. You can use the Search bar at the top of the window to find it easily.
- Next, click on Use at the bottom.
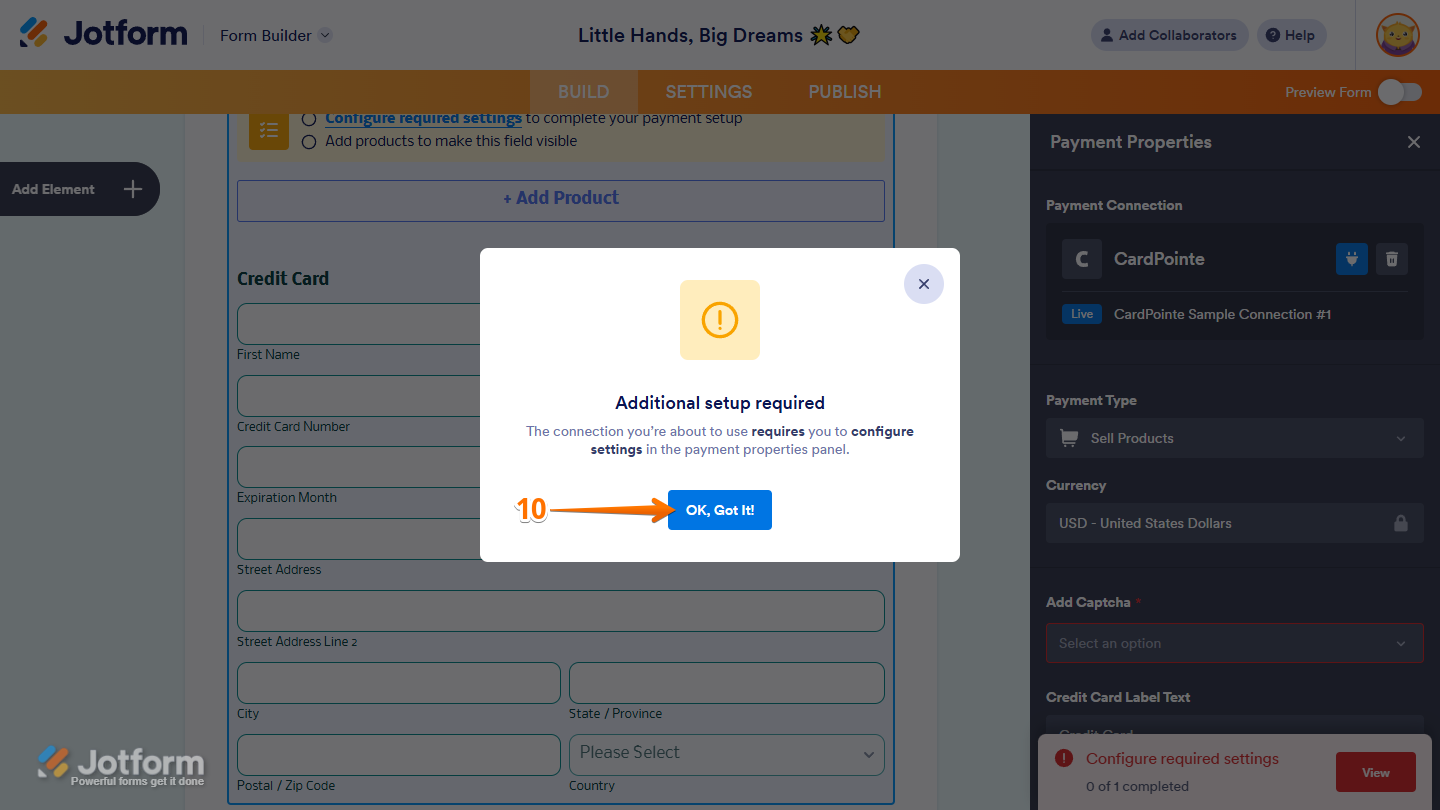
- In the Additional Setup Required window that comes up, click on Ok, Got It!. This only shows when you set up your payment connection before completing any required payment properties.
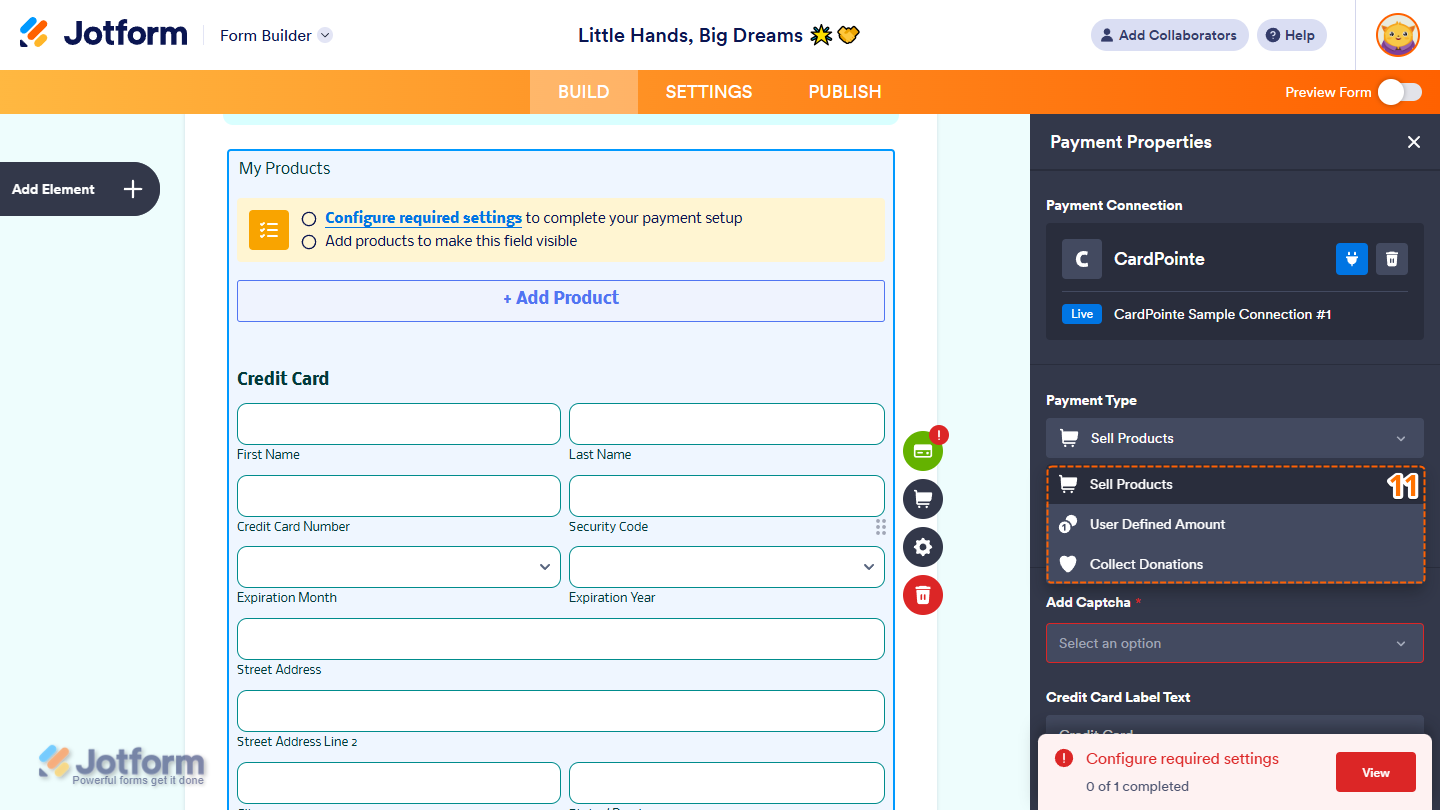
- Now, in the Payment Properties menu on the right side of the page, click on the Payment Type Dropdown menu and select the option you’d like the payment to be processed for:
- Sell Products — This is selected by default. Use this to sell physical or digital goods at a fixed price, allowing customers to make a one-time purchase.
- User Defined Amount — This lets customers enter the amount they want to pay, useful for tipping, custom amount pricing, or flexible payments.
- Collect Donations — Select this to accept voluntary contributions. It’s commonly used for fundraising, nonprofit support, or charitable causes.
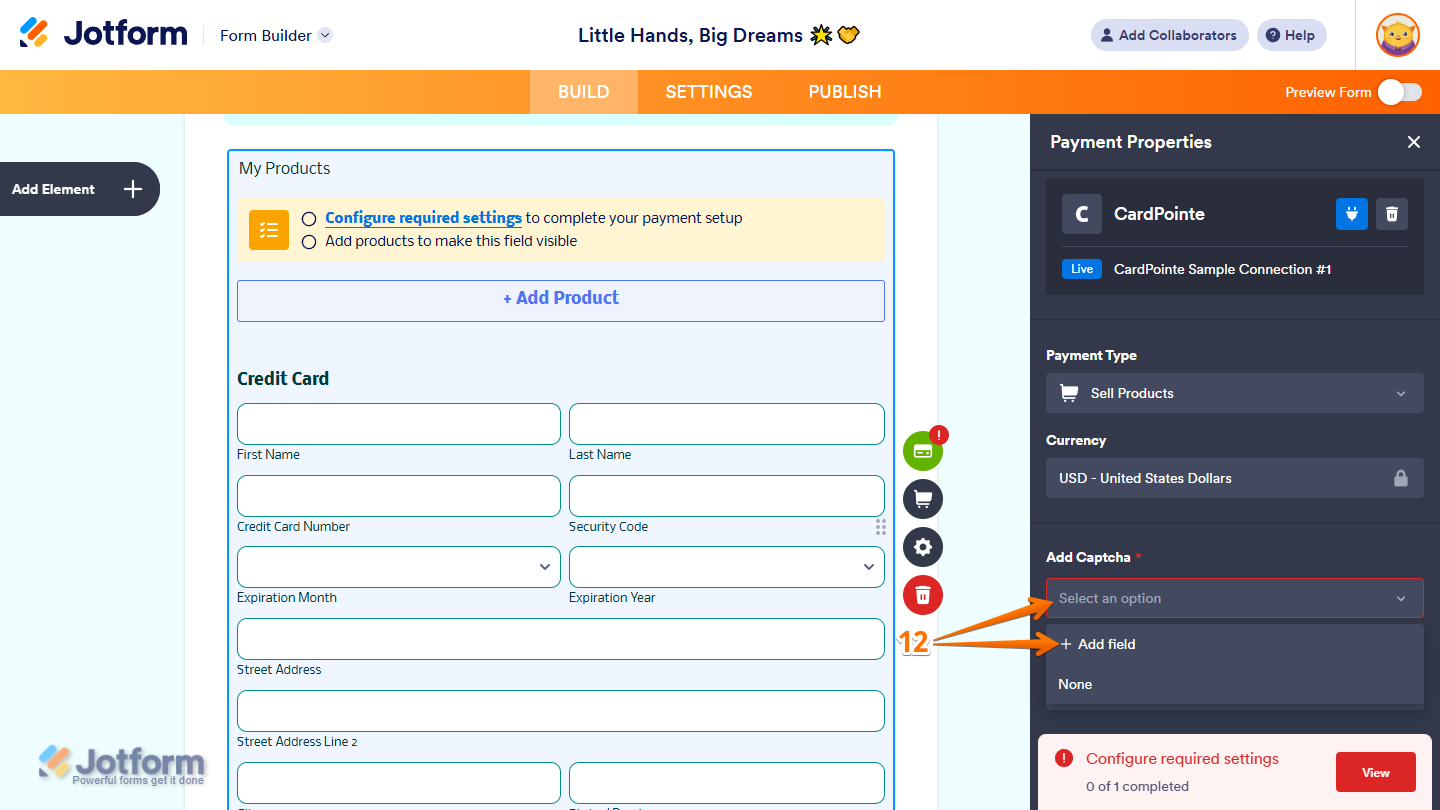
- Then, click on the Add Captcha dropdown and select the Captcha field on your form from the Dropdown menu that opens. Or, click on Add Field from the Dropdown menu to add one and select it.
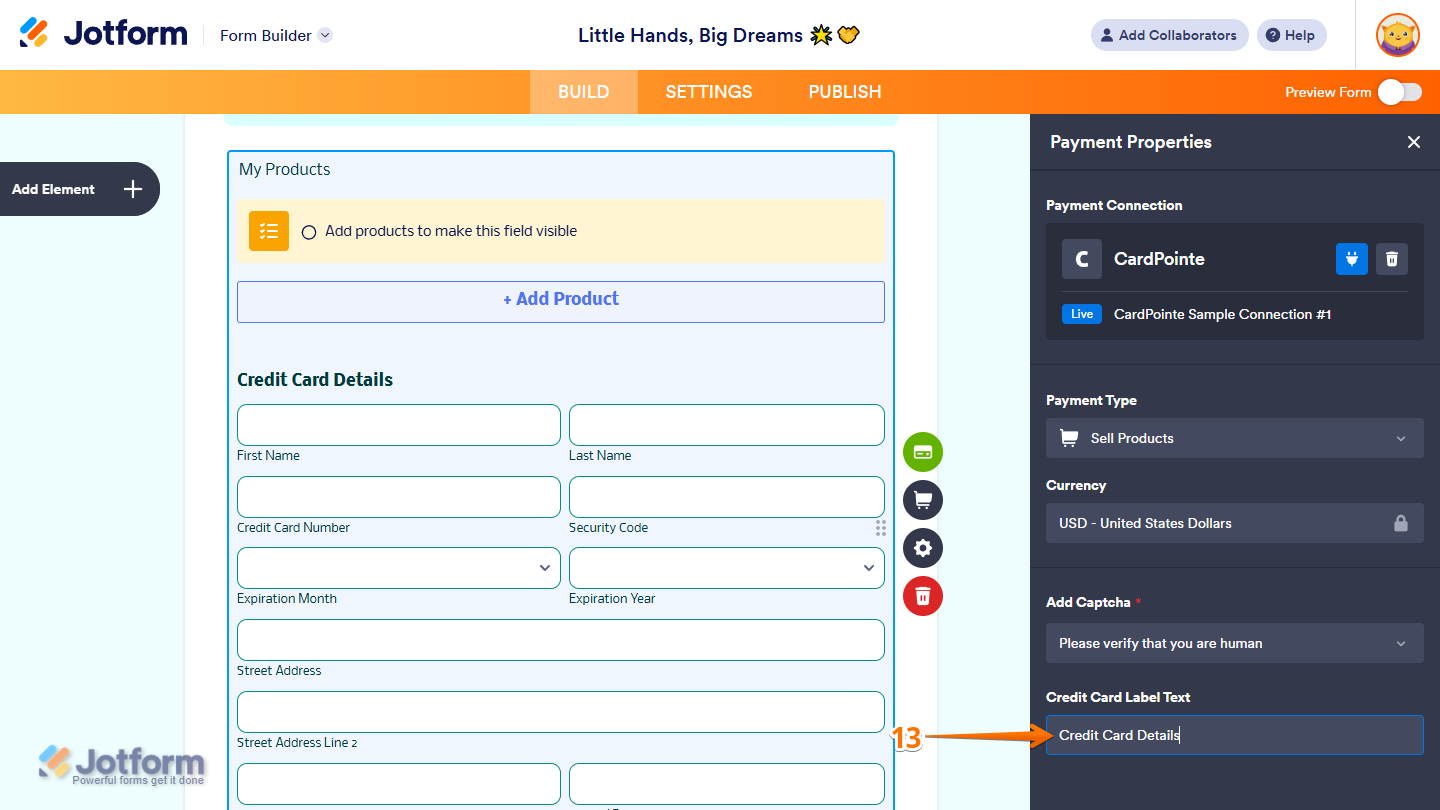
- Next, in the Credit Card Label Text Input box, you can keep the default text or enter a new one to change the heading of the Credit Card fields in your Payment field.
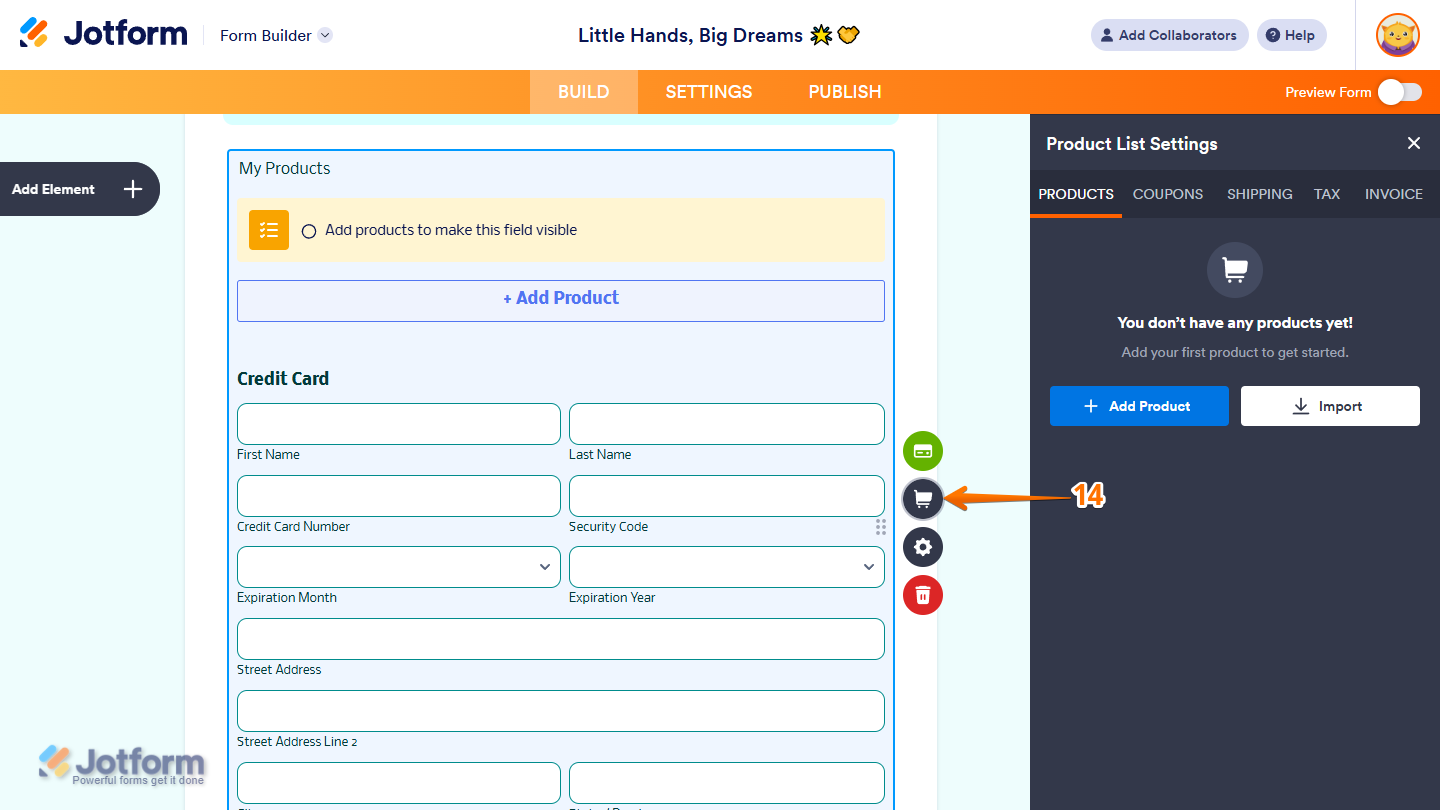
- Once everything is set for the Sell Products payment type, on the right side of your Payment field, click on the Shopping Cart icon to set up the products respondents can purchase through your form.
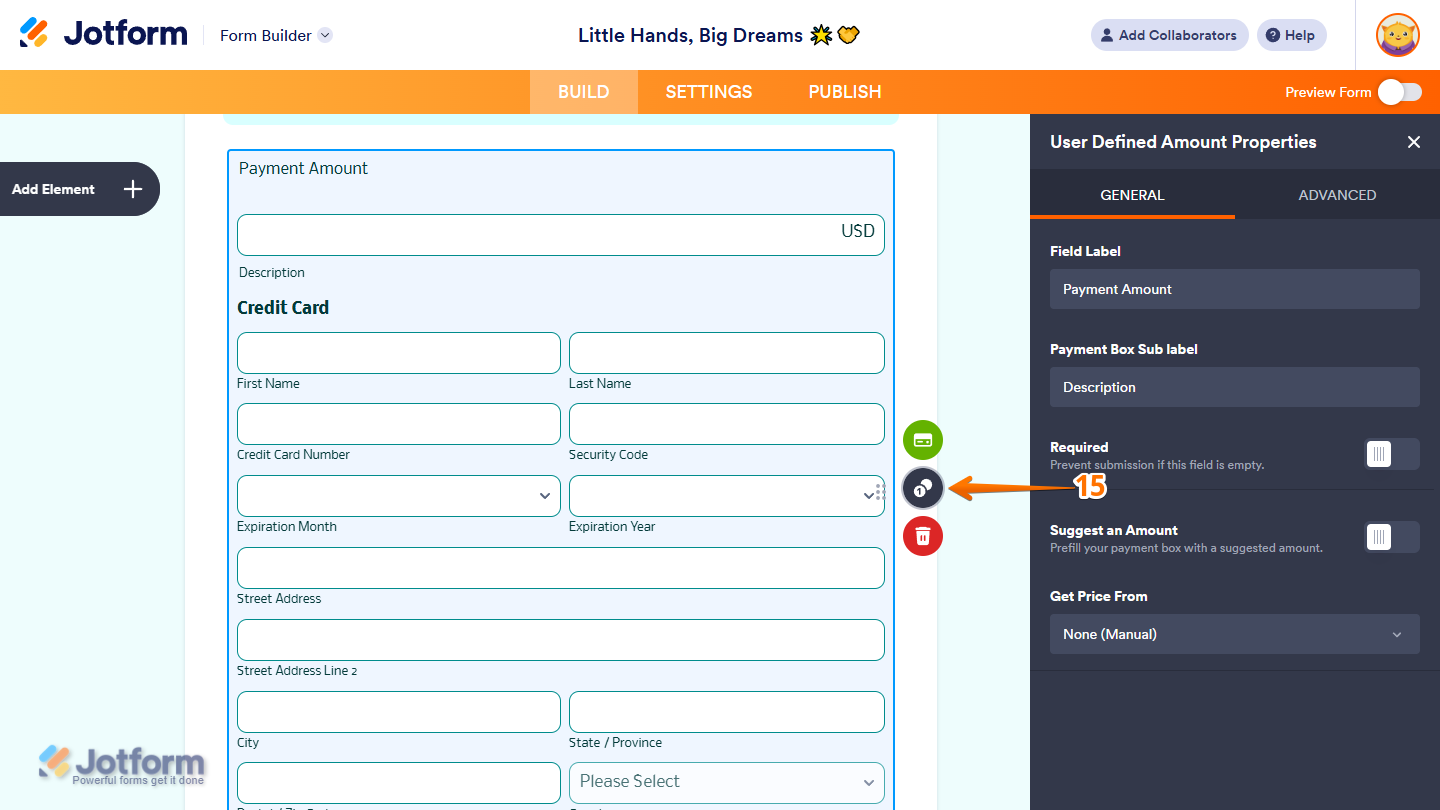
- For the User Defined Amounts payment type, on the right side of your Payment field, click on the Money Token icon to set up your form to collect custom amounts from respondents.
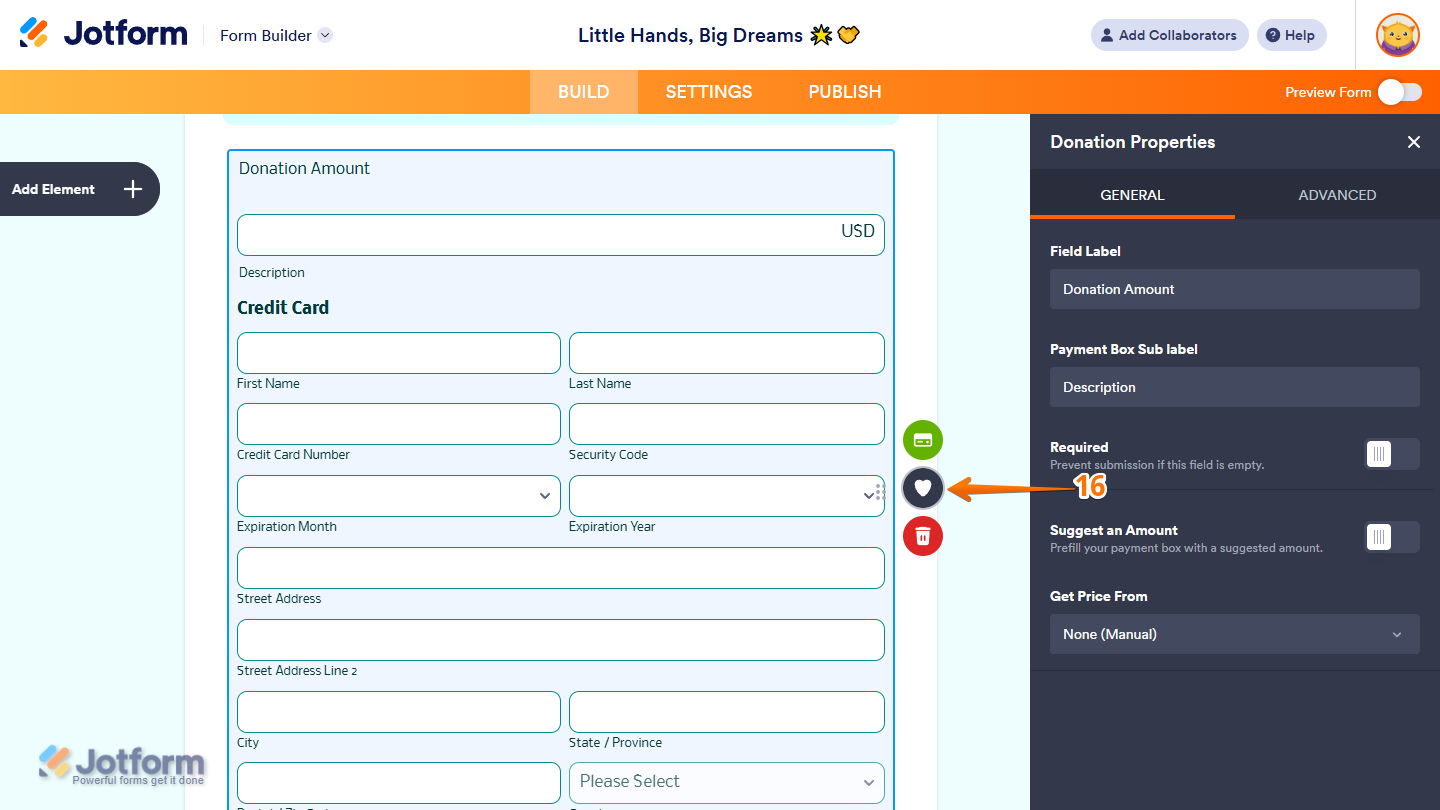
- Then, for the Collect Donations payment type, on the right side of your Payment field, click on the Heart icon to set up your form to collect donation amounts from respondents.
That’s it. Your CardPointe (CardConnect) Reusable Payment Connection has been added to your account and is now used in your form’s payment field.

Send Comment:
9 Comments:
January 3, 2025
Why I can't see sell subscriptions with "Card Connect" ?
August 1, 2024
Hello,
I work for Propelr Payments and we have the ability to use the CardConnect/Cardpointe platform to do business. A few of our reps have tried to get their customers setup with Jotform using the CardConnect platform and have all ran into the same issue. In your instructions on how to integrate, you don't mention at all the merchant site needing to be provided and nobody knows how to get it. Can you please assist? We are able to get the merchant number and the username and password for the api credentials, we just can't get that. Please advise.
November 4, 2022
can we use a different merchant provider, example Fiserv/ First Data?
August 23, 2022
What is the best payment method for that..
June 10, 2022
I am seeing payments hit my PayPal under "Pending" but cannot see where I can aprove them through the Jotform
August 5, 2020
I keep getting an error message when my customers try to submit a credit card payment using Stripe. I contacted Stripe and the payment process is working on their side but on the Jotform submission side, the error code is asking for "API code" to be integrated. I have integrated my Stripe account during the build process in settings. It says the connection is successful on the Jotform side and Stripe side. I just don't know why I would need to integrate API code if the connection is already successful. Help please.
May 20, 2020
Hi,
For the payment method, does it apply to Malaysia payment type?
February 18, 2020
Is the payment processed right away? Can we tell if credit card was declined immediately?
March 16, 2018
What percentage is taken from each payment???